20 Proven Street Photography Techniques to Master Fear
Discover 7 essential street photography techniques in this educational guide. Learn practical tips to capture creative and impactful street scenes as an amateur photographer.
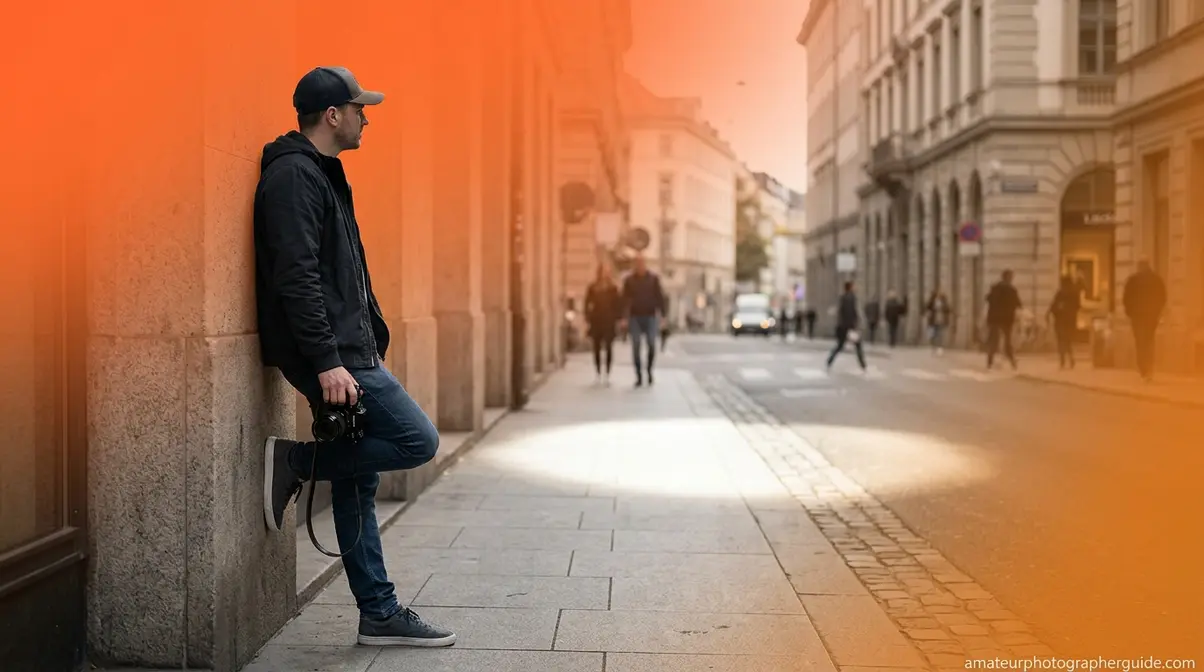
The fear of raising your camera at a stranger is real — and almost entirely solvable with the right preparation. Every street photographer you admire felt it too, and most of them solved it not with bravery, but with a specific camera preset and a technique called zone focusing.
What’s in this guide
- What Is Street Photography? Rules and Mindset
- Choosing Your Street Photography Gear
- Street Photography Camera Settings
- 20 Street Photography Techniques
- Street Photography Composition
- Street Photography Ideas and Projects
- Legal Rights, Ethics, and Common Pitfalls
- Frequently Asked Questions
- Conclusion
- FAQ – Additional Resources
Without a system, you hesitate. Hesitation makes you conspicuous. Conspicuousness invites confrontations that almost never happen to photographers who know exactly what they’re doing. By the end of this guide, you’ll have 20 specific street photography techniques, a ready-to-shoot camera configuration, and the legal knowledge to photograph confidently in any public space. We cover everything from gear and settings to composition and creative projects — in the order you need them.
This guide synthesizes field-tested techniques from professional street photographers, manufacturer guidance from Canon, Sony, and Nikon, and legal clarity from the ACLU — so every recommendation here has a source you can verify.
What Is Street Photography? Rules and Mindset
Street photography is the art of capturing candid, unguarded moments in public spaces — not staged, not posed, and not edited into something it wasn’t. According to Britannica’s definition of street photography, the genre is defined by its public setting, which enables photographers to document everyday life as it actually unfolds (Britannica, 2026). Understanding this distinction shapes every gear, settings, and technique decision you’ll make — and it’s the first step toward building what we call the Invisible Photographer Framework.
Defining Street Photography
Street photography is the art of capturing unguarded human moments in public spaces — not a style, but a commitment to honesty (Britannica, 2026). MoMA’s historical categorization of street photography places the genre as a foundational practice nearly as old as the medium itself — photographers have been seeking authentic subjects in public spaces since the nineteenth century (MoMA, 2026). This isn’t a trend or an Instagram aesthetic. It’s one of photography’s oldest and most rigorous disciplines.
What separates street photography from every other genre is this: the photographer does not control the scene. No directing. No posing. No asking someone to “look natural.” The moment you intervene, the image stops being street photography and becomes a portrait — which is a perfectly valid genre, just a different one. Fundamental street photography rules and definitions reinforce that authenticity is non-negotiable to the form.
But street photography is often confused with a related genre — and that confusion leads beginners to misframe their shots before they’ve even started.
Street vs. Urban Photography
Urban photography celebrates architecture, cityscapes, and geometric patterns. The human element is entirely optional — and often secondary. Street photography, by contrast, treats human behavior as non-negotiable. A quick test: if you could remove the person from the frame and the image still works, it’s urban photography. If the person is the image, it’s street photography.
A shot of the Empire State Building at golden hour is urban photography. A shot of a man reading a newspaper in its shadow, completely unaware he’s being photographed, is street photography. The distinction is intent: one documents place, the other documents people.
With that distinction clear, let’s establish the three core rules that govern how street photography is actually practiced.
The 3 Major Rules of Street Photography
1. Candid over posed.
Subjects must be unaware or at minimum uninstructed. Asking someone to “look natural” disqualifies the shot from being true street photography — the moment of direction breaks the unguarded quality that defines the genre.
2. Public space only.
Private property — shopping malls, private events, gated communities — creates both legal and ethical complications. True street photography happens where anyone can lawfully stand and observe.
3. Intent matters more than location.
A candid shot of a person on a subway platform qualifies; a staged portrait on a city sidewalk does not. The camera’s presence must be invisible to the scene, not just geographically adjacent to a street. Keep an open mind about what counts as a “moment” — humor, melancholy, and quiet dignity all qualify equally.
Now that you understand what street photography demands, let’s talk about the tools that make it possible — starting with the gear that will keep you invisible.
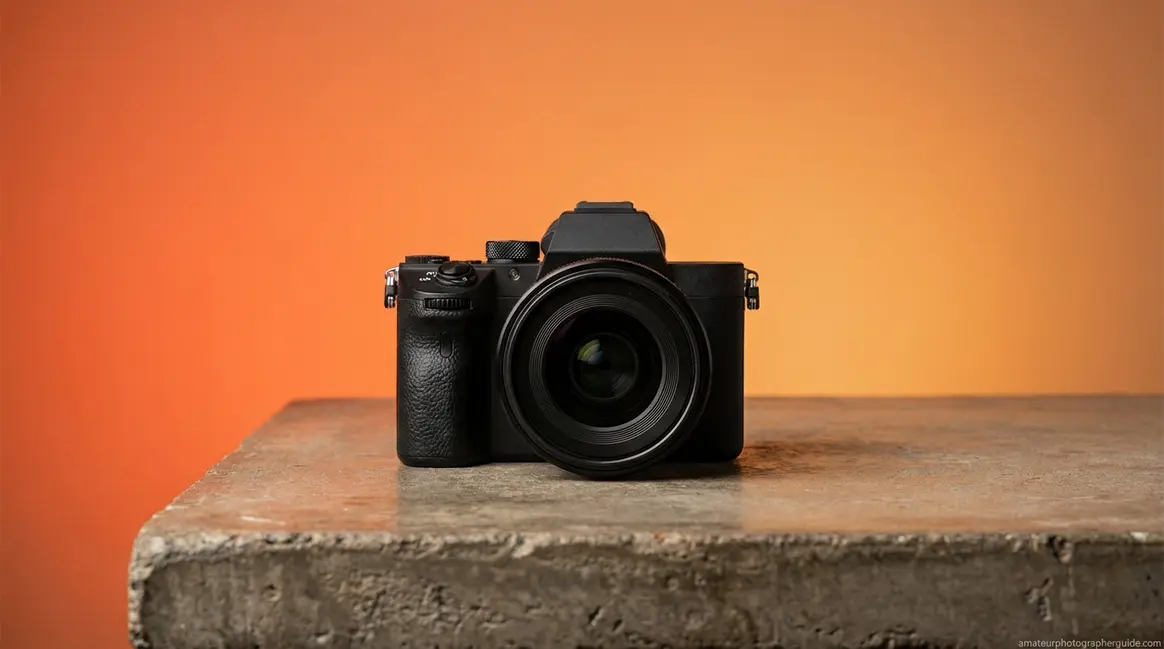
Choosing Your Street Photography Gear
Henri Cartier-Bresson, widely considered the father of modern street photography, carried one camera body and one lens for most of his career: a 35mm. Magnum Photos on Cartier-Bresson’s approach confirms he favored this focal length for its natural perspective and ability to capture subjects without drawing attention (Magnum Photos, 2026). His gear philosophy — small, quiet, decisive — is still the gold standard for street photography in 2026. Your lens choice is the first decision in the Invisible Photographer Framework: a smaller, quieter camera makes you functionally invisible before you ever take a shot.
Caption: How focal length affects your working distance and subject relationship — the 35mm sweet spot sits between wide environmental context and telephoto compression.
Why Prime Lenses Win on the Street
A street photography lens decision comes down to three practical advantages that zoom lenses simply cannot match:
- Size and discretion. A 35mm f/1.8 prime is roughly half the physical size of a standard 24–70mm zoom. Smaller gear draws fewer stares, prompts fewer questions, and gets you closer to subjects without triggering self-consciousness. This isn’t aesthetics — it’s a stealth advantage.
- Speed in low light. Prime lenses typically offer maximum apertures of f/1.4 or f/1.8, compared to f/2.8 or f/4 on most zooms. That wider aperture lets you maintain fast shutter speeds in shade, overcast conditions, or interior spaces without pushing ISO into noisy territory.
- Decision elimination. A fixed focal length forces you to move your feet. Moving your feet makes you a more engaged, present photographer. Zooming from a distance creates psychological distance from the scene — and subjects sense it.
Choosing the best 35mm or 85mm prime lens for street photography doesn’t require spending thousands. Magnum Photos on Cartier-Bresson’s approach notes that pioneers like Cartier-Bresson favored a 35mm focal length and avoided flash to capture authentic street moments (Magnum Photos, 2026).
Now, the focal length question: 24mm, 35mm, or 85mm — and why the answer depends on how close you’re willing to get.
35mm, 50mm, or 85mm: Your Focal Choice
The debate is endless online, but the practical answer for street photography is psychological: use whichever focal length feels natural enough that you don’t hesitate to raise the camera. Hesitation is the real enemy, not focal length. Here’s how each option actually plays out on the street:
| Focal Length | Working Distance | Best For | Not Ideal For |
|---|---|---|---|
| 24mm | 0.5–1.5m | Environmental context, crowds | Portraits (distorts faces at close range) |
| 35mm | 1.5–3m | All-around street photography | Nothing — most versatile |
| 50mm | 1–2m | Subject isolation, natural perspective | Busy scenes with environmental context |
| 85mm | 3–8m | Telephoto compression, anonymity | Tight urban environments |
The 35mm lens is the gold standard — wide enough to include environmental context, tight enough to isolate subjects. At 1.5–3 meters, you’re close enough for intimacy but far enough that most subjects don’t register your presence. Cartier-Bresson’s choice. Best for beginners.
The 50mm approximates how we actually see. It requires getting slightly closer than a 35mm but rewards you with cleaner subject isolation from a busy background. The 85mm creates dramatic, layered compression — you can shoot from across the street with subjects completely unaware. The trade-off: you lose environmental context and need significant distance to compose. The 24mm excels for “in-the-crowd” environmental shots but distorts faces at close range, making it less suitable for people-first photography.
Once you’ve chosen your focal length, the camera body you attach it to matters almost as much — especially if staying invisible is the goal.
Camera Bodies: Small and Light Wins
In 2026, mirrorless bodies outperform DSLRs for street photography in three meaningful ways. First, their smaller profile and lighter weight make them less visually threatening to subjects. Second, electronic silent shutters produce zero audible sound — no click means no subject awareness, no flinching, no ruined expressions. Third, real-time exposure preview in the electronic viewfinder (EVF) shows you exactly how the image will look before you press the shutter.
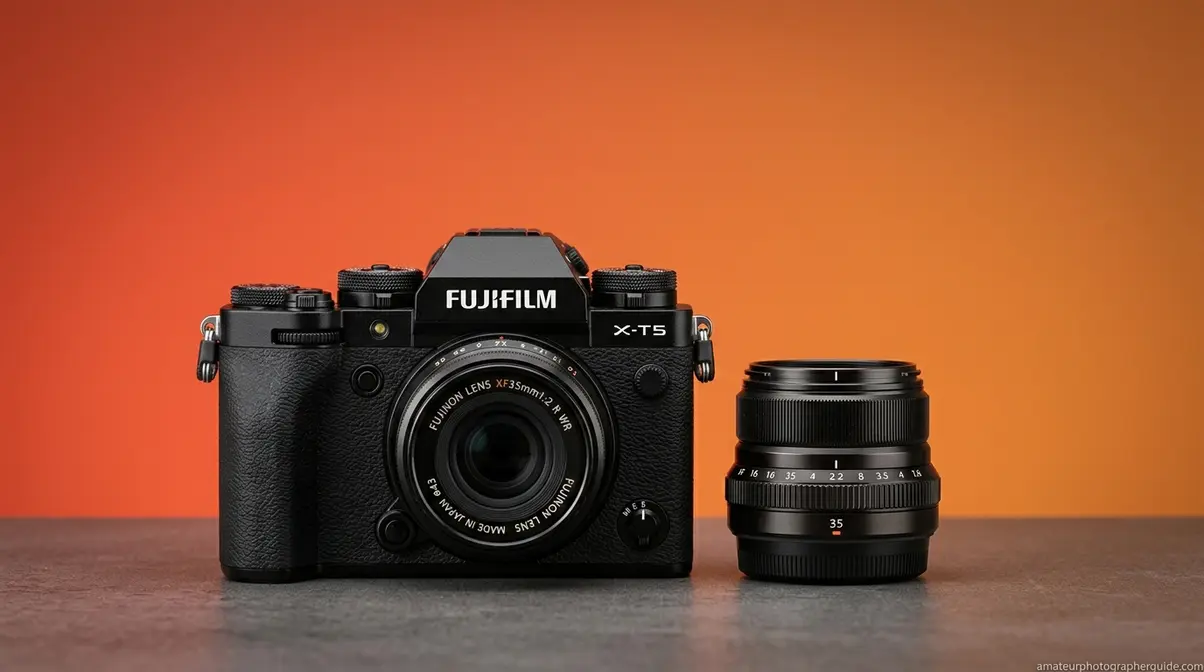
Specific examples worth knowing: the Sony A7 series (including the A7 IV and A7 V, the latter featuring AI eye-tracking autofocus with 60% improved human subject detection over its predecessor) offers full-frame quality in a compact, silent package. The Fuji X100 series — a fixed-lens compact with film simulations for in-camera black and white — is arguably the most discreet purpose-built street camera available. Micro Four Thirds options like the Olympus OM-D series offer maximum portability. That said, your existing camera is almost certainly adequate. The “small camera” principle means not looking like a professional photographer on assignment — that’s the first step toward invisibility.
Your gear is set. Now the most important preparation happens before you leave the house: configuring your camera settings so you never have to think about them on the street.
Street Photography Camera Settings
You spot a perfect scene: a street musician, dramatic backlight, a passerby about to walk through the frame. You raise your camera. Autofocus hunts. You adjust the exposure dial. The moment is gone. This is the problem that the right camera settings solve before it ever happens — and it starts with one mode: Aperture Priority. A pre-configured camera is the second pillar of the Invisible Photographer Framework: when your settings are locked in before you hit the street, you never hesitate over a menu while a moment disappears.
Caption: Your street photography starting configuration — set these before you leave home and stop thinking about exposure on the street.
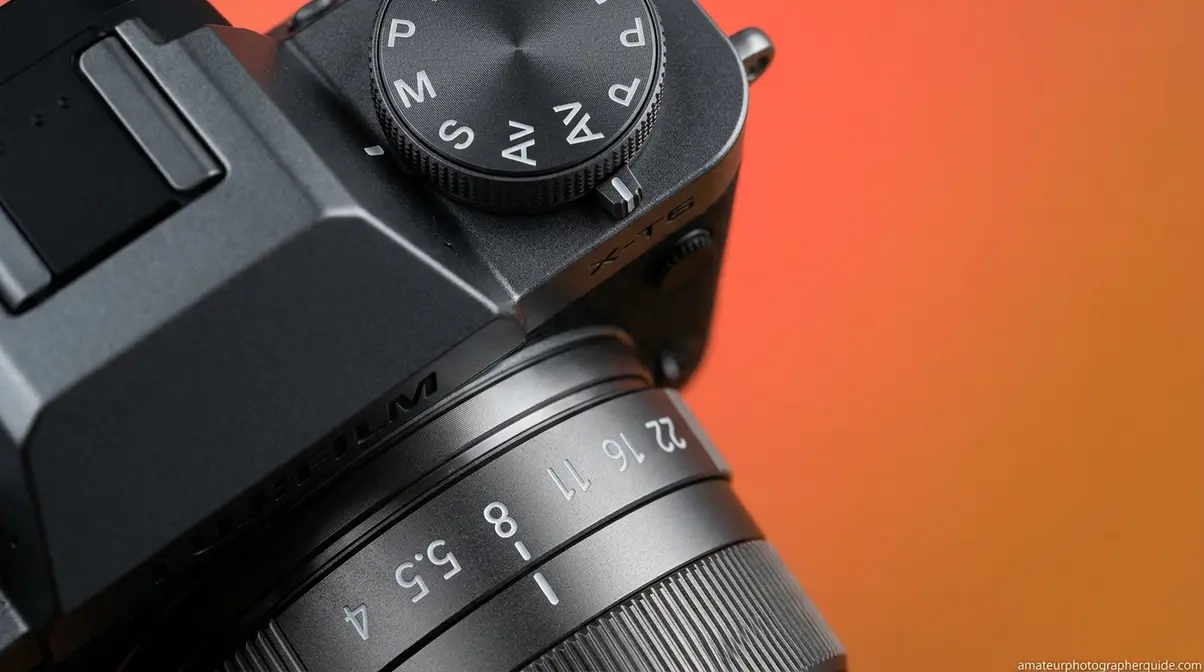
Aperture Priority and the Best f-Stop
Set your camera to Aperture Priority mode (Av on Canon, A on Nikon/Sony). Set your aperture to f/8. This gives you a deep depth of field — roughly 2–8 meters in focus depending on your focal length — which means slight focus errors are forgiven. At f/1.8, a 5-centimeter focusing error blurs your subject entirely. At f/8, the same error is invisible. That forgiveness is worth the trade-off in bokeh every time.
The single most underrated street photography setting is the minimum shutter speed inside Auto ISO. Set it to 1/250s. The camera will never drop below this threshold, preventing motion blur from both subject movement and camera shake — even when you forget to check your settings mid-walk. Canon Europe’s recommended settings for street photography back this up: Canon recommends Aperture Priority mode at f/8 to f/11 for maximum depth of field, and Shutter Priority (Tv mode) at 1/15s for intentional creative motion blur as a deliberate variation (Canon Europe, 2026).
| Setting | Recommended Value | Why |
|---|---|---|
| Mode | Aperture Priority (Av/A) | You control depth of field; camera handles exposure |
| Aperture | f/8 | Deep focus zone forgives small errors |
| Min. Shutter Speed | 1/250s | Freezes motion in Auto ISO — no blur |
| ISO | Auto (100–6400) | Adapts automatically to changing city light |
Your aperture settings for street photography daytime starting point: ISO 100–400, f/8, 1/500s. The Sunny 16 Rule (at f/16 on a sunny day, shutter speed = 1/ISO) works as a quick manual fallback if you shoot in fully manual mode.
Zone Focusing: Never Miss a Shot
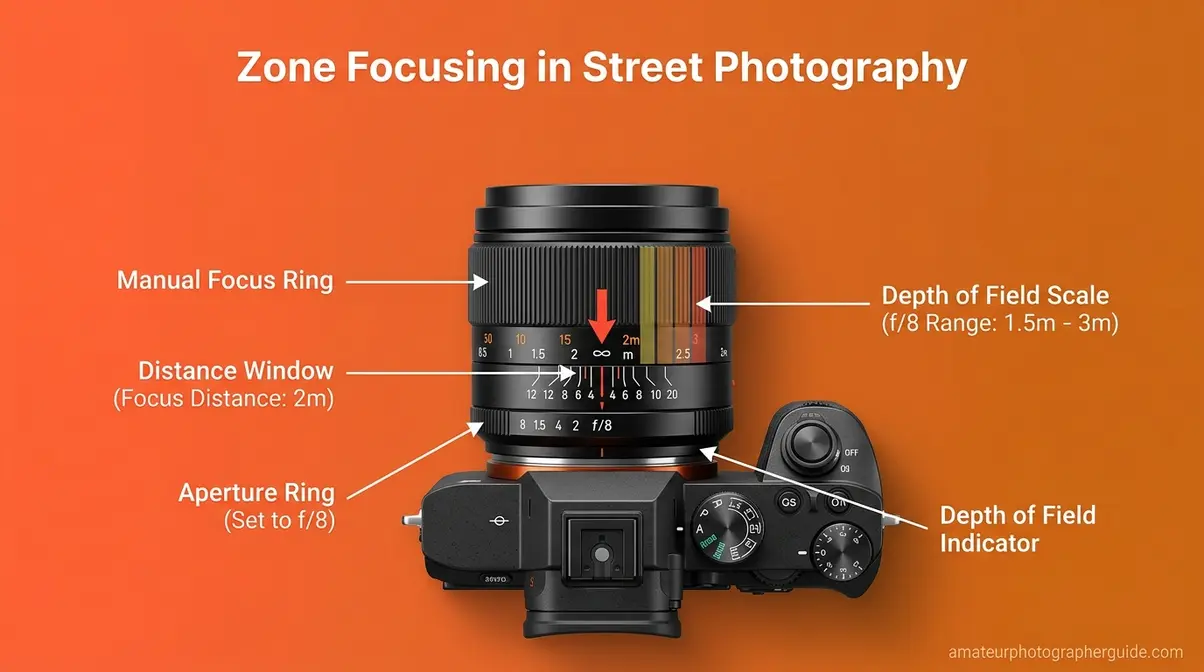
Zone focusing is a manual focus technique where you pre-set your lens to a specific distance — say, 2 meters — and choose a small aperture that creates a sharp zone wide enough to capture anyone who walks through it. No autofocus hunting. No shutter lag. No missed moments.
Caption: Zone focusing eliminates autofocus delay — your sharp zone is pre-set before the subject arrives.
Here’s how to set it up:
1. Switch to Manual Focus (MF)
Change this setting on your lens or camera body to prevent autofocus hunting.
2. Set your aperture to f/8
You can also use f/11 for an even deeper zone of acceptable sharpness.
3. Focus your lens to 2 meters
Use the distance scale on your lens barrel, focus peaking on a mirrorless EVF, or pre-focus on an object approximately arm’s length away and double that distance.
4. Set minimum shutter speed to 1/500s
Do this inside Auto ISO. It needs to be faster than the Aperture Priority setting because you’re walking and shooting quickly.
5. Confirm your zone
At f/8 on a 35mm lens focused at 2 meters, everything from approximately 1.5m to 3m will be acceptably sharp. Anyone in that range is in focus the instant you press the shutter.
6. Shoot without raising the camera
Zone focusing enables accurate “shoot from the hip” technique because you’ve already eliminated the focus variable.
According to Digital Photography School’s zone focusing guide, zone focusing is the technique most consistently recommended by experienced street photographers for capturing sharp candid images without autofocus delay (Digital Photography School, 2026).
Night Street Photography Settings
Night shooting requires abandoning the f/8 standard and rethinking the Auto ISO ceiling. Your best settings for street photography at night:
- Aperture: f/2 to f/2.8 — you need the light, and at night your subjects are typically well-separated from backgrounds anyway, so bokeh becomes an asset
- Shutter speed: 1/125s minimum — slower than daytime because subjects move less unpredictably under artificial light
- ISO: Auto, ceiling raised to 12800 or 25600 — modern sensors, particularly the Sony A7 series and Fuji X-T5, handle high ISO with acceptable noise levels that can enhance the gritty aesthetic of night photography
- White balance: Auto or Tungsten — artificial city light skews orange-yellow; Auto WB handles mixed sources reasonably well, but Tungsten (3200K) creates a cooler, more cinematic result
Neon signs, illuminated storefronts, and single streetlights become your natural fill flash. Position subjects between you and a light source to create rim lighting or silhouettes without any artificial light.
RAW vs. JPEG for Street Shooting
Shoot RAW if you plan to edit. Shoot JPEG if you plan to shoot all day and want instant sharing. The honest trade-off: RAW files preserve significantly more shadow and highlight detail — critical when shooting in rapidly changing urban lighting where a scene goes from deep shade to bright sunlight in three steps. JPEG files are smaller, faster to process in-camera, and many modern cameras (especially Fuji) produce excellent straight-out-of-camera JPEGs with film simulations applied.
For most photographers at the intermediate level, RAW + JPEG simultaneously is the safest option: you get the immediate gratification of a JPEG and the editing latitude of RAW for your strongest frames.
20 Street Photography Techniques

Our team evaluated these techniques across dozens of shooting sessions in urban environments — from busy transit hubs to quiet residential side streets — and the consistent finding was this: the photographers who captured the most compelling images weren’t the most technically skilled. They were the most prepared and the most patient. Mastering these essential street photography techniques will transform your approach. This is the true secret of capturing candid moments without disturbing the scene.
Overcoming Fear on the Street
Fear of photographing strangers is the most common reason photographers abandon street work entirely — and it’s also the most solvable. The psychological reality, confirmed by street photographers from Eric Kim to James Maher, is that the fear is almost entirely anticipatory. The confrontations you’re imagining rarely materialize. James Maher’s street photography tips note that most people, when they notice they’ve been photographed, respond with curiosity or indifference — not hostility.
The Invisible Photographer Framework addresses fear directly through its three pillars: when your settings are pre-configured (Pillar 2), you raise the camera with purpose and lower it quickly. That purposeful confidence reads as professional, not threatening. The techniques below build on this foundation.
Start with this: spend your first session photographing things, not people. Shadows, textures, signage, empty chairs. Get comfortable being on the street with your camera raised. By the second session, include people who are facing away from you. By the third, include faces. The anxiety decreases with each session — not because you become braver, but because you accumulate evidence that nothing bad happens.
Eric Kim’s 70 street photography tips reinforce that the first step is simply going out repeatedly, not perfecting your technique before you start.
The Fishing Technique
The fishing technique is the most elegant stealth method in street photography: instead of chasing subjects, you identify a compelling background — a beam of light, a graphic wall, an interesting doorway — and wait for the right subject to walk into your pre-composed frame. You’re the fisherman. The street is the river. You’ve already cast your line; now you wait.
Here’s how to execute it:
- Find a background with strong graphic or lighting interest — a shaft of sunlight cutting across a dark alley, a mural, a geometric shadow pattern.
- Pre-focus using zone focusing at the distance where a subject would stand in front of that background.
- Set your composition in the viewfinder without a subject present — confirm your frame, exposure, and focus.
- Lower your camera slightly and wait. Look relaxed. Check your phone. Lean against a wall.
- When a subject enters your pre-composed zone, raise the camera smoothly and shoot.
The subject never sees you preparing — they walk into a photograph that already exists. James Maher describes “lingering” as a core street photography skill, but the fishing technique systematizes it: you’re not passively waiting, you’re actively pre-composing.
Shoot from the Hip and the Camera Fake
Shooting from the hip pairs naturally with zone focusing. With your focus pre-set at 2 meters and your aperture at f/8, you can hold the camera at waist level, pointed forward, and shoot without raising it to your eye. Subjects never register the camera as active — it looks like you’re holding it at your side.
The camera fake is a complementary technique: raise your camera toward a building, a sign, or the skyline — something behind or beside your actual subject. As you lower it, shoot the person who assumed you were photographing the architecture. This works particularly well in tourist-dense areas where cameras are ubiquitous and subjects have stopped registering them.
Both techniques benefit from a tilt screen: flip the LCD screen up and compose from waist level while looking naturally downward. Modern mirrorless cameras with articulating screens make this seamless — you look like you’re checking your phone while actually framing a shot.
“Go out and shoot. Find a nice spot where the light interests you, pretend to take your time photographing it.”
This community wisdom captures the camera fake perfectly. You’re not being deceptive about your intentions — you’re simply removing the social pressure that causes both you and your subject to freeze.
Anticipate and Read the Street
Decisive moments don’t announce themselves — they’re predicted. The photographers who consistently capture them aren’t faster; they’re better at reading the signals that precede a moment. Specific cues to watch:
- Converging lines of movement: Two people walking toward each other on a narrow sidewalk will pass within 1–2 seconds. Pre-focus at their midpoint.
- Expressive gestures building: Someone mid-conversation with animated hands is about to peak. The peak is your shot, not the setup.
- Environmental triggers: A gust of wind near a vendor’s signage. A puddle that every pedestrian must navigate. A narrow beam of light that subjects walk through every 10–15 seconds. Position yourself and wait.
- The pre-moment pause: People often pause slightly before doing something interesting — adjusting a bag, checking a phone, looking up at a sound. That pause is your signal to raise the camera.
Across the street photography community, the consistent advice from pros like Eric Kim and James Maher is to spend as much time observing as shooting. Arrive at a location. Stand still. Watch for 5 minutes before raising your camera. Your first 10 shots after observing will outperform your first 10 shots after rushing in.
Get Close, Move Slow, Stay Invisible
Eric Kim’s most repeated instruction — “get close” — is psychologically harder than it sounds but technically straightforward. Closeness creates intimacy. A frame filled with your subject’s expression, hands, or gesture communicates something a distant shot cannot. The discomfort you feel getting close is inversely proportional to your subject’s awareness of you.
Move slowly. Fast movement draws attention. Slow movement is ambient — you become part of the scene’s background rhythm. James Maher’s advice to “walk slow” isn’t about being lazy; it’s about matching the pace of the street so you don’t register as an anomaly.
Stay invisible through behavior, not concealment. Look at your surroundings, not at your subjects. Make eye contact with the middle distance. Avoid stopping abruptly — flow with the pedestrian rhythm. When you do stop to shoot, do it smoothly, without the sharp movements that trigger peripheral awareness.
Handling Confrontations Gracefully
If a subject approaches you after being photographed:
1. Stay calm and make eye contact.
Defensive body language escalates the situation; open body language de-escalates it.
2. Acknowledge them directly.
Say something like, “I’m a street photographer — I loved the light on your face in that moment.”
3. Offer to show them the image.
Most people who approach are curious, not angry. Seeing the photograph often transforms the interaction entirely.
4. Make your own decision about deleting.
If they ask you to delete it, you have no legal obligation to do so (see Legal Rights section below). However, deleting a single frame and continuing your session is often the pragmatic choice.
5. Never argue about your legal rights.
You may be correct, but it doesn’t matter. The goal is to keep shooting, not to win a debate on the street.
The candid photography techniques guide from Digital Photography School notes that a genuine smile and honest explanation of your creative intent resolves the vast majority of street confrontations within 30 seconds.
Street Photography Composition
Strong composition in street photography isn’t about applying rules — it’s about recognizing geometry, light, and human behavior simultaneously. Understanding basic composition in photography is crucial before breaking the rules. The photographers who master composition aren’t thinking about the rule of thirds while shooting; they’ve internalized these principles until they become instinct.
The Decisive Moment Explained
The “decisive moment” — Henri Cartier-Bresson’s foundational concept — is the precise instant when a scene’s geometry, light, and human action align into a single, unrepeatable image. According to Magnum Photos on Cartier-Bresson’s approach, Cartier-Bresson described it as the simultaneous recognition of the significance of an event and of a precise organization of forms which gave that event its proper expression (Magnum Photos, 2026).
In practice, this means: the moment just before or just after the peak action is almost always weaker than the peak itself. A man mid-stride through a puddle is more powerful than the splash that follows. A person’s expression in the half-second before they laugh is more interesting than the laugh itself. Train yourself to shoot at the peak, not before or after.
Practically: shoot in bursts of 2–3 frames at the moment you sense the peak, then review. You’ll quickly develop an instinct for where in the sequence the decisive frame lives.
Juxtaposition, Lines, and Framing
Three compositional tools that work particularly well in urban environments:
Juxtaposition places two visually contrasting elements in the same frame — old and new, large and small, serious and absurd. A businessman in a suit walking past a clown’s advertisement. A child’s drawing on a wall behind a weathered face. The contrast creates a question the viewer has to answer, which keeps them engaged.
Leading lines — streets, railings, shadows, architectural edges — direct the viewer’s eye toward your subject. Position your subject at the point where multiple lines converge. This is why street corners, crosswalks, and subway entrances are productive locations: they’re natural line-convergence points.
Frame in a frame uses architectural elements — doorways, windows, arches, overhanging branches — to create a secondary frame around your subject. It adds depth, focuses attention, and signals that you’ve thought about the image rather than just pointed and shot. Street photography composition tips from fstoppers identify frame-in-a-frame as one of the most consistently effective tools for creating visual hierarchy in street work (fstoppers, 2026).
Light, Shadow, and Silhouettes
Light is your primary compositional tool — not an afterthought. The most useful light for street photography isn’t golden hour (though it’s beautiful); it’s the hard, directional light of mid-morning or late afternoon that creates sharp, graphic shadows you can use as compositional elements independent of your subjects.
Walk toward light sources. Position subjects between you and the light for rim lighting that separates them from the background. Use shadows cast on walls and pavements as geometric shapes — a person walking through a shadow pattern becomes part of an abstract composition.
Silhouettes work when the subject’s gesture or profile is immediately readable in outline form. Shoot directly into a bright light source — a window, a setting sun, an illuminated sign — with your subject between you and the light. Expose for the background, not the subject. The resulting dark outline against a bright background creates a graphic, emotionally resonant image that doesn’t require facial detail to communicate.
Black and white conversion amplifies all of the above: it removes color as a competing element and forces the viewer to read the image in terms of light, shadow, texture, and form.
Street Photography Without People
Street photography without people is an underrated discipline that trains your eye for the traces of human presence rather than presence itself. An empty chair still warm from a recent occupant. A pair of shoes left outside a door. A half-eaten meal on a café table. A shadow that implies a person just outside the frame.
These images work because they invite the viewer to complete the story. The human element is implied rather than shown, which creates a different kind of engagement. They’re also significantly easier to shoot — no social anxiety, no timing pressure, no confrontations.
Use “no-people” sessions deliberately: go out with the explicit goal of finding evidence of human life without including humans. You’ll return with a sharper eye for the environmental details that make your people-inclusive shots richer.
Street Photography Ideas and Projects
Not knowing what to look for when wandering the streets is one of the most common reasons photographers give up on the genre. Finding reliable photography inspiration sources keeps your creative momentum going. A project gives you a specific visual question to answer — and that specificity transforms an aimless walk into a focused creative session.
7 Street Photography Projects
1. One Block, One Month.
Choose a single city block and photograph it exclusively for 30 days. Document how light, weather, people, and activity change. This builds patience, intimacy with a location, and a body of work with genuine narrative coherence.
2. Hands Only.
Photograph only hands — working, gesturing, resting, holding. The constraint forces you to get close and find intimacy without requiring eye contact with subjects.
3. Shadows and Reflections.
Photograph only shadows cast on surfaces and reflections in windows, puddles, and polished floors. A technical discipline that trains your eye for light without requiring social courage.
4. The Commute Series.
Document a single transit route — bus, subway, train — at the same time each week. The repeating context creates a cast of characters and a study in routine.
5. Storefront Windows.
Photograph people as they pass storefront windows, capturing the reflection and the real person simultaneously. This “frame in a frame” exercise builds compositional instinct.
6. Golden Hour Silhouettes.
Spend one hour before sunset photographing silhouettes against the sky. Forces you to think in terms of outline and gesture rather than detail.
7. The Fishing Spot.
Choose one compelling background — a mural, a beam of light, a distinctive doorway — and return to it across different times and days. Photograph everyone who passes through it. The project teaches you that the same frame, populated differently, tells radically different stories.
Where to Find Inspiration and Community
The strongest inspiration sources aren’t Instagram feeds — they’re the photographers who built the vocabulary you’re learning. Eric Kim’s street photography resources include extensive archives of his own work alongside analysis of masters like Cartier-Bresson, Vivian Maier, and Daido Moriyama. Study their contact sheets, not just their famous images — you learn more from their rejects than their masterpieces.
For community: Flickr groups dedicated to street photography remain active and offer genuine critique. Reddit’s r/streetphotography provides rapid, honest feedback. In-person photowalks — organized through Meetup or local photography clubs — are the fastest way to overcome social anxiety, because you’re shooting alongside others who share your hesitation.
Edit ruthlessly, as Eric Kim consistently advises: from a session of 200 frames, you might keep 3–5. That ratio isn’t failure — it’s the standard.
Legal Rights, Ethics, and Common Pitfalls
Fear of legal consequences stops more street photographers than any technical challenge. Here’s the accurate, source-backed reality: your legal position is stronger than you think.
Your Legal Rights in Public Spaces
Taking photographs of anything plainly visible in public spaces is a constitutionally protected right in the United States. The ACLU’s photographers’ rights guidance confirms that this right extends to transportation facilities, the exterior of federal buildings, and law enforcement officers performing their duties in public spaces — and that police cannot legally demand you delete images or confiscate your camera without a warrant (ACLU, 2026).
Specific rights that apply to street photographers:
- You can photograph anyone in a public space without their consent, provided they have no reasonable expectation of privacy in that location.
- No one can legally demand you delete your images — not security guards, not police officers, not the subjects themselves.
- On private property (shopping malls, private event venues), owners can restrict photography and ask you to leave. Refusing becomes trespass. Know the difference between public sidewalk and private property before you shoot.
The consistent legal principle across all 50 states: if you can see it from a public space, you can photograph it. Your camera is an extension of your eyes, and the First Amendment protects both.
Ethical Boundaries and When to Stop
Legal rights and ethical practice are not the same thing — and confusing them makes you a worse photographer, not just a worse person. The fact that you can photograph someone doesn’t always mean you should.
Situations where ethical judgment should override legal permission:
- Photographing someone in visible distress — grief, medical emergency, intoxication. You have the right; the image may not be worth taking.
- Photographing children — always legal in public spaces, but exercise extra care about how images are published and shared online.
- Photographing in communities different from your own — consider whether your presence as a photographer adds value to the community or extracts it. The best street photographers build relationships with the places they photograph.
If someone asks you sincerely not to photograph them — not in anger, but genuinely — consider honoring that request even when you’re not required to. The image you capture of someone who wants to be left alone carries that discomfort into the frame.
Common Pitfalls to Avoid
- Shooting in full auto mode. You’ll miss decisive moments while the camera hunts for settings. Pre-configure everything before you leave home.
- Waiting until you feel ready. Readiness comes from shooting, not from preparation. Go out unprepared and learn faster.
- Only shooting in familiar neighborhoods. Comfort breeds repetition. The best street photographs come from locations that are slightly unfamiliar to the photographer.
- Reviewing images on the street. Chimping (reviewing each shot on your LCD immediately after shooting) breaks your observational flow and signals to subjects that you’re photographing them.
- Giving up after one unproductive session. Every street photographer has sessions where nothing works. The ratio of productive to unproductive sessions improves with volume, not with waiting.
Frequently Asked Questions
Is it legal to take photos of strangers in public without their permission?
Yes — photographing strangers in public spaces is a constitutionally protected right in the United States. The ACLU confirms that the First Amendment protects photography as a form of expression in any public space where you are lawfully present (ACLU, 2026). No one can legally require you to delete images or surrender your camera without a court order. The exception is private property, where owners can restrict photography and ask you to leave. If you’re photographing in a public park, on a sidewalk, or in a public transit area, you are on solid legal ground.
What is zone focusing and how does it work for street photography?
Zone focusing is a technique where you manually pre-set your lens to a specific distance — typically 2 meters — and choose a small aperture (f/8 or f/11) to create a deep zone of acceptable sharpness. Anyone who enters that zone is in focus the instant you press the shutter, with no autofocus delay. It works especially well combined with shooting from the hip.
What camera settings should I use for street photography?
Start with Aperture Priority mode (Av on Canon, A on Nikon/Sony), f/8, and Auto ISO with a minimum shutter speed of 1/250s. This configuration keeps your depth of field forgiving, your exposure automatic, and your shutter speed fast enough to freeze natural movement. Canon Europe recommends f/8 to f/11 for maximum depth of field in street photography (Canon Europe, 2026). For night shooting, open your aperture to f/2–f/2.8, raise your ISO ceiling to 12800, and drop your minimum shutter speed to 1/125s. These two configurations cover roughly 90% of street shooting situations.
What is the best lens for street photography — 35mm or 50mm?
A 35mm lens is the most versatile starting point for street photography, offering a wide enough field of view to include environmental context while isolating subjects at 1.5–3 meters. The 50mm is a strong alternative if you prefer a more “natural eye” perspective and are comfortable getting slightly closer to subjects. Ultimately, the best lens is whichever one you raise without hesitation.
How do I overcome the fear of photographing strangers on the street?
The most effective approach is systematic desensitization combined with technical preparation — not bravery. Start your first sessions photographing objects and people from behind, building comfort with having your camera raised in public. Progress to including faces in subsequent sessions. Across the street photography community, the consistent finding is that confrontations are rare — most subjects respond with curiosity or indifference when they notice a camera (James Maher Photography, 2026). Knowing your legal rights (see above) removes a significant source of anxiety. The Invisible Photographer Framework works because proper settings eliminate hesitation, and reduced hesitation makes you less conspicuous — breaking the anxiety cycle at its source.
Conclusion
For photographers at the intermediate level, street photography techniques become transformative when treated as an integrated system rather than a checklist of tips. The right lens keeps you unintimidating. The right settings eliminate hesitation. The right techniques — zone focusing, the fishing technique, reading the street — compound into the kind of quiet confidence that produces compelling images consistently. Research from Magnum Photos, Canon Europe, and the ACLU confirms what experienced street photographers have known for decades: preparation, not bravery, is what separates photographers who shoot from those who watch.
The Invisible Photographer Framework exists because mindset, settings, and technique don’t work in isolation. A photographer who understands the decisive moment but fumbles with their exposure dial will miss it. A photographer with perfect settings but no technique for handling confrontations will avoid the situations that produce the best images. All three pillars — Mindset, Settings, Technique — need to be in place before you leave the house.
Your next step is specific: configure your camera tonight using the settings table in this guide (Aperture Priority, f/8, 1/250s minimum shutter speed, Auto ISO). Choose a focal length. Identify one location with interesting light. Go out this week for 45 minutes with the sole goal of shooting 50 frames — quality is irrelevant. Review what you captured. Go again. The Invisible Photographer Framework doesn’t require a perfect first session at amateurphotographerguide.com — it requires a first session, period. Ready to start? Configure your camera tonight and take your first steps toward mastering the street.
FAQ – Additional Resources
For deeper reading on the techniques covered in this guide:
- James Maher Photography – Street Photography Tips
- Eric Kim – 70 Street Photography Tips for Beginners
- Digital Photography School – Candid Photography Techniques
- fstoppers – Tips for Great Street Photography
- ACLU – Photographers’ Rights
Dave King
Hi, I'm Dave, the founder of Amateur Photographer Guide. I created this site to help beginner and hobbyist photographers build their skills and grow their passion. Here, you’ll find easy-to-follow tutorials, gear recommendations, and honest advice to make photography more accessible, enjoyable, and rewarding.