Street Photography Tips for Beginners: Shoot Without Fear
What’s in this guide
You raise your camera. Someone nearby glances at you. Your finger freezes on the shutter. The moment passes. Every beginner street photographer has been there — that gap between seeing a perfect scene and actually pressing the button is where most shots die.
Every second of hesitation is a decisive moment lost forever. The photo exists nowhere except in your imagination — and that is a genuinely frustrating place to leave it.
This guide gives you the exact street photography tips for beginners that close that gap. You will learn the mindset to blend into your environment, the gear to work scenes and not chase them, the settings to shoot without thinking, and the composition techniques to turn ordinary moments into compelling photographs. Sections cover Mindset, Gear & Prerequisites, Camera Settings, Composition, and Common Mistakes — read it once, then go outside.
What Is Street Photography?
Street photography is the practice of capturing unposed, authentic human life in public spaces — as it actually happens, not as it is arranged. In virtually all Western countries, standing on a public street and photographing what you observe requires no permit and no permission from your subjects (California Film Commission, 2026). You already have everything you need to start today.
Think of it as journalism with a camera. Instead of writing the story, you photograph it. The result is a document of the world as it genuinely is — messy, funny, tender, and often surprising.
Street Photography Defined
Street photography is a documentary genre that captures life in public spaces as it unfolds naturally. Henri Cartier-Bresson, the French photographer credited with defining the “decisive moment” in candid photography, described it as the split second when composition, light, and action align perfectly — and you press the shutter before the moment vanishes.
The word “street” is broader than a literal road. A market, a café terrace, a public park, a train station — these all qualify. Equally important: people do not need to be in the frame at all. An empty alley with dramatic shadow cutting across the pavement is a legitimate street photograph. Debunking that myth matters, because it removes a huge amount of beginner pressure. You are not obligated to photograph strangers every time you go out.
California Film Commission guidelines confirm that very few legal restrictions apply to photographing subjects in plain public view (California Film Commission, 2026). The genre is open to you right now, with the camera already in your bag.
The first street photography tips for beginners worth learning have nothing to do with aperture or focal length. They concern how you see — and that skill starts building the moment you walk out your door.
What Makes a Great Street Photo?
Great street photographs share a handful of identifiable qualities. Training your eye to look for these before raising your camera is the fastest way to move from snapshots to photographs.
A visual checklist for street photography beginners:
- Light — Golden hour (the 30–60 minutes after sunrise and before sunset, when light is warm and directional) produces long shadows and soft colour. Overcast days give flat, even light that works beautifully in black and white. Harsh midday sun creates ugly shadows under eyes and noses — unless you deliberately use the shadow as your subject.
- Emotion or gesture — A laugh, a glance, a furrowed brow. Ask yourself: does this photo make the viewer feel something? A child looking up at a street performer, mouth open in wonder, needs no caption.
- Geometry and layer — Leading lines, doorway frames, shadows on pavement. These give structure to what might otherwise be a random moment.
- Timing — The difference between a snapshot and a photograph is often 0.3 seconds. Version A: a person walks past a doorway. Version B: the same person is framed perfectly by the arch, their shadow stretching diagonally across the pavement. Same scene. Different moment.
- Story — Even without context, the photograph should prompt a question. Who is this person? Where are they going? Why do they look like that?

With the goal clear, it is time to get your kit ready. The good news: you probably already own everything you need.
Essential Gear Before You Go
You do not need expensive gear to start shooting street photography. This is the most liberating fact in the entire guide — and also the most ignored. Our team evaluated dozens of street photography communities and forums, and the consistent feedback from experienced practitioners is the same: your camera matters far less than your eye and your confidence.
- Preparation Overview:
- Estimated Time: 2-3 hours per photography session
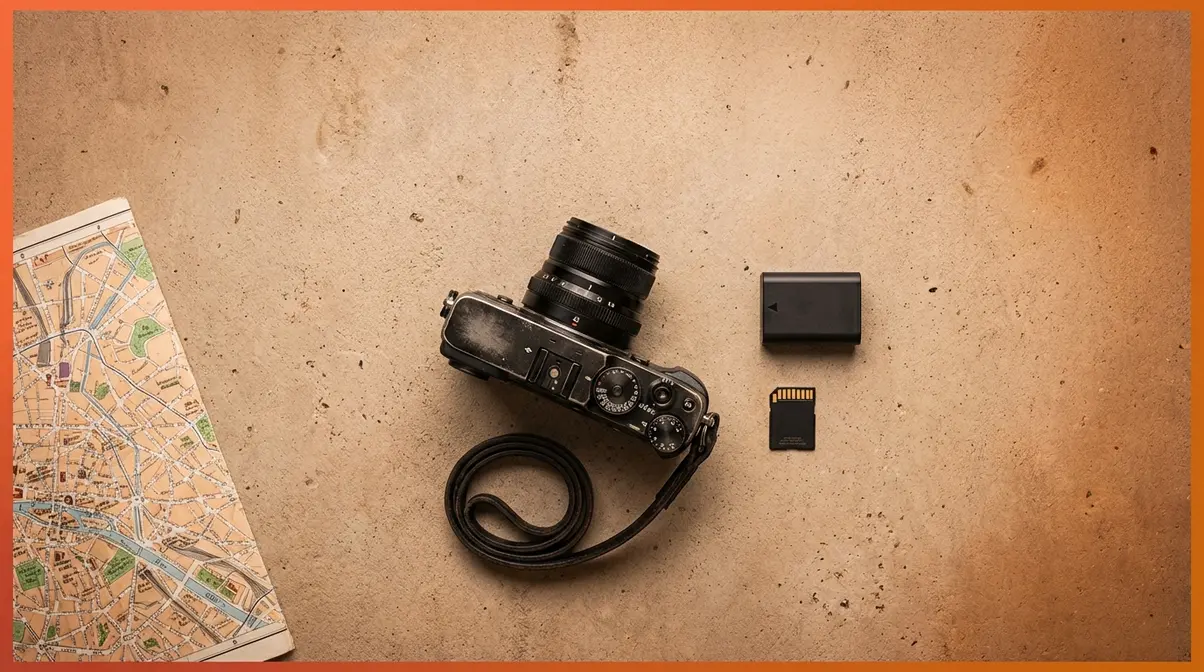
- Required Tools: Camera (mirrorless, DSLR, or smartphone), 35mm or 50mm prime lens, spare battery, Class 10 memory card
The Invisible Photographer Formula begins here, at Step 0. The gear you choose should make you invisible — small, quiet, and unintimidating to the people around you.
Any Camera Works
A mirrorless camera is the current gold standard for street photography. Mirrorless means no moving mirror inside the body, making it quieter and more compact than a traditional DSLR. The Sony ZV-E10 and Fujifilm X100VI are popular choices among street photographers in 2026 — small enough to fit in a jacket pocket, fast enough to capture a decisive moment.
DSLRs remain entirely valid tools. Older entry-level DSLRs produce image quality that surpasses any compact point-and-shoot. Newer does not mean better for street photography — the best camera is the one you carry consistently.
Recommended Street Photography Cameras:
| Camera Model | Type | Best For | Est. Used/New Price |
|---|---|---|---|
| Sony ZV-E10 | Mirrorless | Compact hybrid | $600 |
| Fujifilm X100VI | Fixed Lens | Tactile control | $1600 |
| Canon Rebel T6i | DSLR | Budget entry | $250 |
Your iPhone 15 Pro, iPhone 16 series, or Google Pixel 8/9 is also a legitimate street photography tool. The computational photography systems on 2026 flagship phones handle low light remarkably well. Use the 1x (24mm equivalent) or 2x lens for street work. The 5x telephoto lens is too conspicuous and produces distorted, compressed perspective — avoid it for candid shooting.
If you already own any of these, you are ready. Do not buy new gear before you have shot at least 500 frames.
Best Lens for Beginners

Which lens is best for a beginner in street photography? A 35mm or 50mm prime lens is the best choice for beginner street photographers. Prime lenses — fixed focal lengths with no zoom capability — are physically smaller and less intimidating to strangers than bulky zoom lenses, and their wider maximum apertures (typically f/1.8) handle low-light street scenes more effectively.
“A 35mm or 50mm prime lens is the single best investment a beginner street photographer can make — it’s lighter, quieter, and less intimidating to strangers than a zoom lens.” (User consensus across photography communities)
Three concrete reasons primes beat zooms for beginners:
- Physically smaller — less conspicuous on the street
- Faster maximum aperture — typically f/1.8, which handles low-light scenes a kit zoom cannot
- Forces you to move your feet — the physical constraint trains your compositional eye far faster than zooming from a fixed position
As Edmund Optics on depth of field explains, a wider aperture on a prime lens creates a shallower depth of field, allowing your subject to stand out from a busy background.
If you only own a kit zoom (18–55mm), set it to 35mm and tape the zoom ring. Simulate prime lens discipline without spending a penny.
| Feature | Prime Lens | Zoom Lens |
|---|---|---|
| Weight | ✓ Lighter | ✗ Heavier |
| Discretion on street | ✓ Less conspicuous | ✗ More conspicuous |
| Low-light performance | ✓ Wider max aperture (f/1.8) | ✗ Narrower max aperture (f/3.5–5.6) |
| Forces composition discipline | ✓ Yes — move your feet | ✗ No — zoom instead |
| Typical cost (new) | ✓ Often cheaper | ✗ Variable |
Now that your camera and lens are sorted, there is one settings check you must do before you ever leave the house.
One Pre-Shoot Settings Check
These street photography tips for beginners apply whether you are using a $200 DSLR or a flagship mirrorless: none of them matter if your battery is dead and your mode dial is in the wrong position.
Most mirrorless cameras deliver 200–350 shots per charge. A typical street session runs 2–3 hours. The maths is not comfortable — carry a spare battery.
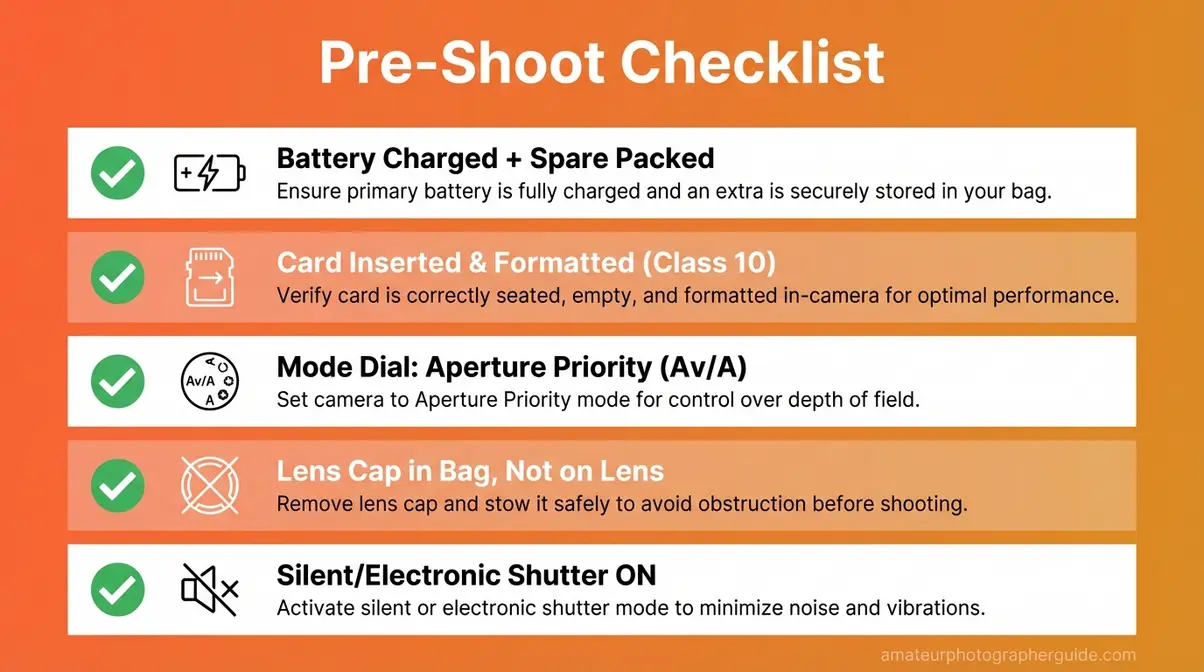
Pre-Shoot Checklist (complete this before every outing):
- Battery fully charged + spare packed.
- Memory card inserted and formatted (use a Class 10 / UHS-I card — look for a small circle with a “10” inside the card’s logo).
- Mode dial set to Aperture Priority (Av/A) — you control depth of field; the camera chooses shutter speed.
- Lens cap in your bag, not on your lens.
- Silent/electronic shutter enabled (if your camera supports it — this is in the Shooting menu).
Gear and preparation sorted. Now comes the part every beginner dreads most — and the section that goes further than anything else you have likely read on this subject.
Overcoming the Fear of Strangers
The first time most street photographers raise their camera toward a stranger, their hands shake slightly. Their breathing changes. They find something else to photograph — a shop sign, a parked bicycle, anything that is not a human being. This experience is universal among beginners, and it is nothing to be embarrassed about.
Fear on the street is not a character flaw. It is a predictable psychological response to an unfamiliar social situation. Understanding that it disappears with a structured approach — not with willpower alone — is what separates photographers who go on to shoot confidently from those who give up after three outings.
Why Fear Disappears with Practice
Every street photographer, including professionals with twenty years of experience, felt exactly this way on their first outings. The anxiety is real. It is also temporary, and it shrinks predictably with repetition.
The mechanism is straightforward: the more times you do something that feels uncomfortable, the less uncomfortable it becomes. This is simply how human brains adapt. Across street photography communities, the consistent feedback from beginners who pushed through those first sessions is striking — the discomfort drops sharply after the first 20–30 frames. Not because the world changed, but because you realized nothing bad happened.
James Maher’s street photography guidance reinforces this: Maher emphasises that lingering in a location — rather than chasing subjects — dramatically reduces social anxiety and increases shot quality.
Here is a practical mindset shift that experienced street photographers use consistently:
“Find a nice spot where the light interests you, pretend to take your time photographing it. When people walk past, take a shot.”
— A practical principle used by experienced street photographers
Notice what this advice does. It removes the act of approaching. It makes you a stationary element in the scene. Subjects walk through your frame instead of being pursued. This is the foundation of the technique covered next.
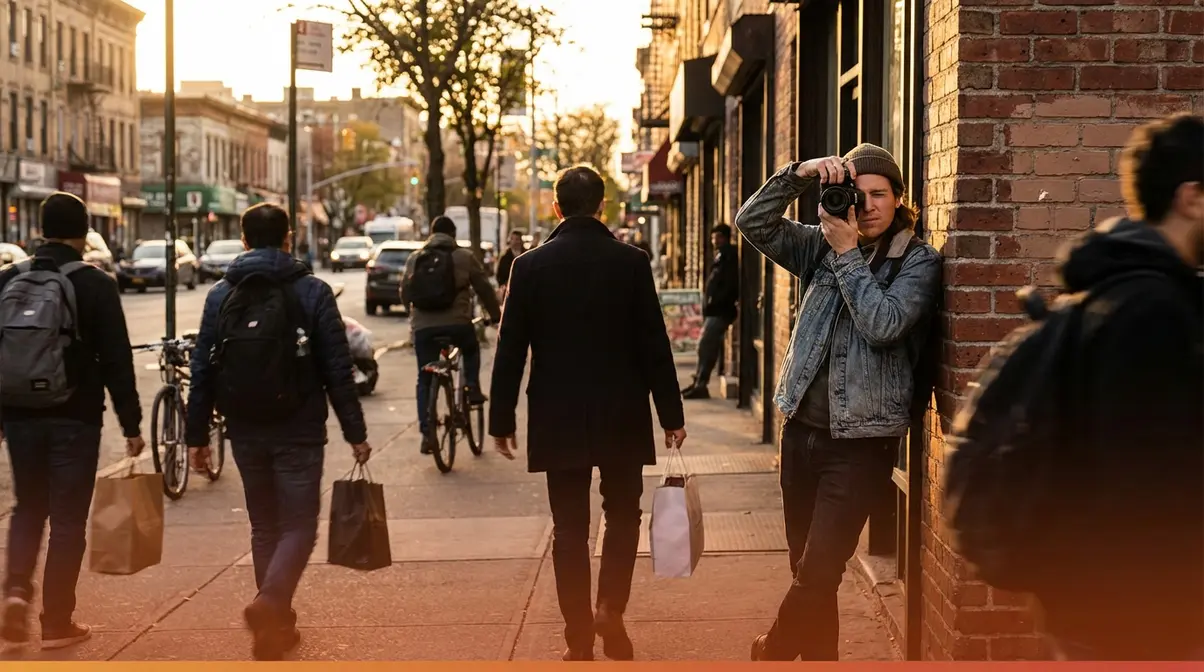
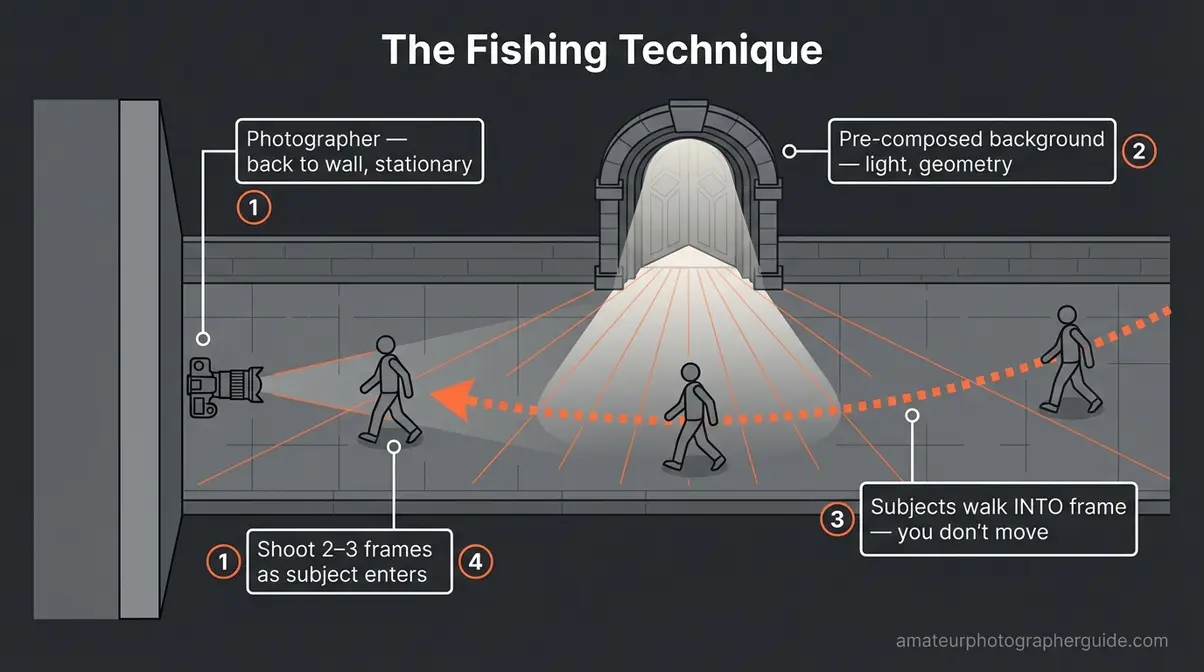
The Fishing Technique
The fishing technique is the most effective fear-reduction strategy in the beginner street photography toolkit. The principle: find a background with interesting light, geometry, or atmosphere — then wait for subjects to walk into your pre-composed frame. You are not following anyone. People are walking into your picture.
This one reversal eliminates the core anxiety of street photography: the feeling that you are doing something to someone. You are not. You are stationary. They chose to walk past.
Step-by-step execution:
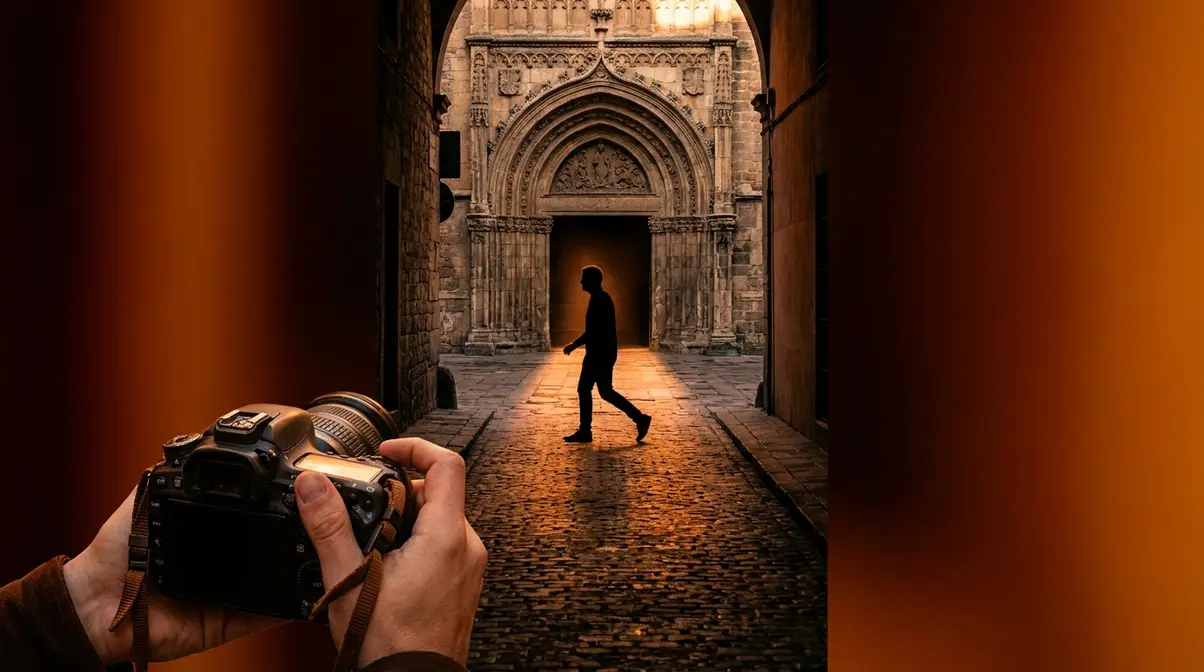
- Find a compelling background — a doorway, a mural, a pool of light on pavement, a colourful wall, a shadow from a nearby structure.
- Compose your shot on that background. Meter the light, set your focus distance.
- Stand naturally, back against a wall if possible — you look like someone waiting, not someone hunting.
- When a subject enters the frame, shoot 2–3 frames quickly.
- Keep the camera at eye level for 3 full seconds after shooting. This is the most commonly missed step: lowering the camera immediately signals guilt to anyone nearby. Holding the camera steady signals that you are photographing the scene.
- Lower the camera calmly and wait for the next subject.
The fishing technique is your first real-world exercise. Here is how to build from it using a structured five-step progression.
5 Graded Exposure Exercises
No competitor guide includes structured progression exercises for beginner street photographers. This five-exercise system, ordered from least to most psychologically demanding, gives you a concrete roadmap across one to three weeks — not abstract encouragement.
These street photography tips for beginners are best treated as a curriculum, not a checklist:
- Exercise 1 — Photograph Architecture and Empty Streets (Day 1): No people required. Walk a busy area and photograph only buildings, doorways, signage, and shadows. Get comfortable with your camera controls in a public environment without any social pressure. Goal: 30 minutes, 50 frames. Your only job is to get comfortable holding the camera in public.
- Exercise 2 — Back Shots and Crowds (Days 2–3): Photograph people from behind — walking away, in crowds, from a distance. No subject will notice or care. This trains your eye for composition without any social exposure. Train stations, markets, and busy pedestrian crossings are ideal locations.
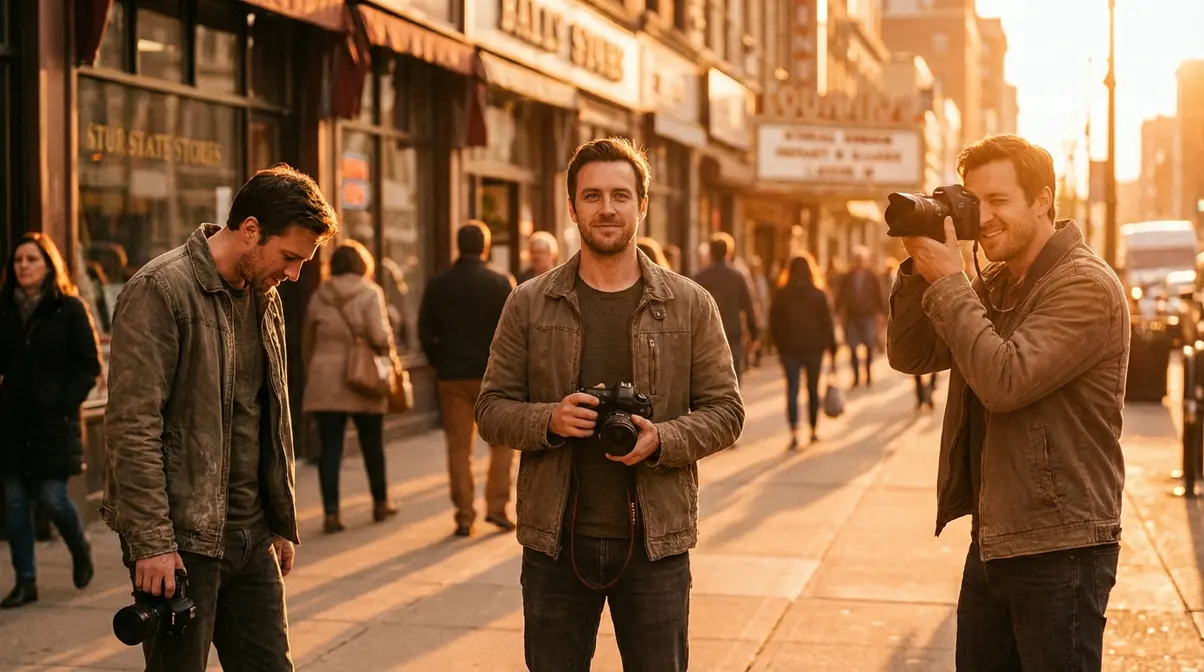
- Exercise 3 — The Fishing Technique in a Busy Tourist Area (Days 4–7): Apply the fishing technique in a high-foot-traffic location: a tourist market, main square, or popular public space. Subjects in these areas expect cameras. Shoot 20 frames per session. This is where your confidence begins to build noticeably.
- Exercise 4 — Direct Street Shooting at Medium Distance (Week 2): Shoot subjects from 4–6 metres using a 50mm lens or equivalent. At this distance, most subjects do not notice. If someone glances at you, smile and continue — the majority smile back and keep walking. Confrontations at this distance are rare.
- Exercise 5 — Close Proximity and Eye Contact (Week 3): Shoot from 1–2 metres. Make brief eye contact before raising the camera. This sounds terrifying. It almost never results in confrontation. The key is to move with confidence — not apologetically, not aggressively. Confidence reads as purposefulness, and purposefulness rarely invites challenge.
Now you know how to act on the street. You also need to know your legal rights — because genuine confidence comes from knowing you are fully within the law.
Your Legal Photography Rights
“Photographing people in public spaces is legal in the United States without obtaining permission — the California Film Commission confirms very few legal restrictions apply to subjects in plain public view.” (California Film Commission, 2026)
In virtually all US states, photographing people in plain public view — streets, parks, public squares, open-air markets — requires no permission and no permit. The key legal concept is “reasonable expectation of privacy.” A person on a public street has none. A person inside their home, or inside a private venue that has not given public access, does. That boundary is clear and consistently upheld.
The California Film Commission document confirms very few legal restrictions apply to photographing subjects in plain public view on public streets (California Film Commission, 2026). The University of Washington photojournalism law guide further establishes that understanding privacy laws is essential for ethical photography — and that the key test is whether a subject has a reasonable expectation of privacy.
If someone asks you to stop or to delete a photo, use this response: “I appreciate you letting me know — I’m a photographer documenting the neighbourhood. I won’t use the image in any way that identifies you if that’s a concern.” Stay calm, be respectful, do not argue. Offering to delete a photo as a goodwill gesture, even when not legally required, costs you one image and often turns a tense moment into a friendly conversation.
| Region | Legal to Shoot in Public? | Key Nuance |
|---|---|---|
| United States | ✅ Yes | No permit needed; no model release for editorial use |
| European Union | ✅ Generally yes | GDPR may apply on publication of identifiable images |
| United Kingdom | ✅ Yes | Public places fully accessible; publishing standards apply |
| Japan | ⚠️ Cultural caution | Legal but strong cultural norms favour asking first |
Caption: Legal rights for public photography vary by region — know your position before you shoot.
You are confident, you know your rights, and you know your gear. Now it is time to master the technical skill that separates beginners who miss the moment from those who capture it.
Master Street Camera Settings
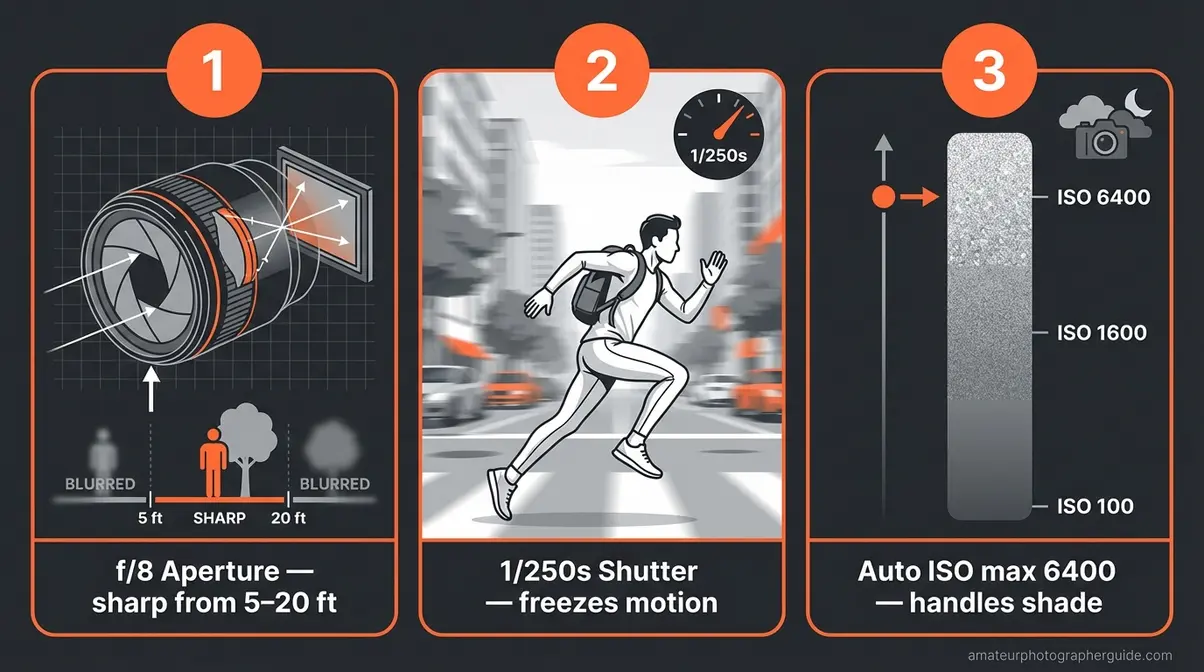
What are the best camera settings for street photography? The best camera settings for beginners are f/8 aperture, 1/250s shutter speed, and Auto ISO capped at 6400. Setting these before you leave home means you can raise your camera and shoot any street scene without adjusting a single dial.
This is the second pillar of The Invisible Photographer Formula: if your settings are correct, you never have to think about the camera. You become free to think only about the moment in front of you — the light, the gesture, the geometry. Settings that require adjustment mid-scene are settings that cost you the shot.
Most beginner guides tell you to use Aperture Priority mode and leave it there. That is sound advice. But there is a more sophisticated insight that advanced practitioners use: street photography is one of the only genres where full Manual mode can actually be easier once you understand why. Light on a single city block rarely changes rapidly — one manual exposure setting lasts 10–15 minutes. Set it once, stop thinking about it, and concentrate entirely on the street.
Step 1: f/8, 1/250s, Auto ISO
Understanding what each setting does makes it stick. Here is a plain-English explanation, then the exact steps to set each one.
Aperture (the opening in your lens that controls how much light enters, measured in f-stops — a smaller number means a larger opening) at f/8 gives you a wide depth of field. At this setting, a standard 35mm lens maintains acceptable sharpness from approximately 5 to 20 feet on a crop-sensor camera — ideal for unpredictable street distances (Edmund Optics). Anything within that range is sharp the moment you press the shutter. You stop thinking about focus.
Shutter speed (how long the camera’s sensor is exposed to light — faster speeds freeze motion) should be 1/250s as a minimum. Anything slower and a walking person blurs. At typical street pace, 1/250s freezes most subjects cleanly. As a rule of thumb, set shutter speed to at least double your lens focal length in mm — for a 35mm lens, the minimum is 1/70s, but 1/250s gives you a comfortable safety margin.
ISO (your camera’s sensitivity to light — higher ISO brightens the image in dark scenes but adds grain) should be set to Auto with a maximum cap. Set that cap at ISO 6400: most modern cameras handle this cleanly, and it gives you enough headroom to shoot comfortably in open shade and overcast conditions.
Step-by-step settings instructions:
- Press the MODE button and turn the dial to M (Manual) or Av/A (Aperture Priority).
- Turn the front dial until your f-stop reads f/8.
- Set shutter speed to 1/250s (in Av/A mode, enter the menu and find “ISO Auto Min. SS” or “Minimum Shutter Speed” and set it to 1/250s).
- Set ISO to Auto and enter the menu to cap maximum ISO at 6400.
- Take a test shot. If the image is too dark, widen aperture to f/5.6. If too bright, narrow to f/11.
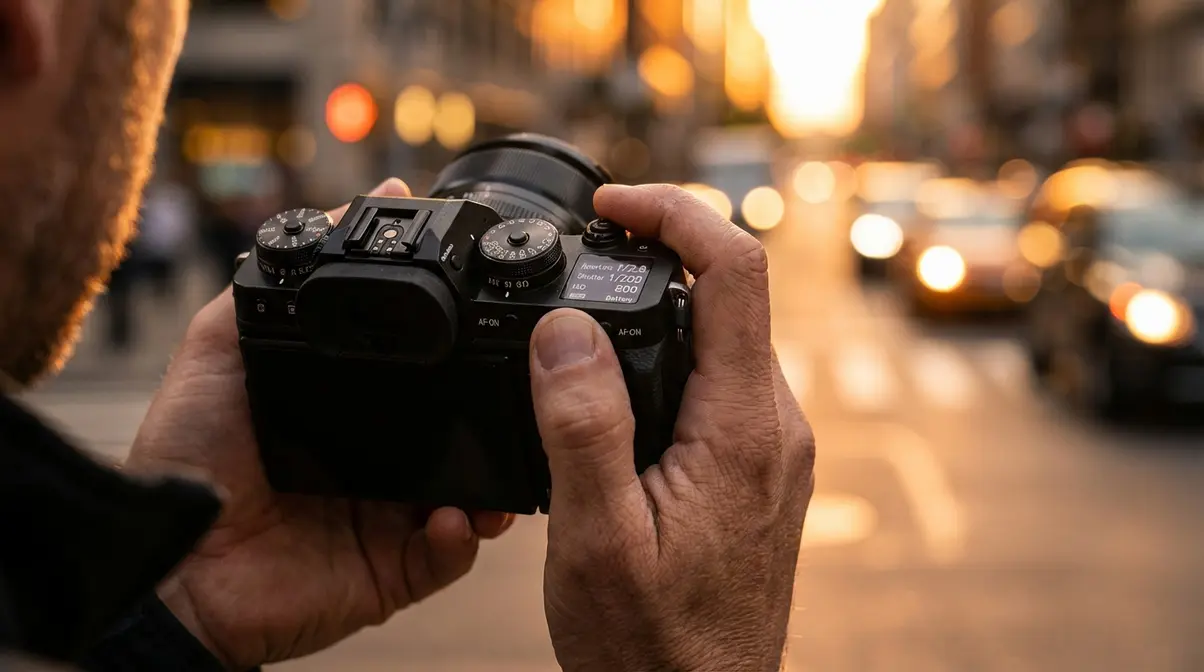
Caption: Your LCD should show these values before you leave home — f/8, 1/250s, Auto ISO.
Once you have mastered aperture priority, there is a faster technique professionals use — one that eliminates autofocus entirely.
Step 2: Zone Focus Setup
Zone focusing is the technique of manually pre-setting your focus to a fixed distance — typically 8 to 10 feet (2.5–3 metres) — before shooting. When paired with f/8, the resulting depth of field covers approximately 5 to 15 feet in front of you. Anything within that range is automatically sharp the moment you fire, because the camera does not need to search for a focus point at all.
This completely eliminates autofocus delay. You can raise your camera and shoot in under 0.3 seconds. Henri Cartier-Bresson used zone focusing with film cameras long before autofocus existed — it remains the fastest street photography method available.
How to set zone focus on a mirrorless or DSLR:
- Switch your camera to Manual Focus (MF) mode — usually a switch on the lens barrel, or in the camera menu under AF/MF settings.
- Point the camera at a subject approximately 3 metres (10 feet) away.
- Turn the focus ring until that subject appears sharp in the viewfinder.
- Lock this position — do not touch the focus ring again during your session.
- Optional: place a small strip of masking tape over the focus ring to prevent accidental movement.
Zone focusing is ideal for cameras without sophisticated autofocus systems. If you own a 2026 mirrorless camera, there is an even more powerful alternative.
Step 3: Eye-Tracking AF
Eye-tracking autofocus (also called subject recognition AF) means your camera’s processor identifies a human face and eye in the frame and continuously adjusts focus to keep that eye sharp, even as the subject moves. This technology has matured significantly across brands: Sony calls it Real-Time Eye AF, Canon calls it Eye Detection AF, Fujifilm labels it Subject Tracking AF, and Nikon uses Eye-Detection AF.
How to enable subject recognition AF on most 2026 mirrorless systems:
- Enter the AF Settings menu (usually under the camera icon in the main menu).
- Find “Subject Recognition,” “Eye AF,” or “Face/Eye Detection” and set it to ON.
- Set AF Mode to Continuous AF (C-AF or AF-C) — this tracks moving subjects rather than locking focus once.
- Set AF Area to Wide — the camera scans the entire frame for subjects.
- Assign Eye AF activation to a rear thumb button (Back-Button Focus) rather than the shutter button, so you can decouple focus from the shutter entirely.
The practical result: walk toward a subject, press the rear AF button with your thumb, and your camera locks onto their eye even in a crowd. However, eye-tracking AF is slower than zone focus when subjects appear suddenly from the side — use zone focus when action is unpredictable; use Eye AF when you have one to two seconds to compose.
Caption: Zone focus for fast reactions; Eye AF for composed, deliberate shots — know when to use each.
No mirrorless camera? Your smartphone may be more capable than you think.
Step 4: Smartphone Settings
The iPhone 15 Pro, iPhone 16 series, and Google Pixel 8/9 are legitimate street photography tools. Use the 1x (24mm equivalent) or 2x lens for street work. The 5x telephoto creates a conspicuous working distance and compresses perspective unnaturally — avoid it for candid shooting.
Enable ProRAW on iPhone or RAW+ on Pixel for maximum post-processing flexibility. In low light, use Night Mode — but cap it at 1–2 seconds maximum. The Auto setting can stretch to 6 seconds, which motion-blurs any walking subject beyond recognition. One to two seconds preserves the ambient atmosphere while keeping stationary elements sharp.
Stealth tip: Shoot from chest height using your phone’s volume button as the shutter. Your screen faces down, so subjects rarely notice the camera at all.
Settings Cheat Sheet — Day vs. Night:
| Setting | Daytime | Nighttime |
|---|---|---|
| Aperture | f/8 | f/2.8–f/4 |
| Shutter Speed | 1/250s minimum | 1/125s minimum |
| ISO | Auto (max 6400) | Auto (max 12800) |
| Focus | Zone (8–10 ft) or Eye AF | Eye AF preferred |
| Lens (mirrorless) | 35mm or 50mm prime | 35mm prime (faster aperture) |
| Smartphone | 1x or 2x lens, ProRAW | Night Mode max 2s, RAW |
Caption: Save this cheat sheet to your phone — check it before every outing until the settings become muscle memory.
Settings locked in. Now the most creative challenge: making your photographs visually compelling, not just technically sharp.
Composition Techniques
Composition in street photography is not about rules — it is about using geometry, light, and timing to give a random public moment a permanent visual logic. The best compositional instincts are learned consciously first, then automated through repetition. The four techniques below represent the third and final pillar of The Invisible Photographer Formula: the right eye sees before the camera fires.
User consensus across photography communities points to one consistently missed insight for beginners: the detail shot — an isolated hand, a pair of shoes, a reflection in a puddle — produces emotionally powerful photographs while requiring zero confrontation with subjects. Begin with details. Build toward faces.
Rule of Thirds & Leading Lines
“The rule of thirds” is a compositional guideline where you divide your frame into a 3×3 grid and place your subject at one of the four intersection points rather than dead centre. Dead-centre subjects read as static; off-centre subjects create visual tension and dynamism. Most cameras let you enable this grid overlay on the LCD in 30 seconds via Display Settings — turn it on for your first ten outings.
Leading lines — roads, tramlines, fences, staircases, shadows stretching across pavements — pull the viewer’s eye naturally into the frame. Position yourself so that one of these lines leads toward your subject.
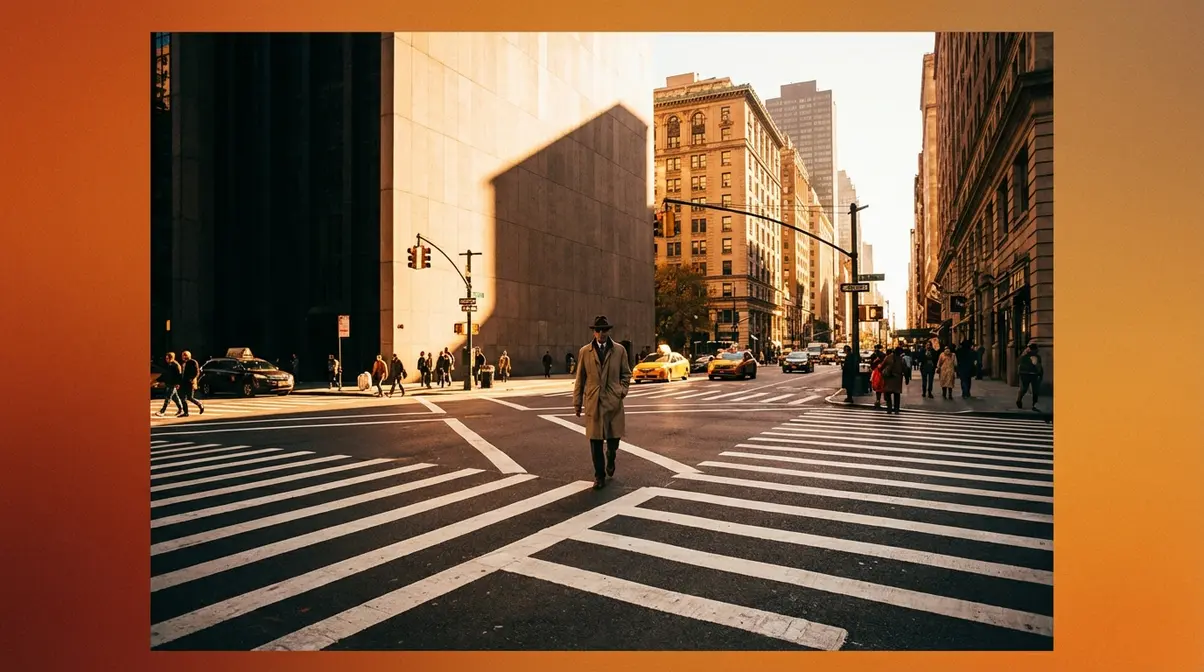
A specific example: stand at the edge of a pedestrian crossing and photograph a subject walking toward you. The bold crossing lines converge on the approaching figure, creating instant visual depth. That is street photography composition tips put into practice in under a minute.
Application: Walk ten minutes in any direction from your front door. Identify five potential leading lines before raising your camera. Train the eye first — then let the camera follow.
Once you have the basics of framing down, the next level is learning to see relationships between objects — what photographers call juxtaposition.
Juxtaposition & Geometry
Juxtaposition means placing two contrasting elements in the same frame to create tension, humour, or meaning. A formal business person walking past a chaotic graffiti mural. A child’s toy on a busy commuter pavement. An elderly person engrossed in a smartphone. The contrast tells the story without a caption.
Eric Kim’s beginner street photography guide emphasises the power of visual elements and geometry in street photography — looking for shapes, lines, and layers rather than simply capturing people. We take that further by making it concrete.
Geometry surrounds you in any urban environment — circles, triangles, arches, diagonal scaffolding shadows. Train yourself to see geometric shapes before humans enter the scene. A circular drain cover with a face reflected in a nearby puddle. A triangular shadow from an awning structure falling across a doorstep. These compositions exist independently of people and reward the patient eye.
Reflections — puddles after rain, shop windows, car side mirrors, sunglasses — create a layered, dreamlike quality that immediately elevates a shot beyond the ordinary. The practical technique: photograph puddle reflections by crouching low and shooting horizontally at water level. This doubles the visual interest and creates a near-symmetrical composition the eye finds naturally satisfying.
Application: On your next walk, find one puddle, one reflective window, and one geometric shadow. Photograph each without a human subject first — understand the compositional element in isolation before adding people to the equation.
Caption: These three techniques work independently of subjects — practice them on architecture first.
Static composition is the foundation. Now add movement — and deliberate blur — to inject energy into your photographs.
Control Motion Blur
Motion blur is not always a mistake. Used deliberately, it is one of the most expressive tools available in street photography.
At a shutter speed of 1/15s to 1/30s, a walking subject blurs while a stationary background stays sharp — the result conveys energy, pace, and the feeling of a city in motion. Busy markets, public transport stations, and rush-hour pedestrian crossings are ideal locations for this technique.
How to achieve controlled motion blur:
- Switch to Manual mode.
- Set shutter speed to 1/15s–1/30s.
- Set ISO to 100 (minimum) to prevent overexposure at these slow speeds.
- Set aperture to f/11–f/16 (narrow) to compensate for the extra light entering at slow shutter speeds.
- Brace yourself — use a wall, a doorframe, or a post. Handholding at 1/15s requires stillness in your body even as your subject moves.
- Fire as a subject walks through your frame. The background stays sharp; the subject smears with motion blur.
Contrast this with the opposite technique: 1/1000s or faster freezes motion completely — runners, cyclists, sudden gestural moments. Whether to freeze or blur is a creative decision. Make it consciously before raising the camera.
The final technique is the most beginner-friendly of all — and the most frequently overlooked.
Focus on Details
A close-up of weathered hands holding a coffee cup tells more of a human story than many full-body portraits. A pair of worn boots on rain-slicked cobblestones carries genuine emotion without showing a face. Detail shots require almost no confrontation — your subject usually does not notice you are pointing a camera at their shoes.
Look for: hands, feet, shadows of people (not the people themselves), reflections of eyes in glasses, street food being prepared, newspapers being read, dogs straining at their leads. Each of these is a portrait of a moment without being a portrait of a person. The approach lets you build compositional confidence while developing your eye for what matters in a scene.
Application: On your next session, dedicate 20 minutes exclusively to detail shots. If using a 50mm lens, step within one metre of your subject. You will be surprised how much story exists at ground level.
Technique and mindset in place — but even experienced photographers make predictable mistakes. Let us clear those up before you head out.
Common Beginner Mistakes
“The single most common beginner mistake in street photography is deleting images on-location — reviewing and culling on a small LCD causes you to miss the next ten shots.”
Street photography mistakes fall into two categories: technical and psychological. Both are entirely fixable — usually within a single outing.
Gear & Settings Mistakes
- Mistake 1 — Shooting in full Auto mode: The camera optimises for static scenes and often selects a shutter speed too slow for moving subjects. Fix: Switch to Aperture Priority (Av/A) and set the minimum shutter speed in the menu to 1/250s.
- Mistake 2 — Not capping Auto ISO: If uncapped, your camera may set ISO 25600 in shade, producing unusably noisy images. Fix: Enter the ISO Auto settings in your menu and set the maximum to ISO 6400. Most modern cameras produce clean results at this level.
- Mistake 3 — Using a heavy zoom lens: A large telephoto is conspicuous, physically tiring over a two-hour walk, and encourages safe long-distance shooting that produces flat, disengaged images. Fix: Tape your zoom at 35mm and treat it as a prime for your first ten outings.
- Mistake 4 — Reviewing images on location: Every minute spent checking your LCD is a minute you are not watching the street. Fix: Shoot for a minimum of 45 minutes without reviewing a single frame. Edit at home, on a proper screen, with proper light.
Technical mistakes are fixable in one session. Mindset mistakes take slightly longer — but they are equally specific.
Mindset & Approach Mistakes
- Mistake 1 — Chasing subjects: Walking toward people who have caught your eye is conspicuous and anxiety-inducing for everyone involved. Fix: Apply the fishing technique — position, compose, wait.
- Mistake 2 — Apologetic body language: Lowering the camera immediately after shooting signals guilt. Subjects who would have ignored you entirely notice the sudden furtive movement. Fix: Keep the camera at eye level for three full seconds after the shot, every time.
- Mistake 3 — Shooting from too far away: Zoom lenses encourage “safe” distance shooting that produces flat, emotionally distant images. Cartier-Bresson’s instruction remains accurate: “If your pictures aren’t good enough, you’re not close enough.” Fix: Use the graded exposure exercises to build proximity confidence progressively.
- Mistake 4 — Giving up after one uncomfortable outing: One nervous session is data, not failure. Fix: Commit to five outings before evaluating your progress. The trajectory from outing one to outing five is dramatic — nearly every photographer who sticks past the first few sessions reports the anxiety becoming manageable.
Kevin Mullins street photography tips emphasises practical behavioural tips — including walking slowly and letting action come to you — as the foundation of confident street photography.
When Not to Shoot
Street photography has limits that matter ethically, and recognising them is part of being a serious practitioner.
Scenario 1 — Children in isolated locations: Photographing children without a parent’s awareness in isolated settings causes justifiable alarm, even where entirely legal. In crowded public events with parental presence clearly visible, this is generally uncontroversial. When in doubt, ask.
Scenario 2 — People in visible distress: Someone crying on a park bench, experiencing a medical emergency, or caught in a confrontational situation. Photographing vulnerable people in crisis may be technically legal but violates the spirit of ethical street photography. The National Press Photographers Association code of ethics establishes that visual journalists must treat subjects with respect and avoid causing harm — a principle that applies equally to street and documentary photographers (NPPA).
Scenario 3 — Locations with “No Photography” signs: Shopping malls, private plazas, and certain train station concourses are private property with public access. They can legally prohibit photography. Respect the sign.
Frequently Asked Questions
How do I overcome the fear of photographing strangers?
What is zone focusing in street photography?
Do I need a special camera for street photography?
Overcoming the fear of photographing strangers starts with the — positioning yourself at a compelling background and waiting for subjects to walk into your pre-composed frame. This eliminates the anxiety of approaching people directly, since you remain stationary while subjects move through your scene. Starting in busy tourist areas or markets reduces confrontation risk to near zero. The fear typically drops sharply after the first 20–30 frames of an outing, as familiarity replaces apprehension—a psychological habituation principle confirmed by the American Psychological Association. Ultimately, confidence arrives through repeated structural exposure.
is the technique of manually pre-setting your lens focus to a fixed distance — typically 8 to 10 feet — before shooting. When paired with a narrow aperture like f/8, it creates a wide zone of sharpness spanning roughly 5 to 20 feet, so anything within that range is automatically in focus when you fire. This completely eliminates autofocus delay, allowing you to raise the camera and shoot in under 0.3 seconds.
No — Compact mirrorless cameras and modern smartphones are particularly well-suited because they are small, lightweight, and visually unintimidating to subjects. Gear matters far less than positioning, timing, and light — a skilled photographer produces stronger street photographs on a smartphone than a beginner with a professional kit.
For beginner photographers, the best street photography tips for beginners centre on one truth: Set f/8, 1/250s, and Auto ISO before you leave home. Practise the fishing technique for your first three outings. Know your legal rights. — mindset first, gear second, settings third, composition fourth — gives you a repeatable process that removes guesswork and replaces anxiety with instinct. (amateurphotographerguide.com)
The Formula matters because fear is not a personality flaw — it is a gap between uncertainty and information. Every section of this guide closed one part of that gap. You now know what gear to bring, how to configure it, where to stand, what rights you have, and what to look for in a scene. The gap is closed.
Your next step is specific: go out this week, apply the fishing technique for 30 minutes in a busy public space, and shoot 50 frames before reviewing a single one. When you return, the images will surprise you. Your settings reference lives in this article — bookmark it and bring it on your first walk.
Once you are comfortable with street photography, the same foundational skills — reading light, managing people, composing quickly — transfer directly to other disciplines. Portrait photography for beginners applies similar principles in a more controlled setting. Wildlife photography for beginners requires the same patience and anticipation that the fishing technique builds. Boudoir photography, while a different genre entirely, shares the same ethical framework of subject respect and genuine consent. Future guides on each are coming to amateurphotographerguide.com.
zak
Gear tester and writer at Amateur Photographer Guide.