
Table of Contents
- What You Need to Clean Your Camera Lens
- How to Clean a Camera Lens: Step-by-Step Process
- Cleaning Lenses for Different Camera Types
- Troubleshooting Blurry, Foggy, and Dirty Lenses
- Safe Cleaning Alternatives and What to Avoid
- Professional Lens Cleaning Costs
- Common Lens Cleaning Mistakes
- Frequently Asked Questions
- Protect Your Investment: Clean Smart, Not Often
This blog post may contain affiliate links. As an Amazon Associate I earn from qualifying purchases.
A smudged camera lens doesn’t just look bad — it actively costs you image quality in every frame you shoot. The good news: knowing how to clean a camera lens safely takes less than five minutes when you use the right approach.
The problem is that most guides skip the part about what not to do. Use the wrong cloth, the wrong solution, or the wrong technique, and you can permanently scratch lens coatings that cost hundreds of dollars to replace. That risk is real — and it’s exactly why so many photographers hesitate.
In this guide, you’ll learn how to clean a camera lens safely at home using the four-stage Escalation Protocol — from a simple air blower to a careful wet clean — so you can restore clarity without risking damage. We cover the essential tools, step-by-step instructions, device-specific tips for phones and DSLRs, troubleshooting for blurry and foggy lenses, and exactly when the problem requires a professional.
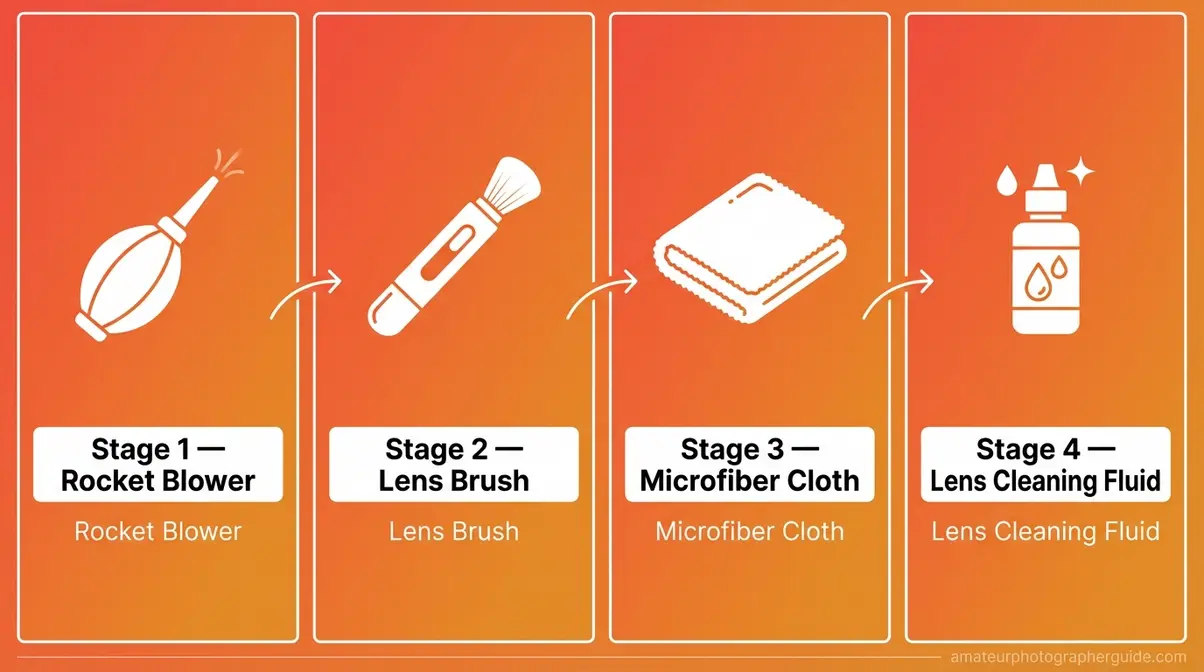
Cleaning a camera lens safely means following a “least-to-most invasive” approach — starting with a dry air blower before ever touching the glass with a cloth. The Lens Cleaning Escalation Protocol keeps your coatings intact by using only as much force as the contamination actually requires.
- The Escalation Protocol works in 4 stages: blower → brush → dry wipe → wet wipe
- Never apply cleaning fluid directly to the lens — always apply to the cloth first
- Household cleaners (Windex, toothpaste) permanently damage lens coatings
- Internal dust rarely affects image quality — external cleaning solves 90% of cases




What You Need to Clean Your Camera Lens
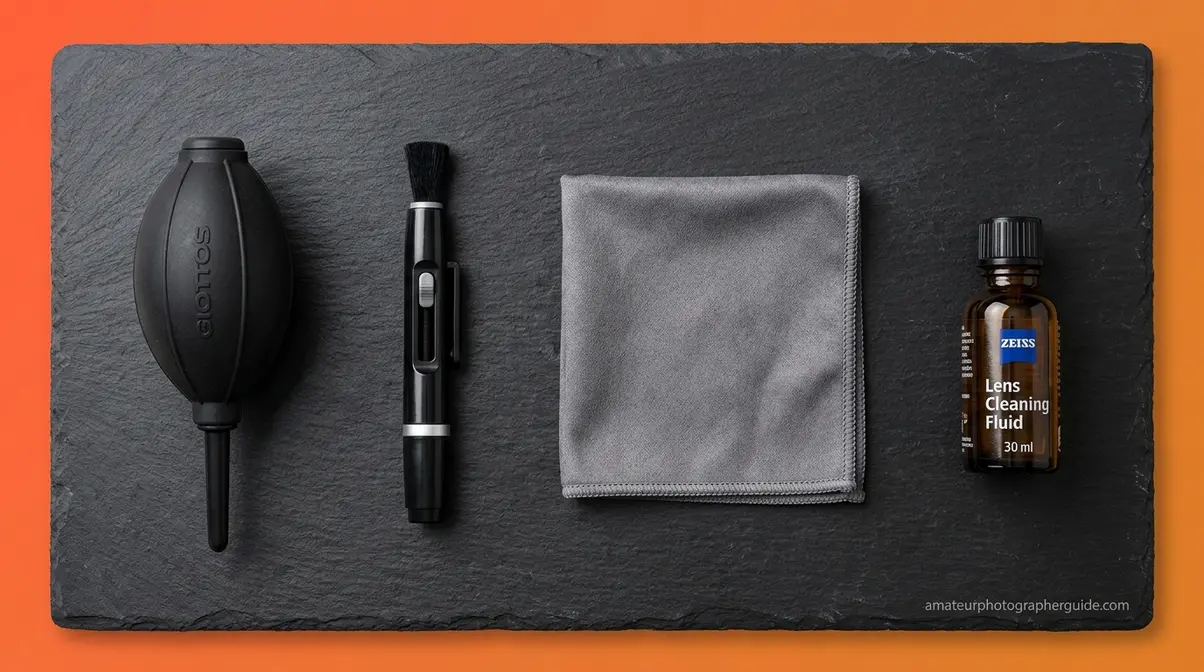
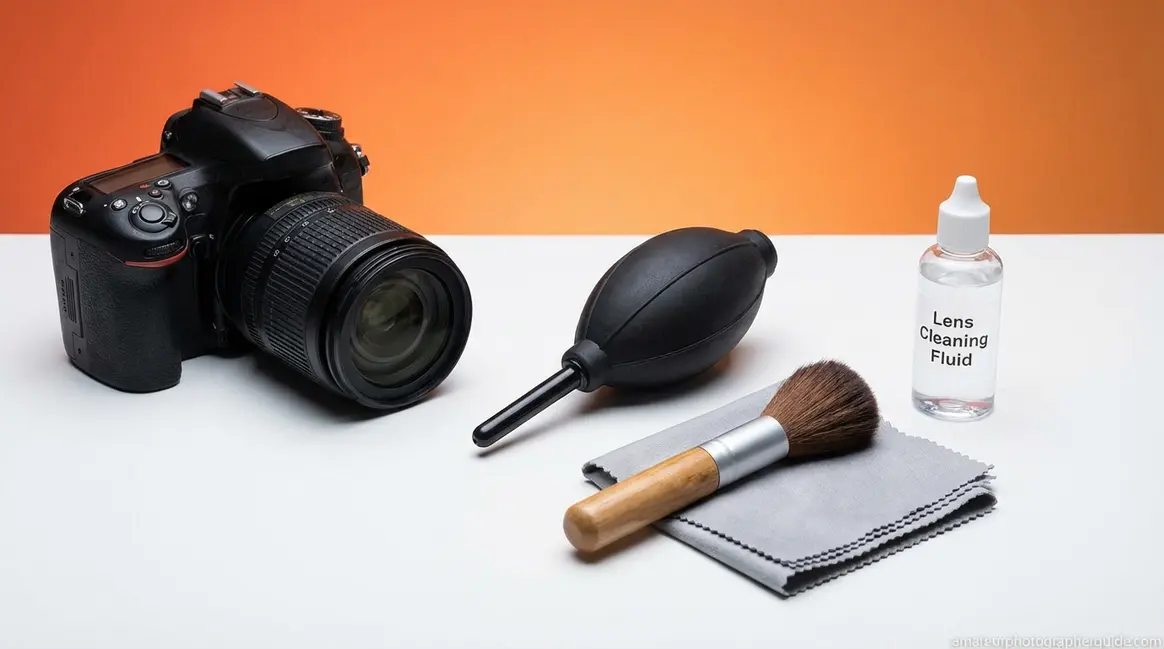
Before you start, gather these four essential tools — using the wrong materials is the most common cause of permanent lens damage. Every tool in The Lens Cleaning Escalation Protocol corresponds to a specific cleaning stage, and each is only used if the previous stage wasn’t enough. Think of the kit as a hierarchy: you reach for the next tool only when the current one leaves the job unfinished.
Here’s what you need:
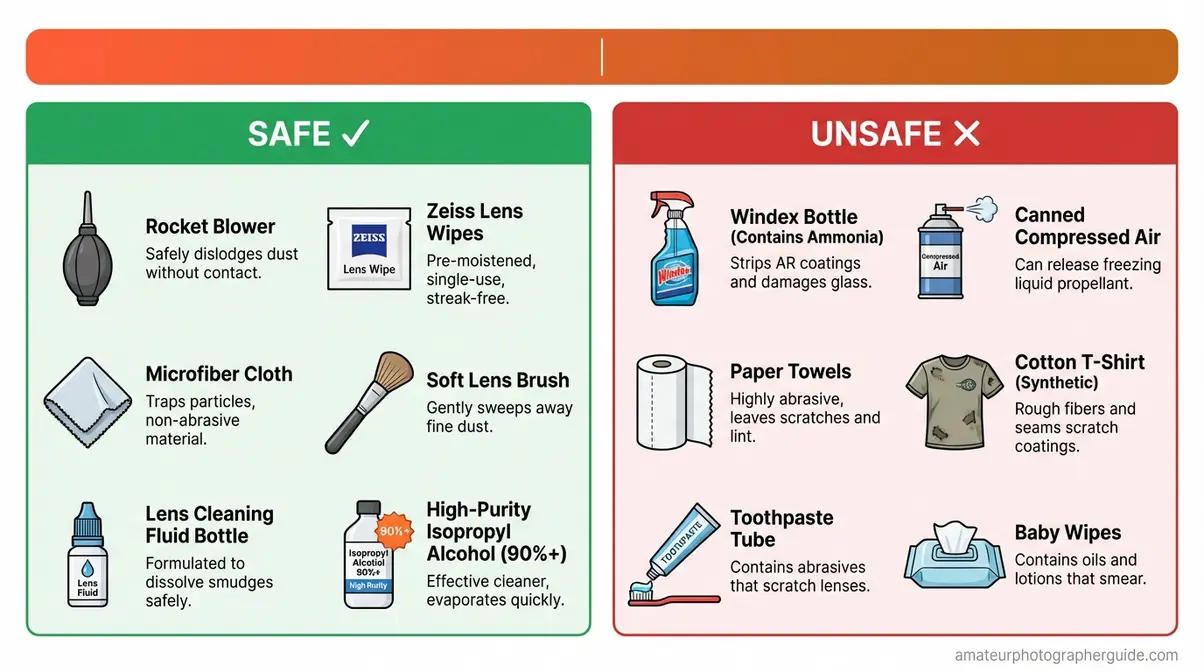
- Rocket blower — a rocket blower is the pear-shaped squeeze-bulb tool that generates a safe puff of air. It removes loose dust without touching the lens. Far safer than canned compressed air, which can spray liquid propellant residue onto the lens surface and freeze the glass on contact. Sony’s support documentation specifically recommends a plain hand blower over canned air for exactly this reason (Sony Electronics, 2026).
- Soft lens brush — a retractable brush with fine synthetic bristles that sweeps particles the blower can’t dislodge. Dedicated lens brushes keep oils off the bristles; paintbrushes and makeup brushes don’t.
- Microfiber cloth — lint-free and non-abrasive. The workhorse of dry cleaning. Must be clean and stored in a sealed bag between uses — a contaminated microfiber cloth scratches more than it cleans.
- Lens cleaning fluid — a solution formulated specifically for optical coatings, using isopropyl alcohol at safe concentrations without additives. Never substitute household glass cleaner.
- Optional: A lens pen — a dual-ended cleaning tool with a brush on one side and a carbon-compound cleaning tip on the other — and Zeiss pre-moistened lens wipes, optical-grade disposable cleaning cloths that combine fluid and cloth in a single step.
“A rocket blower, soft lens brush, microfiber cloth, and lens-specific cleaning fluid are the only four tools you need to safely clean any camera lens.”
With your tools ready, here’s how to use them in the right order.
How to Clean a Camera Lens: Step-by-Step Process
To clean a camera lens effectively, follow the four-stage Escalation Protocol: start with a dry air blower, then use a soft lens brush, progress to a dry microfiber wipe, and only use lens cleaning fluid as a final step for stubborn marks. This process minimizes contact and wear, ensuring you stop cleaning the moment your lens is clear.
“To clean lenses, use a lens-cleaning tissue or microfiber cloth and a tiny quantity of lens-cleaning solution. Never put the solution directly into the lens.”
That captures the core principle — but the full process has four stages, and most lenses only need the first one. The Lens Cleaning Escalation Protocol moves from least invasive to most invasive, stopping the moment your lens is clean. The key insight most guides miss: over-cleaning is a genuine risk. Every unnecessary stage adds contact, and contact means wear.
For a complete guide to caring for all your camera equipment — body, sensor, and accessories — see our complete camera gear cleaning guide.
Step 1: Blow Away Loose Dust
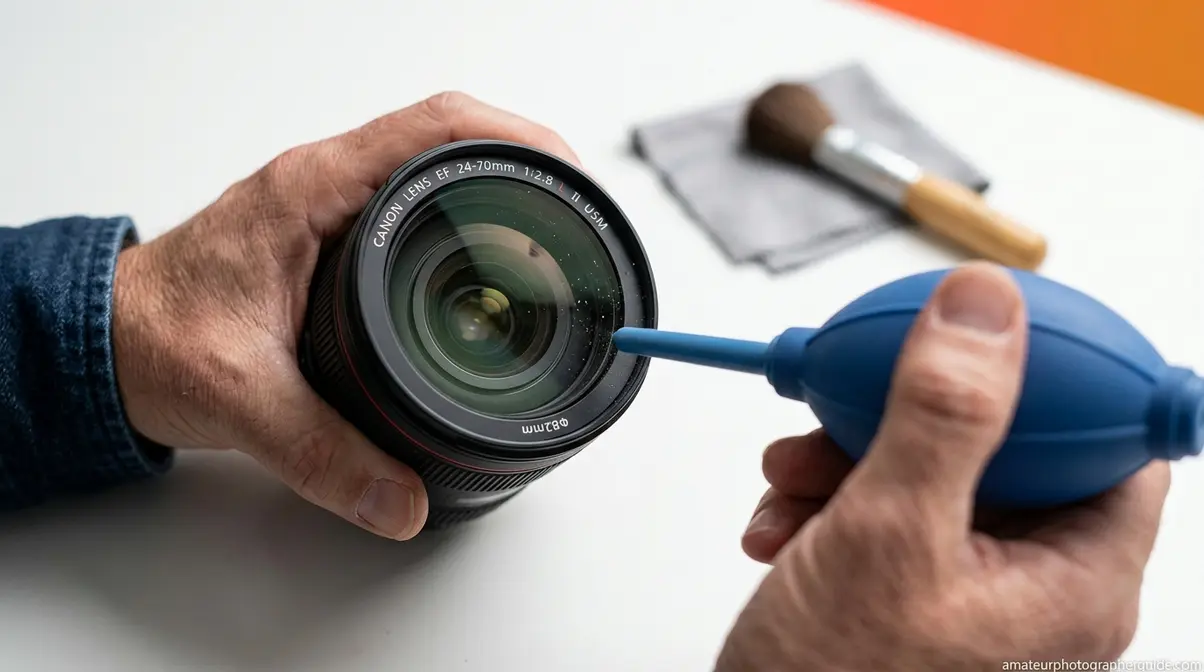
Start every cleaning session here, whether you’re dealing with a light dust particle from a lens change or visible debris after a day outdoors. Hold the lens face-down while using the blower — gravity helps loose particles fall away rather than redistribute across the surface.
Squeeze the rocket blower three to five times from a 45-degree angle, keeping the tip four to six inches from the lens surface. Avoid pointing it perpendicular to the glass, which can force particles into the barrel edges. After blowing, hold the lens up to a bright light source at an angle and look across the surface — this side-lighting reveals particles that straight-on viewing hides completely.
If the lens looks clean, stop here. Across photography communities, the consistent advice is that a quick dust particle — the most common reason photographers reach for a cleaning kit — is the only issue 90% of routine cleaning sessions ever need to address. Continuing to Stage 2 when Stage 1 has already worked is unnecessary wear.
Sony’s support documentation confirms that canned compressed air is specifically not recommended — it can freeze the lens surface and deposit propellant residue that’s harder to remove than the original dust (Sony Electronics, 2026).
If a light inspection shows particles remain after blowing, a soft brush is your next tool — never your fingers.
Step 2: Brush Away Fine Particles
A soft lens brush handles what the blower loosens but can’t fully dislodge — fine sand particles, dried water spots, and stubborn grit sitting in micro-surface irregularities.
Before touching the lens, blow the brush itself with the rocket blower to remove any dust from the bristles. A dirty brush deposits contamination instead of removing it. Use a dedicated lens brush — NOT a paintbrush or makeup brush, as natural hair bristles carry oils from the skin that transfer directly to the glass.
Brush in one direction only: from the center of the lens outward toward the edges, using the lightest possible touch. The goal is sweeping particles toward the rim, not pushing them across the optical surface. A dirty camera lens with fine grit is most vulnerable at this stage — dragging abrasive particles with too much pressure creates micro-scratches.
Inspect under angled light again. If clean → stop. If smudges remain — particularly oily fingerprint marks that the brush simply can’t dissolve — proceed to Step 3.
For fingerprints, oils, or smudges that a brush can’t touch, a dry microfiber cloth is the next stage.
Step 3: Wipe Smudges with Dry Microfiber
For most at-home lens cleaning situations, a dry microfiber cloth resolves the problem entirely — no fluid required. A single fingerprint from accidentally touching the front element while changing a filter is the classic scenario where Stage 3 is the right stopping point.
Use a clean microfiber cloth — one that has been washed in warm water (no fabric softener) and stored in a sealed zip-lock bag. A dirty microfiber cloth is worse than no cloth at all; it redistributes oils and trapped particles, turning a smudge into a scratch.
Wipe in small circular motions starting from the center of the lens and spiraling outward. Never wipe back and forth in straight lines — this drags particles across the glass with each pass. Apply almost no pressure. The cloth lifts oils through surface tension; your hand just guides it across the glass.
B&H Photo’s lens cleaning guide recommends applying solution to the cloth, never the lens, and wiping in circular motions from center outward — the same technique applies even in the dry stage.
One important prohibition: never use a T-shirt, paper towel, or tissue. These contain wood-pulp or synthetic fibers that scratch optical coatings even under light pressure.
If the smudge lifts, stop. If it smears or a residue remains, proceed to Stage 4 — the final and most powerful step.
Step 4: Wet Clean Stubborn Marks
This is how to properly clean a camera lens when dry methods fall short — heavy fingerprint grease after shooting at a food photography event, for example, the kind that doesn’t budge with a dry cloth alone.
Apply one to two drops of lens cleaning fluid to the microfiber cloth or a fresh lens tissue. Never apply fluid directly to the lens. Dropping solution onto the front element risks it seeping into the lens barrel through the focusing mechanism, where it can damage internal elements and lubricants — a repair that costs far more than the bottle of cleaner.
Use the same circular, center-outward motion as Step 3. The damp area of the cloth contacts the glass only; avoid the lens barrel and edge seals. Immediately follow with the dry portion of the cloth — or a fresh dry tissue — to remove any residue before it dries and leaves a streak.
Tamron Americas’ cleaning guide recommends specialized lens cleaners over household alternatives, noting that diluted substitutes should never be applied directly to the lens (Tamron Americas). If you’re using Zeiss pre-moistened lens wipes — optical-grade disposable cloths — skip the separate fluid and cloth entirely. The wipe replaces both and is a reliable all-in-one option for travel.
Once you’ve wiped the lens, a final inspection confirms whether your cleaning was successful — or whether a deeper issue is at play.
Step 5: Dry and Inspect the Lens
When you’ve finished cleaning the lens of your camera, this final check is non-negotiable. Hold the lens up to a single bright light source at a 45-degree angle and look across the surface rather than through it. This reveals streaks, residue, or remaining particles that straight-on viewing misses entirely.
If you see streaks, repeat Step 4 with a fresh, dry area of cloth — streaking usually means too much fluid was used or the cloth wasn’t dry enough for the follow-up wipe. If particles remain, return to Steps 1 and 2.
If the surface looks clean but your images are still soft or hazy, the problem is almost certainly internal — not something the Escalation Protocol addresses. The Troubleshooting section below covers exactly that scenario.
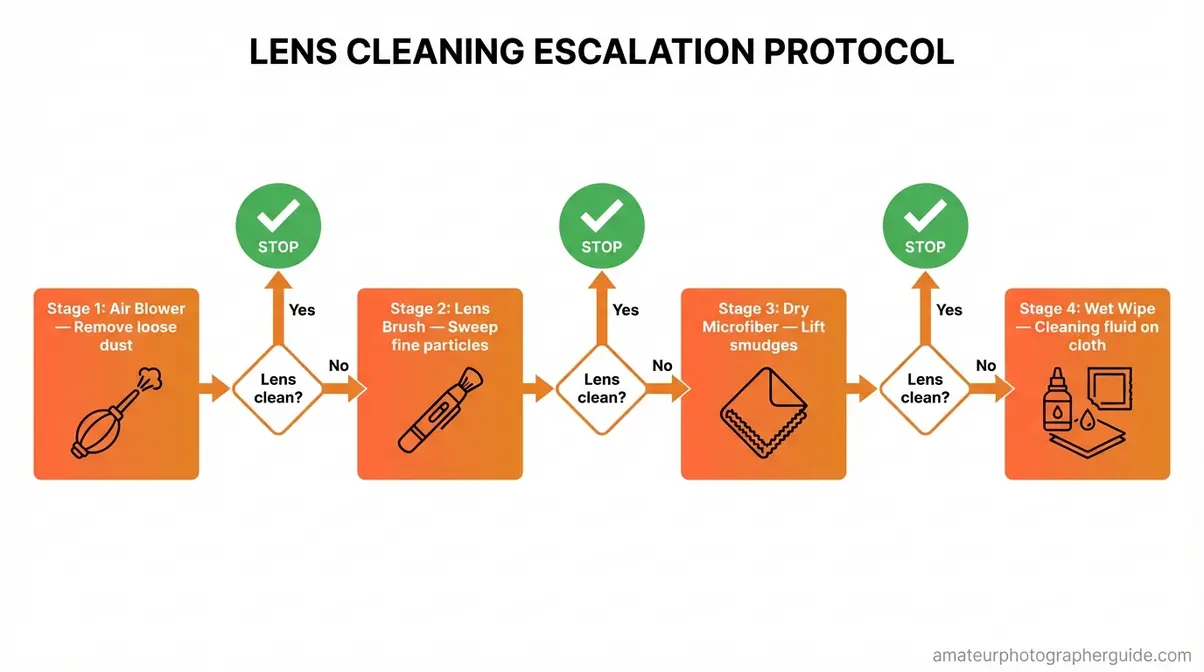
The Escalation Protocol works the same way for most camera lenses — but different camera types have specific considerations worth knowing.
Cleaning Lenses for Different Camera Types
The four-stage Escalation Protocol applies universally, but the physical design of your camera’s lens changes where you start and what precautions you take. Phone camera lenses, DSLR lenses, and security camera lenses each present a different cleaning challenge — and confusing the approach for one with another is a common source of accidental damage.
Clean Phone Camera Lens (iPhone/Android)
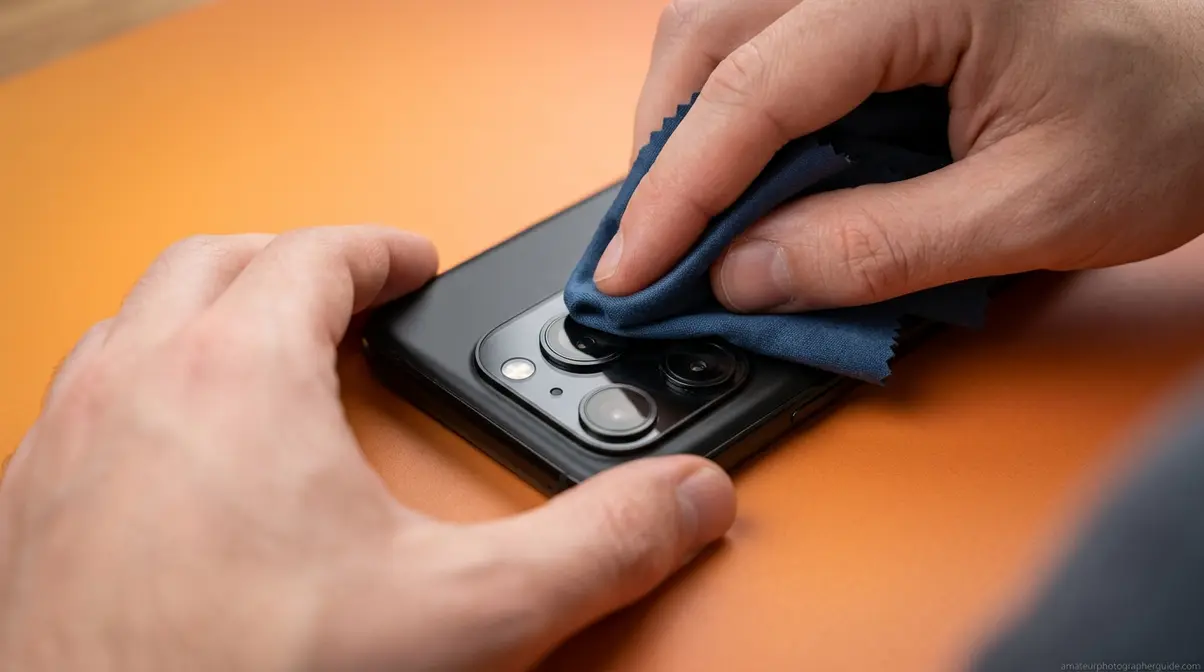
Phone camera lenses are sealed glass windows over the camera module — they cannot be removed, which means you’re always cleaning the exterior surface only. This single fact changes the entire approach: no blower is needed (the sealed design prevents internal dust entry), and the lens protector glass is part of the phone’s chassis rather than a removable optical element.
For routine smudges from pocket lint and fingerprints, a dry microfiber cloth handles the job in seconds. When cleaning a phone camera lens on iPhone or Android, Apple’s support guidance recommends a slightly damp soft lint-free cloth for the device exterior; for the camera glass specifically, dry is almost always enough.
For stubborn grease — sunscreen, makeup, or food residue — apply a single drop of lens cleaning fluid to a microfiber cloth and wipe gently across the glass. Use the same center-outward circular motion as Step 3. Avoid the edges where the glass meets the phone body; moisture near the seam can work into the chassis.
One frequently overlooked step: if your phone is in a protective case, remove it first. Case edges trap lint and grit that scratch the camera glass during wiping — the case itself becomes an abrasive tool if left on.
An iPhone 15 Pro camera glass fogged up from cooking steam, for example, resolves with a single dry microfiber cloth wipe in about ten seconds. No fluid, no blower, no fuss.
DSLR and mirrorless lenses are removable optical elements — they require the full Escalation Protocol and a few extra considerations.
Clean DSLR/Mirrorless Lenses
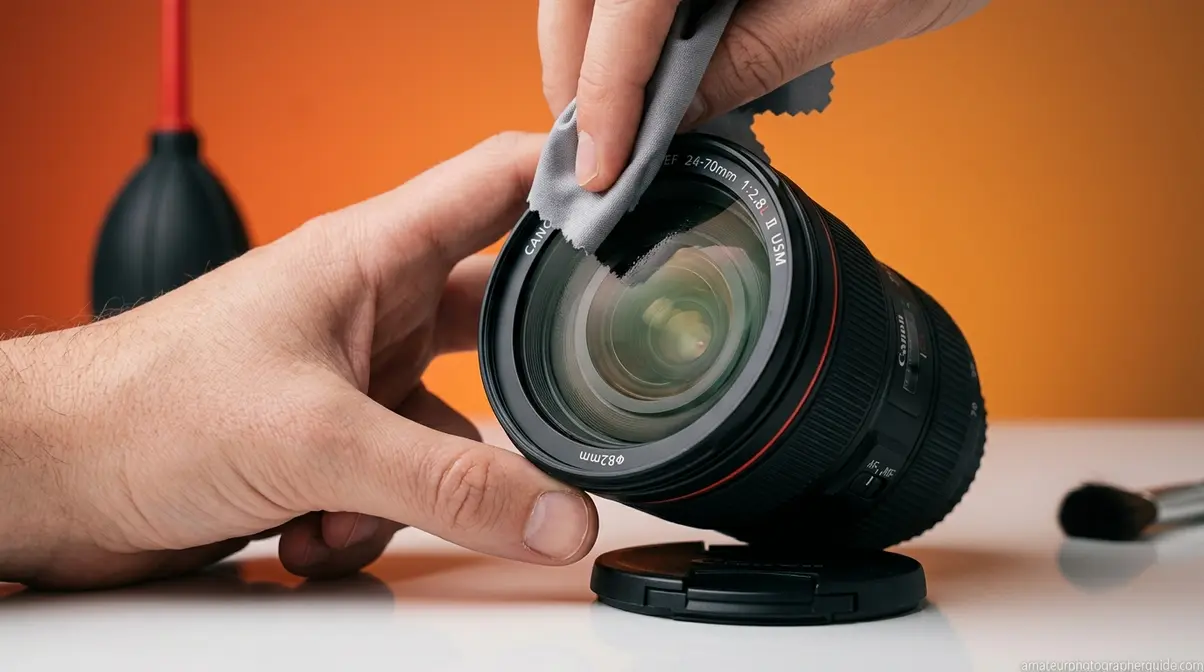
Removable DSLR and mirrorless lenses — Canon EF and RF lenses (the mount systems used in Canon’s DSLR and mirrorless cameras), Nikon F/Z, and Sony’s E-mount system used in their Alpha mirrorless camera lineup — follow the full four-stage Escalation Protocol. The key practical advantage over phone cleaning: you can detach the lens from the body, giving you better access to both elements and reducing the risk of debris falling into the camera mount during cleaning.
Before you start, always cap the rear of the lens. This prevents dust from entering the rear element while you’re working on the front. Clean the front element first, then the rear element last — the rear element is typically cleaner but more sensitive, sitting closer to the sensor optical path.
Canon’s official lens cleaning guide recommends using a soft brush before any cloth contact, consistent with Stage 2 of the Escalation Protocol. Sony’s documentation adds that for the lens mount contacts — the electrical connectors on the rear of the lens — use a dry cloth only. No cleaning fluid on the contacts under any circumstances (Sony Electronics, 2026).
For a Canon 50mm f/1.8 with a fingerprint on the rear element from a lens change, clean the rear element last and reach for Stage 4 only if the dry wipe in Stage 3 doesn’t clear it. Vintage or adapted lenses — Pentax, Contax, or other legacy glass — warrant extra caution on the rear element, as aging coatings are more susceptible to alcohol-based solutions than modern multi-layer coatings.
Security and backup camera lenses face a different challenge — outdoor exposure to rain, dust, and UV light requires a modified approach.
Clean Security/Backup Camera Lens
Security and backup camera lenses are sealed, fixed-mount lenses exposed to outdoor elements continuously. The main contaminants are water spots, road grime, and spider webs — heavier and stickier than typical indoor dust. Start with a dry microfiber cloth; skip the blower (outdoor wind already handles loose particles, and the sealed housing prevents internal dust entry).
For a foggy backup camera showing a cloudy image after rain, wipe the exterior lens surface first before assuming anything more serious. CameraSource’s backup camera guide identifies water spots and grime as the most common cause of foggy backup cameras — typically resolved by cleaning the exterior lens surface (CameraSource).
Internal fog — moisture trapped inside the camera housing — is a different problem. Desiccants placed inside the housing or a hair dryer on low heat from 12 inches away can help evaporate moisture gradually. Do not use high heat, which can warp housing seals.
When cleaning the lens surface doesn’t restore image clarity, the problem is likely internal — and that requires a different strategy.
Troubleshooting Blurry, Foggy, and Dirty Lenses
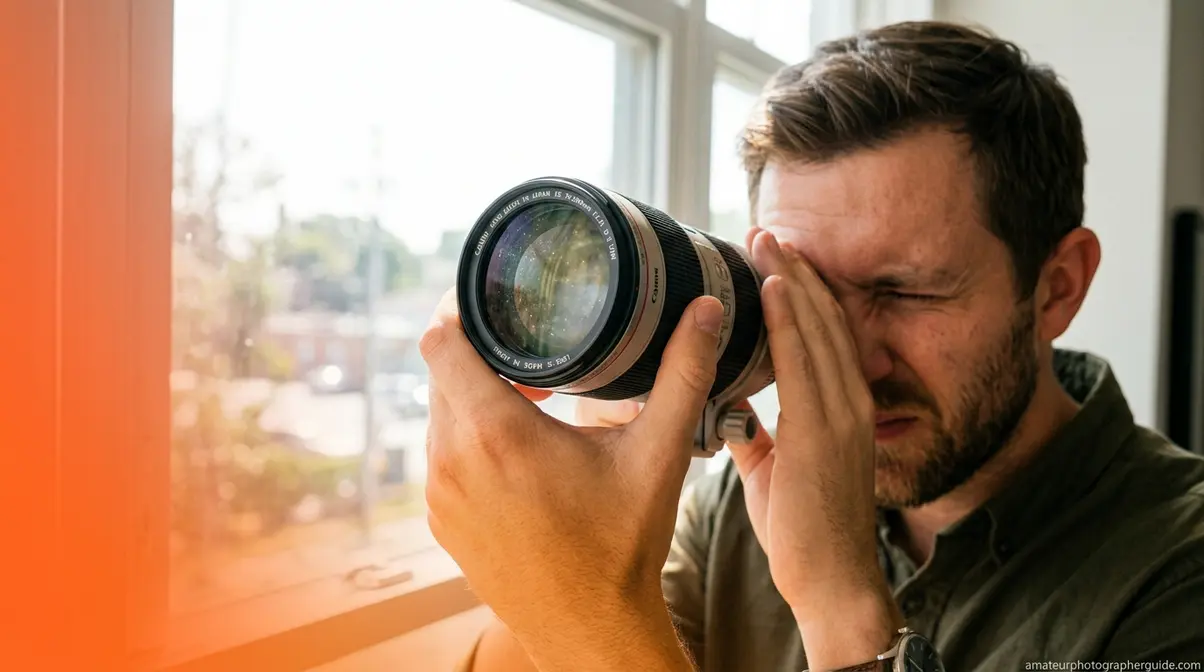
The most important step in troubleshooting a lens isn’t cleaning — it’s diagnosing correctly. External haze and internal haze look nearly identical to the naked eye but require completely different responses. Applying the Escalation Protocol to an internal problem wastes time and adds unnecessary wear; attempting DIY internal cleaning without the right diagnosis risks making things significantly worse.
Blurry or Cloudy Lens? Diagnose Here
A blurry camera lens can have an external cause that’s easy to fix or an internal cause that requires professional help — and the fastest way to tell the difference takes about 30 seconds. Remove the lens from the camera, hold it up to a bright light, and look through the lens at an angle. If the haziness appears on the front or rear element surface — it looks like a smudge or fog on the glass itself — you have an external problem, solvable with the Escalation Protocol. If the haziness is between the internal elements, you have an internal problem.
A second confirming test: shoot a frame at f/11 or f/16 against a bright, evenly-lit white surface (a white wall in daylight works well). Consistent softness across the entire frame points to an internal cause. A specific smudge or dark spot in one area points to an external cause. Sony’s support documentation recommends this aperture test method for diagnosing both lens element and sensor dust (Sony Electronics, 2026).
Common external causes include fingerprints, condensation, dust, and water spots — all addressed by the Escalation Protocol. Common internal causes include lens fungus (a type of mold that grows on internal lens elements in humid storage conditions), internal dust migration through the focus or zoom mechanism, and fogging from aging internal lubricants.
A practical example: a photographer notices soft images after shooting at the beach. The diagnostic test reveals fine sand particles on the front element — an external problem solved with Stages 1 and 2 of the Escalation Protocol, without ever touching a cloth to the glass.
Once you’ve confirmed the problem is internal, here’s what you can safely do — and where the limits of DIY cleaning end.
Clean Inside Lens (Internal Dust/Haze)
True internal cleaning of a camera lens — accessing the elements inside the barrel — requires disassembly. This voids most warranties, risks misaligning optical elements that cost hundreds to realign, and can introduce more contamination than it removes. For the overwhelming majority of photographers, internal cleaning is not a DIY task.
There is one meaningful exception: the rear element — the back glass that faces the camera sensor — is often accessible without full disassembly. Remove the rear lens cap, cap the front element to protect it, and use the rocket blower and brush on the rear element using the same Stage 1 and 2 approach as external cleaning. This safely addresses rear-element dust without touching internal components.
On internal dust and image quality: after evaluating various aperture tests and reviewing community consensus across photography forums, the reality is more reassuring than most guides suggest. Internal dust between lens elements has negligible impact on image quality at typical shooting apertures (f/2.8–f/8). Photography Life’s analysis confirms that dust inside a lens will not affect image quality in most shooting scenarios — the dust is so far from the sensor that it’s completely diffused by the time light reaches the imaging plane (Photography Life, 2023). The panic about internal dust is usually worse than the actual problem.
Lens fungus — a type of mold that grows on internal elements in humid storage conditions — is a different matter. Mild surface fungus can sometimes be slowed by UV light exposure, but significant fungus requires professional cleaning or element replacement. Attempting at-home fungus removal typically spreads it further. Community consensus on iFixit and r/AskPhotography consistently warns against DIY internal disassembly for all but experienced technicians.
Internal haze from aged lubricants — often called “oil on aperture blades” in older lenses — requires professional CLA (Clean, Lubricate, Adjust) service. A vintage 50mm lens from the 1970s with visible internal haze is almost certainly oil migration, not dust, and no amount of external cleaning will help.
For external contaminants that are stubborn or specific — fingerprints, sand, and fungus on the front element — here’s the targeted approach.
Remove Fingerprints, Sand, Fungus
Different external contaminants require different techniques, and using the wrong one for the contamination type causes more damage than the original dirt.
Fingerprints are the oiliest common contamination. They require Stage 4 (wet cleaning) — apply one to two drops of lens cleaning fluid to a microfiber cloth and wipe from center outward. A single pass is usually sufficient. Re-wiping a clean area with a still-damp cloth redistributes the dissolved oil and leaves streaks rather than removing them.
Sand and grit are the most dangerous contaminants on any lens surface. Abrasive particles scratch optical glass if wiped. Always use Stage 1 (the blower) first, repeatedly, until all visible grit is gone — five to ten squeezes if necessary. Never touch a sandy lens with a cloth until the blower has cleared the surface. A beach shoot that leaves sand on the front element deserves the extra 60 seconds of blowing before any cloth makes contact.
Surface fungus on the front element exterior — minor, visible only on the outermost glass — can sometimes be addressed with a microfiber cloth dampened with lens cleaning fluid. More extensive fungus visible inside the lens requires professional cleaning. Prevention is significantly more practical: store lenses in a dry cabinet or with silica gel desiccant packs, and avoid sealing lenses in airtight bags while still warm from outdoor use, which traps humidity.
Jennov’s lens restoration guide recommends desiccants and controlled drying methods for foggy or contaminated specialty camera lenses over abrasive cleaning approaches (Jennov).
Now that you know what to do, here’s the equally important question: what should you never use on your camera lens?
Safe Cleaning Alternatives and What to Avoid
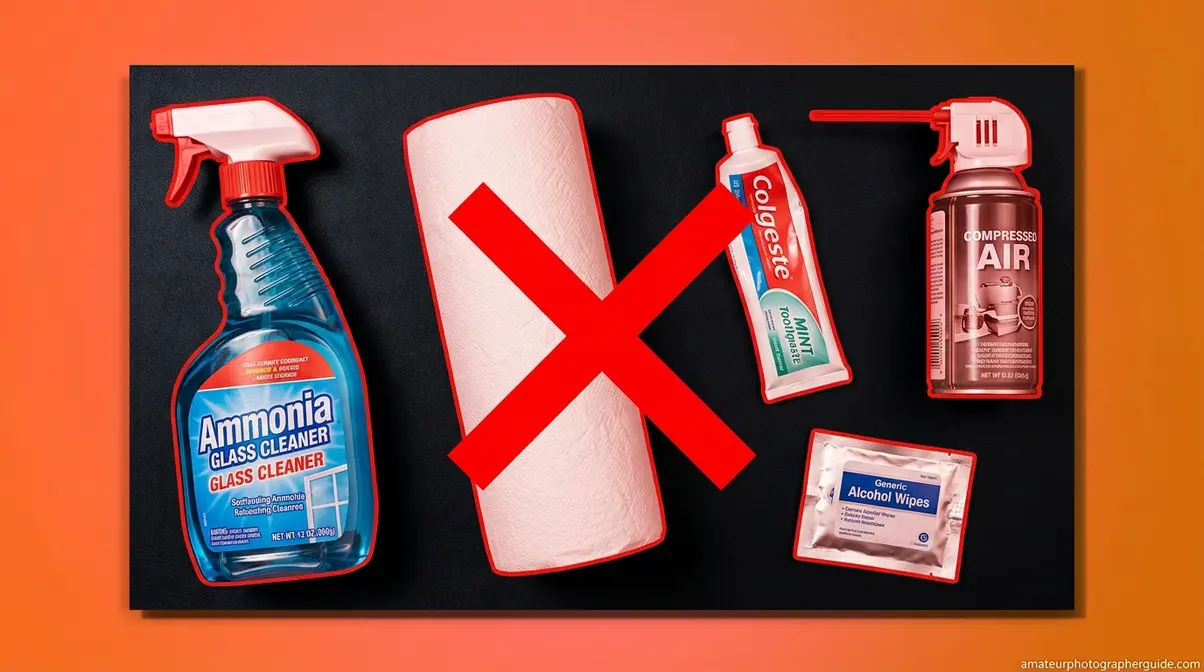
Household glass cleaners appear on camera lens cleaning forums regularly — almost always in warning posts, not recommendations. This section answers the most-searched safety questions directly: Windex, toothpaste, and generic alcohol wipes are not safe substitutes, and the reasons are specific and manufacturer-backed. The Lens Cleaning Escalation Protocol only uses materials formulated specifically for optics — substituting household products breaks the Protocol’s safety guarantee from the first application.
No Lens Cleaner? What to Use
No kit available doesn’t mean no options — it means using the safest available substitute and accepting that some scenarios require waiting until proper tools are accessible.
No cleaning fluid: A clean, dry microfiber cloth handles most smudges without any liquid at all. If moisture is genuinely needed, a very small amount of high-purity isopropyl alcohol (90% or higher) applied to the cloth — never the lens — is the safest substitute. CameraWorld’s cleaning safety guide recommends high-purity isopropyl alcohol as the safest substitute for dedicated lens cleaner, noting that purer alcohol contains fewer additives that could damage coatings (CameraWorld, 2021). Lower concentrations (70% drugstore isopropyl) contain more water and more additives.
No microfiber cloth: Optical-grade lens tissues — available at any camera store or pharmacy — are a good single-use alternative. In a genuine emergency, a clean 100% cotton t-shirt (freshly washed, no fabric softener) is a last resort for a dry wipe only. Never use paper towels, tissues, or napkins — the wood-pulp fibers scratch optical coatings even under light pressure.
No blower: Exhale gently across the lens surface from six to eight inches away. This removes light dust without any tool. Do not blow directly onto the lens with your mouth close — saliva droplets cause worse contamination than the original dust.
On location at a wedding with a fingerprint on the 85mm lens and no kit: exhale gently to dislodge any grit, then use a corner of a clean cotton t-shirt with zero pressure. It’s not ideal — but it’s far better than a paper towel.
For a deep dive into the best lens cleaning products available today, see our ultimate guide to camera lens cleaners.
Knowing what to use in a pinch is one thing — knowing what to never use is more important.
What Never to Use on a Camera Lens
If you’re cleaning without a kit, these are the materials that seem helpful but cause permanent damage. The table below summarizes the most common dangerous substitutes and the specific reason each one causes harm:
| Material | Why It’s Dangerous | Result |
|---|---|---|
| Windex / ammonia-based cleaners | Ammonia strips anti-reflective coatings | Permanent haze and flare |
| Paper towels / tissues | Wood-pulp fibers scratch glass | Micro-scratches on lens surface |
| Toothpaste | Abrasive particles (calcium carbonate) scratch optical glass | Permanent scratches |
| Polyester / synthetic clothing | Synthetic fibers scratch coatings | Micro-scratches |
| Canned compressed air | Propellant residue, freezing effect | Chemical contamination |
| Saliva / water | Mineral deposits, bacteria | Water spots, biological residue |
| Generic alcohol wipes (baby wipes, hand sanitizer) | Additives, fragrances, incorrect alcohol concentration | Coating damage, residue |
The most important prohibition on this list is Windex — and it deserves a specific explanation. “Windex and household glass cleaners contain ammonia — a chemical that permanently strips the anti-reflective coatings on camera lenses, causing irreversible haze and flare.” Ammonia is the active cleaning agent in Windex and similar household cleaners. It chemically degrades the multi-layer anti-reflective coatings applied to modern camera lenses — coatings that reduce flare and ghosting in your images. Once stripped, these coatings cannot be reapplied at home. The damage is irreversible.
The most debated question in lens cleaning communities is alcohol wipes — the answer is more nuanced than a simple yes or no.
Alcohol Wipes on Lenses: The Truth
Not all alcohol wipes are equal, and the distinction matters. Optical-grade pre-moistened wipes — specifically Zeiss lens wipes, which use an isopropyl alcohol formulation at safe concentrations with zero additives — are safe for camera lenses. Generic alcohol wipes from pharmacies or first-aid kits often contain fragrances, aloe vera, or incorrect alcohol concentrations that damage coatings over time.
The four variables that determine whether an alcohol wipe is safe: (1) alcohol type — isopropyl, not ethanol or methanol; (2) concentration — typically around 70% for optical use; (3) additives — zero fragrance, zero moisturizers; (4) material — lint-free, not cotton or woven fabric.
The same rule applies when cleaning a phone camera lens without scratching — only optical-grade wipes, never generic alcohol prep pads. Community consensus on r/AskPhotography consistently flags ammonia-based wipes as damaging to lens coatings — the same chemical concern as Windex.
A practical comparison: Zeiss pre-moistened lens wipes — safe. CVS brand alcohol prep pads — not safe, due to additives and incorrect concentration for optics.
When your lens needs more than you can safely provide at home, professional cleaning is the right call — here’s what to expect.
Professional Lens Cleaning Costs
Professional camera lens cleaning typically costs between $15 and $25 per lens for external cleaning performed alongside a camera body service, and $100 to $300 or more for full internal CLA (Clean, Lubricate, Adjust) service. Based on current 2026 pricing from services including Newark Camera, New York Camera & Video, and The Spotless Camera, external lens cleaning runs approximately $20 per lens, while full body-and-lens cleaning packages range from $89 to $150 depending on sensor size and service scope. For a comprehensive overview of typical repair costs, B&H Photo offers a helpful guide on camera lens repair expenses.
When to go professional — four clear triggers:
- Internal dust or haze confirmed by the diagnostic test described above — not just suspected from image softness
- Lens fungus — visible growth inside the lens barrel
- Lens still under manufacturer warranty (DIY cleaning, particularly any disassembly, may void coverage)
- High-value lens (over $500) where the risk of DIY damage outweighs the professional fee
- Where to go:
- Manufacturer service centers (Canon, Nikon, Sony) — most reliable for warranty work, typically more expensive and slower
- Local camera repair shops — usually faster turnaround (two to three business days is common) and often cheaper for straightforward cleaning
- Mail-in services (such as Lensrentals’ repair division) — convenient for photographers without a local option, with transparent online pricing
What professional cleaning actually means: External cleaning is essentially the Escalation Protocol performed by a technician in a controlled clean-room environment — the same four stages, but with professional-grade tools and a particle-controlled workspace. CLA service is a full disassembly: internal cleaning, re-lubrication of focus and aperture mechanisms, and an optical alignment check. It’s a fundamentally different service from surface cleaning, requiring specialized expertise and equipment to ensure optical integrity.
Photographers who clean their lenses consistently using the Escalation Protocol — catching contamination early before it requires wet cleaning — rarely need professional services except for fungus treatment or warranty repairs. Regular at-home maintenance is the most cost-effective strategy for lens longevity.
Common Lens Cleaning Mistakes
Even photographers who’ve read every guide make these errors — they’re the kind of mistakes that happen in the moment, not from lack of knowledge. For more insights into proper camera care and common pitfalls, check out Digital Photography Review’s camera care section.
Common Pitfalls for Photographers
- Using a dirty microfiber cloth. Scenario: reaching into the camera bag for the same cloth used last month. Consequence: redistributing old oils and trapped grit, potentially scratching the lens surface with contamination you introduced yourself. Fix: wash microfiber cloths in warm water with no fabric softener after every few uses; store in a sealed zip-lock bag.
- Cleaning too often. Scenario: wiping the lens after every single shooting session as a habit. Consequence: cumulative micro-scratches from unnecessary physical contact — each cleaning stage adds wear, even done correctly. Fix: only clean when you can see contamination that is actually affecting your images.
- Skipping Stage 1. Scenario: going straight to a cloth when you can see a smudge, with grit still on the lens surface. Consequence: dragging abrasive particles across the glass with the cloth, turning invisible grit into visible scratches. Fix: always use the blower before any physical contact with the lens.
- Applying fluid directly to the lens. Scenario: dropping cleaning fluid onto the front element because it seems easier. Consequence: fluid seeps into the lens barrel through the focus mechanism and damages internal elements or lubricants. Fix: always apply to the cloth first, never to the glass.
- Using canned air in a dusty room. Scenario: using compressed air indoors in a typical home environment. Consequence: propellant spray and ambient dust blown across the lens and into the camera mount simultaneously. Fix: use a rocket blower only — it moves air without propellant.
When Cleaning Won’t Fix the Problem
Some image quality problems look like dirty lens problems but aren’t. If images are soft even after thorough external cleaning — and the diagnostic test confirms the lens surface is clean — the cause is likely internal haze, optical misalignment, or decentered elements. These require professional evaluation, not another cleaning pass.
Fungus visible inside the lens won’t respond to exterior cleaning under any circumstances. If the lens is high-value, professional CLA is the appropriate response. If the lens is low-value, weigh the repair cost against replacement — if internal damage repair costs exceed 50% of the lens’s replacement value, replacement is often the more practical decision.
Frequently Asked Questions
Can toothpaste clean a camera lens?
Toothpaste should never be used to clean a camera lens — it is abrasive and causes permanent damage. Toothpaste contains abrasive particles, typically calcium carbonate, designed to scrub tooth enamel — far too harsh for the delicate optical coatings on camera lenses. Using toothpaste results in micro-scratches across the lens surface that permanently reduce image sharpness and cannot be repaired at home. Always use cleaning products specifically formulated for optics.
Is lens cleaner just Windex?
No — lens cleaner is not the same as Windex, and Windex should never be used on camera lenses. Windex and similar household glass cleaners contain ammonia, a chemical that permanently strips the anti-reflective coatings on lens elements, causing irreversible haze and increased flare in images. Dedicated lens cleaning solutions are formulated specifically for optical coatings — they clean effectively without chemical degradation. The cost difference between Windex and proper lens cleaner is trivial compared to the cost of lens coating damage.
What’s the best thing to clean a camera lens with?
The most effective tools for cleaning a camera lens are a rocket blower, a soft lens brush, a clean microfiber cloth, and lens-specific cleaning fluid — used in that order. A rocket blower removes loose particles without contact, a brush sweeps fine debris, and a microfiber cloth lifts oils and smudges safely. Optical-grade pre-moistened wipes such as Zeiss lens wipes are an excellent all-in-one alternative, combining cleaning fluid and a lint-free cloth in a single disposable. Avoid paper towels, clothing, or household glass cleaners entirely.
How do you fix a cloudy camera lens?
A cloudy camera lens caused by external contamination is fixed by following the four-stage Escalation Protocol: blower, brush, dry microfiber cloth, then lens cleaning fluid if needed. If cloudiness persists after thorough external cleaning, the issue is likely internal — condensation, aging lubricants, or lens fungus, none of which respond to surface cleaning. Internal cloudiness from condensation sometimes resolves on its own as the lens returns to room temperature; other causes require professional service. A backup camera lens that’s externally foggy is almost always resolved by wiping the lens surface with a clean cloth.
What is a good substitute for camera lens cleaner?
The best substitute for camera lens cleaner is high-purity isopropyl alcohol (90% or higher) applied sparingly to a clean microfiber cloth. Lower concentrations contain more water and additives that can leave residue or damage coatings, so purity matters significantly. For dry cleaning without any liquid substitute, a clean microfiber cloth handles the majority of fingerprints and smudges effectively. Never substitute household glass cleaners, hand sanitizer, or baby wipes — these contain chemicals that damage optical coatings.
Are alcohol wipes safe for camera lenses?
Alcohol wipes are safe for camera lenses only when they are optical-grade — specifically designed for optics with the correct alcohol type and concentration. Zeiss pre-moistened lens wipes are the most widely recommended optical-grade option, using a lint-free material and a safe isopropyl formulation with no added fragrances or moisturizers. Generic pharmacy alcohol prep pads, hand sanitizer wipes, and antibacterial wipes contain additives that can degrade lens coatings over time. When in doubt, use dedicated lens cleaning fluid on a microfiber cloth rather than any pre-moistened wipe.
Protect Your Investment: Clean Smart, Not Often
For amateur photographers protecting a kit lens or prime worth hundreds of dollars, knowing how to clean a camera lens safely is one of the most valuable skills you can develop. The Lens Cleaning Escalation Protocol — blower, brush, dry cloth, wet cloth — ensures you never apply more force or chemistry than the contamination requires. Research confirms that internal dust has negligible image quality impact at typical shooting apertures (Photography Life, 2023), which means most of the anxiety around dirty lenses is focused on the wrong problem. External cleaning, done correctly, solves the vast majority of real-world cases. For more tips on prolonging the life of your camera gear, refer to Ken Rockwell’s guide on camera care.
The Lens Cleaning Escalation Protocol exists to protect your investment from the thing that causes most lens damage: well-intentioned over-cleaning. Every unnecessary stage adds contact. Contact adds wear. The “least-to-most invasive” logic isn’t just a cleaning method — it’s a philosophy for treating precision optics with the respect they deserve, connecting directly to the fear that brought you here in the first place: the worry that trying to fix the problem makes it worse.
Start with a rocket blower for your next cleaning session. If that’s all you need — and for routine dust, it usually is — you’ve already mastered Stage 1 of the Escalation Protocol. For a complete toolkit recommendation to build out your full four-stage kit, see our ultimate guide to camera lens cleaners.
Last update on 2026-05-30 / Affiliate links / Images from Amazon Product Advertising API
