How to Clean Camera Gear: Safe Step-by-Step Guide
Learn professional camera cleaning techniques that extend gear life by 50%. Safe methods for lenses, sensors, and bodies with step-by-step guidance for amateur photographers.
“Changing lenses can be one of the quickest ways dust and tiny particles get into your camera body, and once those make it to the sensor you might start seeing spots in your photos.”
What’s in this guide
That scenario is familiar to almost every photographer. The fix is simpler than you think—and it starts with knowing the right order of operations.
Many guides suggest techniques risky enough to void your warranty. This guide is different. It teaches you how to clean camera gear—body, lens, and sensor—using what professionals call The Escalation Protocol: always start with the least invasive method and escalate only when necessary. You’ll learn the right tools, the correct sequence, and the confidence to know exactly when to stop.
What You’ll Need to Clean Your Camera Gear
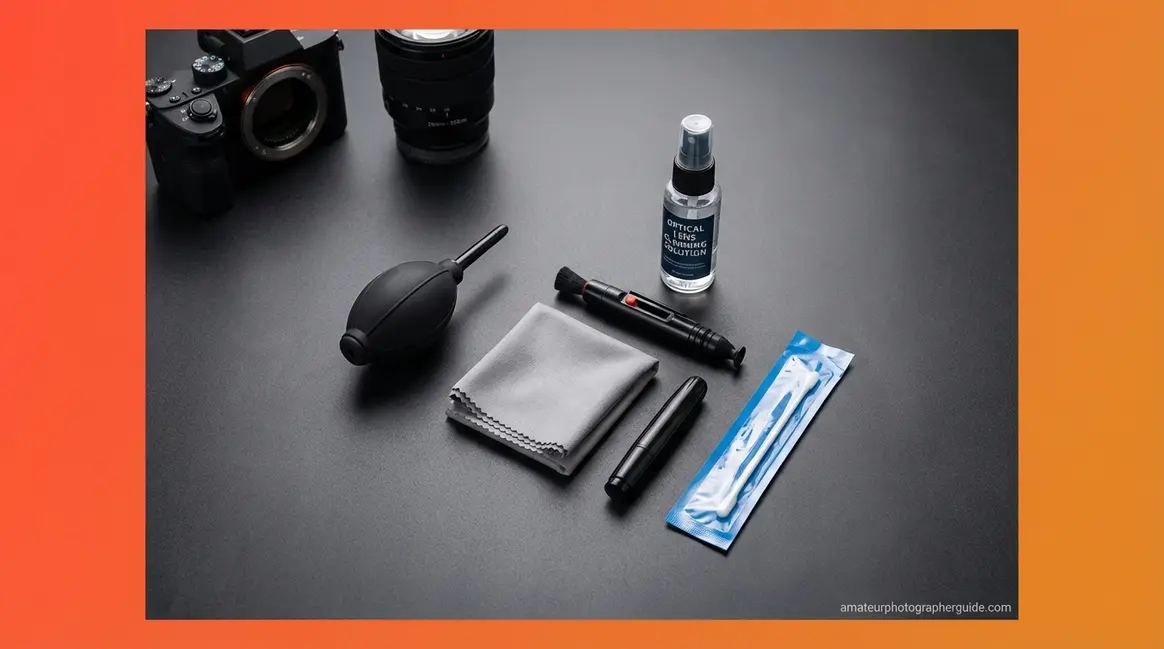
Before you start, you need five specific tools. The wrong substitutes, like tissues or canned air, cause more damage than not cleaning at all. A complete camera cleaning kit costs approximately $20–40 and replaces the need for professional servicing in most scenarios, saving you from an expensive repair bill.
Estimated Time: 20-30 minutes
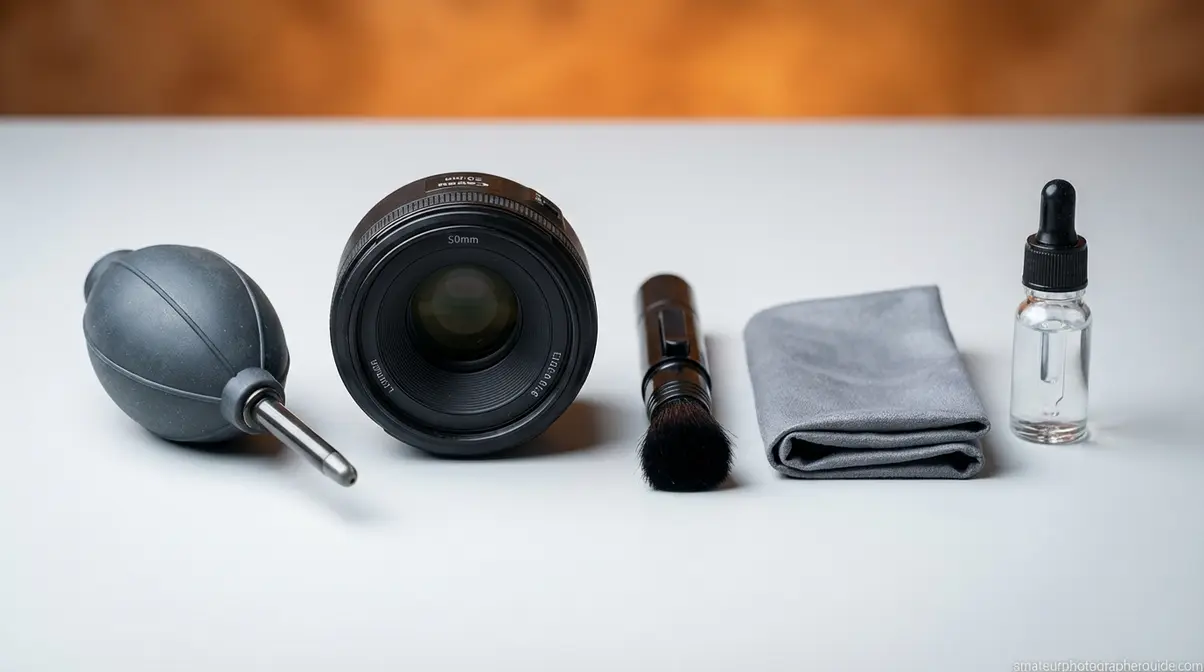
Caption: The five tools that handle 95% of camera cleaning scenarios — assembled kit costs $20–40 at most camera retailers.
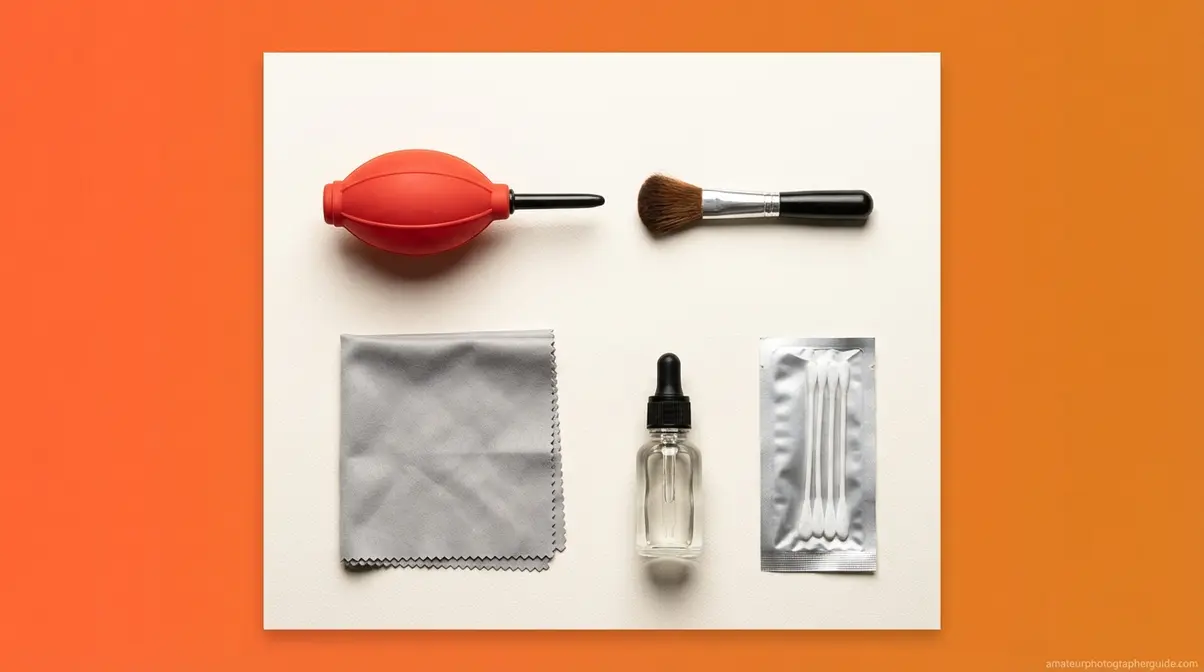
The Essential Camera Cleaning Kit
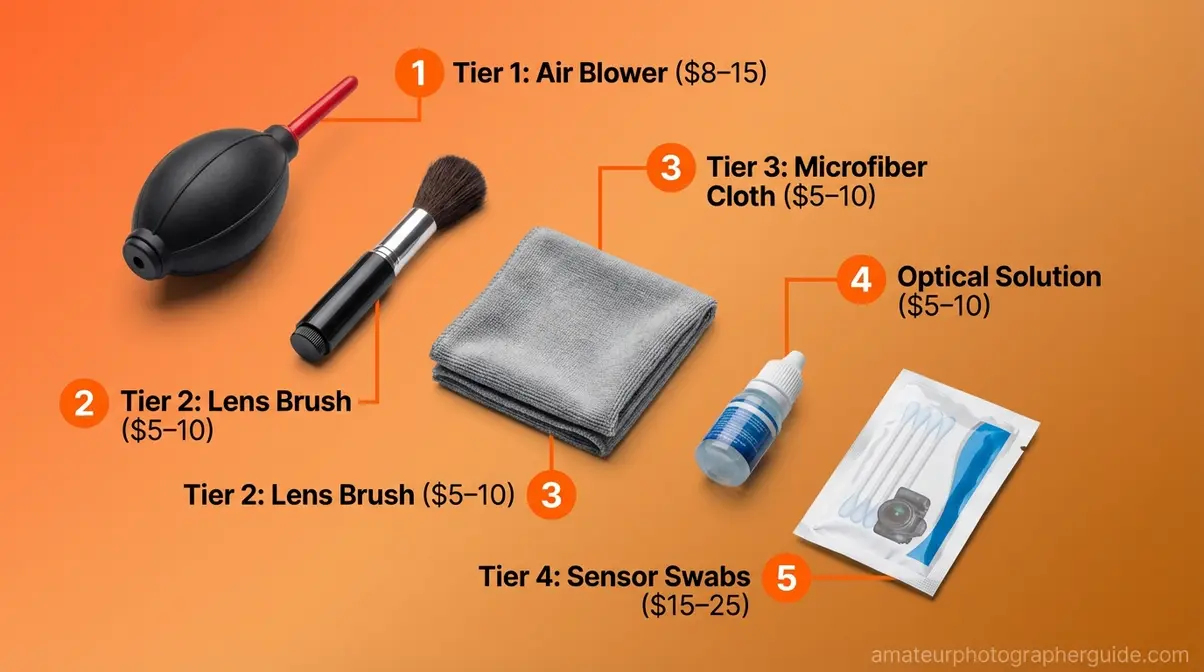
A well-chosen kit covers every tier of The Escalation Protocol. Here are the five tools you need:
- Rubber bulb air blower (~$8–15): The single most important tool. It dislodges loose dust before any physical contact is made. This is Tier 1 of the protocol.
- Soft-bristled lens brush (~$5–10): Sweeps away particles too stubborn for the blower without abrasive contact.
- Camera-grade microfiber cloths (~$5–10 for a pack): Has a tighter, lint-free weave than household cloths. As ZEISS optics guidance confirms, even tissues can cause micro-scratches on coated optical surfaces (ZEISS Vision Care).
- Dedicated optical lens cleaning solution (~$5–10): Formulated for coated glass. Never substitute household cleaners.
- Sensor swabs + ECLIPSE Optic Cleaning Fluid (~$15–25 per pack): Single-use applicators sized to your camera’s sensor. These are for wet sensor cleaning only—Tier 4 of the protocol.
What to Avoid: Damaging Substitutes
Always use dedicated cleaners. These substitutes cause irreversible damage:
- Canned/compressed air: Propels liquid propellant and moisture onto optical coatings, causing permanent stains.
- T-shirts or paper towels: Contain abrasive wood fibers that cause micro-scratches.
- Alcohol wipes (pre-saturated): Strip anti-reflective coatings from lenses, causing permanent hazing.
- Household glass cleaners (Windex, etc.): Contain ammonia, which degrades lens multi-coating.
- Hydrogen peroxide: Acts as a bleaching agent that chemically degrades multi-coating. Never use it on any optic.
- Breathing on the lens: Saliva contains enzymes that can etch coated glass.
With the right kit ready, you can start with the safest part: the camera body.
Step 1 — How to Clean Your Camera Body
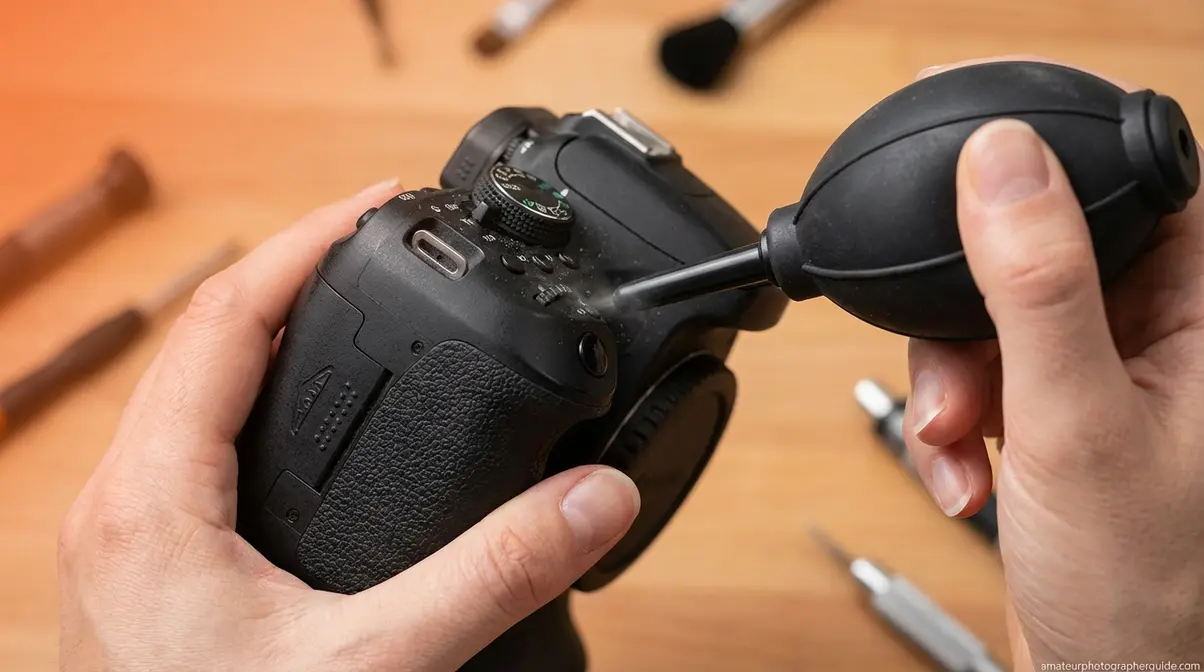
Camera body cleaning should always precede lens and sensor work. Body crevices harbor dust that can transfer to optical surfaces if the sequence is reversed. Before you touch the lens, the body needs attention first.
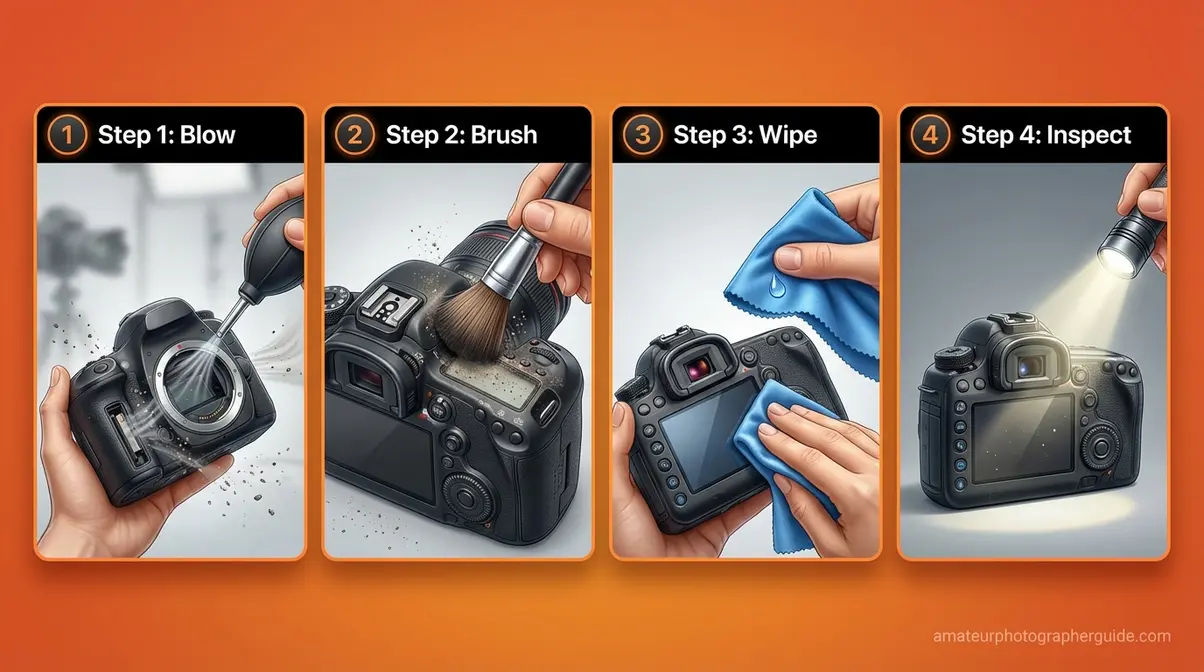
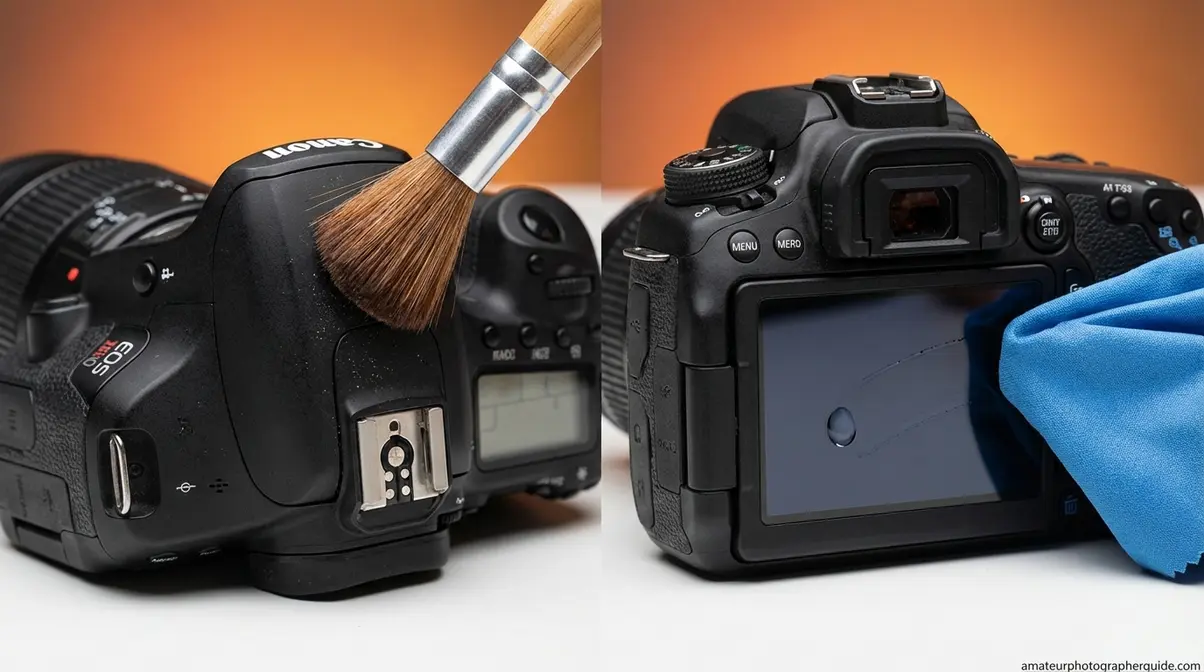
Caption: A systematic approach to exterior body cleaning prevents dust migration to optical surfaces.
Cleaning the Exterior Body Surfaces
This sequence uses Tier 1 (air) and Tier 2 (brush) of The Escalation Protocol.
- Blow: Hold the camera face-down so dust falls away. Use the bulb blower to blast air into all ports, crevices, and around control dials.
- Brush: Use the soft lens brush to sweep remaining particles from body seams, the hot shoe, and viewfinder eyecup.
- Wipe (only if needed): Apply one drop of lens cleaning solution to a microfiber cloth—never directly to the body. Gently wipe body panels and the LCD screen.
- Inspect: Use a bright LED light at an angle to check for remaining dust before moving on.
⚠️ Critical warning: Never touch the shutter curtain—the delicate mechanical component in front of the sensor. It is as thin as a razor blade and not user-serviceable. Accidental contact is one of the most expensive DIY mistakes.
Cleaning the Lens Mount and Electrical Contacts
The lens mount’s electrical contacts—the small gold-plated pins that let the camera and lens communicate—get contaminated with oils during every lens swap. Dirty contacts can cause autofocus and aperture errors.
- Prepare: Lightly moisten a clean cotton swab with 91% isopropyl alcohol. The swab should be damp, not dripping.
- Clean: Make one pass across the metal contact pins on the body-side mount. Use a fresh swab for each pass. This specific use of IPA is for metal contacts only, not glass.
- Clear: Use the bulb blower to remove any residual moisture from the mount cavity before reattaching a lens.
Critical: Do not let IPA drip into the camera body. If you’re uncertain, use a dry brush on the contacts instead.
Step 2 — How to Clean Your Camera Lens
Lens coatings are nano-thin layers that reduce flare and are the most vulnerable part of your camera. They cannot be reapplied once damaged. This process follows The Escalation Protocol to prevent damage from over-cleaning. As official Nikon cleaning guidelines state: apply a small amount of lens cleaning solution to a lint-free tissue and wipe in a circular motion (Nikon Official Support).
Before diving in, watch our companion video for a demonstration of safe cleaning techniques:
The Step-by-Step Lens Cleaning Process
The golden rule: the blower is almost always enough. Only escalate if the blower and brush fail.
- Inspect First: Hold the lens under an angled light to identify the contamination—loose dust, fingerprints, or smudges.
- Blow: Position the bulb blower at a slight angle and give 2–3 firm puffs. For most dust, this is sufficient. Stop here if the lens looks clear.
- Brush (If Needed): Make one light pass with the soft lens brush, rotating from the center outward. Do not apply pressure.
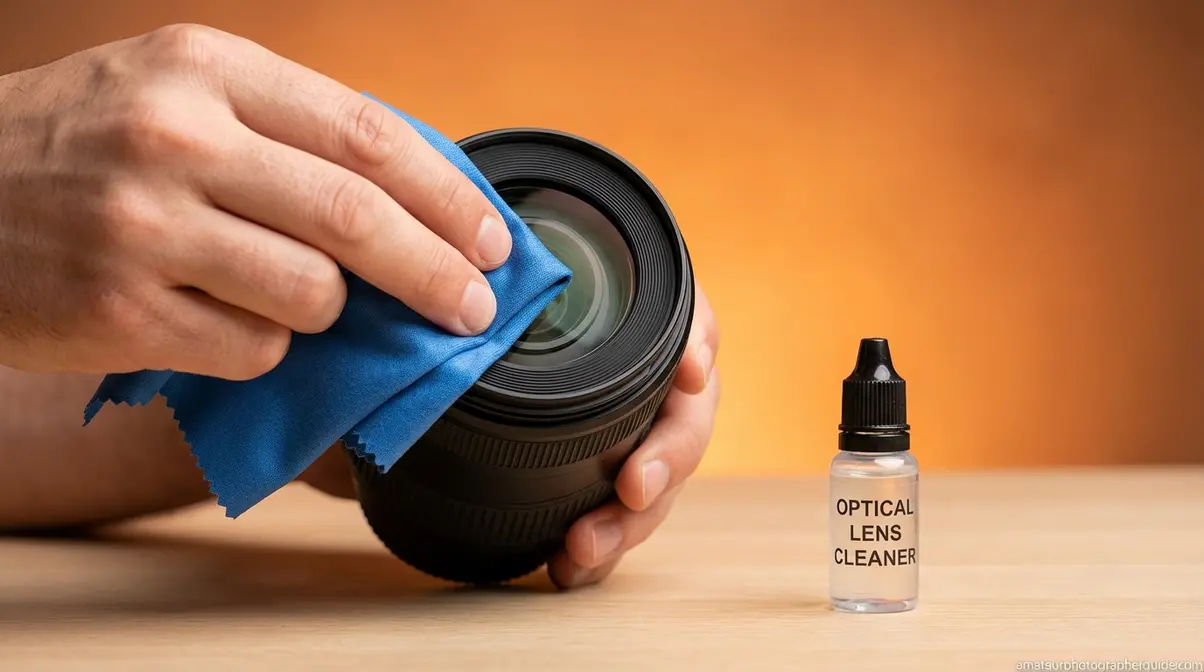
- Dry Wipe (If Needed): Use a clean microfiber cloth in small, gentle circular motions, spiraling from the center to the edge.
- Wet Wipe (If Needed): Apply 1–2 drops of optical solution to a fresh cloth—never directly to the lens. Wipe gently from the center outward and let it air-dry.
Rear Element Note: Use only the blower and brush on the rear element. Wet cleaning this part should be reserved for professional technicians.
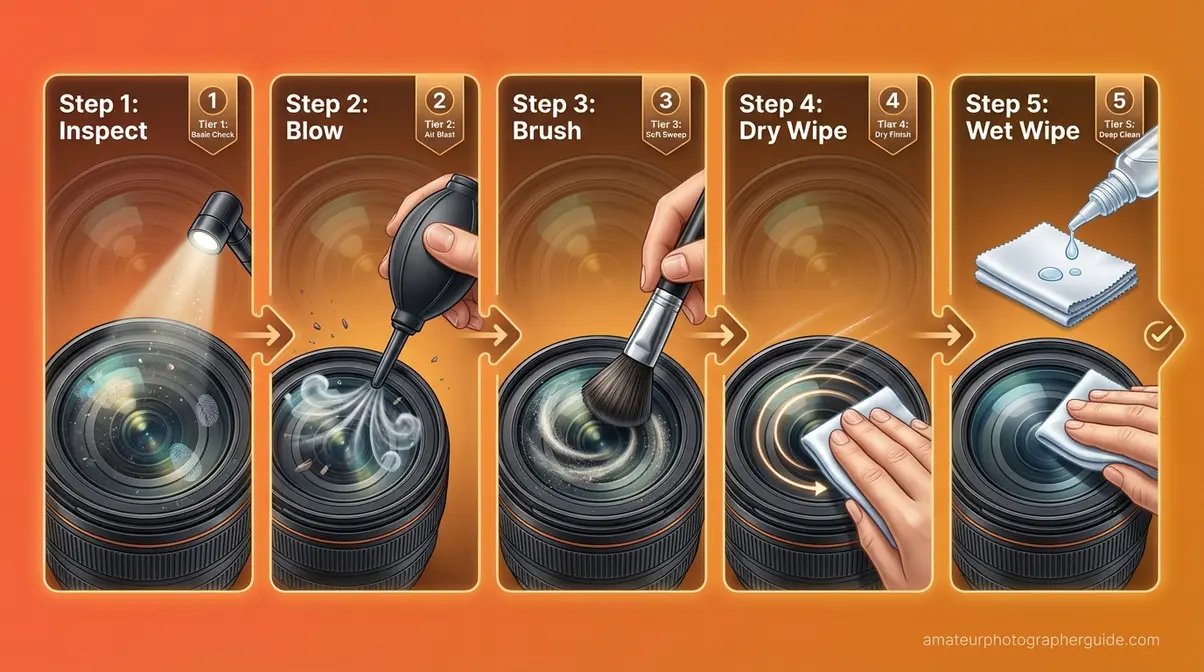
Caption: Each escalation step adds physical contact — only advance to the next tier when the previous one fails.
Chemical Safety: Safe vs. Unsafe Agents
Understanding which chemicals are safe for optical coatings is critical. These rules also apply to smartphone camera lenses.
| Cleaning Agent | Safe for Lens Glass? | Safe for Lens Coatings? | Verdict |
|---|---|---|---|
| Dedicated optical lens cleaning solution | ✅ Yes | ✅ Yes | ✅ Always use this |
| Distilled water | ✅ Yes | ✅ Yes | ✅ Safe alternative for light smudges |
| 70% Isopropyl alcohol | ⚠️ With care | ⚠️ Risk of coating damage with repeated use | ⚠️ Apply to cloth only — never directly; one-time exception, not routine |
| 91% Isopropyl alcohol | ⚠️ With care | ❌ Higher coating damage risk | ❌ Avoid on optics; safe on metal contacts only |
| Hydrogen peroxide | ❌ No | ❌ Bleaches coatings permanently | ❌ Never use |
| Ammonia-based cleaners (Windex, etc.) | ❌ No | ❌ Degrades multi-coating over time | ❌ Never use |
| Pre-saturated alcohol wipes | ❌ No | ❌ Strips coatings + fiber abrasion risk | ❌ Never use |
On 70% IPA: You can use it cautiously, but only if applied sparingly to a microfiber cloth, not directly to the glass. Repeated use can degrade coatings. Use dedicated optical solution and reserve IPA for emergencies.
On hydrogen peroxide: Never. It acts as a bleaching agent that chemically degrades multi-coating, resulting in permanent hazing.
Caption: Optical coatings are nano-thin — chemicals that are safe on household glass can permanently damage lens coatings.
Step 3 — How to Clean Your Camera Sensor
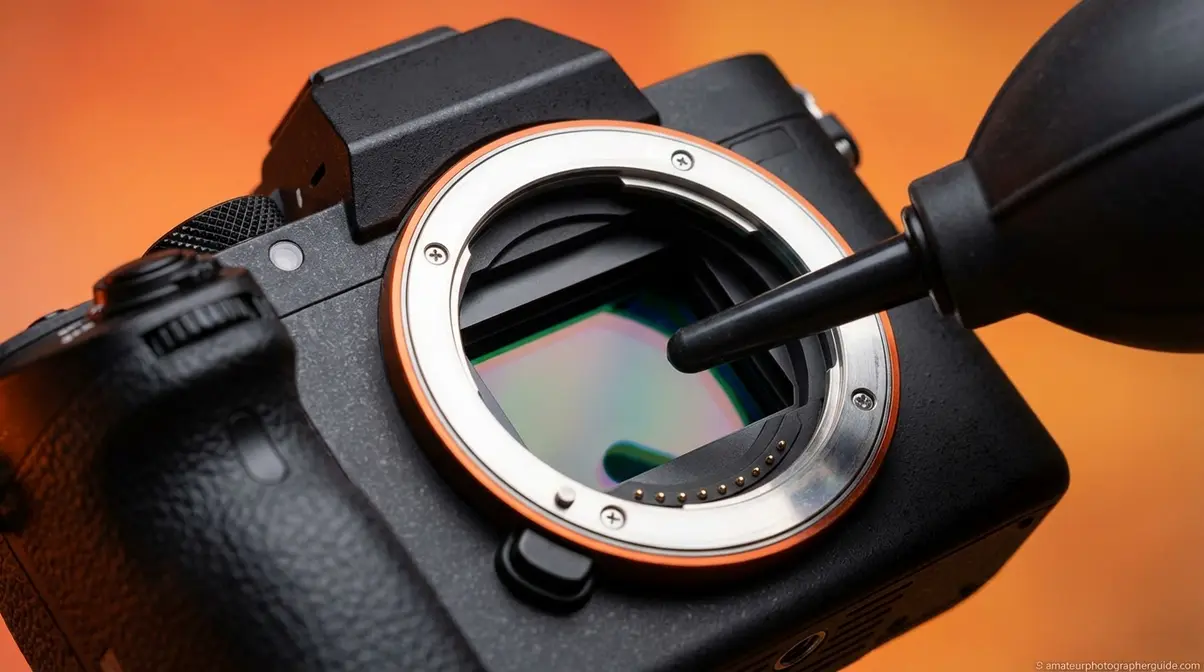
Sensor cleaning is intimidating, but with the right tools and sequence, the risk is manageable. The rule is simple: dry clean first, wet clean only if needed, and stop if you see anything unexpected.
⚠️ Important: Wet sensor cleaning carries a risk of permanent damage. If your camera is under warranty, verify if DIY cleaning voids its terms. When in doubt, defer to a professional. Most manufacturers, including Sony, recommend a blower-only approach first.
As Sony’s official sensor cleaning procedure confirms: the blower tip must not touch the sensor, and dry cleaning should always precede a wet approach (Sony USA).
Dry Cleaning — The Safest First Approach
This is Tier 3 of the protocol. A blower alone solves the majority of sensor dust issues. Try this first.
Prerequisites:
- Charge the battery fully. If the battery dies mid-clean, the shutter can snap shut on your tools, causing severe damage.
- Choose a clean environment, like a bathroom after a hot shower where steam has settled dust.
- Engage sensor access mode: On DSLRs, use the “Sensor Cleaning” or “Mirror Lockup” menu option. On mirrorless cameras, the sensor is directly accessible when the lens is removed.
Dry Cleaning Steps:
- Hold the camera face-down so gravity helps dust fall out.
- Insert the bulb blower tip into the sensor chamber without touching the sensor surface.
- Give 4–6 firm puffs of air. Never use canned air.
- Reattach the lens and take a test shot at f/16 against a white wall.
- Inspect the image at 100% zoom. If dust spots are gone, you’re done. Stop here.
Caption: The single-pass technique — one direction per swab face — prevents redistributing removed particles across the sensor.
If the test shot still shows dust, escalate to a wet clean.
Wet Sensor Cleaning — Step-by-Step for Stubborn Dust
Wet cleaning uses a single-use sensor swab and ECLIPSE Optic Cleaning Fluid. The technique is methodical: one swab, one or two passes, then inspect.
- Prepare Swab: Select the correct swab size for your sensor (APS-C or full-frame). Apply 1–2 drops of ECLIPSE fluid to the applicator pad. Too much fluid causes streaking.
- First Pass: With the camera horizontal, place the swab at the left edge of the sensor. Apply gentle, even pressure and draw it across the full width in one smooth motion.
- Second Pass: Flip the swab to the clean side. Make a single pass in the opposite direction, from right to left. Discard the swab; never reuse it.
- Inspect: Reattach the lens and shoot another test frame at f/16. If streaks appear, it means the swab was too wet. Use a fresh, dry swab (no fluid) to make a single pass to absorb the excess.
- Stop Conditions: Seek professional help immediately if streaks persist, if you see debris that seems bonded to the sensor, or if swab fibers remain on the sensor.
Caption: Common wet sensor cleaning errors — over-saturation and back-and-forth scrubbing — account for most DIY sensor damage.
Preventative Care: Keeping Gear Clean Longer
The best cleaning session is the one you never have to do. A few habits can dramatically reduce how often dust reaches your sensor. This is the pre-protocol step that keeps The Escalation Protocol from ever being needed.
How to Change Lenses Without Letting Dust In
Most sensor dust enters during lens changes. A downward body orientation eliminates most of this risk.
- Angle the camera body downward when detaching a lens. Gravity helps keep dust out.
- Work in a shaded, low-wind location. This reduces air currents that carry dust into the camera body.
- Minimize exposure time. Have the replacement lens ready before you detach the mounted one. The swap should take 5–10 seconds.
- Cover immediately. Attach body and lens caps instantly.
Caption: Angling the body downward during a lens swap is the single most effective free technique for reducing sensor dust contamination.
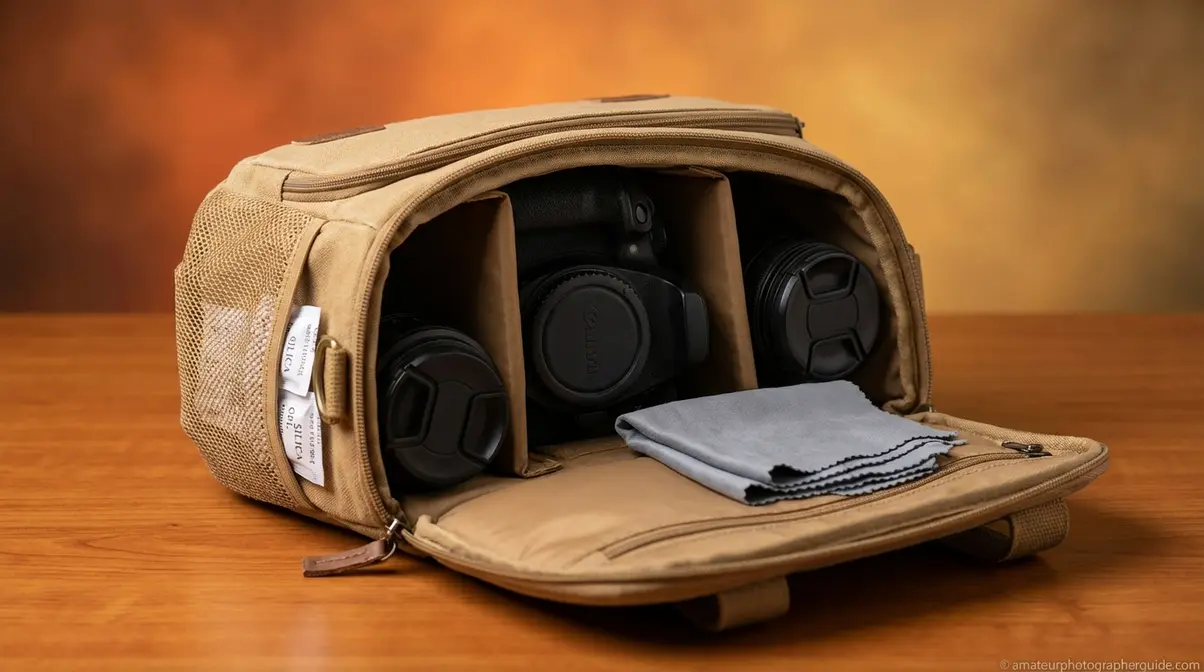
Proper Storage to Prevent Moisture and Dust Buildup
- Use silica gel desiccant packets inside your camera bag to absorb moisture that can cause fungus on lens coatings, especially in humid climates.
- Manage temperature transitions. When bringing cold gear into a warm space, keep it in the bag for 30 minutes to prevent condensation.
- Store lenses vertically with the front element facing down to keep dust off the harder-to-clean rear element.
- Wash your microfiber cloths monthly in warm water with a drop of plain dish soap and let them air-dry. This prevents transferring old dirt back onto your lens.
When You Should Stop and Call a Professional
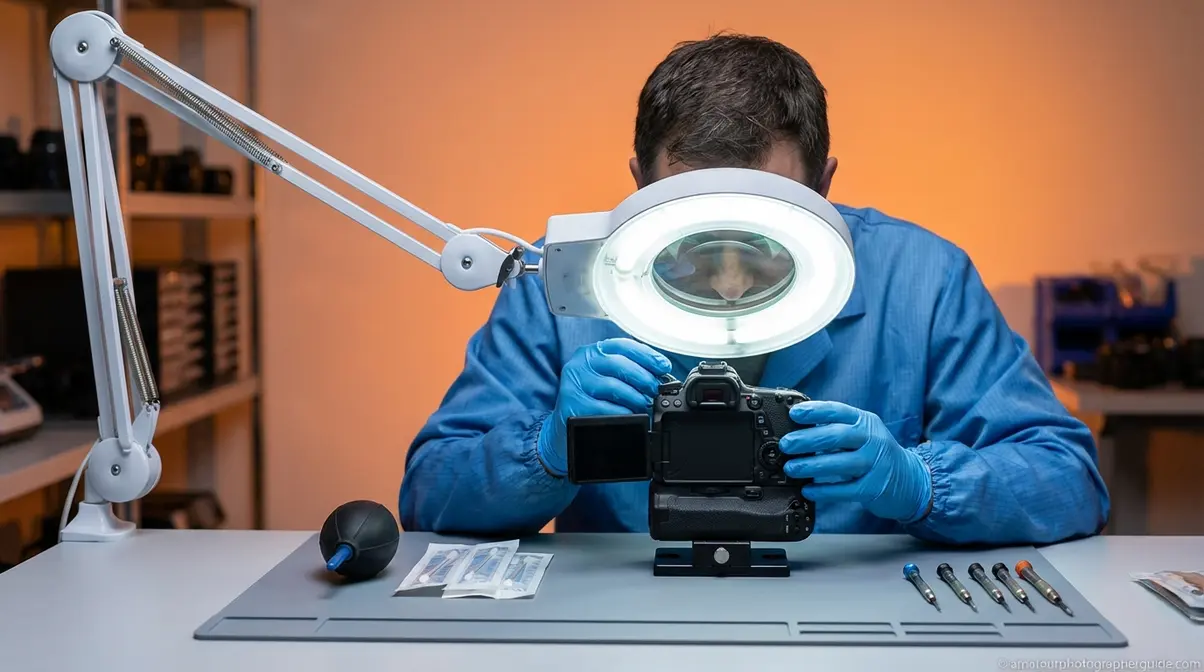
The final level of The Escalation Protocol is professional servicing. A professional sensor clean costs approximately $40–85 (based on current 2026 pricing), a reasonable investment when doubt exists.
Signs That DIY Cleaning Has Reached Its Limit
Fungal growth, visible scratches, or persistent streaks after wet cleaning all require professional servicing. Stop immediately if you see:
- Fungal growth: White or gray web-like patches on interior lens elements require full lens disassembly.
- Welded debris on the sensor: Particles that won’t move with a wet swab may be bonded to the sensor. Forcing removal will cause scratches.
- Lens coating scratches: Hazy or linear marks visible in images cannot be polished out and require professional repair.
- Persistent streaks after wet cleaning: This indicates chemical residue or early coating damage. More cleaning will only worsen it.
- Electrical contact corrosion: Autofocus or aperture errors that persist after cleaning the mount contacts.
The Real Risks of Over-Cleaning — What Can Go Wrong
Gear is damaged more often by over-cleaning than under-cleaning. Common mistakes lead to:
- Scratched lens coatings from abrasive substitutes, appearing as haziness in high-contrast scenes.
- Streaked or smeared sensors from over-saturated swabs, creating light streaks at narrow apertures (f/11+).
- Moisture ingress from improper technique, which promotes fungal growth over time.
Frequently Asked Questions
How to Clean Your Camera Gear?
To clean camera gear, follow The Escalation Protocol: start with a rubber bulb blower, then a soft brush, then a microfiber cloth, and use wet cleaning only when necessary. Clean the body first, then the lens, then the sensor to prevent transferring dust onto optics. A complete kit costs $20–40, while professional servicing is around $40–85 (based on 2026 pricing from major retailers) and is the safest option for stubborn dust.
Can I Use 70% Isopropyl Alcohol to Clean a Camera Lens?
Yes, but with extreme caution. 70% isopropyl alcohol should only be applied sparingly to a microfiber cloth—never directly onto the lens. The risk is cumulative; repeated exposure can gradually degrade the multi-coating that controls flare. Dedicated optical lens cleaning solution is the safer, recommended choice. Reserve 70% IPA for a one-time emergency, not routine cleaning.
Can Alcohol Wipes Damage Camera Lenses?
Yes, alcohol wipes can permanently damage camera lenses and should be avoided. Pre-saturated wipes combine harsh chemicals with loosely woven fibers that can strip the anti-reflective coating from the lens surface. This causes permanent hazing or cloudiness visible in your photos. For safe results, always use a camera-grade microfiber cloth with a dedicated optical lens cleaning solution.
What Is the Best Thing to Clean Camera Lenses With?
The best combination for cleaning camera lenses is a high-quality, camera-grade microfiber cloth and a solution formulated for coated optics. First, use a rubber bulb blower to remove loose dust, which often solves the problem without any contact. If smudges remain, apply 1–2 drops of optical solution to the cloth (not the lens) and wipe gently from the center outward.
How to Keep Camera Gear Dry?
To keep camera gear dry, use silica gel desiccant packets in your camera bag to absorb humidity and prevent fungal growth on lens coatings. When moving from a cold to a warm environment, leave your gear inside its bag for 20-30 minutes to prevent condensation from forming on optical surfaces. For long-term protection in humid climates, a dedicated dry storage cabinet is a reliable investment.
Can I Use Dawn Dish Soap to Clean a Microfiber Cloth?
Yes, a small amount of fragrance-free dish soap like Dawn Original is safe for washing camera-grade microfiber cloths. Hand-wash the cloth in warm water with one drop of soap, then rinse thoroughly until no residue remains, as leftover soap can transfer to your lens. Always air-dry the cloth completely. Never use a machine dryer or dryer sheets, as the heat and chemicals can damage the fibers.
Can I Use Hydrogen Peroxide to Clean a Camera Lens?
No, hydrogen peroxide should never be used to clean camera lenses. It acts as a bleaching agent that chemically degrades the multi-coating on the lens glass. This damage is permanent and results in a hazy, diffused look in photos, especially in backlit scenes. Always use a cleaning solution specifically formulated for coated camera optics and keep all household chemicals away from your gear.
Does 91% Isopropyl Alcohol Damage Electronics?
91% isopropyl alcohol is generally safe for non-optical electronic surfaces like metal contacts and circuit boards, but it should not be used on camera lenses or sensors. The higher concentration evaporates faster but poses a greater risk of stripping delicate lens coatings. For cleaning the metal contacts on a lens mount, 91% IPA on a cotton swab is acceptable in small, controlled amounts.
Conclusion
For photographers seeing dust in their images, knowing how to clean camera gear safely is the difference between a $30 home fix and an $80 professional service visit. The most important principle is to always start with the least invasive method and stop the moment the problem is resolved. A rubber bulb blower and a dedicated optical cleaning solution solve the vast majority of cleaning needs.
The Escalation Protocol provides a repeatable framework for every scenario, from a quick dust-off to a full wet sensor clean. It’s about the discipline of restraint. Damage happens when photographers skip a tier and reach for the most aggressive method first.
Start with the essentials: a rubber bulb blower, a pack of optical-grade microfiber cloths, and a bottle of dedicated lens cleaning solution. These three tools, used in the right order, handle most situations. Watch the companion video for a walkthrough of each step, and return to this guide whenever you’re unsure which tier of the protocol your situation requires.
Dave King
Hi, I'm Dave, the founder of Amateur Photographer Guide. I created this site to help beginner and hobbyist photographers build their skills and grow their passion. Here, you’ll find easy-to-follow tutorials, gear recommendations, and honest advice to make photography more accessible, enjoyable, and rewarding.