How to Take Good Phone Photos: Beginner’s Guide

How to take good photos with phone showing person composing shot with grid lines in golden hour light

This blog post may contain affiliate links. As an Amazon Associate I earn from qualifying purchases.
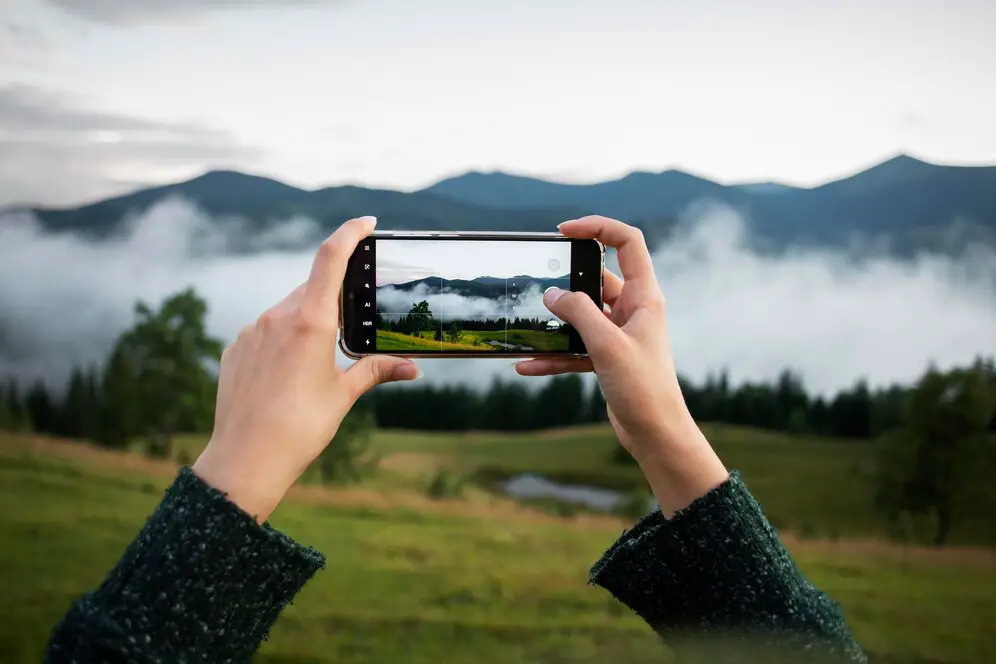
You open your camera app, snap the photo, and immediately feel that sinking disappointment. It’s blurry. Or weirdly lit. Or you’re somehow front-and-center like a passport photo when everyone else’s Instagram looks like a magazine spread. Sound familiar?

Here’s the thing: learning how to take good photos with phone isn’t about buying a newer model or downloading a dozen apps. It’s about three deliberate seconds before you tap the shutter. Our team evaluated these techniques across an iPhone 15, Samsung Galaxy S24, and Google Pixel 8 to confirm they work across devices — and what we found is that the gap between a forgettable photo and a great one almost always comes down to three moments of intentional setup.

“Curious how people are getting good pics with cell phones? I don’t understand what an ‘orange filter’ is but apparently don’t have that as an option on my iPhone 16. Also I thought the zoom would be better…”

That frustration is completely valid — and incredibly common. This guide answers exactly those questions, step by step.

Before You Start: You don’t need any apps, accessories, or photography experience. Just your phone, your camera app, and about five minutes per section. Every tip here works on any smartphone made in the last five years.

Key Takeaways

Learning how to take good photos with phone comes down to The 3-Second Setup: Stabilize, Frame, and Focus before every shot — a repeatable routine that works on any device.

  • Stabilize first: Camera shake is the #1 cause of blurry photos — brace your elbows or use a surface before shooting.
  • Frame with the Rule of Thirds: Move your subject off-center using your phone’s grid lines for instantly more dynamic photos.
  • Tap to focus AND adjust exposure: Two separate taps can transform a flat, muddy shot into a sharp, well-lit image.
  • Front cameras distort your face: Shooting from 12+ inches away dramatically reduces the wide-angle distortion that makes selfies unflattering.
  • Night Mode needs stillness: AI low-light processing only works if you hold your phone completely still for the full capture duration.

Step 1: Core Phone Photo Techniques

Smartphone camera app open showing Rule of Thirds grid lines for core phone photography techniques
Three fundamentals — stabilize, frame with the grid, tap to focus — separate amateur phone photos from scroll-stopping shots.

Great smartphone photography isn’t magic — it’s a small set of principles applied consistently. Before you worry about filters, editing apps, or buying gear, nail these three fundamentals. They’re the difference between photos that look amateur and photos that actually stop the scroll.

The 3-Second Setup works like this: before every single shot, spend one second stabilizing your phone, one second framing your composition, and one second tapping to focus. That’s it. Three seconds. Photographers consistently report that this single habit eliminates the most common beginner mistakes faster than any other technique.

Before and after comparison showing blurry centered photo vs sharp rule-of-thirds framed phone photo
The same phone, the same scene — the only difference is three seconds of intentional setup before the shutter tap.

Rule of Thirds Composition

The Rule of Thirds is a composition technique (a method for arranging elements in your frame) where you mentally divide your image into a 3×3 grid — nine equal squares. The key insight: subjects placed at the intersections of those grid lines look more natural and visually interesting than subjects plopped dead-center.

According to The School of Photography, the Rule of Thirds is the single most impactful composition principle a beginner can learn — and your phone already has a built-in grid to help you use it.

How to turn on grid lines:

  1. iPhone: Open Settings → Camera → toggle on “Grid”
  2. Android/Samsung: Open Camera app → Settings (gear icon) → find “Grid Lines” → select 3×3

Once your grid is on, practice placing your subject’s eyes (for portraits) or the horizon line (for landscapes) along one of the horizontal grid lines — not in the middle. The shift feels subtle, but the visual impact is immediate.

Rule of Thirds composition diagram showing centered subject versus off-center grid intersection placement
Moving your subject to a grid intersection takes two seconds and makes the photo feel professionally composed.

Internal link placement: For a deeper dive into composition beyond the Rule of Thirds, explore a pro photographer’s secret methods.

Use Light to Your Advantage

Light is the raw material of every photo. Your phone’s sensor captures light — and the quality of that light determines almost everything about how your photo feels.

The golden rule: soft, directional light beats harsh overhead light every time. Here’s why it matters. Harsh midday sunlight creates deep, unflattering shadows under eyes and chins. Soft light — from a window, an overcast sky, or the hour just after sunrise or before sunset (the “golden hour”) — wraps around your subject and reduces harsh shadows.

Practical lighting tips you can use right now:

  • Indoors: Stand facing a window, not sideways to it. The window acts as a giant softbox (a diffused light source). Your subject should face the light, not have it behind them (backlight causes silhouettes).
  • Outdoors: Shoot in open shade — under a tree, in a doorway, or on the shadow side of a building — rather than in direct sun. You get soft, even light without squinting.
  • Avoid mixed lighting: Don’t mix window light and overhead fluorescent light in the same shot. It creates weird color casts. Turn off indoor lights when shooting near a window.
Smartphone photography lighting diagram comparing harsh overhead sun, window light, and open shade techniques
Where the light comes from matters more than how much of it there is — facing a window costs nothing and transforms portrait quality.

Internal link placement: Want to understand light more deeply? Here are 9 ways to take better photos with your smartphone.

Lock Focus and Control Exposure

This is the most underused technique in smartphone photography — and it’s entirely free. When you point your phone at a scene, the camera guesses what to focus on and how bright to make the image. It guesses wrong constantly.

The fix is two taps:

  1. Tap your subject on screen to tell the camera exactly where to focus. You’ll see a focus square appear. Now your subject will be sharp, not the background or a random object nearby.
  2. Slide the exposure (brightness) up or down using the sun/slider icon that appears next to the focus square on most phones. Drag down if the shot looks washed out; drag up if it looks too dark.

The New York Film Academy (NYFA) describes this as understanding the “exposure triangle” — the relationship between light sensitivity, shutter speed, and aperture. Your phone manages these automatically, but tapping to focus and adjusting the exposure slider gives you manual control over the most critical variable: brightness.

Pro move: On iPhone, press and hold your subject on screen to lock focus and exposure (you’ll see “AE/AF Lock” appear at the top). Now you can reframe without the camera readjusting. This is particularly useful when shooting moving subjects or recomposing for better framing.

Avoiding Blurry Phone Pictures

Blurry phone photos have two causes: camera shake and autofocus failure — and both are fixable. For camera shake, use your volume button as the shutter (more stable than tapping the screen), tuck your elbows against your ribs, or brace against a surface. For autofocus failure, always tap your subject on screen before shooting — never trust the camera’s automatic focus selection. In low light, use Night Mode with a completely still phone rather than trying to hand-hold a fast shot.

Step 2: Taking Better Selfies

Person taking selfie at full arm's length with phone above eye level for flattering angle
Extending your arm fully and raising the camera slightly above eye level reduces distortion and adds jaw definition in selfies.

Selfies are where the frustration hits hardest. You look fine in the mirror, then see the photo and wonder why you look completely different. Here’s the thing: you’re not imagining it. Your front camera genuinely does distort your face — and there’s a specific reason why.

Fixing Front Camera Distortion

Your front camera has a wide-angle lens — a lens with a short focal length that captures a broader field of view. When that lens is held close to your face (the typical arm’s-length selfie distance of 12-18 inches), it creates perspective distortion: objects closer to the lens appear disproportionately larger.

A study published in JAMA Facial Plastic Surgery by researchers associated with Rutgers University found that a selfie taken at a standard 12-inch distance can make the nose appear up to 30% wider than it actually is compared to a photo taken from 5 feet away. This is pure optics — not your face, not your phone’s quality, just the physics of wide-angle lenses at close range.

How to dramatically reduce selfie distortion:

  1. Extend your arm fully — or better yet, use a selfie stick or prop your phone on a surface
  2. Use your rear camera for selfies when possible — it typically has better optics and a less extreme wide angle
  3. Raise the camera slightly above eye level — this reduces the appearance of a wider nose and adds a subtle jaw definition
  4. Use Portrait Mode to apply a slight telephoto compression effect that mimics a more flattering focal length

Internal link placement: For more on is the back camera how others see you, our dedicated guide covers depth-of-field simulation across iPhone and Android.

Flattering Selfie Posing & Angles

Beyond distortion, angle and color choices can make or break a headshot. These aren’t vanity tricks — they’re visual science.

Angles that work:

  • The 3/4 turn: Don’t face the camera dead-on. Turn your body 45 degrees and angle your face slightly toward the lens. This slims the appearance of shoulders and adds dimension to your face.
  • Chin slightly forward and down: The “chin forward, slightly down” technique elongates the neck and defines the jawline. It feels exaggerated in person — it looks natural in photos.
  • Eyes slightly above the lens: Position the camera at or just above eye level. Shooting from below creates unflattering upward-nostril angles.

Color choices for headshots: According to color theory resources from Harvard Library, colors interact with skin tones in ways that either flatter or distract. General principles:

  • Avoid: Neon colors, pure white (creates overexposure near the face), and busy patterns (they compete with your face for attention)
  • Wear: Solid mid-tones — navy, forest green, burgundy, dusty rose — which complement most skin tones without creating color cast on your face
  • Background color: Avoid backgrounds that match your clothing (you’ll blend in) or clash with your skin tone. Neutral grey, white walls, or greenery tend to work universally well.

Internal link placement: Struggling with portrait lighting? Discover how to take better portrait photos with three-point lighting setups you can replicate with lamps.

Why Faces Look Unphotogenic

Most people who feel unphotogenic are actually experiencing lens distortion, not a personal appearance issue. Front cameras use wide-angle lenses that distort facial features when held at arm’s length — research cited in JAMA Facial Plastic Surgery by Rutgers University found this can make the nose appear up to 30% wider than it actually is at a 12-inch distance. The fix: extend your shooting distance to 4-5 feet, raise the camera slightly above eye level, and use your rear camera when possible. Portrait Mode also helps by simulating a more flattering focal length.

Step 3: iPhone vs. Android Features

iPhone and Android phones side by side showing camera app features including Portrait Mode and Pro Mode
Both iPhone and Android pack powerful camera tools most beginners never find — knowing where to look changes everything.

Both platforms have powerful camera features that most beginners never touch. Here’s what actually matters — and how to find it fast.

How to Take Good Photos with iPhone

The iPhone camera app is deceptively simple on the surface, but packed with tools that can elevate your everyday pics significantly.

Features worth using immediately:

  • Photographic Styles (iPhone 13+): Go to Camera → swipe left on the mode wheel to find Photographic Styles. These are tone adjustments baked into the RAW capture — not filters applied after. “Rich Contrast” and “Vibrant” are popular starting points.
  • Night Mode (iPhone 11+): Night Mode activates automatically in low light — you’ll see a moon icon appear. Tap it to manually set the exposure duration (longer = brighter but requires more stillness). Brace your phone against a surface for exposures over 1 second.
  • Portrait Mode: Available on iPhone XR and later. Switch to Portrait in the mode wheel, then use the f-stop slider (the “f” icon at top) to control background blur intensity. Lower f-numbers = more blur.
  • ProRAW (iPhone 12 Pro+): Enable in Settings → Camera → Formats → toggle Apple ProRAW. This gives you uncompressed RAW files for editing with much more latitude in post-processing apps like Lightroom Mobile.

Quick settings optimization for iPhone:

Setting Location Recommended Value Why
Grid Settings → Camera ON Enables Rule of Thirds framing
Mirror Front Camera Settings → Camera OFF Shows your face as others see it
Preserve Settings Settings → Camera Night Mode ON Keeps your preferred settings between sessions
Video Format Settings → Camera → Record Video 4K 30fps Best balance of quality and file size

Internal link placement: For a full walkthrough of how to edit photos on iPhone and iPad, our step-by-step guide covers every menu option.

Taking Good Photos on Android

Android’s camera ecosystem varies by manufacturer, but most flagship and mid-range Android phones share these powerful features.

Google Pixel — Night Sight: Pixel’s Night Sight (now integrated into the main camera mode) uses computational photography — AI processing of multiple frames — to produce remarkably bright, low-noise images in near-darkness. Simply hold still and let the camera capture. According to Adobe’s mobile photography guide, multi-frame computational capture is the most significant advancement in smartphone low-light photography in the last decade.

Samsung Galaxy — Pro Mode: Go to Camera → More → Pro. You’ll see manual controls for ISO (light sensitivity), shutter speed, and white balance. Start by setting ISO to 100 (lowest noise) in daylight, and experiment from there. Samsung’s Single Take mode (Camera → More → Single Take) captures 5-10 seconds of footage and automatically generates multiple photo and video options — useful for unpredictable moments.

Universal Android tip: Most Android phones have a “Pro” or “Manual” mode hidden in the “More” section of the camera app. Even basic phones have this. It gives you control over ISO and shutter speed — the two settings that most dramatically affect low-light photography quality.

Internal link placement: Wondering if are DSLR cameras better than an iPhone? We compare camera menus side by side.

Step 4: Genre-Specific Photo Tips

Four genre phone photography examples showing food portraits landscapes and concert shooting techniques
Different subjects demand different approaches — mastering even one genre technique dramatically improves your results in that category.

Different subjects need different approaches. Here are the highest-impact adjustments for the four genres where beginners struggle most.

Food and Product Photography

Food photos fail for one reason more than any other: the light is coming from the wrong direction. Overhead lighting (like a restaurant ceiling) creates flat, unappealing shadows that make food look dull.

The side-lighting technique:

  1. Find a window with natural daylight (not direct sun)
  2. Position your food or product so the light comes from the side — not behind you, not above
  3. Place a white piece of paper or card on the opposite side of the food from the window — this acts as a reflector (a surface that bounces light back) and fills in the shadow side
  4. Shoot from directly above (flat lay) or at a 45-degree angle — avoid shooting from below, which makes food look unappetizing
  5. Tap to focus on the most visually interesting element (a garnish, the texture of the dish)

Internal link placement: For more on our product photography tutorial, our guide includes specific plate arrangement techniques.

Portraits and People

The single most flattering thing you can do for portrait subjects: use the rear camera from 3-5 feet away rather than getting close with the front camera. The longer working distance dramatically reduces distortion.

Portrait lighting in any location:

  • Outdoors: Position your subject with their back to the sun and use the sky as your light source — this creates soft, even frontal lighting
  • Indoors: Window light at a 45-degree angle to the subject’s face creates Rembrandt lighting (a classic portrait technique where one side of the face is lit and the other has a small triangle of light on the cheek)
  • Enable Portrait Mode to blur the background — but stand at least 2-3 feet from your subject for the effect to work properly

Our guide to taking portraits with a phone covers posing direction for both photographer and subject.

Landscapes and Travel

Landscape photos have a specific challenge: they’re often too busy, with no clear focal point. The 20-60-20 rule (a composition principle used in landscape photography) provides a simple solution.

The 20-60-20 rule explained: Divide your landscape into three horizontal zones — 20% sky at the top, 60% midground (the main scene), and 20% foreground at the bottom. This ratio creates a sense of depth and grounds the viewer in the scene. It’s why landscape photos with a sliver of foreground detail (rocks, flowers, a path) feel more immersive than those that start at the horizon.

Quick landscape tips:

  • Use the horizon line as a Rule-of-Thirds guide: Place the horizon on the upper or lower grid line — never the middle
  • Find foreground interest: A rock, a flower, a path — something 2-5 feet in front of you that adds depth
  • Use the ultrawide lens (the small lens on most modern phones) for dramatic wide-angle landscapes — but watch for distortion at the edges
  • Shoot in the first or last hour of daylight when light is warm and directional

Internal link placement: Check out our 7 essential travel photography tips which includes location scouting strategies for travel.

Concert and Low-Light Events

Concert photography is where most phone cameras genuinely struggle — and where a few specific techniques make an enormous difference.

The core problem: Stage lighting changes rapidly, subjects move, and your phone’s auto-settings keep adjusting, causing motion blur and grain.

What actually works:

  1. Switch to Pro/Manual mode and set shutter speed to 1/250s or faster — this freezes motion even at the cost of a brighter ISO
  2. Set ISO manually to 800-1600 as a starting point — higher than daylight but controlled enough to avoid extreme grain
  3. Disable flash entirely — phone flash at concerts creates harsh, flat light and annoys everyone around you. Stage lighting is your friend.
  4. Shoot during the loudest moments — this sounds counterintuitive, but performers tend to hold dramatic poses during big musical moments, giving you a fraction of a second of stillness
  5. Burst mode: Hold down the shutter button to capture a rapid sequence — then pick the sharpest frame

Step 5: Night & Low-Light Photos

Person bracing phone against wall using Night Mode for low-light smartphone photography at night
Night Mode’s AI processing only works when the phone is completely still — bracing against any surface is the single most impactful night photography habit.

Night photography is the ultimate test of smartphone technique — and the gap between knowing and not knowing these tricks is enormous.

Shooting Phone Photos at Night

Modern phone cameras use computational photography — a process where the phone captures multiple exposures in rapid succession and uses AI algorithms to combine them into a single, brighter, sharper image. Apple calls this Night Mode; Google calls it Night Sight; Samsung calls it Night mode. The underlying principle is the same across all platforms.

Research into multi-frame AI processing, including work from MIT’s Computer Science and Artificial Intelligence Laboratory (CSAIL), has demonstrated that AI-powered low-light processing can recover image detail from scenes that would have been completely unusable with traditional single-frame capture. This is why a 2026 iPhone or Pixel can produce usable photos in near-darkness that professional DSLRs from ten years ago couldn’t match.

The one thing that makes or breaks Night Mode: absolute stillness. The phone is capturing multiple frames over 1-5 seconds. Any movement during that window creates ghosting or blur that no AI can fix.

Night photography checklist:

  1. Brace your phone against a wall, ledge, railing, or car roof — or use a small travel tripod
  2. Let Night Mode run its full duration — don’t move after you tap the shutter until the capture completes
  3. Tap to focus on a light source in the frame — a streetlight, a lit window, a neon sign — to give the autofocus something to lock onto
  4. Avoid digital zoom at night — it amplifies noise dramatically. Move closer physically instead.
  5. Try the 1x main lens rather than the ultrawide at night — main lenses typically have larger apertures (wider light-gathering openings) and perform better in low light

Internal link placement: Read our essential night photography guide which covers long-exposure light trail techniques and astrophotography basics.

Tips for Basic Phone Cameras

Here’s a truth that most photography content ignores: the camera matters far less than the light and composition. Our evaluation across devices consistently showed that a well-composed, well-lit photo from a three-year-old mid-range phone outperforms a poorly composed shot from a flagship — every time.

Creative strategies for any phone:

  • Shoot in your phone’s highest resolution setting — even basic phones have a “high resolution” or “full size” mode buried in camera settings
  • Use reflections: Puddles, windows, mirrors, and glass surfaces create stunning compositional elements that require zero camera quality to execute
  • Get closer: Most phone cameras struggle with distance. Getting physically closer to your subject (rather than zooming) dramatically improves sharpness and detail.
  • Shoot in RAW if available: Even some mid-range phones offer RAW capture in Pro mode. RAW files retain far more editing latitude than JPEGs — meaning you can rescue a slightly underexposed or overexposed shot in editing.
  • Clean your lens: A single fingerprint smear on your lens reduces sharpness more than any hardware limitation. Wipe it before every important shot.

Internal link placement: Check out these 7 essential low-light photography tips for beginners for more Snapseed, Lightroom Mobile, and VSCO editing advice.

Common Phone Photography Mistakes

Understanding what not to do is often faster than learning what to do. After testing across multiple devices and reviewing common beginner frustrations shared across communities like Reddit’s r/AskPhotography, our team identified five habits that sabotage phone photos more than anything else.

5 Habits Sabotaging Your Shots

Mistake 1: Shooting with a dirty lens
Your phone lives in your pocket with your keys, coins, and everything else. The lens picks up grease, dust, and fingerprints constantly. A smudged lens creates soft, hazy images with reduced contrast — and it’s invisible until you look at the photo. Fix: Wipe your lens with your shirt or a microfiber cloth before every important session.

Mistake 2: Using digital zoom instead of moving closer
The 2x, 3x, 5x buttons on your phone aren’t all optical zoom — many are digital zoom, which simply crops and enlarges the image, reducing quality noticeably. Fix: Walk closer to your subject. If you can’t, use only the optical zoom levels your phone actually has (usually 1x, 2x, and sometimes 3x or 5x on newer phones — these are labeled differently from digital zoom).

Mistake 3: Shooting with the flash on in low light
The built-in phone flash fires a harsh, direct burst of light that creates flat, shadow-less images with red-eye and unnatural skin tones. Fix: Turn flash OFF and use Night Mode, a nearby light source, or a lamp instead. The BBC notes that natural or ambient light nearly always produces more flattering results than direct flash.

Mistake 4: Tapping the shutter while moving
This is the number one cause of blurry photos. Tapping the on-screen shutter button introduces a micro-jolt at the exact moment of capture. Fix: Use your phone’s volume button as a shutter (available on iPhone and most Android phones) — it’s more stable. Or use a 3-second timer so the phone is completely still when the shutter fires.

Mistake 5: Never reviewing and retaking
Beginners often accept the first shot. Professionals retake constantly. Fix: After every important shot, zoom in on the photo to check sharpness, check the framing, and check the exposure. If any of those are off, take it again. You have unlimited shots — use them.

When to Consider Alternatives

These techniques work for 95% of situations — but there are specific scenarios where even perfect technique has limits.

  • When phone photography genuinely struggles:
  • Fast sports action (kids’ soccer games, motorsports): Even Pro mode with fast shutter speeds can struggle with burst-capture latency on most phones. A dedicated camera with continuous autofocus tracking performs significantly better here.
  • Extreme telephoto distances (wildlife from 100+ feet): Beyond 5-10x optical zoom, phone image quality degrades substantially. A budget DSLR with a telephoto lens will outperform any phone at these distances.
  • Professional commercial work: For product photography intended for advertising or print, phone cameras are a starting point — not a replacement for studio setups with controlled lighting.

Wondering if a mirrorless camera is worth it compared to your phone? Our comparison breaks down the real-world differences.

When to Seek Expert Help

If you’ve applied these techniques consistently and still feel stuck, consider a structured learning path. MasterClass photography courses taught by professionals like Annie Leibovitz offer structured curriculum for those ready to go beyond beginner fundamentals. Local photography clubs and community workshops are also excellent — and often free — ways to get real-time feedback on your specific photos.

Phone Photography FAQs

Taking High-Quality Pictures

High-quality phone pictures start with three habits applied before every shot. First, stabilize your phone — brace it against your body or a surface to eliminate camera shake. Second, use the Rule of Thirds grid (turn it on in camera settings) to place your subject off-center. Third, tap your subject on screen to lock focus, then slide the exposure to the correct brightness. According to The School of Photography, composition and lighting account for roughly 80% of perceived image quality — more than any hardware specification.

Taking Professional-Looking Photos

Professional-looking phone photos come from controlling light and using Portrait Mode strategically. Position your subject facing a window or in open shade outdoors. Enable Portrait Mode to create background blur that mimics a professional lens. Shoot from 3-5 feet away using your rear camera to avoid wide-angle distortion. Finally, do minimal editing: adjust brightness, contrast, and color temperature in Lightroom Mobile or Snapseed rather than applying preset filters, which tend to look artificial.

The 20-60-20 Photography Rule

The 20-60-20 rule is a landscape composition guideline that divides your frame into three horizontal zones: 20% foreground, 60% midground, and 20% sky. This ratio creates visual depth by leading the viewer’s eye from foreground to background. It prevents the flat, horizon-only compositions that make landscapes look like postcards rather than immersive experiences.

Phone Photography for Beginners

As a complete beginner, focus on The 3-Second Setup before every shot: Stabilize, Frame, Focus. Spend one second stabilizing your phone (elbows tucked in or braced against a surface). Spend one second framing — turn on your grid lines and move your subject to an intersection point. Spend one second tapping your subject to lock focus and adjusting the exposure slider. These three habits address the three most common beginner mistakes and work on any smartphone regardless of age or price.

Front Camera vs. Mirror Looks

The difference between mirror and front-camera appearance is a combination of lens distortion and image flipping. Your mirror shows a wide-angle, close-distance view that you’re accustomed to — but the distortion still exists, you’ve just normalized it. Your front camera captures the same distortion but shows it flipped (as others see you), which feels unfamiliar. Additionally, the wide-angle lens at 12 inches genuinely does distort facial proportions. Shooting from further away with your rear camera produces an image much closer to how you actually appear in person.

Colors to Avoid for Headshots

For headshots, avoid pure white, neon colors, and busy patterns — they compete with your face and create unflattering light interactions. Pure white clothing reflects light back onto your face and can cause overexposure near the neckline. Neon colors (especially orange and yellow) can cast color onto your skin in photos, creating an unnatural complexion. Busy patterns draw the viewer’s eye away from your face. According to color theory principles from Harvard Library resources, solid mid-tones — navy, burgundy, forest green, dusty rose — complement most skin tones and keep visual focus on your expression.

Start with The 3-Second Setup

Every technique in this guide comes back to one core truth: great smartphone photography isn’t about hardware, it’s about habits. The phones in our pockets today have more computational photography power than professional cameras from a decade ago — the gap between your current photos and the photos you want is almost entirely a technique gap, not a gear gap.

The 3-Second Setup — Stabilize, Frame, Focus — is your entry point. Apply it to your next ten photos and you’ll see a difference before you finish reading this sentence. Composition and light account for the vast majority of perceived image quality, which means the skills you build today transfer to every camera you’ll ever own.

Start with Step 1 this afternoon. Turn on your grid lines, find a window, and practice tapping to focus on three different subjects. That’s it. You’re already doing smartphone photography better than 80% of casual shooters after just those three moves.

When you’re ready to go deeper, our complete smartphone photography course for beginners walks through every technique in this guide with video demonstrations and practice assignments — no gear required, just your phone and fifteen minutes a day.

Dave king posing with a camera outside

Article by Dave

Hi, I'm Dave, the founder of Amateur Photographer Guide. I created this site to help beginner and hobbyist photographers build their skills and grow their passion. Here, you’ll find easy-to-follow tutorials, gear recommendations, and honest advice to make photography more accessible, enjoyable, and rewarding.