
Table of Contents
- Featured Snippet Answer
- Why It’s Useful to Know Multiple Methods
- Method 1: Using USB Cable + Canon Software
- Method 2: Using Card Reader or Camera as Mass Storage
- Method 3: Wireless & Cloud Transfer via image.canon
- Understanding Transfer Protocols: PTP vs Mass Storage
- Pro Tips & Best Practices
- Troubleshooting Common Issues
- FAQs
- Conclusion
This blog post may contain affiliate links. As an Amazon Associate I earn from qualifying purchases.
How to Transfer Photos from a Canon Camera to Computer (Windows & macOS Guide)
Moving images from your Canon camera to your computer is a simple but important skill. Whether you shoot in RAW or JPEG, doing it correctly ensures file integrity, easy organization, and smooth post-processing. Below you’ll find step-by-step methods, tips, troubleshooting, and best practices tailored for Canon cameras.
Featured Snippet Answer
To transfer photos from your Canon camera to your computer, connect the camera (or its memory card) via USB or card reader. Use Canon’s EOS Utility or Image Transfer Utility, or access the memory card folder directly in File Explorer (Windows) or Finder (macOS). On supported Canon cameras, you can also wirelessly upload via image.canon and automatically sync to your PC.
Why It’s Useful to Know Multiple Methods
Some users prefer USB direct transfer; others prefer working via an SD/memory card reader.
Using Canon’s software helps preserve metadata, supports RAW decoding, and automates downloads.
Wireless / cloud sync adds flexibility when shooting on the go.
Understanding the underlying protocols (PTP vs mass storage) aids in troubleshooting.
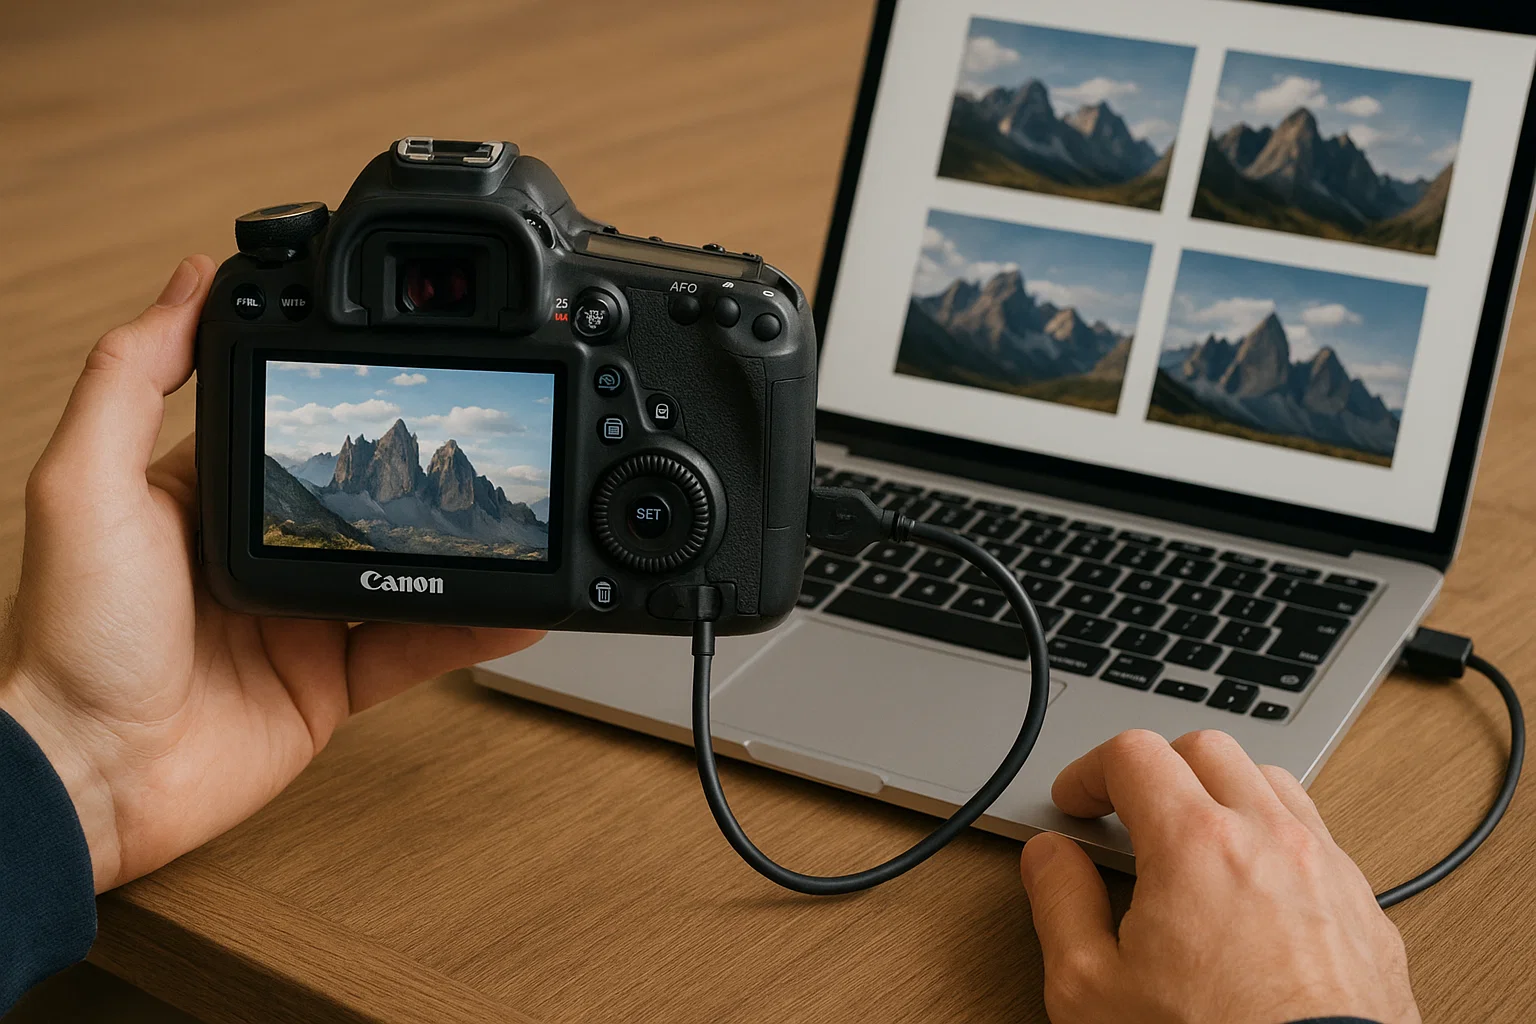
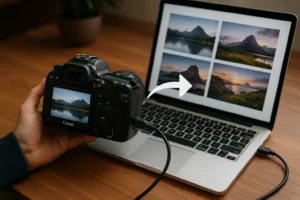
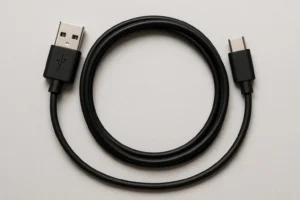
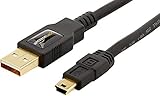
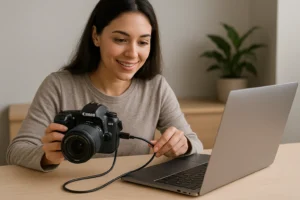
Method 1: Using USB Cable + Canon Software
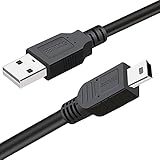
- This mini USB Cord is compatible with all Mini-b 5-Pin devices.This camera IFC-400PCU IFC-200U IFC-500U USB data transfer cable, cord or wire is used for transferring pictures,image and other files from your camera to your PC or Mac Computer. See Product Images and Product Description for the complete list of compatible camera models.
- This mini USB Cable is Compatible with Canon PowerShot ELPH 100 HS,ELPH 110 HS,ELPH 115 IS,ELPH 130,ELPH 135,ELPH 140 IS,ELPH 150 IS,ELPH 160,ELPH 170 IS,ELPH 180 IS,ELPH 190 IS,ELPH 300 HS,ELPH 310 HS,ELPH 320 HS,ELPH 330 HS,ELPH 340 HS,ELPH 350 HS,ELPH 360 HS,ELPH 500 HS,ELPH 510 HS,ELPH 520 HS,ELPH 530
- Compatible with Canon PowerShot SX1 IS, SX10 IS, SX20 IS, SX30 IS, SX40 HS, SX50 HS, SX60 HS, SX100 IS, SX130 IS, SX150 IS, SX160 IS.SX170IS, SX200 ISSX210 IS, SX230 HS, SX260 HS, SX270 HS, SX280 HS, SX400 15, SX410 1S, SX420 15, SX500 IS, SX510 HS, SX520 HS,SX530 HS,SX540 HS, SX600 HS, SX610 HS, SX700 HS, SX710 HS
- Compatible with Canon Powershot A : A10,A20,A60,A70,A75,A80,A85,A95,A100,A200,A300,A310,A400,A470,A480,A490,A495,A510,A520,A580,A650 IS,A720 IS,A800,A810,A1000 IS,A1100 IS,A1200,A1300,A1400, A2000 IS,A2100 IS,A2200,A2300,A2400 IS,A2500,A2600,A3000 IS,A3100 IS,A3300 IS,A3400 IS, A3500 IS,A4000 IS
- Compatible with Canon EOS REBEL:SL1 SL2 T1i T2i T3 T3i T4i T5 T5i T6 T6i T6s T7i XSi XT Xti & other models needing an IFC-400PCU USB cable.

- This camera IFC-400PCU IFC-200U IFC-500U USB data transfer cable, cord or wire is used for transferring pictures and other files from your camera to your PC or Mac. See Product Images and Product Description for the complete list of compatible camera models.
- This mini USB Cable is compatible with all Mini USB 5-Pin devices. This compatible with Canon PowerShot ELPH 300, SX400, 300 HS, A1400, SD600, G7X, SX400is & other models needing an IFC-400PCU, IFC-200U or IFC-500U camera cable.
- This is also compatible with Canon EOS REBEL SL1 SL2 T1i T2i T3 T3i T4i T5 T5i T6 T6i T6s T7i XSi XT Xti & other models needing an IFC-400PCU USB cable.
- Compatible with PowerShot SX 1 IS 10 IS 100 IS 130 IS 150 IS 160 IS 170 IS 20 IS 200 IS 210 IS 230 HS 260 HS 270 HS 280 HS 30 IS 40 HS 400 IS 410 IS 420 IS 50 HS 500 IS 510 HS 520 HS 530 HS 540 HS 60 HS 600 HS 610 HS 700 HS 710 HS & more.
- Compatible with Powershot A 10 1001000 IS1100 IS12001300 1400 20 200 2000 IS 2100 IS 2200 2300 2400 IS 2500 2600 300 3000 IS 310 3100 IS 3300 IS 3400 IS 3500 IS 400 4000 IS 470 480 490 495 510 520 580 60 650 IS 70 720 IS 75 80 800 810 85 95
Step-by-Step (Windows / macOS)
Install Canon software
Download and install EOS Utility or Image Transfer Utility 2 from the Canon support website. support.usa.canon.com+1
Connect via USB
Use the USB cable that came with your camera; connect to your computer.
Turn on the camera (set it to playback or “PC” mode).
Launch the software
On EOS Utility, choose “Download Images to Computer.” cam.start.canon
In Image Transfer Utility, follow prompts to select files or automatic download. support.usa.canon.com
Configure preferences
Choose destination folder, file naming, and filters (e.g. by date). cam.start.canon
Start transfer
Click “Start automatic download” or select specific images and press “Download.” cam.start.canon
Wait for the transfer to complete before disconnecting.
Why use software?
It can automatically preserve metadata and organize files.
It may launch Canon’s DPP (Digital Photo Professional) for further editing. cam.start.canon
Method 2: Using Card Reader or Camera as Mass Storage
If your camera uses an SD card or similar, or if it supports USB Mass Storage mode:
- Eject the memory card from your camera.
- Insert it into your computer’s SD card slot or an external card reader.
- Open File Explorer (Windows) or Finder (macOS).
- Locate the card (often shows as “NO NAME,” “Untitled,” or the camera model).
- Navigate to DCIM / 100CANON (or similar) folder and copy images to your computer.
After copying, safely eject the drive.
This method bypasses software entirely and gives direct file access.
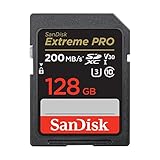
- Save time with card offload speeds of up to 200MB/s powered by SanDisk QuickFlow Technology (Up to 200MB/s read speeds, engineered with proprietary technology to reach speeds beyond UHS-I 104MB/s, require compatible devices capable of reaching such speeds. Based on internal testing; performance may be lower depending upon host device, interface, usage conditions and other factors. X = 150KB/sec. SanDisk QuickFlow Technology is only available for certain capacities. Actual user storage less.)
- Pair with the SanDisk Professional PRO-READER SD and microSD to achieve maximum speeds (sold separately)
- Shot speeds up to 90MB/s (Write speed up to 90MB/s. Based on internal testing; performance may be lower depending upon host device. 1MB=1,000,000 bytes. X = 150KB/sec.)
- Perfect for shooting 4K UHD video and sequential burst mode photography (Full HD (1920×1080) and 4K UHD (3840 x 2160) video support may vary based upon host device, file attributes and other factors. See HD page on SanDisk site.) Sequential Write Performance: Up to 90MB/s
- UHS Speed Class 3 (U3) and Video Speed Class 30 (V30) (UHS Speed Class 3 designates a performance option designed to support 4K UHD video recording with enabled UHS host devices. UHS Video Speed Class 30 (V30), sustained video capture rate of 30MB/s, designates a performance option designed to support real-time video recording with UHS enabled host devices. See the SD Association’s official website.)

- Great choice for compact to mid-range point-and-shoot cameras
- Quick transfer speeds up to 140MB/s (Up to 140MB/s read speed engineered with proprietary technology to reach speeds beyond UHS-I 104MB/s, requires compatible devices capable of reaching such speeds. Based on internal testing; performance may be lower depending on host device, interface, usage conditions and other factors. 1MB=1,000,000 bytes.)
- Up to 128GB to store tons of pictures (1GB=1,000,000,000 bytes. Actual user storage less.)
- Exceptional video recording performance with UHS Speed Class 1 (U1) Class 10 rating for Full HD video (1080p) (UHS Speed Class 1 (U1) designates a performance option designed to support real time video recording with UHS enabled host devices. See consumers speed page on SanDisk site. Full HD (1920×1080) video support may vary based upon host device, file attributes, and other factors. Visit the SanDisk Video Knowledge Base for more information.)
- Compatible with SanDisk SD UHS-I card reader (sold separately)
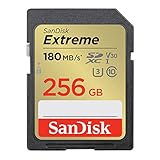
- Save time with card offload speeds of up to 180MB/s powered by SanDisk QuickFlow Technology (Up to 180MB/s read speed. Engineered with proprietary technology to reach speeds beyond UHS-I 104MB/s, require compatible devices capable of reaching such speeds. Based on internal testing; performance may be lower depending on host device, interface, usage conditions and other factors. 1MB=1,000,000 bytes. SanDisk QuickFlow Technology is only available for 64GB, 128GB, 256GB, and 512GB capacities. 1GB=1,000,000,000 bytes. Actual user storage less.)
- Pair with the SanDisk Professional PRO-READER SD and microSD to achieve maximum speeds (sold separately)
- Write speeds up to 130MB/s (Engineered with proprietary technology to reach speeds beyond UHS-I 104MB/s, require compatible devices capable of reaching such speeds. Based on internal testing; performance may be lower depending on host device, interface, usage conditions and other factors. 1MB=1,000,000 bytes.)
- Perfect for shooting 4K UHD video and sequential burst mode photography (Full HD (1920×1080) and 4K UHD (3840 x 2160) video support may vary based upon host device, file attributes and other factors. See HD page on SanDisk site.)
- Capture uninterrupted video with UHS Speed Class 3 (U3) and Video Speed Class 30 (V30) (UHS Speed Class 3 designates a performance option designed to support 4K UHD video recording with enabled UHS host devices. UHS Video Speed Class 30 (V30), sustained video capture rate of 30MB/s, designates a performance option designed to support real-time video recording with UHS enabled host devices. See the SD Association’s official website.)

- Great for Compact to midrange Point and Shoot digital Cameras and camcorders
- Twice As Fast As Ordinary SDHC Cards, Allowing You To Take Pictures And Transfer Files Quickly
- Exceptional video recording performance with class 10 rating for Full HD video (1080p); Compatibility : SDHC I/SDXC I devices
- Quick transfer speeds up to 80MB/s and WaterProof, temperature Proof, X ray Proof, magnet Proof, shockProof
![SanDisk 128GB Ultra SDXC UHS-I Memory Card - 120MB/s, C10, U1, Full HD, SD Card - SDSDUN4-128G-GN6IN [Older Version]](https://m.media-amazon.com/images/I/41lyWGmdA7L._SL160_.jpg)
- This version has been discontinued by manufacturer
- Great choice for compact to mid-range point-and-shoot cameras
- Quick transfer speeds up to 120MB/s(1) to back up those moments.
- (1)Up to 120MB/s read speed, engineered w/ proprietary technology to reach speeds beyond UHS-I 104MB/s, compatible device required. Based on internal testing; performance may be lower depending on host device & other factors. 1MB=1,000,000 bytes.
- Up to 128GB to store tons of pictures and even more Full HD video(2).
Method 3: Wireless & Cloud Transfer via image.canon
On newer Canon cameras with Wi-Fi:
Upload images from the camera to image.canon (Canon’s cloud). image.canon
Install Downloader for image.canon on your computer. It will sync the uploaded images automatically into the folder you choose. image.canon
On Windows/Mac, images are stored locally, and new files download automatically.
This method is great for remote workflows or wireless backup.
Understanding Transfer Protocols: PTP vs Mass Storage
Some Canon cameras connect using Picture Transfer Protocol (PTP) instead of exposing file structure as a drive. Wikipedia
PTP: Camera appears as a camera device — you might not see file timestamps or script access.
Mass Storage / MSC: Camera behaves like a standard USB drive; you can copy files freely.
Many Canon models support both modes; check your camera’s settings (USB mode) and switch as needed.
Pro Tips & Best Practices
Always power the camera on before transfer to avoid corrupted files.
Use the USB cable that came with the camera — low-quality cables may cause data errors.
Do not remove the card or power off mid-transfer — this risks file corruption.
Always back up your photos immediately, preferably in two locations.
For high volumes, card reader with fast UHS-II / UHS-III is often faster than USB transfer via camera.
If transfer fails, try restarting the software, using a different port, or reformatting the card (after backup).
Troubleshooting Common Issues
| Problem | Possible Cause | Fix |
|---|---|---|
| Computer doesn’t detect the camera | Incorrect USB mode, faulty cable | Change USB mode (PTP/Mass Storage), try different cable or port |
| Transfer hangs mid-way | Corrupted card, file error | Use a card reader or repair file system |
| Files missing metadata | Using generic copy | Use Canon software or keep RAW + associated sidecar files |
| Wireless sync not working | Camera not linked to image.canon | Link camera, update firmware, check network |
FAQs
Do I need Canon software to transfer photos?
No. You can use a card reader or file explorer method. But Canon software offers benefits like metadata retention and automatic downloading.
Can I transfer RAW files?
Yes — all methods support RAW formats. Make sure your editing software can read them.
Why doesn’t the camera show up as a drive?
It may be using PTP mode rather than mass storage; switch the USB connection mode.
Which method is fastest?
High-speed card readers usually outperform USB camera transfers.
Does image.canon support RAW files?
Yes — Canon supports downloading original files, including RAW, via image.canon to your PC. image.canon
Conclusion

Transferring photos from your Canon camera to your computer is straightforward once you know your options. Use Canon’s software for structure and automation, or stick to the card-reader method for simplicity and speed. For modern workflows, image.canon offers wireless syncing. Armed with these methods and best practices, you’ll spend less time fighting transfers and more time editing and creating.
Brought to you by Amateur Photographer Guide — your source for practical wisdom, gear guidance, and photographic growth.