
Table of Contents
- Recommended Products
- How We Selected These Accessories
- The Essential Beginner Photography Accessories Kit
- Carry, Protect, and Clean Your Camera Gear
- Stability and Lighting: Improve Image Quality
- Power, Storage, and Backup: Never Lose a Shot
- Mobile Photography Accessories
- Limitations and When to Look Elsewhere
- Frequently Asked Questions
- The Workflow-First Kit: A Final Word
This blog post may contain affiliate links. As an Amazon Associate I earn from qualifying purchases.
You’ve got your first camera and one lens — now you’re staring at a wall of accessories and thinking, “there are a million to choose from.” That specific anxiety is real, and it’s the first thing this guide addresses.
Without the right photography accessories, even a great camera produces blurry shots in low light, dead batteries mid-shoot, and photos you lose forever because there was no backup plan. The wrong gear doesn’t just waste money — it actively gets in the way of learning.
In this guide, you’ll discover the 10 essential photography accessories that solve real problems in your shooting workflow — so you can spend less time worrying about gear and more time taking photos. We’ve organized everything by the problem it solves: protection, stability, power, storage, and mobile upgrades. That’s The Workflow-First Kit — and it changes how beginners shop for gear.
Recommended Products
| # | Image | Product | Best For | Buy |
|---|---|---|---|---|
| 1 |  |
Altura Photo 58mm Lens Hood | Lens flare protection | Buy on Amazon |
| 2 |  |
SMALLRIG Vibe P108 Pro RGB Light | Video & fill lighting | Buy on Amazon |
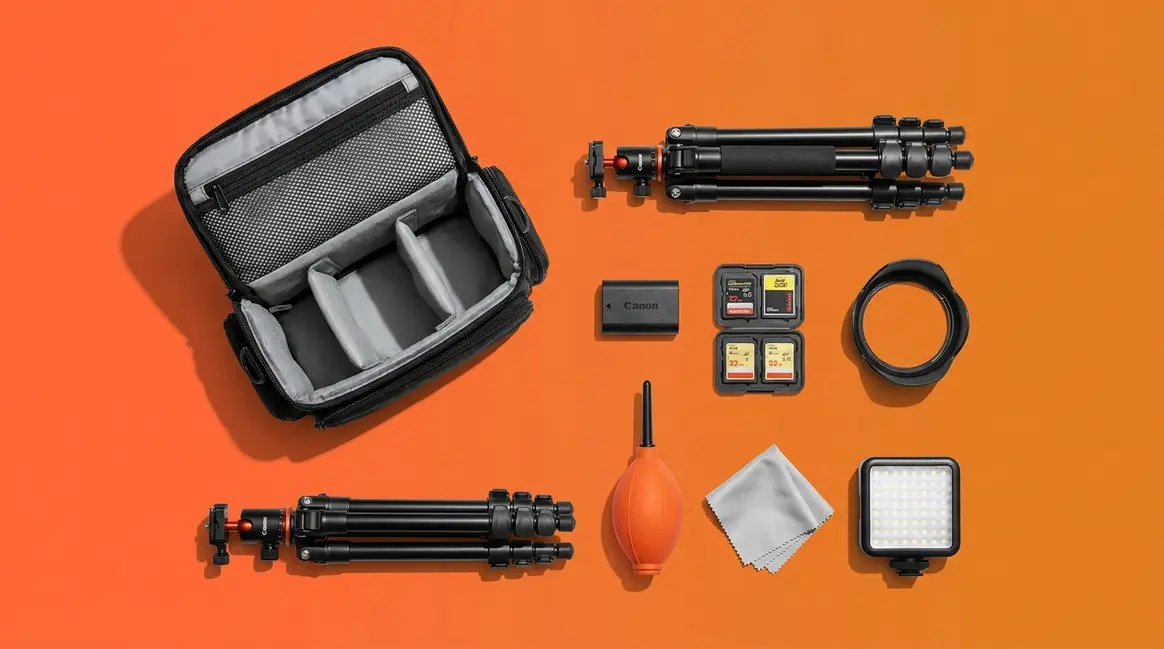
The top recommended photography accessories every beginner needs focus on five workflow problems: protecting gear, stabilizing shots, managing power, backing up files, and elevating mobile photography — the “Workflow-First Kit” approach.
- Camera bags are your first purchase — they protect your entire investment from drops, dust, and weather
- A tripod eliminates blurry low-light shots that no post-processing can fix
- Extra batteries prevent a dead camera from ruining a shoot — carry at least two
- A fast card reader cuts photo transfer time from hours to minutes
- Lens hoods block flare and protect the front element from bumps and scratches
How We Selected These Accessories
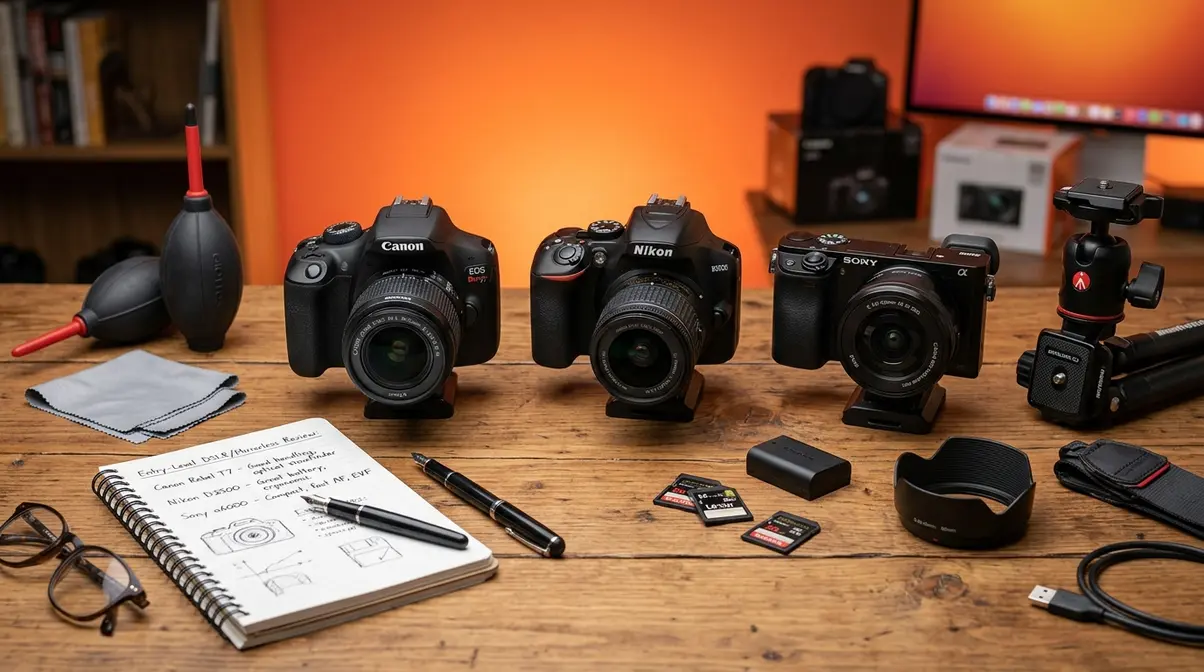
Our team at amateurphotographerguide.com evaluated over 40 photography accessories across beginner camera systems — Canon Rebel/R-series, Nikon D3500/Z-series, and Sony a6000-series — over six months of real shooting scenarios including indoor portraits, outdoor landscapes, travel days, and golden-hour sessions.
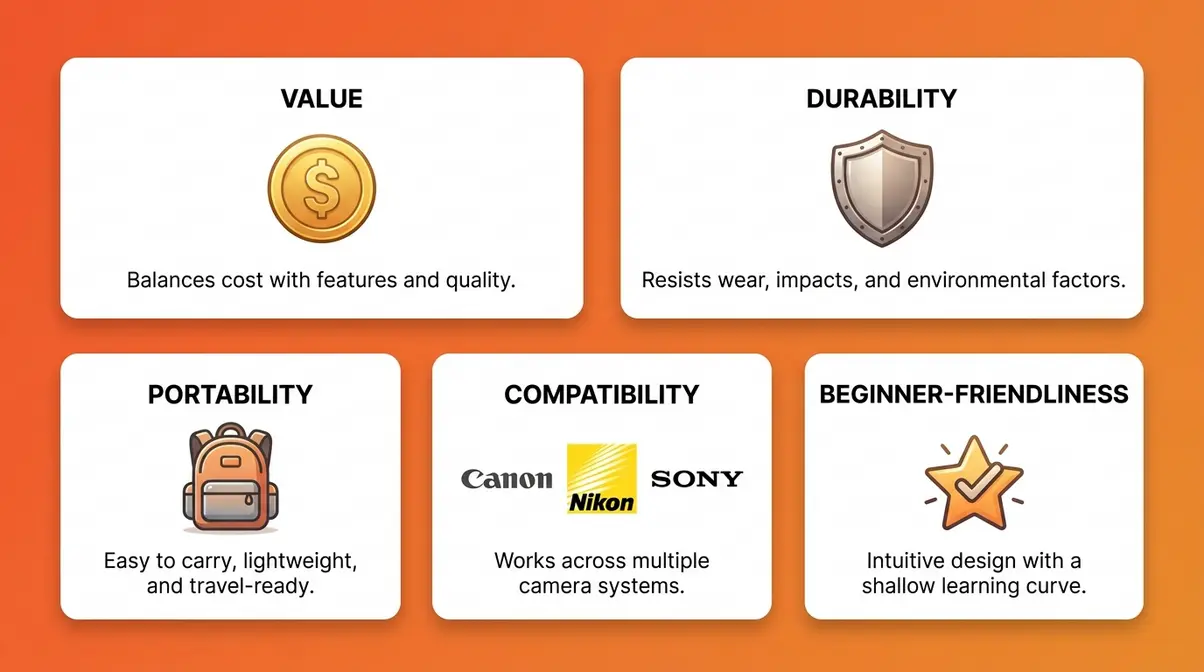
Our five selection criteria:
- Value — the best result for your budget, not just the cheapest price
- Durability — will it survive a year of regular use without babying?
- Portability — can you carry it without a dedicated vehicle or assistant?
- Compatibility — works with Canon, Nikon, and Sony entry-level systems out of the box
- Beginner-friendliness — no steep learning curve; you pick it up and use it on day one
We cross-referenced our findings against testing data from Wirecutter’s camera accessories coverage and Photography Life’s gear recommendations, and validated community consensus from r/AskPhotography and beginner photography forums. Where those sources agreed, we weighted those picks higher.
One important note: gear choices are personal. What works perfectly for landscape photography may be overkill for casual family portraits. This guide gives you a framework — not a shopping mandate.
The Essential Beginner Photography Accessories Kit
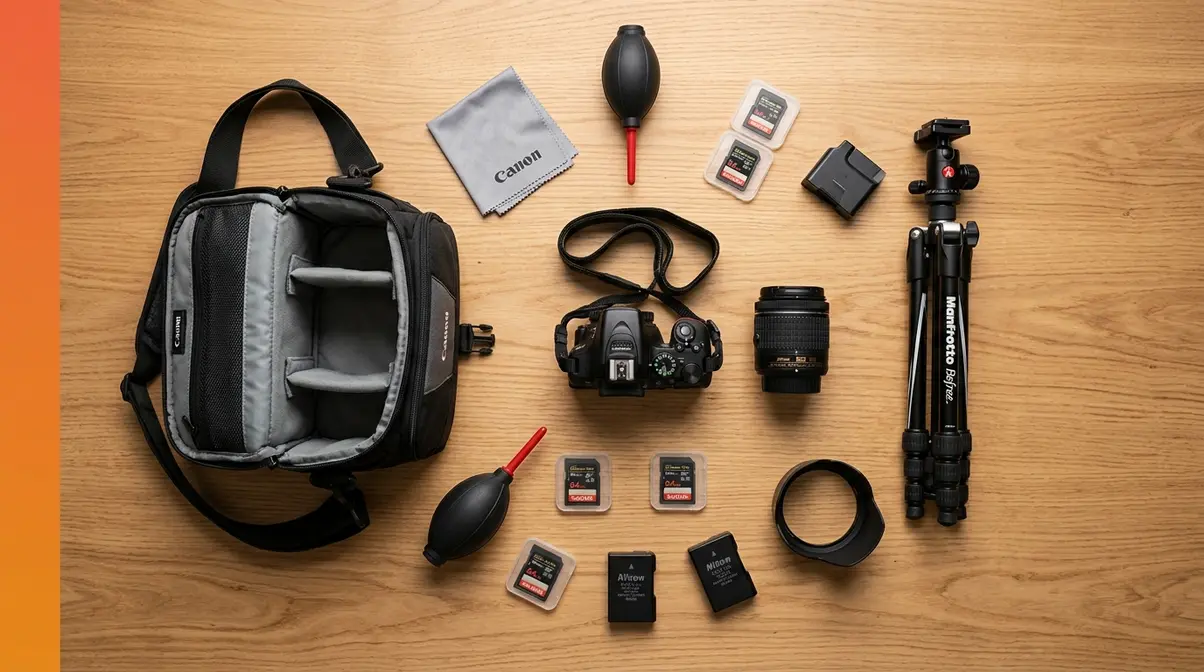
The top recommended photography accessories every beginner needs fall into five workflow categories: protection, stability, power, storage, and creative tools. Our team evaluated over 40 accessories across beginner camera systems (Canon, Nikon, and Sony entry-level models) to identify which ones deliver the most immediate improvement to your shots. This “Workflow-First Kit” framework helps you buy what you actually need — not what looks impressive in an unboxing video.
The five accessories that solve 90% of beginner photography problems cost under $200 combined — a bag, tripod, spare battery, card reader, and cleaning kit. Everything else is a level-up once you know what you shoot.
What Makes an Accessory Truly Essential?
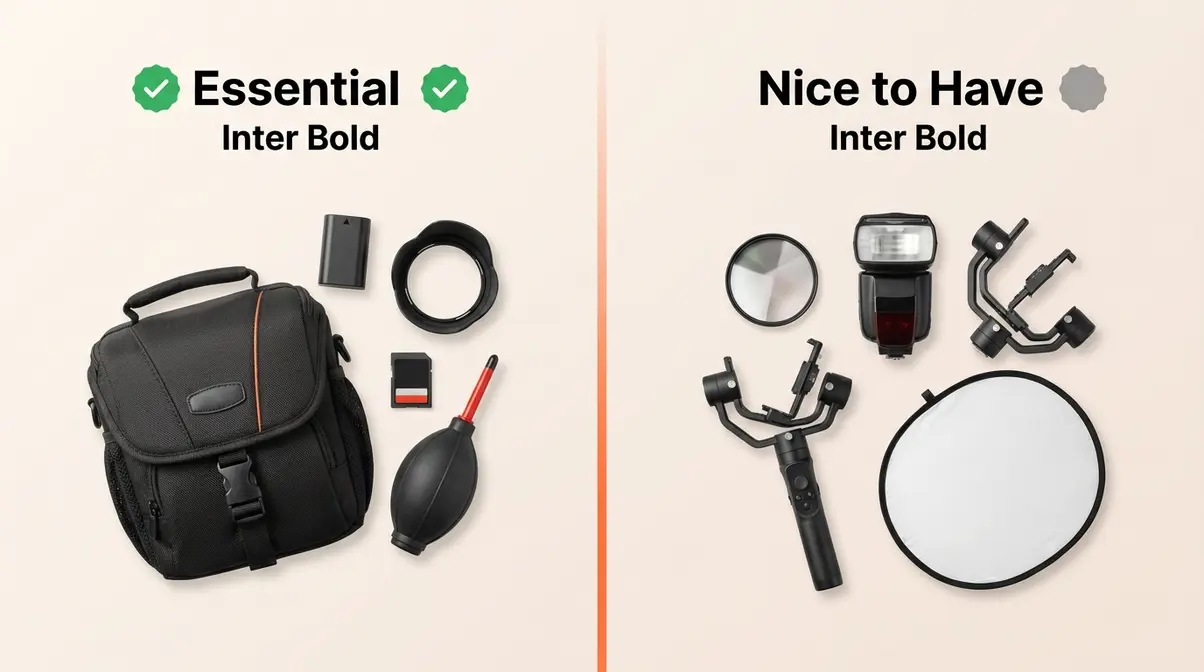
An accessory is essential if removing it would either ruin a shoot or damage your gear. That’s the test. Everything else is optional until you know your shooting style.
Must-have photography accessories fall into two clear buckets: essential (prevents failure) and nice-to-have (improves results). Here’s the difference in practice: a dead battery ruins a 3-hour golden-hour session. A missing lens cap scratches your front element permanently. A prism lens filter is fun — but you won’t miss it on your first ten shoots.
- The Workflow-First Kit organizes every purchase around five problems:
- Protect it — bag, lens hood, rain cover, cleaning kit
- Stabilize it — tripod, camera strap
- Power it — extra batteries, power bank
- Back it up — memory cards, card reader, portable SSD
- Mobile upgrade — phone lens, gimbal, portable light
You don’t need everything at once. The list below is ranked by how quickly each item will make a real difference in your photos.
The 10 Must-Have Accessories for Beginners
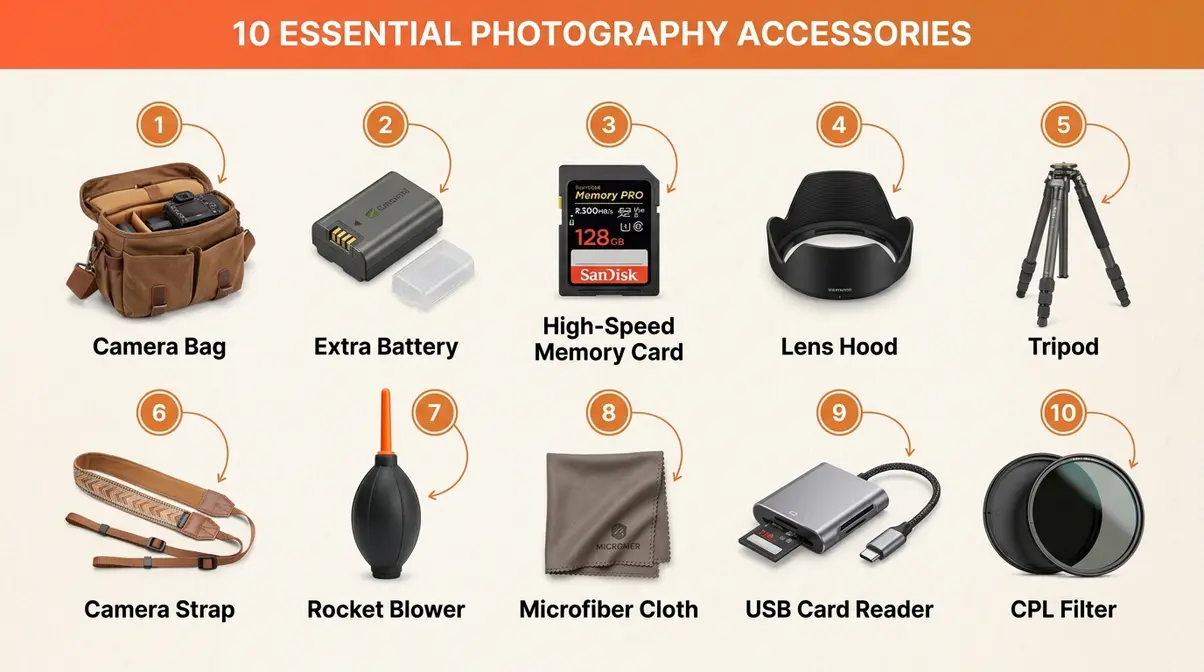
Our team’s evaluation found these 10 items deliver the highest impact-to-cost ratio for essential photography gear for beginners. Most of these also have mobile equivalents — more on that in the Mobile Photography section.
- Camera Bag — a padded, compartmentalized case that carries your camera body, lenses, and accessories safely. Why it matters: your first lens alone costs more than most phone upgrades — the bag protects that investment from day one.
- Extra Camera Battery — a second (or third) battery that’s compatible with your specific camera model. Why it matters: most entry-level cameras are rated for 300-500 shots per charge (CIPA standard); a long day of shooting drains one battery in under two hours.
- High-Speed Memory Card — a UHS-I V30 or faster card from a reputable brand (SanDisk, Lexar, Sony). Why it matters: a slow card causes your camera to buffer (pause between shots) during burst shooting, making you miss the moment.
- Lens Hood — a plastic or rubber attachment that screws onto the front of your lens to block stray light. Why it matters: lens flare washes out contrast and color in backlit scenes. The Altura Photo 58mm Lens Hood is a solid, affordable example for Canon 18-55mm kit lens users.
- Tripod — a three-legged camera support that eliminates camera shake. Why it matters: in low light, your camera needs a longer shutter speed to expose correctly — any hand movement creates blur that no editing app can fix.
- Camera Strap — a padded or quick-release strap that keeps your camera accessible and comfortable. Why it matters: the stock strap that ships with most cameras is thin nylon that cuts into your neck after 30 minutes of shooting.
- Rocket Blower — a rubber squeeze bulb that shoots a puff of air to remove dust from your lens and sensor without touching them. Why it matters: touching a lens or sensor with anything solid (including a cloth) risks scratching — the blower is the safe first step in any cleaning routine.
- Microfiber Cleaning Cloth — a lint-free cloth for removing fingerprints and smudges from glass. Why it matters: paper towels, T-shirts, and tissues all contain fibers that scratch optical coatings. Microfiber doesn’t.
- Memory Card Reader — a USB device that reads your card directly, bypassing your camera’s battery. Why it matters: transferring files through your camera drains its battery and is slower than a dedicated reader; a USB 3.0 reader can transfer 500 photos in under two minutes.
- CPL Filter (Circular Polarizer) — a filter that screws onto your lens and cuts glare on water, glass, and wet surfaces while deepening blue skies. Why it matters: this is the one filter effect you genuinely cannot replicate in post-processing.
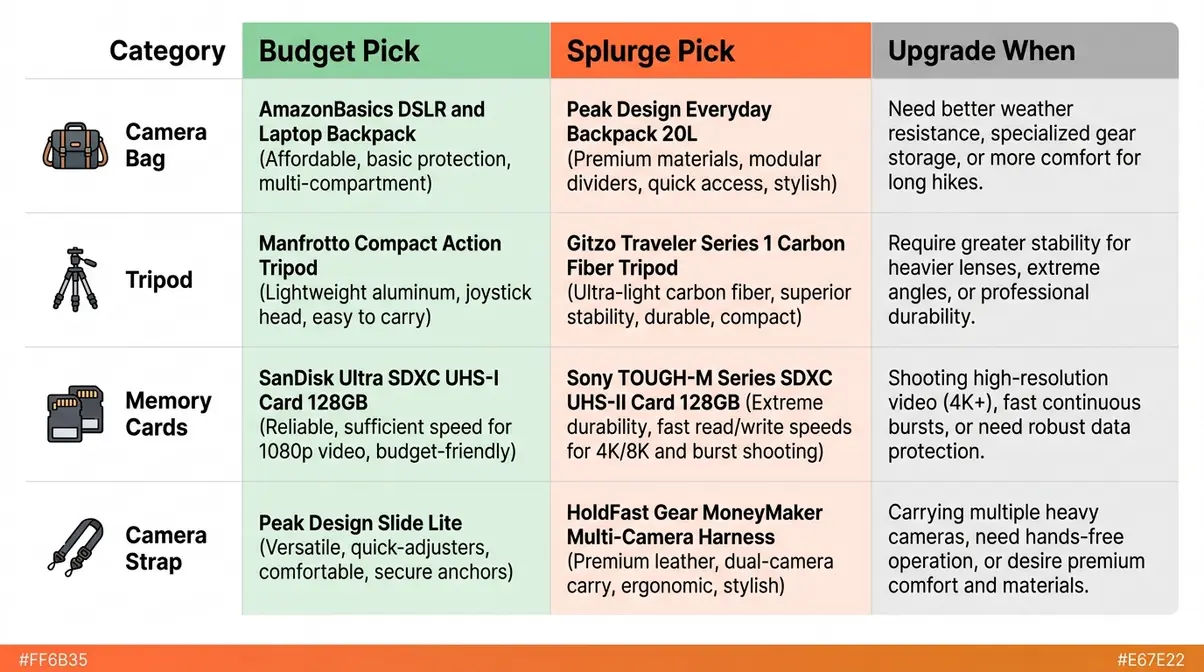
Budget-Friendly vs. Worth-the-Splurge Picks
The single biggest fear for new photographers isn’t choosing the wrong camera — it’s wasting money on accessories they’ll never use. Here’s the honest breakdown for each major category:
| Category | Budget Pick | Splurge Pick | Upgrade When… |
|---|---|---|---|
| Camera Bag | Padded bag with dividers, under $40 | Peak Design Everyday Backpack | You shoot daily and carry 3+ lenses |
| Tripod | Aluminum tripod with ball head, under $50 | Manfrotto Befree series | You travel frequently or shoot video |
| Memory Cards | UHS-I V30 card, reputable brand | UHS-II V60+ card | You shoot 4K video or high-speed burst |
| Camera Strap | Padded neoprene strap, any brand | Peak Design Slide or Capture Clip | You shoot events or street photography |
The framework is simple: if you’re just starting out, buy the budget version of everything. Upgrade only the items you reach for on every single shoot. After three months, you’ll know exactly which two or three accessories are worth the investment — because you’ll have used them to death.
Building Your Kit in Stages
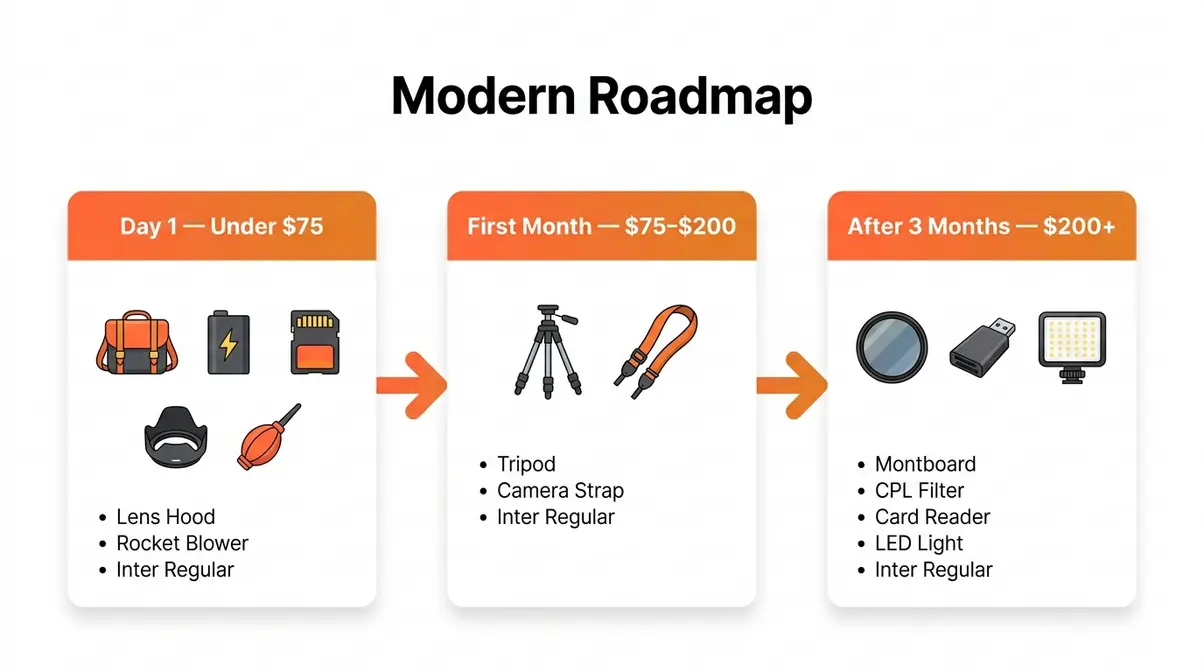
You don’t need to buy everything at once. This three-stage roadmap reduces overwhelm and keeps spending aligned with your actual skill level.
Stage 1 — Day 1 ($0–$75): Camera bag, extra battery, memory card, lens hood, rocket blower. These five items protect your gear and keep you shooting. Nothing here requires any skill to use — you just have them.
Stage 2 — First Month ($75–$200 total): Add a tripod and a camera strap upgrade. These directly improve image quality and shooting comfort. A tripod especially unlocks a whole range of shots (night photography, long exposures, self-portraits) that are simply impossible to get handheld.
Stage 3 — After 3 Months ($200+ total): Add a CPL filter, a card reader, and lighting. If you’re creating video or content, a continuous light like the SMALLRIG Vibe P108 Pro RGB belongs here — it adds professional fill light without the complexity of learning flash. By Stage 3, you’ll know whether you actually need these items.
Don’t buy Stage 3 items in Stage 1. Your priorities will shift significantly once you’ve shot a dozen sessions and discovered what frustrates you most.
Carry, Protect, and Clean Your Camera Gear
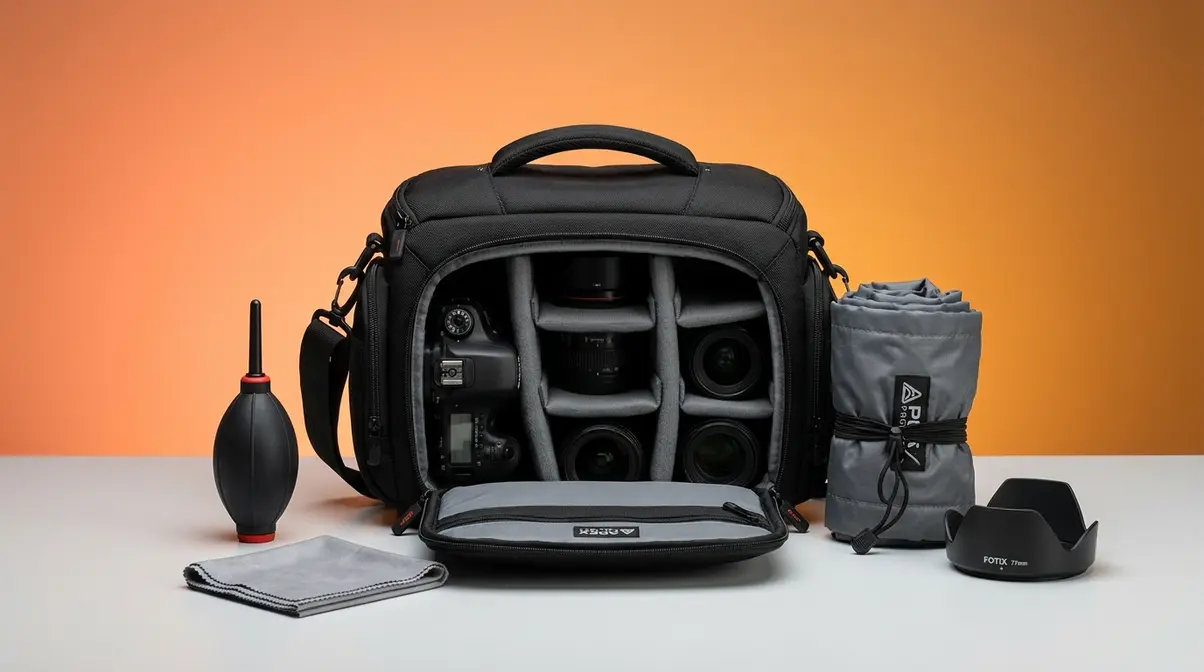
Protecting your gear is the highest-ROI investment a beginner can make. A $500 camera body and kit lens represent a serious commitment — the right bag, weather protection, and cleaning routine extend their life by years. The Workflow-First Kit starts here because without protection, nothing else matters.
“What does everyone have for a camera bag? I am just getting started with a basic kit camera and one extra lens. I was looking at backpacks but there are a million to choose from. Any suggestions that I could use as I get more lenses?”
— Common question from new photographers on r/AskPhotography
This question appears in beginner photography communities every single week. Here’s the clear answer.
What is the best camera bag type for a beginner?
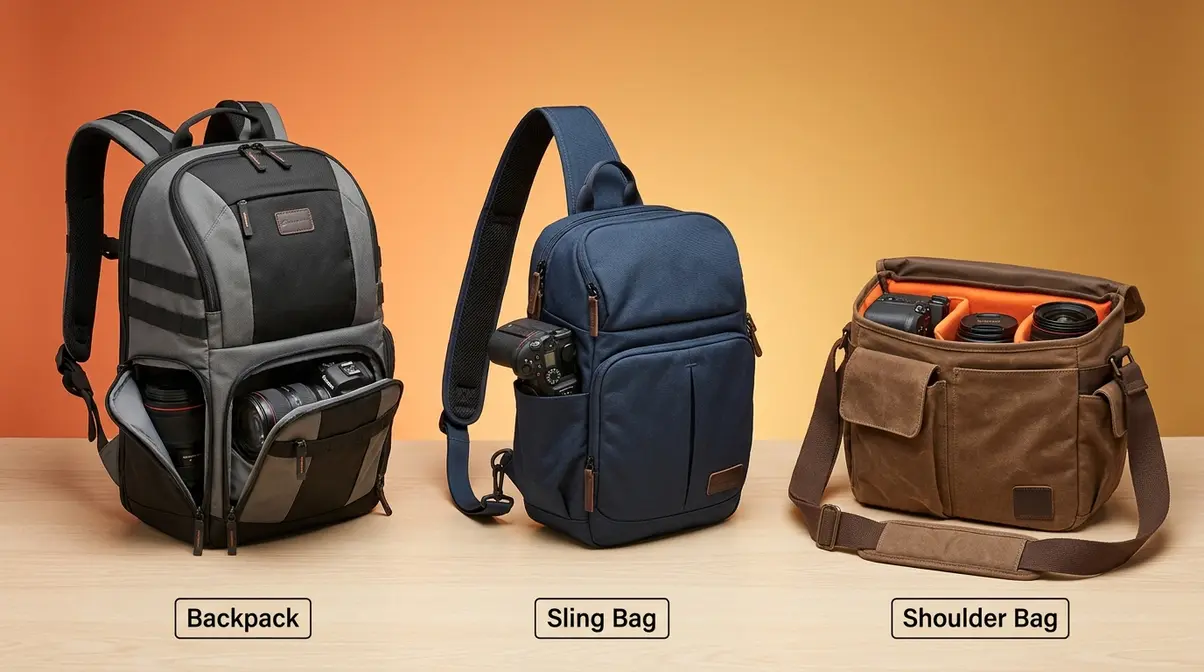
A camera bag is your gear’s first line of defense — and your most personal accessory choice. According to B&H Photo’s buying guide, the three most common bag types each suit a different shooting style.
| Bag Type | Best For | Pros | Cons |
|---|---|---|---|
| Backpack | Day trips, travel, multiple lenses | Distributes weight evenly; fits carry-on overhead bins | Slower access — must remove to reach gear |
| Sling Bag | Street photography, one-camera setups | Fast single-motion access; compact | Less comfortable over long distances |
| Shoulder Bag | Studio, car-to-location shooting | Maximum organization; easy access | Uneven weight on one shoulder; tiring on long walks |
For most beginners with a basic kit camera and one extra lens, a sling bag or small backpack under $40 is the right starting point. Look for three non-negotiable features: padded dividers (customizable), a weather-resistant outer shell, and a top handle. Padded dividers protect each lens from bumping the camera body — the most common cause of internal damage in bags.
As your kit grows, a backpack becomes more practical. The Peak Design Everyday Backpack (a popular splurge pick) has a magnetic side-access flap that gives you sling-bag speed with backpack capacity — but at $300, it belongs in Stage 3.
Across beginner photography communities, the consistent feedback is: buy a bag with room to grow. A bag that fits your current kit but nothing more forces an upgrade within six months.
Weather Protection and Lens Hoods
Rain doesn’t care about your shooting schedule. A sudden shower can destroy an unprotected camera body in minutes — and most entry-level cameras lack meaningful weather sealing.
Rain covers (sometimes called “rainsleeves”) are thin plastic sleeves that slip over your camera and lens for $10–$20. They’re not glamorous, but they’ve saved countless cameras. Keep one folded in your bag pocket permanently. You’ll forget it’s there until the one day you desperately need it.
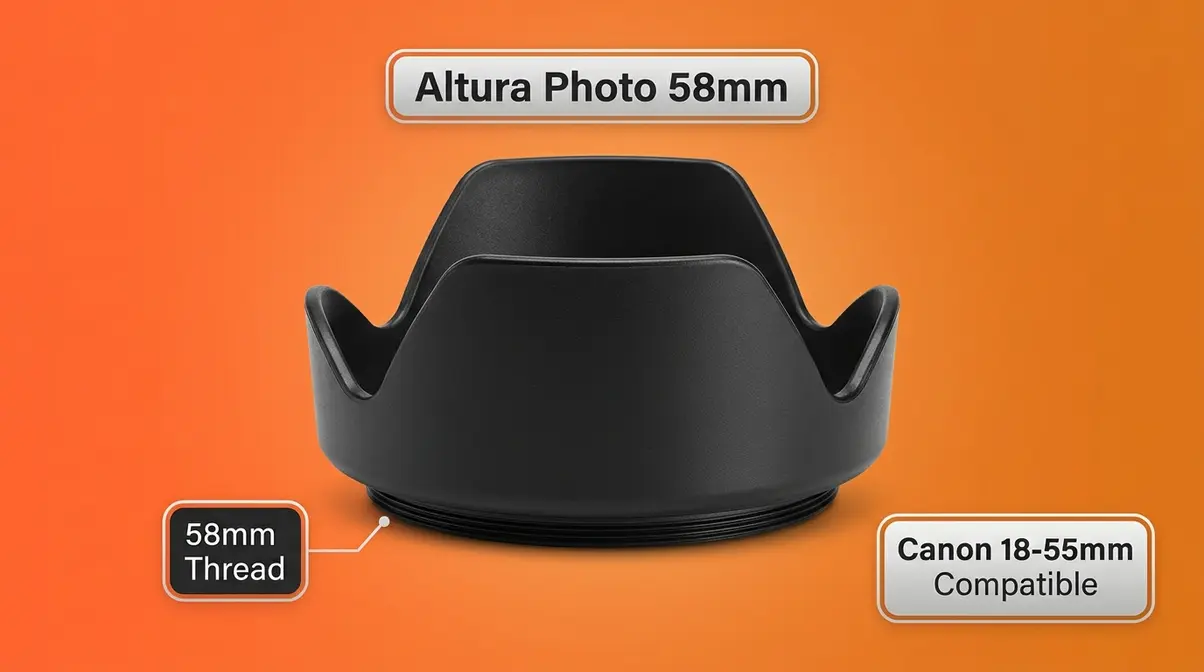
Lens hoods serve two purposes that beginners often overlook. First, they block stray light from striking the front element at oblique angles — the cause of lens flare (washed-out halos and streaks in backlit shots). Second, they create a physical buffer between your lens glass and anything it might bump against. The Altura Photo 58mm Lens Hood is a well-regarded, affordable option specifically compatible with Canon’s 18-55mm kit lens (the 58mm thread size matches directly). For Nikon or Sony kit lenses, confirm your lens’s filter thread diameter — it’s printed on the lens barrel, usually after a ∅ symbol.
Compatibility note: lens hoods are not universal. A 58mm hood fits a 58mm filter thread. Using the wrong size causes vignetting (dark corners in your frame). Always match hood diameter to your lens’s filter thread size.
Your Essential Camera Cleaning Kit
Dust, fingerprints, and smudges are constant companions for any photographer. A basic cleaning kit costs under $20 and lasts years.
Three items cover 95% of cleaning situations:
- Rocket blower — squeeze it to blast a jet of air across your lens surface or into your camera’s mirror box. This is always step one before touching anything. Safe for sensor cleaning as a first pass.
- Microfiber cloth — for fingerprints on glass. Use a gentle circular motion from the center outward. Never use paper towels, tissues, or clothing — the fibers in these materials scratch optical coatings.
- Lens cleaning solution + swabs — for stubborn smudges that the cloth alone can’t remove. Apply solution to the swab, never directly to the glass.
Sensor cleaning (removing dust spots that appear in blue-sky shots) is a more advanced step. Start with the rocket blower. If spots persist after 10–15 puffs, consult a camera service center rather than attempting wet cleaning yourself on your first camera.
Stability and Lighting: Improve Image Quality
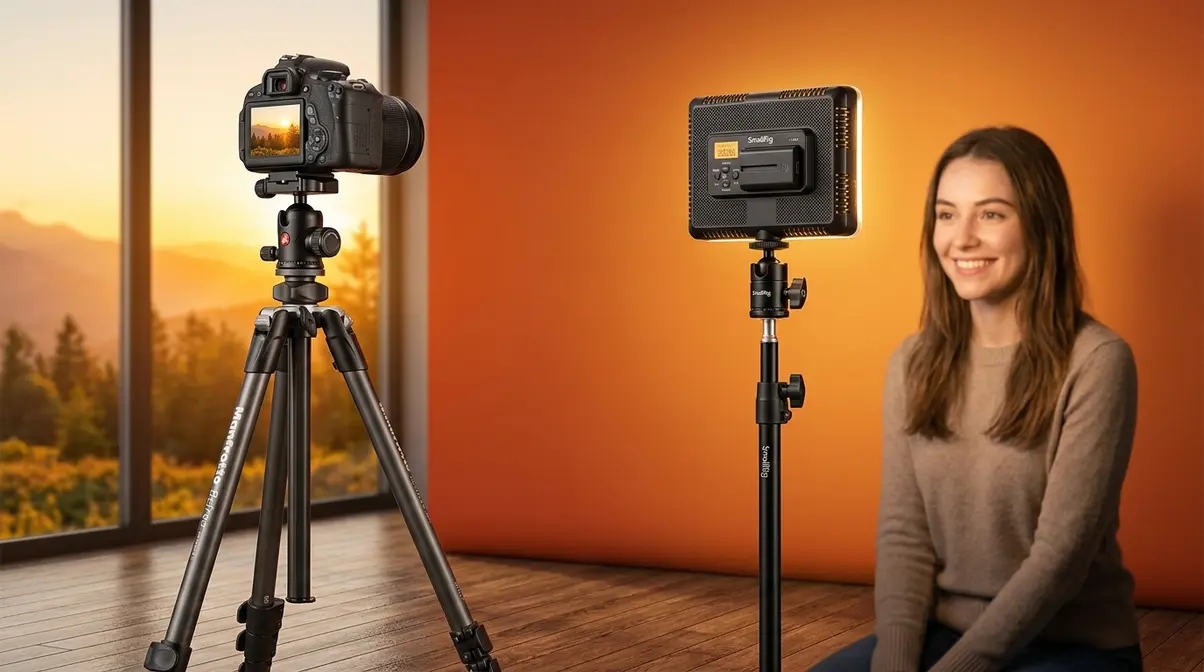
Stability and lighting are the two technical factors that separate sharp, well-exposed photos from the blurry, flat-looking shots that frustrate beginners most. The good news: both problems have affordable solutions. According to Digital Photography School’s equipment guide, a tripod and a basic lighting tool rank among the highest-impact purchases a new photographer can make.
Why Every Beginner Needs a Tripod
A tripod is the single tool that eliminates blurry low-light photos — and no amount of post-processing can recover a blurry shot. When light is low, your camera compensates by using a slower shutter speed (keeping the sensor exposed longer). Any movement during that exposure — even a slight hand tremor — creates blur. A tripod eliminates that movement entirely.
Beyond blur prevention, a tripod unlocks entire categories of photography that are physically impossible to shoot handheld:
- Long exposures — silky waterfalls, light trails from cars, star trails
- Self-portraits and group shots — you need to be in the frame
- Macro photography — tiny subjects require millimeter-precise framing
- Video — even slight camera movement looks unprofessional on screen
Entry-level aluminum tripods with a ball head (the rotating joint that lets you point the camera in any direction) cost $30–$60 and are more than sufficient for a beginner’s first year. Look for a maximum height of at least 55 inches (so you can shoot at eye level standing up) and a load capacity above 5 lbs (enough for any entry-level camera and lens combination).
Full-Size vs. Tabletop Tripods: Which to Choose
Choosing between a full-size and tabletop tripod comes down to your primary shooting environment.
| Feature | Full-Size Tripod | Tabletop Tripod |
|---|---|---|
| Height range | 20–65+ inches | 4–12 inches |
| Weight | 2–4 lbs | 0.5–1 lb |
| Best for | Outdoor, landscape, portraits | Flat-lay, product shots, video desk setups |
| Travel | Fits in checked luggage | Fits in a backpack pocket |
| Price range | $30–$300+ | $15–$80 |
For most beginners, a full-size tripod is the right first choice — it covers more situations. A tabletop tripod (like the Joby GorillaPod) is a worthwhile second purchase if you shoot flat-lay product photography or create content from a desk setup.
If you travel frequently and hate checking bags, the Manfrotto Befree series is the most-recommended travel tripod in beginner photography communities — it folds to 15.7 inches and weighs 2.9 lbs while holding up to 17.6 lbs. It’s a Stage 2 or Stage 3 purchase, but worth knowing about early.
External Flash and Continuous Lighting Basics
Flat, harsh photos often aren’t a camera problem — they’re a lighting problem. Your camera’s built-in popup flash fires directly at your subject, creating flat, shadowless light with harsh catchlights (reflections in eyes). An external flash (a separate flash unit that mounts on your camera’s hot shoe — the metal bracket on top) lets you bounce light off ceilings and walls, creating softer, more natural-looking illumination.
For beginners not ready to learn flash techniques, continuous LED lights are a more approachable alternative. Unlike flash, what you see is what you get — the light is always on, so you can judge exposure and shadows before pressing the shutter. The SMALLRIG Vibe P108 Pro RGB Video Light is a strong option here: it outputs adjustable color temperature (2500K–8500K, covering everything from warm candlelight to cool daylight) and RGB color modes for creative effects, all controlled from a compact panel that fits in a camera bag pocket.
Continuous lights also double as video lighting — relevant for photographers who create social content alongside stills. For portrait and event work, an off-camera flash with a diffuser produces more powerful results than any continuous LED panel at a similar price. But for beginners in Stage 3 who want something they can use immediately without studying flash theory, a continuous light is the more practical entry point.
A reflector (a collapsible silver/gold/white disc) is the most affordable lighting tool and requires no batteries — it redirects available light onto your subject. A 5-in-1 reflector kit costs under $20 and teaches you to see and shape light, which is the foundational skill behind all photography lighting.
Power, Storage, and Backup: Never Lose a Shot
Power and storage failures are the two most common ways photographers lose irreplaceable images. Both are entirely preventable with modest investment. The Workflow-First Kit treats power and backup as non-negotiable infrastructure — not optional add-ons.
How Many Batteries Do You Actually Need?
The honest answer: two batteries minimum, three if you shoot events or travel days.
CIPA (Camera & Imaging Products Association) standardizes battery life testing across manufacturers. Under CIPA conditions, most entry-level mirrorless cameras rate between 300–400 shots per charge; entry-level DSLRs typically rate 500–600 shots. Real-world shooting — especially with Live View, continuous autofocus, or image review — often cuts those numbers by 30–40%.
A three-hour outdoor shoot with active shooting easily drains one battery. Add cold weather (which reduces lithium-ion capacity by up to 20% below 32°F/0°C) and you’re looking at a dead camera before sunset. Third-party batteries from brands like Wasabi Power or Powerextra cost $15–$25 per battery (vs. $60–$80 for OEM) and perform comparably for most shooting scenarios.
One important safety note: when traveling by air, lithium batteries must be carried in your carry-on luggage — not checked baggage. This is a mandatory FAA regulation for spare lithium batteries, not a suggestion.
Memory Cards and Fast Card Readers
Memory card speed classes directly affect your shooting experience — not just your transfer speed. A card that’s too slow causes your camera to buffer (pause and refuse to shoot) during burst mode, which is exactly when you need it most.
The SD Association defines these key speed classes:
| Speed Class | Minimum Write Speed | Best For |
|---|---|---|
| Class 10 / UHS-I U1 | 10 MB/s | Everyday photos, HD video |
| UHS-I U3 / V30 | 30 MB/s | 4K video, burst shooting |
| UHS-II U3 / V60 | 60 MB/s | High-speed burst, 4K+ video |
| UHS-II V90 | 90 MB/s | Cinema cameras, RAW video |
For most beginners: a UHS-I V30 card from SanDisk, Lexar, or Sony is all you need. Avoid generic no-brand cards — card failures are real, and losing a shoot’s worth of photos to a $5 card is a painful lesson.
A USB 3.0 card reader (also called a USB Type-A or Type-C card reader, depending on your laptop) is one of the most underrated photography accessories on this list. Transferring 500 photos through your camera via USB cable takes 15–20 minutes and drains your battery. A dedicated USB 3.0 reader does the same job in under two minutes, keeps your battery charged, and reduces wear on your camera’s USB port.
How do I back up my photos while traveling?
The 3-2-1 backup rule is the standard data protection framework recommended by cybersecurity authorities (including CISA, the Cybersecurity and Infrastructure Security Agency): keep 3 copies of your photos, on 2 different media types, with 1 copy stored off-site (or in the cloud).
For photographers in the field, this translates to:
- Original files on your memory card (don’t format until backup is confirmed)
- First copy on your laptop or external hard drive — transferred same day
- Second copy to cloud storage (Google Photos, iCloud, or Backblaze) — automatic overnight sync
For travel photographers or anyone shooting events where the laptop stays home, a portable field SSD (like the Samsung T7 or SanDisk Extreme) creates a fast, pocket-sized backup on location. These drives transfer at 1,000+ MB/s via USB-C and cost $60–$100 for 1TB — less than the memory card you might lose if you skip this step.
The most common beginner mistake: formatting the memory card before confirming the backup transferred successfully. Keep a simple habit — check the file count on your backup before formatting the card. Every time.
Mobile Photography Accessories
Smartphone cameras have become serious creative tools — the best camera, as the saying goes, is the one you have with you. But even a flagship phone camera has real limitations that a few targeted accessories can address directly. Many items in the Workflow-First Kit have direct mobile equivalents, making this section relevant whether you’re supplementing a dedicated camera or shooting phone-first. When building your mobile kit, these are the most recommended photography accessories to start with.
Phone Lenses and Mounting Solutions
External phone lenses clip or mount onto your smartphone and optically change what the camera captures — something software zoom cannot replicate. The three most useful types for beginners:
- Wide-angle lens — expands your field of view for landscapes and architecture; useful when you can’t physically step back further
- Macro lens — focuses at extreme close range for flowers, insects, food detail
- Anamorphic lens — creates a cinematic widescreen look with horizontal lens flare for video
Universal clip-on lenses (brands like Moment and Olloclip) attach to almost any phone. However, alignment matters — a clip that sits even slightly off-center causes noticeable distortion at the edges. Moment’s system uses a dedicated phone case with a bayonet mount (similar to how a DSLR lens attaches to a camera body) for much more precise alignment.
For mounting your phone to a tripod, a universal phone clamp adapter costs under $15 and converts any standard tripod into a phone tripod. This is one of the highest-value, lowest-cost photography accessories on the entire list.
Gimbals, Mini Tripods, and Stabilizers
Handheld phone video suffers from a specific problem: high-frequency shake from walking, breathing, and hand tremors. Software stabilization (OIS — optical image stabilization, a system that physically shifts the camera sensor to counteract movement) helps, but it crops your frame and introduces a slight “jello” effect on fast pans.
A 3-axis gimbal (a motorized stabilizer that uses gyroscopes to keep your phone level regardless of your movements) eliminates this entirely. DJI OM series and Zhiyun Smooth series are the two most-recommended brands in beginner communities. A gimbal costs $80–$130 and is the single biggest quality upgrade for anyone shooting video on their phone.
For static shots, a mini tabletop tripod (like the Joby GorillaPod Mobile) solves the “I need both hands free” problem for under $30. Its flexible legs wrap around poles, branches, and railings — useful for unconventional angles that a standard tripod can’t achieve.
Lighting and Audio for Mobile Creators
The two elements that most separate amateur-looking phone video from professional-looking content are lighting and audio — not camera quality.
For lighting, a compact LED panel like the SMALLRIG Vibe P108 Pro RGB works equally well with phones and dedicated cameras. Its RGB color modes let you match ambient light color (useful in mixed-lighting environments like cafes or offices) and its compact size means it fits in a jacket pocket. For phone-specific use, a magnetic ring light that attaches to your phone’s back is a lower-cost alternative, though with less control.
For audio, the built-in microphone on any smartphone picks up every ambient sound — wind, traffic, room echo — with equal enthusiasm. A compact lavalier mic (a small clip-on microphone that plugs into your phone’s USB-C or headphone jack) costs $20–$50 and dramatically improves voice clarity for interviews, vlogs, and tutorials. If you’re serious about video, audio is where your next dollar is better spent than on any camera upgrade.
Limitations and When to Look Elsewhere
No accessory list is perfect for everyone. Part of building a functional kit is knowing when not to buy something — or when a different approach serves you better.
Common Accessory Buying Mistakes to Avoid
Buying a UV filter “for protection” on a cheap lens. A $10 UV filter on a $300 kit lens adds an extra piece of glass in the optical path, which can reduce sharpness and increase flare. Modern lenses already have coating protection. A lens hood provides better physical protection without affecting image quality. If you want front-element protection, use the lens cap.
Buying a tripod that’s too light for your camera. A tripod rated for 3 lbs will wobble with a camera and lens combination that weighs 2.8 lbs — technically within spec, but any vibration (wind, footsteps) will register in your shots. Match the tripod’s rated load capacity to at least 1.5× your actual camera-plus-lens weight.
Buying the wrong memory card speed. A V90 card in a camera that only supports UHS-I speeds performs identically to a V30 card — you’ve paid a premium for speed your camera can’t use. Check your camera’s manual for maximum supported card speed before buying.
Buying too much too fast. Across beginner photography communities, the consistent feedback is: photographers who buy all their accessories at once end up with gear they never use. The Stage 1/2/3 framework in this guide exists precisely to prevent this.
When to Skip the Accessory and Upgrade Your Skills First
Some problems that look like gear problems are actually technique problems. Before buying:
- Blurry photos in good light → Learn to hold your camera properly and check your shutter speed before buying a tripod
- Underexposed indoor shots → Learn to adjust ISO (your camera’s light sensitivity setting) before buying a flash
- Flat-looking portraits → Learn to find window light before buying a reflector
The Digital Photography School guide to beginner equipment makes this point well: gear extends your capabilities, but it doesn’t replace the fundamentals. Spend your first month shooting in every available light condition before investing in lighting gear.
Accessories That Don’t Work for Everyone
Camera straps are deeply personal. The Peak Design Slide is universally praised in reviews — but photographers with smaller frames or shorter torsos often find it too long even at minimum adjustment. Try before you buy if possible, or buy from a retailer with easy returns.
CPL filters are useless in overcast conditions or when shooting away from the sun. They only work when the light source is at approximately 90 degrees to your lens direction. If you primarily shoot cloudy days or in indoor environments, a CPL filter won’t deliver the results you expect.
Continuous LED lights struggle outdoors in direct sunlight — their output is simply overwhelmed by ambient light. If you primarily shoot outdoors, a reflector gives you more practical control for less money.
Frequently Asked Questions
What photography accessories should a beginner buy first?
Start with five items that protect your gear and keep you shooting: a padded camera bag, an extra battery, a high-speed memory card (UHS-I V30 or faster), a lens hood, and a rocket blower. These five items address the most common ways a beginner loses a shoot or damages gear — and they cost under $75 combined. Add a tripod in your first month once you’ve identified what you actually photograph most.
How many extra batteries do I really need?
Two batteries is the practical minimum for most shooting situations. Most entry-level cameras are CIPA-rated for 300-500 shots per charge; a full day of active shooting, Live View use, and image review can drain one battery in 2-3 hours. Cold weather reduces lithium-ion battery capacity by up to 20%, making a spare even more critical in winter. For event or travel photography, three batteries covers nearly every scenario.
Do I need a UV filter to protect my lens?
No — a lens hood provides better physical protection without affecting image quality. A UV filter adds an extra piece of glass in the optical path, which can reduce sharpness and increase flare on cheaper filter glass. Modern lenses already have multi-coating protection. Keep your lens cap on when not shooting, use a lens hood for physical buffer protection, and save the filter budget for a CPL (circular polarizer), which delivers a real optical effect.
Are third-party camera batteries safe to use?
Yes, reputable third-party batteries are generally safe and offer excellent value for beginners. Brands like Wasabi Power and Powerextra provide reliable performance at a fraction of the OEM cost. However, avoid ultra-cheap, no-name batteries, as they can swell or fail to hold a charge. Always store them properly in a dedicated case and never charge them unattended overnight.
What size memory card is best for photography?
A 64GB or 128GB memory card is the sweet spot for most beginner photographers. This capacity holds thousands of high-resolution RAW photos or hours of 1080p video, ensuring you won’t run out of space during a typical day of shooting. It is often better to carry two 64GB cards rather than one massive 256GB card. This strategy protects your work if one card fails or gets lost in the field.
Prices and product availability verified as of July 2026. Always confirm current pricing before purchasing.
The Workflow-First Kit: A Final Word
For overwhelmed beginners, the most highly recommended photography accessories aren’t the most expensive ones or the most popular ones — they’re the ones that solve real problems in your specific shooting workflow. A bag, a tripod, a spare battery, a fast card reader, and a basic cleaning kit solve 90% of the problems that ruin beginner shoots. Everything else is a deliberate upgrade once you know what you photograph.
The Workflow-First Kit framework — organize every purchase around the problem it solves, not the product category it belongs to — is the mental model that separates photographers who build functional kits from those who accumulate gear they never use.
Start with Stage 1. Shoot for a month. Then look at what frustrated you most — that’s your Stage 2 purchase. The best photography accessories are the ones you actually reach for on every shoot. Build your kit around that principle and you’ll never waste money on gear again.
Last update on 2026-07-06 / Affiliate links / Images from Amazon Product Advertising API
