
Table of Contents
- Key Takeaways
- Introduction to the Rule of Thirds
- Why the Rule of Thirds Works Visually and Psychologically
- Common Misconceptions and Mistakes with the Rule of Thirds
- Comparing the Rule of Thirds With Other Composition Techniques
- How to Apply the Rule of Thirds Practically in Photography
- When and Why to Break the Rule of Thirds
- Summary and Practical Takeaways on the Rule of Thirds
- Explore More Photography Tips and Guides
- Frequently Asked Questions
- Recommended
This blog post may contain affiliate links. As an Amazon Associate I earn from qualifying purchases.
Many amateur photographers treat the rule of thirds like a rigid law, but about 40% misuse it by applying it too strictly, creating formulaic shots. The rule of thirds is actually a flexible compositional guideline that helps you create balanced, eye-catching images when you understand both how to use it and when to break it. This guide will walk you through the mechanics, psychology, practical application, and creative exceptions that transform good photos into great ones.


Key Takeaways
| Point | Details |
|---|---|
| The rule of thirds uses a 3×3 grid to place subjects on lines or intersections for visual balance. | Position key elements along grid lines rather than dead center for more dynamic composition. |
| Viewer engagement increases up to 30% with thirds-based composition compared to centered subjects. | Our eyes naturally gravitate to intersection points, creating stronger visual interest. |
| The rule is a flexible guideline, not a strict requirement for every shot. | Breaking the rule intentionally for symmetry, abstract work, or creative impact often produces superior results. |
| Combining the rule with other techniques like leading lines boosts impact by 50%. | Layering compositional methods creates sophisticated, professional-looking photographs. |
| Camera grid overlays improve framing accuracy by 25% for novices. | Enable your camera’s grid feature to train your eye and compose more confidently in real time. |
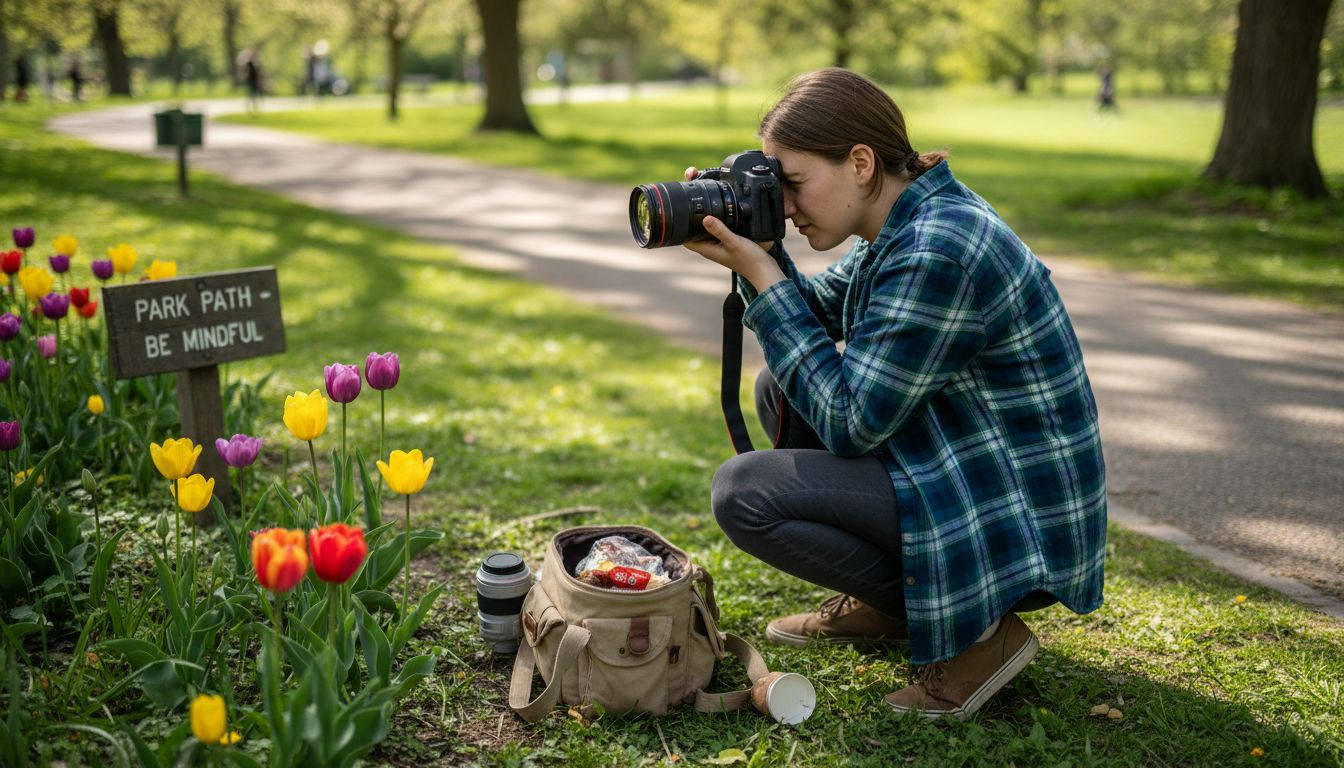
Introduction to the Rule of Thirds
The rule of thirds divides an image into a 3×3 grid by placing two equally spaced horizontal lines and two equally spaced vertical lines across your frame. These lines create four intersection points where your eye naturally lands first. When you position important subjects, horizons, or focal points along these lines or at these intersections, you create compositions that feel balanced yet dynamic.
Think of the grid as invisible scaffolding. The vertical lines work perfectly for placing trees, people, or architectural elements. The horizontal lines excel at positioning horizons in landscapes or dividing foreground from background. The four intersection points serve as powerful anchor spots for eyes, faces, flowers, or any subject demanding immediate attention.
Most modern cameras and smartphones include a rule of thirds grid overlay you can enable in settings. This feature transforms abstract theory into practical shooting guidance. Here’s what the grid helps you accomplish:
- Position horizons on the top or bottom third line rather than cutting the frame in half
- Place portrait subjects’ eyes near the top intersection points for natural, engaging compositions
- Align vertical elements like poles or trees along the left or right third lines
- Create breathing room by positioning subjects off-center with space to “look into”
- Balance multiple subjects by distributing them across different intersection points
The beauty of this system is its simplicity. You don’t need to measure or calculate. Just visualize or display those lines, then compose accordingly. With practice, the grid becomes intuitive, guiding your framing decisions before you even raise the camera.
Why the Rule of Thirds Works Visually and Psychologically
Human visual perception naturally favors asymmetrical balance over rigid symmetry. Studies in visual psychology demonstrate that placing subjects on the thirds grid increases viewer engagement by up to 30% compared to centered composition. Your brain processes these off-center arrangements as more interesting because they create subtle tension that keeps your eyes moving through the frame.
When you center a subject, the composition feels static. Your eye lands on the middle, stops, and has nowhere else to explore. Off-center placement creates a visual journey. Your eye hits the subject first, then travels through the negative space, exploring relationships between elements. This movement generates the engagement that separates memorable photos from forgettable snapshots.
“The thirds grid taps into centuries of artistic composition wisdom. Renaissance painters discovered these proportions created pleasing balance long before cameras existed. Modern eye-tracking research confirms what artists knew intuitively: our gaze follows predictable patterns, and smart composition leverages these patterns.”
The psychology behind the rule of thirds connects to how we process visual information:
- Our peripheral vision naturally scans images in Z or F patterns, hitting thirds intersections first
- Off-center subjects create visual weight that balances with negative space
- Asymmetry suggests motion, narrative, and context rather than isolated stillness
- The golden ratio (approximately 1.618) closely relates to thirds proportions, creating inherently pleasing divisions
- Negative space around subjects provides context and breathing room that centered compositions lack
This isn’t about arbitrary rules. It reflects genuine human perception patterns that photographers can harness. When you align your compositions with how people naturally see and process images, you create photos that feel right even when viewers can’t articulate why.
Common Misconceptions and Mistakes with the Rule of Thirds
The biggest mistake amateur photographers make is treating guidelines as gospel. About 40% of amateurs misuse the rule by applying it too rigidly, forcing every subject onto grid lines regardless of context. This mechanical approach produces technically correct but creatively bland photographs. The rule exists to help you, not constrain you.
Many beginners also believe centering is always wrong. That’s nonsense. Centered composition works beautifully for symmetrical subjects, reflections, architectural shots, and minimalist work. A perfectly centered sunflower against a clean background or a reflected mountain in still water often demands center placement. The key is intentionality. Choose centering deliberately for effect, not accidentally out of habit.
Another common pitfall involves misunderstanding what elements to align. You don’t need to cram everything onto grid lines. The rule applies to your primary subject or dominant visual elements. Secondary details can and should fall wherever composition demands. Trying to align every element creates cluttered, overthought images.
Here are the most frequent rule of thirds common mistakes to avoid:
- Forcing subjects onto grid lines when the scene calls for different placement
- Ignoring foreground and background elements while obsessing over main subject position
- Applying the rule to macro and abstract photography where it often doesn’t apply
- Never experimenting with center composition or alternative arrangements
- Forgetting that cropping in post-production can adjust thirds alignment
- Assuming the rule works equally well for all photographic genres
Pro Tip: Shoot the same scene multiple ways. Capture one frame with strict thirds alignment, another centered, and a third with the subject in an unusual position. Review them later to train your eye for what actually works versus what the rule suggests should work.
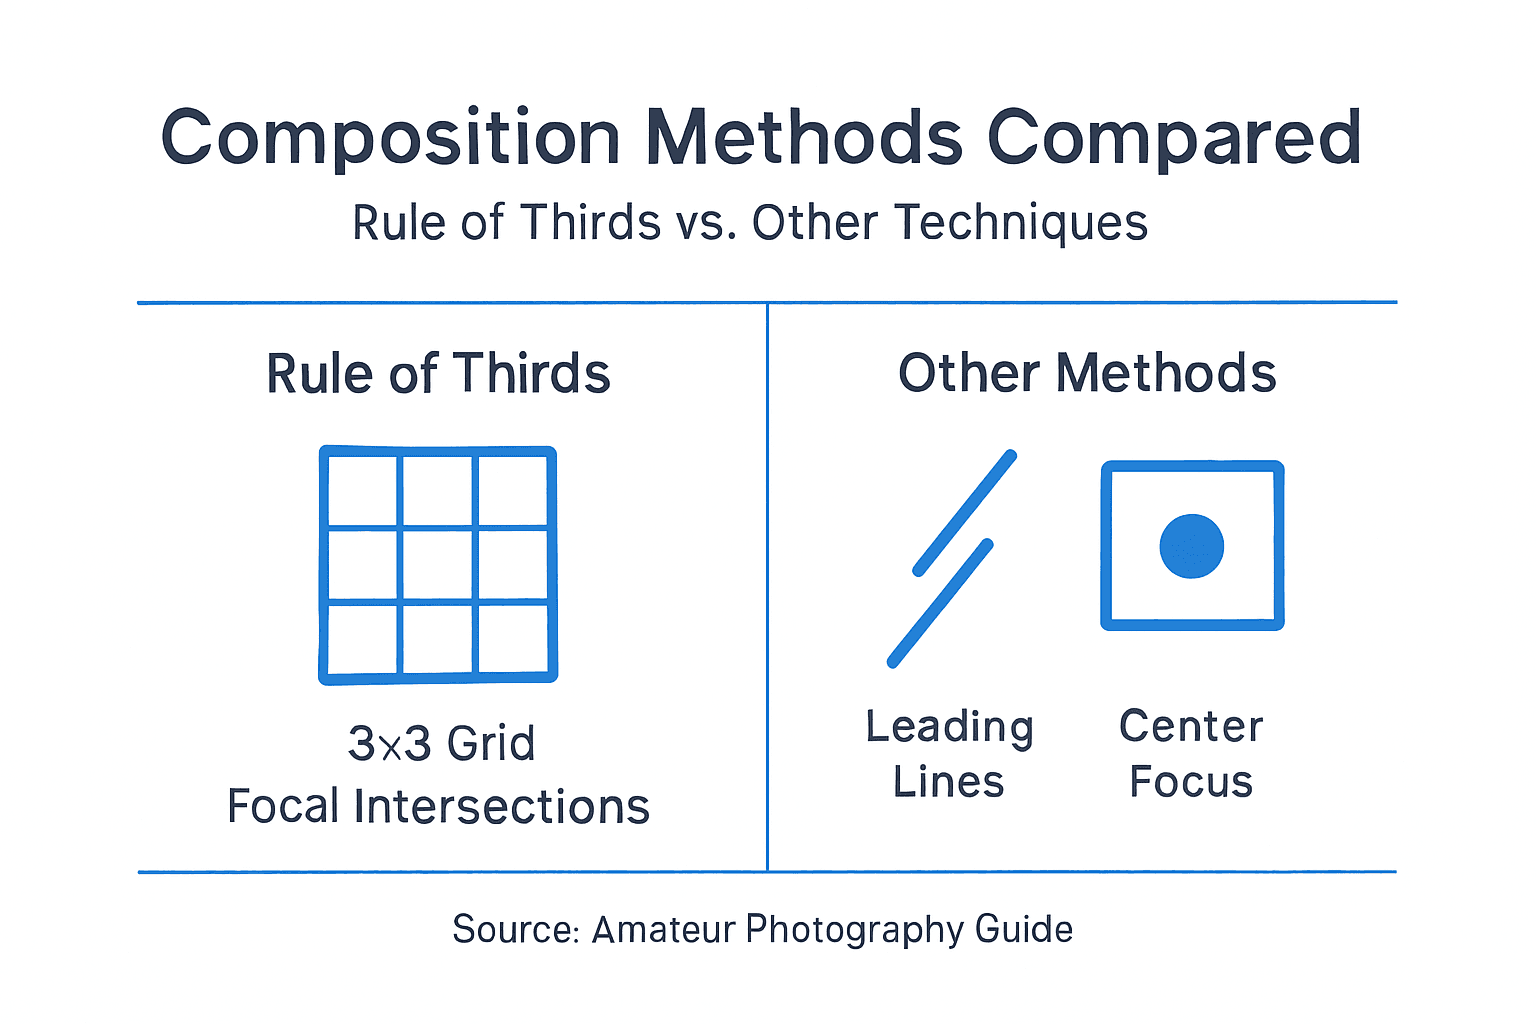
Comparing the Rule of Thirds With Other Composition Techniques
The rule of thirds is one tool in a larger compositional toolkit. Combining the rule of thirds with other composition techniques can improve image impact by 50%, creating layered visual interest that single methods can’t achieve. Understanding when to use each technique and how they complement each other elevates your photography significantly.
| Technique | Best For | Limitations | Combines Well With |
|---|---|---|---|
| Rule of Thirds | General scenes, portraits, landscapes | Can feel formulaic if overused | Leading lines, framing |
| Leading Lines | Drawing eye to subject, creating depth | Requires clear linear elements | Rule of thirds, symmetry |
| Symmetry | Architecture, reflections, patterns | Can feel static without focal point | Centered subjects, minimalism |
| Framing | Isolating subjects, adding context | Needs natural frame elements | Rule of thirds, depth |
| Negative Space | Minimalism, emphasizing isolation | Requires strong single subject | Rule of thirds, simplicity |
Each method serves specific purposes. Leading lines guide viewers through your image toward a focal point. When you position that focal point on a thirds intersection while using a path or river as a leading line, you create sophisticated composition that leverages multiple principles. Framing uses environmental elements like windows, archways, or branches to create a frame within your frame, adding depth and context.
Symmetry works when you want to emphasize order, calm, or architectural precision. A perfectly centered reflection often beats an off-center one. The rule of thirds might guide where you position the horizon line in that reflection, but the main subject stays centered. This combination respects both techniques without forcing incompatible applications.
Key situations where combining compositional techniques creates powerful results:
- Use leading lines to guide eyes toward a subject positioned on a thirds intersection
- Apply negative space on one side while positioning your subject on the opposite third line
- Frame your subject naturally while aligning the frame opening with grid lines
- Balance symmetrical elements across the center while using thirds for foreground/background division
Pro Tip: Start with one technique until it feels natural, then layer in a second. Trying to apply multiple compositional rules simultaneously while learning creates paralysis. Master thirds first, then experiment with adding leading lines or framing to your thirds-based compositions.
How to Apply the Rule of Thirds Practically in Photography
Using camera grid overlays improves framing accuracy by 25% among novices, transforming theoretical knowledge into practical skill. Here’s your step-by-step process for implementing the rule effectively every time you shoot:
- Enable your camera or smartphone’s grid overlay in the settings menu (usually under display or composition options).
- Before raising the camera, identify your main subject and decide which intersection point or line makes most sense.
- Position your subject so key elements align with grid lines or intersections (eyes on top intersections for portraits, horizon on top or bottom line for landscapes).
- Check the entire frame for balance, ensuring negative space and secondary elements support rather than fight your composition.
- Take the shot, then review the image to see if the thirds alignment creates the impact you intended.
- Adjust and reshoot if needed, experimenting with different grid positions to find what works best.
Practical framing considerations make the difference between mechanical rule-following and thoughtful composition:
- Leave space in the direction your subject faces or moves (a person looking right should be on the left third)
- Position horizons on the top line when emphasizing foreground, bottom line when showcasing sky
- Align vertical subjects like trees or buildings with vertical grid lines for natural stability
- Use intersections for small, distinct subjects like flowers, eyes, or architectural details
- Consider the entire visual weight distribution, not just where the main subject lands
Your camera’s grid is a learning tool, not a permanent crutch. Initially, you’ll compose by consciously aligning elements with visible lines. After a few hundred shots, the grid internalizes. You’ll start seeing thirds divisions naturally, even without the overlay. This is when the rule truly becomes useful, guiding your eye without constraining creativity.
Pro Tip: Practice by reviewing your existing photos and mentally overlaying the thirds grid. Notice which successful shots already follow the rule naturally and which compelling images intentionally break it. This retrospective analysis trains your compositional instincts faster than any amount of theory.
When and Why to Break the Rule of Thirds
Rigid adherence to any compositional guideline kills creativity. The best photographers know exactly when breaking the rule of thirds effectively produces superior results. Once you understand the rule thoroughly, intelligent violations become powerful artistic choices rather than accidents.
Centered composition works brilliantly for subjects with inherent symmetry. Butterflies, flowers shot from directly above, architectural facades, and reflected scenes often demand center placement. The symmetry itself becomes the compositional strength, and forcing these subjects off-center creates awkward imbalance rather than dynamic tension.
Abstract and macro photography frequently ignore thirds placement entirely. When you’re filling the frame with texture, pattern, or extreme closeups, traditional compositional rules matter less than color relationships, contrast, and shape. A macro shot of water droplets or rust patterns might look best with the most interesting element dead center or in an unusual position that emphasizes the abstract quality.
Situations where breaking the rule creates stronger images:
- Symmetrical subjects like reflections, butterflies, or centered pathways that emphasize balance
- Extreme closeups where the subject fills most of the frame anyway
- Minimalist compositions relying on negative space and a single centered element
- Creative portraits where unusual framing serves conceptual purposes
- Panoramic crops where traditional thirds divisions don’t translate effectively
- Action shots where subject position matters less than captured motion and energy
Pro Tip: Break the rule deliberately with clear artistic intent, not accidentally out of laziness. Before centering a subject or using unusual placement, ask yourself why that choice serves the image better than thirds alignment. If you can articulate the reason, you’re making a creative decision. If you can’t, you might just be ignoring good composition.
The goal is photographic fluency, not rule memorization. Master the rule of thirds until it becomes second nature, then develop the judgment to know when other approaches work better. This flexibility separates competent photographers from exceptional ones.
Summary and Practical Takeaways on the Rule of Thirds
The rule of thirds is your foundation for thoughtful composition, not a restriction on creativity. It works because human visual perception naturally gravitates toward asymmetrical balance, creating engagement and visual interest that centered compositions often lack. By positioning key elements along grid lines or intersections, you tap into these perceptual preferences.
Remember that this guideline flexes with context. Apply it to most general scenes, portraits, and landscapes for immediate composition improvement. Break it deliberately for symmetrical subjects, abstract work, or when artistic vision demands different placement. The difference between amateur and advanced photography lies in knowing when to follow guidelines and when to trust your creative judgment.
Your practical checklist for effective rule of thirds photography:
- Enable and use grid overlays until thirds composition feels automatic
- Position horizons on top or bottom third lines based on whether you’re emphasizing foreground or sky
- Place portrait subjects’ eyes near top intersection points for natural, engaging framing
- Leave negative space in the direction subjects face or move
- Combine thirds alignment with leading lines, framing, or other techniques for sophisticated compositions
- Shoot multiple versions with different alignments, then compare results to train your eye
- Break the rule intentionally for symmetry, abstracts, or creative effect, not accidentally
Practice transforms theory into instinct. The more you shoot with conscious attention to thirds placement, the faster these decisions become automatic, freeing your creative energy for other aspects of photography.
Explore More Photography Tips and Guides
You’ve learned how the rule of thirds creates more engaging compositions. Ready to fix other common photography challenges? Our beginner’s photography guide addresses frequent camera mistakes that undermine even well-composed shots, from exposure issues to focus problems.

Building strong photography habits matters as much as technical knowledge. Small daily practices compound into significant skill improvements over time. Check out our essential beginner tips for practical advice that elevates your photography immediately, covering everything from lighting awareness to shooting discipline.
Frequently Asked Questions
What is the rule of thirds in design?
The rule of thirds divides any visual composition into a 3×3 grid using two horizontal and two vertical lines. Designers and photographers place important elements along these lines or at their four intersection points to create balanced, visually interesting work. This principle applies equally to photography, graphic design, web layouts, and other visual media.
Should I always follow the rule of thirds in photography?
No, the rule of thirds is a guideline, not a requirement. Follow it for most general photography to create balanced compositions, but break it deliberately for symmetrical subjects, minimalist work, abstract photography, or when your creative vision demands different placement. Knowing when to violate the rule is as important as understanding it.
How do I enable the rule of thirds grid on my camera?
Most cameras and smartphones include a grid overlay in the settings menu. For DSLRs and mirrorless cameras, check the display or shooting settings menu for “grid display” or “composition guides.” On smartphones, look in the camera app settings for “grid” or “grid lines.” Enable it to see the overlay while composing shots.
Can I fix rule of thirds composition in post-processing?
Yes, cropping during editing lets you adjust composition to align with the rule of thirds even if you didn’t frame perfectly while shooting. Most editing software includes grid overlays or crop guides specifically for thirds alignment. However, heavy cropping reduces resolution, so composing correctly in-camera remains ideal whenever possible.
Does the rule of thirds work for vertical photos?
Absolutely. The rule of thirds applies identically to vertical, horizontal, and square formats. The 3×3 grid simply rotates with your frame orientation. For vertical portraits, position eyes near the top intersection points and leave space above the head along the top third line for balanced, professional-looking results.
Recommended
- The Rule Of Thirds Explained: A Photographer’s Ultimate Guide
- Rule of Thirds Explained: Composition for Photographers
- Golden Ratio in Photography: Composition That Captivates
- How to Improve Photo Composition for Stunning Images
Last update on 2026-07-07 / Affiliate links / Images from Amazon Product Advertising API
