
Table of Contents
- The Exposure Triangle: Your Camera’s Foundation
- 5 Beginner Mistakes & How to Fix Them
- Composition Techniques That Transform Your Photos
- Mastering Natural Light in the Field
- Essential Gear for Nature Photography in 2026
- Getting Started with Wildlife Photography
- Common Pitfalls and When the Rules Don’t Apply
- Frequently Asked Questions
- What You’ve Learned — And What to Do Next
This blog post may contain affiliate links. As an Amazon Associate I earn from qualifying purchases.
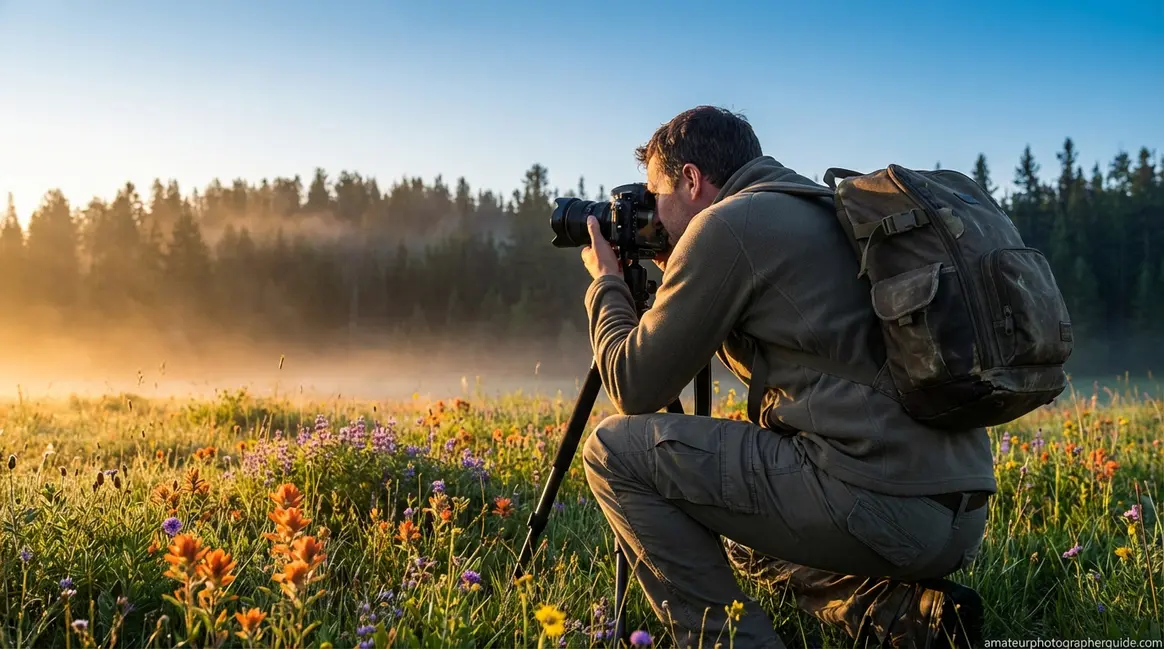
You press the shutter, excited by the scene in front of you—a heron lifting off the water, a meadow lit by morning sun. But the preview screen shows a blurry, flat image, nothing like what you saw. That gap between vision and reality is the most common frustration in photography.
Most online guides recycle the same vague advice, but this guide provides a logical sequence. You can go out with your camera a dozen times and come home with nothing, simply because no one showed you what to practice first.
Here, you’ll learn which settings to adjust, which composition rules matter, and how to choose the right gear without overspending. We’ll cover the exposure triangle, five common mistakes, composition, lighting, budget gear for 2026, and wildlife ethics—in an order that builds skill upon skill.
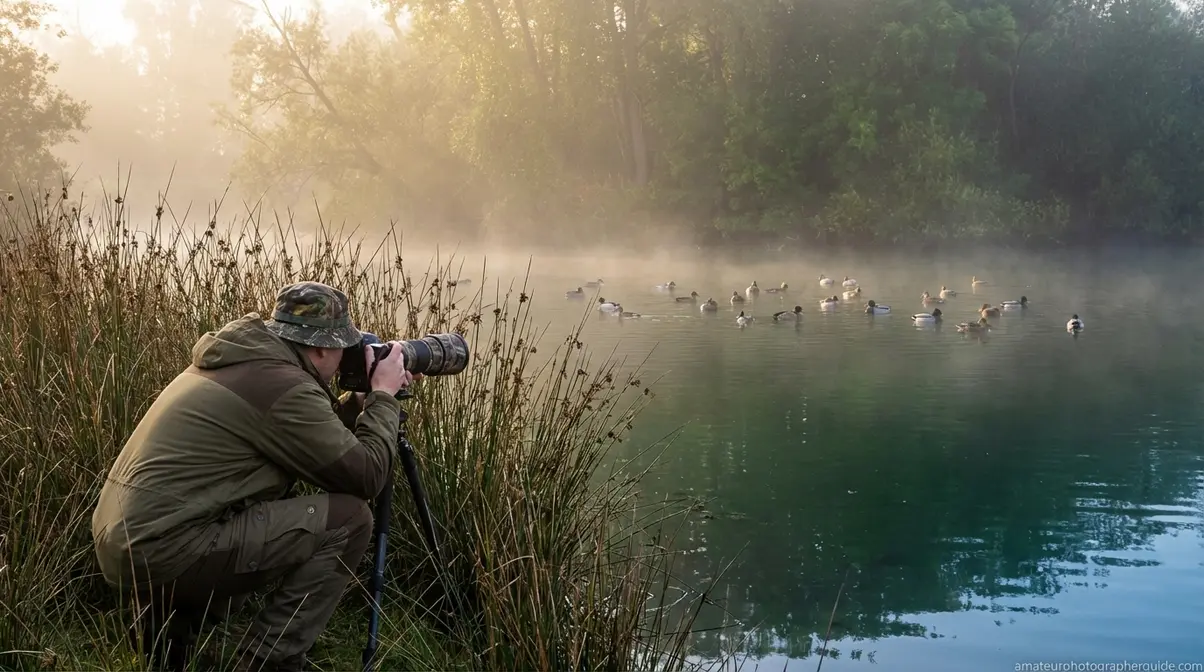
Great nature photography tips for beginners start with one insight: light and composition matter more than camera price. Using The First-Shot Framework — master light first, then composition, then settings — beginners can capture compelling shots with any camera.
- Shoot during golden hour (sunrise/sunset) for soft, dramatic natural light
- Use a tripod to eliminate camera shake — the single biggest sharpness killer for beginners
- Start with the rule of thirds, then layer in leading lines and framing
- Under $750, a used DSLR with a kit lens outperforms most new compact cameras
- Wildlife ethics come first: never disturb an animal for a shot
The Exposure Triangle: Your Camera’s Foundation
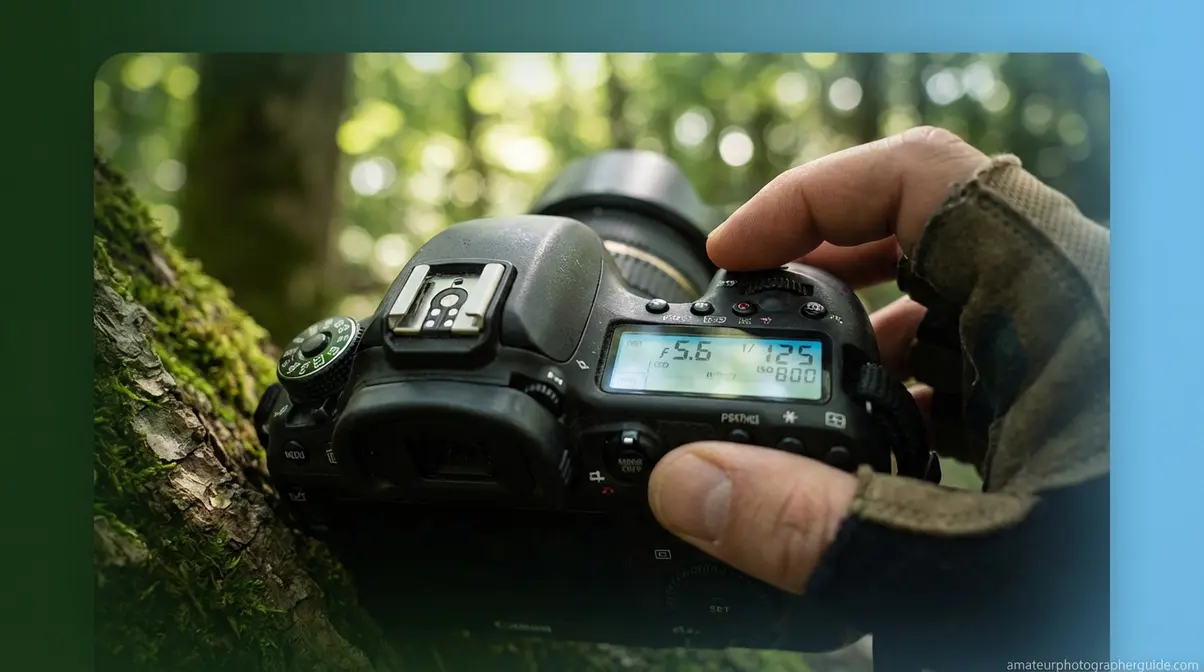
The exposure triangle consists of three camera controls—aperture, shutter speed, and ISO—that together determine how much light reaches your sensor. B&H Photo Explora explains that these elements regulate the light that creates a photograph. When you change one, you must compensate with another. This constraint is the most important concept to understand before heading into the field. Think of it as your cheat sheet for photography for beginners; every tip in this guide connects back to it.
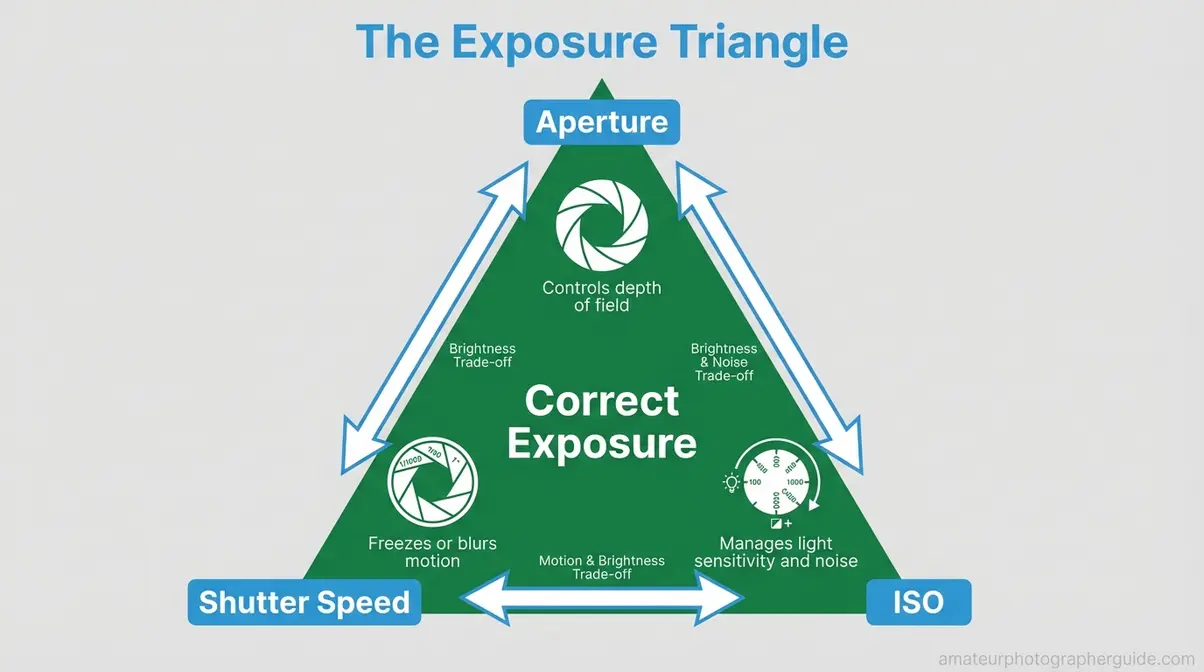
Caption: The exposure triangle — aperture, shutter speed, and ISO — governs every camera setting decision you’ll make in the field.
The Exposure Triangle & Why It’s First
Instead of memorizing a long list of settings, the exposure triangle teaches a system of trade-offs. To freeze a bird in flight, you must increase shutter speed, which means you must compensate by using a wider aperture or higher ISO to maintain the correct exposure. This is why “The First-Shot Framework” puts settings third, not first. You need to know what result you’re chasing—the right light, a strong composition—before you know which setting to reach for.
Aperture: Controlling Depth and Blur
Aperture is the size of the lens opening, expressed as an f-stop. A wide aperture (a low f-number like f/1.8) creates a shallow depth of field, making the background soft and blurry. A narrow aperture (a high f-number like f/16) keeps the entire scene sharp.
For landscapes, f/8 to f/11 is a reliable starting point. For wildlife portraits, f/5.6 or f/6.3 isolates the subject beautifully. For example, a heron shot at f/6.3 turns the background reeds into a smooth green wash, making the bird pop from the frame. Be aware that very wide apertures like f/1.8 create a very thin plane of focus, which is risky for moving animals.
Shutter Speed: Freezing or Flowing Motion
Shutter speed controls how long the sensor is exposed to light. A fast shutter speed (1/1000s or faster) freezes motion, which is critical for birds in flight. A slow shutter speed (1/4s or slower) creates deliberate motion blur, often used for silky waterfalls.
For wildlife photography beginners, a useful rule is that your minimum handheld speed should be 1/focal length. With a 200mm lens, you need at least 1/200s to avoid camera shake.
| Scenario | Recommended Shutter Speed |
|---|---|
| Bird of prey diving | 1/2000s or faster |
| Deer walking through brush | 1/500s–1/1000s |
| Waterfall (on tripod) | 1/4s–2s |
| Static landscape (on tripod) | Any, use histogram |
According to Fstoppers, camera shake, insufficient shutter speed, and heat haze are the leading causes of blurry photos. This means most blur problems are solved with a settings adjustment, not a new camera.
ISO: Managing Light Sensitivity and Noise
ISO measures the sensor’s sensitivity to light. Higher ISO values (1600, 3200) let you shoot in dim light but can introduce “noise”—a grainy texture. Modern cameras handle high ISO far better than older models.
One of the most important nature photography tips for beginners is this: a sharp, slightly grainy image beats a smooth, blurry one every time. If your shutter speed is dropping too low for wildlife (e.g., below 1/250s), don’t be afraid to push the ISO to 1600 or higher. You can reduce noise in post-processing, but you can’t fix blur.
5 Beginner Mistakes & How to Fix Them
Camera shake and insufficient shutter speed are consistently identified by Fstoppers as leading causes of blurry nature photos—and the fix costs nothing: a tripod and a shutter speed adjustment. These five mistakes map directly to the First-Shot Framework, covering errors in Light, Composition, and Settings.
Before reading each fix, watch this companion video for a visual before-and-after of these common errors:
Mistake #1: Shooting in Harsh Midday Light
Midday sun creates harsh, overhead light, leading to deep shadows and washed-out colors. The solution is to shoot during golden hour. Adobe defines this as “the period shortly after sunrise or before sunset during which daylight is redder and softer.” Professionals build their schedules around it. A meadow shot at midday looks bleached and flat; the same meadow at golden hour has long amber shadows, rich texture, and warm color.
Fix: Arrive 20 minutes before golden hour begins to ensure you’re ready when the best light appears.
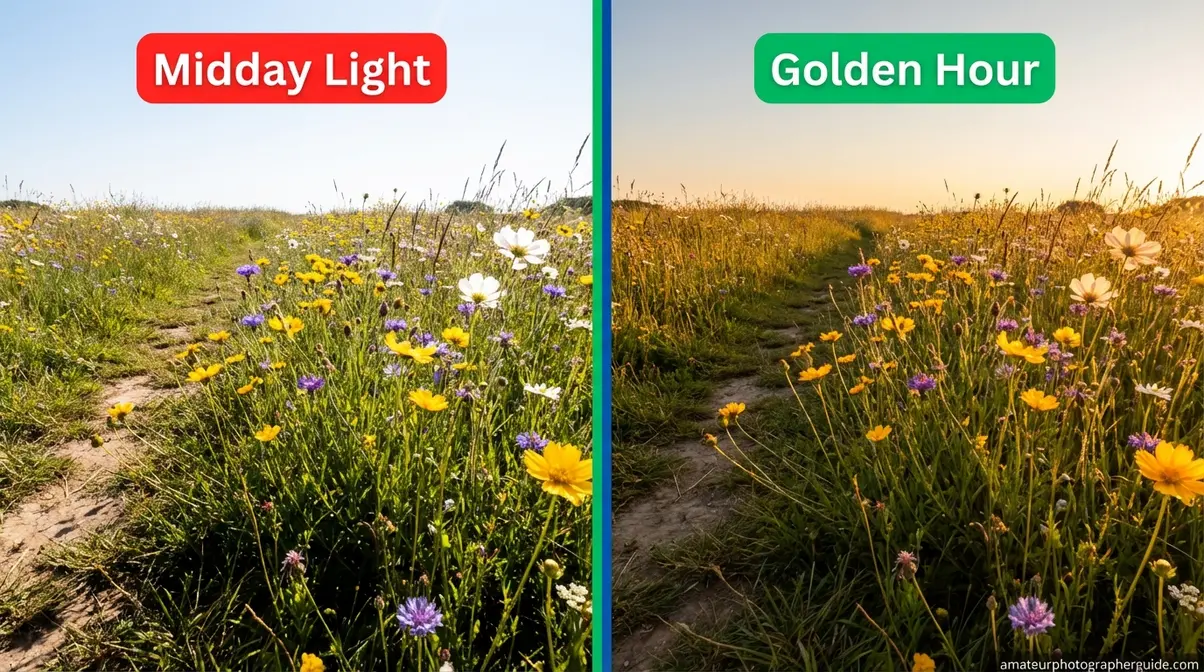
Caption: Same meadow, 6 hours apart — golden hour transforms flat midday light into warm, textured drama.
Mistake #2: A Cluttered, Distracting Background
Beginners often focus only on their subject, ignoring distracting background elements like a fence post or a stray branch. These details can ruin an otherwise great shot.
- Two fixes that take seconds:
- Shift your position. Moving a few feet left or right can completely change the background.
- Open your aperture (use a lower f-number) to blur the background into soft, indistinct shapes.
A fox in a field looks striking—until you see the fence post behind its head. Three feet to the right, and it’s gone.
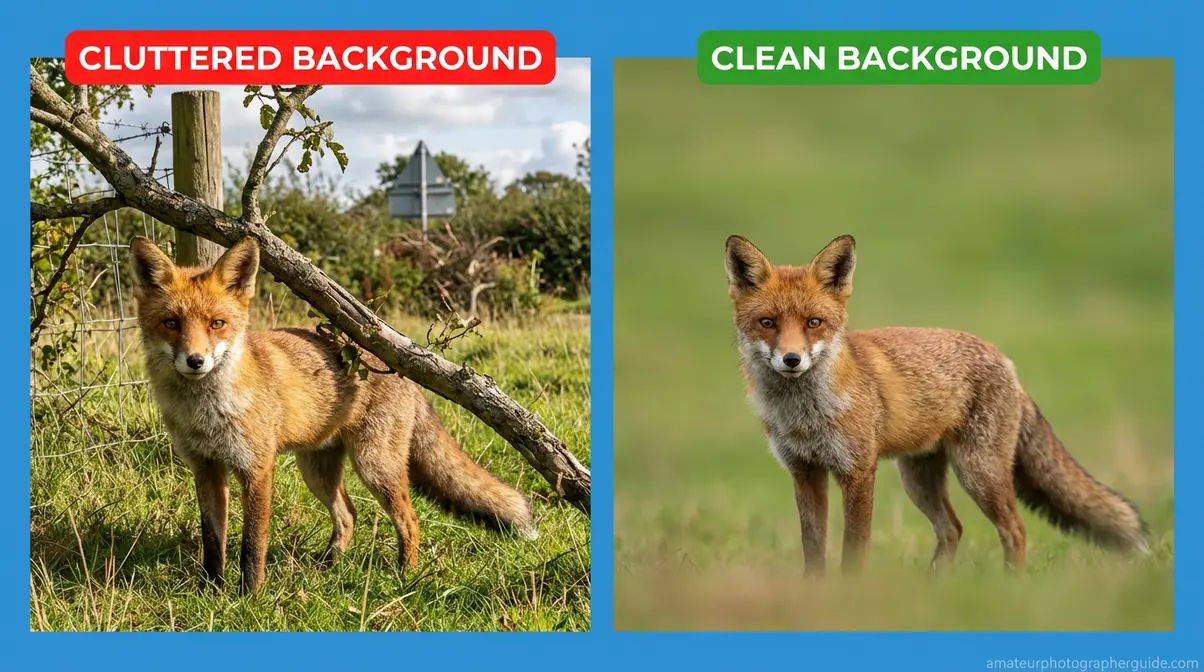
Caption: Three feet of repositioning eliminates the background distraction — no new gear required.
Mistake #3: Camera Shake and Motion Blur
Camera shake comes from your hand movement, smearing the entire frame. Motion blur comes from a subject moving faster than your shutter speed can freeze it.
Fix for camera shake: Use a tripod and enable the 2-second self-timer. This simple trick is one of the most effective nature photography tips for beginners, as the delay eliminates vibrations from pressing the shutter. A handheld shot at 1/60s might be a blurry mess, but the same shot on a tripod with the timer will be sharp.
Fix for motion blur: For wildlife, use a shutter speed of at least 1/1000s. Note that image stabilization (IS/VR) only corrects for camera shake, not subject motion.
Caption: Same shutter speed — 1/60s — produces blur handheld and a sharp image on a tripod with the 2-second timer.
Mistake #4: Ignoring the Foreground
Landscapes without a foreground element often look flat and lack a sense of scale. Adding a rock, a patch of wildflowers, or a log in the lower third of the frame creates three distinct layers: foreground, midground, and background.
Fix: Get low to the ground to exaggerate the foreground and create depth. A mountain vista shot from standing height looks like a snapshot. The same mountain photographed from behind a cluster of wildflowers at f/11 creates a layered scene with genuine scale.
Caption: Adding a foreground element transforms a flat snapshot into a three-dimensional scene.
Mistake #5: Shooting at Eye Level Every Time
Beginners default to shooting from a standing eye-level position, resulting in predictable and unremarkable photos.
- Three alternative angles to try:
- Ground level: Creates a “their world” perspective for small subjects like insects or birds.
- Slight crouch: Drops you to eye level with medium-sized animals, creating a more direct connection.
- Elevation: Using a rock or hill gives landscapes context and a sense of scale.
A common robin photographed from a standing height is uninteresting. The same robin from ground level looks monumental.
Composition Techniques That Transform Your Photos

When composition clicks, technical knowledge becomes creative control. For those seeking great nature photography tips for beginners, this is the key. PetaPixel, a leading photography publication, documents 28 distinct composition techniques, proving the rule of thirds is just a starting point. In the First-Shot Framework, after you learn to read light, you learn to guide a viewer’s eye through the frame.
Caption: Centered compositions signal confrontation; rule of thirds placement creates tension and visual breathing room.
Rule of Thirds: A Starting Point
The rule of thirds divides your frame into a 3×3 grid. The four intersection points are where the human eye naturally gravitates. Placing your subject on one of these “power points” instead of the dead center makes the composition feel more dynamic. The fastest way to build this habit is to enable the grid overlay in your camera’s display.
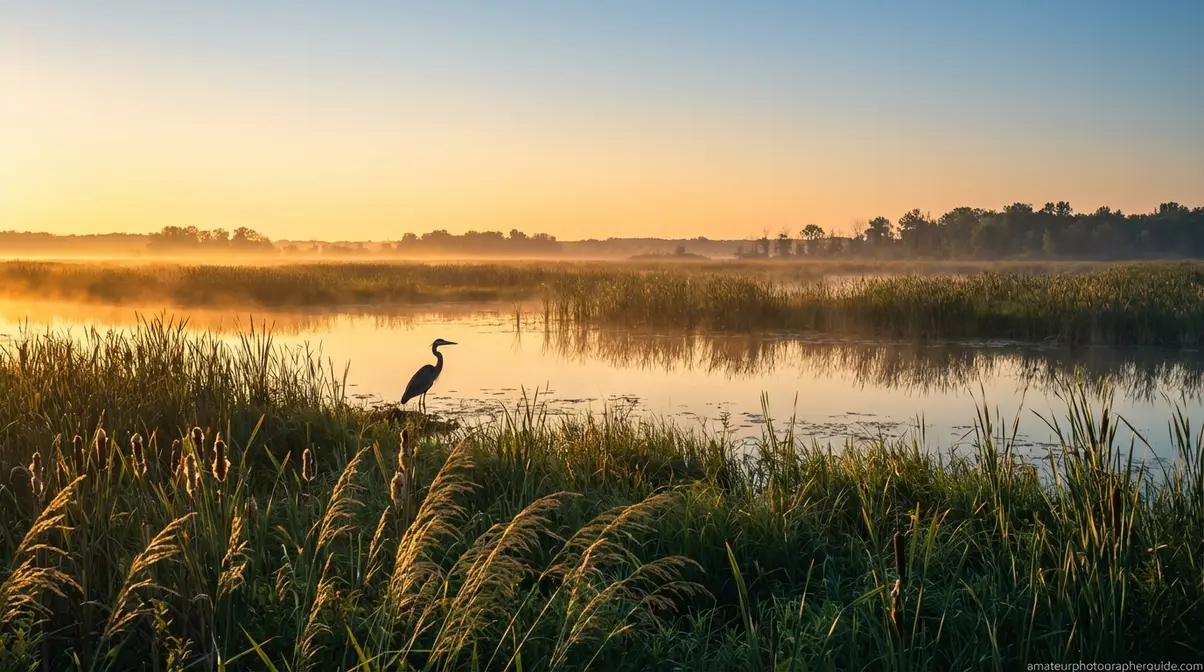
When to apply it: A heron placed on the left-third intersection, with open water filling the other two-thirds, implies motion and creates tension.
When to break it: Centered symmetry works brilliantly for reflections in a lake. Direct animal portraits can also be more powerful when centered, signaling confrontation.
Leading Lines, Framing, and More
Beyond the rule of thirds, three other techniques are invaluable for beginners:
- Leading lines are elements like rivers, paths, or branches that pull the viewer’s eye toward the subject. They are most effective when they enter from a corner of the frame.
- Frame within a frame uses natural elements like an arch of branches or a gap between boulders to surround the main subject, adding depth and context.
- Dynamic symmetry uses the golden ratio to create a subtly off-axis “sweet spot” for subject placement, which can make a composition feel mathematically balanced.
Color, Light Direction, and Juxtaposition
Color and light are powerful compositional tools. Warm-cool color contrast—like orange autumn leaves against a blue sky—creates emotional impact. Similarly, the direction of light defines texture. Side-lighting reveals every detail in tree bark or an animal’s fur in a way that flat, direct light cannot. A fox photographed with golden side-light shows every hair on its coat; under flat midday light, it looks like a soft toy. Mastering these elements is a key part of the First-Shot Framework.
Mastering Natural Light in the Field
These nature photography tips for beginners are immediately actionable and cost nothing but an earlier alarm. Mastering light means understanding when it’s beautiful and recognizing that overcast days or blue hour are also creative opportunities. Light is the first skill in the First-Shot Framework because it’s the one element you can only anticipate, not control. As Adobe notes, shooting during golden hour provides softer, warmer light and is the single highest-impact habit a beginner can adopt.
Golden Hour and Blue Hour: When to Shoot
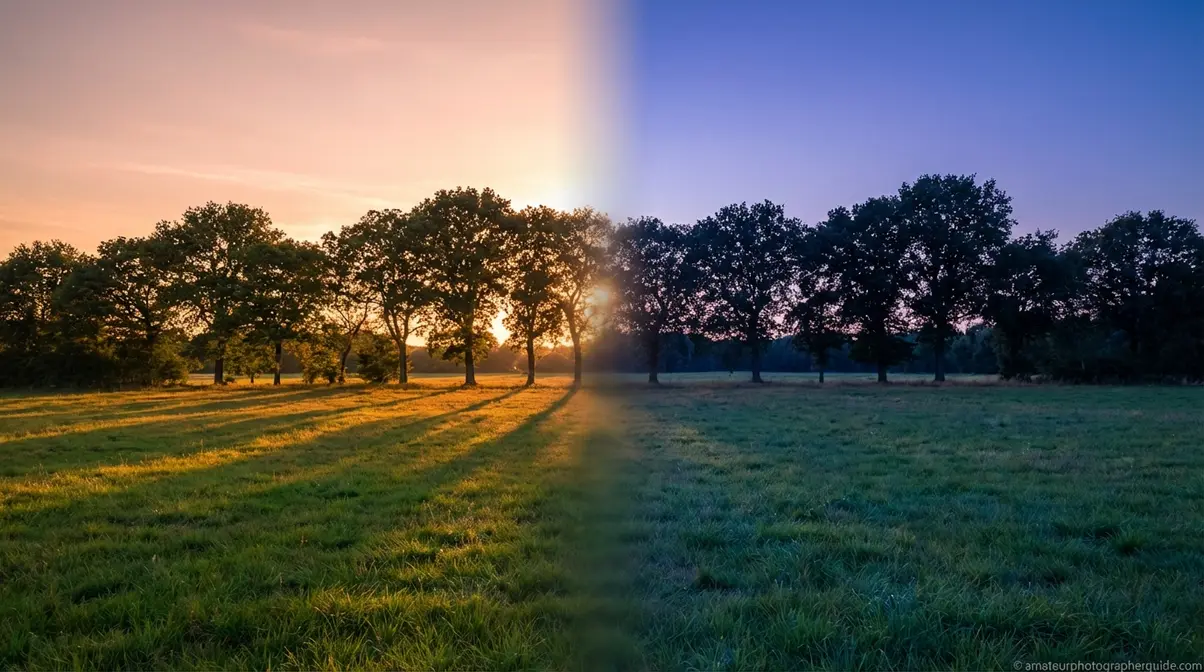
Golden hour occurs for about 30 to 60 minutes after sunrise and before sunset. The light is warm, low, and directional, creating long shadows that reveal texture. It changes fast, so arrive early.
Don’t pack up when the sun sets. Blue hour—the 20 to 30 minutes that follow—produces cool, even, blue-purple light that is often easier to shoot in. A field that glows amber during golden hour becomes a dramatic silhouette against an indigo sky during blue hour.
Overcast vs. Direct Sun: Which Is Better?
Overcast days are an asset, not a problem. Cloud cover acts as a giant natural diffuser, scattering sunlight to eliminate harsh shadows and create smooth, even illumination. This light is often preferable for close-up subjects like flowers and fungi, as well as woodland scenes. There are no blown-out highlights or deep black shadows to manage. Overcast light is also ideal for smartphone nature photography, as the even diffusion helps phone cameras avoid clipping highlights or underexposing shadows.
Reading the Histogram to Protect Your Shot
The histogram is a graph on your camera’s screen showing the distribution of light from pure black (left) to pure white (right). If the graph’s “mountain” stacks up against the right edge, you have “blown-out” highlights—details that are permanently lost. If it stacks against the left, you’ve lost shadow detail.
The goal is to keep the mountain away from both walls. In a bright, snowy scene, the histogram will be pushed to the right. Reduce your exposure until the graph pulls away from the edge to ensure you capture recoverable detail.
Caption: A histogram pushed against the right wall means blown highlights you can’t recover in editing — check it after every challenging exposure.
Essential Gear for Nature Photography in 2026

When beginners ask for nature photography tips, gear questions dominate. The right equipment removes technical barriers, but the biggest gear advantage in 2026 isn’t a new camera—it’s buying used.
A used DSLR from 2021 to 2023 with an interchangeable lens offers more quality per dollar than any new compact camera under $300. The sensor quality, manual controls, and lens flexibility are superior. The models below offer a concrete starting point (prices vary—verify on KEH Camera or MPB when purchasing).
Budget Tier 1: Under $750 — The Smart Starter Kit
The best starter kit includes a used DSLR or mirrorless body like the Canon EOS Rebel SL3, Nikon D3500, or Sony A6000. All offer full manual controls and interchangeable lenses. Used bodies typically cost $250 to $450. Add a used 18-55mm kit lens for around $70.
This leaves room in the budget for a tripod, which is more important than a lens upgrade at this stage. A solid aluminum tripod costs $60 to $80 and is essential for sharp landscapes and static wildlife shots.
Budget Tier 2: $750–$1,500 — Stepping Up Your Kit
To step up your wildlife photography kit, you need better autofocus and a telephoto lens. A mirrorless body like the Canon EOS R50 offers excellent subject-tracking AF. Used DSLRs like the Nikon D7500 are also strong alternatives with proven wildlife performance.
For lenses, a used 70-300mm telephoto zoom ($150–$300) provides the necessary reach for birds. For more serious wildlife photography, the Sigma 100-400mm f/5-6.3 (~$500–$700 used) is the most cost-efficient entry point.
| Camera / Lens | Approx. Price Range | Best For |
|---|---|---|
| Canon EOS R50 (body) | $600–$700 | Mirrorless AF tracking |
| Nikon D7500 (used) | $400–$600 | Wildlife, high ISO |
| 70-300mm telephoto (used) | $150–$300 | Birds, mid-distance wildlife |
| Sigma 100-400mm (used) | $500–$700 | Serious wildlife reach |
The One-Lens Rule: Start With the Kit Lens
Resist the urge to buy multiple specialty lenses right away. The One-Lens Rule is simple: master one lens completely before buying another. A standard kit lens (like an 18-55mm) forces you to solve compositional problems by moving your feet, not just zooming. This builds instincts that specialty lenses can undermine. Great gear doesn’t replace the First-Shot Framework, but it removes barriers to applying it.
Download our free printable gear checklist for your first nature photography outing — .
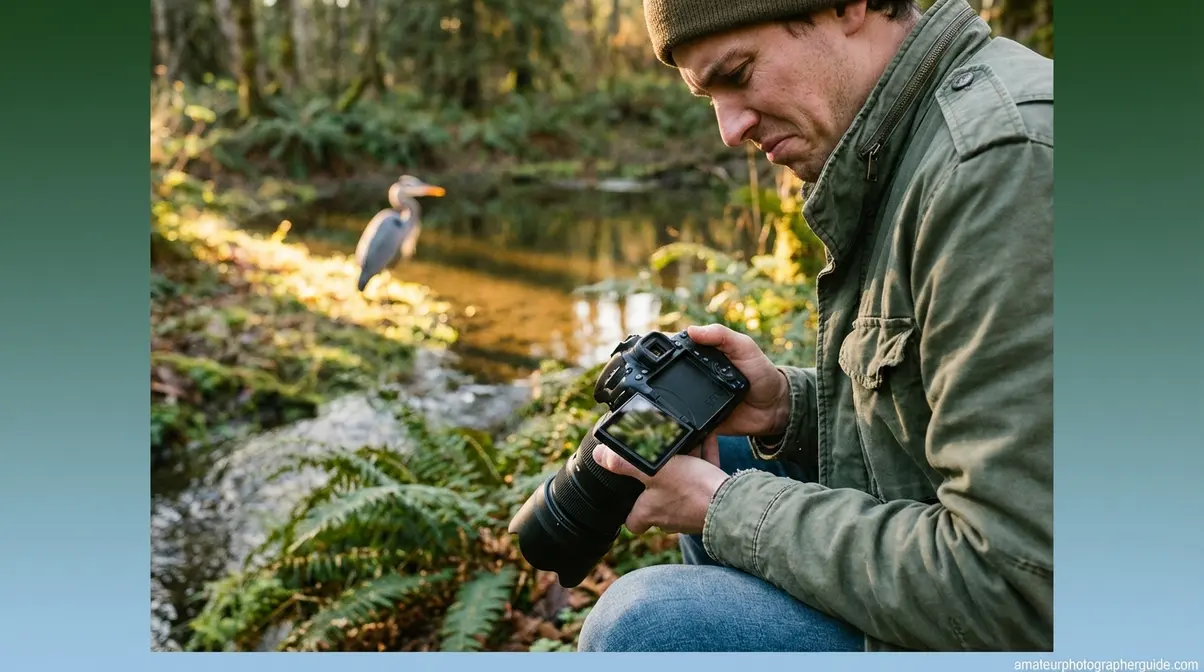
Getting Started with Wildlife Photography
Wildlife photography for beginners is where the First-Shot Framework is truly tested, as light, composition, and settings converge in a split-second moment. According to the ethical wildlife photography guidelines published by Utah State Parks, the core principle is “Nature comes first”—the animal’s well-being always takes priority over the shot. These wildlife photography tips for beginners are sequenced to help you succeed ethically.
Camera Settings for Moving Animals
Three settings are critical for sharp wildlife captures:
- Switch to Continuous AF mode (AI Servo on Canon, AF-C on Nikon/Sony). This mode continuously tracks a moving subject while the shutter is half-pressed.
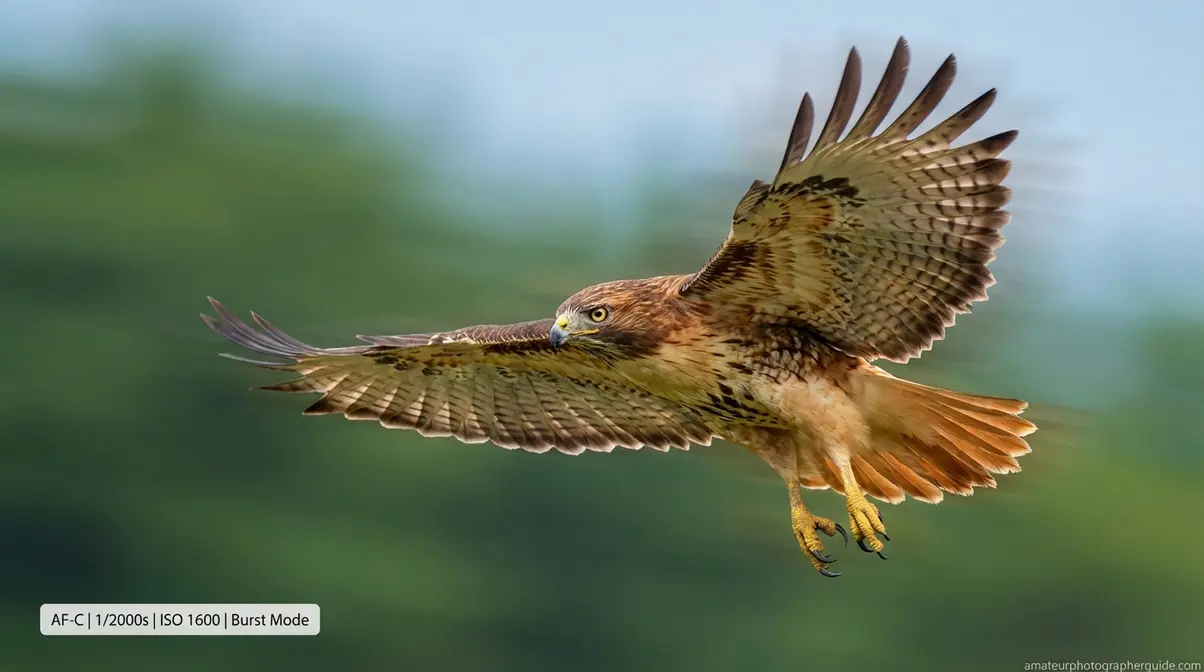
- Set shutter speed to at least 1/1000s for most wildlife, and 1/2000s or faster for birds in flight. Accept the resulting higher ISO; a sharp, noisy image is better than a smooth, blurry one.
- Enable Burst mode (Continuous shooting). Holding the shutter for a sequence of shots allows you to select the “peak moment” frame later.
How to Approach Wildlife Safely and Ethically
The ethical wildlife photography guidelines from Utah State Parks set a clear standard: stay at least 100 yards from predators (bears, wolves) and 25 yards from most other wildlife. If an animal changes its behavior because of you, you are too close. Back away slowly.
Never use food to attract wildlife or manipulate the environment (e.g., move nests, break branches) for a better shot. Baiting habituates animals to humans, which can be a death sentence for the animal. Follow the “Respect Wildlife” and “Leave What You Find” principles from the seven core principles of Leave No Trace.
“The most transformative tip for any aspiring wildlife photographer is simple: get outdoors with your camera in hand.”
Planning Your First Wildlife Photography Trip
A pre-trip checklist separates productive outings from wasted ones:
- Research species on iNaturalist or eBird to know what to look for and when animals are most active.
- Check sunrise/sunset times and set your alarm to arrive 45 minutes before golden hour begins.
- Charge both batteries and keep the spare warm in a pocket.
- Pack a spare memory card.
- Bring weather protection like a heavy-duty ziplock bag to cover your camera in light rain.
Common Pitfalls and When the Rules Don’t Apply
Three Traps for Beginners
1. Gear Before Skills: Don’t buy a new lens until you’ve truly mastered your current one. Spend at least 30 days with a single lens; you’ll find that many of its “limitations” are actually compositional problems you can solve by moving.
2. Golden Hour Fanaticism: Golden hour is ideal, but waiting for perfect conditions means missing practice. Overcast days and even harsh light have creative applications. Adapt to what’s available.
3. Rules as Laws: The rule of thirds is a tool, not a commandment. The goal is to understand principles well enough to break them with clear purpose, not by accident.
When to Seek a Workshop or Mentor
For wildlife photography, especially with large predators or in remote areas, a guided workshop offers immense value. Field skills like predator awareness and low-impact tracking can be learned much faster through direct mentorship than through solo practice.
Frequently Asked Questions
What are common nature photo mistakes?
Common nature photo mistakes include cluttered backgrounds, shooting in harsh midday light, and using a shutter speed that’s too slow to freeze motion. Another frequent error is camera shake from handholding the camera. Using a tripod, shooting during the golden hour, and paying attention to everything in the frame will fix most of these issues.
How to begin nature photography?
To begin nature photography, start with the camera you have and focus on light and composition instead of gear. Practice the rule of thirds and shoot during golden hour (just after sunrise or before sunset). A basic interchangeable-lens camera, a tripod, and consistent practice are all you need to create compelling images.
How do I get sharp nature photos?
To get sharp nature photos, use a sturdy tripod and your camera’s 2-second self-timer to eliminate camera shake. For landscapes, use a narrow aperture like f/11 for deep focus. For wildlife, use Continuous AF mode and a fast shutter speed (at least 1/1000s) to freeze motion. Use Live View to magnify and confirm focus.
What is the best first camera for nature photography?
The best first camera for nature photography is a used interchangeable-lens model (DSLR or mirrorless) with full manual controls. Options like the Canon EOS Rebel SL3, Nikon D3500, or Sony A6000 are excellent starting points. They offer great image quality and the flexibility to grow with you as you learn exposure.
What is the 20-60-20 rule in photography?
The 20-60-20 rule in photography is a color composition principle where an image’s palette is divided into three proportions: 60% dominant color (setting the mood), 20% secondary color (adding depth), and 20% accent color (a contrasting tone to draw the eye). Originating from interior design, it helps create visual harmony (PixelShouters, 2026).
What are the 5 C’s of photography?
The 5 C’s of photography usually refer to a framework from cinematography: Camera angles, Continuity, Cutting, Close-ups, and Composition, from Joseph V. Mascelli’s work on filmmaking. In still photography, some instructors use variations like Composition, Clarity, Colour, Creativity, and Continuity. No single definition is standard for still photos.
What is the f for in photography?
The f in photography refers to the f-stop, or aperture value. It describes the size of the lens opening. A low f-number (e.g., f/1.8) means a large opening, which lets in more light and creates a shallow depth of field with a blurry background. A high f-number (e.g., f/16) means a small opening, letting in less light for a greater depth of field.
What are the 7 basics of photography?
The 7 basics of photography are Aperture (depth of field), Shutter Speed (motion), ISO (light sensitivity), Composition (arrangement of elements), Light (quality and direction), Focus (subject sharpness), and Exposure (the balance of the first three). Mastering these seven foundations allows for intentional creative control in any situation.
What You’ve Learned — And What to Do Next
For beginners, the most important takeaway is that technique outweighs gear. Light awareness, intentional composition, and correct settings—the three layers of the First-Shot Framework—produce better images than any lens upgrade. The most effective habit change costs nothing: wake up earlier and be in the field at golden hour. This one decision will transform your images faster than any purchase.
The First-Shot Framework—Light → Composition → Settings—is a learning sequence. When a photo isn’t working, ask first if the light is right. If so, ask if the composition is intentional. This two-question diagnostic solves the majority of beginner issues.
Start with what you own. Set an alarm for 30 minutes before sunrise this week. Head to a nearby park and shoot with just one lens. Review your shots against the five mistakes in this guide, and you’ll know exactly what to work on next.
