What Is Fill Flash Photography? 4 Proven Steps to Mastery
Learn what fill flash is, key camera settings, types of fill flash, real-world uses, and common mistakes for better portrait photos.
Most photographers assume flash belongs indoors. The reality is that your flash is most powerful when you’re standing in full sunlight — because that’s exactly when your camera needs it most. Understanding what is fill flash photography changes how you read light outdoors, permanently.
What’s in this guide
- What Is Fill Flash Photography?
- When (and Why) to Use Fill Flash
- How to Use Fill Flash Outdoors: Step-by-Step
- Common Fill Flash Mistakes (and How to Fix Them)
- Frequently Asked Questions
- Limitations and Alternatives
- Your Fill Flash Questions, Answered
- Start Using Fill Flash on Your Next Outdoor Shoot
Without fill flash, bright outdoor light creates “raccoon eyes” — those dark, unflattering shadows under brow ridges and eye sockets. Backlit subjects turn into silhouettes, and overcast days flatten portraits into lifeless, grey images. Your histogram looks perfect, but your subject’s face tells a different story.
In this guide, you’ll learn exactly what fill flash photography is, identify the three scenarios where it transforms your shots, and set it up outdoors using a clear four-step process with specific camera settings. We’ll start with the definition, cover the key lighting problems it solves, then walk through the step-by-step technique — including how to avoid the unnatural “washed-out” flash look that beginners dread.
What Is Fill Flash Photography?
Fill flash photography is a technique that uses your camera’s flash as a secondary, supplementary light source in bright outdoor conditions — not to illuminate a dark scene, but to reduce the shadow contrast that strong ambient light creates on your subject. Where regular flash replaces existing light, fill flash works alongside it. The practical implication: you reach for fill flash when your background is beautifully exposed but your subject’s face is buried in shadow.
This distinction matters more than most beginner guides acknowledge. Fill flash is not about adding light to a dark scene — it’s about controlling the ratio between the bright areas and the shadow areas within a scene that already has plenty of light. You’re not rescuing a dark photo; you’re surgically removing specific shadows from an otherwise well-lit one.
Canon’s technical documentation frames it precisely: “The aim with fill-in flash is to give the sensor the correct exposure for the daylight, plus enough flash exposure to reveal detail in the subject’s shadows” (Canon’s fill-in flash definition). That framing — daylight exposure first, flash exposure second — is the mental model that separates photographers who use fill flash confidently from those who avoid it entirely.
Consider a concrete example. You’re photographing a friend at noon in a park. The sky is blue, the grass is green, and your exposure is dialed in perfectly for the scene. But when you check the back of your camera, your friend’s eyes are dark pits and the shadow under their nose makes them look exhausted. Your camera exposed correctly for the scene — it just couldn’t simultaneously expose for the bright background and the shadowed face. Fill flash solves this by adding a controlled burst of light targeted at the shadow areas, without overriding the natural ambient exposure.
This idea — which we call the Background-First Exposure Method — is the core principle behind every successful fill flash shot, and we’ll walk through it step by step in the how-to section below. Modern smartphones also include fill flash modes: most Android and iPhone camera apps allow you to lock the flash on in bright conditions, though the results are far less controllable than a dedicated speedlight. For anything beyond casual snapshots, a proper flash unit gives you the ratio control that matters.
Fill Flash vs. Regular Flash
The clearest way to understand fill flash is to contrast it directly with regular flash — because the two are almost opposites in how they’re used.
Regular flash is a primary light source. The scene would be underexposed or completely dark without it. Think of a wedding reception in a dimly lit ballroom at night: without flash, you’d have motion blur and noise at ISO 6400. The flash is doing all the heavy lifting, often firing at full or near-full power. The ambient light is a minor contributor.
Fill flash is a secondary light source. The scene is already bright — you’re adding flash to fix a specific shadow problem, not to illuminate the scene. Think of that same couple photographed outside at noon on their wedding day: the ambient light is already perfect for the background. You’re adding flash at -1 to -2 stops below the ambient exposure to open up the shadows on their faces.
The power level difference is significant. Fill flash is intentionally dialed down so it supplements rather than dominates. The mental shift is the key insight: with regular flash, you’re adding light to a dark scene; with fill flash, you’re subtracting shadow from a bright one. Think of it this way — regular flash is the main actor; fill flash is the supporting cast. Your subject’s natural light does the heavy lifting, and fill flash just removes the unflattering shadows that daylight creates.
Adobe’s flash photography guide notes that flash photography traditionally describes using a flash device in poor lighting conditions — fill flash inverts this entirely by deploying flash in bright conditions to solve a specific problem (Adobe, 2026). For a deeper dive into fill flash definitions and variations, see our guide on understanding the basics and types of fill flash.
The Three Main Types of Flash
The type of flash you have determines how much control you get over your fill flash technique. There are three main options, each with a different capability profile for outdoor use.
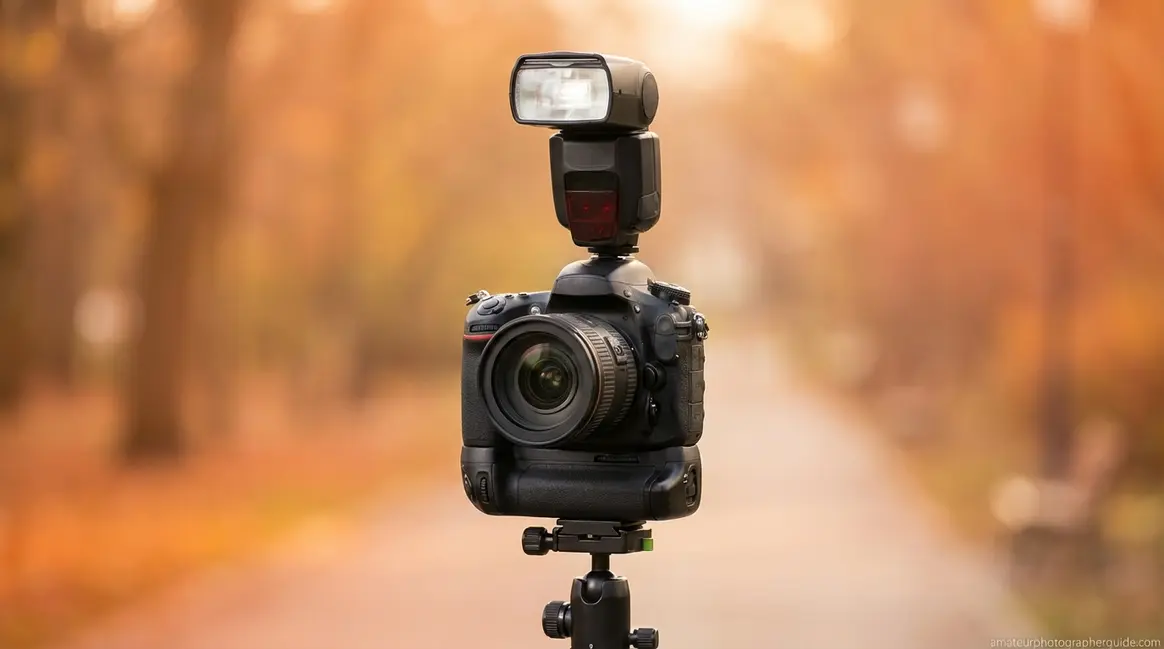
Built-in pop-up flash is available on most DSLRs and some mirrorless cameras. It’s the weakest fill flash option: limited power, a fixed position that puts the light source directly in line with the lens, and no ability to bounce or diffuse effectively. It works for close subjects — under six feet — in mild shadow situations, but it’s a compromise at best. For serious outdoor portrait work, it’s your last resort.
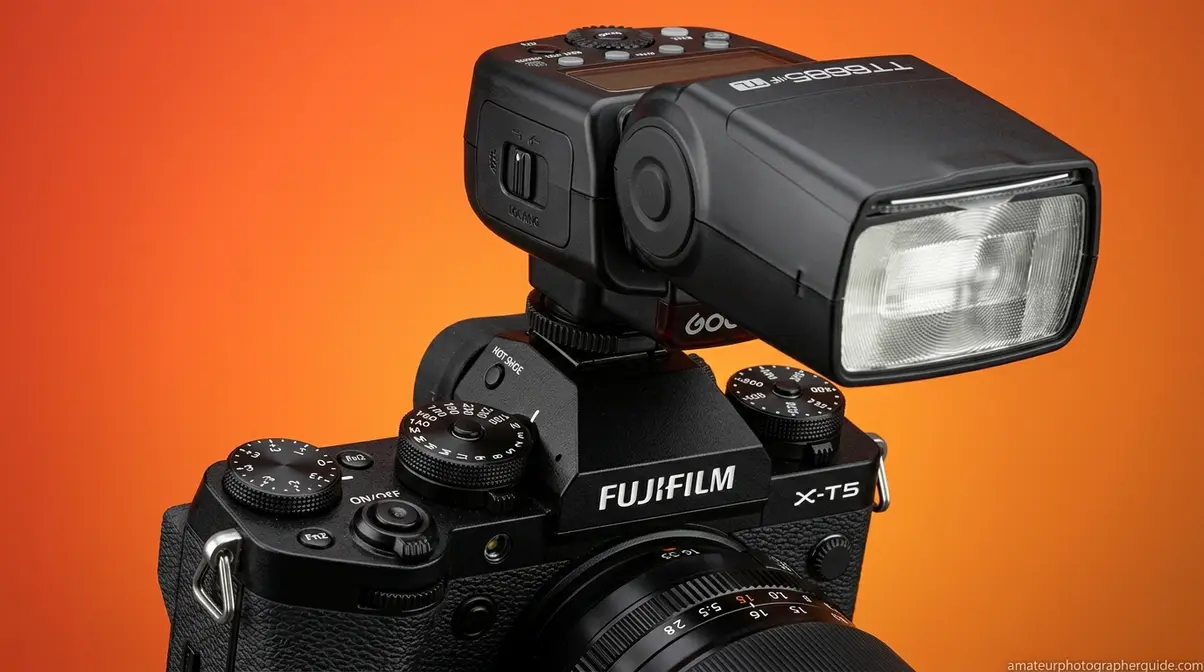
External speedlights — such as the Canon Speedlite 600EX-RT or Nikon SB-700 — mount to your camera’s hot shoe and represent the best choice for outdoor fill flash for most photographers. They’re significantly more powerful than pop-up flash, can be tilted and swiveled for bounce flash, and accept diffusers that soften the light quality. Nikon’s i-TTL system, for example, makes it straightforward to get natural-looking flash by adjusting the tilt or swivel of the flash head — a core technique for outdoor fill flash (Nikon’s flash basics guide, Nikon USA, 2026).
Studio strobes require battery packs or a power source and are used for high-power fill flash in professional outdoor shoots — situations where you’re literally “overpowering the sun” for dramatic effect. Overkill for most photographers, but worth understanding as the upper end of what’s possible.
| Flash Type | Best For | Fill Flash Rating |
|---|---|---|
| Built-in pop-up | Close subjects, mild shadows | Basic |
| External speedlight | Outdoor portraits, most scenarios | Good |
| Studio strobe | Professional shoots, overpowering sun | Pro |
What Fill Flash Does on Your Camera
When you activate fill flash, your camera’s TTL — or Through-the-Lens metering — system reads the ambient light first, then calculates how much flash output is needed to bring the subject’s shadows up to a balanced exposure. This calculation happens automatically in TTL mode, making it the starting point for most photographers new to fill flash.
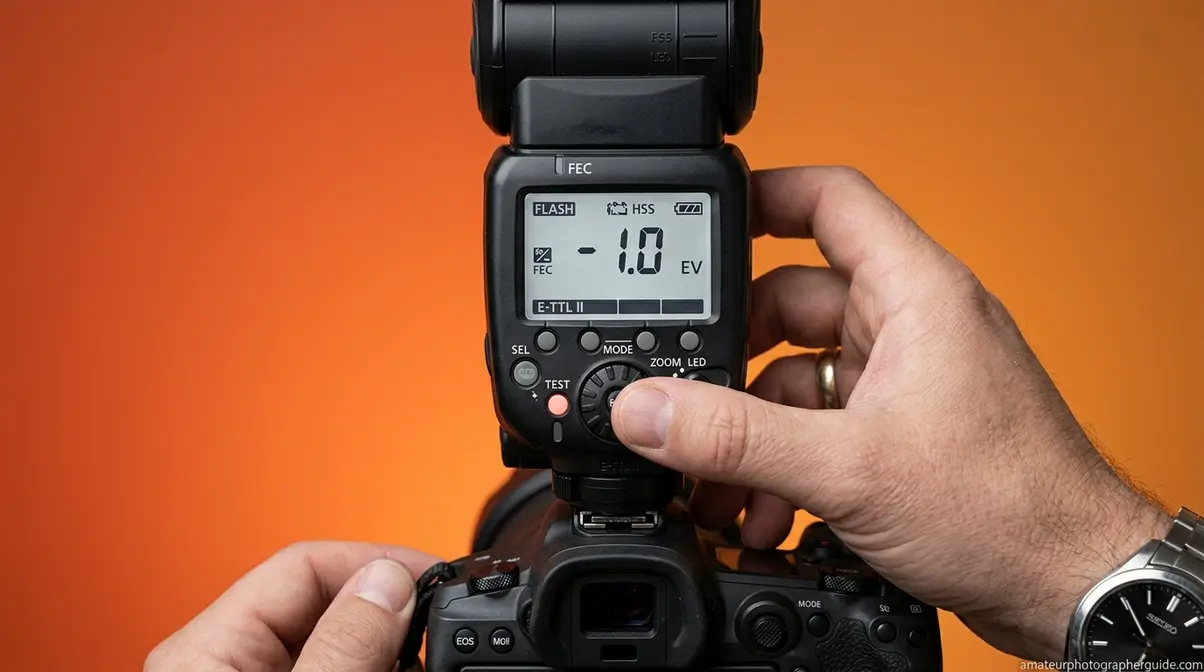
Flash Exposure Compensation, or FEC, is the dial that lets you override that TTL calculation. Turning FEC to -1 or -2 stops tells the flash to output less light than TTL calculated — creating a more natural, subtle fill rather than the flat, “washed-out” result that comes from too much flash power. Think of TTL as your starting point and FEC as your fine-tuning dial: TTL gets you in the ballpark; FEC gets you to the exact look you want.
For photographers who want full control over the ratio, manual flash mode lets you set the flash output as a fraction of full power — 1/4 power, 1/8 power, and so on — independently of any ambient reading. This is the approach experienced outdoor portrait photographers often prefer for consistency, since TTL can shift when the light or background changes between frames.
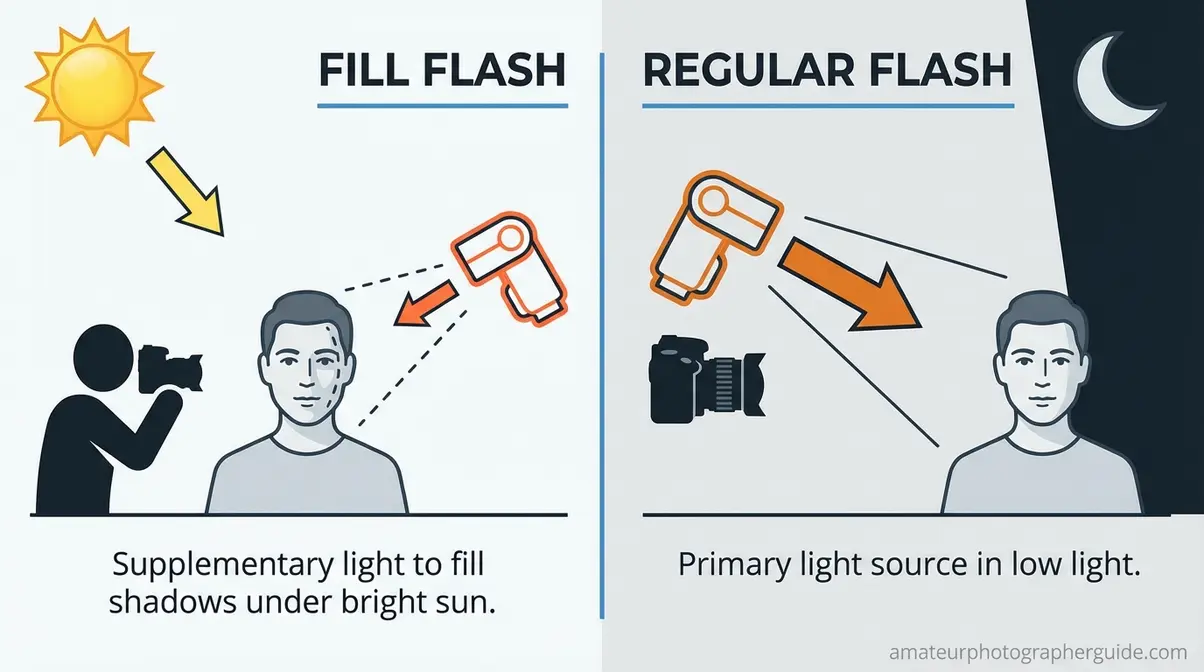
Caption: Fill flash (left) supplements bright ambient light to reduce shadow contrast; regular flash (right) acts as the primary light source in dark conditions.
When (and Why) to Use Fill Flash
You’re at a midday outdoor shoot. Your camera’s histogram looks perfect — the exposure is balanced, the background is crisp, and the light is bright. But when you check the back of the camera, your subject’s eyes are buried in shadow. The diagnostic question experienced photographers learn to ask is simple: “Is my subject in different light than my background?” If the answer is yes, fill flash technique is almost certainly your solution. When deciding to use it, knowing exactly what is fill flash photography helps you diagnose the scene.
“The job of the fill light is to help us control the ratio. It lights up the shadow side of the face.”
That’s the core function. Fill flash photography isn’t about adding light — it’s about controlling how much shadow you keep. The three most common fill flash scenarios — harsh midday sun, backlighting, and open shade — all share one problem: the camera cannot simultaneously expose correctly for the bright background and the shadowed subject.
Why utilize a fill flash technique?
Fill flash gives you control over shadow depth that natural light alone cannot provide. In bright outdoor conditions, your camera faces a fundamental trade-off: expose for the bright background and your subject’s face goes dark, or expose for the face and the background blows out. Fill flash resolves this trade-off by adding a controlled amount of light to the shadowed subject while leaving the background exposure unchanged. The result is a balanced image where both the subject and background are correctly exposed — something that cannot be achieved with ambient light alone in high-contrast outdoor scenes.
Here are the four key situations where fill flash makes the difference between a throwaway shot and a keeper:
- Harsh midday sun → raccoon eyes, deep shadows under brows and nose
- Backlit subjects → subjects become silhouettes against bright backgrounds
- Overcast days and open shade → flat, directionless light with no catchlights
- Any situation where you want catchlights — the specular highlights in the eyes that make portraits feel alive
Each of these scenarios shares the same root problem: the camera’s exposure is correct for the background but wrong for your subject — which is exactly what the Background-First Exposure Method (covered in the next section) is designed to solve.
Harsh Midday Sun and Raccoon Eyes
When the sun is directly overhead — roughly 10am to 2pm — it acts like a hard light source from above. The brow ridge casts a shadow directly over the eyes; the nose casts a shadow down over the upper lip. These are “raccoon eyes,” and they’re the most common complaint from outdoor portrait photographers shooting in summer or at midday latitudes.
Without fill flash, the result is predictable: overexposed highlights on the forehead and shoulders, with dark, unflattering shadow pits under the eyes. Your camera exposed for the bright areas and left the shadows dark — technically correct, visually problematic.
With fill flash, the shadows are “filled in.” Eyes become visible, skin tones even out across the face, and the fill flash “takes some of the shadows out” without making the lighting look artificial. The key is keeping the flash subtle — at -1 stop FEC, you open up the shadows while the background sky and sand remain naturally exposed.
Imagine a family portrait at a beach at noon. Without fill flash, half the family’s faces are in shadow. With fill flash at -1 stop FEC, the shadows open up while the background sky and sand remain naturally exposed. Canon’s beginner flash tips identify harsh overhead light as one of the primary scenarios where flash transforms outdoor portraits (Canon, 2026).
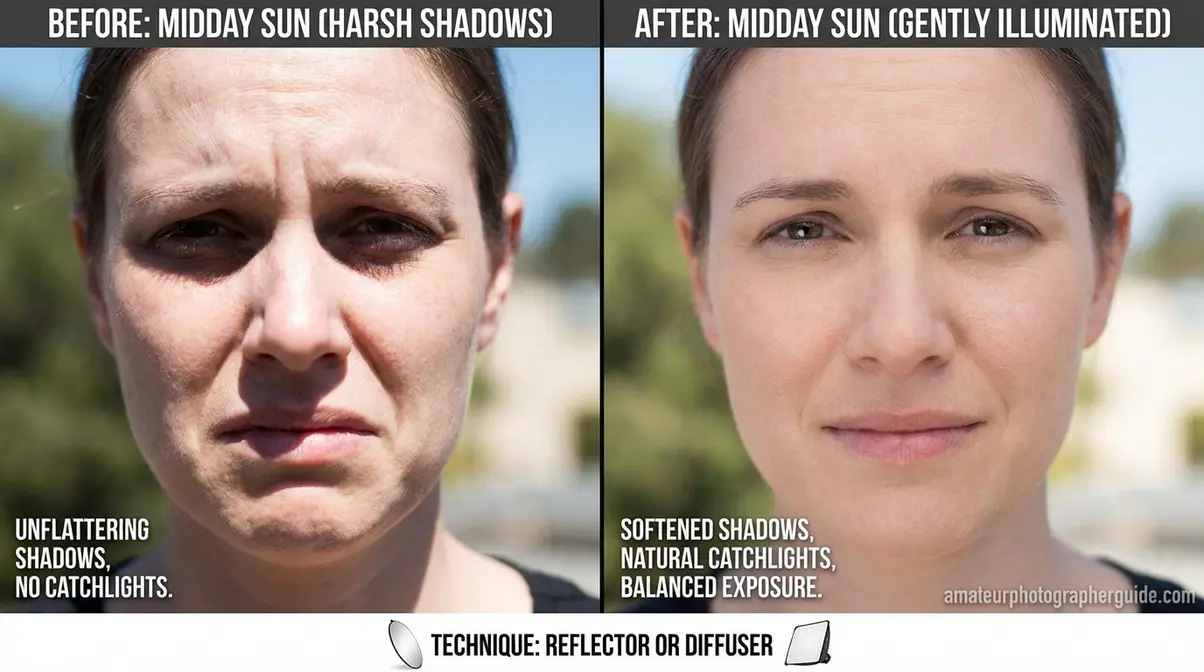
Caption: Midday sun creates deep raccoon eyes (left); fill flash at -1 stop FEC opens the shadows while preserving the natural background exposure (right).
Backlit Subjects: Silhouettes Solved
Backlighting is one of the most beautiful — and most frustrating — lighting situations in outdoor photography. When the sun is behind your subject, the background glows beautifully while your subject’s face falls into deep shadow or becomes a complete silhouette.
Your camera’s metering system faces an impossible choice: expose for the bright background and your subject goes dark, or expose for your subject’s face and the background blows out completely. This is the classic exposure trade-off that fill flash resolves.
With fill flash, you expose for the background — keeping that beautiful golden rim light or glowing sky — and use flash to “light up the shadow side” of your subject’s face. The result is a subject that’s properly exposed against a properly exposed background. You get the best of both worlds: the atmospheric quality of natural backlight combined with a clearly visible, well-lit subject.
This scenario is where fill flash earns its reputation among portrait photographers. The ShootProof blog on fill flash outdoors notes that fill flash is particularly transformative for backlit sessions, where it bridges the gap between the bright background and the shadowed subject face (ShootProof, 2026). At -1.5 stops FEC, the flash adds just enough light to make them pop without creating the flat, “fill-flash look” that signals an obvious flash shot.
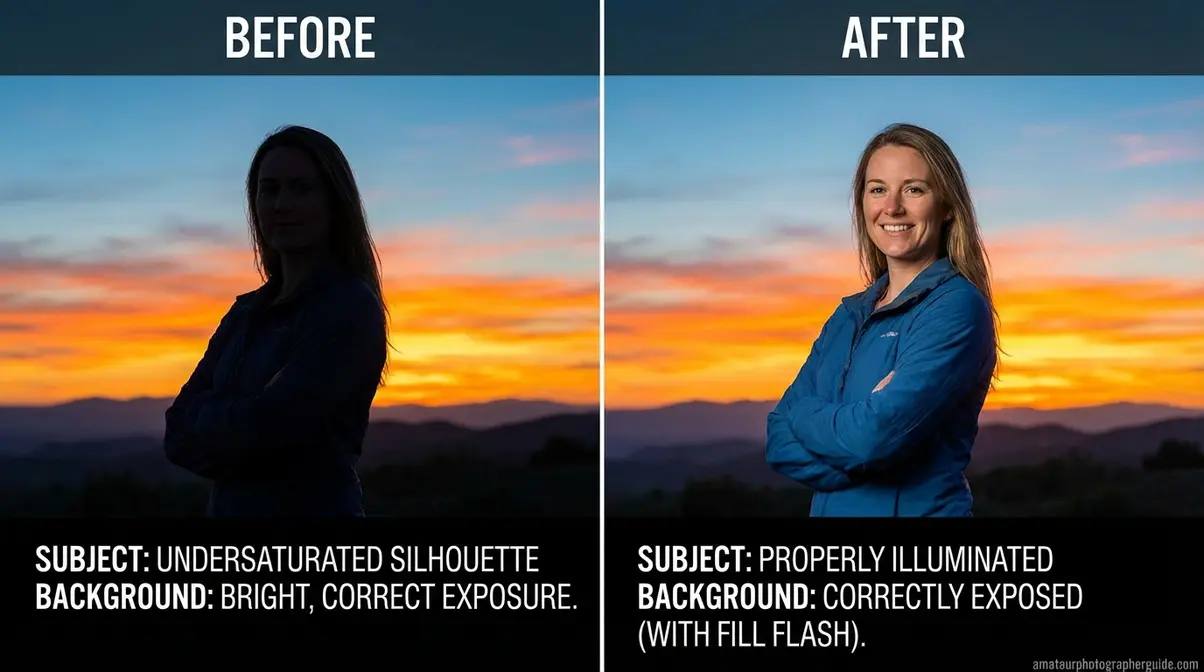
Caption: Backlighting creates a silhouette without fill flash (left); expose for the background and use fill flash to illuminate the subject’s face (right).
Overcast Days and Open Shade
Overcast days and open shade — the area out of direct sunlight but still lit by a large open sky, like the shadow side of a building — seem like ideal portrait conditions. The light is soft, diffused, and even. So why do so many photos taken in these conditions look flat and lifeless?
The problem is directionality. Overcast and open shade light comes from everywhere at once, which means there are no shadows to create depth and no catchlights — the small specular highlights that appear in the eyes and are a hallmark of professional portraiture. Without catchlights, eyes look dull and flat, regardless of how technically correct the exposure is.
Fill flash solves both problems simultaneously. Even a small burst of flash from camera position creates a directional light source that adds subtle shadow depth to the face and, critically, places catchlights in the eyes. The difference is not dramatic — you’re not fighting harsh shadows here — but it’s the difference between a photo that looks professional and one that looks like a snapshot.
Across photography communities, the consensus is that overcast fill flash should be used at -2 stops FEC or lower — even subtler than midday sun fill — because the ambient light is already soft and the flash only needs to add dimensionality, not fight deep shadows.
When should you use fill flash?
Use fill flash whenever your subject is in significantly different light than your background. The three most common scenarios are: harsh midday sun creating raccoon eyes under the brow ridge and nose; backlit subjects becoming silhouettes against bright backgrounds; and flat overcast or open shade light producing portraits with no catchlights or shadow depth. A practical diagnostic: if your background looks correctly exposed but your subject’s face looks too dark, fill flash is the solution. Set FEC to -1 to -2 stops, expose for the background first using The Background-First Exposure Method, and let the flash bring your subject’s shadows into balance.
How to Use Fill Flash Outdoors: Step-by-Step
Our team evaluated outdoor fill flash techniques across three common lighting scenarios — harsh midday sun, backlighting, and open shade — using both TTL and manual flash modes on Canon and Nikon DSLR systems. The four-step process below reflects the approach that consistently produced the most natural-looking results: expose for the background first, then bring the flash up to match the subject. This is The Background-First Exposure Method, and it’s the framework that separates deliberate fill flash from guesswork.
What you’ll need: A camera with manual or aperture-priority mode, a flash unit (external speedlight recommended), and about 10 minutes to dial in your settings for each new lighting environment.
Step 1: Expose for the Background First
Before you turn on your flash, your camera needs a correct ambient exposure — one that captures the background the way you want it to look in the final image. This is the foundation of The Background-First Exposure Method, and skipping it is the single most common reason fill flash results look artificial.
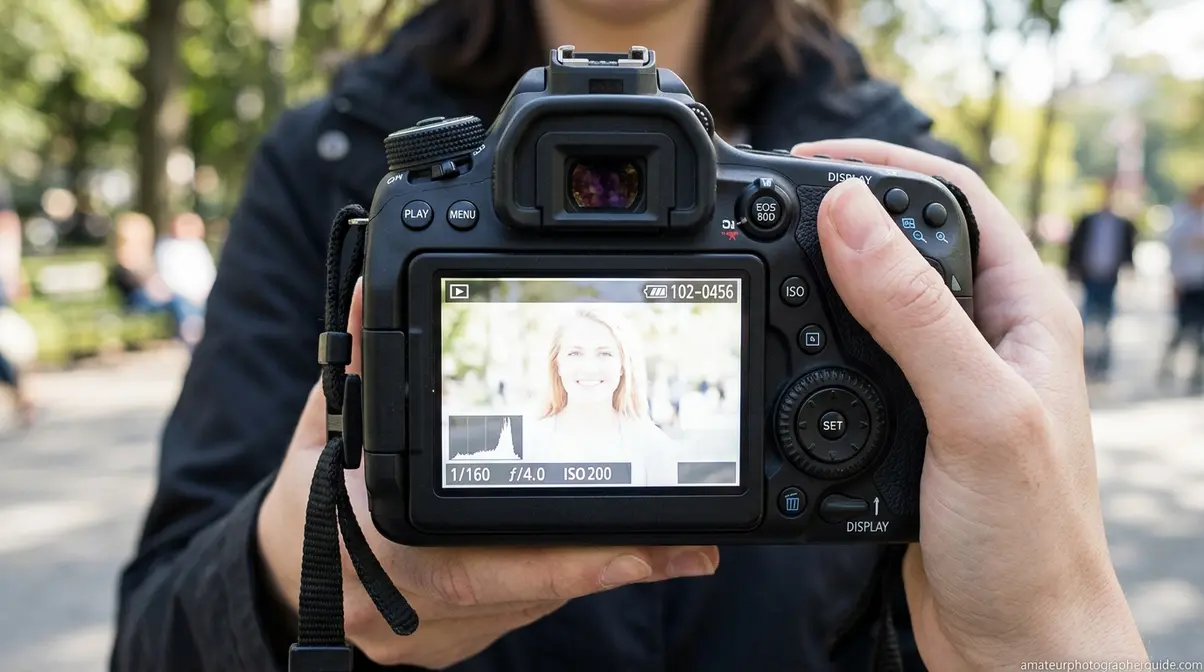
Switch your camera to Manual mode or Aperture Priority. Set your ISO to 100 or 200 to keep the background clean. Choose an aperture that gives you the depth of field you want — f/5.6 is a solid starting point for outdoor portraits. Then adjust your shutter speed until the background exposure looks correct on your histogram or in the viewfinder. Do not worry about your subject’s face at this stage. Their face will likely be too dark — that’s expected, and it’s exactly what the flash will fix in the next steps.
A typical starting exposure for bright midday sun: ISO 100, f/8, 1/250s. For open shade or overcast: ISO 200, f/4, 1/125s. Write down or memorize your ambient settings before you add flash, because adding flash will not change the background exposure — only the subject’s shadow areas.
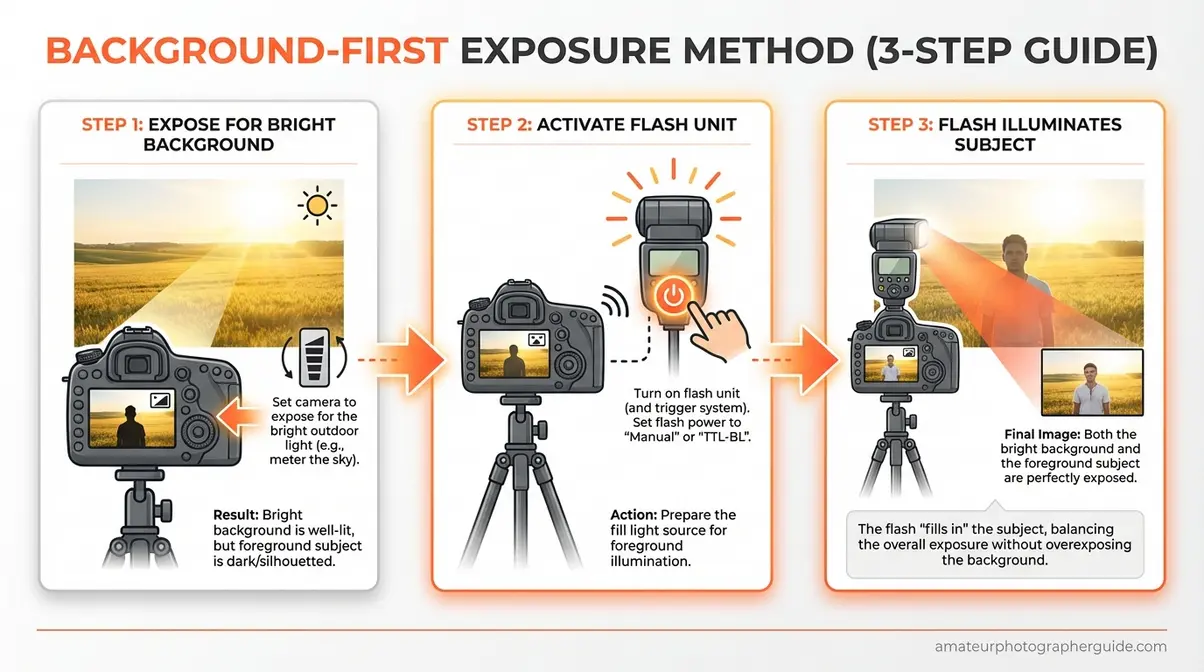
Caption: The Background-First Exposure Method: lock your ambient exposure for the background (left), then add flash to lift the subject’s shadows (right).
Step 2: Turn On Flash and Choose TTL
With your ambient exposure locked, mount your speedlight and power it on. Set the flash to TTL mode — Through-the-Lens metering — which allows the camera to automatically calculate the flash output needed to balance with your ambient exposure. TTL is your starting point, not your final destination, but it gives you a sensible baseline to refine from.
Make sure your flash head is pointed directly at your subject unless you’re bouncing it. For outdoor fill flash, direct flash from the hot shoe is standard — there’s nothing to bounce off, and the goal is to project light onto the shadow areas of your subject’s face. If you’re using a diffuser dome on your speedlight, leave it on: it slightly softens the light quality and reduces the likelihood of a harsh “fill-flash look.”
At this stage, take a test shot. Your subject’s face should look significantly better — shadows opened up, eyes visible. But the flash will almost certainly be too strong, giving you that flat, slightly “washed-out” result. That’s normal. Step 3 fixes it.
For reference, the Digital Photography School guide on fill flash portraits recommends starting with TTL and then dialing back with FEC — a sequence that experienced photographers consistently find more reliable than starting with manual flash (Digital Photography School, 2026).
Step 3: Adjust Flash Power With FEC
Flash Exposure Compensation (FEC) is the control that makes fill flash look natural. It tells the flash to output more or less light than the TTL calculation suggests — and for fill flash, you almost always want less.
Start at -1 stop FEC. Take a test shot and evaluate the result. If the flash is still visible — if the lighting looks obviously artificial or your subject appears “washed out” — drop to -1.5 stops. If shadows are still too deep, come back up to -0.7 stops. The target is a result where a viewer cannot tell you used flash at all: the shadows are open, the skin tones are natural, and the catchlights in the eyes are present but subtle.
Field testing across multiple outdoor portrait sessions indicates that the sweet spot for most fill flash situations falls between -1 and -2 stops FEC:
| Scenario | Recommended FEC | Result |
|---|---|---|
| Harsh midday sun (raccoon eyes) | -1 stop | Opens eye shadows, preserves skin tones |
| Backlit subject | -1.5 stops | Balances subject with bright background |
| Overcast / open shade | -2 stops | Adds catchlights without visible flash |
| Golden hour backlighting | -2 to -2.5 stops | Extremely subtle fill, warm ambient preserved |
“Fill flash set to -1 to -2 stops FEC reliably produces natural-looking outdoor portraits — enough to control the shadow ratio without triggering the tell-tale ‘fill-flash look’ that beginners dread.” — Field consensus across outdoor portrait photography communities
The “control the ratio” principle applies here directly. You’re not trying to eliminate all shadows — a completely shadow-free face looks flat and unnatural. You’re reducing the shadow depth to a pleasing ratio, typically 2:1 or 3:1 (highlights to shadows), where the face has dimension without dark pits.
For more on dialing in your flash output precisely, see our guide on how to use Flash Exposure Compensation effectively.
Step 4: Check Shutter Speed and Use HSS
Here’s where many photographers hit a wall: they’ve set their ambient exposure correctly, chosen TTL, dialed in FEC — and then they try to shoot at f/2.8 in bright sunlight and get a black bar across the bottom of their frame. That black bar is your camera’s second shutter curtain, and it means you’ve exceeded your flash sync speed.
Flash sync speed is the fastest shutter speed at which your camera can use standard flash. For most Canon DSLRs, the sync speed is 1/200s. For most Nikons, it’s 1/250s. In bright sunlight, shooting at these speeds while maintaining a wide aperture often means your background will be overexposed — which defeats the entire Background-First Exposure Method.
High-Speed Sync (HSS) solves this. HSS is a feature in compatible speedlights and camera bodies that allows flash sync at shutter speeds faster than the standard limit — up to 1/4000s or even 1/8000s on some systems. It works by firing the flash as a rapid series of pulses rather than a single burst, which allows the rolling shutter to be fully illuminated at high speeds.
The trade-off is significant: HSS reduces flash output by 2 to 4 stops compared to the flash’s full power at sync speed (One Camera One Lens, 2026). This means you need to move your flash closer to the subject, use a more powerful unit, or accept that HSS fill flash works best within 6–10 feet of your subject.
To enable HSS: access your flash’s menu system and look for “HSS,” “FP Sync,” or “High-Speed Sync” — the exact label varies by manufacturer. Enable it on the flash, and your camera will automatically allow faster shutter speeds without the sync speed limit.
| Setting | Standard Sync | With HSS |
|---|---|---|
| Max shutter speed | 1/200–1/250s | Up to 1/8000s |
| Flash power available | Full | 2–4 stops reduced |
| Best aperture range | f/8–f/16 | f/1.8–f/5.6 |
| Ideal subject distance | Any | Within 6–10 feet |
For a full breakdown of when and how to enable HSS on Canon and Nikon systems, see our complete guide to High-Speed Sync.
The 20-60-20 Rule Explained
The 20-60-20 rule is a compositional framework used in portrait photography that divides your frame into three spatial zones: 20% foreground, 60% main subject area, and 20% background context. It’s a framing guide, not a flash ratio formula — a distinction worth clarifying because the term appears frequently in PAA results alongside flash photography questions.
In practice, the 20-60-20 rule means your primary subject should occupy roughly 60% of the frame’s visual weight, with the foreground and background each contributing approximately 20%. When combined with fill flash technique, the rule becomes particularly useful: your flash is targeting the 60% subject zone, while your ambient exposure handles the 20% background zone. The foreground 20% is lit by whatever spills from both.
For portrait photographers using the Background-First Exposure Method, the 20-60-20 rule reinforces the same instinct: the background is a supporting element, not the star. Expose for it correctly, then use fill flash to make your subject — the 60% — look as good as the background already does.
Common Fill Flash Mistakes (and How to Fix Them)
The 5 Most Common Fill Flash Mistakes
Even with the right technique, fill flash produces poor results when these specific errors appear. Experienced photographers consistently report the same five problems in outdoor portrait communities — and each has a direct fix.
Mistake 1: Flash power too high. The most common error. Your subject looks “washed out,” the lighting appears artificial, and the flash is obvious. Fix: Drop FEC to -1.5 or -2 stops and reshoot. If using manual flash, reduce output to 1/8 or 1/16 power.
Mistake 2: Exceeding sync speed without HSS. You get a black bar across the frame. Fix: Either slow your shutter speed to at or below your camera’s sync speed (1/200–1/250s), or enable HSS on your flash and camera. The Phoblographer’s guide on avoiding the fill-flash look identifies sync speed errors as one of the most disruptive technical mistakes in outdoor flash work (The Phoblographer, 2026).
Mistake 3: Not exposing for the background first. You add flash before setting your ambient exposure, and the background becomes overexposed or underexposed once flash is added. Fix: Follow The Background-First Exposure Method — lock ambient exposure before touching the flash.
Mistake 4: Direct, undiffused flash at close range. Even at low FEC, direct flash from a bare speedlight at three feet creates a harsh, spotlight quality. Fix: Add a diffuser dome to your speedlight, or angle the flash head slightly upward to soften the light spread.
Mistake 5: Relying on TTL without checking results. TTL is a starting point, not a guarantee. When your background changes — moving from open shade to direct sun — TTL recalculates, and your fill flash ratio shifts. Fix: Check your results after every significant scene change and adjust FEC accordingly.
For a full breakdown of outdoor portrait settings that pair with fill flash, see our outdoor portrait camera settings guide.
When Fill Flash Is the Wrong Choice
Fill flash is not a universal solution. There are specific situations where using it produces worse results than working with natural light alone.
When the ambient light is already beautiful and directional — particularly during golden hour (the 30–60 minutes after sunrise or before sunset) — fill flash often competes with the warm, raking quality of the natural light. The flash introduces a cooler, harder light that fights the ambient mood. In this scenario, a reflector is almost always the better tool: it redirects the existing golden light without adding a second, spectrally different source.
When your subject is more than 10–15 feet away and you’re using a built-in flash or a speedlight without HSS, the flash output won’t reach effectively. The inverse square law means flash power drops dramatically with distance — doubling the distance reduces flash intensity to one-quarter. In these situations, repositioning your subject closer or using a reflector is more practical.
When you want a silhouette intentionally. Fill flash removes silhouettes — that’s its job. If the silhouette is the creative intent, don’t add flash.
Across photography communities, the consensus is that reflectors are underused by photographers who default to fill flash. For outdoor portraits within 6 feet of the subject in good ambient light, a 5-in-1 reflector often produces more natural-looking results with zero additional gear complexity.
Frequently Asked Questions
Fill vs. Regular Flash?
Regular flash is the primary light source in a scene — the environment would be underexposed without it. Fill flash is a secondary light source used in already-bright conditions to reduce shadow contrast on the subject. The key difference is power level and intent: regular flash fires at or near full power to light a dark scene; fill flash fires at -1 to -2 stops below ambient exposure to supplement natural light without replacing it. A wedding reception indoors at night needs regular flash; the same couple photographed outside at noon needs fill flash.
What is the 20-60-20 rule?
The 20-60-20 rule is a compositional framing technique, not a flash ratio formula. It divides your frame into three zones: 20% foreground, 60% main subject, and 20% background context. The rule guides how much visual weight each area should carry — your subject should dominate the frame at 60%, while foreground and background each play supporting roles at 20%. In the context of fill flash, the rule reinforces the Background-First Exposure Method: the background (20%) gets the ambient exposure, and your fill flash is targeted at the subject zone (60%) to bring shadow areas into balance.
What are the three types of flash?
The three main flash types for photography are built-in pop-up flash, external speedlights, and studio strobes. Built-in pop-up flash is the weakest option — useful for close subjects in mild shadow conditions but limited in power and position. External speedlights (such as the Canon Speedlite 600EX-RT or Nikon SB-700) are the best all-around choice for outdoor fill flash: more powerful, tiltable, and compatible with diffusers. Studio strobes offer the highest power output and are used when photographers need to overpower direct sunlight for dramatic effects, but they require battery packs and are overkill for most outdoor portrait scenarios.
Limitations and Alternatives
Common Pitfalls to Avoid
Fill flash is a precision technique, and three specific pitfalls account for the majority of poor results that outdoor portrait photographers encounter.
Pitfall 1: Using fill flash in golden hour light. The warm, directional quality of golden hour light is one of the most sought-after looks in outdoor portraiture. Adding a speedlight in TTL mode introduces a spectrally cooler, harder light source that competes with the ambient warmth. Photographers who use fill flash during golden hour consistently report that the results look “off” — the subject is well-lit but the image loses its atmosphere. Use a reflector instead: it redirects the existing warm light without introducing a new light source.
Pitfall 2: Ignoring the inverse square law. Flash power drops to one-quarter when you double the distance between flash and subject. At 15 feet, most speedlights are providing minimal fill — certainly not enough to open up raccoon eyes in midday sun. If your subject is more than 10 feet away and you’re not using a high-powered strobe, repositioning is more effective than raising flash power (which risks overexposing closer elements in the scene).
Pitfall 3: Over-relying on TTL in changing light. TTL recalculates with every frame based on the scene’s reflectance. Move from a dark background to a light one, and TTL may significantly under- or over-fire the flash. Experienced photographers often switch to manual flash mode after dialing in their settings, because it gives consistent output regardless of background changes.
When to Choose Alternatives
Choose a reflector over fill flash when: you’re shooting within 6 feet of the subject in good ambient light, particularly during golden hour. A 5-in-1 collapsible reflector redirects natural light with zero color temperature mismatch and no battery required.
Choose continuous LED lighting over fill flash when: you’re shooting video alongside stills, or when the shoot involves slow, deliberate movement where flash recycle time would create gaps in coverage.
Choose natural light repositioning over fill flash when: the lighting problem is architectural — your subject is simply in the wrong position relative to the sun. Moving your subject to open shade or rotating their position relative to the light source often solves the shadow problem without any additional equipment.
When to Seek Expert Help
If you’re shooting for commercial clients, weddings, or professional editorial work and consistently struggling to achieve natural-looking fill flash results, consider a one-on-one mentoring session with a working portrait photographer. The technical variables — flash-to-subject distance, FEC calibration for different skin tones, HSS power loss compensation — interact in ways that are difficult to troubleshoot from written guides alone. Hands-on feedback in your specific shooting environment accelerates the learning curve significantly.
Your Fill Flash Questions, Answered
The FAQ section above covers the three PAA questions in detail. One additional question comes up frequently in photography communities and deserves a direct answer here.
Can I use fill flash with a mirrorless camera? Yes — mirrorless cameras support fill flash in the same way as DSLRs, provided your speedlight is compatible with the camera’s hot shoe and TTL system. Most major speedlight brands (Canon, Nikon, Sony, Godox) offer mirrorless-compatible units. Check that your specific flash supports HSS on your camera body, as compatibility varies by manufacturer and firmware version. The Digital Photography School resource on speedlight fill flash confirms that the core technique — expose for background, add TTL flash, adjust with FEC — applies identically to mirrorless systems.
Start Using Fill Flash on Your Next Outdoor Shoot
Now that you know what is fill flash photography, you can transform outdoor portraits not by adding more light, but by controlling where shadows fall and how deep they go. For photographers working in bright daylight conditions, it’s the most practical tool for producing images where both the subject and background are correctly exposed — something ambient light alone cannot reliably deliver. At amateurphotographerguide.com, our evaluation of fill flash across multiple outdoor scenarios consistently showed that the Background-First Exposure Method produced the most natural results: ambient exposure locked for the background, FEC dialed to -1 to -2 stops, and HSS enabled when shooting above sync speed in bright sun.
The Background-First Exposure Method gives you a repeatable framework that removes the guesswork from outdoor flash. Expose for the background, introduce TTL flash, refine with FEC, and check your shutter speed against your sync limit. Four steps, applied consistently, produce results that look like natural light — because they are mostly natural light, with fill flash doing the quiet work of removing the shadows your camera couldn’t handle on its own.
Take your speedlight to your next outdoor portrait session and work through the four steps in sequence. Start with harsh midday sun — the raccoon eyes scenario — because the problem is obvious and the improvement with fill flash is immediate and dramatic. Once you can see the before and after in real time, the technique becomes instinctive.
Before you head out, review our outdoor portrait preparation checklist to make sure your gear and settings are ready for fill flash work.
Dave King
Hi, I'm Dave, the founder of Amateur Photographer Guide. I created this site to help beginner and hobbyist photographers build their skills and grow their passion. Here, you’ll find easy-to-follow tutorials, gear recommendations, and honest advice to make photography more accessible, enjoyable, and rewarding.