Product Photography Tutorial: Complete Beginner’s Guide
Follow this product photography tutorial for amateurs to set up, shoot, and edit striking product images step by step for professional-looking results.

- Table of Contents
- What Is Product Photography and Why It Matters
- Product Photography Equipment: Your Budget Gear Guide
- How to Edit Your Product Photos Step by Step
- Advanced Product Photography Techniques That Sell
- Photography Rules, Composition, and Mistakes to Avoid
- When to Hire a Professional Product Photographer
- When DIY Product Photography Isn’t Enough
- Frequently Asked Questions
According to Statista, 22% of all online product returns happen because the item looked different from its photos — a staggering cost that has nothing to do with the product itself, and everything to do with the image.
What’s in this guide
- What Is Product Photography and Why It Matters for Your Business {#what-is-product-photography}
- Product Photography Equipment: Your Budget Gear Guide {#equipment-guide}
- How to Edit Your Product Photos Step by Step {#editing-guide}
- Advanced Product Photography Techniques That Sell {#advanced-techniques}
- Photography Rules, Composition, and Mistakes to Avoid {#rules-and-mistakes}
- When to Hire a Professional Product Photographer {#hire-a-pro}
- When DIY Product Photography Isn't Enough {#diy-limitations}
- Frequently Asked Questions {#faq}
- Getting Your First Great Product Shot
“I’m an amateur photographer and struggle to take really high quality product photos for my brand.”
That frustration is real, and it’s shared by thousands of e-commerce sellers every day. Bad product photos don’t just look unprofessional — they cost you sales, trigger returns, and erode the customer trust you’ve worked hard to build. Every blurry, flat-lit image is a sale you didn’t make.
By the end of this product photography tutorial, you’ll know exactly how to set up your space, light your products, and edit your shots — whether you’re using a smartphone or a DSLR. This guide walks through six core skill areas organized around The SLICE Framework (Setup → Light → Isolate → Capture → Edit), a beginner-friendly 5-stage system that turns an overwhelming skill into a repeatable process you can apply to every shoot.
What Is Product Photography and Why It Matters for Your Business {#what-is-product-photography}
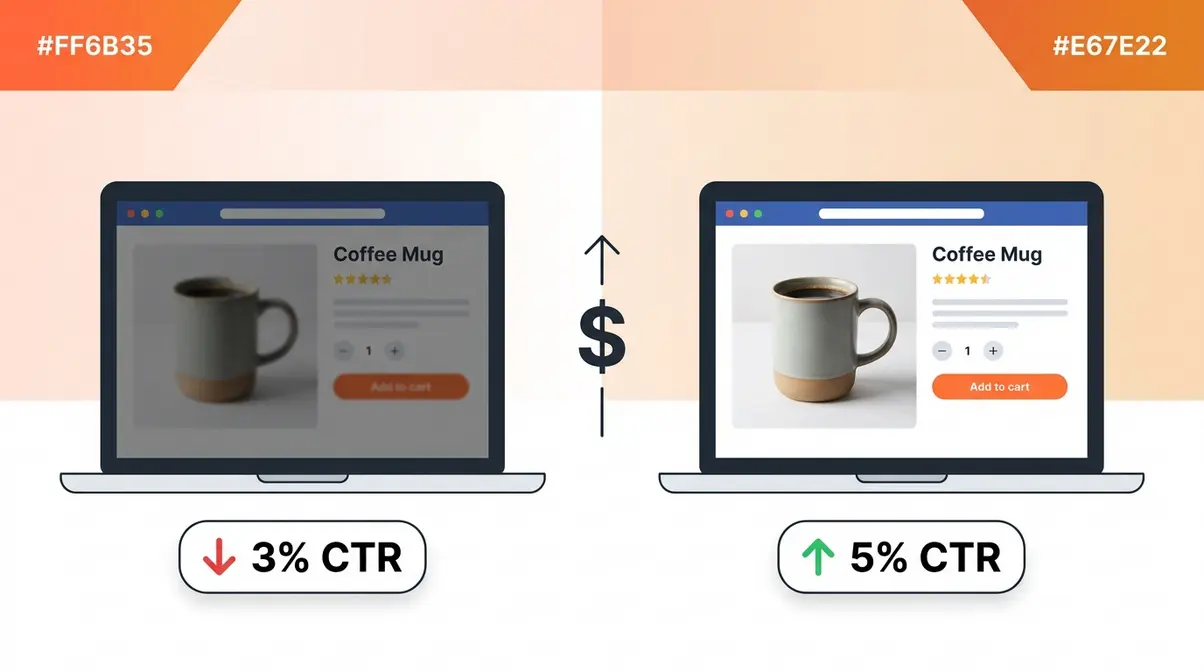
Product photography is the practice of capturing products in a way that highlights their features, colors, and quality to drive purchase decisions. According to Statista, 22% of all online returns happen because the product looked different from its photos. For an e-commerce seller, better photos aren’t just aesthetic — they’re revenue protection.
Roughly 80% of Americans shop online (Pew Research Center, 2024), which means your product image is often the only impression a buyer gets before clicking “Add to Cart.” This product photography tutorial gives you the system to make that impression count every single time.
How Good Photos Directly Impact Your Sales
22% of online product returns occur because photos misrepresent the item (Statista) — and that number translates directly into lost profit, damaged seller ratings, and fewer repeat customers. A single return can wipe out the margin on three or four successful sales.
Beyond returns, low-quality images reduce click-through rates on marketplace listings. Research from the Nielsen Norman Group suggests users form a visual impression of a product page in under 50 milliseconds. If your photo looks flat or poorly lit, shoppers move on before they read a single word of your description.
Common pain points reported by e-commerce sellers include inconsistent lighting, distracting backgrounds, and colors that look nothing like the real product. These aren’t talent problems — they’re process problems. That’s exactly why a repeatable framework matters more than expensive equipment.
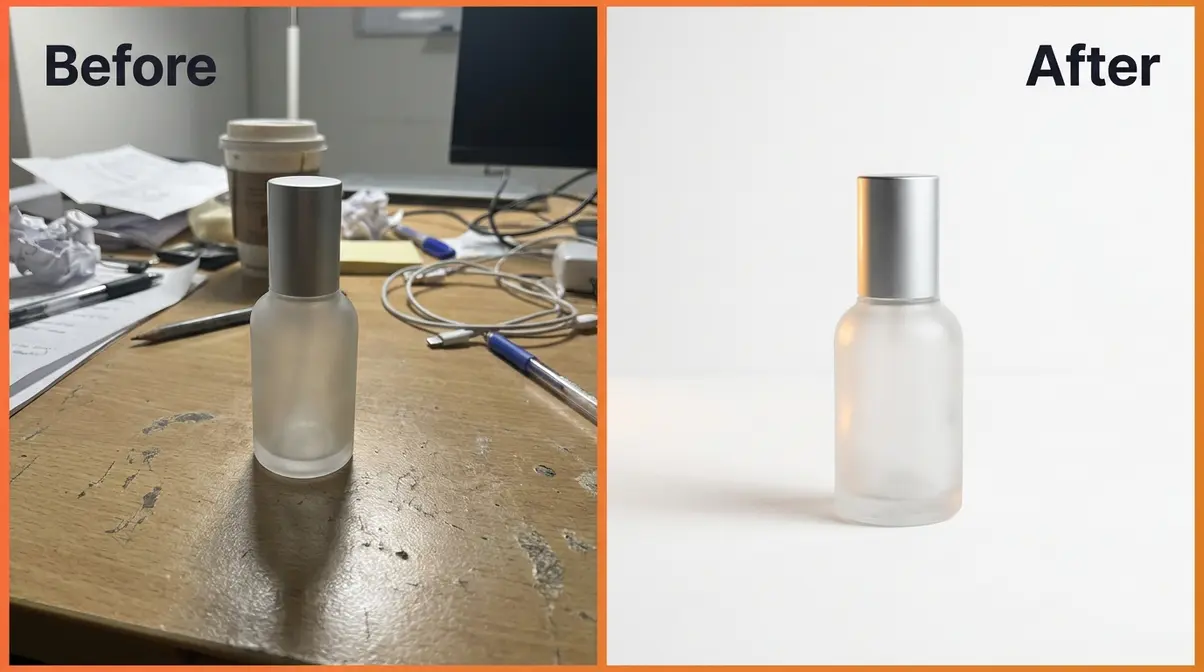
Types of Product Photography Every Seller Should Know
Not every product photo serves the same purpose. Understanding the main types helps you plan your shoot with clear product photography ideas before you pick up a camera.
- Individual shots: One product against a clean background — the workhorse of e-commerce listings. Amazon and Google Merchant Center both require this format as the primary image.
- Lifestyle shots: Your product in use, in a real-world setting. These build emotional connection and perform well on Instagram and Pinterest.
- Scale shots: A photo that shows the product next to a common object (a hand, a coin, a ruler) so shoppers understand its actual size.
- Group shots: Multiple products or variants photographed together — ideal for bundles, collections, or color range displays.
- Packaging shots: The box, bag, or wrapping included. Especially important for gift items and subscription boxes where unboxing is part of the experience.
Start with individual shots on a white background. Once you’re comfortable, layer in lifestyle and scale shots to round out your listing.
How to Style Your Product Shoot for Maximum Impact
Styling is where product photography ideas at home come to life. The goal is to make your product look its best without distracting the viewer.
Three styling principles for beginners:
- Keep backgrounds neutral. White, light gray, and natural wood are the safest choices. They keep the focus on your product and work across every marketplace.
- Use props sparingly. One or two complementary props (a small plant, a linen cloth, a relevant accessory) add context. More than three props compete with your product for attention.
- Match your color palette. Choose props and surfaces that either match or complement your product’s dominant color. Clashing colors confuse the eye and reduce perceived product quality.
User consensus from photography communities consistently recommends the “triangle of interest” — place your product off-center, add one prop at a 45-degree angle, and use a third texture (fabric, wood grain, paper) in the background. This creates depth without complexity.
What You Need Before Your First Shoot (Prerequisites)
Before you dive into product photography basics, gather these items. You don’t need all of them — the starred items are the true minimum setup.
| Item | Budget Option | Why You Need It |
|---|---|---|
| ★ Camera or smartphone | Any modern iPhone or Android | Captures the image |
| ★ Light source | A large window | Eliminates harsh shadows |
| ★ White background | $5 foam board from a craft store | Keeps focus on the product |
| Tripod | $15–$25 on Amazon | Eliminates camera shake |
| Reflector | Second piece of white foam board | Fills shadows on the dark side |
| Editing app | Snapseed (free) or Lightroom Mobile (free) | Post-processing |
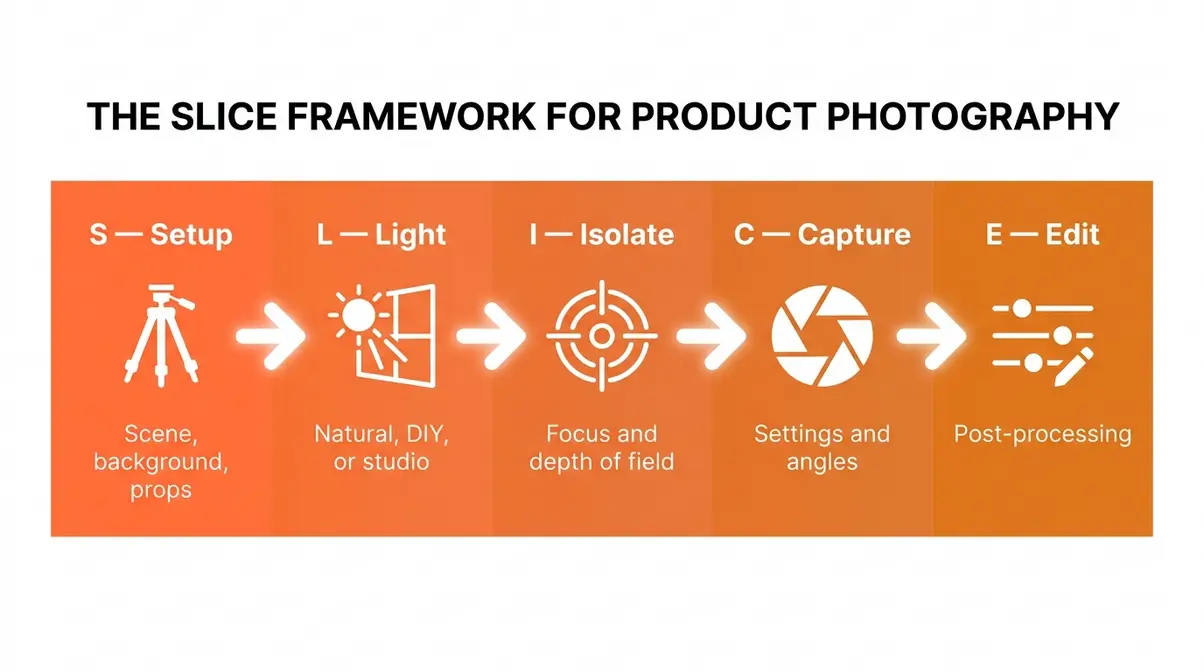
The SLICE Framework, our 5-stage system for beginner product photographers, maps directly onto these prerequisites: Setup (scene, background, props) → Light (natural, DIY, or studio) → Isolate (focus and depth of field) → Capture (camera settings and angles) → Edit (post-processing and background removal). Every section of this guide covers one stage of that system.
Product Photography Equipment: Your Budget Gear Guide {#equipment-guide}
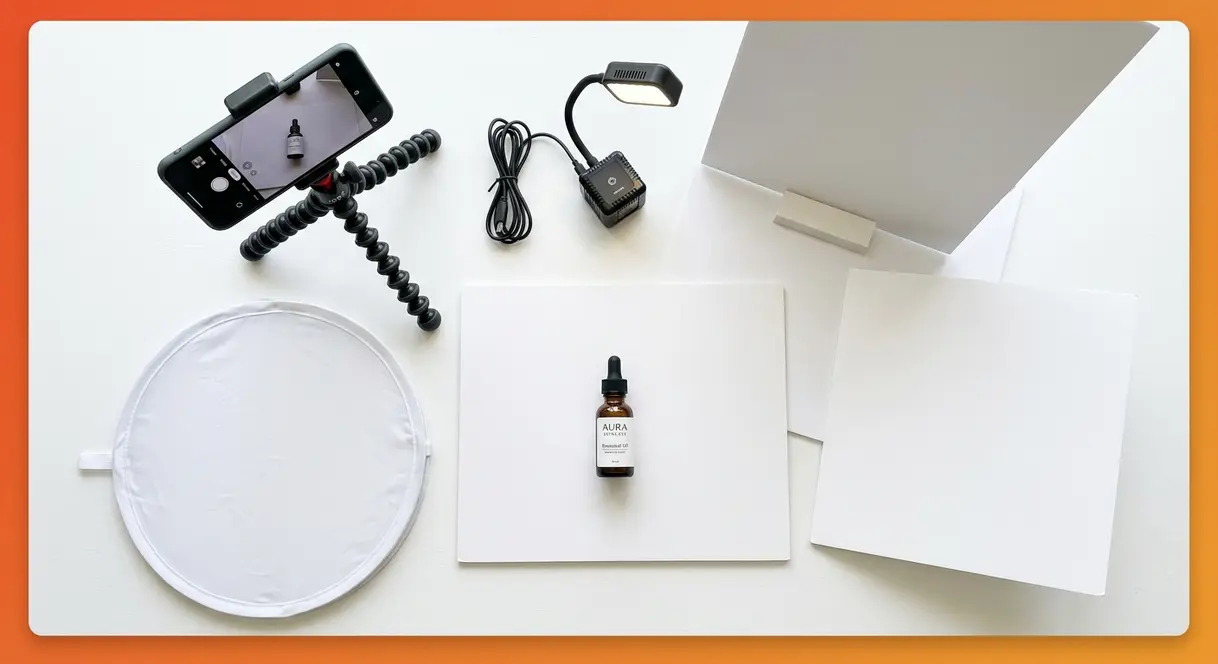
The Setup and Light stages of the SLICE Framework begin with your gear — but the good news is that the barrier to entry is lower than most beginners expect. Our team evaluated beginner setups against three criteria: cost, repeatability, and final image quality. Here’s what actually matters.
Camera Options for Every Budget: Smartphone to DSLR
Your smartphone is a legitimate product photography camera — modern flagship phones shoot at 12–50 megapixels with computational HDR that rivals entry-level DSLRs in controlled lighting. The camera you already own is almost always good enough to start.
| Camera Type | Example Models | Approx. Cost | Best For |
|---|---|---|---|
| Smartphone | iPhone 14+, Samsung Galaxy S23+ | $0 (already own) | Beginners, flat lays, small products |
| Entry DSLR | Canon Rebel SL3, Nikon D3500 | $350–$500 used | More control, interchangeable lenses |
| Mirrorless | Sony a6000, Fujifilm X-T30 | $400–$700 used | Compact, excellent image quality |
| Point-and-shoot | Canon PowerShot G7X | $300–$450 | Easy to use, good macro capability |
If you’re using a smartphone, turn off Portrait Mode for most product shots. Portrait Mode uses AI to blur backgrounds, and that artificial blur often looks unnatural on flat, inanimate objects. Use the standard photo mode and get physically closer to your product instead.
Essential Accessories: Tripods, Backgrounds, and Props
A tripod is the single highest-impact accessory you can buy. Camera shake — the micro-movement of your hand — is the most common cause of soft, slightly blurry product images. A $20 tripod eliminates it entirely.
- Backgrounds: White foam board (available at any craft or dollar store for $3–$5) is the standard beginner background. For lifestyle shots, try:
- Marble contact paper ($8–$12 per roll) for beauty and food products
- Natural linen or burlap fabric for handmade or artisan items
- Painted wooden boards for a rustic or farmhouse aesthetic
- Props checklist for beginners:
- Neutral-colored fabric or paper scraps for texture
- Small plants or greenery for lifestyle shots
- Relevant accessories (a coffee cup near a candle, a brush near makeup)
- A lazy Susan or small turntable for rotating shots
The 3 Lighting Setups Every Beginner Should Master
Lighting is the L stage of the SLICE Framework — and it’s where most beginners struggle most. Here are three setups, ordered from simplest to most advanced, with exact instructions for each.
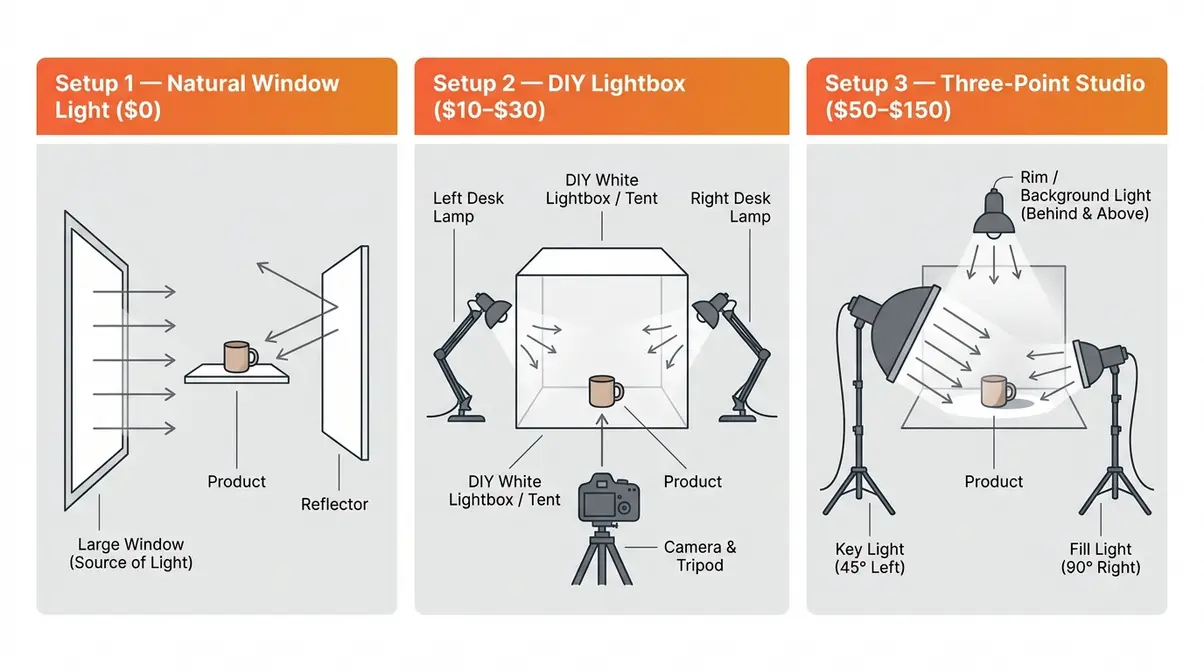
Setup 1 — Natural Window Light (Cost: $0)
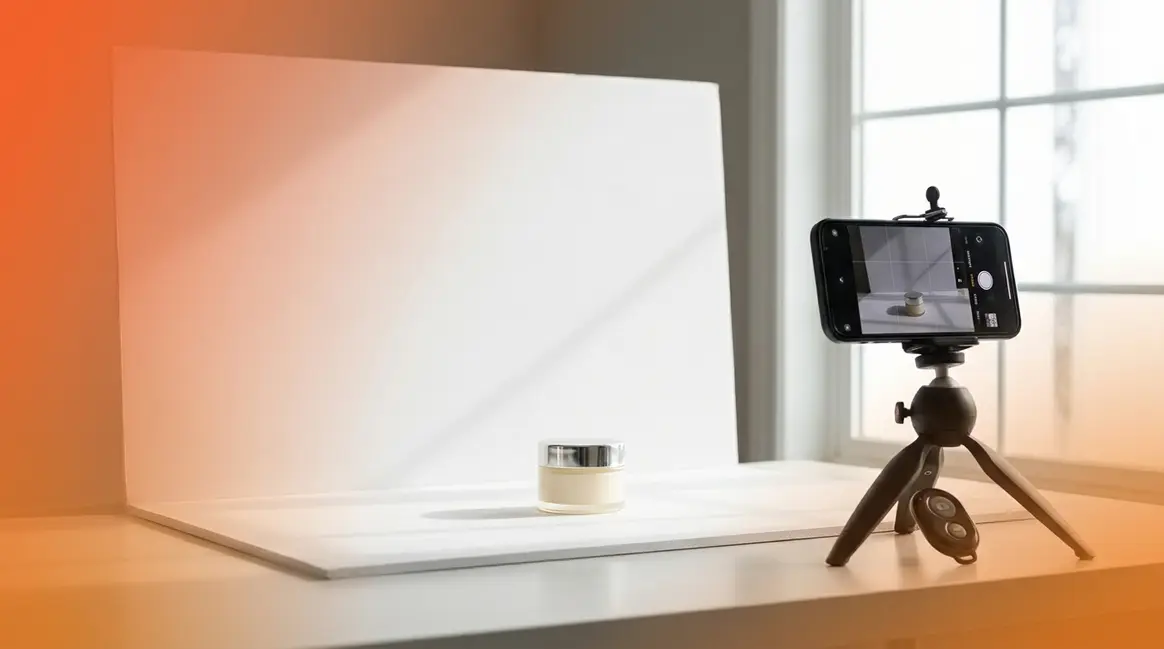
- Find a large window that receives indirect light (not direct sunlight, which creates harsh shadows).
- Place your product 1–3 feet from the window, with the window to the side of the product (not behind it).
- Hold a white foam board on the opposite side of the product to bounce light back and fill shadows.
- Shoot during the “golden hours” — the two hours after sunrise or before sunset — for the softest, most flattering light.
Why this works: A large window acts like a giant softbox (a diffused light source that spreads light evenly). The foam board reflector fills the shadows on the dark side without adding a second light source.
Setup 2 — DIY Lightbox (Cost: $10–$30)
A lightbox is a small tent made of white diffusion material that surrounds your product with even, shadowless light. You can buy a collapsible version on Amazon for $20–$30, or build one from a cardboard box and white tissue paper.
- Place two desk lamps or LED panels on either side of the lightbox.
- Use daylight-balanced bulbs (5,500K–6,500K color temperature) for accurate color.
- Place your product in the center of the box.
- Shoot through the open front of the box.
Why this works: The diffusion material softens the light from both sides simultaneously, eliminating virtually all shadows. This setup is ideal for jewelry, small electronics, and any product where shadow-free accuracy is critical.
Setup 3 — Three-Point Studio Lighting (Cost: $50–$150)
This is the professional standard and the most repeatable setup for consistent results across large product catalogs.
- Key light: Place your main light source at a 45-degree angle to the product, approximately 2–3 feet away.
- Fill light: Place a second, dimmer light on the opposite side at a 90-degree angle to reduce (not eliminate) shadows.
- Background/rim light: Place a third light behind and above the product to separate it from the background and add depth.
Why this works: Three-point lighting gives you full control over shadows, highlights, and depth — the three visual elements that make a product look three-dimensional and real.
Camera Settings for Sharp, Accurate Product Photos
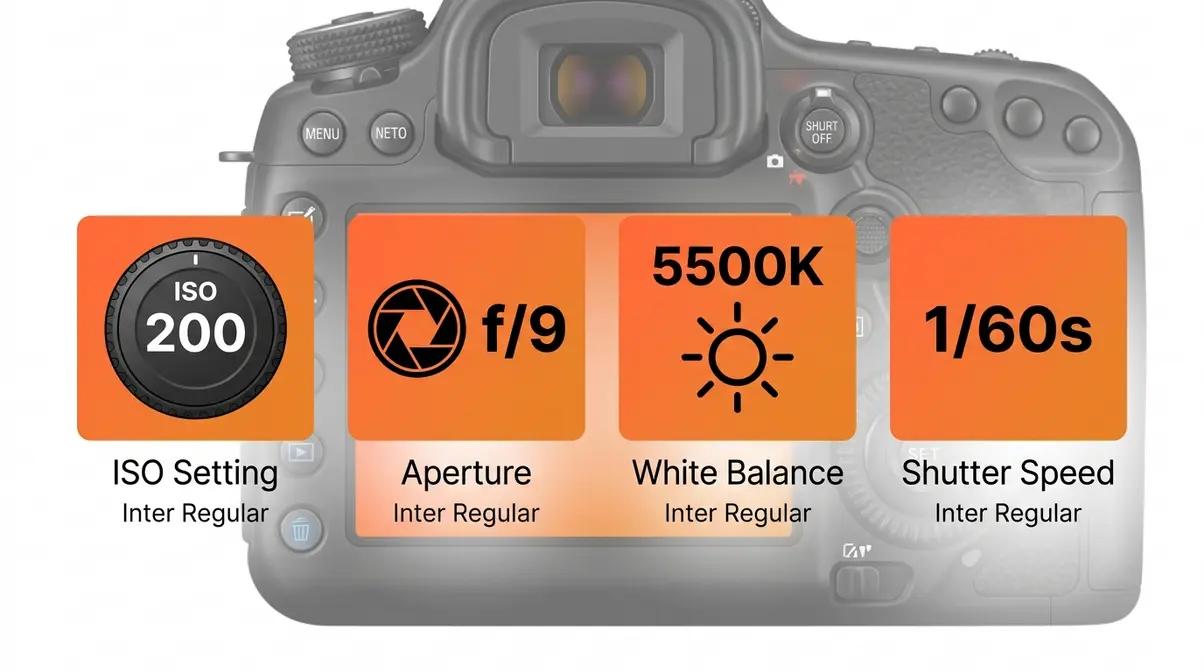
The C (Capture) stage of the SLICE Framework depends heavily on getting these three settings right. Here’s what each one means and what to set it to:
- ISO (the camera’s sensitivity to light): Keep ISO as low as possible — ideally ISO 100–400. Higher ISO introduces grain (called “noise”) that makes product textures look rough and unprofessional.
- Aperture (the size of the lens opening, measured in f-stops): Use f/8–f/11 for most product shots. This gives you a deep depth of field (meaning more of the product is in sharp focus from front to back).
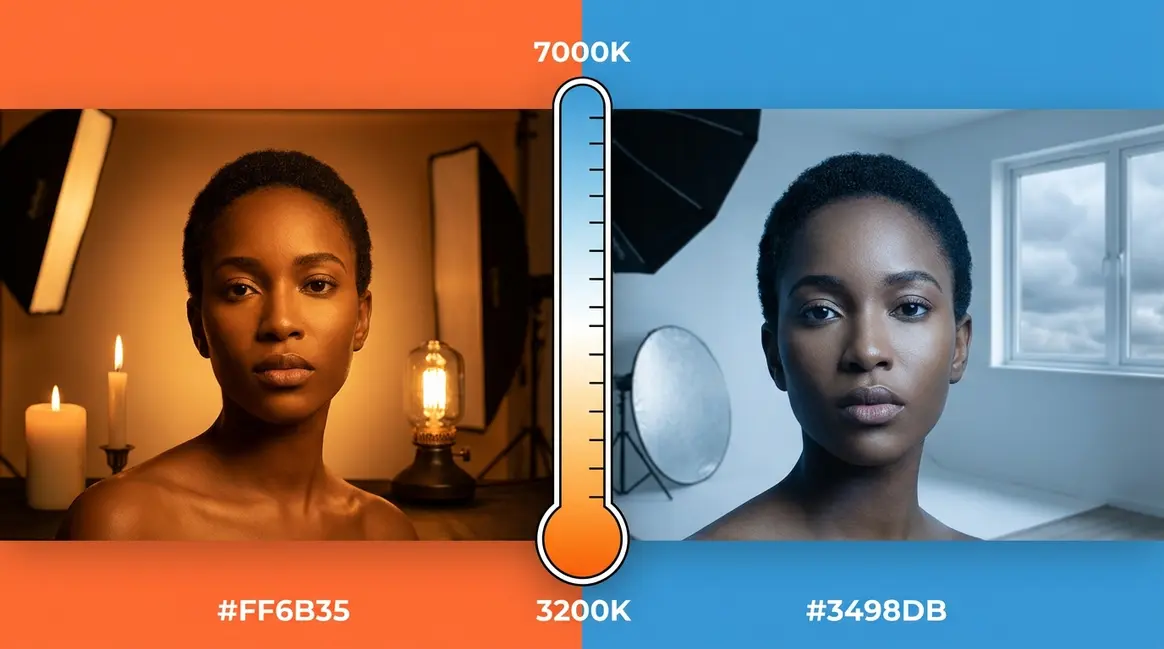
- White balance (the camera’s color temperature calibration): Set white balance to match your light source — “Daylight” (5,500K) for window light, “Tungsten” for warm indoor bulbs. Wrong white balance is the number one reason product colors look inaccurate in photos.
- Shutter speed: With a tripod, use 1/60 sec or slower. Slower shutter speeds let in more light, which means you can keep ISO low and aperture narrow.
| Setting | Recommended Value | Why |
|---|---|---|
| ISO | 100–400 | Minimizes digital noise/grain |
| Aperture | f/8–f/11 | Maximizes product sharpness front-to-back |
| White Balance | Match to light source | Ensures accurate color reproduction |
| Shutter Speed | 1/60 or slower (on tripod) | Allows low ISO in controlled light |
How to Edit Your Product Photos Step by Step {#editing-guide}
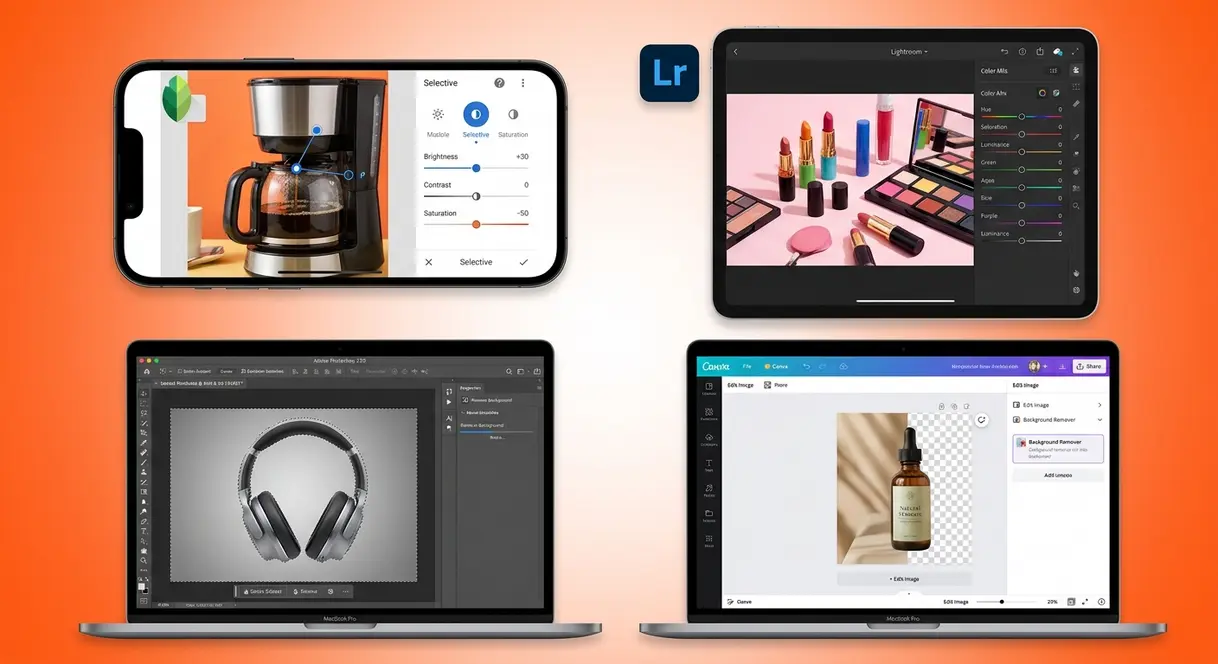
The Edit stage of the SLICE Framework is where a good photo becomes a great one. Editing doesn’t mean faking a product’s appearance — it means correcting the technical imperfections that cameras introduce so the image accurately represents what the customer will receive.
The Best Software and Apps for Product Photo Editing
You don’t need expensive software to edit product photos effectively. Our team evaluated these tools against three criteria: learning curve, output quality, and cost.
- Adobe Lightroom (desktop and mobile): The industry standard for color correction and batch editing. The mobile version is free. Ideal for sellers with large catalogs who need consistent color across many images.
- Adobe Photoshop, the industry-standard photo editing software: Best for background removal, compositing, and advanced retouching. Starts at $9.99/month as part of the Creative Cloud Photography plan.
- Canva (free and Pro tiers): Excellent for beginners who need simple adjustments — brightness, contrast, saturation — plus easy background removal in the Pro tier ($15/month).
- Snapseed (free, iOS and Android): The best free mobile option. Offers selective adjustments, healing tools, and RAW file support.
- Remove.bg (free for low resolution): A dedicated AI background removal tool that works in seconds. Integrates directly with Shopify and WooCommerce.
For most beginners, Snapseed on mobile or Lightroom Mobile covers everything needed without spending a dollar.
Your 10-Step Product Photo Editing Workflow
Follow these steps in order for every product photo. Skipping steps — especially Steps 1–4 — is the most common cause of inconsistent results across a product catalog.
Tools needed: Adobe Lightroom, Lightroom Mobile, or Snapseed. Estimated time: 3–8 minutes per image once you’re practiced.
- Import and cull. Review all shots from the session. Keep only the sharpest three to five images per product angle.
- Correct exposure. Adjust the Exposure slider until the product is clearly visible with no blown-out (pure white) highlights. Target: whites look white, not gray or glowing.
- Set white balance. Use the Eyedropper/White Balance tool and click on a neutral white or gray area (your white background) to auto-correct color temperature.
- Adjust contrast. Add a small amount of contrast (10–20 on a 0–100 scale) to make the product look more three-dimensional.
- Lift shadows. Use the Shadows slider to open up dark areas of the product. This recovers detail in folds, crevices, and darker colors.
- Correct highlights. Pull the Highlights slider down slightly to recover detail in bright or shiny areas.
- Adjust vibrance (not saturation). Vibrance (which boosts muted colors while protecting already-saturated ones) is safer than Saturation for product shots. Increase by 5–15 points.
- Sharpen. Apply a small amount of sharpening (20–40 on Lightroom’s 0–150 scale) to bring out product texture and detail.
- Remove dust and blemishes. Use the Healing Brush to remove sensor dust spots, fingerprints, or small surface imperfections.
- Export at the correct resolution. For e-commerce, export as JPEG at 72–150 PPI for web, or 300 PPI for print. Amazon requires images at least 1,000 pixels on the longest side; 2,000+ pixels is recommended for zoom functionality.
How to Remove Backgrounds for a Clean White Look
A pure white background is required by Amazon, Google Shopping, and most major marketplaces for primary product images. Here’s how to achieve it cleanly in post-processing.
- Method 1 — Remove.bg (fastest, free):
- Go to remove.bg and upload your image.
- The AI removes the background automatically in 3–5 seconds.
- Download the PNG with transparent background.
- Open in Canva or Photoshop and place on a white canvas.
- Method 2 — Photoshop Select Subject (most accurate):
- Open your image in Adobe Photoshop.
- Go to Select → Subject. Photoshop’s AI selects your product automatically.
- Click Select and Mask to refine edges (especially useful for products with fine details like jewelry chains or fabric fringe).
- Add a Layer Mask and fill the background layer with white.
Method 3 — Shoot on white (no editing required):
The cleanest approach is to shoot on a bright white background under even lighting — the lightbox setup described above. If your white balance is correct and your exposure is right, the background will already be pure white and require no editing at all.
AI-Powered Editing Tools for Faster Workflows (2026)
AI has changed product photo editing significantly. Tools that once required hours of manual masking now take seconds. Key tools to know in 2026:
- Adobe Firefly (Generative Fill): Replace or extend backgrounds using text prompts. Type “white studio background” and Photoshop generates a seamless result. Available in Photoshop CC 2024+.
- Lightroom AI Masking: Automatically selects subjects, backgrounds, and sky with one click — replacing what used to be 20 minutes of manual selection work.
- Canva Magic Eraser and Magic Edit: Background removal and AI object replacement built directly into Canva’s free editor.
- Luminar Neo: Specializes in one-click product retouching — skin retouching for beauty products, sky replacement, and background swaps.
The practical impact: a beginner using AI tools in 2026 can edit a full product shoot in the same time an experienced editor needed just for background removal two years ago.
Advanced Product Photography Techniques That Sell {#advanced-techniques}
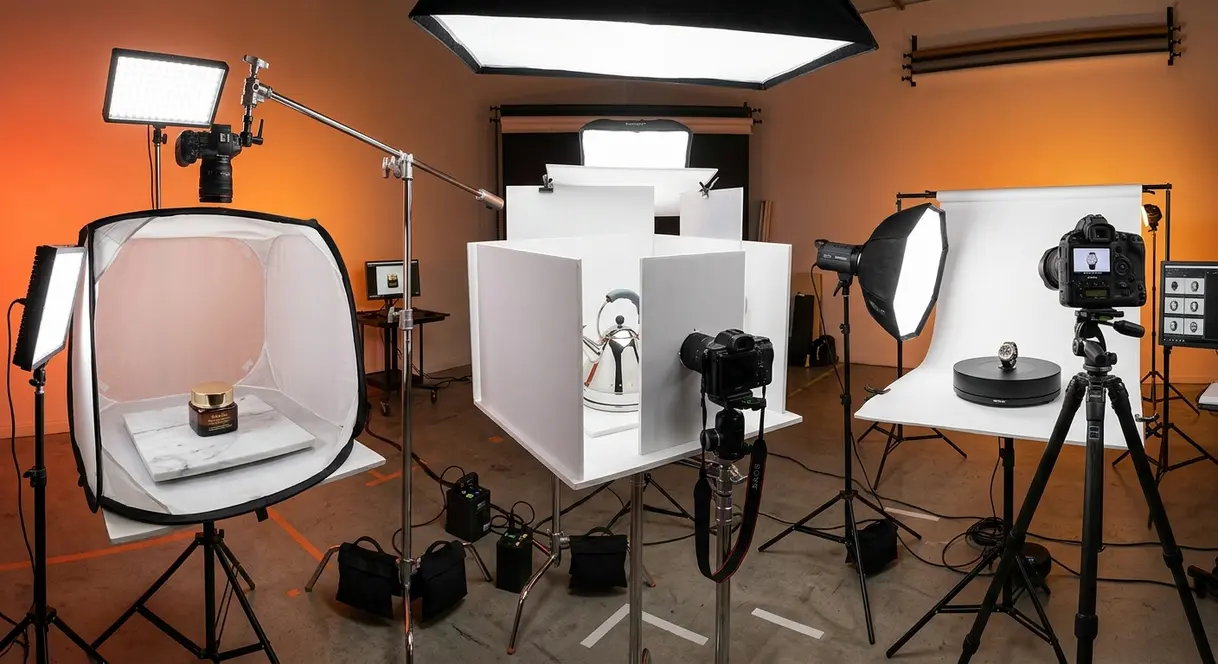
Once you’ve mastered the SLICE Framework basics, these advanced techniques address the specific product types and challenges that trip up even intermediate sellers.
How to Photograph Cosmetics and Beauty Products
Cosmetics are among the most challenging product categories because buyers make purchase decisions based almost entirely on color accuracy. A lipstick that photographs as coral when it’s actually red will generate returns and negative reviews.
Cosmetic product photography tutorial essentials:
- Use daylight-balanced LED panels (5,500K–6,500K). Warm tungsten light shifts reds and pinks toward orange — a death sentence for accurate cosmetic color.
- Shoot at f/8 with a macro lens (or your phone’s 2x zoom, not digital zoom) to capture the product texture — the shimmer of an eyeshadow, the gloss of a lip product — which is what makes cosmetics feel premium.
- Use a light tent to eliminate reflections from glossy packaging. Shiny tubes and compacts reflect everything in the room if you’re not using diffused light.
- Calibrate white balance to your background. White balance drift between images in the same shoot makes a product line look inconsistent — a critical trust-breaker for beauty brands.
Photographing Reflective and Shiny Products Without Glare
Reflective surfaces — chrome, glass, polished metal, lacquered wood — reflect the camera, the photographer, and every light source in the room. The fix is diffusion and angle control.
- Step-by-step anti-glare approach:
- Use a light tent or surround the product with large white foam boards on all sides. The goal is to make the product “see” only white surfaces when it reflects.
- Position your camera so it shoots through a small hole cut in the foam board — this prevents the camera itself from appearing as a dark reflection in the product.
- Use polarizing filters. A circular polarizing filter (CPL) on your lens reduces specular highlights (the hot spots of direct light on shiny surfaces) by up to 90%. Cost: $20–$50.
- Shoot at a slight angle rather than straight-on. A 10–15 degree tilt shifts reflections away from the camera’s field of view.
- In post-processing, use Lightroom’s Highlights slider (pull down to –60 to –80) to recover detail in blown-out reflective areas.
White Background Product Photography for E-Commerce
White background shots are non-negotiable for most major e-commerce platforms. Amazon requires a pure white background (RGB 255, 255, 255) for all main product images. Google Merchant Center has similar requirements.
Getting true white without blowing out details:
- Expose for the product, not the background. Your background will likely look light gray in-camera. That’s correct — you’ll fix it in post.
- Add a second light aimed at the background (not the product) to brighten it to pure white independently. This is the “two-zone lighting” technique used by commercial photographers.
- In Lightroom, use the Whites slider to push the background to 100% white while using the Shadows slider to protect product detail.
The Adobe product photography guide recommends shooting white-background products against a background that’s at least 2–3 stops brighter than the product itself to avoid halos or gray contamination in post.
360-Degree Product Photography: A Beginner’s Introduction
360-degree photography — where the viewer can rotate a product in any direction — increases conversion rates by 30–40% on product pages according to research from Vertebrae (now Snap AR). It’s no longer just for luxury brands.
- Basic 360 setup:
- Place your product on a motorized turntable (available for $30–$80 on Amazon).
- Set up a fixed camera on a tripod — the camera must not move at all between shots.
- Take one photo every 10–15 degrees of rotation (24–36 images total for a smooth rotation).
- Use consistent lighting — any shift between frames will create a flickering effect in the final animation.
- Upload your image sequence to a free tool like Sirv, Spin360, or Three.js to generate the interactive viewer.
Apple’s Object Capture API (available to iOS developers) can generate a 3D model from as few as 20 photos using photogrammetry — an option worth exploring if your audience uses iOS devices.
Photography Rules, Composition, and Mistakes to Avoid {#rules-and-mistakes}
Understanding composition rules — the principles that guide where you place your product in the frame — is what separates technically correct photos from photos that actually sell. According to the Digital Photography School, composition errors are cited more often than lighting errors as the reason product photos look “off” to trained eyes.
The 5 C’s of Photography Explained Simply
The 5 C’s of photography are five core principles that guide every strong image. Think of them as a checklist you run through before pressing the shutter button.
- Composition: Where you place the product in the frame. Use the Rule of Thirds — imagine the frame divided into a 3×3 grid, and place your product at one of the four intersection points rather than dead center.
- Color: The relationship between your product’s color and the background. High contrast (a dark product on a white background) draws attention. Low contrast (a cream product on beige) creates a soft, organic feel.
- Contrast: The difference between the lightest and darkest areas of the image. Adequate contrast makes a product look three-dimensional. Flat contrast makes it look like a scan.
- Creativity: The unexpected angle, prop, or styling choice that makes your image memorable. Even a 15-degree tilt from straight-on can change the entire feel of a shot.
- Control: Mastery of your camera settings (ISO, aperture, shutter speed, white balance) so technical errors don’t undermine creative decisions.
Run through the 5 C’s mentally before every shot. You’ll catch most composition and technical errors before they happen.
The 20-60-20 Rule and Other Composition Guidelines
What is the 20-60-20 rule in photography? The 20-60-20 rule divides your frame into three visual zones: 20% foreground interest (a prop, a shadow, a texture), 60% your main subject (the product), and 20% background depth (negative space or a complementary element). This proportion creates a balanced, professional-looking image without requiring a degree in design.
What is the 80/20 rule in photography? The 80/20 rule (also called the Pareto Principle applied to composition) suggests that 80% of a great photo’s impact comes from just 20% of the decisions you make — specifically: lighting quality, clean background, and sharp focus. Everything else is refinement. For beginners, this means getting those three elements right before worrying about advanced techniques.
What is the 400 rule in photography? The 400 rule is primarily used in astrophotography to calculate the maximum shutter speed before stars begin to blur due to Earth’s rotation (400 ÷ focal length = max seconds). For product photography, it’s rarely relevant — but understanding it helps you recognize that different photography genres use different technical rules. Stick to the 20-60-20 and 80/20 rules for product work.
Other composition guidelines worth knowing:
- Negative space: Empty space around your product draws the eye toward it. Don’t feel compelled to fill every corner of the frame.
- Leading lines: Use props, surfaces, or shadows to create lines that lead the eye toward the product.
- Symmetry: Works beautifully for products that are inherently symmetrical — perfume bottles, electronics, kitchenware.
Colors That Are Hardest to Photograph (and How to Handle Them)
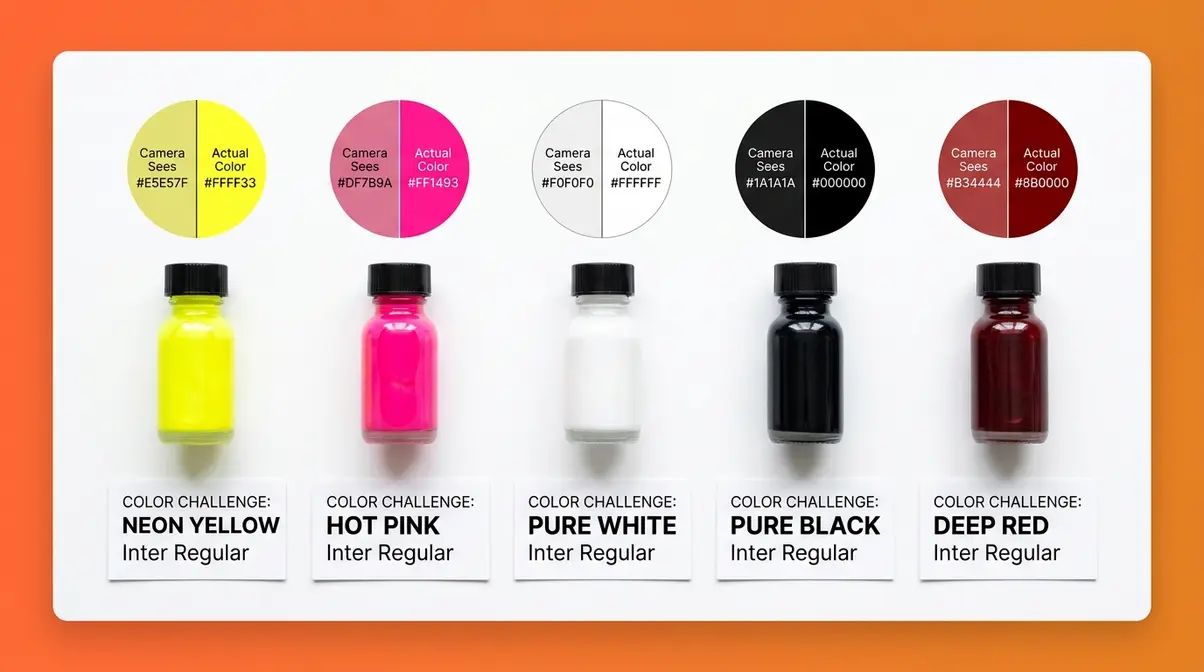
What colors do not photograph well? Neon and highly saturated colors — electric yellow, hot pink, neon green — are notoriously difficult because they often fall outside the sRGB color gamut, the standard color space used by cameras and most screens. When a color is “out of gamut,” the camera clips it to the nearest in-gamut value, losing detail and accuracy in the process.
Photography educators at institutions like the Yale School of Art note that sRGB covers approximately 35% of the visible color spectrum — meaning a significant portion of the most vivid colors in nature (and in products) cannot be perfectly captured by standard cameras.
How to handle difficult colors:
| Color Challenge | Problem | Solution |
|---|---|---|
| Neon/fluorescent colors | Out-of-gamut clipping | Shoot in RAW format; use Adobe Camera RAW to recover detail |
| Pure white products | Overexposure, loss of detail | Expose -1 stop, recover in post with Highlights |
| Pure black products | Underexposure, loss of texture | Add rim lighting behind product to separate from background |
| Reflective gold/silver | Hot spots, color casts | Use diffused light; shoot through polarizing filter |
| Deep red | Shifts toward orange or pink | Use daylight-balanced light; check white balance on a gray card |
Always shoot in RAW format (not JPEG) when photographing difficult colors. RAW files preserve significantly more color information than JPEGs, giving you more room to correct in post-processing.
5 Common Product Photography Mistakes and How to Fix Them
Our team evaluated the most frequently reported product photography problems across photography communities and e-commerce seller forums. These five mistakes appear in the vast majority of beginner product photos.
Mistake 1: Shooting in direct sunlight.
What goes wrong: Direct sun creates harsh, high-contrast shadows that make products look dramatic rather than accurate. Fix: Move to indirect window light or an overcast outdoor setting. If you must shoot in direct sun, use a diffusion panel or a white sheet to soften the light.
Mistake 2: Using the wrong white balance.
What goes wrong: Products look orange (in warm indoor light) or blue (in shade). Fix: Set white balance manually using a gray card, or correct it in post by clicking a neutral white area with the eyedropper tool.
Mistake 3: Shooting at too high an ISO.
What goes wrong: Images look grainy and product textures look rough. Fix: Use a tripod, open a window, or add a light source so you can lower ISO to 100–400.
Mistake 4: Centering every product in the frame.
What goes wrong: Dead-center composition looks static and amateurish. Fix: Apply the Rule of Thirds — move the product to one of the four grid intersection points for a more dynamic, professional composition.
Mistake 5: Skipping post-processing entirely.
What goes wrong: Even a technically good photo looks flat and dull straight out of camera. Fix: Run every image through a basic 5-step edit: correct exposure → set white balance → add contrast → adjust shadows/highlights → sharpen. This takes under 3 minutes and makes a visible difference.
When to Hire a Professional Product Photographer {#hire-a-pro}
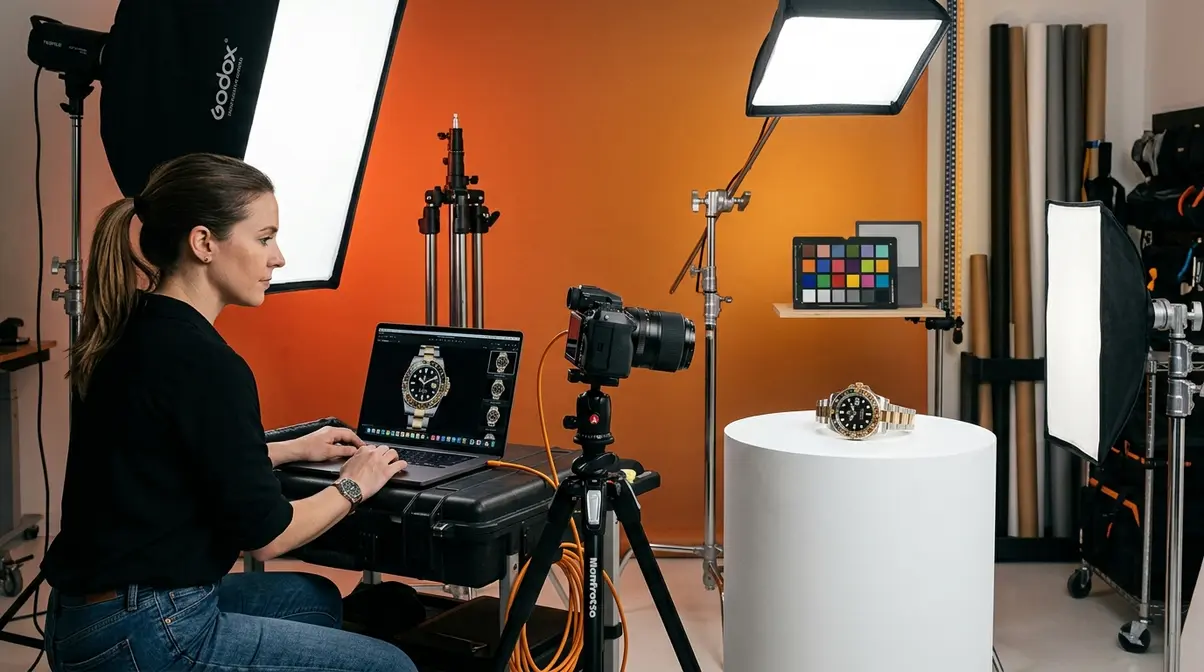
The SLICE Framework gives you the tools to create strong product photos yourself. But there are situations where DIY is the wrong choice — and recognizing them early saves both time and money.
Is Hiring a Professional Worth the Cost?
Professional product photography typically costs $50–$500 per image, depending on the photographer’s experience, your location, and the complexity of the shoot. A day rate for a full studio session ranges from $500–$3,000, often yielding 30–80 final edited images.
The business case for hiring a professional becomes clear when you calculate your cost per conversion. If your product sells for $80 with a 3% conversion rate on a DIY-photo listing, and a professional shoot costs $500 for 20 images but raises your conversion rate to 5%, the additional revenue from the improved images pays for the shoot within weeks on most moderately trafficked listings.
According to research from the Shopify blog, product images are the most influential factor in purchase decisions for online shoppers — more so than price, reviews, or product descriptions for first-time buyers. That context makes professional photography an investment, not an expense.
How to Find and Vet a Product Photographer
Not all photographers are product photographers. A wedding photographer’s skills do not automatically transfer to e-commerce work. Here’s how to find the right specialist.
- Where to look:
- Thumbtack and Bark: Marketplace platforms where photographers list product-specific services with ratings and reviews.
- Instagram: Search hashtags like #productphotographer and your city name. Photographers who post product work consistently are self-selecting as specialists.
- Local Facebook business groups: Often the fastest way to find vetted local photographers with community recommendations.
- Fiverr and Upwork: Good for budget-conscious sellers — look for photographers with 50+ completed product photography orders and a 4.8+ rating.
- Vetting checklist:
- Ask for a portfolio of work in your specific product category (jewelry photographers and food photographers have very different skill sets).
- Request a test shoot of 3–5 images before committing to a full catalog project.
- Clarify file delivery format, resolution, and whether background removal is included.
- Confirm turnaround time and revision policy in writing before paying a deposit.
What to Look for in a Product Photography Portfolio
A strong product photography portfolio for e-commerce work demonstrates three specific capabilities that differ from general photography.
- Color accuracy: Products should look true-to-life — not oversaturated, not washed out. If a photographer’s portfolio shows cosmetics that look like a different color from the real product, that’s a red flag.
- Background consistency: All images in a catalog shoot should have matching backgrounds, lighting, and color tone. Inconsistency across a product line looks unprofessional on a storefront.
- Technical sharpness: Zoom into the product in portfolio images. Fine details — stitching on fabric, text on packaging, texture on ceramics — should be sharp and clearly resolved.
If a photographer’s portfolio shows only lifestyle shots with no clean white-background e-commerce work, they may not be the right fit for marketplace listings that require strict technical standards.
When DIY Product Photography Isn’t Enough {#diy-limitations}
Common Pitfalls of the DIY Approach
Even with the SLICE Framework and the right equipment, some situations genuinely exceed what DIY product photography can deliver. Recognizing these scenarios early prevents wasted time and missed revenue.
Pitfall 1 — Catalog scale: Shooting 200+ SKUs consistently is extremely difficult without professional equipment and controlled studio conditions. Color drift between sessions, background inconsistencies, and physical fatigue all compound at scale. If your catalog exceeds 50 products and continues to grow, the time investment in DIY photography may exceed the cost of outsourcing.
Pitfall 2 — High-value or complex products: Jewelry, watches, and precision instruments require macro lenses, focus stacking (combining multiple images shot at different focus distances into one fully sharp image), and often specialized lighting rigs that cost thousands of dollars. The gap between a DIY macro shot and a professional jeweler’s image is immediately visible to buyers.
Pitfall 3 — Video and motion content: Short-form video on TikTok, Instagram Reels, and Amazon’s video slots drives significant conversion lift — but producing quality product video consistently requires additional skills, equipment, and editing time that extends well beyond still photography.
When to Upgrade or Outsource
- Upgrade your DIY setup when:
- Your current gear is consistently limiting image quality (e.g., your phone camera can’t capture the detail your product requires)
- You’ve mastered the basics and hit a technical ceiling
- You’re shooting the same product type repeatedly and a specialized tool (macro lens, turntable, lightbox) would pay for itself quickly
- Outsource to a professional when:
- Your product photos are technically correct but still not converting visitors into buyers
- You’re launching a new brand or product line where first impressions are critical
- You need video content and don’t have the skills or time to produce it
- Your time is more valuable spent on product development, marketing, or customer service than on photography
The Canva product photography guide notes that many successful small brands use a hybrid approach: DIY photography for ongoing catalog updates and secondary images, professional photography for hero images, launch campaigns, and paid advertising creative.
When to seek expert help: If your product involves legal, safety, or compliance contexts — pharmaceutical products, children’s items, regulated goods — professional photography that meets platform-specific technical requirements (exact pixel dimensions, color profiles, background specifications) is worth the investment to avoid listing suppression or compliance issues.
Frequently Asked Questions {#faq}
How do you do product photography for beginners?
Product photography for beginners starts with three fundamentals: clean background, good lighting, and a stable camera. Place your product on a white foam board background near a large window for soft, natural light. Use a tripod (or prop your phone against a stack of books) to eliminate camera shake. Shoot in the standard photo mode — not portrait mode — and run the image through a free editing app like Snapseed to correct exposure and white balance. Most beginners can produce marketplace-quality images with equipment they already own within an afternoon of practice.
What is the 80/20 rule in photography?
The 80/20 rule in photography states that 80% of a great photo’s impact comes from just 20% of the decisions you make. Those high-impact decisions are: lighting quality (soft vs. harsh), background cleanliness (distracting vs. neutral), and sharp focus. Everything else — props, angles, advanced editing — contributes the remaining 20%. For beginners, this means mastering those three fundamentals first before investing in advanced techniques or expensive gear. A well-lit, sharp photo on a clean background outperforms a poorly lit, blurry photo with every advanced technique applied.
What is the 20-60-20 rule in photography?
The 20-60-20 rule divides your frame into three visual zones for balanced, professional-looking composition. The foreground (20% of the frame) holds a small prop or texture element that adds depth. The middle ground (60%) contains your main subject — the product. The background (20%) provides negative space or a subtle complementary element. This proportion guides the eye naturally to the product without making the image feel empty or cluttered. It’s one of the fastest composition upgrades a beginner can apply because it simply requires repositioning elements you’re already using.
What is the 400 rule in photography?
The 400 rule is a technical formula used primarily in astrophotography to calculate maximum shutter speed before stars blur. The formula is: 400 ÷ focal length (in mm) = maximum shutter speed in seconds. For example, with a 20mm lens, the maximum shutter speed before star trails appear is 400 ÷ 20 = 20 seconds. For product photography on a tripod in a controlled studio setting, the 400 rule is not directly applicable — you have full control over your environment and don’t need to compensate for Earth’s rotation. Focus on the 20-60-20 rule and 80/20 rule for product work instead.
What are the most common product photography mistakes?
The most common product photography mistakes are poor white balance, shooting in direct sunlight, and centering every product in the frame. Wrong white balance makes products appear orange or blue — the single most common cause of color-inaccurate listings. Direct sunlight creates harsh shadows that misrepresent product shape and texture. Dead-center composition looks static and amateurish. Additional common errors include shooting at high ISO (causing grain) and skipping post-processing entirely. Each of these mistakes has a direct fix: manual white balance, indirect light, Rule of Thirds composition, low ISO with a tripod, and a basic 5-step editing workflow.
What are the 5 C’s of photography?
The 5 C’s of photography are Composition, Color, Contrast, Creativity, and Control — five principles that guide every strong product image. Composition governs where you place the product in the frame. Color manages the relationship between the product and its background. Contrast makes the product look three-dimensional. Creativity introduces a distinctive angle or styling choice that makes the image memorable. Control refers to mastery of camera settings so technical errors don’t undermine creative decisions. Running through the 5 C’s as a mental checklist before pressing the shutter button catches most composition and technical errors before they happen.
What colors are hardest to photograph?
Neon and highly saturated colors — electric yellow, hot pink, and neon green — are the hardest to photograph accurately because they often fall outside the sRGB color gamut that cameras and screens use. When a color is out of gamut, the camera clips it to the nearest available value, losing detail and shifting the hue. Deep reds can shift toward orange or pink under warm light. Pure black and pure white both lose texture detail if exposure isn’t carefully controlled. The solutions: shoot in RAW format to preserve maximum color data, use daylight-balanced lighting (5,500K–6,500K) for accurate color reproduction, and calibrate white balance using a gray card before each session.
Getting Your First Great Product Shot
Start with what you have. A modern smartphone, a large window, and a $5 piece of white foam board are genuinely enough to produce marketplace-quality product photos. The SLICE Framework — Setup, Light, Isolate, Capture, Edit — gives you a repeatable process so every shoot builds on the last. Research from the Digital Photography School consistently shows that lighting quality and background cleanliness account for the majority of perceived photo quality, and both are achievable at zero cost.
The SLICE Framework works because it replaces “I need better photos” with “I need a better process.” Each stage is a specific, learnable skill — not a vague aspiration. When something looks wrong in a photo, the framework tells you exactly which stage to revisit.
Pick one product. Set up near a window. Run through the SLICE Framework once. Edit the result with Snapseed or Lightroom Mobile. Compare it to what you had before. That first session — not a course, not a camera upgrade, not a studio rental — is where your product photography transformation actually begins.

Dave King
Hi, I'm Dave, the founder of Amateur Photographer Guide. I created this site to help beginner and hobbyist photographers build their skills and grow their passion. Here, you’ll find easy-to-follow tutorials, gear recommendations, and honest advice to make photography more accessible, enjoyable, and rewarding.