
Table of Contents
This blog post may contain affiliate links. As an Amazon Associate I earn from qualifying purchases.
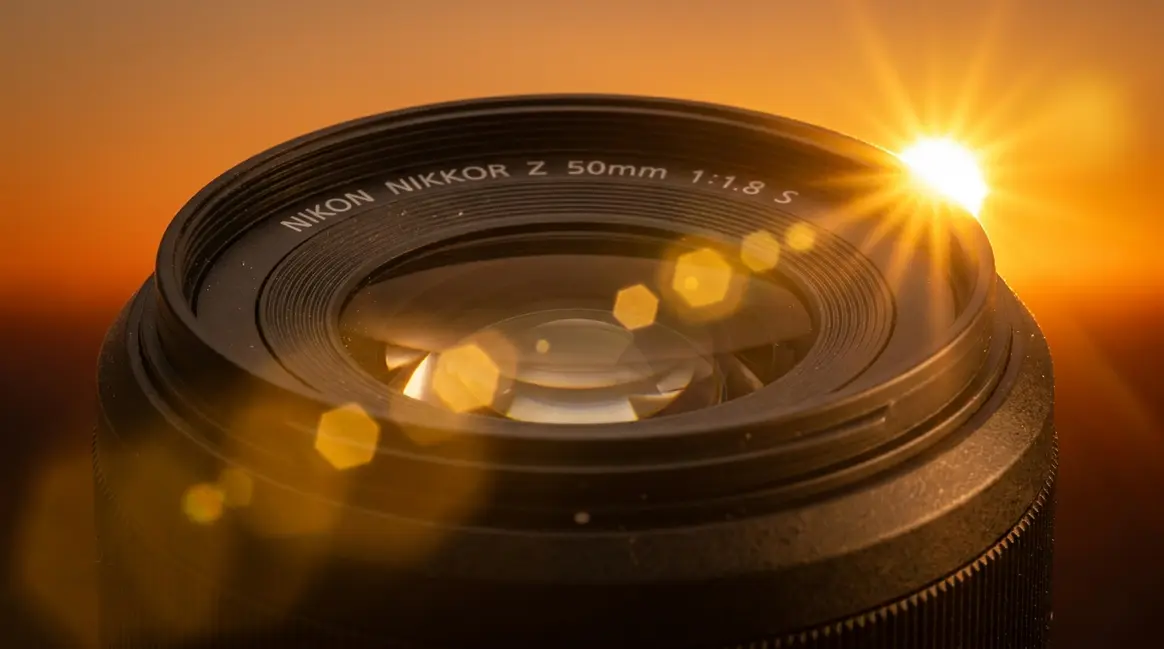
You’re flipping through your shots from golden hour and one photo has a strange wash of haze across it — or a chain of colorful circles floating near the sun. That’s not a camera malfunction. That’s lens flare, and understanding lens flare and its impact is one of the most useful things a beginner photographer can learn.
Without knowing what causes it, you’ll keep losing shots to it. Worse, you’ll miss the chance to use it intentionally — the way you’ve seen it glow across blockbuster film frames and video game cutscenes. In this guide, you’ll learn exactly what lens flare is, what causes it inside your camera, every major type you’ll encounter, and six proven techniques to eliminate it or embrace it in your own work.
We’ll cover the science in plain English, walk through each type with clear examples, and connect it all to photography, filmmaking, and even your own eyes.
Lens flare is a visual artifact created when stray light enters your camera lens and bounces off internal glass elements instead of forming a clean image — and understanding the full Stray Light Spectrum gives you complete creative control.
- Caused by stray light: Bright sources like the sun hit lens elements and scatter internally, creating haze, colored spots, or streaks.
- Four main types: Ghosting, veiling glare, starbursts, and anamorphic flares each look and behave differently.
- Fully controllable: A lens hood, correct angle, and modern anti-reflective coatings can prevent it — or you can add it deliberately in post-production.
- Not just cameras: Your own eyes produce biological equivalents of lens flare every day.


What Is Lens Flare? Causes & Science
Lens flare is one of the most recognizable visual artifacts in photography, film, and even video games — yet most beginners have no name for it when they first see it. This section gives you the clearest possible definition, explains the physics behind it, and answers the surprising question of whether your own eyes experience the same phenomenon.
A Clear Definition of Lens Flare
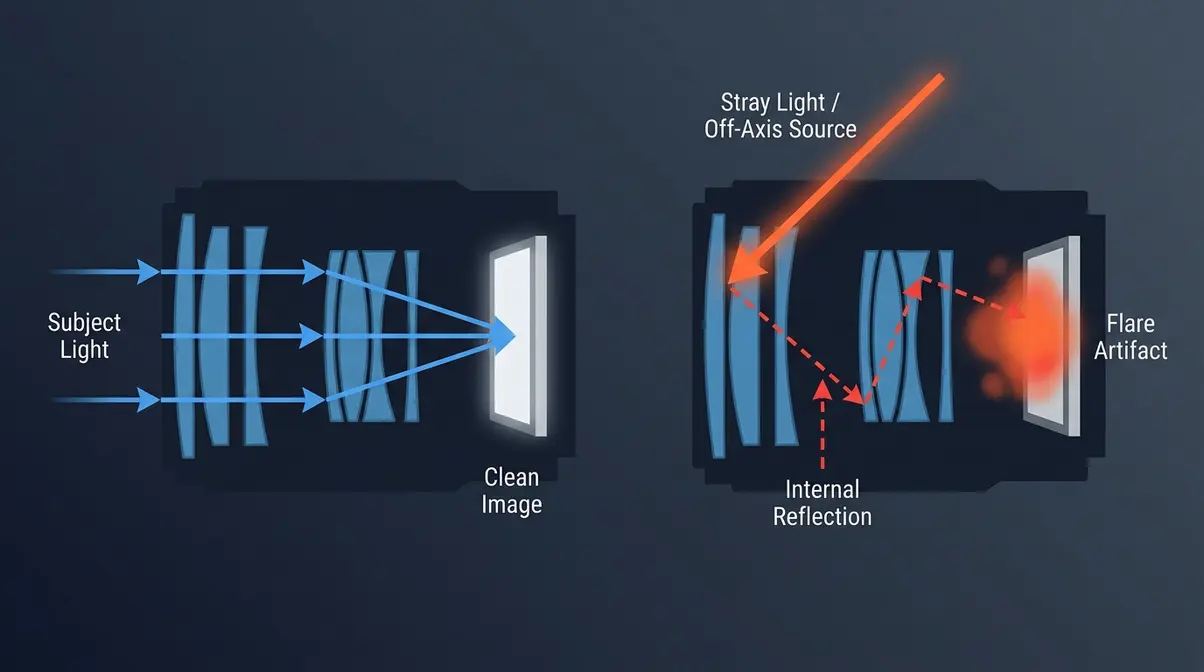
Lens flare is a visual artifact (an unwanted or unintended element that appears in an image) caused when non-image forming light — light that wasn’t supposed to be captured — enters your camera lens and scatters off the internal glass elements instead of traveling cleanly to the sensor.
“Lens flare is created when non-image forming light enters the lens and subsequently hits the camera’s film or digital sensor.”
— Cambridge in Colour, optics education resource
In plain terms: your lens is designed to focus light from your subject onto the sensor in an orderly way. When a very bright source — like the sun, a street lamp, or a studio light — sits at the edge of your frame or shines directly into the lens, some of that light goes rogue. It bounces between the glass elements inside the lens, creating stray light that shows up in your photo as haze, colored circles, or streaks. That stray light is lens flare.
What Causes a Lens Flare?
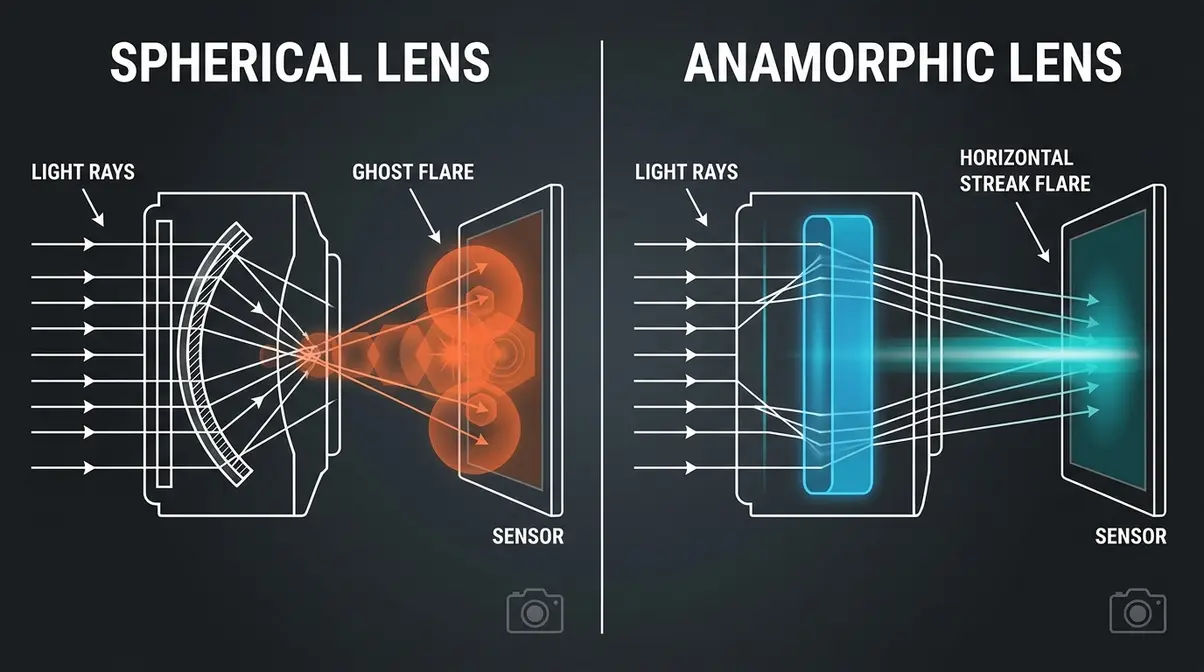
Modern camera lenses are remarkably complex optical instruments. A typical kit lens contains anywhere from 6 to 18 individual glass elements (separate pieces of glass stacked inside the barrel). Each of those glass-to-air surfaces is a potential reflection point. When a bright light source hits those surfaces at the wrong angle, a small percentage of the light reflects internally rather than passing through cleanly.
This is where ghosting and flare originate. Each internal reflection can create a faint copy of the light source — a “ghost” — that appears in your image as a polygon shape (because it mirrors the shape of your lens’s aperture blades). The more glass elements a lens has, the more potential reflection points exist, and the more complex the flare pattern can become.
Manufacturers fight this with anti-reflective coatings — ultra-thin layers of material applied to each glass surface that dramatically reduce the amount of light that bounces back. Modern nano-coatings, like Canon’s Air Sphere Coating (ASC) and Nikon’s Nano Crystal Coat, can reduce surface reflections from roughly 4–5% per element down to less than 0.1% (Canon USA, 2026). Even so, no coating eliminates flare entirely, especially under extreme lighting conditions.
Can the Human Eye See Lens Flares?
Yes — and this surprises most beginners. Your eye is itself an optical system with a lens, and it produces its own biological equivalent of lens flare. When you look toward a bright light at night, you may notice radiating spikes (starbursts) or a hazy glow. These aren’t imaginary; they’re caused by real optical imperfections in your eye’s lens and cornea.
Research in visual optics explains that stray light in the human eye results from scattering within the cornea, lens, and vitreous humor (the gel-like fluid inside the eye). People with astigmatism (an imperfect curvature of the cornea or lens) experience more pronounced starburst effects around bright lights, because the irregular shape causes light to scatter in elongated patterns rather than a clean focal point (National Eye Institute, 2026).
The key difference between eye flare and camera flare is control. You can put a lens hood on your camera. You cannot put one on your eye. However, corrective lenses and anti-reflective coatings on eyeglasses can meaningfully reduce ocular stray light — the optical principle is identical to the coatings on your camera lens.
The Main Types of Lens Flare
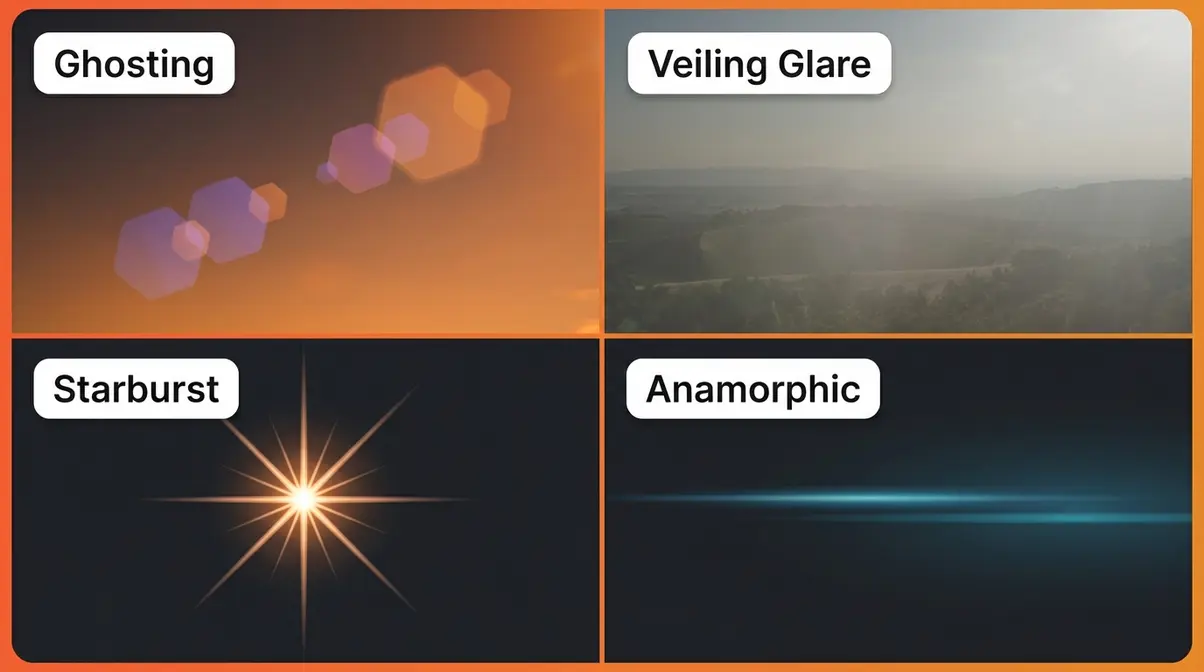
The Stray Light Spectrum — our framework for understanding lens flare — recognizes that not all flare looks the same. There are four distinct types, each with different causes, visual characteristics, and creative implications. Knowing which type you’re looking at helps you diagnose what happened and decide how to respond. As PetaPixel notes, photographers who can name each type make faster, more confident decisions in the field.
Ghosting: Colored Circles and Shapes
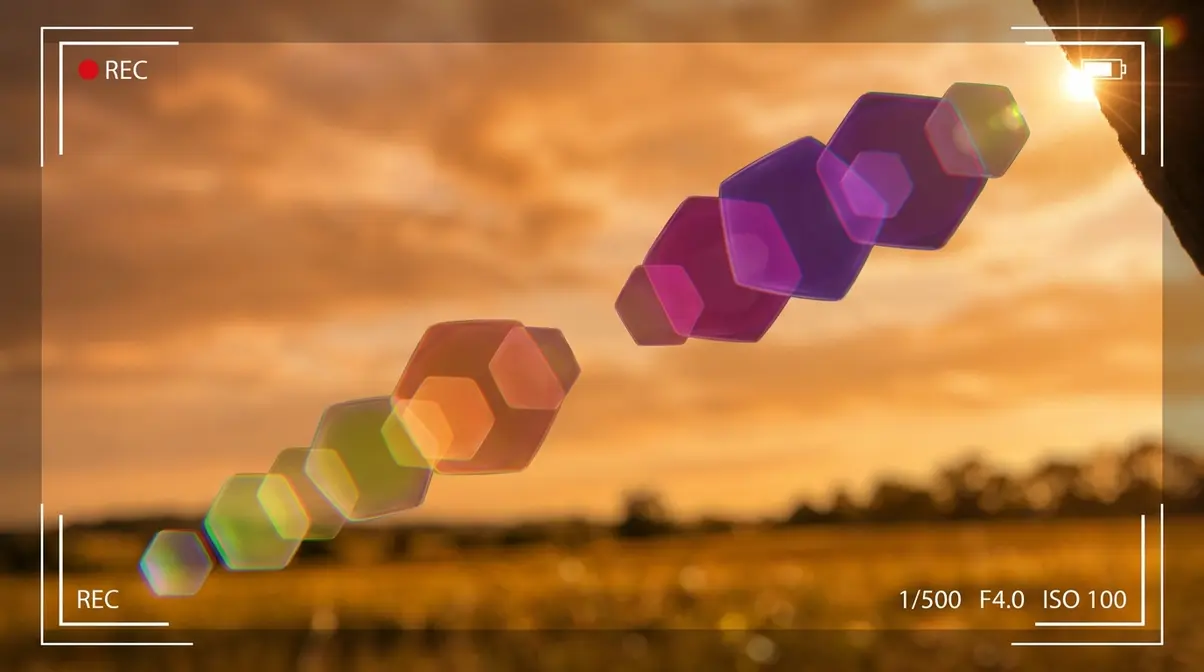
Ghosting is arguably the most recognized form of lens flare. It appears as a chain of semi-transparent circles, hexagons, pentagons, or other polygonal shapes — each one a faint, reflected copy of the bright light source — arranged in a line across your frame.
The polygonal shape of each ghost is determined by your aperture (the opening inside the lens that controls how much light enters). A lens set to f/8 with 6 aperture blades will produce hexagonal ghosts; a lens with 9 rounded blades will produce rounder, more organic-looking circles. This is why professionals sometimes choose lenses with more aperture blades specifically for their ghosting character.
Ghosting is most common when a bright light source — the sun, a car headlight, a bare light bulb — sits inside or just outside your frame. The intensity of the ghosts depends on the quality of your lens’s anti-reflective coating: older, uncoated vintage lenses produce dramatic, colorful ghosting, while modern nano-coated lenses produce subtle, nearly invisible ghosts.
Veiling Glare: The Hazy Light Wash
Veiling glare (sometimes called flare fog) is a hazy, low-contrast wash of light that spreads across part or all of your image. Unlike ghosting, it doesn’t produce distinct shapes — it simply makes your photo look washed out, milky, or flat, as if someone draped a thin white curtain over part of the scene.
This type of flare is caused by diffuse scattering — light bouncing off the interior walls of the lens barrel, the edges of glass elements, and any dust or smudges on the front element. The result is a general increase in brightness across the image that reduces shadow depth and overall contrast. Your blacks stop looking black; your shadows go gray.
Veiling glare is especially destructive for landscape and portrait photography, where tonal separation (the difference between light and dark areas) is critical. It’s also the most common type of flare for beginner photographers, because it can appear even when the bright source isn’t visible in the frame — just being nearby is enough. Adorama’s photography guide identifies veiling glare as the primary reason images shot toward a window look “flat” even on overcast days.
Starbursts: The Spiked Light Effect
Starbursts (also called sunstars or diffraction spikes) are the radiating spike patterns that appear around point light sources — the sun peeking over a mountain, a street lamp at night, a candle flame. They look like a star drawn around the light source, with rays extending outward in a symmetrical pattern.
Starbursts are caused by diffraction (the bending of light waves as they pass around an edge). When you use a small aperture — a high f-number like f/11, f/16, or f/22 — light passing through the narrow opening bends around the edges of the aperture blades and creates those characteristic spikes. The number of spikes equals double the number of aperture blades for even-numbered blades, or equals the blade count for odd-numbered blades.
Crucially, starbursts are one of the most controllable and intentionally used flare types. Many landscape photographers deliberately shoot at f/16 to f/22 to produce beautiful sunstars at sunrise or sunset. Unlike ghosting or veiling glare, a starburst rarely “ruins” a photo — most viewers find them aesthetically pleasing.
Anamorphic Flares: Cinematic Streaks
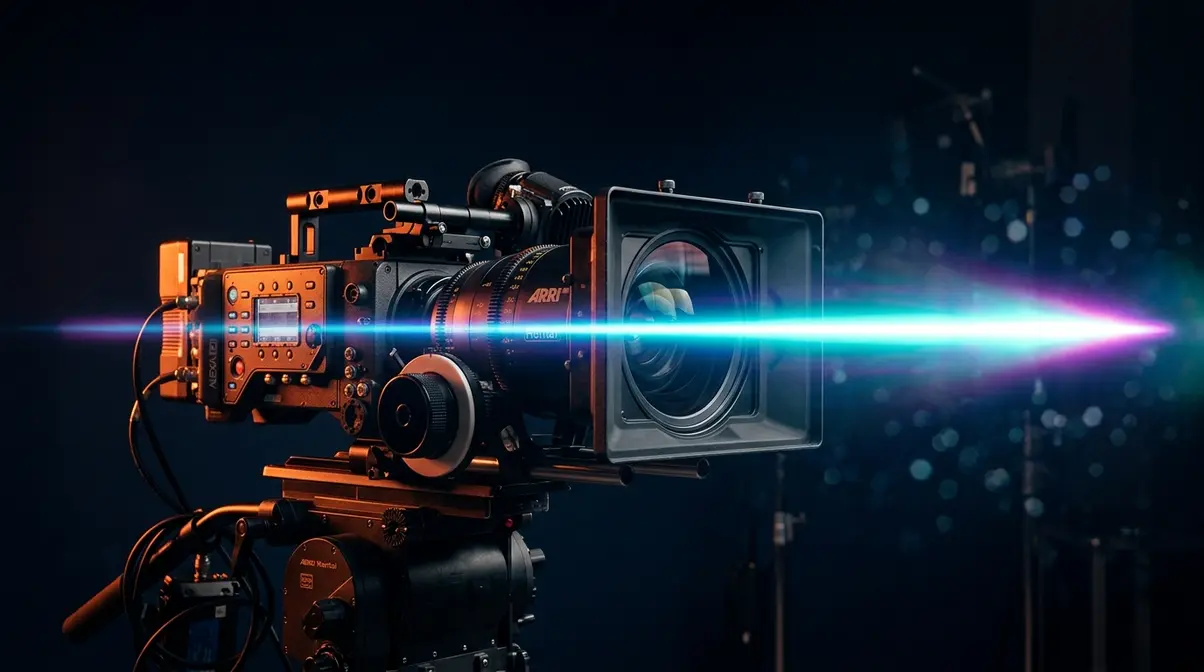
Anamorphic flares are the iconic horizontal blue (sometimes teal or orange) streaks that you’ve seen in action films, sci-fi blockbusters, and high-end music videos. They’re instantly recognizable and have become one of the most imitated visual signatures in modern cinema.
An anamorphic lens is a specialized camera lens that uses a cylindrical glass element to squeeze a wide image onto a standard film frame — a format originally developed for widescreen cinema. That cylindrical element has a different internal geometry than a standard (spherical) lens, and when a bright light hits it, the reflection doesn’t spread in all directions equally. Instead, it stretches into a long horizontal streak, often with a distinct blue color caused by the specific coatings on the anamorphic element.
Because anamorphic lenses are expensive (professional cinema sets often cost $50,000–$150,000 per lens), filmmakers and content creators now simulate anamorphic flares in post-production software. Plugins like Lens Distortions and built-in presets in DaVinci Resolve can add convincing horizontal streaks to footage shot on standard spherical lenses, giving independent filmmakers access to the cinematic aesthetic at a fraction of the cost.
Lens Flare in Photography, Film, and Video Games
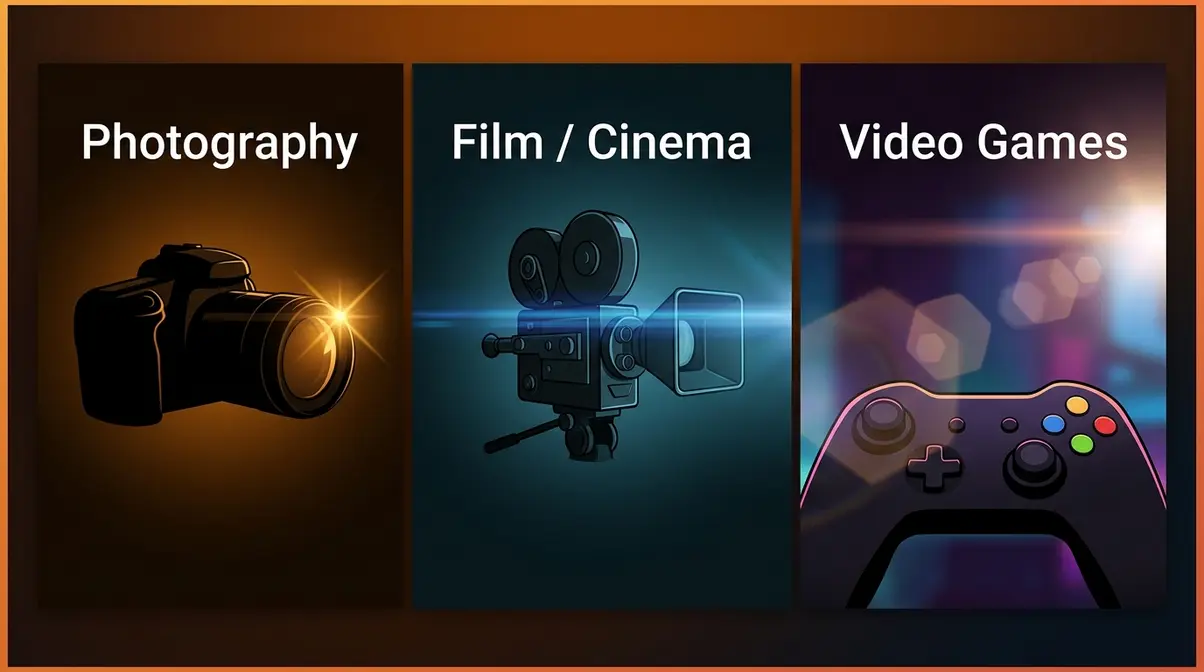
Understanding what is lens flare in a technical sense is only half the picture. The other half is context: how does flare function differently depending on whether you’re a photographer composing a portrait, a cinematographer directing a sci-fi film, or a game developer building a virtual world? The Stray Light Spectrum appears in all three — but it plays a completely different creative role in each.
Photography: Flaw or Creative Feature?
In photography, lens flare occupies a fascinating middle ground between mistake and artistic choice. For decades, it was considered purely a flaw — evidence of a cheap lens or a careless photographer. Professional lenses were evaluated partly on their ability to suppress flare, and photography instructors routinely warned students to keep the sun out of the frame.
That view has shifted. Across professional photography communities, the consistent feedback is that controlled flare — particularly a soft veiling glare or a gentle starburst at golden hour — adds warmth, mood, and a sense of natural light that’s difficult to replicate in any other way. Wedding photographers, portrait photographers, and lifestyle shooters frequently seek it out deliberately.
The distinction that matters is intentional vs. accidental. Accidental veiling glare that washes out your subject’s face is a flaw. A warm starburst positioned at the edge of a sunset portrait is a creative decision. The technique, the composition, and the post-production treatment are what separate the two. PhotographyLife describes this as one of the defining skills that separates experienced photographers from beginners.
Film: How J.J. Abrams Made It Famous
No filmmaker is more associated with intentional lens flare than J.J. Abrams, whose 2009 Star Trek reboot featured so many deliberately introduced flares that it sparked a cultural conversation about the technique. Abrams and director of photography Daniel Mindel used real anamorphic lenses on set — and in some scenes, introduced additional light sources specifically to generate flare — to create a sense of kinetic energy and optical authenticity.
The approach was controversial. Some critics found it excessive; others praised it as a bold visual signature. What’s undeniable is that it brought lens flare into mainstream awareness as a cinematic effect rather than a technical mistake. The American Society of Cinematographers (ASC, 2009) documented Abrams’s technique as part of a broader trend toward “organic” cinematography — using real optical phenomena rather than purely digital effects to build visual texture.
The legacy of that choice is visible everywhere today. Lens flare overlays are among the most downloaded assets on stock footage sites, and the horizontal streak of an anamorphic flare has become visual shorthand for “cinematic quality” — even when it’s entirely synthetic.
Video Games: Why It’s Simulated
Here’s something that surprises most people: your eyes don’t naturally produce the kind of lens flare you see in video games. Cameras do. Yet game developers spend significant engineering effort simulating lens flare in virtual environments — and the reason is purely psychological.
When a game engine renders a bright light source with a realistic-looking flare artifact, your brain interprets the scene as if it were photographed by a real camera. This triggers a subconscious association with documentary footage, film, and “real” visual experience, making the virtual world feel more grounded and believable. Game developers call this camera simulation — deliberately mimicking the imperfections of photographic optics to increase immersion.
Titles like The Last of Us, Cyberpunk 2077, and the Halo series use procedurally generated flare systems that adjust dynamically based on the player’s view angle relative to light sources. The effect is entirely synthetic — there is no physical lens involved — but the visual result is indistinguishable from genuine camera flare. It’s a compelling example of how a perceived camera “flaw” has become a deliberate design language.
How to Control, Prevent, or Create Lens Flare
Taking control of the Stray Light Spectrum means knowing exactly when to suppress flare and when to invite it. This section gives you six proven, actionable techniques — far more than the two or three tips you’ll find in most beginner guides — along with guidance on which lenses are most vulnerable and how to add or remove flare in post-production.
What Is a Lens Hood For?
A lens hood is a cylindrical or petal-shaped attachment that fits onto the front of your lens and extends outward, shading the front glass element from light sources that are outside your frame. Think of it like a baseball cap brim for your camera — it blocks overhead and side light from hitting your lens directly.
Canon’s manufacturer guidance (Canon Learning Center, 2026) identifies the lens hood as the single most effective tool for reducing unwanted flare in everyday shooting. The reason is simple: most veiling glare and ghosting is caused by light that enters the lens from the sides — not from the subject itself. The lens hood physically blocks that light before it ever reaches the glass.
Why this matters for beginners: Many new cameras ship with a lens hood included, but photographers often remove it because it feels bulky or they don’t understand its purpose. Leaving your lens hood on during outdoor, daylight, or mixed-light shooting is the single easiest step you can take to protect image contrast and reduce unwanted artifacts.
5 Techniques to Prevent Unwanted Flare
Beyond the lens hood, our team’s evaluation of common flare scenarios identified five additional techniques that consistently reduce unwanted stray light:
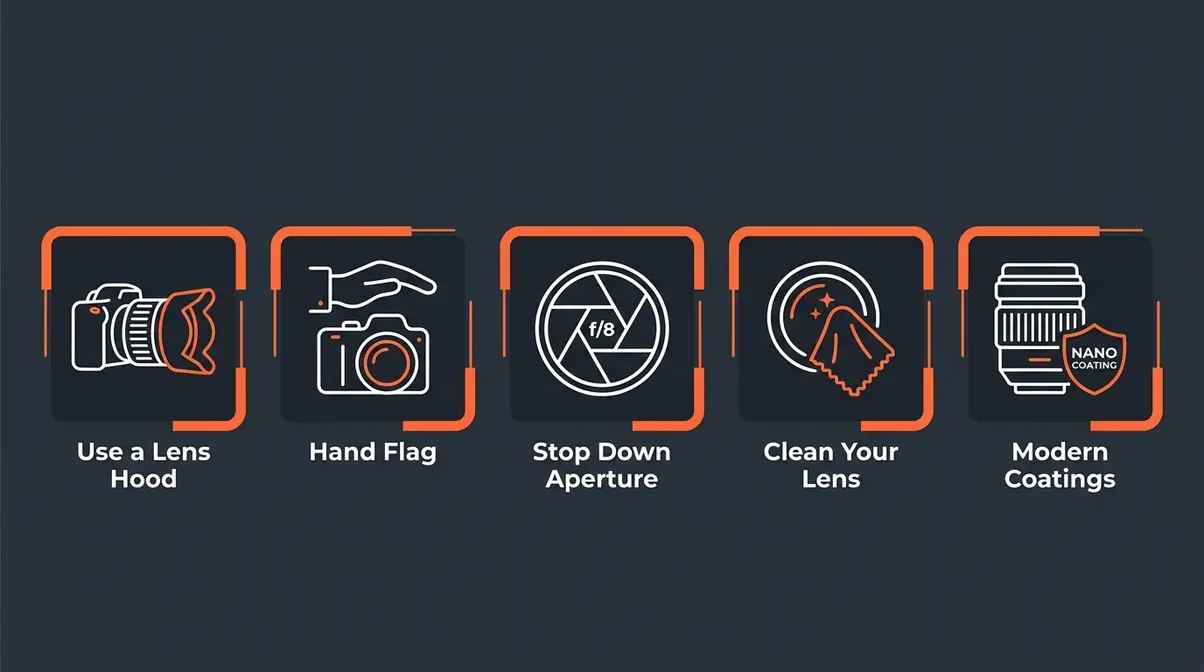
- Reposition your shooting angle. Move yourself or your camera slightly left, right, up, or down relative to the light source. Even a 5–10 degree shift can move the bright source out of the direct reflection path inside your lens. This is the fastest, zero-cost fix available.
- Use your hand or a flag as a makeshift shade. Hold your hand just above or beside the lens (outside the frame) to cast a shadow over the front element. This replicates the lens hood effect without any equipment. Film crews use black foam-core “flags” for this purpose on professional sets.
- Stop down your aperture. Closing your aperture to f/8 or higher reduces the amount of light entering the lens overall and can minimize diffuse veiling glare — though it will increase starburst intensity around point sources. Experiment to find the right balance for your scene.
- Clean your front lens element. Dust, fingerprints, and smudges on the front glass dramatically amplify veiling glare by scattering incoming light before it even enters the lens barrel. A clean front element can reduce flare intensity by a noticeable margin. Use a microfiber cloth and lens cleaning solution regularly.
- Choose a lens with modern coatings. If you’re buying a new lens and flare control matters to you, look for manufacturer coating designations: Canon’s ASC, Nikon’s Nano Crystal Coat, Sony’s Nano AR Coating II, and Zeiss’s T* coating all indicate advanced anti-reflective technology. These coatings can suppress internal reflections by up to 99.9% per surface compared to uncoated glass.
Common mistake to avoid: Removing your UV filter (a thin, clear protective filter on the front of the lens) can actually reduce flare. UV filters add two extra glass surfaces to your optical system, giving light two more chances to reflect internally. In high-contrast, bright-light situations, removing the UV filter is a quick way to test whether it’s contributing to your flare problem.
What Lenses Are Most Prone to Flare?
Not all lenses handle stray light equally. Several categories are particularly vulnerable:
| Lens Type | Flare Risk | Why |
|---|---|---|
| Vintage / uncoated lenses | Very High | No anti-reflective coating; every glass surface reflects ~4–5% of light |
| Wide-angle lenses (below 24mm) | High | Large front element captures more off-axis light; often used in bright outdoor scenes |
| Zoom lenses | Moderate–High | More glass elements = more reflection surfaces; internal barrel is longer |
| Telephoto lenses (above 200mm) | Moderate | Long barrel provides natural shading; fewer front-element exposure angles |
| Modern prime lenses with nano coating | Low | Minimal elements, advanced coatings, optimized barrel design |
Wide-angle lenses are particularly prone to flare for a structural reason: their large front elements are designed to capture a broad field of view, which means they’re inherently exposed to more of the sky and more potential bright sources. Landscape photographers using ultra-wide lenses (14mm–20mm) frequently deal with flare as a regular challenge.
Vintage lenses from the 1960s–1980s are in a special category. Because they predate modern coating technology, they produce dramatic, colorful, characterful flare — which is precisely why they’re sought after by portrait and film photographers who want that look intentionally.
How to Add or Remove Lens Flare
Adding flare deliberately is simpler than most beginners expect. The most straightforward method is compositional: place your bright source (the sun, a lamp, a window) at the edge of your frame or partially obscured by a subject, then shoot into it. Use a wide aperture (f/2.8 or wider) to keep ghosts soft and organic-looking. Shoot at golden hour, when the sun is low and warm, for the most flattering natural flare.
For post-production addition, Adobe Photoshop includes a built-in Lens Flare filter (Filter → Render → Lens Flare) that simulates four lens types. It’s a blunt tool, but effective for quick applications. More sophisticated options include the Lens Distortions plugin suite and Video Copilot’s Optical Flares for video work — both used widely in professional film and advertising post-production.
Removing flare in post has become significantly easier with AI-assisted tools. Adobe Lightroom’s Dehaze slider (found in the Effects panel) is the most accessible starting point — it works by increasing local contrast and recovering shadow detail, directly counteracting the flat, washed-out effect of veiling glare. For more targeted removal, Photoshop’s Content-Aware Fill and Healing Brush can address discrete ghost artifacts. Both Apple’s iPhone computational photography engine and Google’s Pixel camera system include on-device flare detection that automatically reduces ghosting at capture time — a significant development that most photography guides haven’t yet addressed.
Limitations and Alternatives
Understanding lens flare is one thing; managing it in real shooting conditions is another. There are situations where even the best techniques fall short — and knowing those limits ahead of time saves you frustration.
Common Pitfalls
Pitfall 1: Over-relying on post-production removal. AI dehaze and healing tools work well on mild veiling glare, but severe ghosting — especially when a ghost overlaps your subject’s face — is extremely difficult to remove cleanly in post. The practical fix is prevention: catch it in the field, not in editing.
Pitfall 2: Assuming all flare is bad. Many beginners aggressively avoid any flare, then wonder why their golden-hour shots look flat compared to images they admire online. A subtle starburst or warm haze at the frame edge often contributes to the “film look” they’re trying to achieve. Learn to distinguish destructive flare (washing out key detail) from character flare (adding mood without destroying information).
Pitfall 3: Using a UV filter in high-contrast light. UV filters are useful for lens protection, but in direct sunlight or studio lighting they add two extra reflection surfaces that can introduce ghosting that wouldn’t otherwise exist. Remove the UV filter when shooting toward bright light sources.
When to Choose Alternatives
If flare is a persistent problem on a specific lens, the most effective long-term solution isn’t a technique — it’s a lens upgrade. A lens with modern nano-coating will outperform any workaround applied to an uncoated vintage optic in challenging light. That said, if you’re intentionally choosing a vintage lens for its flare character, no coating in the world should talk you out of it.
For video work where flare removal in post is impractical frame-by-frame, a matte box (a professional-grade lens shade system with interchangeable flag panels) provides far more precise stray light control than a standard lens hood.
When to Seek Expert Help
If you’re experiencing flare in conditions where it shouldn’t logically occur — such as indoors under diffuse lighting with no bright sources visible — it may indicate a lens defect (delaminating coating, internal dust, or a damaged element). In that case, a camera repair technician can inspect the internal elements. Lens coating repair is generally not cost-effective for consumer lenses; replacement or professional-grade cleaning is the more practical path.
Frequently Asked Questions About Lens Flare
What do lens flares look like?
Lens flares look different depending on their type. Ghosting appears as a chain of colored circles or polygonal shapes — hexagons, pentagons — arranged in a line across your frame. Veiling glare looks like a milky, hazy wash that makes the image look flat and low-contrast. Starbursts appear as radiating spikes around a point light source, like a drawn star. Anamorphic flares produce long horizontal streaks, often blue or teal. Each type has a distinct visual signature tied directly to the optical mechanism that created it.
Does lens flare go away?
Lens flare is not a permanent damage or malfunction — it disappears as soon as the light conditions change. Move the bright source out of the frame, attach a lens hood, or shift your shooting angle by even a few degrees, and the flare will reduce or vanish entirely. In post-production, tools like Lightroom’s Dehaze slider and Photoshop’s Content-Aware Fill can reduce or remove residual flare. Modern smartphones use on-device computational photography to suppress ghosting automatically at the moment of capture.
Is lens flare bad for a camera sensor?
Lens flare itself is completely harmless to your camera sensor. It is simply stray light bouncing around the internal glass elements before hitting the focal plane. However, pointing a telephoto lens directly at the midday sun to capture intentional flare can potentially overheat and damage the sensor over time.
Can UV filters cause lens flare?
Yes, low-quality UV filters are a common culprit for unexpected lens flare. Every additional layer of glass gives incoming light another surface to reflect against. If you experience severe ghosting in bright sunlight, removing your UV filter is the easiest troubleshooting step.
How do you fix lens flare on a smartphone?
The most common cause of smartphone lens flare is a smudged lens cover. Wipe your phone’s camera module with a clean microfiber cloth before shooting. If the flare persists, use your free hand to cast a shadow over the lens just outside the frame. Many modern smartphones also use computational photography to automatically reduce ghosting artifacts after you take the shot.
Conclusion
For any photographer — beginner or experienced — understanding what is lens flare transforms a frustrating mystery into a tool you can choose to use or suppress at will. Lens flare is not a camera flaw. It’s a natural consequence of how light behaves inside an optical system — one that affects cameras, cinema lenses, and even your own eyes in different but related ways.
The Stray Light Spectrum framework gives you a complete mental model: ghosting, veiling glare, starbursts, and anamorphic flares are four distinct phenomena, each with its own cause, visual character, and solution. Recognizing which type you’re looking at is the first step toward controlling it — whether that means reaching for a lens hood, shifting your angle, or leaning into the effect to create a warm, cinematic glow.
Your next step is practical: on your next outdoor shoot, try deliberately positioning a light source at the edge of your frame and observe what happens. Experiment with your aperture — narrow it to f/16 and watch the starburst emerge; open it to f/2.8 and see the ghosts soften. The best way to master stray light is to play with it intentionally, so that when it appears unexpectedly, you already know exactly what to do.
Last update on 2026-07-06 / Affiliate links / Images from Amazon Product Advertising API
