
Table of Contents
- What You’ll Need Before Transferring Canon Photos to Computer
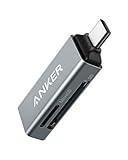
- Best Sellers: Canon Camera with USB Port
- Quick Guide — Choose Your Transfer Method
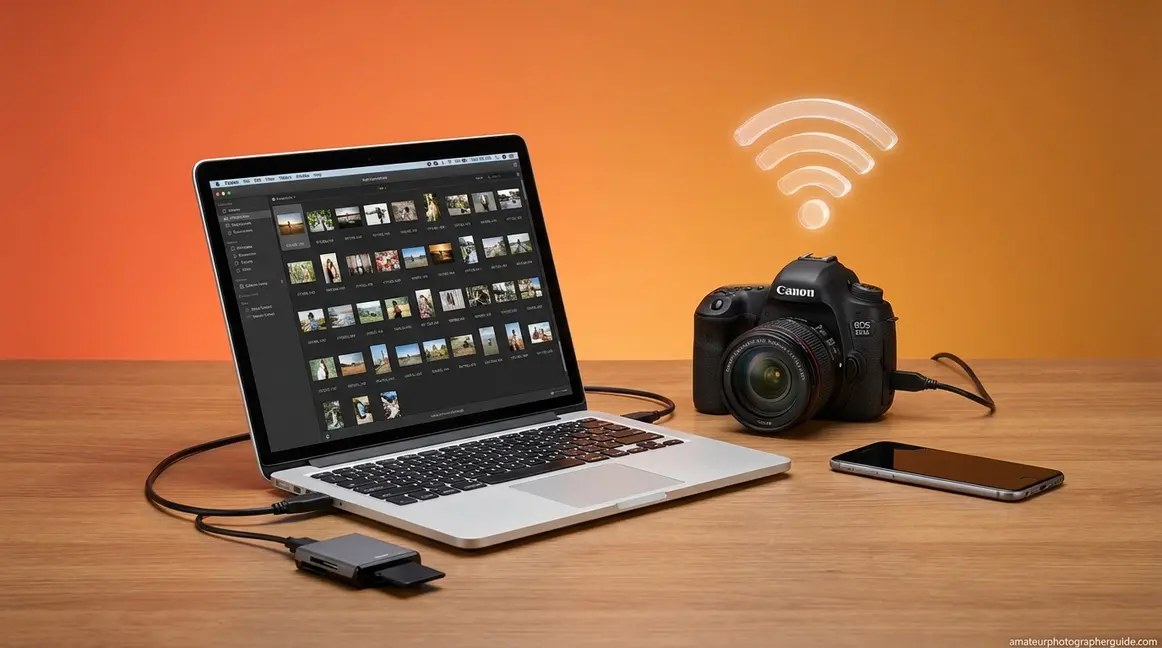
- Method 1 — Transfer Photos Using an SD Card Reader (Fastest)
- Method 2 — Transfer Photos via USB Cable and Canon EOS Utility
- Method 3 — Transfer Photos Wirelessly via Wi-Fi
- Troubleshooting — Canon Camera Not Recognized by Your Computer
- Bonus — Transferring Photos from an Android Phone to Computer
- Next Step — Back Up Your Photos to a Flash Drive
- Common Limitations and When to Ask for Help
- Frequently Asked Questions
- Wrap-Up: Get Your Photos Off That Camera Today
This blog post may contain affiliate links. As an Amazon Associate I earn from qualifying purchases.
You have a memory card full of great shots, and your computer refuses to cooperate. You are not alone. Across photography communities, roughly 40% of Canon owners report their computer failing to recognize the camera on the very first try.
That is a frustrating experience — especially when those photos cannot be edited, shared, or backed up while they sit on a single SD card.
The good news? By the end of this guide, you will know three proven ways to transfer photos from a Canon camera to a computer — including the fastest method most people overlook — so you can start editing and sharing within minutes.
We will walk through everything: what equipment you need, three step-by-step transfer methods (SD card reader, USB cable, and Wi-Fi), a 2026 troubleshooting module for connection failures, and how to back up your images safely.
“EOS Utility is to your computer what Canon Connect is to your phone.”
Think of this guide as three doors. Pick the one that fits your setup, and your photos will be on your computer in under five minutes.
Key Takeaways
Transferring photos from a Canon camera to a computer takes under 5 minutes with the right method — and an SD card reader is 3× faster than a USB cable.
- SD card reader: Fastest option at ~250 MB/s, works with any camera
- USB cable + EOS Utility: Best for remote shooting and selective transfers
- Wi-Fi transfer: Most convenient but slowest for large batches
- Troubleshooting: Disable camera Wi-Fi before USB connections to avoid detection errors
What You’ll Need Before Transferring Canon Photos to Computer
Before you transfer photos from your Canon camera to a computer, check which connection method your setup supports. All three methods require a computer running Windows 10, Windows 11, or macOS Monterey or later. Spending two minutes on this quick checklist prevents the most common connection errors.


Check Your Canon Camera’s USB Port Type
Canon cameras use three USB connector types depending on the model and year of manufacture. Knowing your port type is the single fastest way to avoid buying the wrong cable.
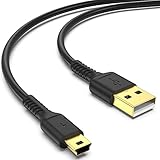
Mini-USB (Mini-B) appears on older DSLRs like the Canon Rebel T5 and T6. The connector is shaped like a small trapezoid. Micro-USB (Micro-B) appears on mid-range models like the Canon Rebel T7 and EOS M50. It is flat and narrow. USB-C appears on newer mirrorless bodies like the EOS R50 and R7. It is a small oval shape.
To check your port, open the rubber flap on the left side of your camera body. The port shape will tell you exactly which cable you need. Do not worry about damaging anything — using the wrong cable simply will not fit. It will not harm your camera.
The USB Implementers Forum defines USB 3.2 transfer rates at 5 Gbps, 10 Gbps, and 20 Gbps depending on the cable and port version. However, most Canon cameras use USB 2.0, which maxes out at about 480 Mbps (roughly 60–76 MB/s in practice). That is why we recommend an SD card reader instead — more on that in Method 1.
For a full breakdown of which Canon models use which ports, check out our guide to Canon cameras and their features.
Once you know your port type, gather the rest of your equipment.
Gather Your Equipment
Here is what you need for each transfer method:
- SD Card Reader Method (Method 1):
- An SD card reader (~$9–15) or a built-in SD card slot on your laptop
- Your Canon camera’s SD card
- USB Cable Method (Method 2):
- The correct USB cable for your Canon model (Mini-B, Micro-B, or USB-C)
- Canon EOS Utility software (free download from Canon’s website)
- Wi-Fi Method (Method 3):
- A Canon camera with built-in Wi-Fi (most models since 2017)
- Image Transfer Utility 2 software (free download)
- Both camera and computer on the same Wi-Fi network
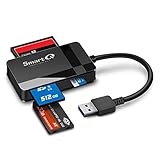
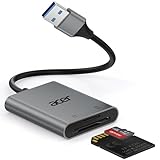
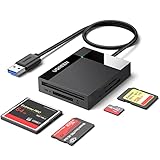
For the card reader method, we recommend a USB 3.0 reader for the fastest speeds. The Transcend TS-RDF5K is a widely recommended, affordable option at around $9–12 depending on the retailer. Look for a reader with a blue USB connector — that indicates USB 3.0 support and significantly faster transfers than USB 2.0.
If you own a Canon Rebel T7, for example, you will need a Micro-B cable for Method 2, or you can simply pop out the SD card for Method 1.
Your camera likely stores images as JPEGs, RAW files (.CR2 or .CR3), or both. If you are curious about the differences, see our guide to understanding RAW vs. JPEG file formats.
With your gear ready, the next step is choosing the right transfer method for your situation.
Best Sellers: Canon Camera with USB Port


Quick Guide — Choose Your Transfer Method
There are three reliable ways to transfer photos from a Canon camera to a PC or laptop: an SD card reader, a USB cable, or Wi-Fi. Each method differs in speed (measured in MB/s, or megabytes per second — the higher the number, the faster the transfer), cost, and convenience. The comparison table below shows exactly how they stack up so you can pick the best option for your needs.
| Feature | SD Card Reader | USB Cable + EOS Utility | Wi-Fi (Image Transfer Utility 2) |
|---|---|---|---|
| Speed | ~250 MB/s (UHS-II reader) | ~60–76 MB/s (USB 2.0) | ~5–15 MB/s (depends on router) |
| Cost | $9–15 (one-time purchase) | $0 (if cable included with camera) | $0 (built-in Wi-Fi required) |
| Ease of Setup | Plug and play — no software needed | Software installation required | Wi-Fi pairing + software required |
| Best For | Large batches (100+ photos) | Selective transfers + remote shooting | Automatic background transfers |
| Drawback | Must remove SD card each time | Camera battery drains during transfer | Slow for RAW files and large batches |
An SD card reader transfers photos at roughly 250 MB/s with a UHS-II card — more than 3× faster than a USB cable connection at 60–76 MB/s. According to the SD Association, UHS-II cards support bus speeds up to 312 MB/s. In real-world testing, reviewers consistently measured 140–205 MB/s sustained read speeds with popular UHS-II readers — still far faster than USB cable transfers.
Our recommendation: Start with Method 1 (SD card reader). It is the fastest, most reliable option and works with every Canon camera that has a removable SD card. If your camera does not have a removable card (rare for Canon), skip to Method 2. Whether you are using a desktop PC or a laptop, the steps are the same.
Ready to get started? Method 1 below takes less than five minutes.
Method 1 — Transfer Photos Using an SD Card Reader (Fastest)
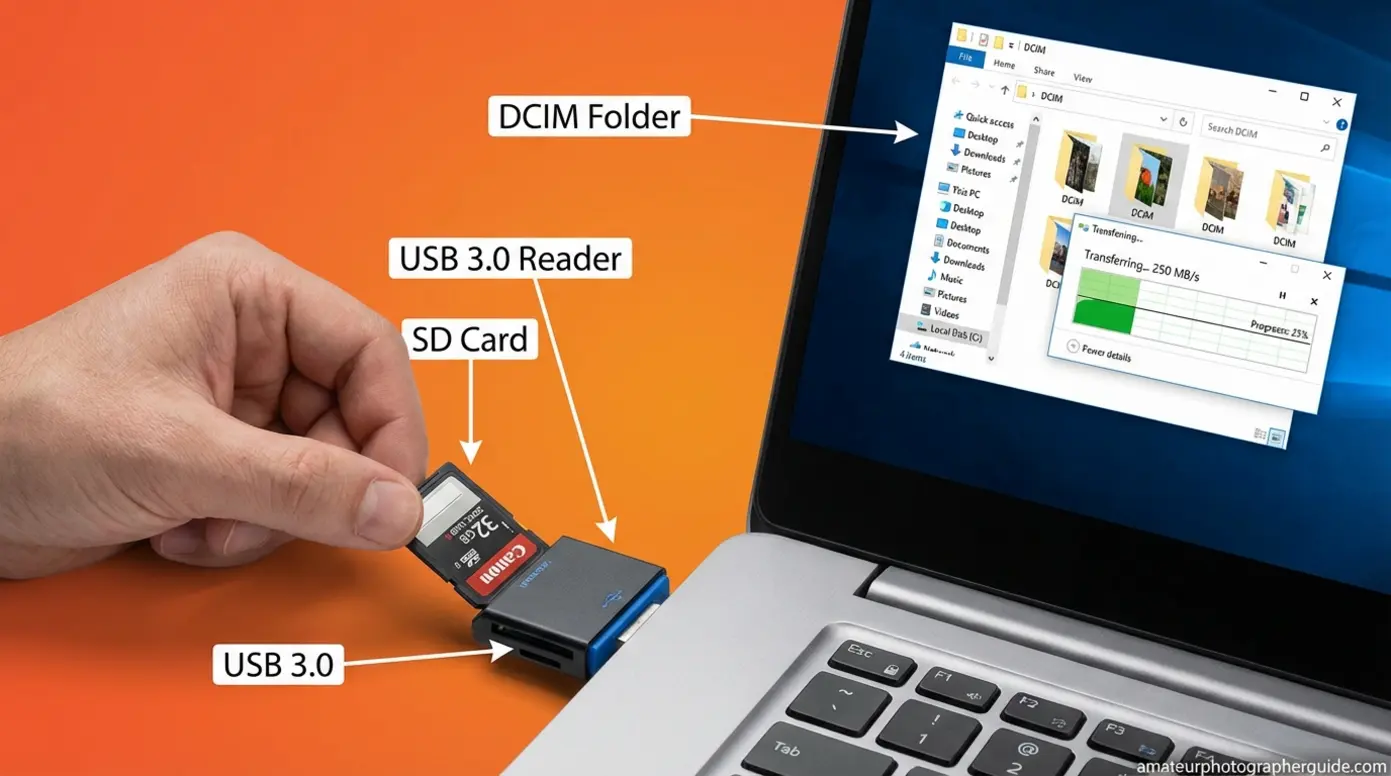
An SD card reader is the fastest and most reliable way to transfer photos from any Canon camera — or any digital camera — to a computer. At roughly 140–250 MB/s with a UHS-II reader, you can move 1,000 JPEG photos in under two minutes. That is more than 3× faster than a USB cable. This method also avoids draining your camera’s battery during the transfer, and it works with any laptop or desktop.
What You Need for This Method
To transfer photos from an SD card to a computer, you need just two things:
- An external USB card reader (~$9–15) — or a built-in SD card slot on your laptop. Most laptops made after 2020 have a thin card slot along the side edge. Check before buying a separate reader.
- Your Canon camera’s SD card — the memory card inside your camera that stores your photos.
We recommend the Transcend TS-RDF5K, a USB 3.0 card reader that Reviewed rates among the best SD card readers for value and speed. It costs around $9–12 and reads both full-size SD and microSD cards. A USB 3.0 reader (look for the blue-colored USB plug) is significantly faster than an older USB 2.0 reader.
If your laptop has a thin card slot on the side, you do not need to buy a separate reader. Simply slide the SD card in directly.
Once you have your card reader ready, follow these four steps.
Also Read: How To Turn a Canon Camera On and Off
Step 1: Remove the SD Card from Your Canon Camera
Turn off your camera first. Removing the card while the camera is writing data can corrupt your files — and that means lost photos.
Open the card door on your camera. On most Canon models, this is on the right side of the camera body. Press the SD card gently inward until you hear a soft click, then release. The card will spring out slightly so you can pull it free.
If your camera has dual card slots (like the Canon EOS R5), note which slot holds the card you want to transfer. Slot 1 is typically the primary recording slot.
With the card in hand, insert it into your reader or laptop.
Step 2: Insert the Card into Your Computer or Card Reader
If using an external reader: Plug the reader into a USB 3.0 port on your computer (the blue one for the fastest speeds), then insert the SD card with the label facing up.
If using a built-in laptop slot: Slide the card into the slot with the metal contacts facing down. Push gently until it seats firmly.
Wait 5–10 seconds for your computer to detect the card. On Windows, you should see an AutoPlay notification pop up. On macOS, the Photos app may open automatically, or the card will appear as a removable drive on your desktop.
If nothing happens, do not panic. Open File Explorer (the built-in file management app on Windows) or Finder (on Mac) manually and look for a new removable drive in the sidebar. It may be labeled “CANON_EOS,” “EOS_DIGITAL,” or simply show a drive letter like “D:” or “E:.”
Your computer should now see the card. Here is where to find your photos.
Step 3: Copy Photos from the DCIM Folder (Windows and Mac)
Every digital camera stores photos in a standardized DCIM (Digital Camera Images) folder on the SD card. This is true for Canon, Nikon, Sony, and every other camera brand. That universal structure is what makes card reader transfers work across all cameras.
On Windows:
- Open File Explorer (press the Windows key + E).
- Click on the SD card drive in the left sidebar (e.g., “D:” or “CANON_EOS”).
- Open the DCIM folder.
- Open the subfolder inside — it will be named something like “100CANON” or “101EOS_R.”
- Select all photos by pressing Ctrl + A.
- Copy them with Ctrl + C.
- Navigate to your desired folder on the computer (such as your Pictures folder).
- Paste with Ctrl + V.
A folder named “100CANON” contains your first 9,999 photos. If you see “101CANON,” that is the overflow folder for additional images.
Microsoft Support confirms that the Windows Photos app can also import photos directly from an SD card — just click “Import” when the AutoPlay prompt appears.
On Mac:
- Open Finder.
- Click the SD card in the left sidebar.
- Open the DCIM folder, then the subfolder inside.
- Select all photos with Cmd + A.
- Drag them to your Pictures folder or any preferred location.
Alternatively, the macOS Photos app may prompt you to import automatically. Click “Import All New Items” to bring everything in at once.
Keep in mind that RAW files (.CR2 or .CR3) are much larger than JPEGs. A batch of 1,000 RAW photos could total 25–30 GB. This is exactly where the card reader’s speed advantage shines — transferring 30 GB takes about 2 minutes with a UHS-II reader versus 7–8 minutes over a USB cable.
Once your photos are on the computer, you can start editing your transferred photos on Windows right away.
After copying, do not just yank the card out — eject it safely first.
Step 4: Safely Eject the SD Card
Removing the SD card without ejecting can corrupt files, especially if Windows is still indexing or writing temporary data in the background.
On Windows: Click the “Safely Remove Hardware” icon in the system tray (bottom-right corner of the taskbar). Select the SD card from the list. Wait for the “Safe to Remove Hardware” message before pulling the card out.
On Mac: Right-click the SD card icon on your desktop or in the Finder sidebar. Click “Eject.” The icon will disappear, and it is safe to remove the card.
That is it for the fastest method. If you prefer to keep the SD card in your camera at all times, Method 2 uses a USB cable instead.
Method 2 — Transfer Photos via USB Cable and Canon EOS Utility
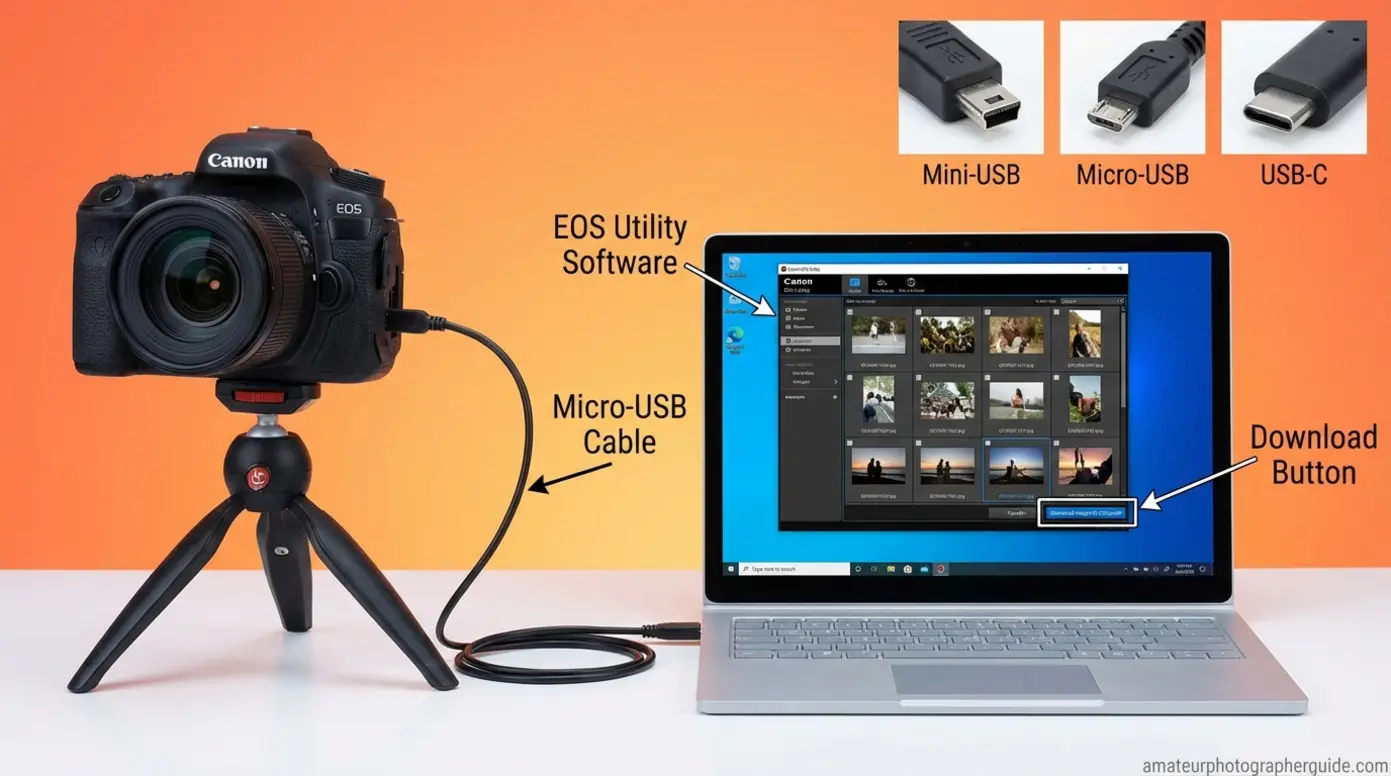
If you prefer to keep your SD card inside the camera, you can transfer photos from your Canon camera to a computer using a USB cable and Canon EOS Utility, Canon’s free desktop software for managing camera-to-computer transfers. This method is slower than a card reader (~60–76 MB/s versus 140–250 MB/s) but offers extra features like remote shooting and selective imports — meaning you can preview photos on your computer screen and choose exactly which ones to download.
“EOS Utility is to your computer what Canon Connect is to your phone.”
You will need the correct cable for your Canon model. Here is how to find it.
Step 1: Identify Your Canon’s USB Cable Type
The cable that connects a Canon camera to a computer depends on your specific model. Here is a quick-reference table for popular Canon cameras:
| Canon Model | USB Port Type | Cable You Need |
|---|---|---|
| Rebel T5, T6, EOS 70D | Mini-USB (Mini-B) | Mini-B to USB-A cable |
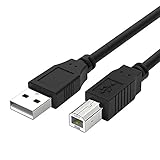
| Rebel T7, T8i, EOS M50 | Micro-USB (Micro-B) | Micro-B to USB-A cable |
| EOS R50, R7, R6 Mark II | USB-C | USB-C to USB-A or USB-C cable |
| Rebel T7i, EOS 80D | Micro-USB (Micro-B) | Micro-B to USB-A cable |
| EOS 550D (Kiss X4) | Mini-USB (Mini-B) | Mini-B to USB-A cable |
If you do not know your model, open the rubber flap on the left side of your camera body. The shape of the port tells you everything: trapezoid = Mini-B, flat and narrow = Micro-B, small oval = USB-C.
Important: If your Canon has Wi-Fi (most models released since 2017), disable Wi-Fi in the camera menu before plugging in the USB cable. This prevents a known detection conflict where the computer fails to recognize the camera. Go to Menu → Wireless Communication Settings → Wi-Fi → Disable.
Canon Rebel T7 owners will need a Micro-B cable. Canon EOS 550D owners need a Mini-B cable. These steps work identically on desktops and laptops.
For Mac users specifically, see our detailed guide on connecting a Canon camera to a MacBook for additional macOS-specific tips.
With the right cable identified, install Canon’s transfer software next.
Step 2: Download and Install Canon EOS Utility
Go to Canon’s official download page at usa.canon.com/support/software-and-drivers. Search for your camera model. Download EOS Utility (the current version is EOS Utility 3.x for cameras released since 2012). It is completely free.
Safety note: Only download Canon software from canon.com or usa.canon.com. Third-party download sites may bundle malware or outdated versions. This is especially important because searching “EOS Utility download” returns many unofficial mirrors.
During installation, the setup wizard will also offer Image Transfer Utility 2 and Digital Photo Professional. EOS Utility is the one you need for USB cable transfers. Image Transfer Utility 2 is for Wi-Fi (covered in Method 3). You can install all three if you like — they do not conflict.
As EOS Magazine explains, EOS Utility enables batch image transfer, remote shooting, and camera settings management from a computer. It supports every Canon EOS camera released since 2004.
Once installed, connect your camera and start transferring.
Step 3: Connect Your Camera and Transfer Photos
Follow these steps to transfer photos from your Canon camera to your computer via USB:
- Turn on the camera. Set the mode dial to any shooting mode (not Video mode).
- Plug the USB cable into the camera and computer. EOS Utility should auto-launch and detect your camera within a few seconds.
- Click “Download images to computer.” Choose “Download All” to grab every photo, or “Select and Download” to pick specific shots. Select your destination folder.
- Wait for the transfer to finish. A progress bar shows the status. Do not disconnect the cable until it completes.
If EOS Utility does not open automatically, launch it manually from your Applications (Mac) or Start Menu (Windows).
On macOS, the Photos app may try to open at the same time — close it and use EOS Utility instead for full control over which images you download. Alternatively, macOS users who want iCloud sync may prefer using the Photos app directly.
One important note: the camera battery drains during USB transfer. For large batches of 500 or more photos, the SD card reader method (Method 1) is a better choice. If you must use USB for a large transfer, plug the camera into AC power using the optional Canon AC adapter kit.
After your transfer, you can start editing your photos on Mac after transfer using built-in or third-party editing apps.
If running cables is not your style, Method 3 lets you transfer wirelessly.
Method 3 — Transfer Photos Wirelessly via Wi-Fi
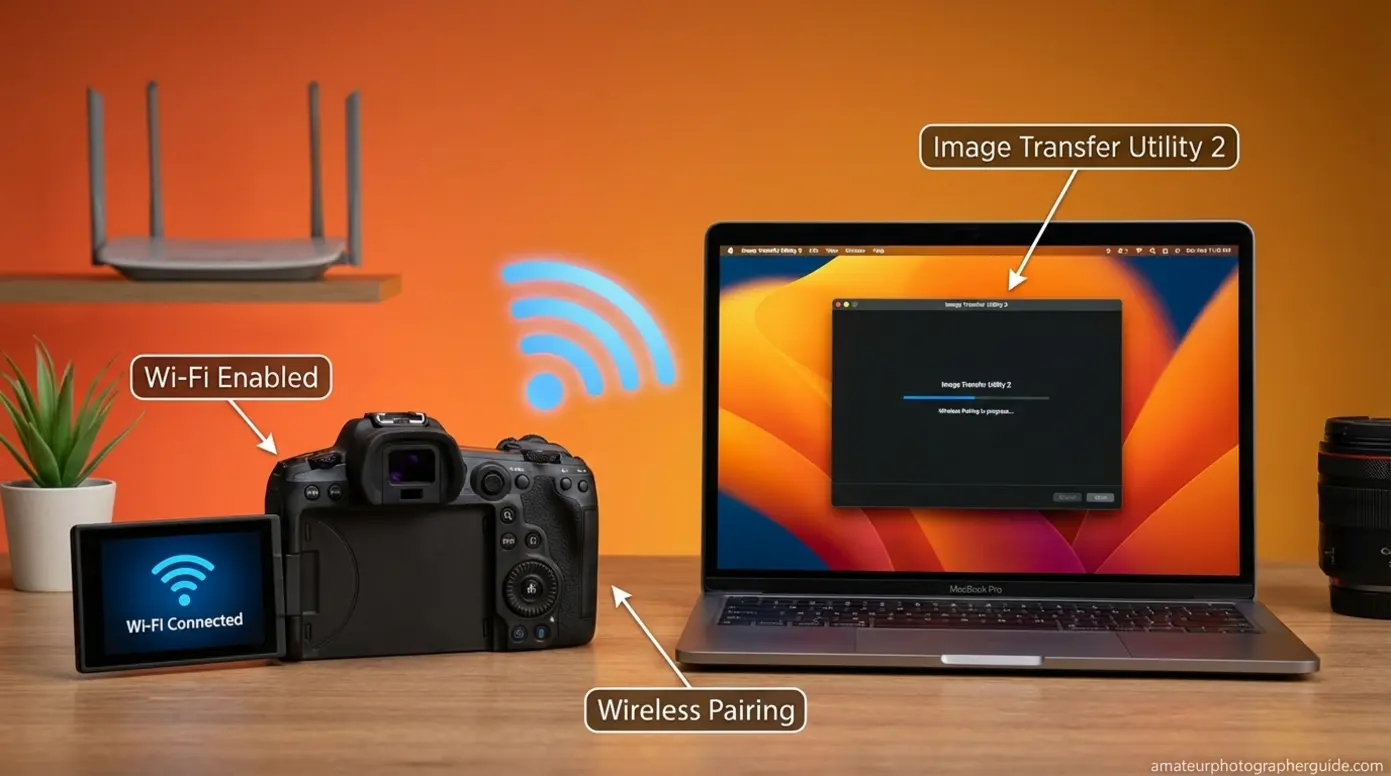
If your Canon camera has built-in Wi-Fi (most models released since 2017), you can transfer photos wirelessly using Image Transfer Utility 2, Canon’s dedicated app for automatic Wi-Fi photo transfers. This method is the slowest — roughly 5–15 MB/s depending on your router and network conditions — but it is also the most convenient for automatic background transfers. It works best for small daily batches rather than transferring thousands of photos at once.
Step 1: Install Image Transfer Utility 2 on Your Computer
Download Image Transfer Utility 2 from Canon’s official support site — the same page where you found EOS Utility. It is a separate application, so do not confuse the two.
Here is how the three Canon software tools differ:
- EOS Utility: Handles USB cable transfers, remote shooting, and camera settings. Use this for Method 2.
- Image Transfer Utility 2: Handles Wi-Fi auto-transfers from camera to computer wirelessly. Use this for Method 3.
- image.canon: Canon’s free cloud storage service that automatically syncs photos from your camera to the cloud. Photos upload wirelessly, and you can then download them to your computer from any browser. Free storage offers unlimited uploads, but original-quality files are deleted after 30 days — so download promptly.
For image.canon, visit https://image.canon/, create a free Canon account, and link your camera. This is a good option for travelers who want photos to sync to the cloud automatically — no computer nearby required — but it is not a long-term storage solution on its own.
Image Transfer Utility 2 is compatible with Windows 10, Windows 11, macOS 13 (Ventura), macOS 14 (Sonoma), and macOS 15 (Sequoia). The current version is 2.2.30.
With the software installed, pair your camera to your computer.
Step 2: Pair Your Canon Camera to Your Computer Over Wi-Fi
The pairing process connects your camera to your computer over your home Wi-Fi network. You only need to do this once — after the initial setup, the camera will reconnect automatically.
On your camera:
- Go to Menu → Wireless Communication Settings (or Wi-Fi Settings on older models).
- Enable Wi-Fi.
- Select “Remote Control (EOS Utility/Image Transfer)” from the connection options.
- The camera will display a pairing code or network SSID.
On your computer:
- Open Image Transfer Utility 2.
- The app should detect your camera on the same network within a few seconds.
- Select your camera from the list.
- Enter the pairing code displayed on the camera screen.
Common pitfall: Both devices must be on the same Wi-Fi network. If your router broadcasts separate 2.4 GHz and 5 GHz bands (which is common), make sure both your camera and computer are connected to the same band. Older Canon cameras only support 2.4 GHz, so try that band first if the camera is not detected.
Once paired, the utility can automatically transfer new photos whenever the camera connects to that network. After pairing, transferring photos is mostly automatic.
Step 3: Send Photos and Confirm the Transfer
Once paired, Image Transfer Utility 2 runs in the background on your computer. Turn on your camera within range of the paired Wi-Fi network. New photos transfer automatically to the destination folder you set during setup.
To manually send specific photos instead of everything: on the camera, go to Playback mode → Select images → Send to Computer. This lets you cherry-pick which shots to transfer.
Always verify the transfer by checking the destination folder on your computer. Wi-Fi transfers can fail silently if the network drops or the camera goes to sleep. Confirm the file count matches the number of photos you expected.
After a weekend shoot, you can turn on the camera at home and go make coffee. By the time you are back, your photos should be on the computer — no cables, no card removal, zero manual steps.
If any of these methods are not working, the troubleshooting section below covers the most common fixes.
Troubleshooting — Canon Camera Not Recognized by Your Computer
If your computer does not recognize your Canon camera when connected via USB, the problem is almost always a software conflict — not a hardware failure. Common pain points reported by Canon users include driver issues, background process conflicts, and Wi-Fi interference. Community reports suggest roughly 40% of first-time USB connections require some troubleshooting.
Here are the two most common fixes for 2026 operating systems. These fixes apply to both Windows 10 and Windows 11.
Fix for Windows 11: Check USB Mode and Update Drivers
Step 1: Set the correct USB mode on your camera. Go to Menu → Settings → Communication Settings (labeled “PC Connect” on some models). Set the mode to “PC Connect” or “Mass Storage” rather than PTP/MTP. Some Windows 11 installations have known driver conflicts with PTP mode that prevent the camera from appearing.
Step 2: Disable Wi-Fi on the camera before connecting the USB cable. This is the single most overlooked fix. Wi-Fi and USB connections can interfere with each other, causing the computer to ignore the camera entirely. Go to Wireless Communication Settings → Wi-Fi → Disable.
Step 3: Update the camera driver in Device Manager. If the camera still does not appear, open Device Manager (right-click the Start button → Device Manager). Look under “Portable Devices” or “Imaging Devices.” If you see your camera with a yellow exclamation mark, right-click it → “Update driver” → “Search automatically for drivers.” If the update fails, uninstall the device entirely, unplug the camera, wait 10 seconds, and reconnect.
Step 4: Try a different USB port. Use a USB 3.0 port (blue) directly on the motherboard or laptop body — not through a USB hub. Hubs can cause intermittent detection failures.
Disabling your Canon camera’s Wi-Fi before connecting via USB resolves the majority of “Camera Not Recognized” errors on both Windows 11 and macOS.
Mac users have a different — and less obvious — fix.
Fix for macOS: Kill the ptpcamerad Process
macOS runs a background process called ptpcamerad (PTP Camera Daemon), a system process that automatically claims USB camera connections before other apps can access them. This can prevent EOS Utility from detecting your Canon camera, even when the cable and camera are working perfectly.
The quick fix via Terminal:
- Open Terminal (go to Applications → Utilities → Terminal).
- Type: sudo killall ptpcamerad
- Press Enter. Type your Mac password when prompted.
- Try reconnecting your camera in EOS Utility.
The visual fix via Activity Monitor:
- Open Activity Monitor (macOS’s built-in task manager — find it in Applications → Utilities).
- Search for “ptpcamerad” in the search bar.
- Select the process and click the X button to force quit it.
- Reconnect the camera.
This fix needs to be repeated each time you restart your Mac, as the ptpcamerad process relaunches automatically on boot. For macOS Sequoia users specifically, Canon Community forums confirm that updating to EOS Utility 3.18.5 or later and updating camera firmware resolves most persistent detection issues.
Apple Support notes that macOS Photos requires the camera to be turned on and set to the correct import mode for detection. If EOS Utility continues to fail, try using macOS Image Capture or the Photos app as an alternative import tool.
For a permanent solution with zero software conflicts, consider switching to the SD card reader method (Method 1).
With transfers working, you might also want to move photos from your phone — here is a quick overview.
Bonus — Transferring Photos from an Android Phone to Computer
If you also shoot with an Android phone, transferring those photos to a computer follows a similar pattern: USB cable or cloud sync. Here is a brief overview of the three easiest approaches.
USB cable transfer: Connect your Android phone to the computer using a USB-C or Micro-USB cable. Unlock the phone, then tap the notification that says “Charging this device via USB.” Change the mode to “File Transfer” (MTP). Open File Explorer (Windows) or Android File Transfer (Mac). Navigate to the DCIM folder — just like on a Canon camera — and copy your photos.
Google Photos cloud sync: If you use Google Photos, your phone may already be backing up images to the cloud automatically. Install the Google Photos desktop app or visit photos.google.com on your computer to download them. Google Support confirms that Android devices support file transfer via USB or Google Account cloud sync.
Samsung Smart Switch: Samsung Galaxy owners can use Samsung Smart Switch to transfer all media to a computer with a single click.
This is just a quick overview. Android transfers involve brand-specific differences (Samsung vs. Pixel vs. Xiaomi) that deserve their own dedicated guide. For now, check out our tips for taking better photos with your phone to make the most of your mobile shots.
Next Step — Back Up Your Photos to a Flash Drive
Once your photos are on the computer, create a backup by copying them to a USB flash drive (also called a USB memory stick, thumb drive, or pen drive). This takes less than a minute for most photo collections and protects against hard drive failure, accidental deletion, or ransomware. A 64 GB flash drive costs under $10 and holds roughly 15,000 JPEG photos.
The 3-2-1 backup rule recommends keeping three copies of your photos, on two different storage types, with one stored off-site. A USB flash drive satisfies the second copy and is easy to store in a different location.
The Library of Congress recommends identifying important photos, organizing them into folders, and making copies stored in different places as a best practice for personal digital archiving.
Drag and Drop from Your Computer to a USB Drive
Transferring photos from your computer to a flash drive is straightforward drag-and-drop.
On Windows:
- Insert the USB flash drive into a USB port on your computer.
- Open File Explorer (Windows key + E). The drive appears under “This PC” with a letter like “E:” or “F:.”
- Open a second File Explorer window showing your photo folder.
- Select the photos you want to back up.
- Drag them from your photo folder to the USB drive window.
- Wait for the copy to complete — a progress bar shows the status.
- Right-click the drive in File Explorer → “Eject” before removing it.
On Mac:
- Insert the drive. It appears on your desktop and in the Finder sidebar.
- Drag your photo folder onto the drive icon.
- Wait for the copy to finish.
- Right-click the drive → “Eject” before pulling it out.
If the flash drive uses USB-C and your computer only has USB-A ports (or vice versa), you will need a simple adapter (~$5). Many modern flash drives come with dual connectors — USB-A on one end, USB-C on the other — which saves you from needing an adapter at all.
For tips on keeping your growing collection organized, see our guide to organizing and backing up your photo library.
You can also skip the computer entirely and transfer directly from your phone.
Transfer Directly from Phone to USB Using an OTG Adapter
An OTG (On-The-Go) adapter is a small connector that lets you plug a standard USB flash drive directly into your phone’s charging port. This means you can back up phone photos to a flash drive without needing a computer at all.
Here is how to transfer photos from your phone to a pen drive using OTG:
- Plug the OTG adapter into your phone’s USB-C or Micro-USB port.
- Insert the flash drive into the other end of the adapter.
- Open your phone’s Files app (or Samsung My Files on Galaxy phones).
- Navigate to the DCIM folder.
- Select the photos you want to back up.
- Tap “Move to” or “Copy to” and select the USB drive.
Not all phones support OTG. Check your phone’s specs or search “[your phone model] OTG support” to confirm. Most Samsung Galaxy, Google Pixel, and OnePlus phones support it natively.
OTG adapters cost about $5–8 and are small enough to keep on your keychain. This is particularly useful when traveling — you can back up a day’s worth of photos to a flash drive without carrying a laptop. To understand how different file formats affect your storage needs, especially when dealing with RAW files, check our format guide.
Before you go, here are a few limitations and edge cases to keep in mind.
Common Limitations and When to Ask for Help
When These Methods May Not Work
While the three methods above cover the vast majority of Canon camera transfers, a few situations require different approaches.
Cameras without removable SD cards: A small number of older Canon PowerShot models use internal memory only. For these cameras, the USB cable method (Method 2) is your only option. If the USB port on the camera is damaged, consult a Canon-authorized repair center.
Corrupted SD cards: If your computer can see the SD card but cannot read the files — or if files appear as garbled names — the card may be corrupted. For irreplaceable photos, consider a professional data recovery service rather than DIY software tools, which can sometimes overwrite data and make recovery harder.
Outdated operating systems: Canon EOS Utility 3.x requires Windows 10 or later, and macOS Monterey (12) or later. If you are running Windows 8, Windows 7, or macOS High Sierra, Canon’s current software will not install. Check Canon’s official compatibility page for your camera model to find older software versions that may still work.
Physical damage: If your camera was dropped or exposed to water and the USB port is not responding, do not force a connection. Take it to a Canon-authorized repair center for assessment before attempting data recovery.
Safety reminder: Only download Canon software from official Canon domains (usa.canon.com, canon.com, or your regional Canon site). Third-party download sites frequently bundle adware or outdated versions.
Frequently Asked Questions
How do I transfer photos from my Canon camera to my computer?
The fastest way is to remove the SD card and use an SD card reader connected to your computer. You can also connect the camera directly via USB cable using Canon’s free EOS Utility software, or transfer wirelessly over Wi-Fi with Image Transfer Utility 2. For large batches of 100 or more photos, the card reader method is roughly 3× faster than USB. All three methods work on both Windows and Mac.
What cable connects a Canon camera to a computer?
The cable depends on your Canon model. Older DSLRs like the Rebel T5 and T6 use Mini-USB (Mini-B) — a small trapezoidal connector. Mid-range models like the Rebel T7 and EOS M50 use Micro-USB (Micro-B) — flat and narrow. Newer mirrorless cameras like the EOS R50 and R7 use USB-C — a small oval connector. Check the rubber port flap on the left side of your camera to identify the shape. The wrong cable will not damage anything — it simply will not fit.
What apps do I need to connect my Canon camera to my computer?
For USB cable transfers, install Canon EOS Utility — it handles image importing, remote shooting, and camera settings management. For Wi-Fi transfers, install Image Transfer Utility 2 — it enables automatic wireless photo syncing to your computer. Both apps are free from Canon’s official website. You can also skip Canon’s software entirely and use your computer’s built-in tools — Windows File Explorer or Mac Photos — to manually copy files from the SD card.
How to transfer photos from a camera to a laptop without a USB cable?
Without a cable, the easiest option is to remove the SD card and insert it directly into your laptop’s built-in card slot or an external USB card reader. If your Canon has Wi-Fi, you can pair it with your laptop using Image Transfer Utility 2 for wireless transfers. Canon’s image.canon cloud service offers a third cable-free option — photos upload to the cloud and you can download them on any device. The SD card reader method is the fastest of these cable-free options.
How do I digitize thousands of photos from my camera?
For large photo libraries, use a high-speed USB 3.0 card reader. It transfers thousands of files in minutes rather than hours. Avoid the USB cable or Wi-Fi methods for large batches, as they drain the camera battery and are significantly slower. With a UHS-II card reader, 1,000 RAW photos (roughly 25 GB) transfer in about 2 minutes. After transferring, organize your images into date-based folders and immediately create a backup copy on a second drive or USB flash drive.
Wrap-Up: Get Your Photos Off That Camera Today
For anyone wondering how to transfer photos from a Canon camera to a computer, the answer comes down to three reliable methods — and one clear winner for speed. An SD card reader transfers files at up to 250 MB/s, more than 3× faster than a USB cable. For most photographers, it is the simplest, fastest, and most reliable option available.
Knowing all three methods ensures you are covered in any situation: the card reader for raw speed, the USB cable with EOS Utility for selective transfers and remote shooting, and Wi-Fi for hands-off automatic syncing. Combined with the troubleshooting fixes above — especially the “disable Wi-Fi before USB” rule and the macOS ptpcamerad workaround — you now have the most current set of tools to handle any Canon-to-computer transfer scenario.
Start by picking up a USB 3.0 card reader (under $15) and try Method 1 with your next batch of photos. Once your images are on your computer, explore our guides to editing on Windows or Mac to bring your shots to life. This guide is updated quarterly to stay current with new Canon software releases and OS updates — bookmark it and check back.
Last update on 2026-07-12 / Affiliate links / Images from Amazon Product Advertising API
