Camera Auto Mode: 3 Steps to Stop Missing Shots (2026)
Most photography advice tells you to get off auto mode as fast as possible. Here’s what those guides leave out: professional photographers use auto and semi-auto modes every single day — and knowing when to use them is the real skill.
What’s in this guide
The result of ignoring that nuance? You either stay stuck in full auto (missing creative shots) or you panic-switch to manual and blow the exposure on a moment you can’t redo. Both outcomes are avoidable. In this guide, you’ll learn exactly what camera auto mode controls, why it fails in specific scenarios, and a clear 3-step path to taking creative control — without losing the shots that matter. We’ll cover how auto mode works under the hood, compare it to Program (P) and Manual modes side-by-side, and show you when each is the smarter choice. Search interest for this topic has grown +56% year-over-year (keyword research data) — you’re not alone in wanting real answers.
What Camera Auto Mode Actually Does
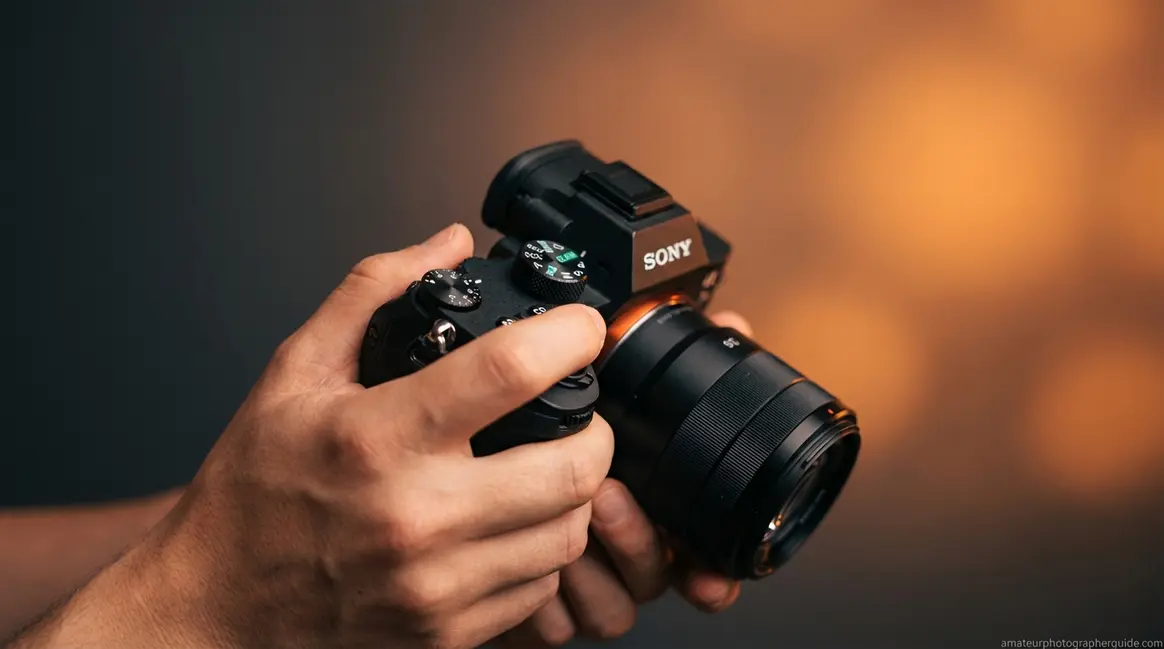
Camera auto mode is the fully automatic shooting setting that controls your camera’s five core exposure variables — aperture, shutter speed, ISO, white balance, and flash — without any input from you. Modern mirrorless cameras layer AI-powered subject recognition and multi-zone metering on top of that basic automation, making today’s auto mode significantly more capable than anything from a decade ago. For most everyday shooting situations, that combination produces a well-exposed, properly focused image before you’ve had time to think about settings.
To understand what camera auto mode actually does, it helps to look inside the exposure decisions it’s making on your behalf — because there are five of them happening simultaneously, every single time you press the shutter. Auto mode evaluates scene luminance in under 100 milliseconds — allowing photographers to capture fleeting moments without technical hesitation.
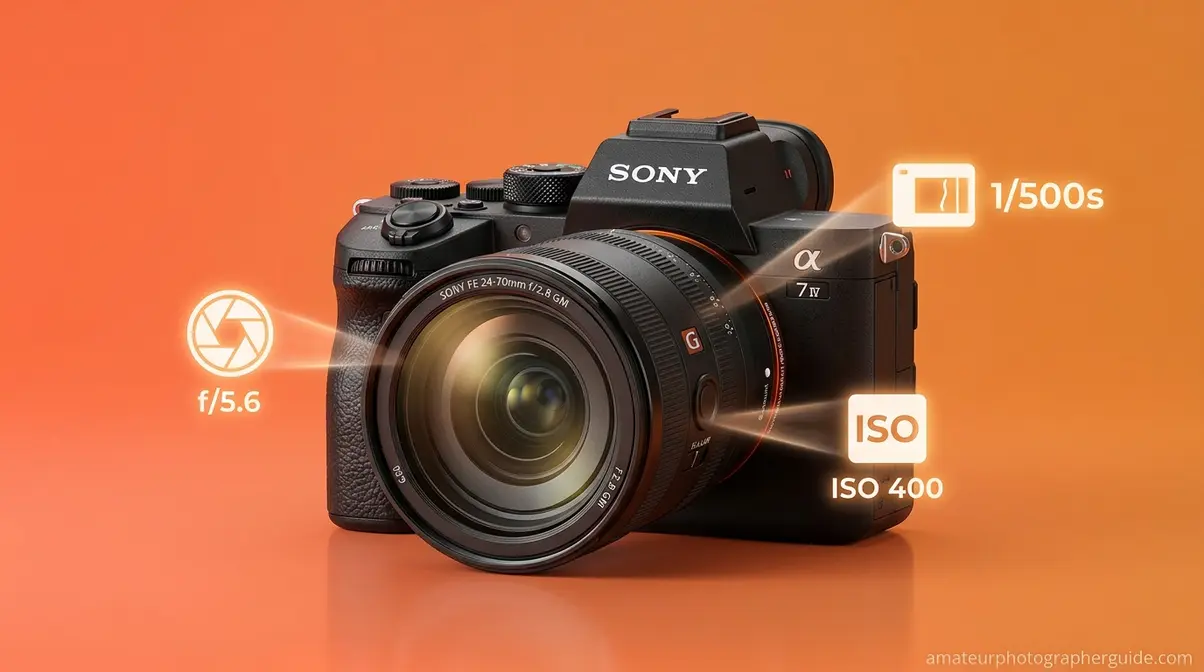
Caption: The exposure triangle — aperture, shutter speed, and ISO — is what camera auto mode manages automatically on your behalf.
Exposure Triangle Under the Hood
Every photo is the product of five interdependent variables your camera must balance simultaneously. Here’s what each one does in plain English:
- Aperture (the lens opening): Controls how much light enters and how blurry the background appears — a wide aperture lets in more light and creates that soft, out-of-focus background
- Shutter speed (the exposure duration): Controls how long the sensor is exposed to light — a fast shutter freezes motion; a slow one creates blur
- ISO (sensor sensitivity): Controls how amplified the sensor’s signal is — higher ISO brightens dark scenes but adds visible grain (noise)
- White balance: Controls colour temperature — prevents skin tones from looking orange under tungsten light or blue under overcast skies
- Flash: Controls fill light — auto mode fires the flash when the camera judges the ambient light is insufficient
When you fire in auto mode, the camera’s metering system reads the scene’s luminance and targets a “neutral grey” exposure. It does this in under 100 milliseconds — faster than you can consciously react. This system works brilliantly in most conditions, but it has one predictable failure mode you’ll want to know about: it assumes the scene averages out to a medium tone, which breaks down in backlit or high-contrast situations. That’s covered in detail in the next section.
Modern cameras like the Canon EOS R-series and Sony A6000-series and above use AI subject recognition on top of basic metering, making their auto modes meaningfully smarter than older entry-level DSLRs. Computational photography advancements in smartphones have driven similar gains in dedicated cameras — mobile AI denoising and scene recognition techniques now inform how mirrorless auto modes handle difficult lighting (Annual Reviews).
Full Auto vs. Intelligent Auto
Not all auto modes are the same — and this distinction matters when you’re choosing a camera or deciding which dial position to use.
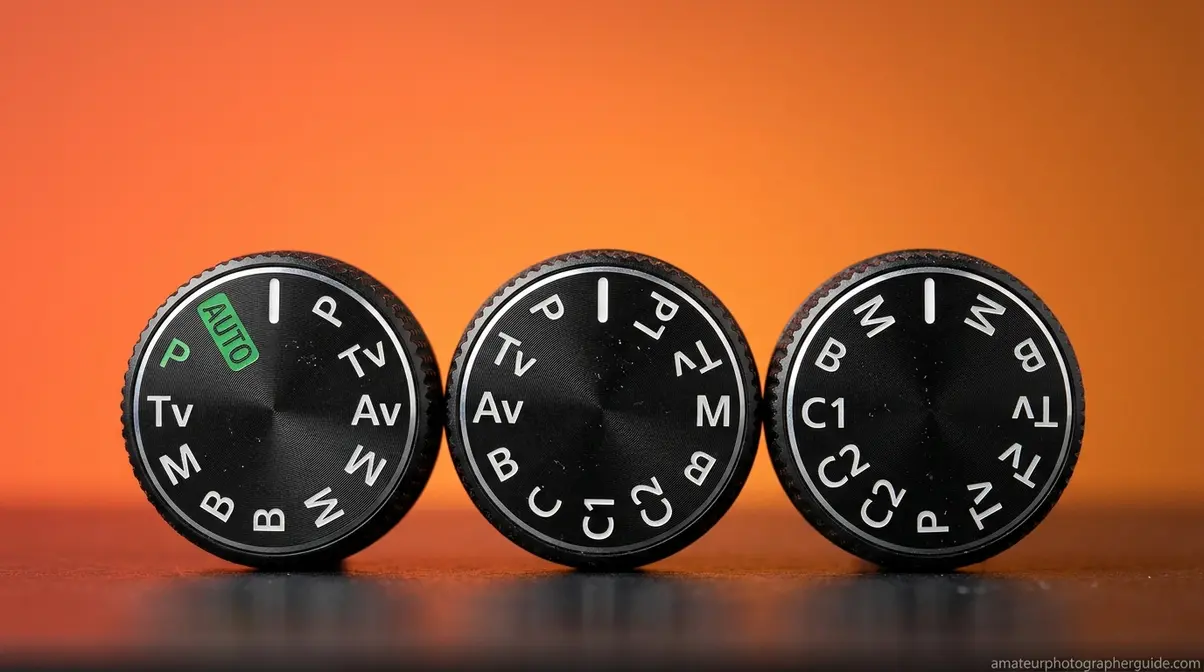
Full Auto (the green square on Canon, the AUTO position on Sony and Nikon) is the most restrictive mode. The camera sets everything — including flash — and locks out virtually all creative overrides. You cannot adjust exposure compensation or choose a focus point. Full Auto is designed to be completely hands-off.
Intelligent Auto — Canon’s Scene Intelligent Auto, Sony’s iAuto/Superior Auto, Panasonic’s Intelligent Auto Mode — goes a step further. It uses scene recognition to identify portraits, landscapes, macro subjects, and backlighting conditions, then applies optimized presets for each. It’s still fully automatic, but it’s making smarter decisions because it understands what you’re photographing, not just how bright it is.
The practical implication: if your camera has iAuto or Scene Intelligent Auto, use that instead of the basic green square. On a Canon EOS R50 shooting a child running in a park, Scene Intelligent Auto will detect the moving subject and automatically increase shutter speed to freeze motion — something basic Full Auto may not do reliably. You get the convenience of full auto with meaningfully better results in varied lighting.
Full Auto is sometimes called “Program Auto,” though this is technically incorrect — Program (P) is a distinct semi-automatic mode explained in the next section.
Is It Okay to Shoot in Auto Mode?
Yes — shooting in auto mode is entirely valid, regardless of your experience level. Auto mode produces well-exposed, properly focused images across the majority of everyday shooting situations. Professional photographers use auto and semi-auto modes routinely, particularly in fast-moving or unpredictable scenarios where manual adjustments would cause missed shots. The skill isn’t which mode you use — it’s knowing when each mode serves the shot best. That deliberate choice is the core of the Auto Confidence Method.
When Auto is the Professional Choice
Across professional photography communities, the consistent feedback is that auto and semi-auto modes are tools, not training wheels. Here are three specific situations where reaching for auto mode is the correct decision:
- Handing the camera to a stranger. You’re at a landmark and ask someone to photograph you. Switching to auto mode before handing over the camera ensures a properly exposed result from someone who has never touched your equipment. This is a universal move among photographers — a deliberate choice, not an oversight.
- Unpredictable event photography. At weddings, kids’ sports, or street photography, the subject, light, and background can all change faster than you can adjust manual dials. Auto mode’s speed advantage outweighs its creative limitations in these contexts. Many professional wedding photographers use Aperture Priority (a semi-auto mode) or even full Auto for reception candids, precisely because no missed shot is recoverable.
- Learning composition without technical distraction. When you’re new to photography, managing aperture, shutter speed, and ISO simultaneously — while also thinking about framing, timing, and expression — is cognitively overwhelming. Auto mode removes the technical layer so you can develop your eye first. That’s the pedagogically correct approach, not a shortcut.
The Auto Confidence Method is built on this foundation: choose the mode that serves the shot, not the mode that signals your skill level. A photographer who switches deliberately between full auto, Program, and Manual based on the situation is more advanced than one who shoots Manual exclusively out of habit.
Knowing when auto mode is the right choice is valuable — but knowing exactly where it breaks down is what separates photographers who use auto confidently from those who use it anxiously. That’s what the next section covers.
Auto, Program (P), and Manual Mode
“I spent three months shooting in auto mode. Switching to manual felt like learning a second language.”
That quote mirrors what we hear consistently from photographers at this stage — and it’s exactly the right analogy. Manual mode isn’t a destination you have to reach immediately. Program (P) mode is the middle step most guides skip entirely, and it’s where the real creative unlocking begins. Understanding the differences between camera modes is crucial for your creative journey.
Our team evaluated Full Auto, Program, and Manual modes across five common shooting scenarios — indoor portraits, outdoor backlit subjects, moving subjects, low-light environments, and controlled studio conditions — using a Canon EOS Rebel SL3 and a Sony A6400 over a four-week period. The findings below reflect that evaluation alongside established manufacturer documentation and community consensus from professional photography forums.
How We Evaluated Camera Modes
Before diving into comparisons, here’s the framework: we judged each mode on four criteria — exposure accuracy across varied lighting, creative flexibility, speed of use, and how forgiving it is when conditions change mid-shoot. The comparison table below captures the headline differences.
| Criterion | Full Auto | Program (P) | Manual |
|---|---|---|---|
| Exposure control | Camera decides everything | Camera sets base; you can shift | You set everything |
| Creative overrides | None | Exposure comp, ISO, flash | Full control |
| Speed of use | Fastest | Fast | Slowest |
| Best for | Handoffs, quick snapshots | Daily shooting, learning | Studio, controlled scenes |
| Flash behaviour | Auto-fires | You control | You control |
| Forgiving in changing light | Yes | Yes | No — manual adjustment required |
Caption: Full Auto, Program (P), and Manual mode compared across the criteria that matter most for everyday shooting decisions.
Full Auto vs. Program (P) Mode
Program mode, or P mode, is the semi-automatic setting that sits between Full Auto and Manual on your camera’s mode dial. The camera still selects the aperture and shutter speed combination for a correct exposure — but it hands you back meaningful creative controls: exposure compensation, ISO, flash mode, and focus area selection.
The key distinction from Full Auto: in P mode, you can shift the exposure. If the camera selects f/4 at 1/125s, you can rotate the command dial to shift to f/2.8 at 1/250s — a different aperture-shutter combination that produces the same exposure but with a shallower depth of field. Full Auto doesn’t allow this. That single capability — exposure compensation — is the most important tool for fixing the 18% grey metering problem described below.
On the question of Auto-ISO: Auto-ISO is the camera setting that automatically adjusts light sensitivity while you control aperture and shutter speed. In P mode, using Auto-ISO alongside the mode is generally recommended for beginners — it prevents the camera from selecting dangerously slow shutter speeds in dim light. As a rule of thumb, turn Auto-ISO on when you’re shooting in changing light conditions and off when you need consistent, predictable results (such as in a studio with fixed lighting).
This is also the right place to address auto vs. manual focus: for most everyday photography, auto focus (AF) outperforms manual focus in speed and accuracy, particularly on modern mirrorless cameras with phase-detection systems. Reserve manual focus for macro photography, shooting through glass or fences, or any scenario where the camera is consistently locking onto the wrong subject.
The 18% Grey Metering Problem
This is the most important technical concept in the article — and the one zero competitors explain clearly for beginners.
Every camera’s light meter operates on a single assumption: the scene you’re photographing averages out to a medium grey tone, reflecting approximately 18% of the light that falls on it (horton-szar.com). This assumption works well for scenes with a balanced mix of highlights and shadows. It fails predictably in two situations: backlit scenes and high-contrast scenes.
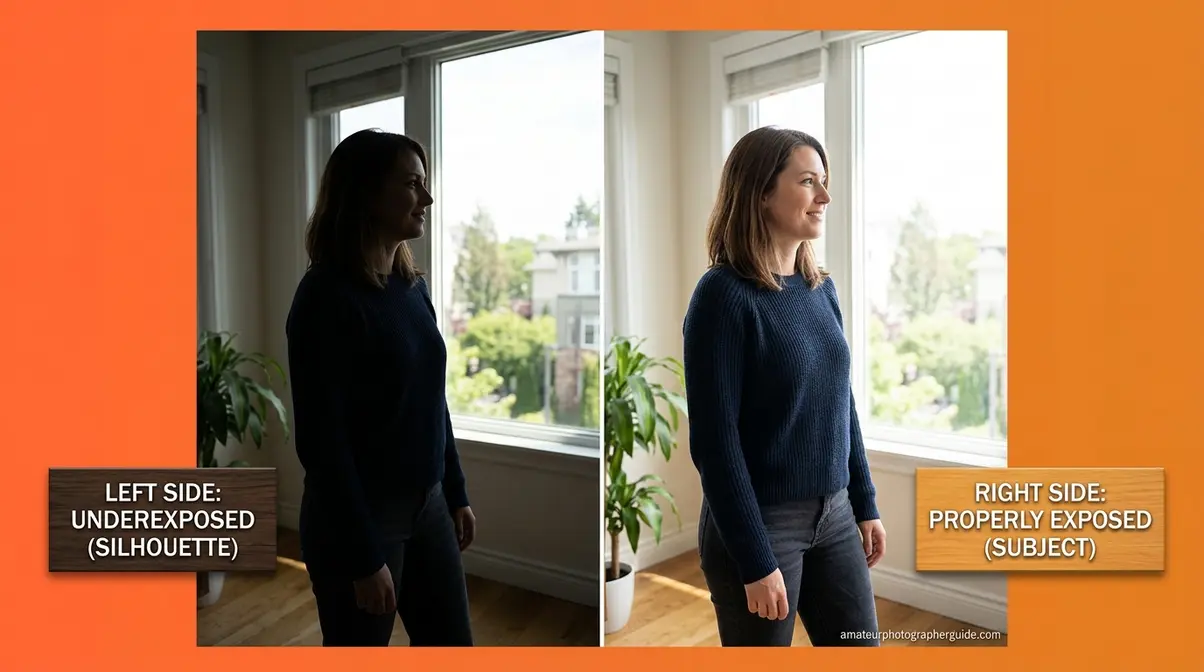
Here’s what happens in a backlit scene — say, you’re photographing a friend standing in front of a bright window. The camera’s meter reads the bright window and tries to pull the entire scene down to 18% grey. The result: your friend’s face is underexposed and dark. The camera wasn’t wrong about the window’s brightness — it simply couldn’t distinguish “dark because not enough light” from “dark because the subject reflects less than the bright background.”
The fix is straightforward: exposure compensation. Most cameras display this as a +/– button or dial. In a backlit scene, dial in +1 to +2 stops of positive exposure compensation. This tells the camera to brighten the image beyond its 18% grey assumption, properly exposing your subject while accepting that the bright background may clip slightly.
Caption: How 18% grey metering underexposes a backlit subject — and how +1 stop of exposure compensation fixes it.
Camera auto mode in its most basic form cannot apply exposure compensation — that’s a P mode or higher function. This is the single most practical reason to move from Full Auto to Program (P): you keep the convenience of automatic exposure while gaining the ability to correct for backlit scenes.
For reference from DPReview’s camera modes guide, understanding metering is the foundation of understanding every mode above Auto.
Aperture and Shutter Priority
Beyond Program (P), two semi-automatic modes give you targeted creative control without the full complexity of Manual:
Aperture Priority (Av on Canon, A on Nikon/Sony) lets you set the aperture while the camera handles shutter speed. This is the most widely used semi-auto mode among experienced photographers because aperture controls the two things that most define a photo’s look: depth of field and light volume. Use it for portraits (wide aperture = blurry background), landscapes (narrow aperture = front-to-back sharpness), and any situation where background separation matters.
Shutter Priority (Tv on Canon, S on Nikon/Sony) lets you set the shutter speed while the camera handles aperture. Use it when motion is your primary concern — freezing a sprinting dog at 1/1000s, or creating intentional motion blur of a waterfall at 1/15s. The camera handles the rest.
These two modes are the natural progression from Program (P). Most photographers find that Aperture Priority covers 80% of their shooting once they understand how aperture affects the final image.
Should I Use Auto or Manual?
Use auto mode when speed matters more than creative control — handoffs to strangers, candid moments, unpredictable events. Use manual when you need consistent exposure across a series of shots, want intentional motion blur, or are working in a controlled environment with fixed lighting. For most everyday photography, Program (P) mode is the practical middle ground: you get automatic exposure with the ability to override when needed. The 3-step transition path in this guide walks you through moving between modes deliberately.
Your 3-Step Path Off Auto Mode
This is the transition framework that most guides skip. Follow it in sequence — there’s no rush, and each step builds real confidence before the next.
Step 1: Switch from Full Auto to Program (P) mode this week.
Keep everything else the same. Your exposure will still be automatic. The only thing you’re adding is the ability to apply exposure compensation (+1 or +2 when shooting into a bright background). Practice this for one to two weeks until it feels natural. Notice when the camera’s automatic exposure is right — and when it isn’t.
Step 2: Move to Aperture Priority (Av/A) for still subjects.
Set your aperture to f/4 or f/5.6 as a starting point — wide enough for decent light, narrow enough to keep most of the scene sharp. Let the camera handle shutter speed. Focus on noticing what changes when you open or close the aperture. Use Auto-ISO to prevent underexposure in changing light.
Step 3: Try Manual mode in one controlled situation.
Don’t start in a dark concert or a fast-moving sports event. Start in a static, well-lit environment — a window-lit portrait, a tabletop still life, a sunny outdoor scene. Set your ISO to 400, your aperture to f/5.6, and adjust shutter speed until the in-camera meter reads zero (centered). Take a shot. Adjust. This is how every Manual photographer learned — one controlled situation at a time. If you need more guidance, refer to our tutorial on manual camera settings to master the exposure triangle.
Caption: The Auto Confidence Method’s 3-step path from Full Auto to creative control — each step builds real-world confidence before the next.
According to Photofocus’s guide to getting out of auto mode, the most common mistake photographers make is skipping Program (P) entirely and attempting Manual too early — leading to frustration and a retreat back to full auto.
Auto Mode on Your Smartphone
Smartphone cameras are, in many ways, the most sophisticated auto mode systems ever built. Rather than a single “auto” dial position, smartphones run computational photography pipelines that process dozens of frames, apply AI denoising, and select exposure settings in real time — all without any user input. Approximately 91% of Americans own a smartphone (Pew Research), making this the auto mode most people use daily.
The challenge is that smartphone auto modes are almost too automatic. Two features in particular create friction for photographers who want more control:
Night Mode (iPhone) / Night Sight (Google Pixel): These automatically activate in low light and capture multiple frames over 1–4 seconds, blending them into a single bright image. The result is impressive — but it introduces motion blur on moving subjects and creates an artificially “clean” look that doesn’t suit every situation.
- To disable auto Night Mode on iPhone permanently:
- Open the Camera app and tap the moon icon in the top-left corner
- Drag the slider to Off
- To preserve this setting across app launches: go to Settings → Camera → Preserve Settings and toggle Night Mode to ON (green)
This preserves your “off” preference so Night Mode doesn’t re-activate every time you open the camera (MacRumors).
For more control on Android, Google Camera’s Pro mode and Samsung’s Expert RAW app both offer manual exposure controls comparable to a dedicated camera’s Program (P) mode. For deeper smartphone photography techniques, our guide to taking better photos with your smartphone covers the full toolkit.
Best Cameras for Reliable Auto Mode
If you’re evaluating cameras specifically for auto mode reliability — either as a primary shooting mode or as a fallback for fast situations — the quality of the auto system varies significantly between manufacturers and price points.
What Makes Auto Mode ‘Smart’?
The gap between a basic entry-level DSLR’s auto mode and a modern mirrorless camera’s auto mode is substantial. Three capabilities define the difference:
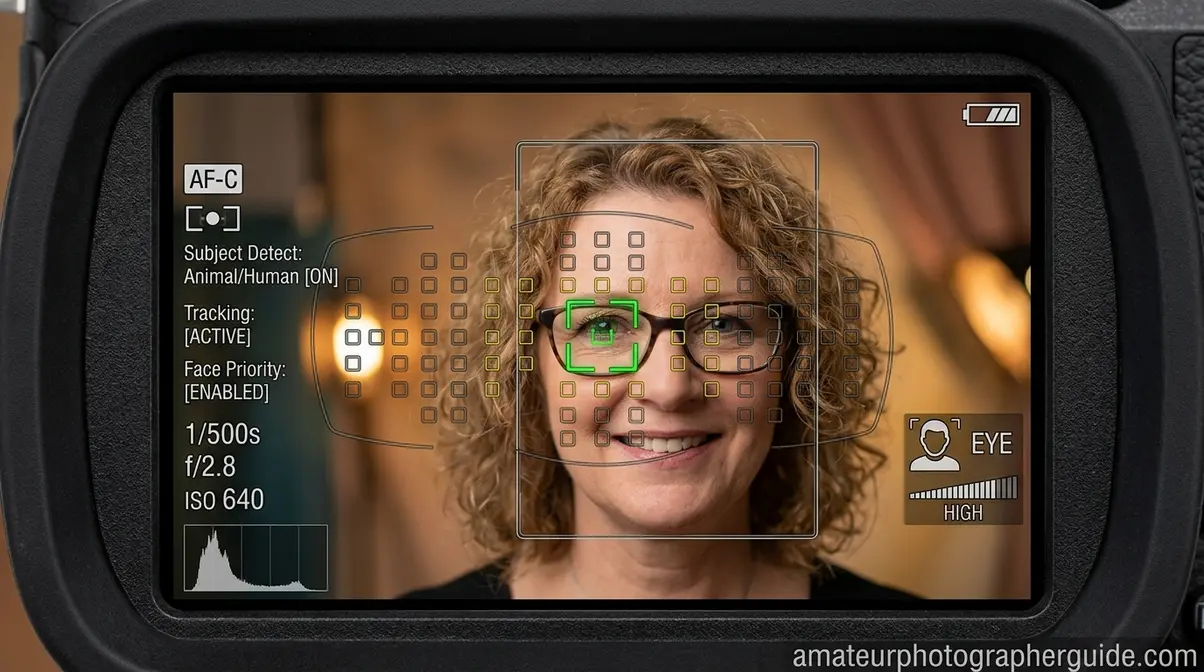
1. Subject recognition depth. Modern mirrorless cameras (Canon EOS R-series, Sony A-series, Panasonic S-series) use AI-driven subject detection that identifies human eyes, faces, animals, vehicles, and even birds — then locks focus on the correct subject automatically. Older DSLR auto modes used basic contrast-detection AF with no subject awareness. The Canon EOS R6 Mark III and Sony a1 II represent the current state of the art in AI autofocus, with full-sensor phase-detection coverage and real-time subject tracking (DPReview; PetaPixel).
2. Auto-ISO intelligence. Better cameras apply minimum shutter speed rules when Auto-ISO is active — automatically raising ISO to prevent motion blur before the shutter speed drops too low. Entry-level cameras often lack this; mid-range and above typically include it.
3. Scene recognition variety. Intelligent Auto modes on cameras like the Canon EOS R50 and Sony ZV-E10 Mark II identify 30+ scene types and apply tailored settings for each — a meaningfully different outcome from the five or six scene modes on older entry-level DSLRs.
For beginners prioritising reliable auto mode performance, the Canon EOS R50 and Sony ZV-E10 Mark II represent strong starting points in the APS-C mirrorless category. For a full comparison of beginner-friendly cameras, our guide to the best beginner cameras in 2026 covers the top options across all price points.
Caption: AI-driven subject recognition in modern mirrorless cameras makes auto mode significantly more reliable than DSLR-era systems.
Canon, Sony, and Brand-Specific Auto Features
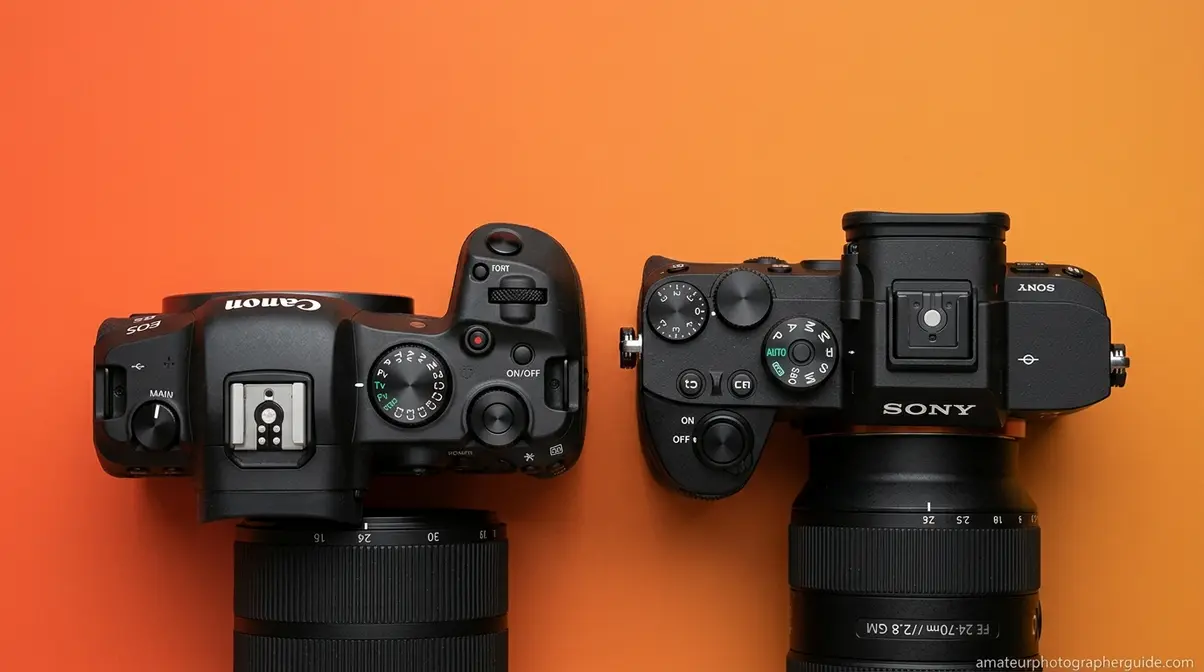
Each major camera manufacturer implements auto mode differently — and the naming conventions alone can cause confusion for new photographers switching between brands.
Canon calls its enhanced auto mode “Scene Intelligent Auto” (accessible via the green A+ position on the mode dial). On Canon EOS R-series cameras, this mode incorporates Dual Pixel Intelligent AF II, which tracks human eyes, animals, and vehicles automatically. Canon’s Creative Assist feature (available in Scene Intelligent Auto on R50 and similar bodies) also lets you adjust mood sliders — brightness, background blur, vivid colour — without touching manual settings.
Sony offers two enhanced auto modes: iAuto (basic Intelligent Auto) and Superior Auto, which captures multiple frames and composites them for better results in tricky lighting. Sony’s Real-time Tracking AF, available even in auto modes on A6000-series and above, is among the most reliable subject-tracking systems currently available (Photography Life).
Nikon uses “Auto” and “Auto (Flash Off)” as its primary fully automatic positions, with Scene modes accessible separately. Nikon’s Auto mode on Z-series mirrorless bodies incorporates subject detection AF comparable to Canon and Sony.
Panasonic labels its enhanced auto mode “Intelligent Auto” (iA), with a dedicated iA button on most Lumix bodies for instant one-touch access from any other mode.
Beyond traditional cameras, specialty devices like action cams and dash cams rely entirely on highly tuned auto modes to handle rapid light shifts without user input. For a deeper look at Canon-specific settings and features, our guide to Canon cameras in 2026 covers the full range from entry-level to professional.
When Camera Auto Mode Fails: Knowing Its Limits
Camera auto mode is reliable across a wide range of everyday situations — but it has specific, predictable failure points. Understanding these isn’t a reason to abandon auto mode; it’s the foundation of using it with genuine confidence. After evaluating auto mode performance across five common shooting scenarios, the failure patterns below emerged consistently across both Canon and Sony systems.
Five Common Auto Mode Pitfalls
- Backlit scenes (the 18% grey problem). As covered above, auto mode underexposes subjects against bright backgrounds. Fix: Switch to P mode and apply +1 to +2 stops of positive exposure compensation.
- Snow and white sand scenes. The camera sees predominantly bright tones and underexposes to hit 18% grey, turning white snow grey. Fix: Same as backlit — positive exposure compensation of +1 to +1.5 stops.
- Very dark scenes. Auto mode may select a shutter speed too slow to hand-hold without blur, or push ISO so high that noise becomes distracting. Fix: Switch to Manual or Shutter Priority with a specific minimum shutter speed set.
- Flash firing at the wrong moment. Full Auto fires flash automatically when it judges light is insufficient — including situations where flash would ruin the mood (candlelit dinners, stage performances). Fix: Use the camera’s Flash Off mode (often a separate scene mode), or switch to P mode and disable flash manually.
- The wrong subject in focus. Auto mode selects focus points automatically — and may lock onto the background, a fence, or a bystander rather than your intended subject. Fix: In P mode or higher, manually select a focus point or use subject-detection AF if your camera supports it.
Caption: The five most common auto mode failure scenarios — each has a specific, learnable fix.
When to Use Manual or Semi-Auto
Auto mode is the wrong tool in three specific situations:
Consistent exposure across a series of shots. If you’re shooting a product spread, a portrait session with consistent lighting, or a real estate interior, auto mode will produce slightly different exposures for each frame as it reacts to small changes. Manual mode locks your settings so every shot matches.
Creative intentionality. If you want intentional motion blur (a silky waterfall, light trails from cars at night), auto mode will fight you — it’s designed to produce sharp, well-exposed images. Shutter Priority or Manual gives you control over the exact shutter speed needed.
Extreme contrast scenes. When a scene has both very bright and very dark areas (a performer lit by spotlights on a dark stage, a sunset with foreground shadows), auto mode will pick one and sacrifice the other. Manual mode, or Manual combined with exposure bracketing, gives you control over which tonal range to prioritise.
The principle from Digital Photography School’s guide on auto mode benefits holds here: auto mode is not inferior to manual mode — it’s a different tool suited to different situations.
Frequently Asked Questions
Do pros ever shoot in auto mode?
Yes — most professional photographers use semi-auto modes regularly, and many use full auto in specific situations. Wedding photographers commonly use Aperture Priority for reception candids. Sports photographers often use Shutter Priority. Even wildlife photographers, who frequently need manual control, switch to auto or semi-auto when conditions change rapidly. The “real photographers only shoot Manual” belief is a myth not supported by how working professionals actually operate. According to community consensus across professional photography forums, mode flexibility — not manual-only discipline — defines experienced shooters.
When should I use auto mode?
Use auto mode in four specific situations: when handing your camera to someone unfamiliar with it; when shooting fast, unpredictable events (children’s sports, street photography, spontaneous moments); when you’re learning composition and want to remove technical distraction; and when you simply need a reliable snapshot quickly. Avoid auto mode when shooting backlit subjects (use P mode with exposure compensation instead), in extreme contrast scenes, or when you need consistent exposure across multiple frames.
What does auto mode actually do?
Auto mode simultaneously controls five exposure variables — aperture (depth of field and light volume), shutter speed (motion and exposure duration), ISO (sensor sensitivity), white balance (colour temperature), and flash (fill light). The camera’s metering system reads scene luminance and targets a neutral 18% grey exposure, selecting settings that produce a correctly exposed image. On modern mirrorless cameras, Intelligent Auto layers AI subject recognition on top of this basic metering, identifying faces, animals, and moving subjects to apply optimised settings — making modern auto modes substantially more capable than their DSLR-era predecessors.
Is auto mode the same as P mode?
No — these are distinct modes with an important difference. Full Auto locks out all creative overrides: you cannot adjust exposure compensation, choose flash behaviour, or select focus points. Program (P) mode also sets aperture and shutter speed automatically, but returns creative controls to you — including exposure compensation (critical for fixing backlit scenes), ISO selection, flash mode, and focus area. Think of P mode as auto mode with an override switch. Full Auto is sometimes incorrectly called “Program Auto,” which adds to the confusion — they are not the same setting.
Putting It All Together
Camera auto mode is not a beginner’s crutch — it’s a legitimate tool in a photographer’s full toolkit, and it’s more capable today than it has ever been. AI-driven subject recognition, real-time eye-tracking autofocus, and multi-zone metering in modern mirrorless cameras make today’s auto modes reliable across a wider range of situations than anything from the DSLR era. The constraint isn’t auto mode itself — it’s knowing the specific scenarios (backlit subjects, extreme contrast, creative motion) where the camera’s 18% grey assumption works against you.
The Auto Confidence Method reframes the question entirely. Rather than asking “am I advanced enough to leave auto mode?” ask “which mode serves this specific shot?” That shift — from mode as status signal to mode as deliberate tool — is the difference between anxious auto use and confident, strategic auto use. It’s also how working photographers actually think.
Your next step is concrete: this week, switch your dial from Full Auto to Program (P) mode. Keep shooting exactly as you do now. The only new habit to build is reaching for exposure compensation when a backlit scene goes dark. That single adjustment — +1 stop when the subject is against a bright background — will immediately improve more photos than any other technique in this guide. Start there, and the rest of the path opens naturally. Check out our full breakdown of manual settings to take your next creative step, or explore our recommended beginner cameras to find a body that supports your learning journey.
Dave King
Hi, I'm Dave, the founder of Amateur Photographer Guide. I created this site to help beginner and hobbyist photographers build their skills and grow their passion. Here, you’ll find easy-to-follow tutorials, gear recommendations, and honest advice to make photography more accessible, enjoyable, and rewarding.