
Table of Contents
- Key takeaways
- Introduction to camera basics
- Understanding exposure and the exposure triangle
- Aperture, shutter speed, and ISO explained
- Camera modes and transitioning from auto to manual
- Basic composition and lighting techniques
- Common misconceptions and beginner mistakes
- Practical tips to improve your photography
- Explore more beginner photography resources
- FAQ
- Recommended
This blog post may contain affiliate links. As an Amazon Associate I earn from qualifying purchases.
Great photos aren’t about expensive gear. They’re about knowing how your camera works. Most beginners stay stuck in automatic mode, letting the camera make every decision and missing creative opportunities. Understanding camera basics like exposure, aperture, and shutter speed gives you control over brightness, focus, and style. This guide breaks down essential camera functions, shooting modes, composition principles, and common mistakes to help you capture better images starting today.
Key takeaways
| Point | Details |
|---|---|
| Exposure triangle controls brightness | Aperture, shutter speed, and ISO work together to determine how light or dark your photo appears. |
| Each setting creates unique effects | Aperture shapes depth of field, shutter speed captures or blurs motion, and ISO adds grain in low light. |
| Shooting modes bridge auto to manual | Aperture priority and shutter priority modes help you practice one setting at a time before mastering full manual control. |
| Composition and lighting matter equally | Rule of thirds, natural light, and framing techniques enhance image quality alongside technical camera skills. |
| Common mistakes slow progress | Relying only on auto mode, misunderstanding aperture numbers, and avoiding higher ISO settings limit creative growth. |
Introduction to camera basics
Photography starts with understanding your tool. Many beginner photographers struggle because they don’t understand how their camera settings work together to impact photo quality. Beyond auto mode lies a world of creative control over exposure, focus, and composition.
Learning these fundamentals transforms snapshots into intentional images. Beginners often face confusion when first exploring essential beginner camera settings, feeling overwhelmed by technical jargon and numbered dials. This confusion leads to missed moments and frustration.
Key concepts every amateur photographer should grasp include:
- Exposure: the brightness level in your photo determined by light reaching the sensor
- Focus: sharpness of your subject controlled by lens adjustments and camera settings
- Composition: how elements arrange within the frame to guide viewer attention
- White balance: color temperature adjustments ensuring accurate hues
Mastering these basics empowers you to shoot confidently in varied conditions. The journey from automatic shooting to purposeful photography requires patience and practice. Building strong photography habits for beginners accelerates your learning curve.
Experiment regularly with different settings and review results critically. Each shooting session teaches you how your choices affect final images, gradually building intuition that replaces guesswork with skill.
Understanding exposure and the exposure triangle
The exposure triangle controls image brightness and creative effects through three interconnected settings. Aperture, shutter speed, and ISO form this foundational concept in photography. Each component affects how much light reaches your camera sensor, determining whether your photo appears bright, dark, or perfectly balanced.
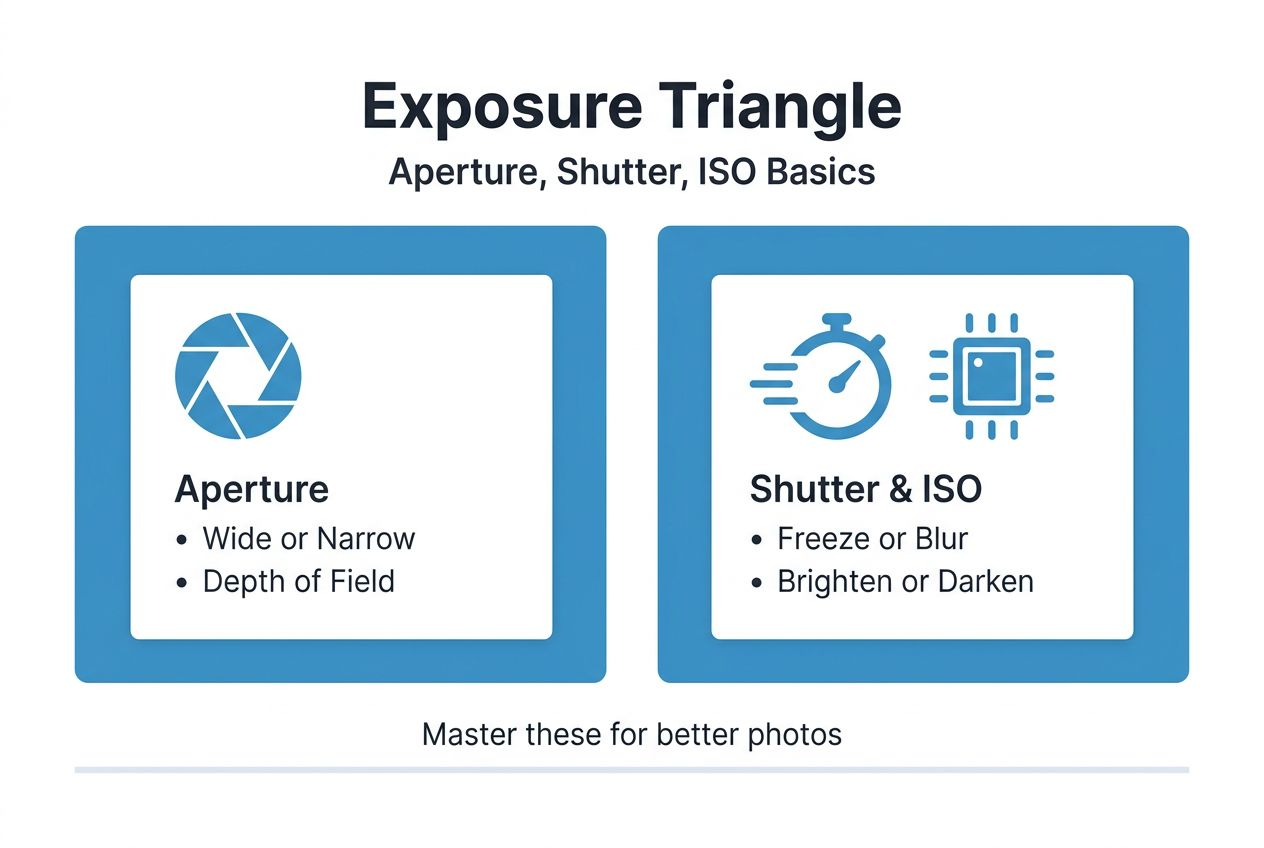
These three settings work together constantly. Changing one requires adjusting another to maintain proper exposure. Understanding their interaction gives you creative control over final results.
Here’s how typical values range for each setting:
| Setting | Range | Effect on Exposure |
|---|---|---|
| Aperture | f/1.8 to f/22 | Wider opening (lower number) = more light |
| Shutter Speed | 1/1000s to 30s | Longer time = more light |
| ISO | 100 to 6400+ | Higher number = more sensitivity to light |
Aperture controls the lens opening size, directly impacting light quantity. A wider aperture like f/1.8 allows more light than a narrow f/16 opening. Shutter speed determines how long the sensor collects light, measured in fractions of seconds or full seconds. ISO adjusts sensor sensitivity, amplifying available light but potentially adding grain.
The balancing act becomes intuitive with practice. Shooting in bright sunlight might use f/11, 1/250s, and ISO 100. Low light conditions could require f/2.8, 1/60s, and ISO 1600 for similar brightness. Explore the exposure triangle photography guide for deeper understanding.
Trade-offs exist with every adjustment. Wider apertures blur backgrounds beautifully but reduce focus range. Slower shutter speeds capture motion blur or risk camera shake. Higher ISO rescues dark scenes but introduces digital noise.
Pro Tip: Practice adjusting one setting at a time while observing how it changes your photo’s brightness and appearance, then compensate with another setting to restore balance.
Mastering this relationship through the comprehensive exposure in photography guide transforms your technical foundation. You’ll make confident decisions about which settings to prioritize based on creative goals and shooting conditions.
Aperture, shutter speed, and ISO explained
Each exposure triangle component creates distinct creative effects beyond brightness control. Aperture size controls depth of field and motion capture abilities, while ISO determines image noise levels. Understanding these individual characteristics helps you choose settings intentionally.
Aperture measures lens opening width using f-numbers. Lower numbers like f/1.8 create wide openings that gather lots of light and produce shallow depth of field. Higher numbers like f/16 create tiny openings that reduce light but keep more of the scene sharp from foreground to background.
Practical aperture applications:
- f/1.8 to f/2.8: Portraits with creamy blurred backgrounds
- f/5.6 to f/8: Group photos keeping multiple people sharp
- f/11 to f/16: Landscapes with everything in focus
- f/22: Maximum depth for macro photography
Shutter speed controls how long light hits the sensor, measured in seconds or fractions. Fast speeds like 1/1000s freeze action perfectly. Slow speeds like 1/15s blur moving subjects, creating motion effects. Speeds below 1/50s typically require stabilization to avoid camera shake blur.
Shutter speed creative uses:
- Freeze sports action with 1/500s or faster
- Capture light trails at night using several seconds
- Blur waterfalls for silky effect at 1/4s with tripod
- Pan with moving subjects at 1/30s for sharp subject, blurred background
ISO amplifies sensor sensitivity to light. Base ISO 100 produces cleanest images with minimal noise. Higher values like ISO 1600 or 3200 brighten dark scenes but add visible grain, especially in shadows. Modern cameras handle higher ISO better, but keeping it low when possible maintains image quality. Your camera’s sensor size impacts photography noise performance significantly.
Balancing these three elements requires understanding their secondary effects. Wider apertures demand precise focus since shallow depth of field leaves little room for error. Faster shutter speeds need more light from aperture or ISO. Lower ISO requires sufficient light from other sources.
Pro Tip: Experiment with each setting independently in similar lighting conditions to observe how aperture affects background blur, shutter speed captures motion, and ISO introduces grain.
Check out detailed explanations on aperture shutter speed ISO to deepen your technical knowledge. Recognizing these relationships transforms camera operation from confusing to intuitive.
Camera modes and transitioning from auto to manual
Camera shooting modes offer different control levels over exposure settings. Aperture Priority empowers depth of field control without overwhelming complexity. Understanding each mode helps you choose the right balance between automation and creative control.
Most cameras provide several standard modes:
| Mode | You Control | Camera Controls | Best For |
|---|---|---|---|
| Auto | Nothing | Everything | Quick snapshots, learning |
| Program | ISO, white balance | Aperture, shutter speed | Beginners exploring basics |
| Aperture Priority | Aperture, ISO | Shutter speed | Portraits, depth of field control |
| Shutter Priority | Shutter speed, ISO | Aperture | Sports, motion effects |
| Manual | Everything | Nothing | Full creative control |
Auto mode makes all decisions for you, useful when grabbing quick shots without thought. Program mode lets you adjust ISO and white balance while the camera balances aperture and shutter speed. These work fine for casual photography but limit creative expression.
Aperture Priority (A or Av) puts you in control of depth of field. You select the aperture, and the camera picks matching shutter speed for proper exposure. This mode helps beginners master one variable while learning how aperture affects background blur and sharpness range.
Shutter Priority (S or Tv) reverses this relationship. You choose shutter speed to freeze or blur motion, and the camera adjusts aperture accordingly. Perfect for sports or creative motion effects.
Manual mode (M) gives complete control over all three exposure settings. Initially intimidating, it becomes your preferred choice once comfortable with exposure relationships. Master manual camera settings through gradual practice.
Practical steps for transitioning to manual:
- Start in Aperture Priority, practicing depth of field control for several weeks
- Note which shutter speeds the camera selects in different lighting
- Switch to Manual in consistent lighting, replicating camera’s automatic choices
- Gradually adjust settings based on creative intent rather than camera suggestions
- Review results and understand why certain combinations worked or failed
Pro Tip: Use Aperture Priority mode extensively before jumping to full Manual, allowing you to master depth of field concepts while the camera handles shutter speed calculations.
Explore camera modes explained for comprehensive guidance. Each mode serves specific purposes, and skilled photographers switch between them based on shooting situations and creative goals.
Basic composition and lighting techniques
Technical camera skills combine with artistic principles to create compelling images. Composition arranges visual elements to guide viewer attention. Lighting shapes mood, dimension, and subject emphasis. Mastering both elevates your photography significantly.
The rule of thirds divides your frame into nine equal sections using two horizontal and two vertical lines. Placing key subjects along these lines or at their intersections creates balanced, engaging compositions. This simple guideline immediately improves snapshot aesthetics.
Natural light offers beautiful, free illumination when used thoughtfully. Golden hour, the period shortly after sunrise or before sunset, provides warm, soft light that flatters subjects and adds atmosphere. Overcast days create diffused lighting perfect for portraits without harsh shadows. Backlighting can create silhouettes or rim lighting effects when positioned creatively.
Framing techniques add depth and context:
- Use doorways, windows, or branches to frame subjects naturally
- Change perspective by shooting from high or low angles rather than eye level
- Get closer to eliminate distracting backgrounds and emphasize subject details
- Consider foreground elements that lead eyes toward the main subject
Avoid relying on built-in flash as primary lighting. It creates flat, harsh illumination that rarely flatters subjects. Instead, position subjects near windows, shoot during optimal outdoor light, or use reflectors to bounce existing light. Understanding available light transforms average scenes into photographic opportunities.
Composition and lighting work alongside exposure settings. Wide apertures combined with rule of thirds positioning and golden hour light create stunning portraits. Fast shutter speeds during midday action benefit from thoughtful framing that captures decisive moments. Building strong photography habits for beginners includes training your eye to see light quality and compositional opportunities before pressing the shutter.
Experiment with different compositional approaches and lighting scenarios regularly. Notice how changing your position relative to light sources affects subject appearance. These artistic fundamentals complement technical camera knowledge, helping you create images that stand out.
Common misconceptions and beginner mistakes
Many amateur photographers hold beliefs that limit their progress. Identifying and correcting these misconceptions accelerates learning. Understanding what doesn’t work saves time and frustration.
Relying exclusively on auto mode prevents skill development. While convenient initially, it trains you to depend on camera decisions rather than understanding exposure principles. Auto mode often produces acceptable results but rarely exceptional ones in challenging lighting.
Aperture numbers confuse beginners because they work counterintuitively. Smaller f-numbers like f/2.8 actually mean wider openings and more light. Larger numbers like f/16 mean tiny openings and less light. This reversed relationship trips up newcomers who expect bigger numbers to mean bigger openings.
Many photographers believe ISO must always stay at 100 for quality. While lower ISO reduces noise, refusing to raise it in dim conditions forces excessively slow shutter speeds or underexposed images. Modern cameras handle ISO 800 or 1600 remarkably well. Use higher ISO when needed rather than accepting blurry shots from camera shake.
Slow shutter speeds below 1/50s require stabilization like tripods or bracing against solid objects to avoid blur from natural hand movement during exposure.
Additional mistakes that slow progress:
- Ignoring white balance, resulting in unrealistic color casts
- Never reviewing camera settings that produced good or bad results
- Avoiding manual focus when autofocus struggles in low contrast
- Shooting only in comfortable conditions instead of challenging lighting
- Expecting immediate mastery rather than embracing gradual improvement
Address these issues by studying common camera mistakes beginner guide resources. Recognize that mistakes provide valuable learning opportunities. Each failed shot teaches you something about exposure relationships, focus techniques, or compositional choices.
Confidence builds through understanding why problems occur and how to fix them. Don’t fear making mistakes during practice sessions. Experimentation reveals which approaches work for your style and subjects.
Practical tips to improve your photography
Applying camera basics requires deliberate practice and reflection. These actionable steps help you build skills systematically. Consistent application transforms theoretical knowledge into practical ability.
- Dedicate practice sessions to specific skills like manual exposure or depth of field experiments
- Review every photo critically, noting which settings produced desired results
- Keep a simple log or notes about successful setting combinations for different scenarios
- Shoot the same subject in various lighting conditions to understand how light affects exposure needs
- Challenge yourself weekly with new techniques like long exposures or intentional motion blur
- Join photography communities online to share work and receive constructive feedback
- Study photos you admire, analyzing their exposure, composition, and lighting choices
Start with simple, stationary subjects before progressing to complex scenes. Master controlling depth of field with portraits before attempting fast-moving sports. Build confidence gradually rather than overwhelming yourself with advanced techniques immediately.
Regular shooting develops muscle memory for camera operation. Your hands learn dial positions and button functions, freeing mental energy for creative decisions. Repetition turns conscious effort into automatic responses.
Analyzing your results teaches more than any tutorial. Compare similar shots with different settings to understand cause and effect. Notice patterns in which combinations work best for your subjects and style. Continued practice with manual camera settings accelerates this learning process.
Pro Tip: Begin with simple, well-lit subjects like flowers or still life arrangements, then gradually increase complexity as your confidence with camera controls grows.
Patience matters more than expensive gear. A photographer who understands exposure thoroughly produces better images with basic equipment than someone with professional gear but limited knowledge. Focus on mastering fundamentals before worrying about advanced equipment.
Experiment boldly and review honestly. Every shooting session offers lessons if you approach it with curiosity rather than perfectionism. Photography skills develop through accumulated experience and intentional practice.
Explore more beginner photography resources
Building on camera basics opens pathways to advanced skills and creative growth. Amateur Photographer Guide offers comprehensive resources designed specifically for hobbyists developing their craft. Our tutorials simplify complex concepts while providing actionable guidance.
Struggling with specific technical challenges? The beginners photography mistakes guide addresses common issues like focusing problems, exposure errors, and composition missteps with clear solutions. Ready to take full control? Our detailed manual camera settings guide walks you through mastering every dial and menu option.
Explore the complete library at Amateur Photographer Guide for gear reviews, shooting techniques, editing tutorials, and creative inspiration tailored to amateur photographers. Each resource builds on foundational skills, helping you progress from beginner to confident hobbyist capturing images you’re proud to share.
FAQ
What is the exposure triangle in photography?
The exposure triangle consists of aperture, shutter speed, and ISO, three settings that control image brightness and creative effects. Balancing these elements determines whether your photo appears properly exposed and achieves your intended artistic style. Each setting affects the others, so adjusting one typically requires compensating with another.
How do aperture, shutter speed, and ISO affect my photos?
Aperture controls light entering the lens and shapes depth of field, affecting how much of your scene stays sharp. Shutter speed governs motion capture, freezing action with fast speeds or creating blur with slow speeds. ISO adjusts sensor sensitivity, brightening images in low light but introducing grain at higher values.
When should I switch from automatic to manual mode?
Switch when you feel comfortable understanding how aperture and shutter speed affect exposure, typically after practicing with aperture priority mode for several weeks. Start experimenting with manual camera settings in familiar, consistent lighting before tackling challenging conditions. Gradual transition builds confidence without overwhelming frustration.
Why do my photos look blurry even with good lighting?
Blurry photos typically result from slow shutter speeds causing camera shake or missed focus. Shutter speeds below 1/50s require stabilization like tripods or bracing against solid surfaces. Check that your camera focused on the intended subject rather than background elements, especially when using wide apertures that create shallow depth of field.
Should I always use the lowest ISO possible?
No, keeping ISO at 100 in all situations forces impractical shutter speeds or underexposed images in dim lighting. Modern cameras handle ISO 800 to 1600 remarkably well with acceptable noise levels. Raise ISO when needed to maintain proper exposure and avoid motion blur, prioritizing sharp, slightly grainy images over dark or blurry ones.