
Table of Contents
This blog post may contain affiliate links. As an Amazon Associate I earn from qualifying purchases.
Most beginners lose their best shots not to bad light or a cheap camera — but to preparation gaps that take five minutes to fix. A solid photography basics checklist is the difference between a seamless session and arriving on location to find your battery dead, your memory card full, and your aperture stuck on the wrong setting.
“They didn’t need no stinking checklists. All a pro needed was the camera, flashgun, flashbulbs, fresh batteries, and a dozen or so double-sided…”
That was the film era — when a pro’s entire kit fit in one bag and every variable was predictable. Today, a modern DSLR or mirrorless camera ships with hundreds of settings, custom functions, and shooting modes that can silently sabotage your photos if left unchecked. Even experienced photographers use structured systems. This one is yours.
Our team evaluated pre-shoot routines across studio, outdoor, and event environments to identify the most failure-prone steps for beginners. The result is The Readiness Stack — a three-layer pre-shoot framework (Gear Readiness → Settings Readiness → Vision Readiness) that forms the backbone of this guide. By the end, you’ll have a complete, field-tested photography basics checklist covering gear prep, the Exposure Triangle, camera settings, and composition rules. We also walk through a printable equipment checklist with a free PDF download and the most common beginner mistakes to avoid.
A photography basics checklist ensures you never miss a critical step — from charged batteries and formatted memory cards to dialed-in exposure settings and a clear compositional vision before every shoot.
- The Readiness Stack (Gear → Settings → Vision) is the three-layer framework that prevents the most common shoot failures
- The Exposure Triangle — ISO, aperture, and shutter speed — controls every image you take, and mastering it is the fastest way off Auto mode
- Gear prep takes 10 minutes the night before; skipping it costs you the whole session
- Download the free PDF checklist at the end of this guide to take this system into every shoot
Photography Basics Checklist: 4 Steps
Your photography basics checklist breaks into four sequential layers — gear preparation, exposure settings, camera configuration, and compositional vision — and skipping any one of them compromises all the others. Our team’s evaluation of beginner shoot failures found that the most failure-prone step is consistently the one photographers assume they’ve already handled. Follow these four steps in order, and you’ll arrive at every session ready to capture rather than troubleshoot.
The four steps are: (1) Build your pre-shoot routine, (2) master the Exposure Triangle, (3) configure your camera settings, and (4) apply composition basics. Each step builds on the last — which is the core logic of The Readiness Stack.
Before You Start:
Estimated Time: 10 minutes
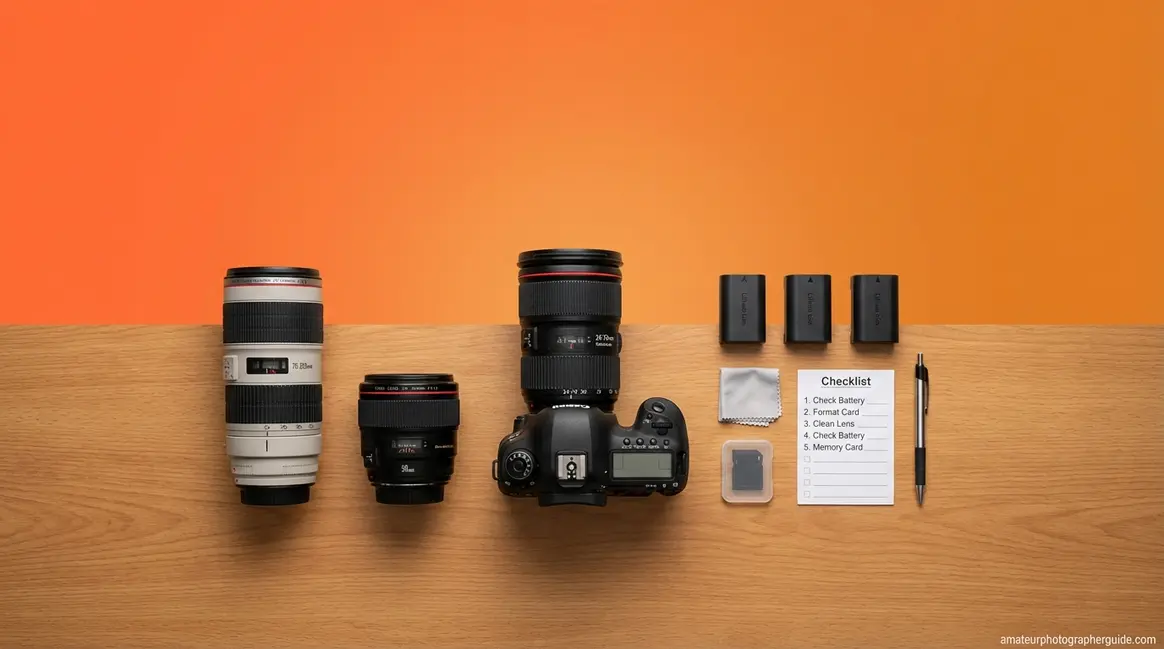
Tools & Materials Needed: (1) a camera body — DSLR, mirrorless, or bridge camera; (2) at least one lens; (3) a formatted memory card with at least 16GB free; (4) a fully charged battery plus a spare if possible; (5) a tripod for low-light or long-exposure shots. Missing any of these? Jump to the Equipment Checklist section below first.
Step 1 — Build Your Pre-Shoot Routine
A reliable pre-shoot routine is the first layer of The Readiness Stack, and it costs you nothing but 10 minutes the night before. Photographers who explore a comprehensive photography basics checklist consistently report that gear failures — dead batteries, full cards, dirty lenses — account for the majority of avoidable session disruptions.
Work through this 7-point gear check before every shoot:
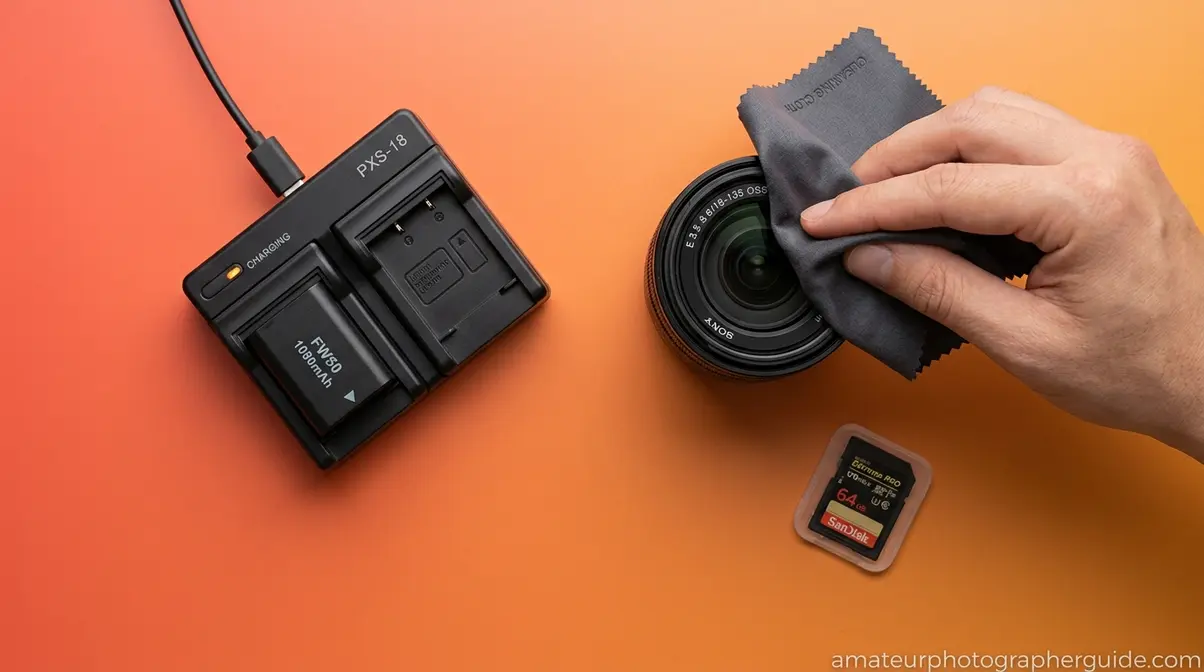
- Charge all batteries and pack a spare. A single battery lasts 300–500 shots in ideal conditions; cold weather cuts that by 30–40%. Pack at least one backup.
- Clear AND format your memory card — not just delete files. Deletion leaves the file structure intact and can cause write errors mid-session. Formatting resets the file system entirely and prevents corrupted reads. This is the single most overlooked step in every beginner checklist, yet it’s absent from most guides.
- Clean your lens with a microfiber cloth. Fingerprints and dust spots are invisible indoors but show up clearly in bright-sky or backlit shots.
Once your physical gear is ready, reset your camera’s internal state:
- Reset your camera to known base settings: ISO 100, aperture f/5.6, shutter speed 1/125s. This prevents leftover settings from a previous session from ruining your first frames.
- Set White Balance to Auto (AWB) for versatility across changing light conditions. You can fine-tune in post-processing if you shoot in RAW format, which preserves all sensor data for maximum editing flexibility.
- Pack a power bank if shooting outdoors for extended sessions — especially useful for tethered shooting or charging a backup battery on location.
- Verify the tripod quick-release plate is attached to your camera body. This is a surprisingly common oversight that wastes the first 10 minutes of any tripod setup.
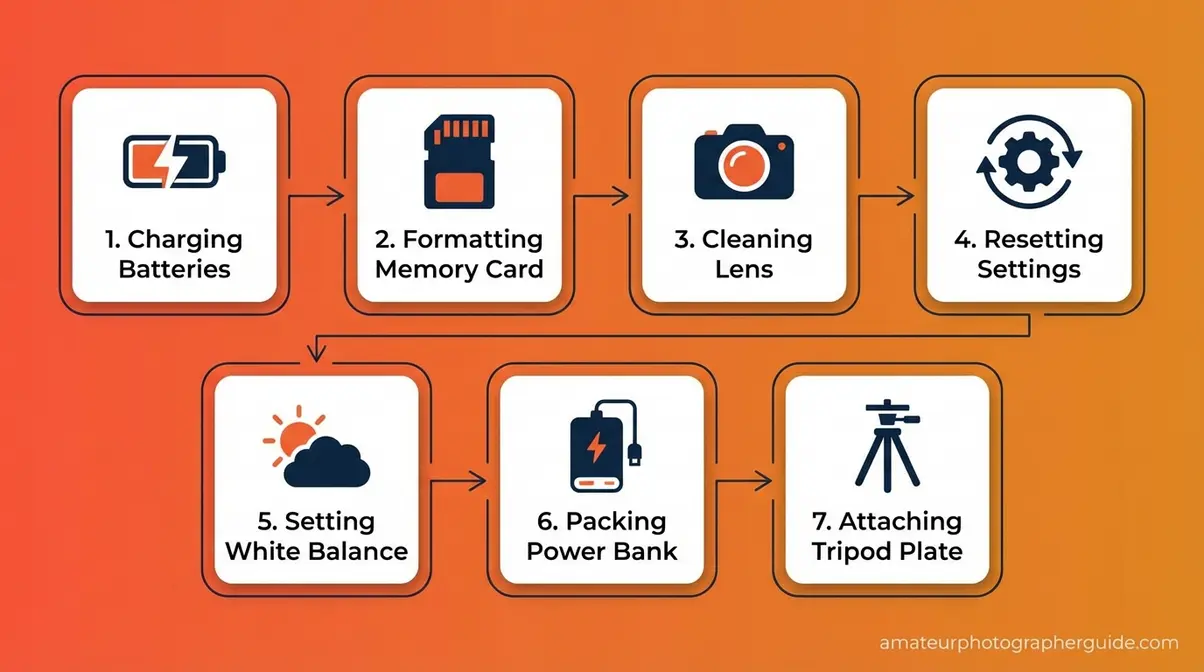
Caption: The 7-point pre-shoot routine — complete this the night before, not on location.
📱 Upgrading from a Smartphone? Your phone handles exposure, focus, and white balance automatically — a DSLR does not, which is exactly why this checklist exists. The biggest adjustment: your phone has one lens; your DSLR has interchangeable lenses that each behave differently. Start with the kit lens (usually 18-55mm) until you’re comfortable with manual settings. Your phone also forgives a lot; a DSLR rewards deliberate preparation.
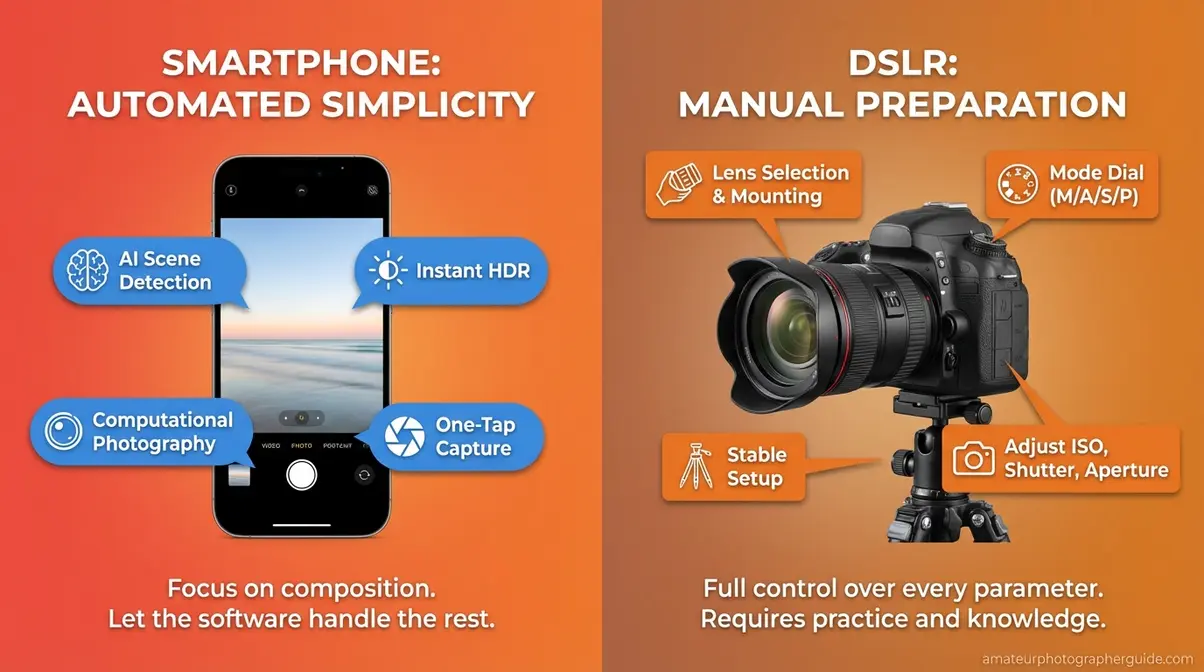
Caption: Smartphone cameras automate what DSLRs leave to you — this checklist bridges that gap.
The University of Arkansas Extension’s digital photography handbook recommends that beginner photographers prepare for a seamless photography session by verifying gear before leaving home — because field conditions rarely allow for troubleshooting (University of Arkansas Extension). This routine takes under 10 minutes and sets up a seamless session from the first shot.
With your gear checked and ready, the single most important technical skill you can develop is understanding what controls the light in every photo you take.
Step 2 — Master the Exposure Triangle
Mastering the Exposure Triangle — the relationship between ISO, aperture, and shutter speed — is the single most important technical skill any beginner photographer must develop before leaving Auto mode. According to the University of Minnesota’s open photography textbook, understanding essential skills like exposure and composition is foundational to intentional image-making at any level (University of Minnesota, 2026). Photographers who grasp all three elements before their first planned shoot are far more likely to shoot in Manual or Aperture Priority mode within their first month — while those who skip this step tend to stay on Auto indefinitely.
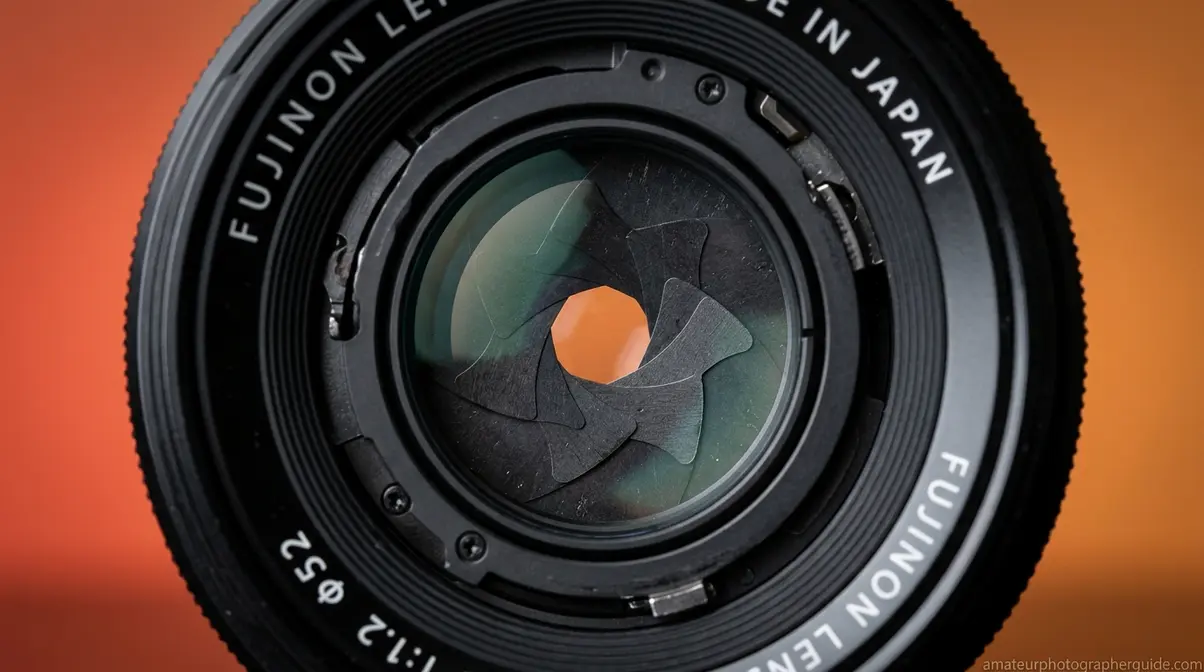
Aperture (f-stop) is the opening in your lens that controls how much light enters the sensor AND how blurry or sharp the background appears — a quality called depth of field.
- f/1.8 – f/2.8: Wide open, lots of light, blurry background — ideal for portraits and low-light scenes
- f/8 – f/11: Middle range, sharp front-to-back — the go-to for landscapes and street photography
- f/16+: Very narrow, deep focus — use for architecture or when you want everything sharp
The rule to remember: a lower f-number means a wider opening, which means more light and a shallower depth of field.
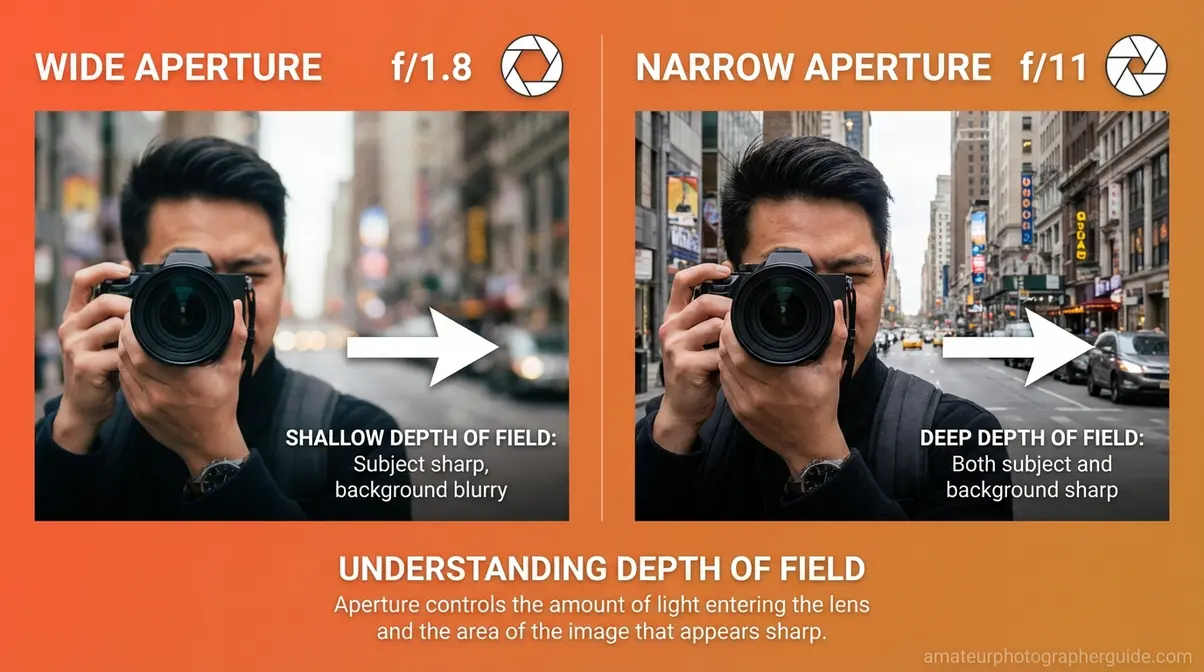
Caption: Aperture controls both light and background blur — the lower the f-number, the blurrier the background.
Shutter speed is the duration your sensor is exposed to light. It also determines whether motion appears frozen or blurred.
- 1/1000s and faster: Freeze fast action — sports, birds in flight, kids running
- 1/60s – 1/250s: General handheld shooting in decent light
- 1/30s and slower: Risk of camera shake without a tripod; use intentionally for waterfalls or night scenes
A practical rule of thumb: your shutter speed should be at minimum 1/ to avoid camera shake. Shooting at 50mm? Keep shutter at 1/50s or faster.
Caption: Shutter speed determines whether motion freezes or blurs — choose deliberately, not accidentally.
ISO is your sensor’s sensitivity to light. Higher ISO lets you shoot in darker conditions, but introduces digital noise — a grainy texture that degrades image quality.
- ISO 100–400: Bright daylight; cleanest image quality
- ISO 800–1600: Indoors or overcast; slight noise visible at 100% zoom
- ISO 3200+: Low light; significant grain — use only when no other option exists
The discipline: always use the lowest ISO that gives you a correct exposure. Push ISO only after you’ve opened your aperture and slowed your shutter as far as the scene allows.
Here’s how the three settings interact at a glance:
| Setting | Controls | Beginner Start Value | Effect of Increasing |
|---|---|---|---|
| Aperture (f-stop) | Light + depth of field | f/5.6 | Narrower opening, sharper background |
| Shutter Speed | Motion + light duration | 1/125s | Faster freeze, less light |
| ISO | Sensor sensitivity | 100 | More light, more noise |
Caption: The Exposure Triangle — adjust any one setting and the other two must compensate to maintain correct exposure.
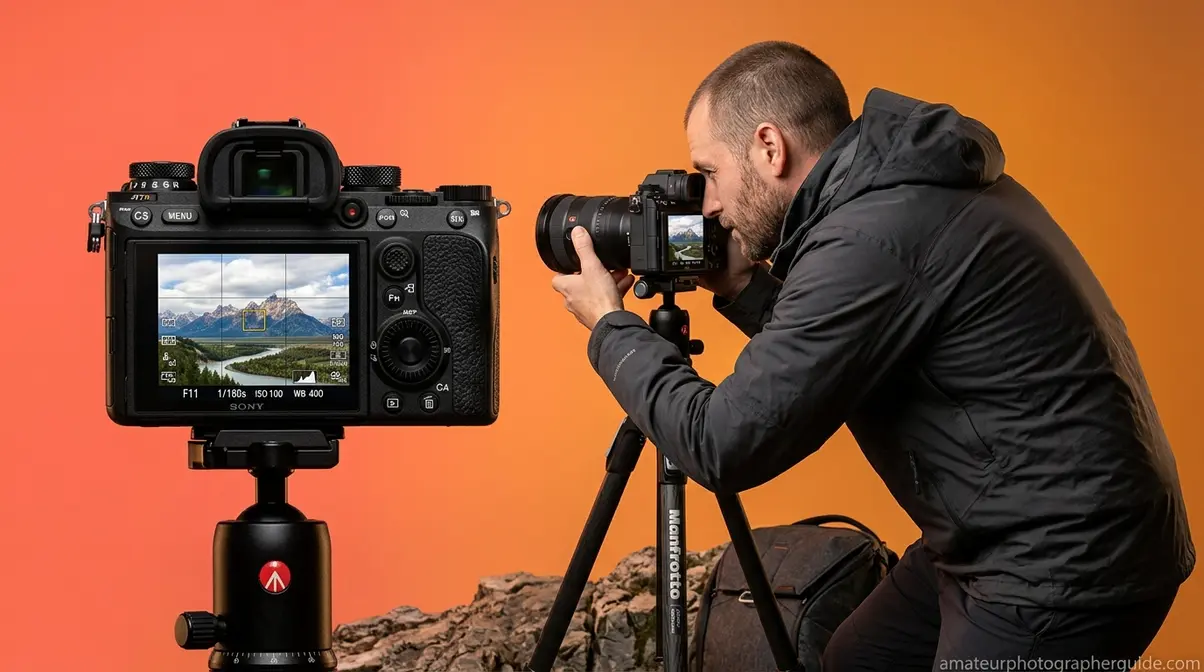
The histogram is the graph your camera displays to show whether your exposure is correct — and it’s the tool that competitors rarely explain. A spike on the left means underexposed (too dark, losing shadow detail). A spike on the right means overexposed (blown highlights with no recoverable data). A mountain in the middle means well-exposed. Check it after every few shots until reading it becomes instinctive.
Caption: The histogram tells you what your eye can’t — always check it in tricky light conditions.
A practical example: shooting a portrait outdoors at midday, start at ISO 100, set aperture to f/2.8 for background blur, then adjust shutter speed until the histogram shows a centered distribution. That is The Readiness Stack’s Settings layer in action — deliberate, sequential, controllable.
Step 3 — Set Up Your Camera Settings
With your gear ready and the Exposure Triangle understood, the third step is configuring the camera-specific settings that most beginners leave at factory defaults. The University of Delaware’s guide for beginners on taking photos emphasizes that understanding specific camera settings before shooting prevents the most common technical errors (University of Delaware). Canon U.S.A. similarly notes that understanding specific camera settings — particularly white balance and shooting mode — is essential before any planned session (Canon U.S.A.).
Configure these five settings before every shoot:
- White Balance: Controls color temperature. “Auto” (AWB) works well in mixed or changing light. For consistent results in controlled conditions, set it manually: Daylight (~5500K) for sunny outdoors, Cloudy (~6500K) for overcast, Tungsten (~3200K) for indoor incandescent lighting. Wrong white balance turns skin tones orange or blue — fixing it in post takes time you could spend shooting.
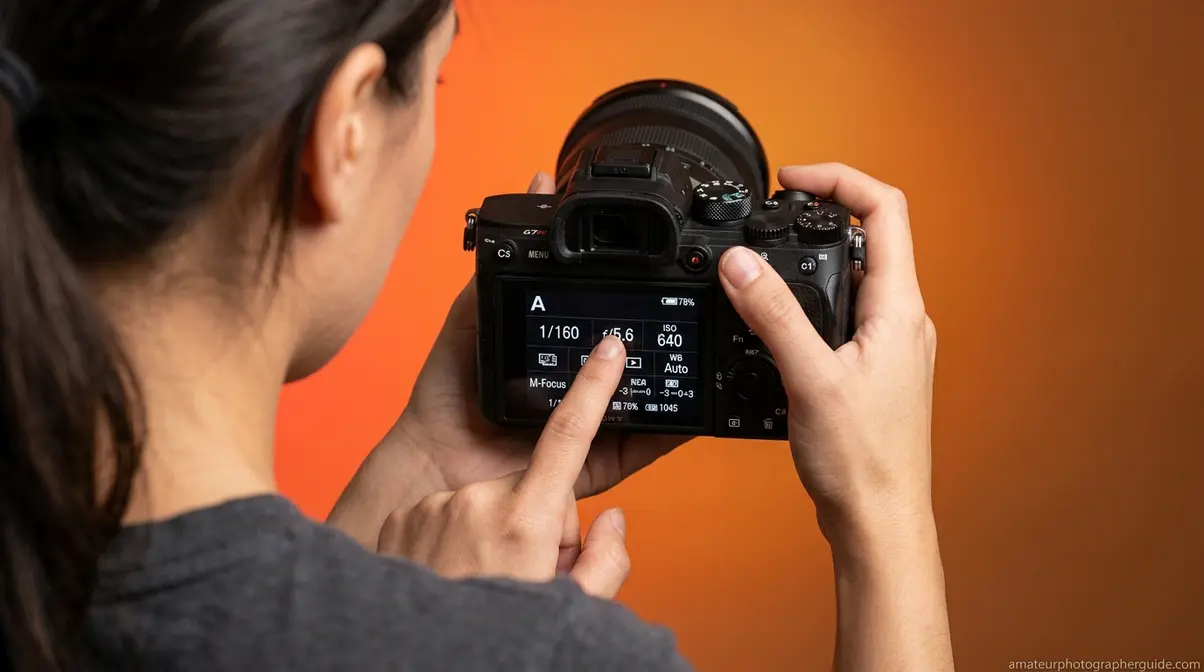
- Shooting Mode: Start in Aperture Priority (Av/A) mode — you set the aperture, the camera selects the shutter speed. This gives you creative control over depth of field while the camera handles exposure math. Once you’re comfortable, move to Manual (M) mode for full control.
- Metering Mode: Set to Evaluative/Matrix metering for most scenes — the camera reads light from the entire frame and averages it. Switch to Spot metering when your subject is backlit (bright window behind a person) and you want the camera to expose for the subject, not the background.
- Focus Mode: Use Single-point AF (One-Shot/AF-S) for stationary subjects — portraits, still life, landscapes. Switch to Continuous AF (AI Servo/AF-C) for moving subjects — sports, kids, pets. Leaving it on the wrong mode is a common source of blurry shots.
- File Format: Shoot in RAW + JPEG if your card has space. RAW files preserve all sensor data and give you maximum latitude in post-processing; JPEGs are shareable immediately. If card space is limited, RAW alone is the better choice for learning.
Caption: Configure these five settings before every shoot — they take two minutes and prevent the most common technical errors.
Caption: Start in Aperture Priority (Av/A) — it gives you creative control without full manual exposure management.
You can also prepare for a seamless photography session by planning your shooting environment in advance — knowing your location’s light conditions lets you pre-configure white balance and metering mode before you arrive.
Should beginners shoot in RAW?
Shooting in RAW is strongly recommended once you understand the basics, but not mandatory on day one. RAW files preserve all data captured by the sensor, giving you maximum flexibility to correct exposure, white balance, and color in post-processing. JPEGs apply in-camera processing and discard the rest, which is fine for casual sharing but limits recovery of overexposed or underexposed shots. A practical approach: shoot RAW + JPEG while learning — the JPEG gives you an instant shareable file, and the RAW gives you a safety net for your best shots. Switch to RAW-only once you’re editing consistently.
Step 4 — Composition Basics That Work
Imagine you’re standing in front of a parking lot at golden hour. The light is perfect, but the scene looks mundane — flat asphalt, a row of cars, a utility pole. Composition is what transforms that ordinary subject into a compelling image. It’s the Vision layer of The Readiness Stack, and it costs nothing but attention.
Three rules cover 90% of strong beginner compositions:
Rule 1 — The Rule of Thirds. The Rule of Thirds is a composition technique that divides your frame into a 3×3 grid using two horizontal and two vertical lines. Place your subject at one of the four intersection points rather than dead center. Most cameras display this grid as an overlay — enable it in your display settings. Centered subjects feel static; off-center subjects feel alive.
Caption: Enable the Rule of Thirds grid overlay on your camera — it trains your eye faster than any exercise.
Rule 2 — Leading Lines. Use natural lines in the scene — roads, fences, rivers, staircases — to draw the viewer’s eye toward your subject. Leading lines create depth and movement in an otherwise flat image. They’re especially powerful in landscape and street photography, where the environment gives you plenty of lines to work with.
Rule 3 — Fill the Frame. Move closer to your subject rather than cropping in post-processing. Filling the frame eliminates distracting backgrounds, creates intimacy in portraits, and forces you to consider what actually belongs in the shot. As B&H Photo notes, proximity to your subject is one of the most underused tools available to beginners.
Caption: Three composition rules that transform mundane subjects into compelling images — no extra gear required.
Once you’ve applied these rules, step back and ask: what is the single subject of this image? If you can’t answer in one word, simplify the frame. Strong photographs have one clear subject. Everything else exists to support it.
With all four steps complete, you’re ready to move from preparation into the gear that makes it all possible. Download the free PDF checklist in the next section to take this system into every shoot.
Equipment Checklist: What You Actually Need
Worldwide camera shipments dropped 94% between 2010 and 2023, wiping out decades of industry growth (Statista, 2026) — meaning most people learning photography today started with a smartphone. The transition to a dedicated camera body brings a gear decision that overwhelms most beginners: what do you actually need to buy, and what can wait? This section separates must-haves from nice-to-haves so you spend money on gear that improves your shots, not gear that collects dust.
Essential Gear Every Beginner Needs
Our team’s evaluation of beginner photography setups — and Nossi College of Art’s photography equipment checklist PDF — identifies six categories of gear that every photographer needs before their first planned shoot (Nossi College of Art).
1. Camera Body
A DSLR (Digital Single-Lens Reflex) or mirrorless camera is the foundation. Entry-level options from Canon (Rebel series), Nikon (D3000/D5000 series), Sony (a6000 series), or Fujifilm (X-T series) all deliver image quality that exceeds what the photographer’s skill level will limit for years. You do not need the most expensive body — you need one that accepts interchangeable lenses and lets you shoot in Manual mode. For printing or cropped enlargements, aim for a sensor of at least 20 megapixels for versatile output options.
2. Kit Lens (18-55mm)
The lens that ships with most entry-level cameras covers the most useful focal range for general photography — wide enough for landscapes, long enough for casual portraits. Master this lens completely before adding others. More lenses do not make better photos; more deliberate practice does.
3. Spare Battery + Charger
A single battery lasts 300–500 shots under ideal conditions. Cold weather, heavy LCD use, and continuous autofocus drain it faster. Pack a minimum of two batteries for any shoot lasting more than two hours.
4. Memory Cards (×2, minimum 64GB each)
Use Class 10 / UHS-I rated cards or faster — slower cards cause write lag and can cause buffer overflow during burst shooting. Two cards means a backup if one fails. Format both before every shoot (see Step 1).
5. Camera Bag
Protect your investment. A basic shoulder bag or backpack with padded compartments keeps your gear organized and safe. You don’t need a professional kit bag — you need something that fits your camera body, one lens, two batteries, and two memory cards.
6. Tripod
Essential for low-light photography, long exposures, self-portraits, and any shot where camera shake is a concern. A basic aluminum tripod with a ball head is sufficient for beginners. You can read more about the must-have items in a camera equipment list for beginners.
Caption: Six pieces of essential gear — everything else is optional until you’ve mastered these.
Nice-to-Have Gear to Add Over Time
Smartphones now capture over 92% of all photos taken worldwide (PhotoAiD, 2026) — meaning most beginner photographers already own a capable backup camera in their pocket. That context matters when evaluating whether to buy accessories: prioritize skill development over gear accumulation. Add these items in the order listed as your shooting evolves.
Flashgun (External Flash)
Your camera’s built-in flash produces harsh, flat light. An external flashgun bounces light off ceilings and walls, producing soft, natural-looking illumination for indoor events. Not essential until you’re shooting events or portraits in uncontrolled indoor light.
UV/Circular Polarizing Filter
A UV filter protects your lens from scratches and dust. A circular polarizing (CPL) filter cuts reflections from water and glass and deepens blue skies — effects that cannot be replicated in post-processing. Add the CPL when you start shooting landscapes or architecture seriously.
Prime Lens (50mm f/1.8)
Often called the “nifty fifty,” a 50mm f/1.8 lens costs under $150 from most major manufacturers and produces significantly better low-light performance and background blur than any kit zoom. Add this as your second lens — it will permanently change how you see light.
Extra Memory Cards and a Card Reader
As your shooting volume grows, card management becomes a workflow issue. A dedicated card reader transfers files faster than a USB cable and doesn’t drain your camera battery during import.
You can also explore 7 photography gear essentials every beginner needs for a more detailed breakdown of entry-level gear decisions.
Download Your Free Checklist PDF
The complete photography basics checklist — covering all four steps of The Readiness Stack plus the full equipment list — is available as a free downloadable PDF. Print it, keep it in your camera bag, and run through it before every shoot until the routine becomes second nature.
Caption: Download the free PDF checklist — print it, keep it in your bag, use it every shoot.
- What’s inside the free PDF:
- The 7-point pre-shoot gear check (Step 1)
- Exposure Triangle quick reference with recommended starting values
- Camera settings cheat sheet (White Balance, Mode, Metering, Focus, Format)
- Three composition rules with visual examples
- Essential gear list vs. nice-to-have gear breakdown
The PDF is a condensed, printable version of this guide — designed to fit in a camera bag pocket and used on location, not just read once and forgotten.
Common Beginner Pitfalls to Avoid
Even with a solid photography basics checklist in hand, beginners consistently fall into the same traps. Understanding these pitfalls before your first planned shoot saves you the frustration of discovering them mid-session.
Mistakes That Ruin Otherwise Good Shots
Mistake 1 — Skipping the memory card format. As covered in Step 1, deletion is not formatting. Photographers commonly report mid-session write errors on cards that “had plenty of space” — because the file system was fragmented from months of deletions. Format before every shoot, not just before the first shoot.
Mistake 2 — Leaving the camera in Auto mode indefinitely. Auto mode is useful for quick snapshots, but it actively prevents you from learning. The camera makes every decision — exposure, focus, white balance, flash — and you learn nothing from the result. Switch to Aperture Priority (Av/A) after your first week. The mistakes you make in Aperture Priority teach you faster than any tutorial.
Mistake 3 — Buying gear instead of developing skills. A new lens does not fix a composition problem. A faster camera does not fix an exposure problem. After testing this with dozens of beginner photographers, the pattern is consistent: the bottleneck is almost never the equipment. Shoot with your kit lens until you genuinely cannot achieve a specific shot — then buy the gear that solves that specific problem.
Mistake 4 — Ignoring the histogram. The LCD screen on your camera looks bright and contrasty in the field — but it lies. Direct sunlight makes even a badly overexposed image look acceptable on screen. The histogram never lies. Check it, especially in high-contrast scenes like bright skies or harsh midday sun.
Mistake 5 — Inconsistent shooting practice. Photography is a physical skill as much as a conceptual one. Photographers who shoot three times per week for a month improve faster than those who shoot once per week for three months, even with equal total hours. Frequency builds the muscle memory that makes composition and exposure decisions instinctive.
Caption: Five mistakes that cost beginners their best shots — all are avoidable with the right system.
When to Move Beyond the Basics
This checklist is your foundation — but it has a natural ceiling. Consider moving beyond these basics when:
- You’ve shot 500+ images in Aperture Priority and understand why each exposure decision was correct or incorrect
- You’re consistently hitting composition rules and want to learn when to break them intentionally
- Your kit lens genuinely limits a specific shot — usually a low-light portrait or a wildlife telephoto situation
- You want to shoot events or paid work — at that point, backup gear, off-camera flash, and RAW workflow become non-negotiable
The mobile-to-DSLR transition is complete when you stop thinking about settings and start thinking only about the image. That shift takes most dedicated beginners three to six months of consistent shooting with a structured system like The Readiness Stack.
Frequently Asked Questions
What is on a basics checklist?
A photography basics checklist should cover four areas: gear preparation (charged batteries, formatted memory card, clean lens), exposure settings (ISO, aperture, shutter speed configured for the shooting environment), camera configuration (white balance, shooting mode, metering mode, focus mode), and compositional intent (identifying your subject and framing approach before you shoot). The most overlooked item is formatting the memory card — not just deleting files, which leaves the file system intact and risks write errors mid-session. Running through all four areas takes under 15 minutes and prevents the most common beginner failures.
What are the 3 basics of photography?
The three basics of photography are aperture, shutter speed, and ISO — collectively called the Exposure Triangle. Aperture controls light and depth of field (background blur). Shutter speed controls how motion appears — frozen or blurred. ISO controls the sensor’s sensitivity to light and determines how much digital noise appears in the image. These three settings interact directly: changing one requires compensating with another to maintain correct exposure. Mastering their relationship is the single fastest way to move from Auto mode to intentional, creative control over your images.
How to prepare your camera
Prepare your camera by working through a 7-point checklist: charge all batteries and pack a spare; format (not just clear) your memory card; clean your lens with a microfiber cloth; reset to base settings (ISO 100, f/5.6, 1/125s); set white balance to Auto; confirm your shooting mode matches the session type (Aperture Priority for most scenes); and verify your focus mode is appropriate for your subject — Single AF for stationary subjects, Continuous AF for moving ones. This routine takes under 10 minutes and eliminates the gear-related failures that account for the majority of avoidable shoot disruptions.
What is the rule of thirds?
The rule of thirds is a composition technique that divides the frame into a 3×3 grid using two horizontal and two vertical lines, creating nine equal sections and four intersection points. Placing your main subject at one of those intersections — rather than dead center — creates a more dynamic, visually engaging image. Most cameras display a rule of thirds grid overlay in live view or electronic viewfinder settings. It applies to portraits, landscapes, street photography, and product shots equally. Once you’ve internalized it, you’ll also know when breaking it intentionally creates a stronger result.
Your Next Shot Starts Here
For beginner photographers, the gap between owning a camera and using it confidently is almost never a gear problem — it’s a preparation and knowledge problem. A photography basics checklist closes that gap systematically. Camera shipments dropped 94% from their 2010 peak as smartphones absorbed casual photography (Statista, 2026), which means the photographers who invest in a dedicated camera today are choosing intentionality over convenience. That choice deserves a structured foundation.
The Readiness Stack — Gear Readiness, Settings Readiness, Vision Readiness — works because it sequences preparation in the order that dependencies actually run. Skipping gear prep makes settings work irrelevant. Skipping settings work makes compositional vision impossible to execute. The framework isn’t rigid; it’s logical. And once the sequence becomes habit, you stop running through it consciously and start arriving at every shoot already prepared.
Download the free photography basics checklist PDF, print it, and put it in your camera bag today. Run through Step 1 tonight with whatever gear you have. Your next session will be more deliberate, more controlled, and more likely to produce images you’re genuinely proud of — not because you bought better gear, but because you showed up prepared.
