
Table of Contents
- What Is Bokeh? Definition, Origins, and Types
- How to Achieve Bokeh: Camera Settings
- Smartphone Bokeh: Portrait Mode Explained
- Bokeh in Video and Film: Directing the Eye
- Bokeh Beyond Photography: Art and Python
- Common Bokeh Mistakes and When to Skip the Effect
- Frequently Asked Questions About Bokeh
- Bokeh Quality, Optical Physics, and Your Next Shot
This blog post may contain affiliate links. As an Amazon Associate I earn from qualifying purchases.
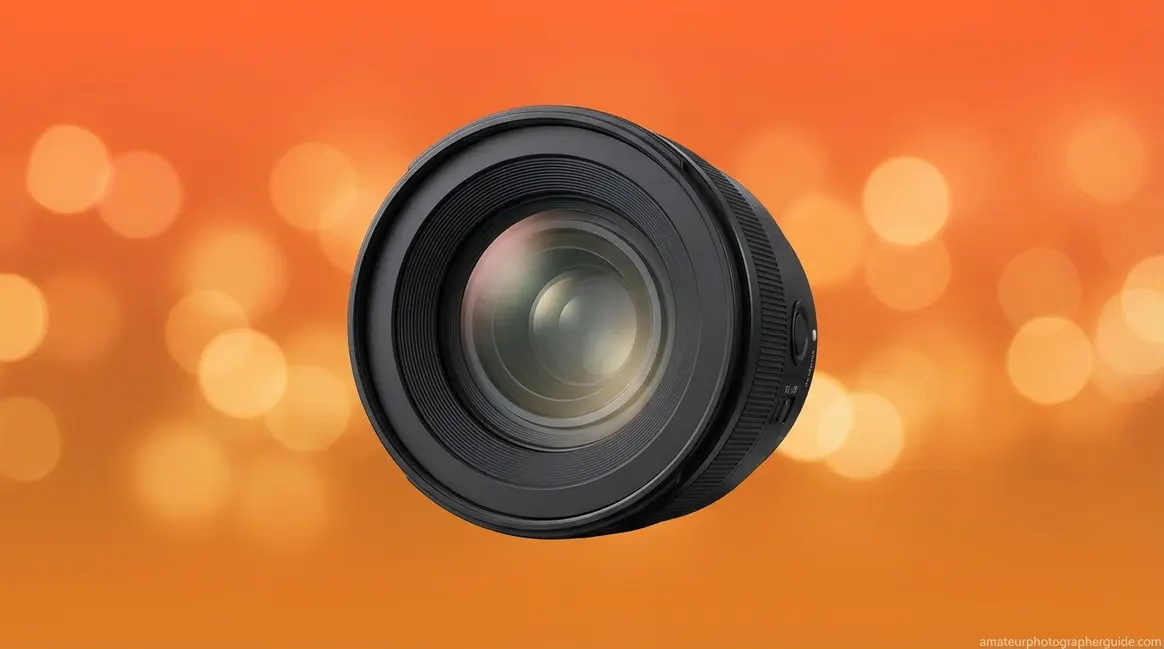
You’ve seen it in professional portraits — that creamy, dreamy blur behind a sharp subject. But here’s what most photography guides miss: what you’re admiring isn’t just blur. It’s bokeh (pronounced BOH-kay), and the difference between ordinary background blur and true bokeh is the difference between a snapshot and a photograph.
Without understanding that distinction, you can spend hours trying to replicate the look and still end up with backgrounds that feel busy and distracting rather than smooth and cinematic. Knowing what is bokeh in photography — and why quality matters as much as quantity — is the skill that separates technically aware photographers from those just hoping for the best.
In this guide, you’ll learn exactly what bokeh is, what separates creamy bokeh from harsh blur, and how to achieve it — whether you’re shooting with a DSLR, mirrorless camera, or the phone in your pocket. You’ll also discover how bokeh applies to video, art, and even software development.
Bokeh is the aesthetic quality of out-of-focus blur in a photograph — not the blur itself, but how your lens renders points of light outside the depth of field. Interest in this technique has grown 60% year-over-year as both camera users and smartphone photographers seek the effect (amateurphotographerguide.com keyword research, 2026).
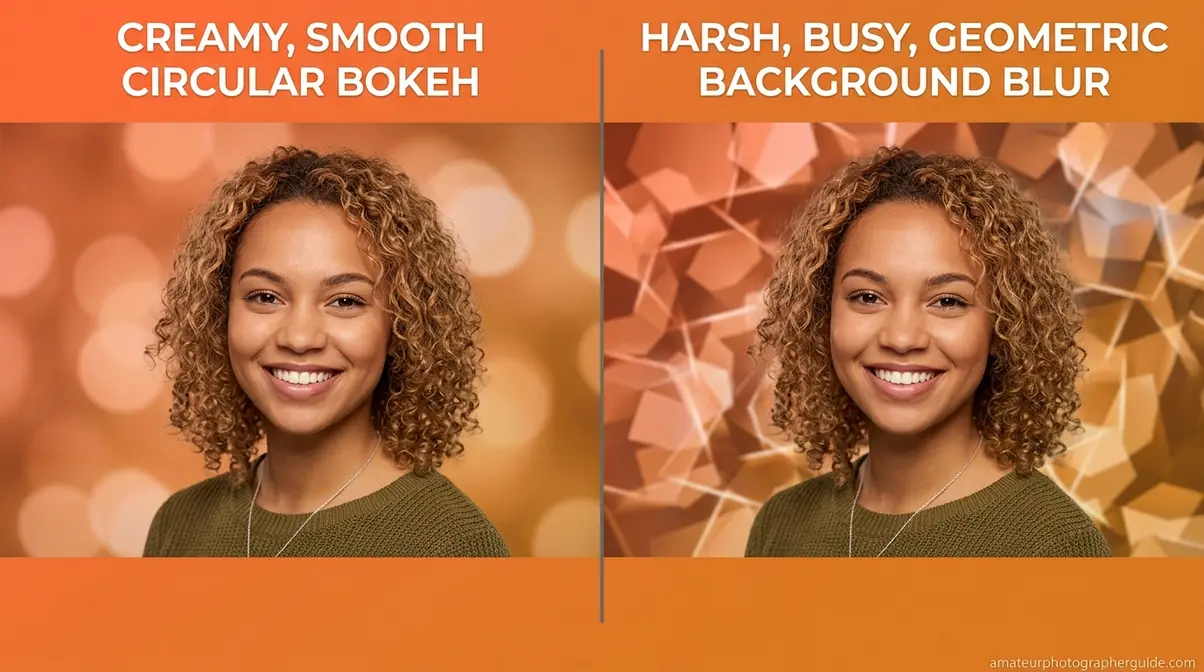
- The Bokeh Quality Spectrum ranges from harsh, distracting “busy bokeh” to silky, cinematic “creamy bokeh” — lens design determines where you land
- Three factors control bokeh: aperture width (f/1.4–f/2.8), focal length (50mm+), and subject-to-background distance
- Smartphones simulate bokeh using computational algorithms — Portrait Mode on iPhone and Android replaces optical physics with software depth-mapping
- Not all blur is bokeh: background blur is a byproduct of shallow depth of field; bokeh is the visual quality of how that blur looks
What Is Bokeh? Definition, Origins, and Types
Bokeh — pronounced BOH-kay — is the aesthetic quality of the out-of-focus areas in a photograph, specifically how a camera lens renders points of light that fall outside the depth of field. The word derives from the Japanese boke (暈け), meaning blur or haze — a term popularized in English photography through the pages of Photo Techniques magazine in 1997. Understanding what is bokeh in photography means recognizing that the blur is incidental; the quality of that blur is everything.
As BBC Maestro notes, bokeh specifically describes the aesthetic quality of out-of-focus areas, differentiating between “good bokeh” that is visually pleasing and “bad bokeh” that distracts the viewer (2026). Meanwhile, RPI research on optical blurring from Rensselaer Polytechnic Institute defines bokeh as the distinctive, non-smooth blurring of out-of-focus objects that serves as a hallmark of modern camera optics.
The distinction matters practically: two lenses can both blur a background, yet one produces a silky result that feels professional while the other creates a nervous, geometric mess that draws the eye away from your subject.
“Bokeh is the quality of out-of-focus or ‘blurry’ parts of the image rendered by a camera lens — it is NOT the blur itself or the amount of blur.”
The Japanese Origins of Bokeh
The word boke (暈け) in Japanese means “blur” or “haze.” When Mike Johnston introduced the term to English-speaking photographers in the May/June 1997 issue of Photo Techniques magazine, he added the letter “h” to guide correct pronunciation — BOH-kay, not BOH-kee. This specific origin story is absent from virtually all competing photography guides, yet it explains why the spelling looks unusual to English eyes.
You’ll still hear both BOH-kay and BOH-keh in professional circles today. The debate is mostly friendly: BOH-kay is the widely accepted standard, and using it confidently signals that you understand the term’s roots rather than guessing from the spelling.
With the name decoded, it’s time to tackle the question photographers argue about most — what actually separates beautiful, creamy bokeh from harsh, distracting blur?
Good Bokeh vs. Bad Bokeh
The bokeh effect in photography isn’t a single look — it’s a quality judgment. Good bokeh produces soft, overlapping circles of light with smooth gradients at their edges. These highlight orbs (sometimes called “bokeh balls”) blend gently into the background, creating that creamy, buttery quality you see in professional portrait work. The transition from sharp to blurred feels gradual, almost liquid.
Bad bokeh — often called “busy bokeh” — does the opposite. Hard-edged, geometric highlight shapes (hexagons produced by 6-blade apertures, pentagons from 5-blade designs) compete with your subject for attention. “Onion rings” — concentric circular bands inside highlight orbs caused by certain lens element constructions — are another telltale sign of lower-quality bokeh rendering.
Some premium lenses go further still. The Sony STF 100mm f/2.8 uses an apodisation element — a special graduated filter at the aperture plane that grades light intensity from the center outward — to produce exceptionally smooth, feathered bokeh that even high-end standard lenses can’t replicate. A Nikon 50mm f/1.8G with 7 rounded blades produces near-circular, smooth bokeh; an older 50mm design with 5 straight blades produces noticeably more geometric, busy results — same focal length, same f-number, dramatically different quality.
Now that you can identify good from bad bokeh by eye, let’s go deeper — because there are actually several distinct types of bokeh, each with its own visual signature.
Types of Bokeh Explained
Not all bokeh looks alike. The type your lens produces depends on its optical design, aperture blade count, and construction — and knowing the types helps you choose the right tool for the look you want.
- Circular bokeh: The gold standard for portraits. Produced by lenses with 9+ rounded aperture blades, these smooth, near-circular highlight orbs sit gently in the background without drawing attention. Most modern prime lenses aim for this type.
- Swirly bokeh: A distinctive, artistic effect produced by vintage lens designs — particularly the Helios 44-2 and Petzval-style lenses like the Lomography Petzval 85mm f/2.2. The blur rotates around the edges of the frame, creating a vortex effect that suits creative portraiture and editorial work.
- Cat’s eye bokeh: Highlight shapes near the frame edges that elongate into a cat’s-eye form due to optical vignetting. Common in wide-aperture lenses at their maximum opening — stopping down to f/2.8 typically reduces it.
- Anamorphic bokeh: Oval or horizontally-streaked highlights produced by anamorphic cinema lenses. Strongly associated with a movie-like aesthetic — that horizontal lens flare and oval bokeh ball combination is instantly recognizable from big-budget film productions.
- Feathered bokeh: A smooth, gradient transition from sharp to blurred with no hard edge. Associated with longer telephoto portrait lenses and the apodisation-element designs mentioned above. This is the “creamiest” type in practical terms.
Understanding bokeh types shows you what’s possible — but to move intentionally up the Bokeh Quality Spectrum, you need to control three specific camera variables. That’s exactly what the next section covers.
Blur vs. Bokeh: Why It Matters
The difference between blur and bokeh is the difference between quantity and quality. Blur is simply any area of your image that falls outside the depth of field (DoF) — the range of distances that appears acceptably sharp. Every camera can produce blur. Bokeh is the aesthetic character of that blur — and not every camera or lens produces beautiful bokeh.
A practical test: look at how point light sources in the background are rendered — streetlights, candles, fairy lights. Smooth, round orbs signal good bokeh. Geometric shapes or nervous, hard-edged swirls indicate lower-quality bokeh from a lens with fewer or straight aperture blades.
This distinction drives real purchasing decisions. A $100 kit lens and a $1,500 prime lens may both throw the background out of focus at f/1.8. Only one renders those out-of-focus points of light as smooth, overlapping circles. Photographers pay a premium for bokeh rendering — not just sharpness. We call this continuum The Bokeh Quality Spectrum — a framework that runs from harsh and distracting at one end to silky and cinematic at the other. Your position on that spectrum is shaped by your lens design, your aperture blade count, and your shooting technique.
You now know what bokeh is and what makes it beautiful. The logical next question: how do you create it? The answer comes down to three camera settings — and you have complete control over all of them.
How to Achieve Bokeh: Camera Settings
Bokeh in a camera is controlled by three variables working in combination: aperture width, focal length, and the physical distance between your subject and background. Utilizing a shallow depth of field with a wide aperture (f/1.4–f/2.8) isolates the subject and intentionally guides the viewer’s eye — the foundational technique for achieving the bokeh effect (University of Kentucky guide on depth of field). Each variable moves your result further toward the creamy end of the Bokeh Quality Spectrum.
What You’ll Need
- A camera with manual or aperture-priority (Av/A) mode
- A lens capable of f/2.8 or wider (f/1.4–f/2.8 recommended)
- A subject with a background at least 3–5 feet behind them
- Natural or soft artificial light (harsh direct flash flattens bokeh)
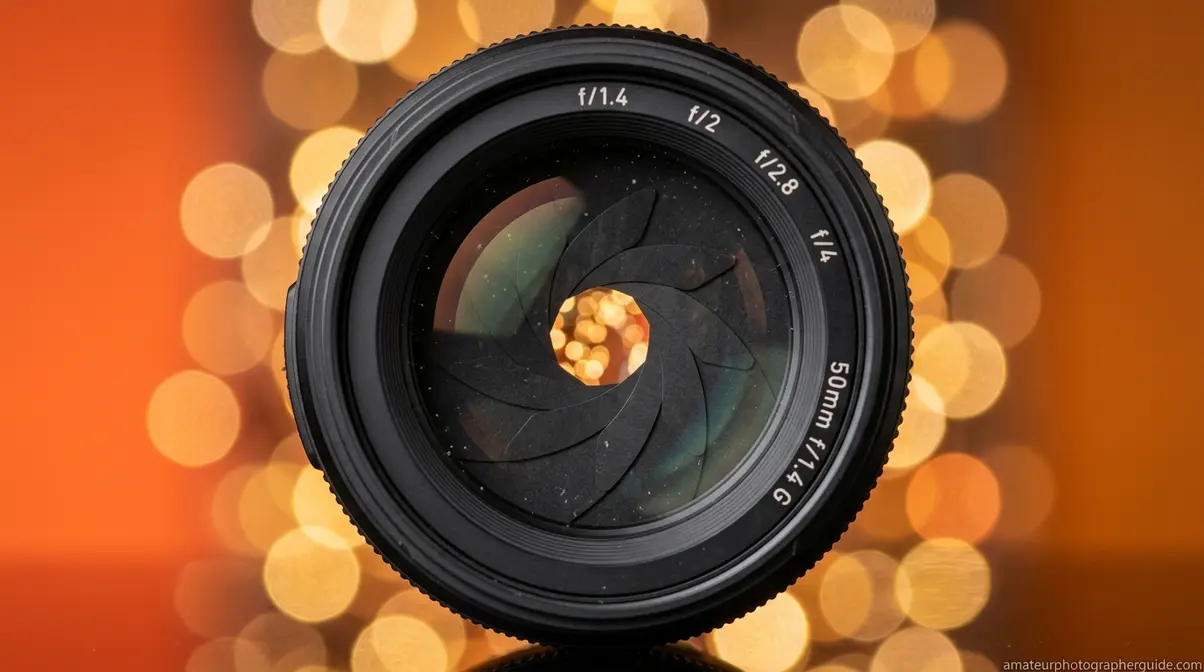
Aperture: The Primary Driver of Bokeh
Bokeh depth of field begins with aperture — the opening in your lens that controls how much light enters the camera. A wide aperture (low f-number: f/1.4, f/1.8, f/2.0, f/2.8) creates a shallow depth of field, throwing the background out of focus. A narrow aperture (f/8, f/11, f/16) brings more of the scene into sharp focus, minimizing background blur entirely.
What most beginner guides overlook is that aperture blade count and shape directly determine the character of your bokeh — not just the amount. Lenses with 9+ rounded blades produce near-circular highlight orbs with smooth edges. Lenses with 5–6 straight blades produce hexagonal or pentagonal shapes that look geometric and busy. A Canon EF 50mm f/1.8 STM has 7 rounded blades — enough for near-circular, pleasing bokeh. An older Canon 50mm f/1.8 II had 5 straight blades, producing noticeably harsher highlight shapes in the same scene.
Set your camera to Aperture Priority mode (Av on Canon, A on Nikon and Sony) and dial in f/1.8 as a starting point. From there, you can learn how aperture settings affect depth of field to refine your results further.
Aperture is the most powerful lever, but it works best when combined with the right focal length — and this is where many photographers underestimate how much difference a longer lens makes.
Focal Length and Subject Distance
Bokeh and how it is achieved involves two variables that photographers frequently underestimate: focal length and subject-to-background distance. Longer focal lengths — 85mm, 135mm, 200mm — compress perspective and magnify background blur relative to the subject. A 135mm f/2 produces noticeably more background separation than a 35mm f/2 at the same aperture, even when both are set to f/2.
The “forgotten pillar” of bokeh is subject-to-background distance. Doubling the distance between your subject and the background increases background blur dramatically — even without changing your aperture or focal length. Move your subject away from walls, trees, and fences. This is the single most overlooked technique in bokeh photography, and it costs nothing.
The combined effect is significant. Portrait at 50mm f/1.8, subject 1 meter from a brick wall: minimal, unimpressive blur. Same setup with the subject 4 meters from the wall: significantly creamier background separation. Add an 85mm lens to that scenario and the background essentially dissolves into smooth, feathered orbs of light.
Now that you understand what moves the needle on bokeh, the next question is which lens to buy — because not all lenses are created equal.
Best Lenses for Bokeh: Prime vs. Zoom
A bokeh lens is almost always a prime lens (fixed focal length). Prime lenses consistently produce better bokeh than zoom lenses at equivalent price points because they’re engineered for a single focal length, allowing wider maximum apertures and more precisely rounded aperture blades.
Three accessible tiers cover most photographers:
- Budget — 50mm f/1.8 (“Nifty Fifty”): Available from Canon, Nikon, and Sony for all major mounts. Excellent entry-level bokeh at portrait distances. The most cost-effective way into quality background blur.
- Mid-range — 85mm f/1.8: The classic portrait focal length. Produces excellent subject separation at f/1.8–f/2.8, with flattering compression and smooth circular bokeh. A strong choice for anyone serious about portraits.
- Premium — 85mm f/1.4 or 135mm f/2: Exceptional bokeh rendering. Wide apertures paired with high blade counts produce the creamiest, most cinematic results. The Sony 85mm f/1.4 GM and Canon EF 135mm f/2L are benchmarks in this category.
Zoom lenses aren’t entirely ruled out. A 70–200mm f/2.8 at 200mm produces strong background blur due to focal length compression — but the maximum aperture is narrower than a prime at the same price, and bokeh quality typically trails the best primes. Discover why prime lenses are ideal for creating bokeh before committing to your next lens purchase.
With the right gear in mind, here’s the complete step-by-step process to set up your camera for maximum bokeh on your next shoot.
Step-by-Step: Your Bokeh Camera Settings
- Set your mode to Aperture Priority (Av/A) — this lets you control the f-stop while the camera automatically handles shutter speed for correct exposure
- Dial your aperture to f/1.8 or f/2.0 — start wide; you can stop down to f/2.8 for sharper subject edges if needed
- Choose a focal length of 50mm or longer — 85mm is ideal for portraits; 135mm for headshots and tighter subject isolation
- Position your subject at least 3–5 feet from the background — the further, the better; 10+ feet produces dramatically smoother results
- Focus on your subject’s nearest eye — use single-point autofocus for precision; at f/1.8, depth of field is razor-thin
- (Optional) Move closer to your subject — reducing camera-to-subject distance also increases background compression and blur
| Setting | Recommended Value | Effect on Bokeh |
|---|---|---|
| Mode | Aperture Priority (Av/A) | Full aperture control |
| Aperture | f/1.4–f/2.8 | Wider = more blur |
| Focal Length | 50mm–135mm | Longer = more compression |
| Background Distance | 3–10+ feet | Further = smoother blur |
| Focus Point | Subject’s nearest eye | Preserves sharpness where it counts |
Camera bokeh gives you the real thing — optical physics doing exactly what it was designed to do. But what about the billions of people shooting with a smartphone? The next section explains how modern phones simulate the same effect.
Smartphone Bokeh: Portrait Mode Explained
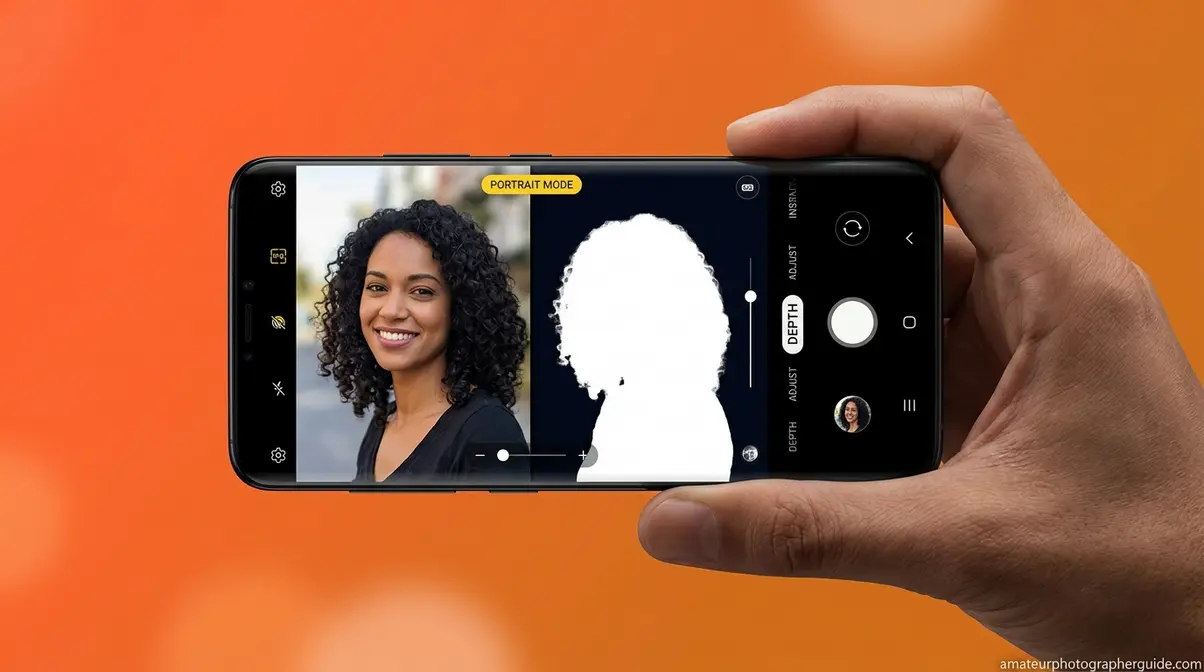
Computational bokeh — a software-generated simulation of optical background blur using AI depth estimation — has made the bokeh effect accessible to anyone with a modern smartphone. Portrait Mode on iPhone and Android devices uses a combination of depth mapping, dual-camera stereo vision, and machine-learning segmentation to identify where the subject ends and the background begins, then applies a mathematically calculated blur to the background layer. If you want to dive deeper, you can master portrait mode to achieve bokeh on your smartphone.
According to DXOMARK’s benchmark research on computational bokeh, smartphone portrait modes simulate the “equivalent aperture” by comparing blur intensity to that of a full-frame DSLR at various f-stops — a useful benchmark for understanding where phone bokeh sits on the Bokeh Quality Spectrum (DXOMARK, 2026). The honest answer: it typically lands in the middle. Better than no bokeh, but rarely matching a quality prime lens at f/1.8.
How Computational Bokeh Works
The process begins with depth data collection. Dual-camera systems use stereo vision — the slight parallax between two lenses — to calculate how far each pixel is from the camera. Some phones use dedicated depth sensors; others rely on dual-pixel autofocus systems or AI inference from a single lens. This data creates a depth map: a pixel-by-pixel distance estimate of the entire scene.
AI segmentation then separates the subject from the background. Rather than a simple binary cut, modern systems generate a graduated depth map that allows for smooth blur transitions across depth planes — mimicking how optical bokeh naturally softens. The processor then applies a mathematically simulated lens blur to background pixels, scaled by their depth-map distance from the subject.
The result is convincing in many conditions — particularly in good light, where higher signal-to-noise ratios allow more accurate depth computation. However, computational bokeh doesn’t currently simulate optical vignetting or non-circular bokeh shapes that premium lenses produce naturally (DXOMARK, 2026).
iPhone Portrait Mode Tips
Apple’s Portrait Mode uses dual-camera depth mapping (on dual and triple-camera iPhones) combined with machine learning to simulate bokeh. To enable it:
- Open the Camera app and swipe to Portrait mode
- Choose a Lighting Effect — Natural Light or Studio Light work best for clean bokeh
- Tap the f-stop slider (bottom of screen) to adjust blur intensity — start around f/2.8 for a natural look
- Tap your subject’s face to confirm focus before shooting
- After capture, open the photo in Edit and adjust the Depth slider to fine-tune background blur
For the cleanest results, maintain 2–5 feet between yourself and your subject, ensure good lighting, and avoid subjects with complex hair or fine edges — these challenge the AI segmentation most.
Android Bokeh: Samsung, Pixel, and More
Android manufacturers each implement computational bokeh differently, with varying results across the Bokeh Quality Spectrum.
Samsung’s Live Focus (Galaxy S and A series) allows real-time adjustment of blur intensity and offers multiple bokeh styles including Circle, Studio, and Stage blur. The interface is intuitive and the results are competitive, particularly on Galaxy S-series flagships where the larger sensor provides better depth data.
Google Pixel’s Portrait Blur uses machine learning trained on a large dataset of real bokeh images, which produces particularly natural-looking subject separation — especially on hair and fine edges that trip up many competitors. The Pixel 8 Pro produces background blur that, at typical viewing distances, is difficult to distinguish from a dedicated lens on casual inspection.
Other Android devices (Xiaomi, OnePlus, OPPO) vary in quality but generally follow the same depth-map approach. Results improve significantly on models with dedicated depth sensors.
The Limits of Smartphone Bokeh
Computational bokeh has real boundaries that matter for working photographers. Edge detection errors — where the AI incorrectly classifies background pixels as subject or vice versa — remain the most visible flaw, particularly around glasses, flyaway hair, and transparent objects like wine glasses.
Flat subjects (paintings, documents, flat-lay product shots) confuse depth-mapping algorithms because there’s no meaningful depth gradient to detect. Bokeh in these scenarios often looks artificial or fails entirely. Low-light performance also degrades significantly — the higher noise levels in underlit scenes reduce depth-map accuracy and produce blotchy, inconsistent blur gradients.
For portraits in good light with a clear subject-background separation, smartphone bokeh delivers genuinely impressive results. For anything more complex, optical bokeh from a dedicated lens remains the more reliable and visually richer tool — sitting consistently at the creamy end of the Bokeh Quality Spectrum that computational methods can only approximate.
Bokeh in Video and Film: Directing the Eye
Bokeh in film is the cinematographer’s primary tool for directing attention — a shallow depth of field forces the viewer’s eye to the sharp subject while the blurred background provides mood and context without distraction. This technique appears throughout professional filmmaking: from intimate character close-ups in drama to the tense, narrow focus planes of thriller sequences that make the world feel claustrophobic and uncertain.
Shallow depth of field in video is a deliberate storytelling choice, not just an aesthetic preference. When a filmmaker racks focus from a blurred foreground to a sharp background mid-scene, they’re shifting narrative weight — telling you what matters now. Bokeh makes that shift feel cinematic rather than mechanical.
Why Filmmakers Love Bokeh
Across professional filmmaking communities, the agreement is consistent: bokeh is valued primarily as an attention-direction tool, not purely as decoration. The blurred background separates subject from environment in a way that flat, everything-in-focus footage cannot. It creates visual hierarchy in a single frame.
Films like Nightcrawler use extreme shallow depth of field to create unease — the world around Jake Gyllenhaal’s character is perpetually soft and uncertain, mirroring his moral ambiguity. Romantic dramas use creamy bokeh to isolate characters in intimate moments, making the viewer feel the emotional proximity. Bokeh is the cinematographer’s equivalent of a spotlight — it controls what the audience sees, and when.
Video Bokeh Settings and Modes
Achieving bokeh in video requires the same three pillars as photography — wide aperture, longer focal length, and subject-background separation — with one additional consideration: exposure control. Shooting at f/1.8 in daylight produces a very bright exposure; you’ll need an ND (neutral density) filter to reduce incoming light without changing your aperture.
Recommended video bokeh settings:
| Setting | Recommended Value | Notes |
|---|---|---|
| Aperture | f/1.8–f/2.8 | Wider = more bokeh; stop down for easier focus |
| Shutter Speed | 2× frame rate (1/50 for 25fps) | Cinema standard for natural motion blur |
| ND Filter | 3–6 stops | Essential for outdoor daylight shooting |
| Focal Length | 50mm–85mm (full-frame equiv.) | Avoids distortion while compressing background |
For what is bokeh in film and post-production work, Adobe Premiere Pro’s Lens Blur effect and third-party tools like Boris FX Sapphire allow adding simulated bokeh in editing — useful for archival footage or situations where in-camera bokeh wasn’t achievable. Results are functional but rarely match optical quality.
Bokeh Beyond Photography: Art and Python
Bokeh’s influence extends well beyond camera lenses — the aesthetic has inspired traditional art mediums and even lent its name to a popular software library. Understanding these connections helps clarify where “bokeh” applies and where the word means something entirely different.
Bokeh in Watercolor and Painting
Bokeh in watercolor painting describes a technique that mimics the soft, circular light orbs of photographic bokeh using wet-on-wet watercolor application. Artists apply wet pigment to a pre-wetted surface, allowing colors to bleed and bloom into soft-edged circles that visually resemble the out-of-focus light points of a wide-aperture photograph.
The technique has grown significantly in popularity on platforms like YouTube and Instagram, where watercolor bokeh tutorials regularly accumulate hundreds of thousands of views. The appeal is the same as photographic bokeh: soft, luminous backgrounds that make foreground subjects — flowers, portraits, lettering — appear to float. Artists often use masking fluid to preserve sharp foreground elements before applying the bokeh background wash, directly paralleling the sharp-subject/blurred-background relationship in optical photography.
Bokeh in Python: Developer Notes
If you searched “what is bokeh” and are a developer rather than a photographer, you’ve likely encountered Bokeh (capital B) — an open-source Python data visualization library that creates interactive charts, graphs, and dashboards for web browsers. The library takes its name from the photographic concept: just as optical bokeh draws the eye to what matters in a photograph, the Bokeh library is designed to make data patterns visually clear and engaging.
The Python Bokeh library and photographic bokeh share only their name. If you’re looking for the Python library, visit the Bokeh official website — this guide covers the photographic technique exclusively.
Common Bokeh Mistakes and When to Skip the Effect
Our evaluation of common photographer frustrations — drawn from professional photography communities and forums including Fstoppers and Photography Life — consistently surfaces the same pattern: photographers chase maximum bokeh without asking whether it serves the image. The result is technically correct but aesthetically weaker photographs.
Common Bokeh Mistakes to Avoid
Shooting wide open at all times. Setting f/1.4 or f/1.8 for every portrait sounds logical — more blur equals better bokeh, right? In practice, extremely wide apertures produce razor-thin depth of field. At f/1.4, the difference between sharp eyes and a soft nose tip is a few centimeters. Miss focus by even a small margin and the most important feature in a portrait — the eyes — becomes unacceptably soft. Stop down to f/2.8 for more reliable sharpness without sacrificing meaningful background separation.
Ignoring the background before shooting. Bokeh doesn’t erase a bad background — it blurs it. A cluttered background with high-contrast elements (bright windows, signage, chain-link fences) produces busy, distracting bokeh even from premium lenses. Scout your background before placing your subject. A smooth, evenly lit wall or distant foliage produces far better results than a closer, complex background at the same settings.
Forgetting subject-to-background distance. As covered earlier, the distance between your subject and the background is as powerful as aperture. Photographers who only adjust f-stop while leaving their subject against a nearby wall consistently underperform what their lens is capable of.
Expecting smartphones to handle complex edges. Portrait Mode struggles with glasses frames, fine hair, and transparent objects. Shooting in these conditions and expecting clean computational bokeh leads to disappointment — and sometimes uncanny, artificial-looking results that are worse than no bokeh at all.
When Bokeh Hurts Your Photos
Environmental portraits. When the background tells the story — a chef in a kitchen, an athlete in a stadium, a musician on a stage — blurring it to obscurity removes narrative context. Stopping down to f/5.6 or f/8 keeps the environment recognizable while still separating the subject from it.
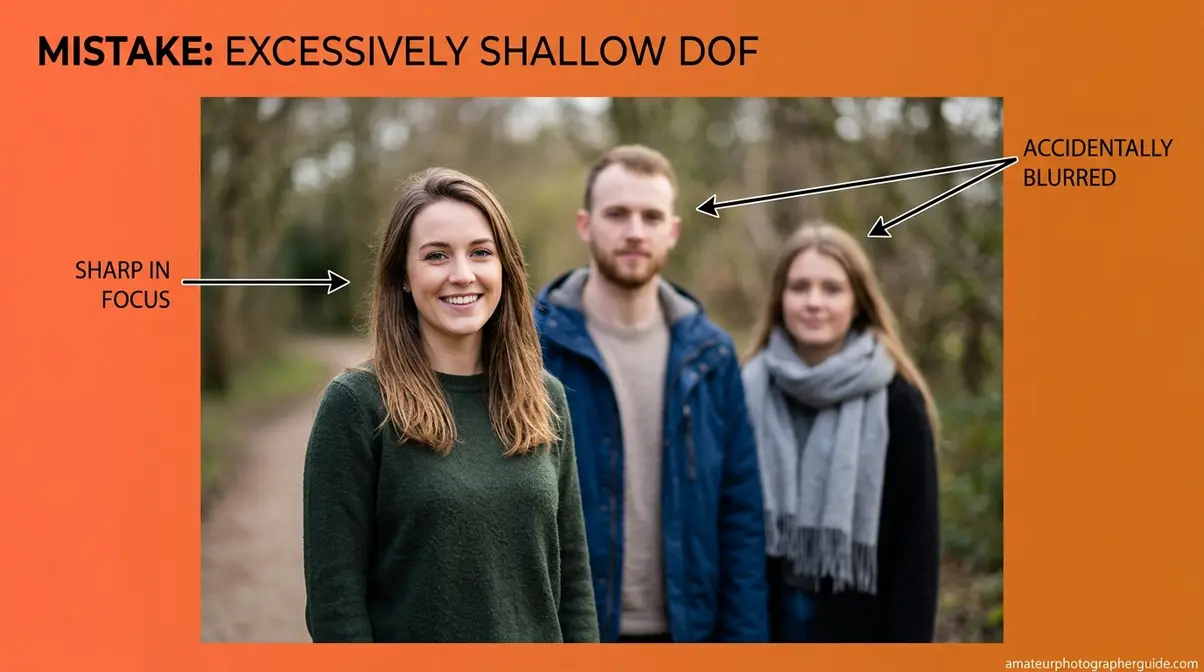
Group photographs. Extreme shallow depth of field renders anyone not on the precise focus plane soft. At f/1.4 with four people at slightly different distances, you’ll get one sharp face and three soft ones. Use f/5.6–f/8 for groups to keep everyone acceptably sharp.
Product photography (most cases). Products typically need to show detail across their full surface. Blurring half the product to achieve bokeh usually reduces the image’s commercial utility. Reserve shallow depth of field for hero shots where mood matters more than technical detail.
Street photography and documentary work. Context is everything in documentary work. Bokeh that removes environmental detail undermines the story the image is trying to tell. Steve McCurry’s iconic “Afghan Girl” works precisely because the background, while slightly soft, still reads as a refugee camp — context that a f/1.4 bokeh treatment would erase.
Frequently Asked Questions About Bokeh
What does bokeh mean in photos?
Bokeh describes the aesthetic quality of the out-of-focus areas in a photograph — specifically how a lens renders points of light that fall outside the depth of field. The word comes from the Japanese boke (暈け), meaning blur or haze, and was introduced to English-speaking photographers by Mike Johnston in Photo Techniques magazine in 1997. It is not the blur itself, but the visual quality of that blur — whether it appears creamy and smooth or harsh and geometric.
Difference Between Blur and Bokeh?
Blur is any area of an image outside the depth of field; bokeh is the aesthetic quality of that blur. Every camera can produce blur — it’s a byproduct of shallow depth of field. However, not every camera or lens produces beautiful bokeh. A practical test: look at how point light sources (fairy lights, candles, streetlamps) appear in the background. Smooth, round orbs indicate good bokeh; geometric hexagons or hard-edged shapes indicate lower-quality bokeh from a lens with fewer, straight aperture blades. Photographers pay a premium for lenses specifically because of their bokeh rendering.
What is the point of bokeh?
Bokeh directs the viewer’s attention to the sharp subject by visually separating it from the background. Rather than competing with a busy environment, a portrait subject appears to float against a smooth, creamy background. This isolation is why professional portrait, wedding, and product photographers actively seek lenses with excellent bokeh rendering. Beyond its functional role, bokeh has significant aesthetic appeal — the soft, luminous quality of well-rendered out-of-focus areas contributes to an image feeling cinematic and intentional rather than casual and snapshot-like.
How do I turn on bokeh?
You don’t turn bokeh “on” — you create the conditions for it. On a dedicated camera, set Aperture Priority mode (Av or A), choose f/1.8 or f/2.0, use a 50mm or longer lens, and position your subject at least 3–5 feet from the background. On an iPhone, swipe to Portrait mode in the Camera app, then adjust the f-stop slider at the bottom of the screen. On Android devices, look for Portrait, Live Focus, or Aperture mode depending on your manufacturer. The effect appears automatically once the camera detects a clear subject-background separation.
Why the Obsession With Bokeh?
Bokeh is one of the clearest visual signals that separates a deliberately crafted photograph from a casual snapshot. Achieving beautiful bokeh requires understanding aperture, focal length, and subject positioning — the combination signals technical competence. Additionally, smooth bokeh is genuinely difficult to replicate without quality glass, which is why a well-rendered creamy background became a marker of professional-grade work. Across professional photography communities, the consensus is that bokeh obsession can go too far — but the underlying desire for clean subject separation from background is a legitimate and important compositional goal.
Is bokeh overused?
Yes — and the overuse is a recognized problem in photography communities. Shooting at the widest aperture in every situation sacrifices depth of field that sometimes adds important context. Environmental portraits, group shots, and documentary work often suffer when photographers prioritize bokeh over storytelling. The most skilled photographers treat bokeh as a compositional tool rather than a default setting — using it when subject isolation serves the image, and stopping down when environmental context matters. As Photography Life notes, the “bokeh craze” is among the top mistakes photographers make when they conflate maximum blur with maximum quality.
Bokeh Quality, Optical Physics, and Your Next Shot
For photographers at any level, bokeh represents one of the most satisfying intersections of technical knowledge and creative vision. The Bokeh Quality Spectrum — from harsh, busy backgrounds to silky, cinematic blur — is not a fixed destination. It’s a range you can move along deliberately, using aperture, focal length, and subject-background distance as your controls. Understanding what is bokeh means understanding that the quality of your out-of-focus rendering is as important as the sharpness of your subject.
The Bokeh Quality Spectrum gives you a practical framework for every shooting decision. Optical prime lenses sit at the creamy end; smartphone Portrait Mode occupies a respectable middle position; a kit zoom at f/5.6 sits near the harsh end. Knowing where you are on the spectrum — and why — transforms bokeh from a happy accident into a repeatable, intentional result.
Your next step: pick up your camera, set Aperture Priority mode, dial in f/1.8 on your longest available lens, and move your subject at least 5 feet from the nearest background. Shoot in good natural light. Review the results and look specifically at how point light sources in the background are rendered. That single exercise will make the Bokeh Quality Spectrum tangible in a way no guide can fully replicate — understand the fundamentals of bokeh and then apply them with your own hands.
