
Table of Contents
This blog post may contain affiliate links. As an Amazon Associate I earn from qualifying purchases.
Every photographer knows how challenging it can be to capture balanced, true-to-life images without harsh shadows. In fact, professional photographers rely heavily on fill light, a lighting technique that helps soften contrast and reveal hidden details. Mastering fill light is essential whether you are tackling high-contrast outdoor scenes or working in a studio. Discover practical tips and expert methods that will help you elevate your photography using effective fill light sources. Lets answer the question – what is fill light?
Key Takeaways
| Point | Details |
|---|---|
| Fill Light is Essential | Fill light is a crucial technique in photography for reducing contrast and enhancing image detail. It allows for a more balanced representation of light and shadow in photos. |
| Diverse Fill Light Sources | Photographers can use various fill light sources such as reflectors, flash units, and natural light to create professional-quality images. Each source has unique characteristics that can affect the overall look. |
| Common Mistakes to Avoid | Avoid over-illumination and poor placement of fill light, as these can result in flat images and unnatural lighting. Pay attention to light temperature and subject context for better results. |
| Experimentation is Key | Test different fill light angles and intensities to discover what best enhances your images. Adjusting these factors can significantly impact the visual balance and mood of your photographs. |
Defining Fill Light in Photography
Fill light represents a fundamental technique in photography that helps photographers control and balance image lighting. Unlike primary light sources that create primary illumination, fill light serves a subtle yet critical purpose in shaping visual composition.
In technical terms, fill light reduces the contrast of a scene by softening shadows and ensuring details remain visible across different lighting conditions. Photographers use fill light to match the dynamic range of their camera’s recording media, creating images that more closely represent how the human eye perceives light and shadow. Think of it like adding gentle brushstrokes to balance a painting’s contrasts.
Photographers employ fill light through various methods, including:
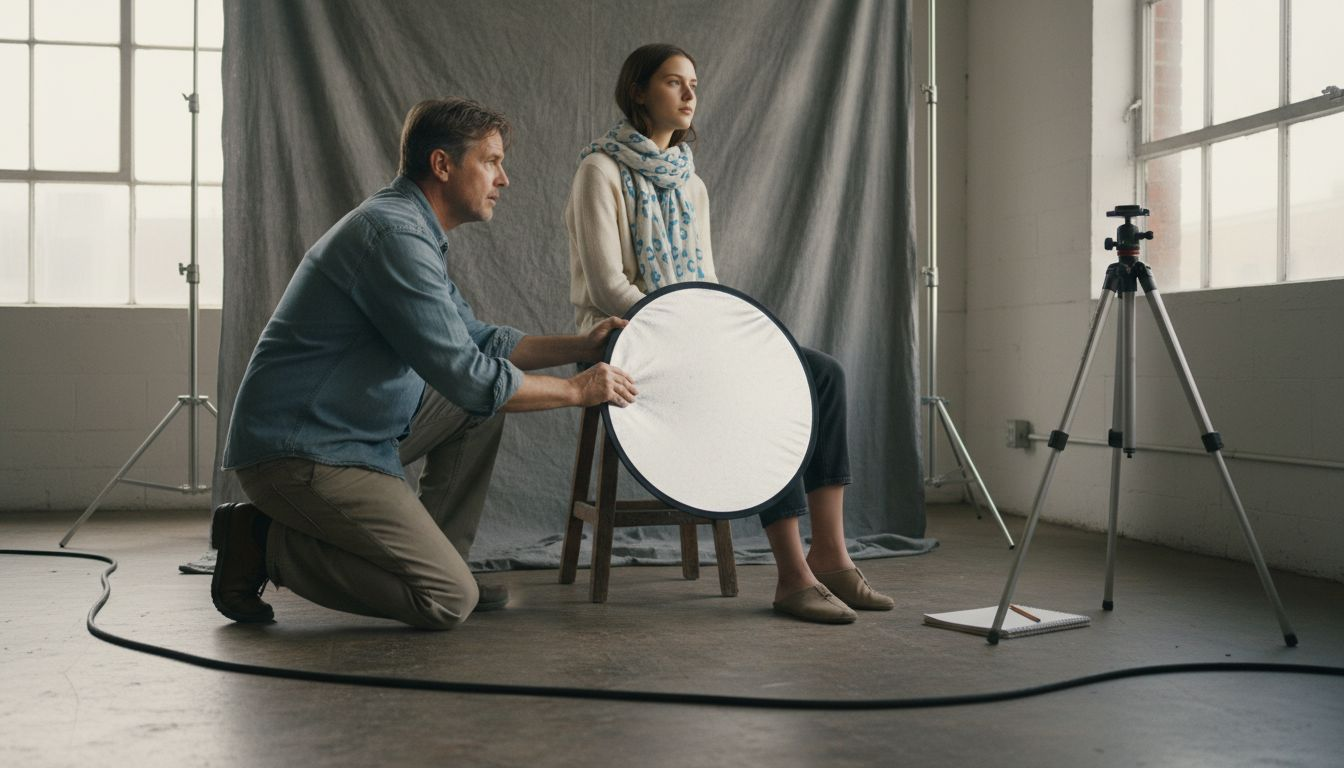
- Reflectors that bounce existing light into shadowy areas
- Secondary light sources positioned strategically
- Camera-mounted flash units
- Natural ambient light from surrounding environments
Understanding fill light becomes particularly crucial when shooting scenes with high contrast or challenging lighting scenarios, such as outdoor portraits where bright sunlight creates harsh shadows. By incorporating lighting techniques from our role of light in photography guide, photographers can transform potentially uneven images into balanced, professional-looking compositions.
Pro Photography Tip: Experiment with different fill light angles and intensities to discover how subtle adjustments can dramatically improve your image’s overall visual balance and mood.
Different Types of Fill Light Sources
Photographers have multiple fill light sources available, each offering unique characteristics and advantages for creating balanced, professional images. Understanding these sources allows you to strategically manipulate light and enhance your photographic compositions.
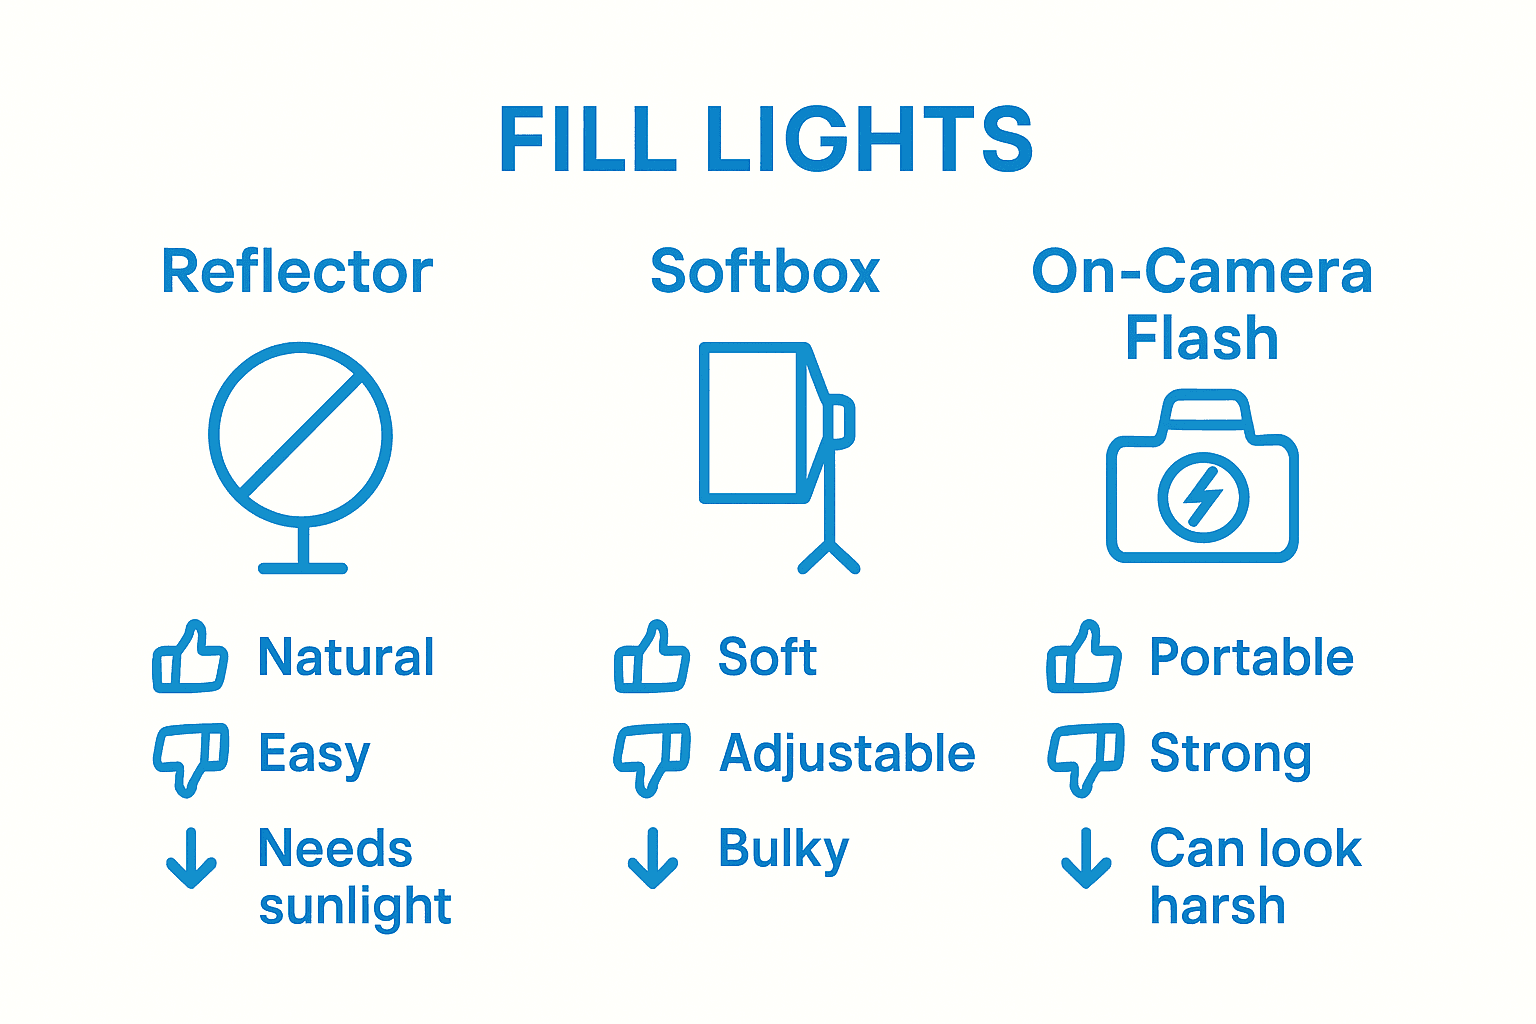
Reflectors represent one of the most versatile and affordable fill light sources. These portable tools bounce existing light into shadowy areas, softening harsh contrasts and creating more even illumination. They come in various colors and materials, including silver, white, gold, and translucent surfaces, each producing slightly different lighting effects.
Additional fill light sources include:
- Natural Light Diffusion: Shooting near windows or using cloud cover to create soft, ambient fill light
- Flash Units: Camera-mounted or off-camera flash devices that provide controlled, adjustable illumination
- Softboxes: Studio lighting equipment that creates gentle, widespread light distribution
- LED Panels: Continuous light sources offering consistent and adjustable fill lighting
While natural light remains a photographer’s most accessible fill light source, professional setups often combine multiple techniques. By understanding how camera light makes and models interact with different fill light sources, photographers can create nuanced, professional-quality images across various shooting environments.
Pro Photography Tip: Always test different fill light sources before a critical shoot to understand how each impacts your specific scene’s lighting dynamics and mood.
Here’s a quick comparison of common fill light sources and their best use cases:
| Fill Light Source | Ideal For | Pros | Cons |
|---|---|---|---|
| Reflector | Outdoor portraits, travel | Portable and affordable | Limited control over intensity |
| Flash Unit | Low-light, studio setups | Adjustable power, consistent | May cause harsh shadows |
| Softbox | Studio portraits, commercial | Very soft, even light | Bulky, requires setup |
| LED Panel | Video, constant-light scenes | Continuous, adjustable output | Battery life limits, cost |
| Natural Light Diffusion | Window portraits, quick shoots | Soft and flattering, free | Weather-dependent, less control |
How Fill Light Works in Practice
In practical photography, fill light operates as a critical balancing technique that transforms potentially harsh or uneven lighting scenarios into beautifully nuanced images. Photographers use fill light to control contrast, revealing details that would otherwise be lost in deep shadows or overly bright highlights.
The lighting ratio plays a crucial role in how fill light functions. This mathematical relationship between key light and fill light determines the overall mood and visual drama of an image. A higher lighting ratio creates more contrast and depth, while a lower ratio produces softer, more evenly illuminated scenes. In three-point lighting setups, fill light typically enters the scene from a side angle, positioned lower than the primary key light to gently illuminate shadowed areas.
Photographers can manipulate fill light through several strategic approaches:
- Adjusting the distance between the fill light and subject
- Changing the intensity of the fill light source
- Using different reflective surfaces to modify light quality
- Experimenting with angle and positioning relative to the key light
Understanding how depth of field impacts lighting can further enhance your fill light techniques, allowing you to create more sophisticated and professional-looking photographs across various shooting conditions.
Pro Photography Tip: Start with a 1:2 or 1:3 lighting ratio when learning fill light techniques, gradually experimenting with more complex configurations as your skills develop.
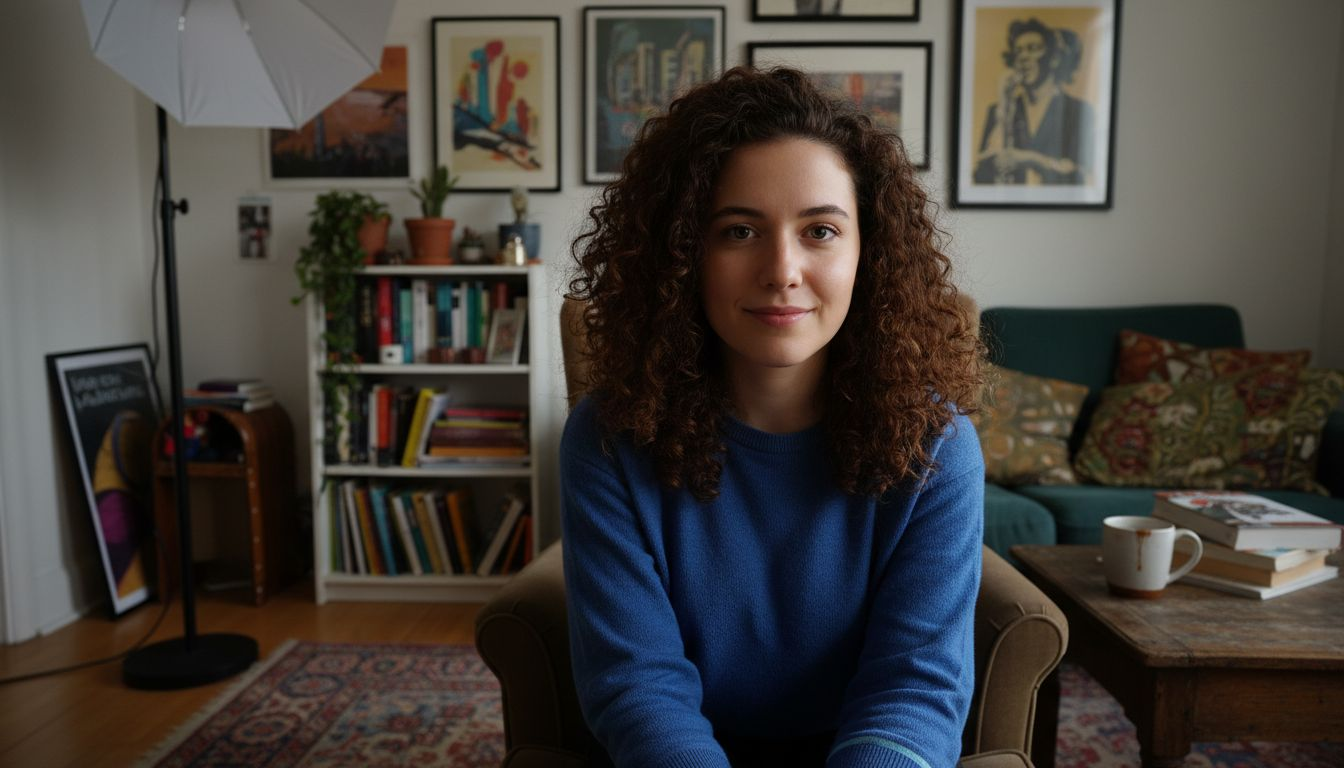
Setting Up Fill Light for Portraits
Portrait photography demands precise fill light techniques that transform ordinary shots into professional-quality images. Understanding how to position and control fill light can dramatically enhance facial features, soften shadows, and create depth that brings your subject to life.
Classic portrait lighting techniques like Rembrandt lighting demonstrate the nuanced art of fill light placement. In this approach, photographers position the fill light or reflector opposite the key light, creating a characteristic triangle of light that illuminates the shadowed side of the face. This method adds dimension and visual interest, preventing flat, lifeless portraits that lack depth and texture.
When setting up fill light for portraits, photographers should consider several critical factors:
- Maintaining a balanced lighting ratio between key and fill lights
- Choosing the right fill light intensity to complement skin tones
- Positioning the fill light to minimize harsh shadows
- Selecting appropriate reflective surfaces based on the desired mood
- Adjusting light angles to highlight or soften facial features
Understanding how to take better portrait photos involves mastering these subtle fill light techniques, allowing photographers to create images that capture not just a subject’s appearance, but their essence and personality.
Pro Photography Tip: Start with a soft, white reflector positioned at a 45-degree angle to your subject, gradually experimenting with different angles and distances to find your ideal lighting setup.


Common Fill Light Mistakes to Avoid
Many photographers struggle with fill light techniques, making critical errors that can compromise the quality and professional appearance of their images. Understanding these common mistakes is the first step toward creating more refined and visually compelling photographs.
One of the most frequent missteps involves over-illumination, where photographers use fill light so intensely that it eliminates natural shadows and flattens the image’s depth. This approach destroys the subtle dimensionality that gives photographs their visual richness. Photographers should aim for a delicate balance, using fill light to soften shadows without completely erasing them, maintaining the subject’s natural contours and texture.
Critical fill light mistakes include:
- Positioning fill light at the same height as the key light
- Using fill light with incorrect color temperature
- Creating unnatural, symmetrical lighting patterns
- Ignoring the specific mood or context of the photograph
- Failing to adjust fill light intensity based on subject and environment
Photographers can significantly improve their technique by exploring common photography mistakes and how to avoid them, which provides broader insights into technical and creative challenges in image composition.
Pro Photography Tip: Always test your fill light setup by taking test shots and reviewing them at 100% magnification, paying close attention to how shadows and highlights interact across different areas of the image.
Below is a summary of common fill light mistakes and how to avoid them:
| Mistake | Typical Outcome | How to Correct |
|---|---|---|
| Over-illumination | Flat, lifeless images | Reduce fill intensity, preserve shadows |
| Poor Placement | Symmetrical lighting, unnatural look | Vary fill height and angle |
| Wrong Color Temp | Off-color casts on subject | Match fill to main light temperature |
| Ignoring Mood | Disconnected subject emotion | Adjust fill to suit mood and setting |
| Set and Forget | Missing subtle facial detail | Regularly check test shots |
Master Fill Light Techniques to Elevate Your Photography
Understanding how fill light shapes your photos is essential to overcoming common challenges like harsh shadows, poor contrast, and flat images. The article highlights key concepts such as lighting ratio, fill light placement, and avoiding over-illumination mistakes — all critical knowledge for any photographer aiming to create balanced and dynamic portraits or scenes.
Unlock your full creative potential with practical tips and tutorials designed specifically for amateur photographers. Visit Amateur Photographer Guide to explore essential shooting techniques, learn how to adjust your lighting setup, and discover advice on choosing the ideal gear for fill light control. Don’t wait to transform your pictures. Start mastering fill light today and bring depth and emotion to every shot by diving into articles like How to Take Better Portrait Photos and 10 Common Photography Mistakes And How To Avoid Them. Your journey to professional-quality photographs begins now.
Frequently Asked Questions
What is fill light in photography?
Fill light is a technique used in photography to reduce contrast in images by softening shadows, ensuring that details remain visible in both bright and dark areas. It helps to create a balanced composition that better represents how the human eye sees light and shadow.
How do I use fill light for portraits?
To use fill light in portraits, position a fill light source or reflector opposite the key light to illuminate the shadowed side of your subject’s face. Adjust the intensity and angle to enhance features while maintaining a balanced lighting ratio.
What are some common types of fill light sources?
Common fill light sources include reflectors, natural light diffusion, flash units, softboxes, and LED panels. Each type has unique characteristics, allowing photographers to choose the best option based on the shooting scenario.
What mistakes should I avoid when using fill light?
Common mistakes to avoid include over-illumination, poor placement, using incorrect color temperatures, ignoring the photo’s mood, and failing to adjust intensity based on the subject. Always test your setup to ensure that shadows and highlights appear natural.
Recommended
- Role of Light in Photography: Complete Guide – Amateur Photographer Guide
- Depth of Field Explained – Amateur Photographer Guide
- What Is High Key Lighting? Complete Photography Guide
- What Is Lens Flare and Its Impact on Photos – Amateur Photographer Guide
Last update on 2026-05-21 / Affiliate links / Images from Amazon Product Advertising API
