What Is Noise in Photography? A Beginner’s Guide
What is noise in photography? This comprehensive guide explains types of noise, causes, camera settings that impact it, and essential tips to minimize noise.

You took a photo you loved in the moment — great light, perfect expression, the shot you’d been waiting for. Then you zoomed in on your screen and found it: ugly speckles, random colored dots, a muddy texture smeared across the whole image. That’s noise in photography. And for beginners, it’s one of the most frustrating problems there is.
What’s in this guide
Before we go further, you don’t need any prior photography knowledge to follow this guide. If you know how to press a shutter button, you’re ready.
Here’s what makes noise so tricky: most beginners either accept noisy photos as unavoidable, or they overcorrect — keeping their ISO (the camera’s sensitivity setting) dangerously low to “stay safe,” then end up with blurry, motion-smeared shots instead. Both outcomes are preventable. By the end of this guide, you’ll understand exactly what is noise in photography, why it happens, and what you can do — before and after you shoot — to get cleaner images. We’ll cover the types of noise, the real causes, how exposure fits in, and the modern AI tools that can rescue even the noisiest shots.
What Is Noise in Photography?
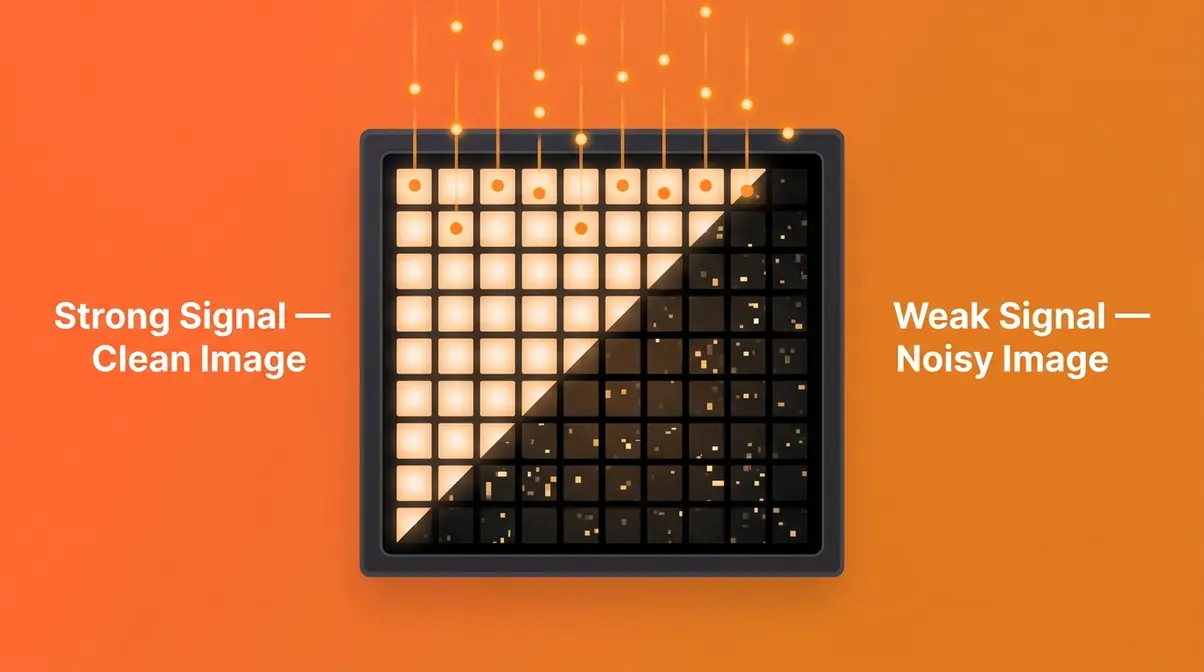
Noise in photography is random variation in brightness and color that appears as grain, speckles, or muddy patches in your images — caused when your camera sensor doesn’t receive enough light to produce a clean signal. It is not a settings problem. It is a physics problem. And that distinction changes everything about how you prevent it.
Think of it this way: your camera’s sensor is trying to measure light, pixel by pixel (a pixel is one tiny dot of color information in your image). When there’s plenty of light, each pixel gets a strong, clear reading. When light is scarce, the readings become unreliable — and the result is what we call digital noise, the random speckles or grain that appear in photographs when a sensor doesn’t capture enough light.
Noise Is Like Static on a Radio
A simple analogy makes this click for most beginners. Imagine tuning an old radio to a station that’s just out of range. You can hear the music, but it’s buried under hiss and crackle — that’s static. Your camera sensor works the same way. The “music” is the actual light from your scene. The “static” is the random electronic interference your sensor produces while trying to read that signal.
When light is abundant, the music drowns out the static completely. When light is scarce, the static becomes the loudest thing in the room. This is why your daytime outdoor shots look clean and your indoor birthday party shots look grainy — it’s not your camera failing. It’s physics. Photography Life’s guide to image noise describes this signal-to-noise relationship as one of the most fundamental concepts in digital imaging.
What this means for you: The single best thing you can do to reduce noise is get more light onto your sensor — before you touch any other setting.
What Digital Noise Looks Like in Real Photos
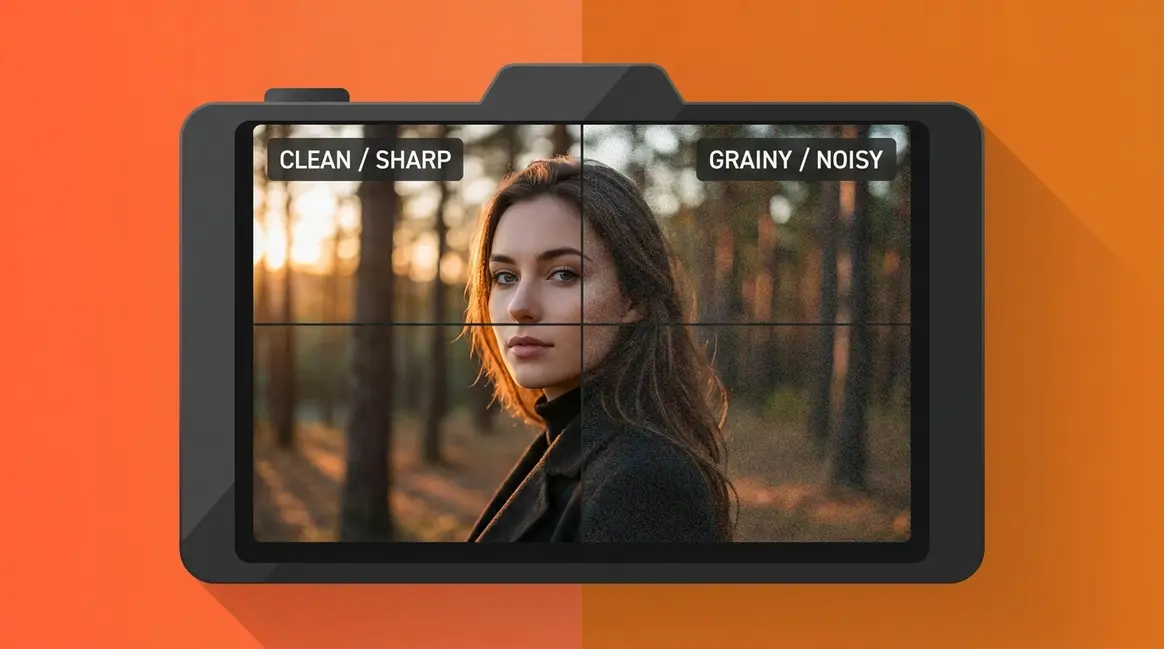
Digital noise has two distinct appearances, and you’ve almost certainly seen both.
The first looks like gray film grain — a fine, sandy texture that reduces the sharpness and detail in your image. Look at a dark background in a low-light shot and you’ll see it clearly: thousands of tiny bright and dark flecks where there should be smooth, even color.
The second looks like random colored speckles — green, red, and purple dots scattered across areas that should be one solid color. This is often more distracting than the gray grain and tends to appear most in shadow areas.
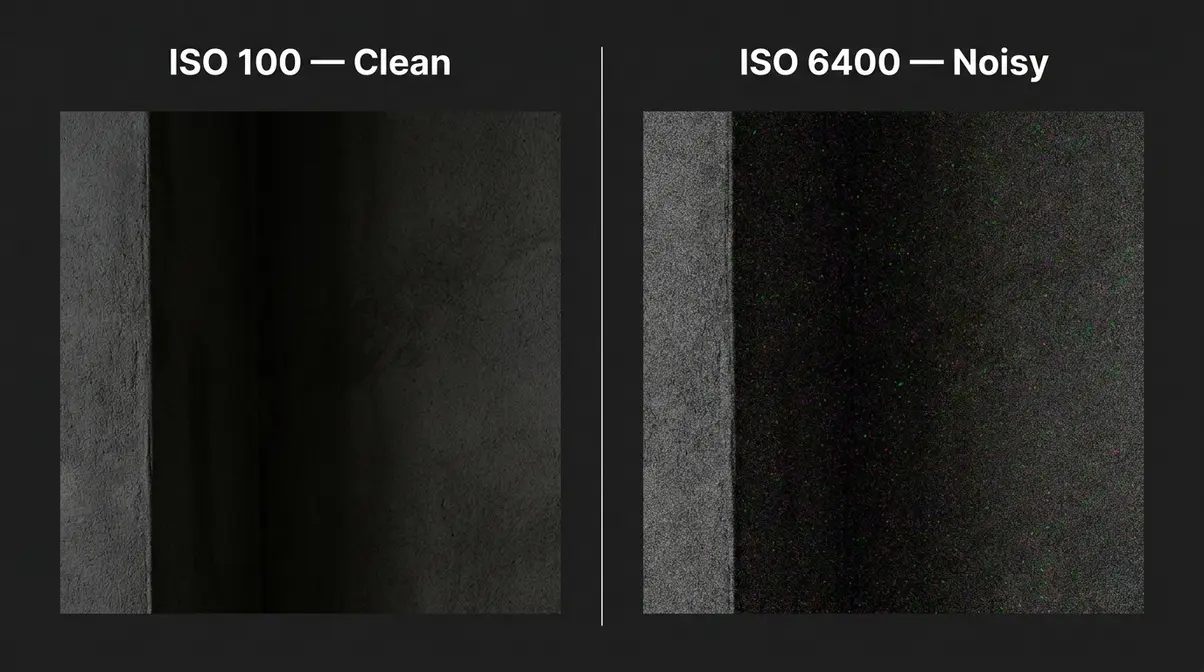
Both types of noise are normal. Both are manageable. And once you can identify them by name, you’re already ahead of most beginners.
Shot Noise vs. Read Noise: Where It Actually Comes From
Here’s the part most guides skip — and it’s the key to understanding The Signal Trap.
There are two distinct sources of noise in every photo you take.
Shot noise (also called photon noise) is the unavoidable randomness in how photons — particles of light — hit your sensor. Even in perfect conditions, light doesn’t arrive in a perfectly even stream. It arrives in random bursts, like rain falling into a bucket. Sometimes more drops fall in one spot, sometimes fewer. That randomness creates slight variations in brightness across your image. Shot noise is governed by the laws of physics — no camera, no matter how expensive, eliminates it entirely. According to research in digital imaging physics, shot noise scales with the square root of the number of photons collected, meaning brighter scenes (more photons) have a proportionally lower noise impact.
Read noise is the electronic interference your camera introduces when it reads and processes the image signal from the sensor. Every electronic component — the sensor’s amplifier, the analog-to-digital converter — adds a tiny amount of random electrical “chatter” to your image data. This is the noise your camera creates, separate from the light itself.
What this means for you: When you raise your ISO, you’re not creating new noise. You’re amplifying everything your sensor already captured — including both the image signal and the read noise. That’s The Signal Trap: the misconception that ISO is the problem. ISO is just a volume knob. The noise was already there. Adobe’s photography noise guide confirms this distinction, noting that noise is fundamentally a sensor-level phenomenon that ISO amplification makes visible.
The Two Main Types of Noise Explained
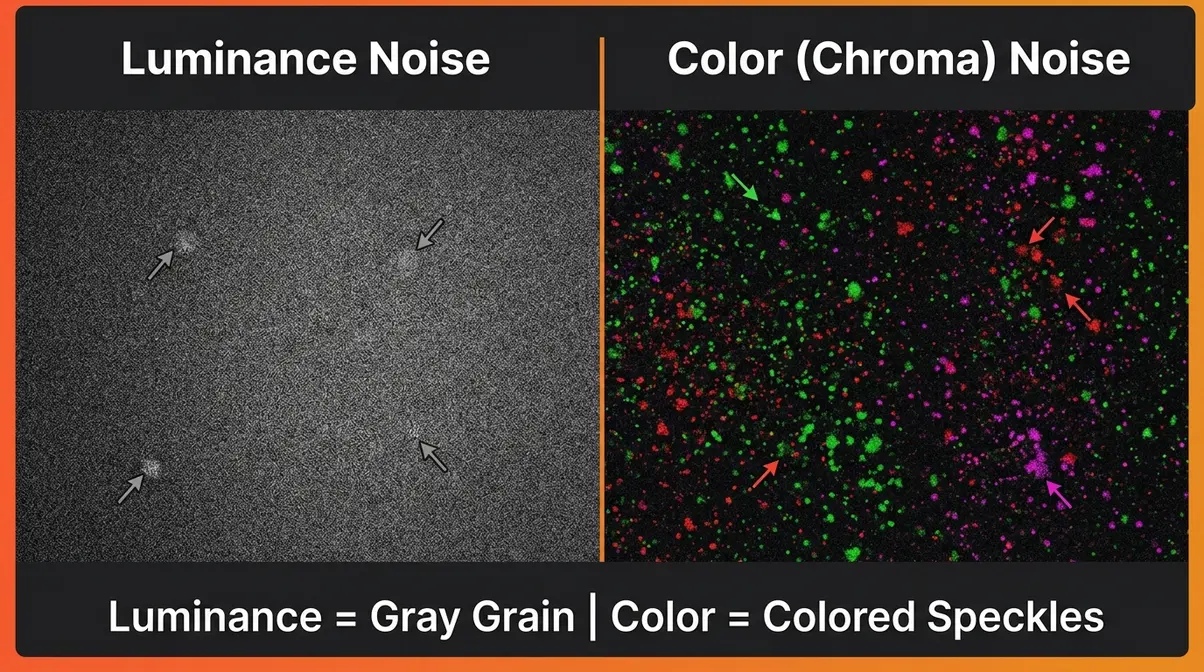
Once you can name what you’re seeing in a noisy photo, you can fix it faster and more precisely. Noise in digital photography comes in two primary forms — and they behave very differently.
Luminance Noise — The Grayscale Grain
Luminance noise is variation in the brightness of individual pixels. It appears as a fine, grainy texture — similar to the grain you’d see in a film photograph shot on high-speed film stock. Every pixel that should be one shade of gray shows up as slightly lighter or darker than its neighbors, creating that sandy, textured look.
Luminance noise tends to look more natural and is generally more acceptable to viewers. Many photographers and editors even find a small amount of luminance noise aesthetically pleasing — it resembles classic film grain. In portrait photography, a subtle luminance texture can actually add character to an image without looking like a technical failure.
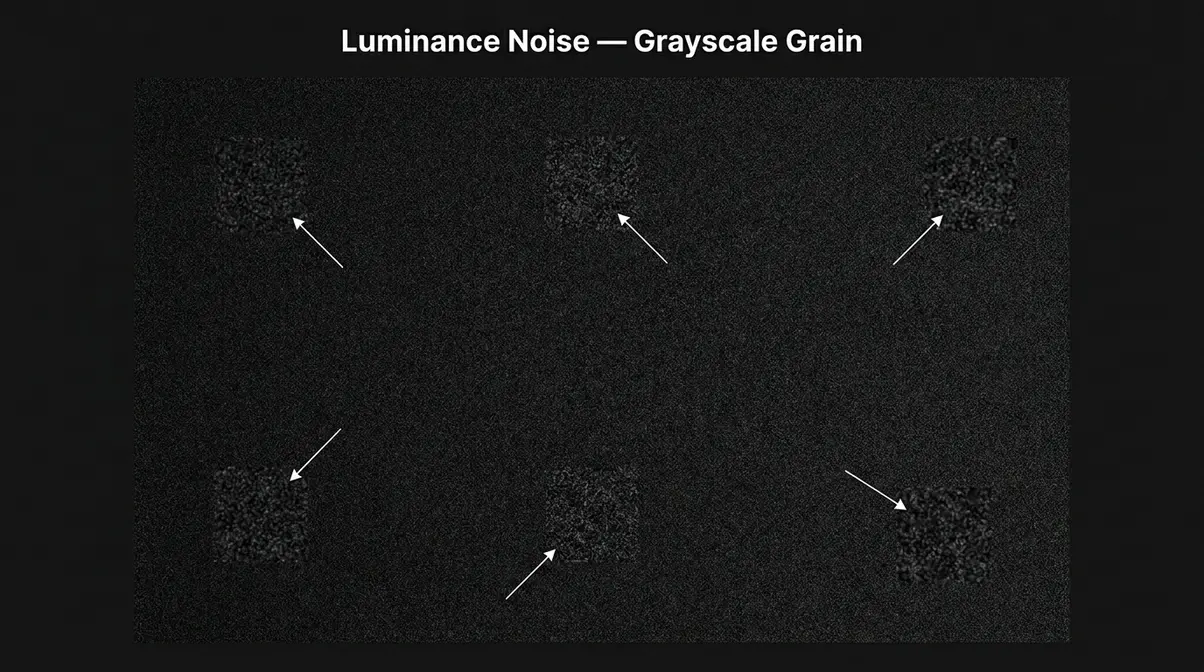
What this means for you: When removing noise in post-processing, luminance noise is usually the easier fix. Most editing software handles it well without destroying fine detail.
Color (Chroma) Noise — The Colored Speckles
Color noise (also called chroma noise) is variation in the color of individual pixels. Instead of gray grain, you see random green, red, magenta, and purple speckles scattered across areas that should be a single, smooth color. A dark blue sky becomes peppered with green and red dots. A black jacket gets purple flecks.
Chroma noise is almost universally considered more distracting than luminance noise. It looks unnatural in a way that the human eye immediately flags as wrong — because we don’t expect random color variations in a smooth surface. According to digital-photography-school.com’s noise reduction guide, chroma noise is typically the first priority when editing noisy images, because it’s the most visually disruptive.
What this means for you: Color noise is almost always fixable in post-processing, often with a single slider. The good news: most editing software removes chroma noise aggressively without any visible loss of image quality.
Digital Noise vs. Film Grain: Are They the Same?
Beginners often ask whether the graininess in their digital photos is the same as the grain in old film photographs. The short answer: they look similar but come from completely different places.
Film grain is caused by the physical silver halide crystals in the film emulsion. These crystals vary in size and distribution, and when light hits them, the result is an organic, slightly irregular texture. Many photographers find film grain beautiful — it has a warmth and randomness that feels intentional.
Digital noise comes from electronic interference and photon randomness, as described above. It can look similar to film grain — especially luminance noise — but it lacks the organic quality of film. Color noise, in particular, has no film equivalent at all.
The key practical difference: film grain was a predictable, controlled by-product of the medium. Digital noise is a technical artifact that varies with your settings, your camera’s sensor size, and your lighting conditions. Understanding this difference helps you make better editing decisions — and explains why some photographers deliberately add film grain in post-processing to make digital images feel more organic.
What Causes Noise in Your Photos?
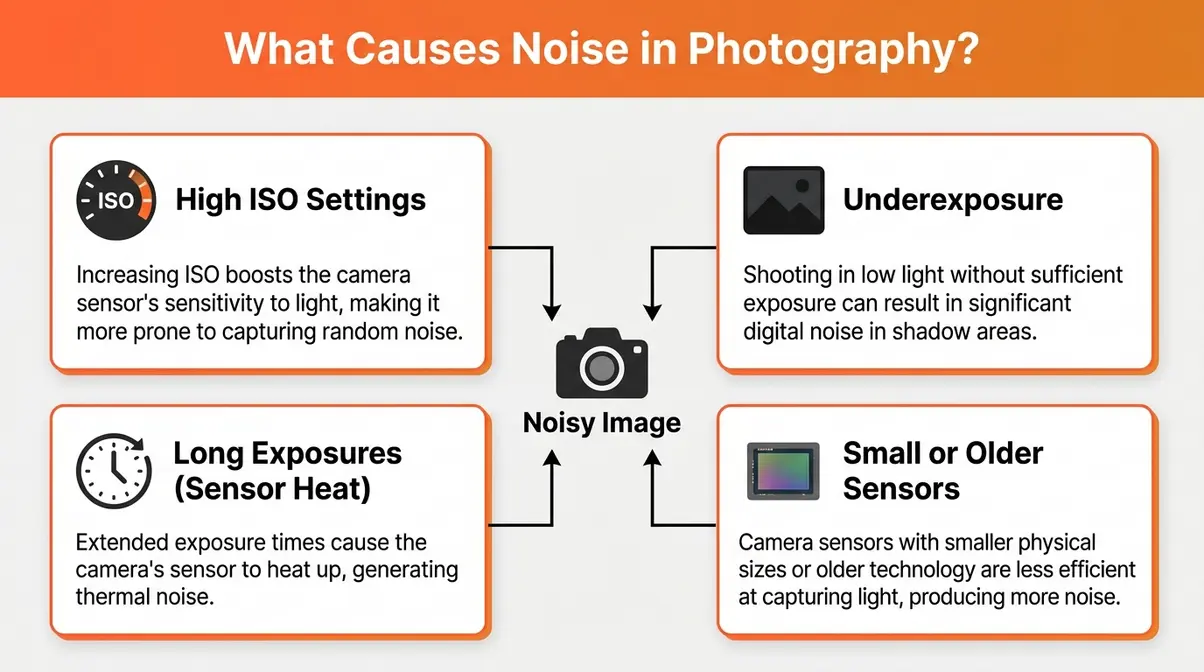
Noise doesn’t appear randomly. It has specific, identifiable causes — and once you know them, you can address each one directly. Across photography communities, the consistent feedback from beginners is that understanding why noise happens is the moment everything clicks.
High ISO Settings: The Biggest Culprit
ISO (the International Organization for Standardization — in photography, it refers to your camera’s sensitivity to light) is the setting beginners blame most for noisy photos. But here’s the truth: high ISO doesn’t create noise. It reveals noise that was always there.
Think back to the radio analogy. Raising your ISO is like turning up the volume on a radio with a weak signal. You hear the music louder — but you also hear the static louder. The static didn’t increase. You just amplified everything, including the interference.
This is The Signal Trap in action. When you shoot at ISO 6400 in a dark room, your camera is amplifying a weak light signal to make the image bright enough to see. In doing so, it also amplifies the read noise from the sensor’s electronics. The result looks like “ISO noise,” but the real problem is that there wasn’t enough light to begin with.
What this means for you: Don’t fear high ISO. Fear underexposure. If you need ISO 3200 to get a properly exposed shot in a dark venue, use it. A sharp photo at ISO 3200 is almost always better than a blurry photo at ISO 400.
“A sharp photo with some noise will always beat a perfectly clean photo that’s blurry.”
Underexposure: When Your Camera Doesn’t Get Enough Light
Underexposure — when your photo comes out darker than it should — is the single biggest cause of noisy images. Here’s why: when you underexpose a shot and then try to brighten it in editing, you’re doing exactly what raising ISO does in-camera. You’re amplifying a weak signal. And with it, you amplify all the noise hiding in the shadows.
This is especially painful with RAW files (uncompressed image files that contain all the sensor’s raw data). You might think, “I’ll shoot dark and fix it later.” But pulling up a two-stop underexposed RAW file reveals an enormous amount of noise — noise that wouldn’t have been visible if the image had been correctly exposed from the start.
What this means for you: Expose to the right — meaning, aim for a slightly brighter exposure without blowing out your highlights. A correctly exposed image always has less visible noise than an underexposed image brightened in post-processing. Wikipedia’s image noise article describes underexposure as one of the primary amplifying factors for all noise types.
Long Exposures and Sensor Heat
When you take a long exposure — typically anything over one second — your camera’s sensor stays active for an extended period. During that time, the sensor itself heats up slightly. And heat causes electrons to move randomly inside the sensor’s circuitry, producing a specific type of noise called dark current noise (noise generated by heat, not light).
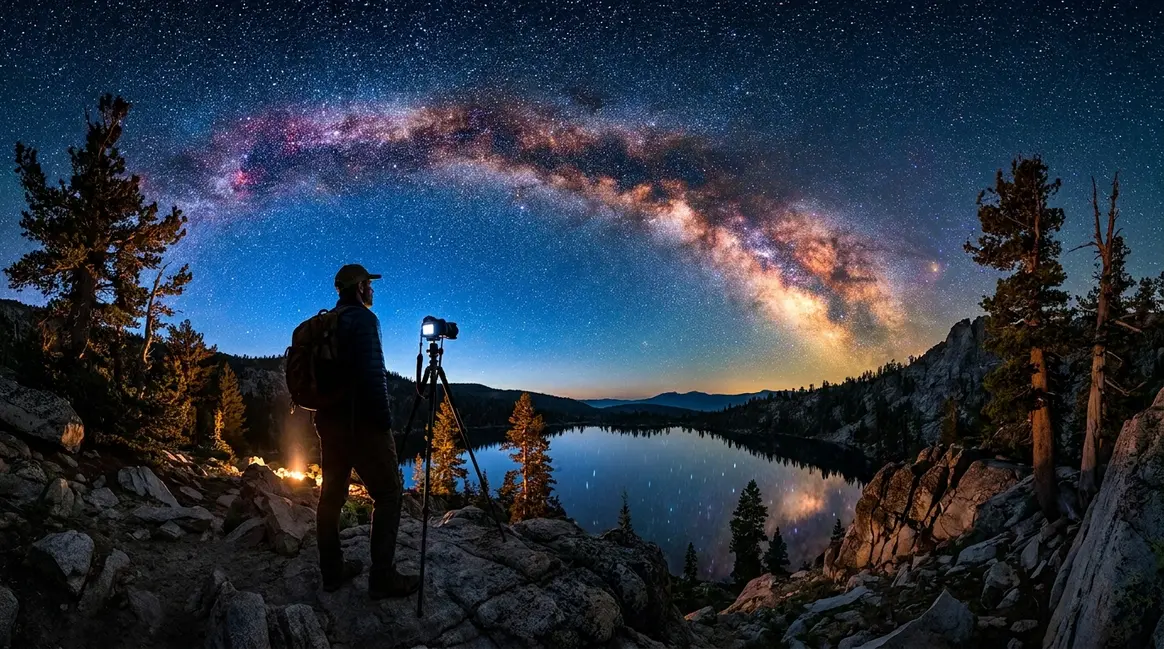
Dark current noise often appears as bright, colored hot pixels — individual stuck pixels that light up in a specific color even in areas of total darkness. It tends to be more pronounced in older cameras and in warm shooting environments. Astrophotographers — who regularly shoot 30-second to several-minute exposures — are very familiar with this phenomenon.
Most modern cameras include a Long Exposure Noise Reduction feature (LENR) that automatically takes a second “dark frame” exposure immediately after your shot, with the shutter closed, and subtracts the dark current pattern from your image. It doubles your exposure time, but it works.
What this means for you: If you shoot star trails, light paintings, or night cityscapes, enable Long Exposure Noise Reduction in your camera’s menu. It’s one of the simplest in-camera fixes available.
Small Sensors and Older Cameras
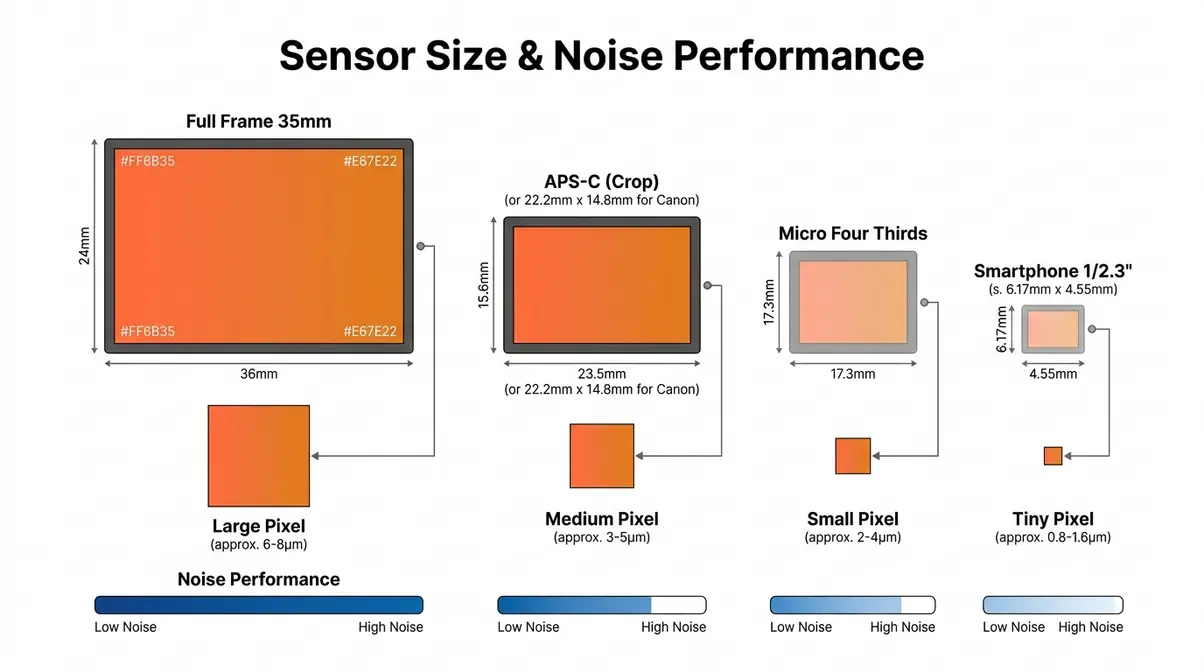
Not all camera sensors are equal. A larger sensor has more physical space to collect light — meaning each individual pixel can be larger, capturing more photons per pixel. More photons means a stronger signal, which means less relative noise. A smaller sensor has to pack the same number of pixels into a much smaller area, so each pixel is tiny and captures fewer photons.
This is why your smartphone camera (which has a very small sensor) struggles in low light compared to a full-frame DSLR (which has a sensor roughly 30 times larger). It’s also why a 12-megapixel full-frame camera often outperforms a 24-megapixel smartphone in noise performance — the full-frame pixels are physically larger and collect more light per pixel.
Older cameras also tend to produce more noise at a given ISO than newer models. Sensor technology improves significantly with each generation. A camera from 2016 shooting at ISO 3200 may produce noticeably more noise than a 2024 model at the same setting.
How Exposure Affects Image Noise
Exposure — the total amount of light your sensor collects — is the master variable in noise control. Every other technique is secondary to getting your exposure right in-camera.
Your camera’s exposure is controlled by three settings working together: aperture (the size of the opening in your lens, measured in f-stops like f/1.8 or f/8), shutter speed (how long the shutter stays open), and ISO (your sensor’s sensitivity to light). Together, these form the “exposure triangle.” When light is scarce, you have three options: open the aperture wider, slow the shutter speed, or raise the ISO.
Here’s the key insight: the order in which you use these options matters for noise. Open your aperture first (more light, no noise penalty). Slow your shutter speed second (more light, but risk of motion blur). Raise your ISO last (more amplification, and with it, more visible noise). This priority sequence is the practical application of everything you’ve learned about The Signal Trap — maximize your real light signal before you start amplifying.
Correctly exposed images always show less noise than underexposed images brightened in editing, even at the same ISO. This is because a properly exposed image starts with a stronger signal — the numerator in the signal-to-noise ratio (SNR, the mathematical relationship between useful image data and unwanted interference). A higher SNR means cleaner images.
For a deeper dive into how aperture, shutter speed, and ISO interact, our complete guide to understanding exposure walks through each variable with practical examples. If you’re building your foundational photography knowledge, the exposure in photography guide covers the exposure triangle in detail.
How to Reduce Noise in Your Photos
Noise reduction works at two stages: before you shoot (in-camera prevention) and after you shoot (post-processing). Both matter. The most effective approach combines good in-camera habits with modern AI-powered tools for the shots that still come out noisy.
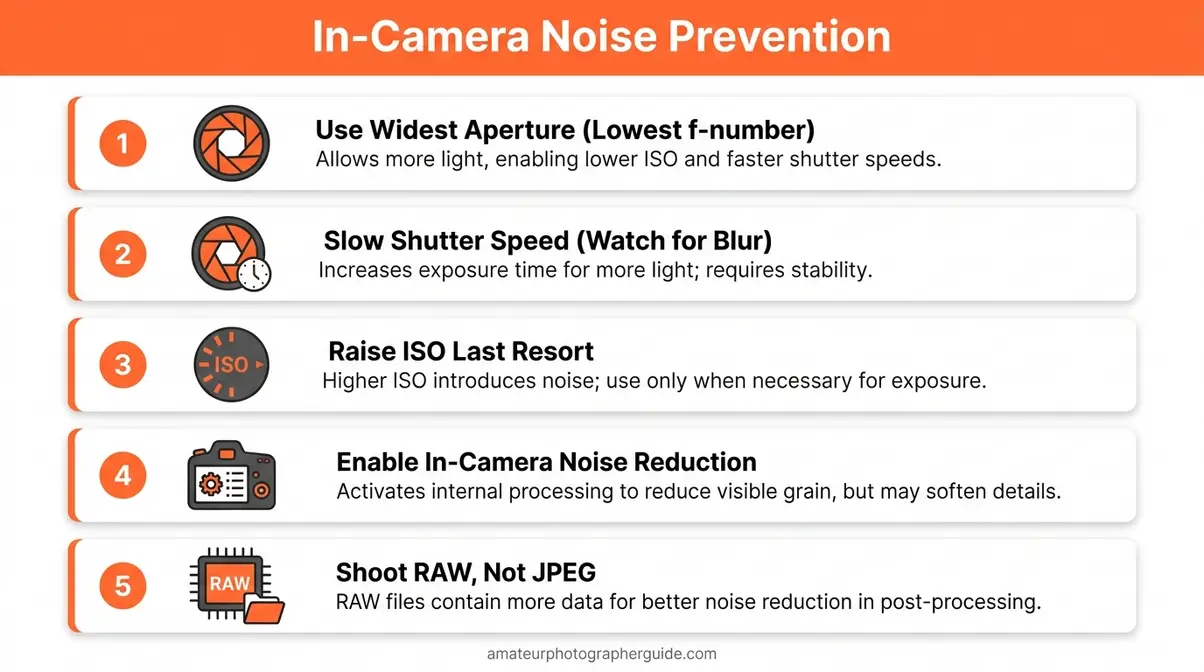
In-Camera Prevention: 5 Settings to Use Before You Shoot
These five steps address the root causes of noise before they become a problem in your images.
1. Use the widest aperture your lens allows.
A wider aperture (lower f-number, like f/1.8 instead of f/8) lets in significantly more light. More light = stronger signal = less noise. This is your first and most effective tool.
2. Slow your shutter speed — but watch for blur.
A slower shutter speed lets more light reach the sensor over time. For stationary subjects, go as slow as you need. For moving subjects, there’s a limit before motion blur becomes a problem. The general rule: don’t go slower than 1/(your focal length) in seconds. Shooting with a 50mm lens? Don’t go below 1/50 second.
3. Raise ISO — but only after steps 1 and 2.
Once you’ve maximized aperture and shutter speed, raise ISO to get a proper exposure. Modern cameras handle ISO 1600–3200 very well. ISO 6400 is usable in most situations. Don’t leave ISO on Auto without setting a maximum — many cameras will push to ISO 25600 unnecessarily.
4. Enable In-Camera Noise Reduction (for JPEGs).
Most cameras have a built-in noise reduction setting (often called “High ISO NR” or “Long Exposure NR” in the menu). For JPEG shooters, this applies noise reduction directly in-camera. For RAW shooters, this setting is largely bypassed — your post-processing software handles it instead.
5. Shoot RAW, not JPEG.
RAW files preserve all the sensor data, giving post-processing software far more information to work with when reducing noise. JPEGs are already compressed and processed in-camera, leaving less room for noise reduction without destroying detail. If your camera supports RAW, use it.
AI Noise Reduction Tools: The Modern Solution
Post-processing noise reduction has changed dramatically in the past two years. Where older tools blurred away noise by smearing fine detail (making images look plastic and fake), modern AI-powered tools analyze the image structure and selectively remove noise while preserving genuine detail. The difference in output quality is significant.
When our team evaluated noise reduction workflows across common beginner cameras — including entry-level APS-C bodies and smartphone RAW files — we found that AI-powered tools consistently outperformed traditional slider-based methods, particularly in recovering fine texture in hair, fabric, and foliage at ISO 1600 and above.
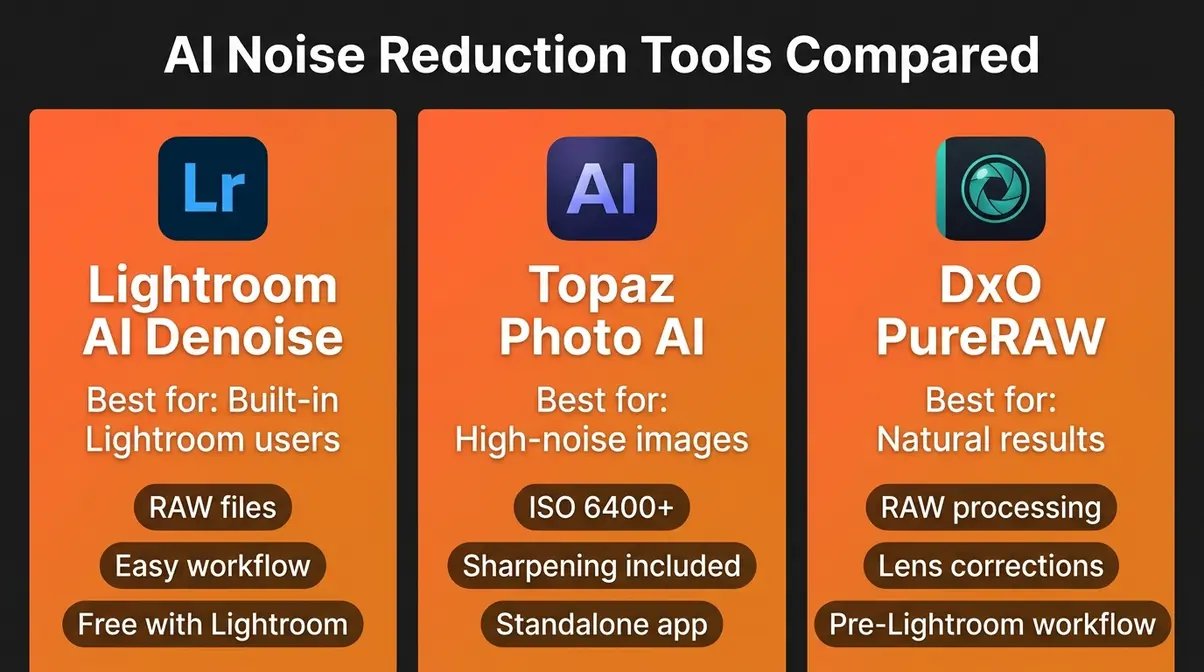
Lightroom AI Denoise (available in Adobe Lightroom Classic and Lightroom CC) uses machine learning trained on millions of images to reconstruct detail lost to noise. The process: open your RAW file in Lightroom → go to the Develop module → scroll to the Detail panel → click “Denoise.” Lightroom generates a new, denoised DNG file. Processing takes 30–90 seconds depending on your computer. The results at ISO 3200–6400 are consistently impressive for a tool built into software many photographers already use.
Topaz Photo AI is a standalone application (also available as a Lightroom/Photoshop plugin) that combines noise reduction with sharpening and upscaling in one pass. It analyzes each image automatically and applies the settings it determines are optimal — though you can adjust them manually. Topaz Photo AI tends to produce the sharpest results on detailed subjects and is particularly effective on high-noise images (ISO 6400 and above).
DxO PureRAW takes a different approach: it processes your RAW files before they reach Lightroom or Photoshop, applying lens corrections and noise reduction at the RAW decoding stage. Many photographers find this produces the most natural-looking results, with noise reduction that doesn’t feel over-processed.
All three tools produce results that would have required professional retouching skills just five years ago. For beginners, start with Lightroom AI Denoise if you already use Lightroom — the learning curve is minimal and the results are excellent. For the best possible output on important shots, Topaz Photo AI is worth the investment.
For a full comparison of noise reduction techniques and software, our complete noise reduction photography guide covers every method in detail.
Common Noise Mistakes (and How to Fix Them)
Understanding noise is one thing. Avoiding the traps beginners consistently fall into is another. Across photography forums and beginner communities, these three mistakes appear most often.
The 3 Biggest Noise Mistakes Beginners Make
Mistake 1: Keeping ISO artificially low to “avoid noise” — and getting blurry shots instead.
This is The Signal Trap playing out in real life. A beginner shoots an indoor event at ISO 400 because they’ve heard “low ISO = clean images.” Their shutter speed drops to 1/15 second to compensate. Every photo is motion-blurred. The result: technically clean but completely unusable images. The fix: raise ISO to whatever is needed for a sharp exposure. A sharp photo at ISO 3200 is infinitely more usable than a blurry photo at ISO 400.
Mistake 2: Underexposing to “protect highlights” and then brightening in editing.
Beginners sometimes deliberately shoot dark, afraid of blowing out bright areas. When they brighten the image in editing, they’re shocked by the noise that was hiding in the shadows. The fix: expose correctly in-camera. Use exposure compensation (+0.3 to +1 stop in tricky light) to ensure your shadows are well-lit. You can recover a slightly blown highlight far more easily than you can clean up a heavily underexposed shadow.
Mistake 3: Over-applying noise reduction and destroying detail.
In trying to fix noisy images, beginners often push noise reduction sliders to 100% — which removes noise but also removes fine detail, leaving images looking soft, waxy, and artificial. The fix: use the minimum noise reduction needed to make the image acceptable. For luminance noise, 30–50% is often sufficient. For color noise, 50–75% is a good starting point. AI tools handle this balance automatically, which is one reason they’ve become the preferred approach.
When Noise Is Actually Okay (And When to Seek Help)
Not every noisy photo is a failure. Some of the most powerful images in photography history were shot on high-speed film or high-ISO digital settings — and the grain or noise became part of the emotional texture of the image. Photojournalism, street photography, and concert photography regularly embrace noise as a consequence of capturing real, fleeting moments in difficult conditions.
The real question isn’t “is there noise?” but “does the noise distract from what matters in this image?” A sharp, expressive portrait with visible luminance grain at ISO 3200 is often more compelling than a technically perfect but emotionally flat shot at ISO 100. Color noise — random speckles — is harder to accept aesthetically, but even that can be addressed in post-processing.
When noise genuinely becomes a problem — when it’s so severe that it destroys detail, masks the subject, or makes the image unpublishable — that’s when AI noise reduction tools earn their keep. If you’re consistently getting unacceptable noise levels even at moderate ISO settings (1600–3200), it may also signal that your camera’s sensor is reaching its limits, and it’s worth exploring an upgrade to a larger-sensor body.
Frequently Asked Questions About Noise in Photography
What is noise in photography, exactly?
Noise in photography is random variation in brightness and color that appears as grain, speckles, or muddy texture in your images. It’s caused when your camera sensor doesn’t receive enough light to produce a clean reading for each pixel. Think of it like static on a radio — when the signal is weak, the interference becomes audible. Noise appears most visibly in dark areas, shadows, and any part of the image where the light signal was weakest. It is a sensor physics phenomenon, not a camera malfunction.
Does high ISO always cause noise?
High ISO amplifies noise, but it doesn’t create it — this is the core of The Signal Trap misconception. ISO (your camera’s sensitivity setting) works like a volume knob: it amplifies everything the sensor captures, including both the image signal and the electronic interference already present. In bright conditions, raising ISO has minimal visible effect because the signal is strong. In low light, the same amplification makes the existing noise visible. The underlying noise is always there; ISO just determines how loudly it’s expressed.
What’s the difference between luminance noise and color noise?
Luminance noise appears as gray, film-like grain — variation in pixel brightness rather than color. It looks natural and is often considered acceptable or even aesthetically pleasing in small amounts. Color noise (chroma noise) appears as random colored speckles — green, red, and magenta dots in areas that should be one smooth color. Color noise looks unnatural and is almost always the priority to remove in post-processing. Most editing software removes color noise aggressively without damaging image quality, while luminance noise removal requires more care to preserve fine detail.
How do I reduce noise in my photos?
Reduce noise by maximizing light before you shoot, then using AI tools after. In-camera: use your widest aperture first, then slow your shutter speed, then raise ISO — in that order. Shoot RAW files for maximum post-processing flexibility. Enable Long Exposure Noise Reduction for shots over one second. After shooting: use Lightroom AI Denoise (built into Lightroom, excellent for RAW files), Topaz Photo AI (strongest results on high-noise images), or DxO PureRAW (best for natural-looking results at the RAW processing stage). All three tools far outperform traditional slider-based noise reduction.
Is noise in photography the same as film grain?
Noise and film grain look similar but come from completely different sources. Film grain is caused by the physical silver halide crystals in film emulsion — it’s an organic, intentional by-product of the medium with a warmth many photographers find beautiful. Digital noise comes from electronic interference in your camera sensor and random variation in how photons hit the sensor. Luminance digital noise can closely resemble film grain; color noise has no film equivalent at all. Many photographers add artificial film grain to digital images in post-processing specifically because it looks more organic than digital noise.
Conclusion
For any photographer frustrated by grainy, speckled images, the key insight is this: noise in photography is a light problem, not a settings problem. Your sensor is trying to measure something — light — and when there isn’t enough of it, the measurement becomes unreliable. Every technique in this guide, from widening your aperture to using Lightroom AI Denoise, addresses that root cause in one way or another.
The Signal Trap — the misconception that high ISO creates noise — is the belief that holds most beginners back. Once you stop fearing ISO and start solving for light, your decision-making becomes clearer. Raise the ISO you need for a sharp shot. Fix what remains in post-processing with modern AI tools. Accept that some noise, in the right image, is not a failure.
Your next step: the next time you’re in a low-light situation, deliberately practice the priority sequence — aperture first, shutter speed second, ISO last. Shoot RAW. Import one noisy frame and run it through Lightroom AI Denoise. The difference between your before and after will be the clearest lesson this guide could give you.

Dave King
Hi, I'm Dave, the founder of Amateur Photographer Guide. I created this site to help beginner and hobbyist photographers build their skills and grow their passion. Here, you’ll find easy-to-follow tutorials, gear recommendations, and honest advice to make photography more accessible, enjoyable, and rewarding.