
Table of Contents
- Table of Contents
- Quick Summary
- 1. Choose the Right Lighting for Portraits
- 2. Master Focus and Sharpness Techniques
- 3. Use Simple Backgrounds for Maximum Impact
- 4. Communicate Effectively with Your Subject
- 5. Experiment with Composition and Framing
- 6. Find Creative Angles and Perspectives
- 7. Apply Basic Editing for Natural Results
- 8. Select the Best Lenses for Portrait Photography
- Elevate Your Portrait Photography with Expert Guidance and Tools
- Frequently Asked Questions
- Recommended
This blog post may contain affiliate links. As an Amazon Associate I earn from qualifying purchases.
Did you know that over 80 percent of memorable portraits rely on thoughtful lighting and sharp focus? Capturing striking portraits is not just about pointing your camera and clicking. Every choice you make, from where you place your subject to the lens you pick, shapes the story your photo tells. Whether you are aiming for professional results or simply want to take better photos of friends and family, mastering a few essential techniques can help you create images that truly stand out.
Table of Contents
- Choose The Right Lighting For Portraits
- Master Focus And Sharpness Techniques
- Use Simple Backgrounds For Maximum Impact
- Communicate Effectively With Your Subject
- Experiment With Composition And Framing
- Find Creative Angles And Perspectives
- Apply Basic Editing For Natural Results
- Select The Best Lenses For Portrait Photography
Quick Summary
| Takeaway | Explanation |
|---|---|
| 1. Use three-point lighting for depth | This technique includes key, fill, and backlight to enhance portraits’ dimensionality and mood. |
| 2. Focus on the eyes for emotional connection | Ensuring the eyes are sharp elevates your portrait’s quality and engages viewers. |
| 3. Simplify backgrounds to spotlight subjects | Clean backgrounds prevent distractions, allowing your subject to stand out prominently. |
| 4. Communicate to ease subjects’ nerves | Building rapport with your subject helps them relax, resulting in more authentic portraits. |
| 5. Choose prime lenses for better clarity | Lenses like 50mm or 85mm provide sharp images and beautiful background blur in portrait photography. |
1. Choose the Right Lighting for Portraits
Lighting can make or break a portrait photograph. The right lighting transforms an ordinary snapshot into a compelling visual story that captures your subject’s essence and emotion.
Understanding portrait lighting techniques is crucial for creating professional looking images. Professional photographers often use three point lighting a foundational method that creates depth and dimension in portraits. This technique involves three strategic light sources: a key light that serves as the primary illuminator, a fill light to soften shadows, and a backlight to separate the subject from the background.
One classic technique you should explore is Rembrandt lighting. Named after the famous painter who mastered this technique, Rembrandt lighting uses one or two lights and a reflector to create a natural compelling image. The signature of this technique is a distinctive triangle of light under the eye on the less illuminated side of the face.
When selecting lighting for your portraits, consider these practical approaches:
- Use natural window light for soft flattering illumination
- Experiment with side lighting to create dramatic shadows
For photographers seeking deeper insights, check out our tutorial on portrait photography techniques.
Remember that lighting is not just technical its emotional. The way you illuminate your subject can communicate mood vulnerability strength or mystery. Take time to experiment and discover how different lighting setups reveal different aspects of your subject’s personality.
2. Master Focus and Sharpness Techniques
Nothing ruins a beautiful portrait faster than an out of focus image. Achieving razor sharp photographs requires understanding how to control your camera’s focus mechanisms and optimize your shooting techniques.
When creating portraits, focus on the eyes. Professional photographers know that the human eye is the most expressive part of a portrait and serves as the central point of emotional connection. By ensuring the eyes are crisp and clear, you automatically elevate the quality of your photograph.
Understanding focus modes is crucial for capturing sharp images. Different situations require different approaches:
- Use single shot autofocus for stationary subjects
- Switch to continuous autofocus when photographing moving subjects
- Consider manual focus for precise control in challenging lighting conditions
Aperture selection plays a significant role in maintaining image sharpness. Wider apertures like f1.8 or f2.8 create beautiful subject isolation with soft backgrounds. Narrower apertures such as f8 or f11 ensure more of your subject remains in sharp focus.
Stabilization techniques can dramatically improve your image clarity. Using a tripod reducing camera shake and selecting appropriate camera settings will help you achieve consistently sharp portraits. Learn more about camera settings in our beginner guide.
Practice and experimentation are key. Every camera and lens combination behaves slightly differently so spend time understanding your specific equipment. Your ability to master focus will transform good portraits into extraordinary visual stories.
3. Use Simple Backgrounds for Maximum Impact
A cluttered background can destroy an otherwise perfect portrait. The key to creating powerful portraits lies in eliminating distractions and keeping the viewer’s attention squarely on your subject.
Background simplicity is a fundamental principle in portrait photography that transforms ordinary images into compelling visual stories. When your background is clean and uncluttered, your subject becomes the hero of the photograph. Professional photographers understand that what you leave out of the frame is often as important as what you include.
To achieve effective background separation, you have several strategic techniques at your disposal:
- Position your subject away from busy or cluttered backgrounds
- Use longer focal lengths to naturally blur background elements
- Select wider apertures like f2.8 or f1.8 to create shallow depth of field
Neutral tones work exceptionally well for portraits. Solid colored walls soft natural landscapes or minimalist settings can provide the perfect backdrop without competing with your subject. Think soft grays neutral browns or muted blues that complement skin tones without stealing visual attention.
Explore our in depth guide on depth of field to understand how lens and camera settings can help you create stunning background blur.
Remember that backgrounds tell a story too. While simplicity is powerful a background can also provide context. A blurred bookshelf might suggest intellectual curiosity. A soft natural landscape could convey tranquility. The art is in finding that perfect balance between simplicity and meaningful subtle context.
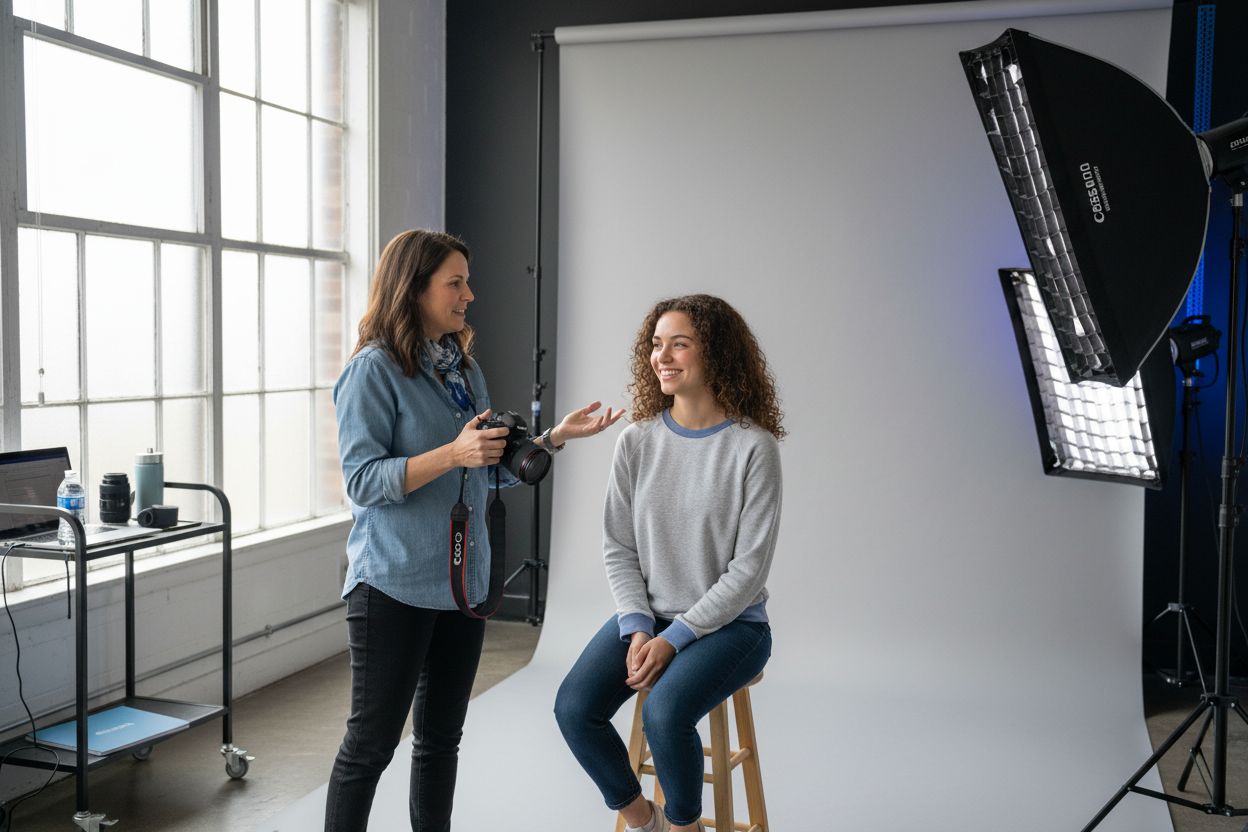
4. Communicate Effectively with Your Subject
A great portrait is more than technical perfection. It is a collaborative dance between photographer and subject that captures genuine emotion and personality.
Effective communication transforms an ordinary photo session into an extraordinary storytelling experience. Your ability to make your subject feel comfortable relaxed and understood directly impacts the quality of your portraits. Most people are not professional models and feel nervous in front of a camera which means your interpersonal skills become just as important as your technical photography skills.
Before you even pick up your camera establish a connection. Take time to chat understand your subject’s personality and make them feel at ease. Your goal is to help them forget they are being photographed and reveal their authentic self.
Practical communication strategies include:
- Ask open ended questions to help subjects relax
- Give clear gentle directions about pose and expression
- Use positive encouraging language
- Show them a few images to build confidence
Different moods and themes require different approaches to posing and expression. A professional headshot needs a confident stance while a personal portrait might require a more relaxed intimate approach. Check out our tutorial on portrait photography techniques for deeper insights into capturing compelling images.
Remember that every subject is unique. What works for one person might not work for another. Stay flexible patient and genuinely interested in bringing out the best in your subject. Your empathy and communication skills will ultimately determine the emotional depth of your portraits.
5. Experiment with Composition and Framing
A compelling portrait is more than just capturing a face. It is about creating a visual narrative that draws viewers into your subject’s world and emotions.
Composition is the visual language that transforms an ordinary photograph into a powerful storytelling medium. Think of your camera frame as a canvas where every element contributes to the overall emotional impact of your image. Strategic placement of your subject can dramatically change the mood and message of a portrait.
The rule of thirds is a foundational technique that can instantly elevate your photography. Imagine dividing your frame into a 3×3 grid and placing key elements like eyes or facial features along these intersecting lines. This approach creates visual tension and guides the viewer’s eye more naturally than centering your subject.
Explore creative framing techniques:
- Use doorways or windows as natural frames
- Incorporate architectural elements to add context
- Experiment with asymmetrical compositions
- Include negative space to create visual breathing room
Learn more about mastering the rule of thirds to understand how this simple technique can transform your portraits.
Do not be afraid to break traditional rules. While guidelines like the rule of thirds provide excellent starting points, true artistry emerges when you understand the rules well enough to know when and how to skillfully bend them. Your unique perspective is what will make your portraits stand out and tell authentic stories.
6. Find Creative Angles and Perspectives
The angle of your camera can transform an ordinary portrait into a captivating visual story. Where you position yourself relative to your subject dramatically influences how viewers perceive the image.
Perspective is a powerful storytelling tool that goes beyond simple camera positioning. It is about creating emotional depth and revealing aspects of your subject that might otherwise remain hidden. Professional photographers understand that changing your physical relationship to the subject can unlock unexpected narratives.
Traditional eye level shots provide a standard view but do not be afraid to experiment. Shooting from slightly above can create a sense of vulnerability while low angle shots can make subjects appear more powerful and dynamic.
Consider these creative angle strategies:
- Shoot from slightly above to emphasize eyes and facial features
- Try extreme low angles for a more dramatic perspective
- Use unexpected framing like partial body or asymmetrical compositions
- Experiment with tilting your camera for dynamic visual tension
Explore unique perspectives in photography to understand how angle selection impacts storytelling.
Selective focus techniques like tilt shift photography offer another dimension of creative control. By manipulating the focus plane you can draw attention to specific elements while creating dreamy blurred backgrounds that add emotional depth to your portraits. Remember that technical skill meets artistic vision when you are willing to move beyond conventional shooting positions.
7. Apply Basic Editing for Natural Results
The goal of post processing is not to transform your image but to enhance what you captured in camera. Subtle editing can elevate a good portrait to an extraordinary one without looking artificially manipulated.
Post processing is about refinement not reinvention. Professional photographers understand that editing should be a gentle touch that brings out the best in your original photograph. Think of editing like makeup subtle enhancements that highlight natural beauty rather than completely changing appearance.
Focus on these key editing principles:
- Correct exposure to recover lost details in shadows or highlights
- Apply selective sharpening especially around eyes and key facial features
- Use minimal noise reduction to maintain skin texture
- Adjust white balance for natural skin tones
- Perform subtle contrast adjustments
Explore our guide to essential photo editing techniques to develop your post processing skills.
When editing portraits remember that less is more. Avoid heavy handed adjustments that make skin look unnaturally smooth or colors appear overly saturated. Your editing should be invisible supporting the emotional core of the portrait without drawing attention to the technical process itself. The most successful edits are the ones viewers do not even realize have been made.
8. Select the Best Lenses for Portrait Photography
Choosing the right lens can transform your portrait photography from average to extraordinary. Your lens is not just a piece of equipment it is your creative storytelling tool.
Prime lenses are the secret weapon of professional portrait photographers. These fixed focal length lenses offer superior optical quality and exceptional performance in low light conditions. Standard prime lenses like the 50mm f/1.8 or 85mm f/1.8 provide consistent sharpness and remarkable image quality at an affordable price point.
When selecting portrait lenses consider these critical factors:
- Choose focal lengths between 50mm and 135mm
- Look for wide apertures like f/1.8 or f/1.4 for beautiful background blur
- Prioritize image stabilization for sharper results
- Consider lens weight and balance with your camera body
Learn more about understanding focal lengths to make informed lens choices.
The 85mm focal length is often considered the gold standard for portrait photography. Its slightly compressed perspective flatters facial features and creates a pleasing separation between subject and background. Whether you are shooting professional headshots or creative personal portraits the right lens can help you tell more compelling visual stories.
Below is a comprehensive table summarizing the key strategies and techniques discussed throughout the article on enhancing portrait photography.
| Technique/Strategy | Implementation | Benefits/Outcomes |
|---|---|---|
| Lighting Techniques | Use three-point lighting, try Rembrandt lighting, and experiment with natural and side lighting. | Creates depth, dimension, and mood; captures subject’s essence. |
| Focus and Sharpness | Focus on the eyes, use appropriate focus modes, and select proper aperture. | Achieves sharp, expressive portraits with emotional connection. |
| Background Simplicity | Use simple backgrounds, neutral tones, and shallow depth of field. | Keeps attention on the subject, enhances visual storytelling. |
| Effective Communication | Establish rapport, use open-ended questions, give clear directions. | Captures genuine emotion and personality in portraits. |
| Composition Techniques | Apply rule of thirds, explore creative framing. | Enhances storytelling, visual tension, and interest. |
| Angle and Perspective | Experiment with angles, use tilt-shift photography. | Provides emotional depth and unique narrative perspectives. |
| Post Processing | Use subtle editing for exposure, sharpening, and white balance. | Enhances images naturally without artificial manipulation. |
| Lens Selection | Opt for prime lenses with wide apertures between 50mm-135mm. | Improves image quality, background blur, and storytelling. |
Elevate Your Portrait Photography with Expert Guidance and Tools
Portrait photography demands more than just pointing a camera. Whether you are struggling to master lighting techniques like Rembrandt lighting or want sharper focus on the eyes for emotional impact you need reliable advice and resources to help you grow. Common challenges like eliminating distracting backgrounds or finding the perfect lens can leave you feeling stuck or frustrated. You want to create portraits that tell authentic stories and truly capture your subject’s personality.

Discover how to overcome these hurdles with practical tutorials and insider tips at Amateur Photographer Guide. From in-depth guides on portrait photography techniques to understanding composition and framing you will gain confidence to experiment creatively and communicate more effectively with your subjects. The time to transform your portraits is now. Visit Amateur Photographer Guide and start your journey toward capturing stunning, heartfelt images today.
Frequently Asked Questions
How can I choose the right lighting for portrait photography?
Choosing the right lighting involves understanding the different lighting techniques and utilizing natural sources. Experiment with natural window light for a soft effect or three-point lighting setups to create depth; start by positioning a key light at a 45-degree angle to your subject.
What should I focus on to ensure sharpness in my portrait images?
To achieve sharp portraits, always focus on the eyes, as they create emotional connections. Use single-shot autofocus for stationary subjects and consider applying appropriate aperture settings, like f/1.8, to achieve both sharpness and beautiful background blur.
What types of backgrounds are best for portrait photography?
Simple backgrounds are crucial for highlighting your subject. Use neutral tones or uncluttered settings to ensure the focus remains on your subject, positioning them away from distractions to enhance the overall impact of the image.
How can I effectively communicate with my portrait subjects?
Effective communication can make your subjects feel more at ease and reveal their authentic selves. Take time to chat before shooting, ask open-ended questions, and provide clear instructions while maintaining a positive, encouraging demeanor throughout the session.
What composition techniques should I use for stronger portraits?
To strengthen your portraits, apply compositional techniques like the rule of thirds which suggests placing key elements along intersecting lines. Experiment with framing your subjects using natural elements like doorways and include negative space to create visual interest.
How can I enhance my portraits during the editing process?
Enhance your portraits by applying subtle edits that refine rather than transform your images. Focus on correcting exposure, adjusting white balance for natural skin tones, and applying selective sharpening on eyes to maintain texture while ensuring the edits feel invisible.
Recommended
- How to Take Better Portrait Photos: A Definitive Guide – Amateur Photographer Guide
- 7 Tips For Better Still Life Photography – Amateur Photographer Guide
- The Basics Ideas Of Photography – Amateur Photographer Guide
- 7 Essential Photography Beginner Tips for New Photographers – Amateur Photographer Guide
- 8 Tips för Artistporträtt: Skapa Fantastiska Bilder » Fotograf Steinberg