What Is Time-Lapse Photography? Complete Beginner’s Guide
What is time lapse photography? Learn key techniques, types, equipment, common mistakes, and creative uses for amateur photographers worldwide.

You’ve seen it before — storm clouds racing across a skyline in seconds, a flower bursting open in a single breath, a city street flickering from dawn to dusk while you blink. You watched it and thought, “How did they do that?” That feeling — equal parts wonder and curiosity — is exactly where this guide starts.
What’s in this guide
The problem is that most guides either give you a vague two-sentence definition and call it done, or they bury beginners in technical jargon so dense that you give up before you ever press record. This guide does neither. You’ll learn exactly what time lapse photography is, how the interval math works, what gear you actually need, and — most importantly — how to shoot your very first sequence tonight, even if all you have is a smartphone.
By the end, you’ll understand the definition, the step-by-step technique, the right gear for every budget, six real-world creative examples with exact settings, and the five mistakes that trip up almost every beginner.
What Is Time-Lapse Photography?
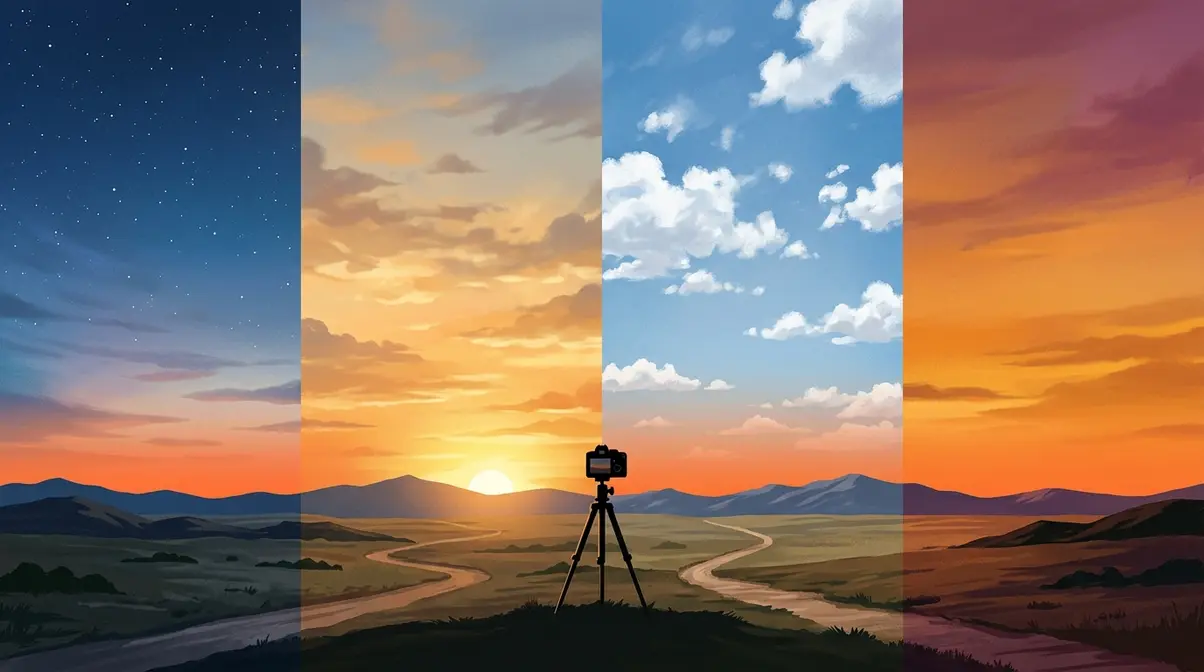
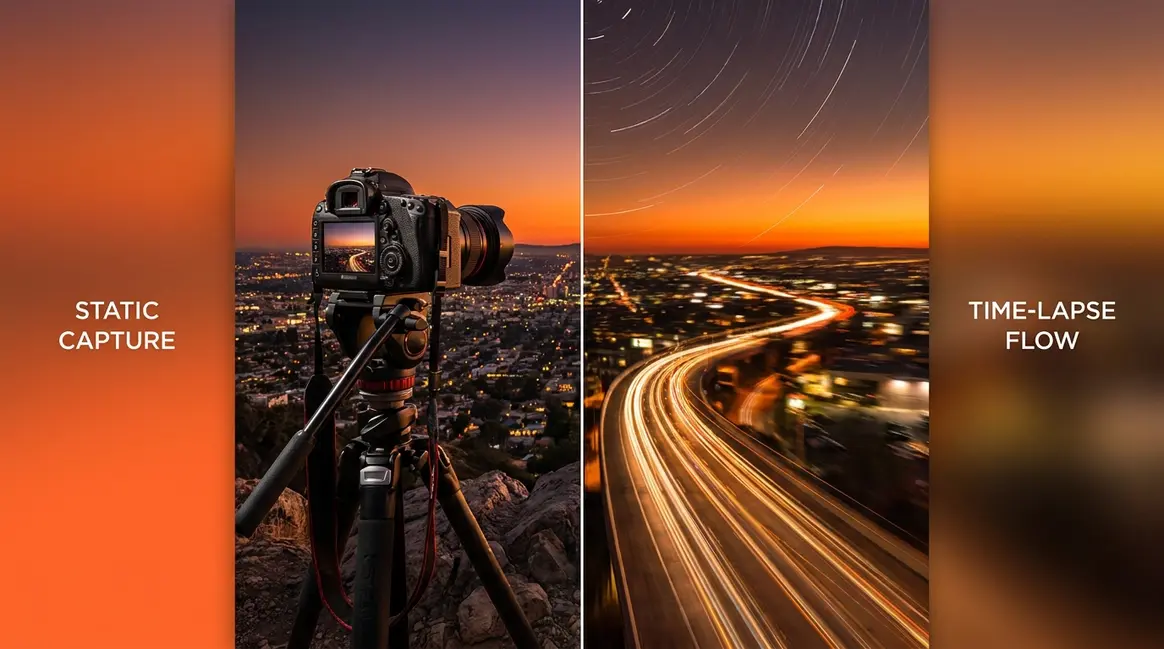
Time-lapse photography is a technique where a camera captures a series of still photos at set intervals — then plays them back as a video at normal speed. Because the images were taken more slowly than they’re played back, the world appears to move faster: a sunset that took two hours compresses into 10 seconds. This lets you see slow natural processes — clouds forming, flowers blooming, cities waking up — that are completely invisible to the naked eye in real time.
That’s the core of what is time lapse photography, and it’s a lot simpler than it sounds. The magic comes from three numbers: how often the camera takes a photo (the interval), how many photos it takes in total, and how fast those photos play back (the frame rate). Change any one of those three, and you change the entire feel of the final video.
How Time-Lapse Photography Works
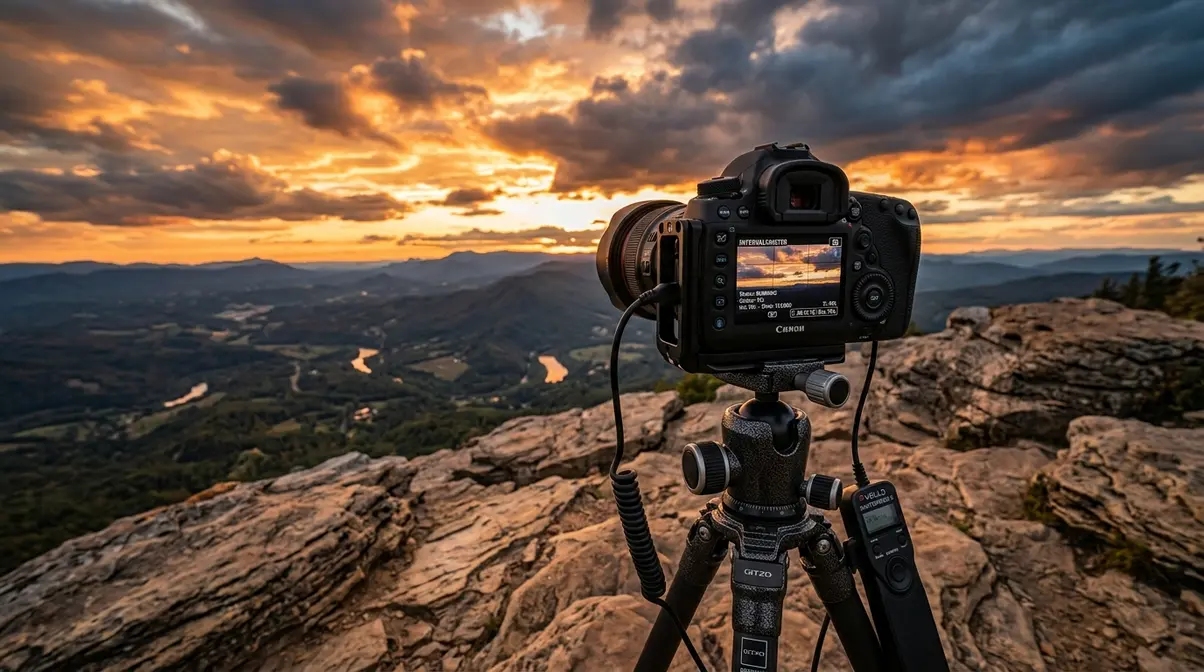
The mechanical process behind time-lapse photography explained is straightforward once you see it laid out. Your camera takes one photo every few seconds — that gap is called the interval. Over time, those individual photos stack up into a sequence. When you play that sequence back at normal video speed (typically 24–30 frames per second), the world zips forward at high speed.
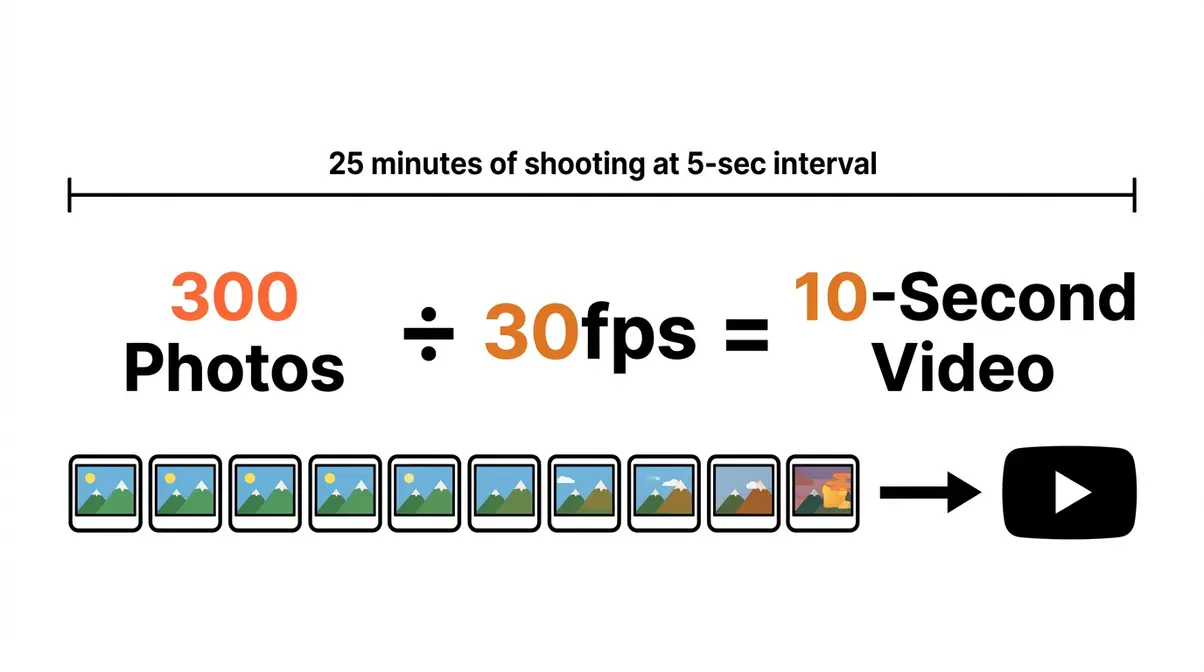
Here’s a concrete example: set your camera to take one photo every 5 seconds and shoot for 30 minutes. You’ll collect 360 photos. Play those 360 photos at 30 frames per second, and you get a 12-second video of 30 minutes of real life. Think of it exactly like a flip-book — each photo is one page. The faster you flip, the smoother the motion looks.
Frame rate — the number of images displayed per second in the final video — is typically 24fps (the cinematic standard) or 30fps (standard digital video). Your brain perceives smooth, convincing motion at around 24 images per second. That’s why time-lapse footage feels real and fluid even though it’s massively sped up.
The interval is the single most important setting you’ll choose. Select it based on how fast your subject moves — slow subjects need long intervals, fast subjects need short ones. You’ll learn the exact numbers in The Interval Ladder framework in the next section.
As capturing film frames at a much lower frequency than they are viewed — often utilizing specialized camera rigs and intervalometers (Indiana University, 2026) — time-lapse photography turns patience into spectacle.
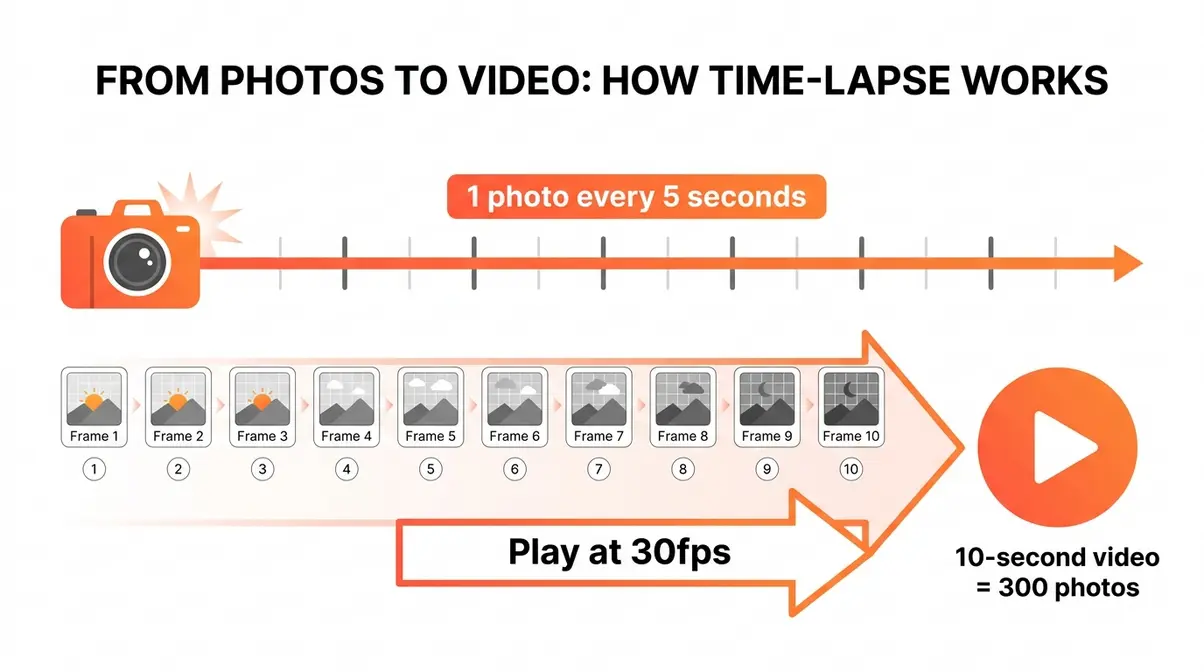
The diagram above shows exactly how this works. Each dot on the timeline is one photo. Stack them all together and press play — that’s time-lapse.
Transition: Now that you know what time-lapse is, here’s a surprising fact about where the technique came from — it’s much older than you might expect.
A Brief History of Time-Lapse
Time-lapse photography is a phenomenon with roots stretching back to the very earliest days of cinema. The technique is widely attributed to the pioneering work of Georges Méliès, who around 1896 discovered that stopping and restarting his camera mid-shot caused objects to appear to jump or transform — an accidental discovery that planted the seed of time manipulation in filmmaking. By the early 1900s, filmmakers were deliberately shooting plant growth and natural processes frame by frame to reveal the invisible rhythms of the natural world.
National Geographic has used time-lapse techniques since the early days of nature filmmaking to reveal environmental changes invisible to the naked eye — from glaciers retreating over decades to flowers completing their full life cycle in seconds.
The democratization of the technique accelerated dramatically with digital cameras and, later, smartphones. What once required expensive film equipment, motor-driven camera rigs, and a darkroom is now a built-in feature on every iPhone and Android device sold today. The same technique that helped early filmmakers create “magic” on a silent film set is now available in your pocket. From documenting plant growth in biology labs to monitoring construction projects over months, the technique quickly found applications far beyond filmmaking — a testament to how universally useful controlled time compression can be.
Time-Lapse vs. Regular Video
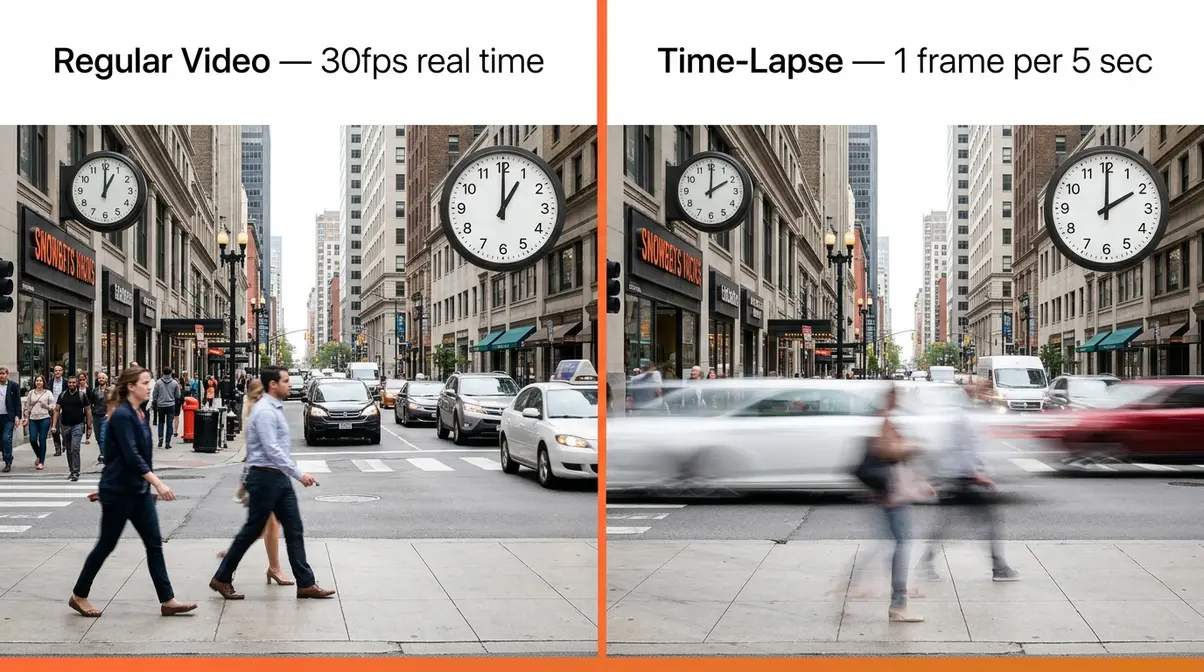
Beginners often confuse time-lapse with slow-motion, or wonder how it differs from simply recording a video. The distinction is clean once you see it side by side.
| Technique | Frames Captured | Playback Effect | Best For |
|---|---|---|---|
| Regular Video | 24–30fps in real time | Normal speed | Everyday recording |
| Time-Lapse | 1 frame every 1–60+ seconds | Faster than real life | Slow processes (clouds, sunsets) |
| Slow-Motion | 120–240fps | Slower than real life | Fast action (sports, splashes) |
| Hyperlapse | 1 frame per step (camera moves) | Faster + moving perspective | City walks, travel sequences |
Regular video captures 24–30 frames per second in real time — what you see is what happened, at the speed it happened. Time-lapse captures 1 frame every few seconds or even minutes, so playback races ahead of real life. Slow-motion does the opposite: it captures far more frames per second than normal (120fps, 240fps), so playback stretches time out and makes fast action look fluid and dramatic.
Hyperlapse — sometimes called a “moving time-lapse” — adds camera movement to the equation. The photographer physically moves the camera between each shot, creating a sweeping, dynamic perspective shift. Standard time-lapse keeps the camera completely still. If you’ve seen a video that seems to fly through a city street while also speeding up time, that’s a hyperlapse.
Understanding what is time lapse video, versus these related techniques, saves you from a lot of confusion when you start searching for tutorials online.
How to Shoot Time-Lapse Photography Step by Step
Once you grasp what is time lapse photography, shooting it is more approachable than most beginners expect. The workflow has five clear steps, and the most important decisions happen before you press the shutter button. This section walks through each one — including the interval math that every other guide skips.
Before You Start: What You Need
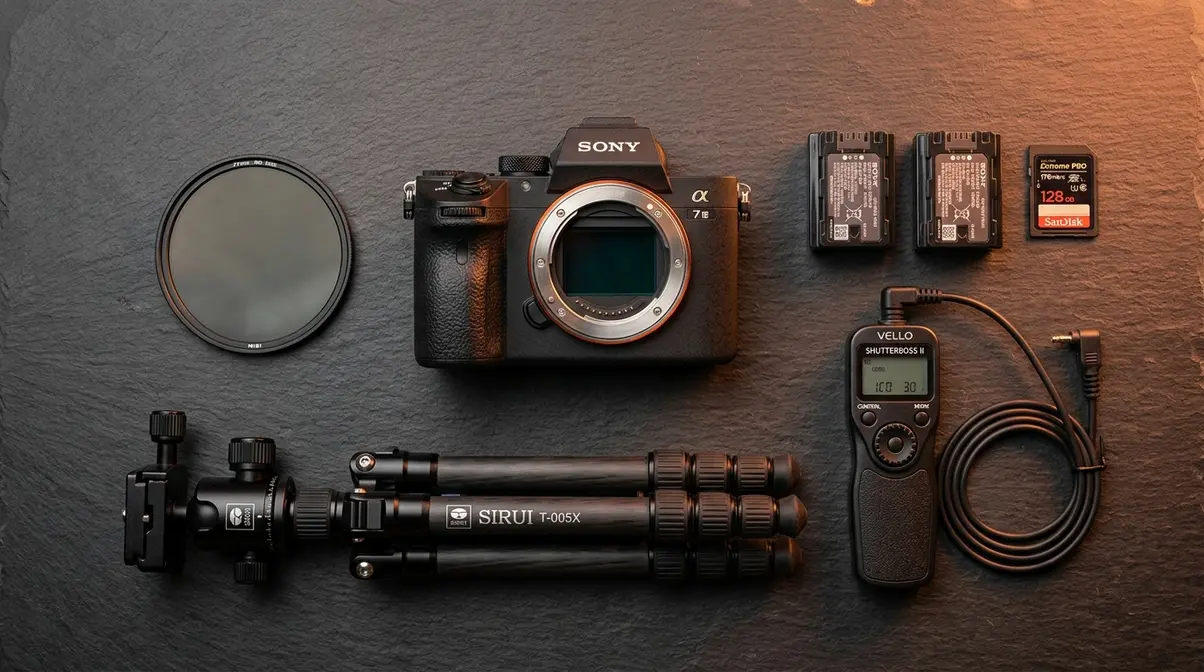
You don’t need expensive gear to shoot your first time-lapse. Here’s a minimal checklist:
- A camera — any smartphone, DSLR, mirrorless, or action camera works
- A stable surface or tripod — this is non-negotiable; even a tiny wobble between frames creates distracting jumps in the final video
- A full battery (or power cable) — a 2-hour shoot can drain most camera batteries completely
- A large memory card — a 30-minute sequence at 1-second intervals produces 1,800 photos
- An intervalometer (for DSLRs without a built-in timer) — an intervalometer is a timer device that automatically triggers your camera at set intervals, so you don’t have to press the shutter button manually hundreds of times
Smartphones handle the intervalometer function automatically inside their time-lapse mode, so if you’re starting with a phone, you can skip that last item entirely.
Step 1 — Choose Your Subject
Your subject determines everything: how long you’ll need to shoot, what interval to use, and where to position your camera. As a beginner, choose a subject with visible, predictable movement — clouds are the single best starting point because they move steadily, look dramatic, and forgive imperfect settings.
A common beginner question is: how long does it take to shoot a time-lapse? The answer depends entirely on your subject:
| Subject | Real Shooting Time | Recommended Interval |
|---|---|---|
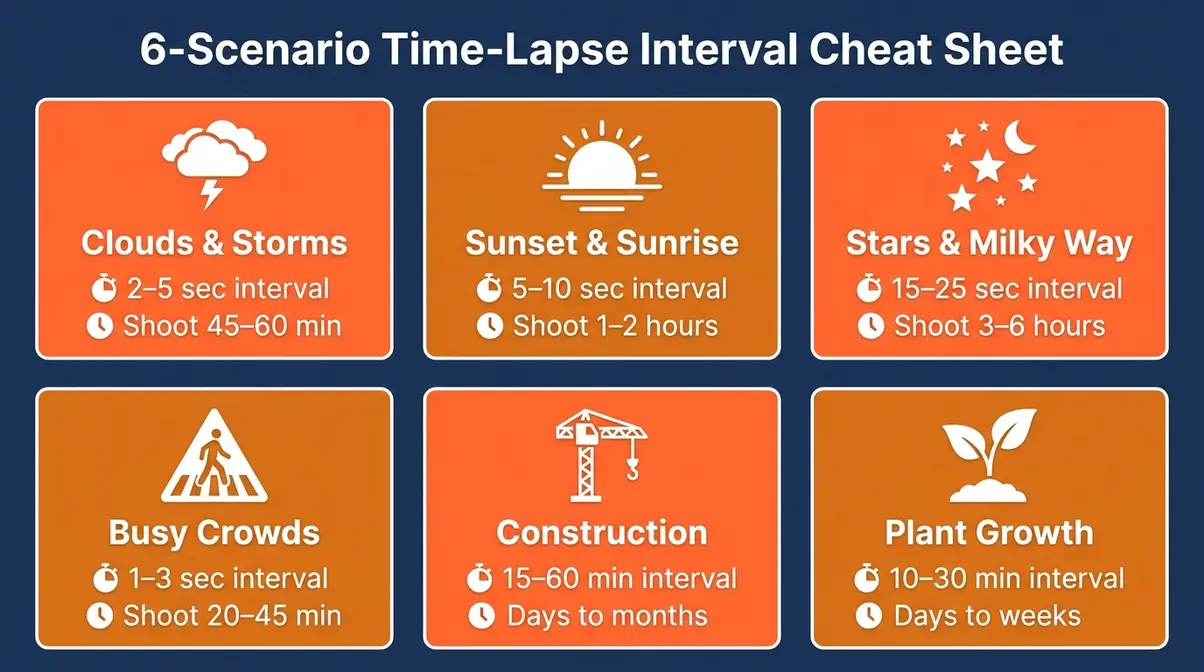
| Fast clouds | 30–60 minutes | 2–5 seconds |
| Sunset / sunrise | 1–2 hours | 5–10 seconds |
| Star trails (night sky) | 3–6 hours | 15–25 seconds |
| Busy street / crowd | 20–45 minutes | 1–3 seconds |
| Construction project | Days to months | 15–60 minutes |
| Plant growth (science) | Days to weeks | 10–30 minutes |
Pick your subject, scout your location in advance, and arrive early enough to set up before the interesting action begins.
Step 2 — Set Your Interval
The interval is the single setting that defines your time-lapse. Get it right and your video looks smooth and dramatic. Get it wrong and the footage either races past too quickly or crawls along with awkward jumps.
“To slow a timelapse like this down (in camera) if I’m being lazy, do I need to have the interval with less seconds (like 2) or more (like 10)? I like the result but just seems like the whole thing goes a bit too quick.”
— Amateur photographer community, r/timelapse
This question — from a real beginner — captures exactly the confusion most new time-lapse shooters experience. Here’s the clear answer: a shorter interval produces a slower, smoother final video. A longer interval produces a faster, more dramatic result.
Think of it this way: if you photograph clouds every 2 seconds for 30 minutes, you collect 900 photos. At 30fps, that’s a 30-second video. If you use a 10-second interval over the same 30 minutes, you only collect 180 photos — a 6-second video that moves five times faster. The subject “goes too quick” when the interval is too long, not too short.
The Interval Ladder
The Interval Ladder is a simple framework for choosing the right interval based on how fast your subject moves. Picture a ladder with rungs from fast to slow — the faster your subject, the lower the rung (shorter interval) you choose.
| Rung | Subject Speed | Interval | Example Subjects |
|---|---|---|---|
| 1 (Fastest) | Very fast | 1–2 sec | Busy intersections, fast crowds |
| 2 | Fast | 3–5 sec | Moving clouds, market scenes |
| 3 | Medium | 5–10 sec | Sunsets, slower cloud formations |
| 4 | Slow | 15–30 sec | Stars, slow fog rolling in |
| 5 (Slowest) | Very slow | 5–60 min | Plant growth, construction, IVF |
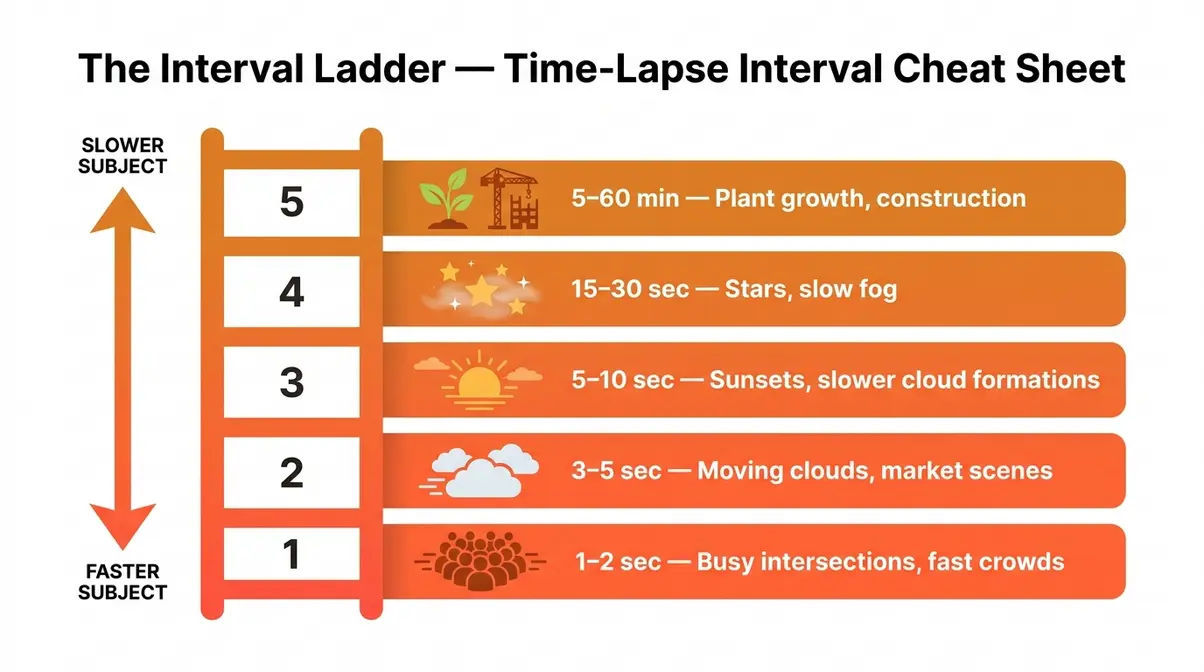
Photographers consistently find that starting at Rung 2 (3–5 seconds) for cloud sequences gives the most satisfying results for a first attempt, according to community consensus across major photography forums. It’s forgiving enough that minor timing errors don’t ruin the footage, and it produces a final video that feels dynamic without being disorienting.
Step 3 — Configure Your Camera Settings
Once you’ve chosen your interval, lock in these four camera settings before you start shooting. Consistency is the goal — any setting that changes automatically between frames will create a flickering effect in the final video. For a deeper dive, review our no-fear guide to basic camera settings.
| Setting | Recommendation | Why It Matters |
|---|---|---|
| Mode | Manual (M) | Prevents auto-exposure from changing between shots |
| ISO | 100–400 (daylight) | Lower ISO = less grain; keep it fixed, not auto |
| Aperture | f/8–f/11 (general) | Sharp focus across the scene; don’t let it vary |
| Shutter Speed | 2× your interval | “180-degree rule” — creates natural motion blur |
| White Balance | Fixed (Daylight/Cloudy) | Auto white balance flickers; manual stays consistent |
| Focus | Manual focus | Autofocus can “hunt” between shots, causing jumps |
The 180-degree rule for shutter speed is worth memorizing: set your shutter speed to roughly half your interval. Understanding the 180-degree rule is easier once you have shutter speed explained clearly. If your interval is 5 seconds, use a 1/2-second shutter. This creates just enough motion blur in each frame to make the final video look cinematic rather than choppy. Without it, fast-moving subjects like clouds can look like they’re teleporting from frame to frame.
ISO is your camera’s sensitivity to light. Keep it as low as possible (100–200 in daylight) to minimize visual noise — grain that makes footage look rough and unprofessional.
Aperture controls how much light enters the lens and how much of the scene is in sharp focus. For wide landscape shots, f/8 to f/11 keeps everything sharp from foreground to horizon.
Step 4 — Calculate Your Photo Count
This is the step every other guide skips — but it’s the one that answers the questions beginners search for most. The math is simple arithmetic:
The Formula:
> Photos needed = Clip length (seconds) × Frame rate (fps)
> Shooting time needed = Photos needed × Interval (seconds)
- Worked example for a 10-second clip:
- Target: 10-second final video at 30fps
- Photos needed: 10 × 30 = 300 photos
- Interval: 5 seconds
- Shooting time: 300 × 5 = 1,500 seconds = 25 minutes
Quick reference table:
| Final Video Length | At 30fps | At 24fps | Shooting Time (5-sec interval) |
|---|---|---|---|
| 10 seconds | 300 photos | 240 photos | ~25 minutes |
| 30 seconds | 900 photos | 720 photos | ~75 minutes |
| 1 minute | 1,800 photos | 1,440 photos | ~2.5 hours |
| 3 minutes | 5,400 photos | 4,320 photos | ~7.5 hours |
How long is a 30-minute time-lapse? That depends on your interval. Shoot for 30 real minutes at a 5-second interval and you collect 360 photos — a 12-second clip at 30fps. Increase the interval to 10 seconds and the same 30-minute shoot produces a 6-second clip. The formula never changes; only the numbers do.
Photos for a 10-Second Timelapse?
A 10-second time-lapse at 30fps requires exactly 300 photos. At 24fps (the cinematic standard), it requires 240 photos. The formula is simple: multiply your desired clip length in seconds by your frame rate. To calculate shooting time, multiply photo count by your interval: 300 photos × 5-second interval = 1,500 seconds = 25 minutes of real-world shooting.
Step 5 — Edit and Export Footage
Once you’ve collected your photos, the editing process assembles them into a video. For beginners, three tools cover every budget:
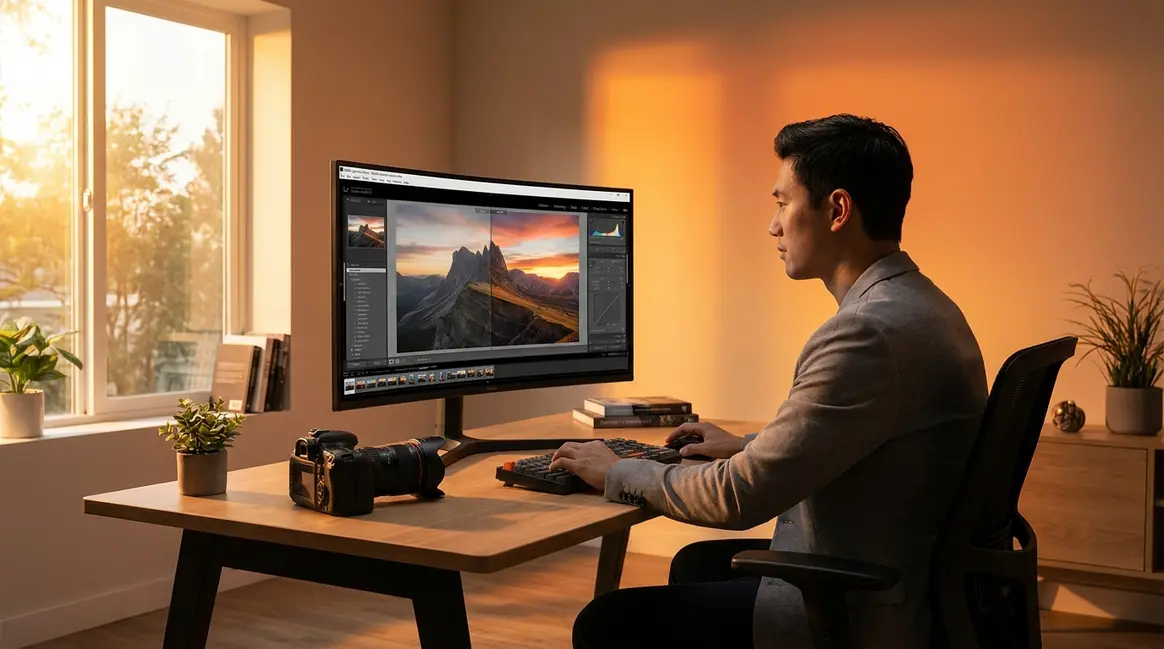
- Adobe Lightroom + Premiere Pro — Import your photo sequence, apply consistent color grading across all frames, then export as a video in Premiere. Best for DSLR shooters who want polished results.
- DaVinci Resolve (free) — Import the image sequence and use the built-in timeline to assemble and color grade. Surprisingly approachable for beginners given its professional capabilities.
- Your smartphone’s built-in app — If you shot on iPhone or Android, the time-lapse is already assembled as a video file. No editing required to start.
The most important editing step for DSLR shooters is deflicker — a process that smooths out subtle exposure variations between frames that cause an annoying strobe effect in the final video. Most editing software includes a deflicker tool, and using it transforms rough footage into a polished sequence.
What Gear Do You Need for Time-Lapse Photography?
When learning what is time lapse photography, the honest answer about equipment is: you need less gear than you think. A smartphone sitting on a stable surface is enough to shoot a compelling time-lapse tonight. That said, understanding your options helps you make smarter upgrades as your skills grow.
DSLRs, Mirrorless, and Phones
Wondering if your smartphone is sufficient or if you need a dedicated camera is the most common gear question beginners ask — and the answer is genuinely reassuring.
Smartphones are the best starting point for most beginners. Every modern iPhone and Android device has a dedicated time-lapse mode built into the native camera app. You tap one button, point the camera at your subject, and the phone handles the interval, exposure, and assembly automatically. Using these built-in modes is one of the easiest ways to take better photos with your smartphone. The results are impressive for casual shooting, social media, and learning the fundamentals.
DSLR and mirrorless cameras give you manual control over every setting — interval, shutter speed, ISO, aperture, and white balance. That control matters when you’re shooting in challenging light (golden hour, night sky) or want to produce footage for professional or broadcast use. Most modern DSLRs and mirrorless cameras include a built-in intervalometer; older models require an external one.
Action cameras (like GoPro) work well for wide-angle outdoor scenes and are weatherproof — a genuine advantage when shooting storms or coastal time-lapses in unpredictable conditions.
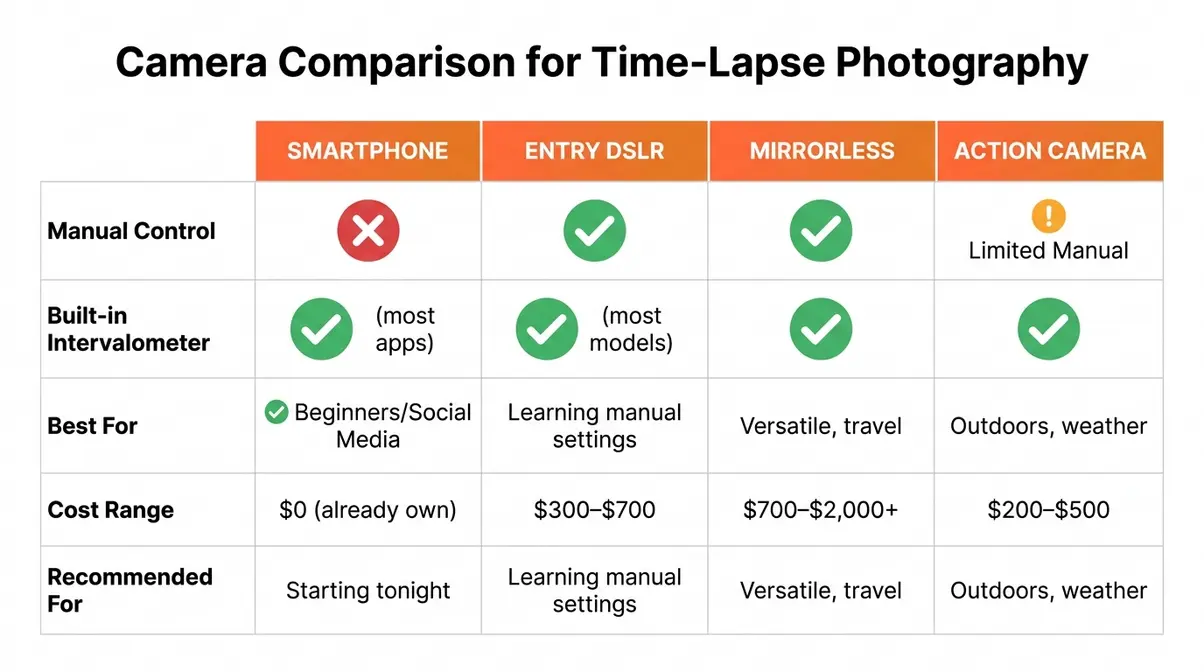
| Camera Type | Best For | Manual Control | Built-in Intervalometer | Cost Range |
|---|---|---|---|---|
| Smartphone | Beginners, social media | No (auto mode) | Yes (automatic) | $0 (already own) |
| Entry DSLR | Learning manual settings | Yes | Most models | $300–$700 |
| Mirrorless | Versatile, travel | Yes | Yes | $700–$2,000+ |
| Action Camera | Outdoors, weather | Limited | Yes | $200–$500 |
Tripods and Essential Gear
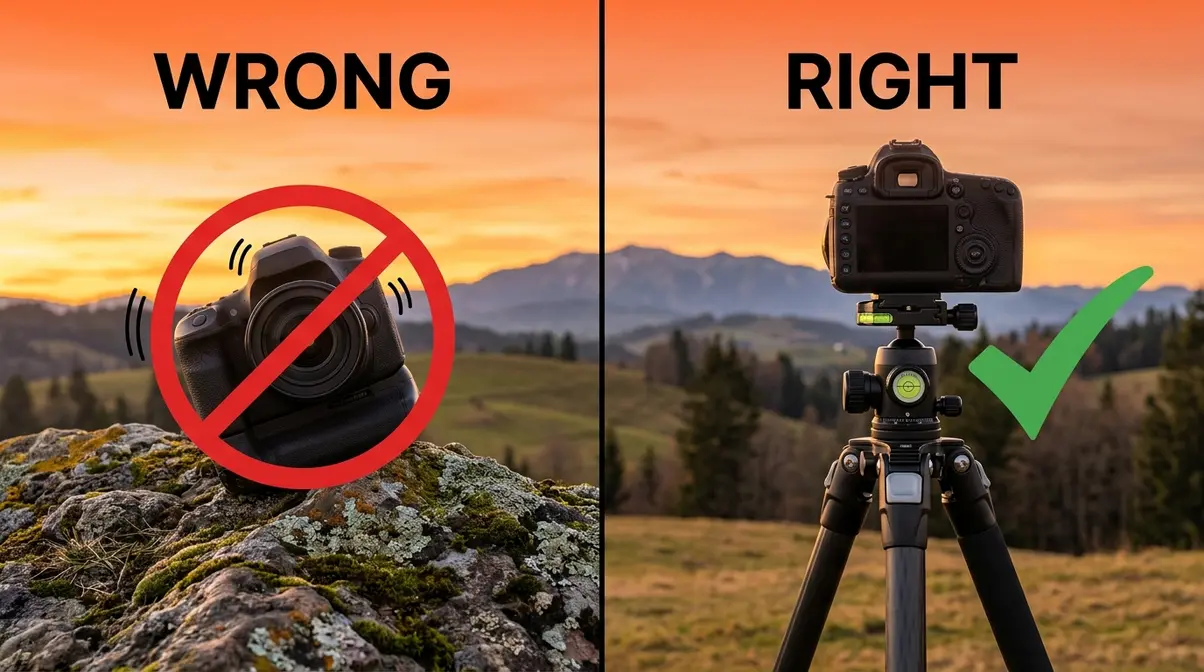
A stable camera is the single most important factor in a clean time-lapse. Even a 1mm vibration between frames creates a distracting shimmy in the final video. A basic tripod costing $30–$50 eliminates this problem entirely. If you’re wondering about a tripod vs monopod, a tripod is strictly required for this technique.
Essential accessories:
- Tripod — Non-negotiable. Any tripod is better than no tripod. Ball-head tripods are convenient for quick setup; pan-tilt heads give more precise positioning.
- Intervalometer — An external intervalometer (a timer device that automatically triggers your camera at set intervals) is needed for older DSLRs without a built-in timer. Expect to pay $20–$50 for a reliable wired version.
- Extra batteries or power bank — A 2-hour outdoor shoot can exhaust two full battery charges. Pack spares or use a USB power bank with a compatible cable.
- Large-capacity memory card — A 2-hour shoot at 3-second intervals generates 2,400 photos. A 64GB card handles this comfortably in RAW format; a 32GB card works for JPEG.
- ND filter (optional) — A neutral density filter reduces the amount of light entering the lens in bright daylight, allowing you to use slower shutter speeds and achieve the motion blur that makes time-lapse footage look smooth and cinematic.
According to Masterclass, having the right accessories — particularly a sturdy tripod — makes a more significant difference to final video quality than the camera brand or model you’re using.
Mobile Duration Math Explained
This is the question that almost no photography guide answers clearly: how long is 1 minute in time-lapse on an iPhone? The answer requires understanding how Apple’s Time-Lapse mode actually works.
How iPhone Time-Lapse works: Unlike a manual DSLR setup where you set a fixed interval, Apple’s native Time-Lapse mode uses a dynamic, adaptive capture rate. According to Apple Support documentation, the iPhone automatically adjusts how frequently it captures frames based on the total recording duration. The longer you record, the less frequently the phone captures frames — this keeps the final video at a consistent, watchable length.
iPhone Time-Lapse duration reference table:
| Real Recording Time | Approx. Output Video Length | Auto Capture Rate |
|---|---|---|
| 1 minute | ~2–3 seconds | ~1 frame/2 sec |
| 10 minutes | ~10–14 seconds | ~1 frame/4 sec |
| 20 minutes | ~20–25 seconds | ~1 frame/4 sec |
| 30 minutes | ~25–35 seconds | ~1 frame/4–8 sec |
| 1 hour | ~40–50 seconds | ~1 frame/8 sec |
| 3+ hours | ~60–90 seconds | ~1 frame/15+ sec |
Note: Apple’s exact algorithm is proprietary and varies slightly by iOS version and device model. These figures reflect community-tested averages across iOS 16–18 (Apple Support, 2026). For precise control over output length, use a third-party app like Lapse It or Framelapse that lets you set a fixed interval manually.
How long is a 20-second iPhone time-lapse in real time? Working backwards from the table: a 20–25 second iPhone time-lapse represents roughly 20 minutes of real-world recording. If your video feels too short, record for longer — Apple’s algorithm will keep the output at a similar length regardless, so longer recording time is almost always better.
Android users: Most Android phones (Samsung, Google Pixel) offer a manual interval selector inside the Pro Video or dedicated time-lapse mode, giving you more direct control than iOS. Apps like Framelapse (Android) offer full manual interval control for precise duration planning.
1 Minute on iPhone Time-Lapse?
On iPhone, 1 real minute of Time-Lapse recording produces approximately 2–4 seconds of final video, depending on your iOS version and device. Apple’s Time-Lapse mode uses an adaptive capture rate — the iPhone automatically captures frames less frequently as total recording time increases, keeping the output video at a consistent, watchable length. For a 20–30 second output video, plan to record for at least 20–30 minutes of real time (Apple Support, 2026). For precise interval control, use a third-party app like Lapse It.
What Can You Capture with Time-Lapse Photography?
Time-lapse photography works on almost any subject where slow change is happening around you. The six scenarios below cover the most popular starting points — each with specific interval settings you can use immediately.
Nature: Clouds, Sunsets, Storms
Weather is the most popular time-lapse subject for good reason: it’s free, it’s always changing, and even an average cloud sequence looks stunning when compressed to 20 seconds. Photographers consistently find that weather subjects are the most forgiving for beginners — small interval errors are invisible because clouds are always moving unpredictably anyway. These sequences pair beautifully with standard tips for better nature photography.
Three essential nature scenarios:
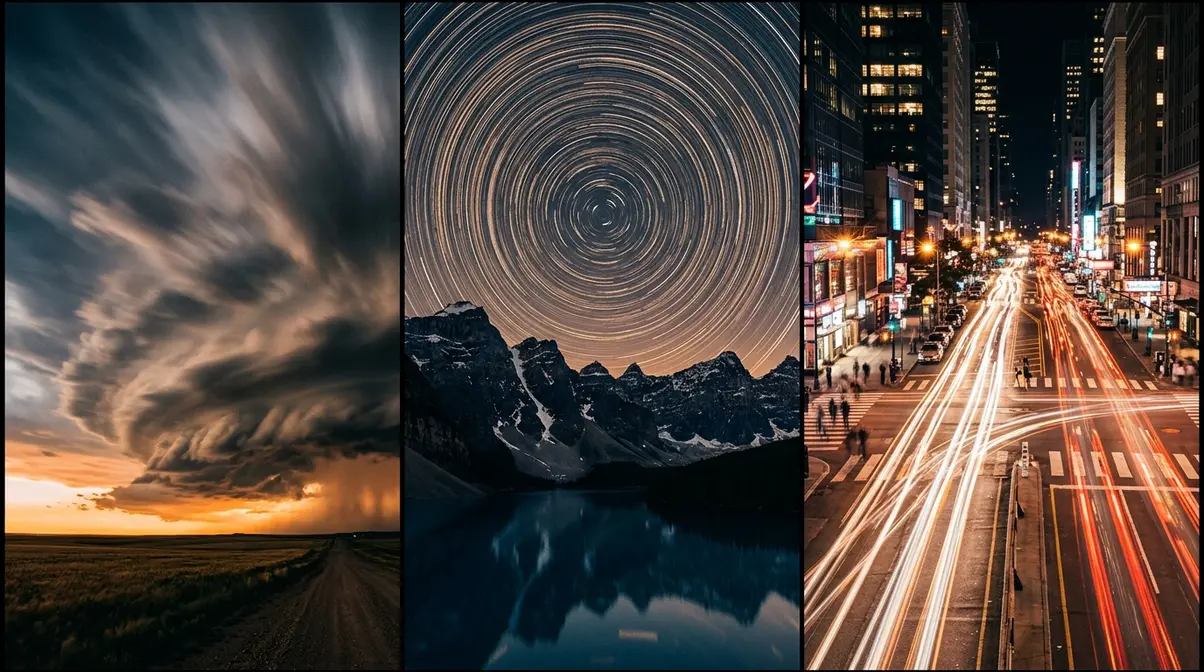
Clouds and storm systems (2–5 second interval): Position your camera facing a wide open sky with a strong foreground element — a tree line, a mountain ridge, a city skyline. Shoot for at least 45 minutes. The drama builds as cloud formations evolve and light shifts across the frame.
Sunset and sunrise — the “holy grail” transition (5–10 second interval): The most technically challenging nature time-lapse is the holy grail — a continuous sequence that transitions from full daylight through golden hour into darkness without flickering or sudden exposure jumps. This requires slowly adjusting exposure throughout the shoot (or using an automated ramping intervalometer). For a first attempt, shoot just the golden hour window (30 minutes before to 15 minutes after sunset) at a fixed 8-second interval.
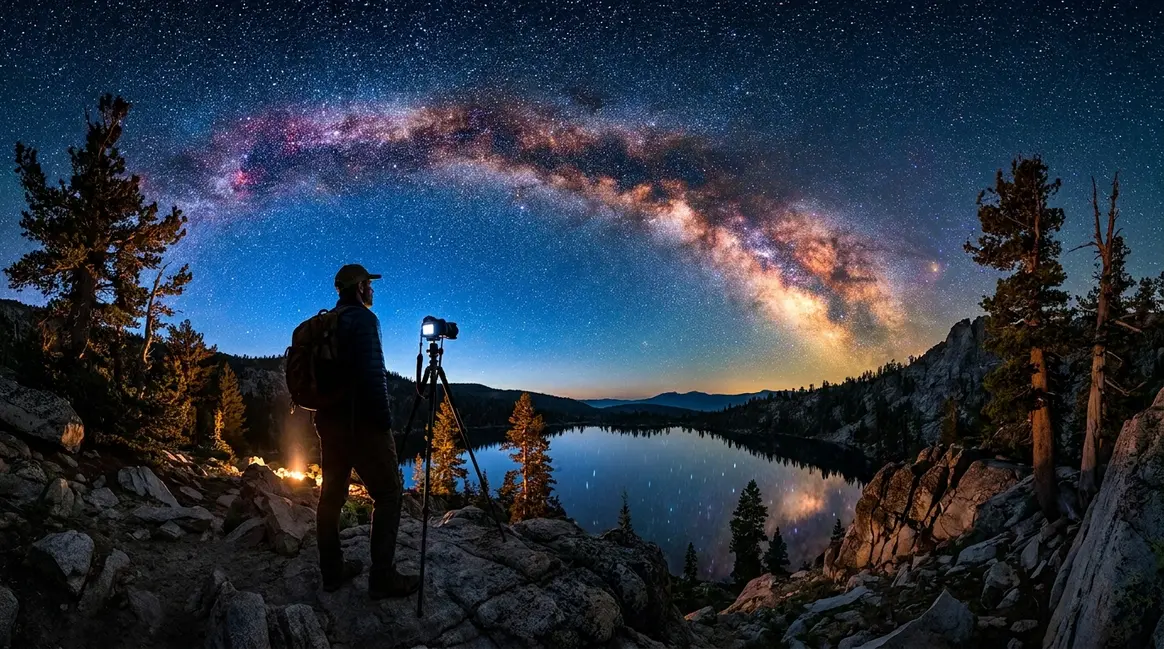
Stars and Milky Way (15–25 second interval): Night sky time-lapse requires a dark location away from city light pollution, a wide-angle lens at its widest aperture, and patience. Set ISO to 1600–3200, aperture to f/2.8 or wider, and a 20-second interval. Shoot for 3–4 hours minimum. The result — stars arcing across the sky as the Earth rotates — is among the most dramatic subjects available to any photographer.
Urban and Creative Subjects
City environments offer some of the most visually compelling time-lapse material available — and you can shoot them from a window, a rooftop, or any elevated public vantage point.
Busy intersections and pedestrian crowds (1–3 second interval): The classic “people become ghosts” effect happens when foot traffic is dense enough that individual people blur into flowing streams. Use a 1–2 second interval at a busy crosswalk during peak hours. The key is finding a camera position slightly elevated above eye level — looking slightly down at the scene creates a cleaner composition.
City traffic at night (2–4 second interval): Car headlights and tail lights trace glowing lines through the frame when captured with a slightly longer shutter speed (1/4 to 1/2 second). Position your camera on a bridge or elevated walkway overlooking a busy road. The light trails create a dynamic, almost abstract result that works beautifully even with a smartphone.
Person time-lapse and personal projects: A growing creative trend involves documenting personal change over time — daily self-portraits assembled into a year-long sequence, a garden growing through the seasons, or a home renovation from empty rooms to finished space. These long-term time-lapse photography projects require nothing more than a consistent camera position, a fixed interval (once daily or once weekly), and patience. Person time-lapse projects are excellent creative photography ideas to try at home.
Scientific and Long-Term Uses
Beyond creative photography, time-lapse has become an indispensable scientific tool — and understanding these applications reveals just how powerful controlled time compression can be.
IVF embryo monitoring: In fertility medicine, time-lapse imaging systems photograph developing embryos every 5–20 minutes inside incubators, allowing embryologists to observe cell division patterns without disturbing the culture environment. Research published via NIH/PubMed indicates that continuous time-lapse monitoring of embryo development can improve embryo selection accuracy in IVF procedures by providing developmental data that static observation cannot capture (NIH, 2026).
NASA environmental monitoring: NASA’s Earth Observatory uses satellite-based time-lapse imaging to document large-scale environmental changes — glacial retreat, deforestation, urban expansion, and seasonal vegetation cycles — over periods spanning decades. These sequences compress years of planetary change into seconds of video, making abstract environmental data viscerally understandable to the public.
Construction and architecture (15–60 minute interval): A camera mounted on a nearby building and set to fire once every 15–60 minutes can document a construction project from groundbreaking to completion. These sequences are now standard deliverables in commercial construction photography, giving clients and stakeholders a compelling visual record of their project.
The breadth of time-lapse photography applications — from a beginner’s first cloud sequence to a NASA satellite array — underscores why the technique has remained relevant for over a century.
Common Time-Lapse Mistakes (and How to Fix Them)
Every beginner makes these errors. Knowing them in advance means you can avoid them entirely — or at least recognize what went wrong when you review your first footage. While there are many common photography mistakes, time-lapse has its own specific pitfalls.
Common Mistakes in Timelapse?
The five most common time-lapse mistakes are: (1) camera movement from an unstable tripod — the single biggest cause of ruined footage; (2) auto exposure or auto white balance flickering between frames; (3) choosing the wrong interval (too long makes footage race past; too short means hours of shooting for seconds of video); (4) running out of battery or storage mid-shoot; and (5) leaving autofocus enabled, which causes subtle focus hunting between frames. Shooting in Manual mode with manual focus solves three of these five errors simultaneously.
Here is a deeper look at how to avoid them:
1. Camera movement between frames (the #1 killer)
Even a slight bump to your tripod mid-shoot creates a jarring jump in the final video. Lock your tripod legs, avoid touching the camera once you start, use a remote shutter release or self-timer for the first frame, and if you’re shooting outdoors, check that your tripod isn’t on soft ground that can slowly sink. Photographers consistently report that unstable mounting is responsible for more ruined time-lapses than any incorrect setting.
2. Auto exposure and auto white balance flickering
If your camera’s exposure or white balance changes automatically between frames — even slightly — the final video will strobe and flicker annoyingly. The fix is to shoot in Manual mode with a fixed white balance. For situations where the light changes dramatically (like a sunset), use a technique called exposure ramping or invest in an intervalometer with built-in ramping support. According to Reuters Institute research on visual media consistency, flickering in time-lapse footage is primarily caused by automatic exposure variation rather than lens or sensor quality.
3. Choosing the wrong interval
Too long an interval and your footage races past in seconds, feeling jerky and disconnected. Too short and you shoot for hours to produce a few seconds of footage. Use The Interval Ladder as your starting guide: fast subjects (clouds, crowds) at 2–5 seconds; slow subjects (stars, sunsets) at 10–25 seconds. When in doubt, choose a shorter interval — you can always speed up footage in editing, but you can’t add frames that weren’t captured.
4. Running out of battery or storage mid-shoot
There are few things more frustrating than reviewing a 3-hour night sky shoot only to discover the camera died at the 90-minute mark. Always start with a fully charged battery (or a USB power cable), carry a spare, and verify your memory card has ample space before you begin. A 2-hour shoot at a 3-second interval generates approximately 2,400 photos — at least 8–12GB in RAW format.
5. Forgetting to switch off autofocus
Autofocus can “hunt” between shots — slightly adjusting focus as it re-evaluates the scene — which creates a subtle in-and-out blur effect across your sequence. Switch to manual focus, set it on your subject before you begin, and tape the focus ring in place if you’re shooting in conditions where accidental bumps are likely.
A Short History of Time-Lapse
The story of time-lapse photography is a thread that runs from the earliest days of cinema to the smartphone in your pocket. Georges Méliès, the French filmmaker, is credited with discovering the foundational principle around 1896 — his camera stopped mid-shot, and when he reviewed the footage, objects appeared to teleport. That “stop trick” evolved into deliberate frame-by-frame photography of slow natural processes.
By the mid-20th century, time-lapse had become a staple of nature documentaries. The BBC’s Life series and National Geographic productions brought time-lapse sequences of blooming flowers, hatching eggs, and decomposing organisms into living rooms worldwide — turning a technical photographic tool into a shared cultural experience.
The digital revolution removed the barriers of film cost and processing time. Consumer DSLRs with built-in intervalometers arrived in the 2000s. Then smartphone time-lapse modes arrived, and the technique became genuinely accessible to anyone. Today, time-lapse sequences are a standard feature of social media content, architectural photography, scientific research, and broadcast journalism — a remarkable journey from a French filmmaker’s broken camera to a tap on your iPhone screen.
Frequently Asked Questions
How long is a 30-minute time-lapse?
A 30-minute time-lapse produces different video lengths depending on your interval setting. At a 5-second interval, 30 minutes generates 360 photos — a 12-second clip at 30fps. At a 10-second interval, the same 30-minute shoot produces only 180 photos — a 6-second clip. The formula is: real time (seconds) ÷ interval × (1 ÷ fps). For most cloud or sunset sequences, a 5–8 second interval produces a satisfying 10–20 second final video from a 30-minute shoot.
Meaning of Time-Lapse Photography
Time-lapse photography is a technique that captures still images at regular intervals and plays them back as a video at normal speed, making time appear to move faster than in real life. Because images are recorded more slowly than they’re played back, a 2-hour sunset compresses into 10 seconds. The technique makes slow natural processes — cloud formation, plant growth, construction — visible in a way that real-time observation cannot.
How long is 1 second in timelapse?
One second of final time-lapse video represents a span of real time determined by your interval and frame rate. At 30fps with a 5-second interval, each second of video represents 150 seconds (2.5 minutes) of real time. At 30fps with a 10-second interval, each second of video represents 300 seconds (5 minutes) of real time. The formula: 1 video second = interval × fps. Longer intervals compress more real time into each second of footage.
How Long to Shoot a Time-Lapse?
Shooting time depends entirely on your subject and the final video length you want. A 10-second clip at 30fps requires 300 photos. At a 5-second interval, that’s 25 minutes of shooting. At a 10-second interval, it’s 50 minutes. For most beginners, plan on a minimum 30–60 minute session for clouds or city scenes, 1–2 hours for a sunset sequence, and 3–6 hours for a compelling star trail sequence.
20-Second iPhone Timelapse?
A 20-second iPhone Time-Lapse output video represents approximately 15–25 minutes of real-world recording time. Apple’s adaptive algorithm captures frames more frequently at the start and less frequently as recording continues. This means a 20-minute recording and a 25-minute recording may produce similar output lengths. To reliably get a 20-second result, record for at least 20 minutes — longer recordings give the algorithm more material to work with and typically produce smoother, more cinematic results (Apple Support, 2026).
Do I need an ND filter for time-lapse?
While not strictly required, an ND (Neutral Density) filter is highly recommended for daytime time-lapse photography. It acts like sunglasses for your lens, allowing you to use slower shutter speeds even in bright sunlight. This introduces natural motion blur to moving subjects like clouds or water, making the final video look smooth and cinematic rather than choppy.
Does time-lapse drain camera battery quickly?
Yes, shooting a time-lapse drains camera batteries significantly faster than normal photography. Because the camera’s sensor, processor, and screen are continuously active for hours, a standard DSLR or mirrorless battery may only last 90 to 120 minutes. For longer sequences, photographers use external power banks or dummy batteries connected to AC power.
Can you shoot a time-lapse without a tripod?
Shooting a standard time-lapse without a tripod is virtually impossible if you want a smooth, professional result. Even resting the camera on a rock or bag leaves it vulnerable to micro-movements from wind or the shutter mechanism. Any shift between frames will cause the final video to jitter violently. A stable tripod is the single most important piece of gear for this technique.
Putting It All Together
For anyone curious about what is time lapse photography, the core technique comes down to three numbers you control: the interval between shots, the total number of photos you collect, and the frame rate at which you play them back. Get those three numbers right, and the technique works every time — whether you’re using a $1,500 mirrorless camera or the phone in your pocket.
The Interval Ladder is the framework that makes the interval decision simple: match your interval to your subject’s speed, and you’ll rarely go wrong. Fast subjects (clouds, crowds) sit at the bottom of the ladder with 1–5 second intervals. Slow subjects (stars, construction, plant growth) sit at the top with intervals measured in minutes or even hours. Every scenario in between finds its place on the rungs.
Start tonight. Point your phone at a window with a view of the sky, tap Time-Lapse, and let it run for 30 minutes. Review the result. Then adjust your interval, change your subject, and try again. The best time-lapse photographers in the world describe their early work the same way — as an unplanned experiment that surprised them. Yours can too. For deeper dives into specific techniques, explore related guides on long exposure photography and basic camera settings.

Dave King
Hi, I'm Dave, the founder of Amateur Photographer Guide. I created this site to help beginner and hobbyist photographers build their skills and grow their passion. Here, you’ll find easy-to-follow tutorials, gear recommendations, and honest advice to make photography more accessible, enjoyable, and rewarding.