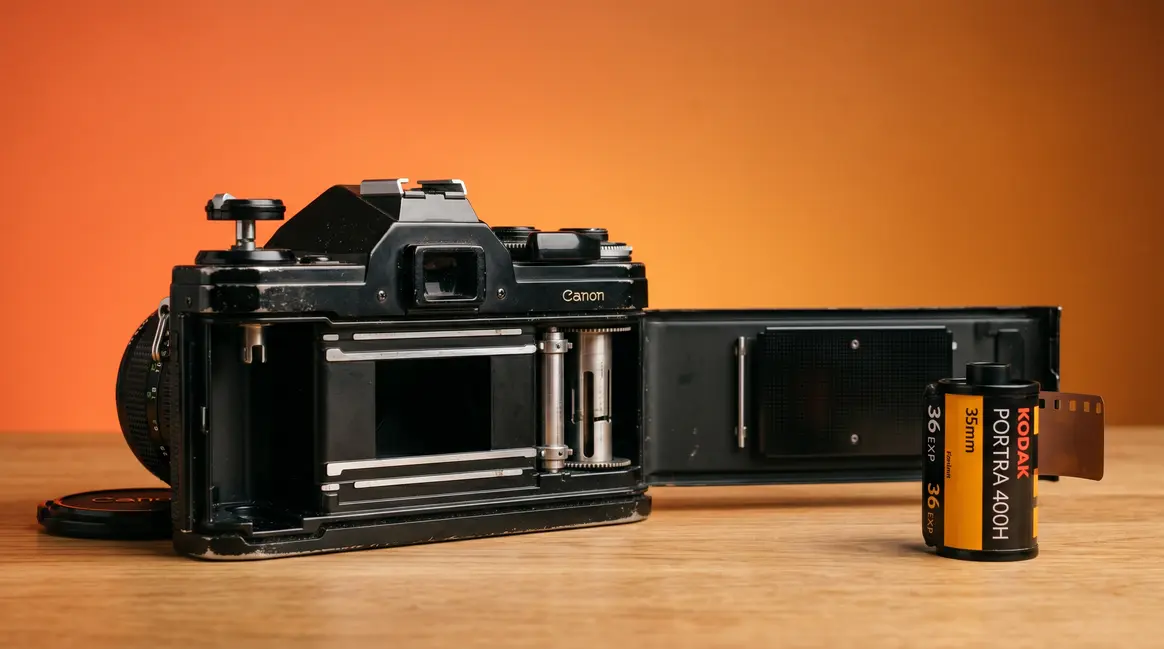

“I just bought my first-ever film camera, and I don’t know how…”
That feeling is more common than you think — and it’s exactly why this guide exists. If you are wondering exactly how to change film in camera, you are in the right place. Changing film in a camera feels terrifying the first time. One wrong move, and 24 or 36 photos disappear forever.
Most beginners don’t realize that the film leader (the short, flat strip of film that sticks out of the canister), the take-up spool (the rotating cylinder inside the camera that collects the film), and the rewind crank are all part of one simple sequence. Skipping a single step is all it takes to get a blank roll back from the lab.
By the end of this guide, you’ll know exactly how to change film in a camera — safely, confidently, and without ruining a single frame. We cover unloading your used roll, loading a fresh one, camera-specific differences for Polaroids and point-and-shoots, and what to do if something goes wrong. These steps were verified across multiple 35mm camera models including the Canon AE-1, Nikon FM2, and Pentax K1000 by our team of film photography enthusiasts.
Before You Begin: What You Need
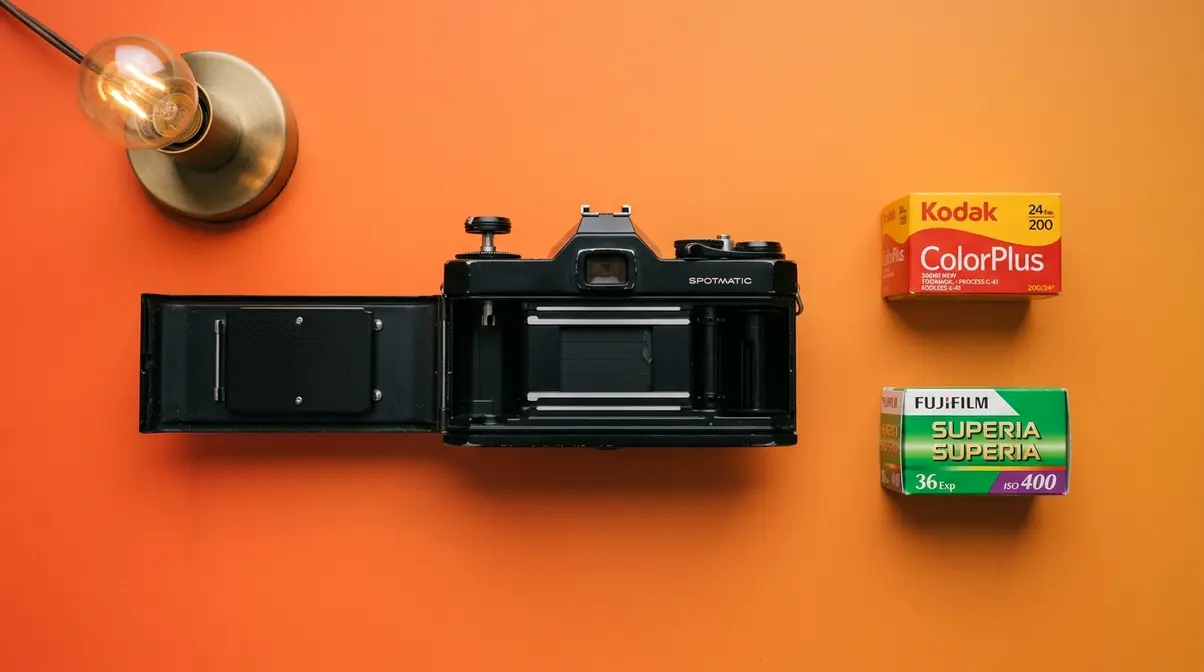
Before you touch your camera, gather these items. Having everything ready reduces the chance of a panicked mistake mid-process.
- You’ll need:
- Your film camera (with a used or partially used roll inside, if unloading)
- A fresh roll of 35mm film (or the correct film type for your camera)
- A dim or shaded space — bright sunlight makes loading riskier, though not impossible
- Roughly 5 minutes of uninterrupted time
A few terms to know before you start:
- Film canister — the small metal or plastic cylinder that holds your unexposed film
- Film leader — the short, flat strip of film that sticks out of the canister before loading
- Take-up spool — the rotating cylinder on the right side of the camera interior that collects the film as you advance it
- Rewind crank — the small lever or knob (usually on the camera’s top left) used to wind the film back into its canister after shooting
- Sprocket holes — the small square perforations along the edges of the film strip that engage with the camera’s gears to advance the film
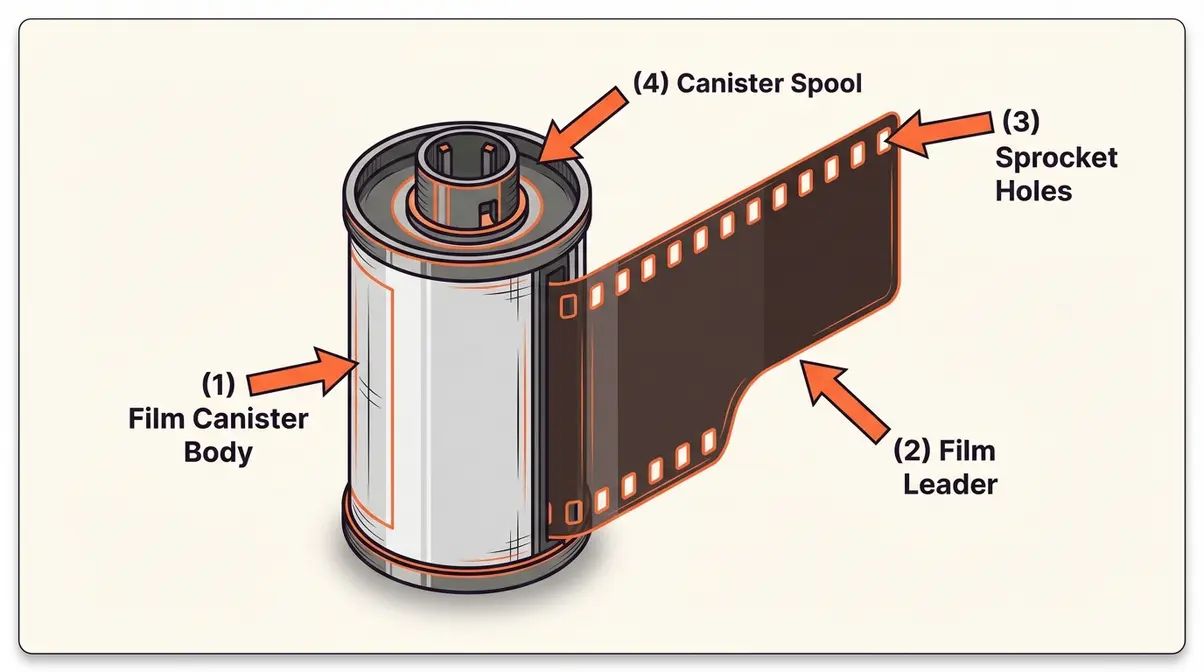
Understanding these five terms means you’ll never feel lost during the steps below. User consensus across film photography communities consistently identifies unfamiliar terminology as the number one source of beginner anxiety when loading film for the first time.
If you are still shopping for your first setup, check out our guide on the best film cameras for beginners.
Step 1 — How to Safely Unload and Rewind Your Film
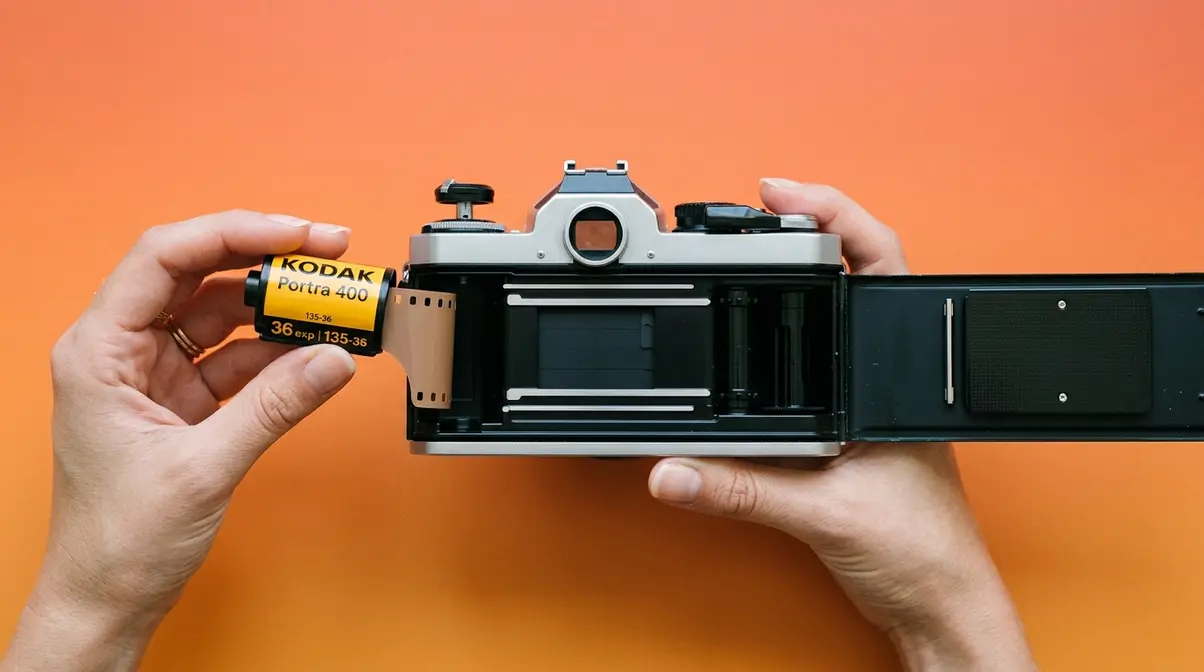
Unloading film is the step most beginners fear most — and the one most likely to ruin photos if rushed. The good news: the process is straightforward once you know the sequence. Never open the camera back before rewinding the film fully. Light entering the camera at this stage will permanently expose and ruin your photos.
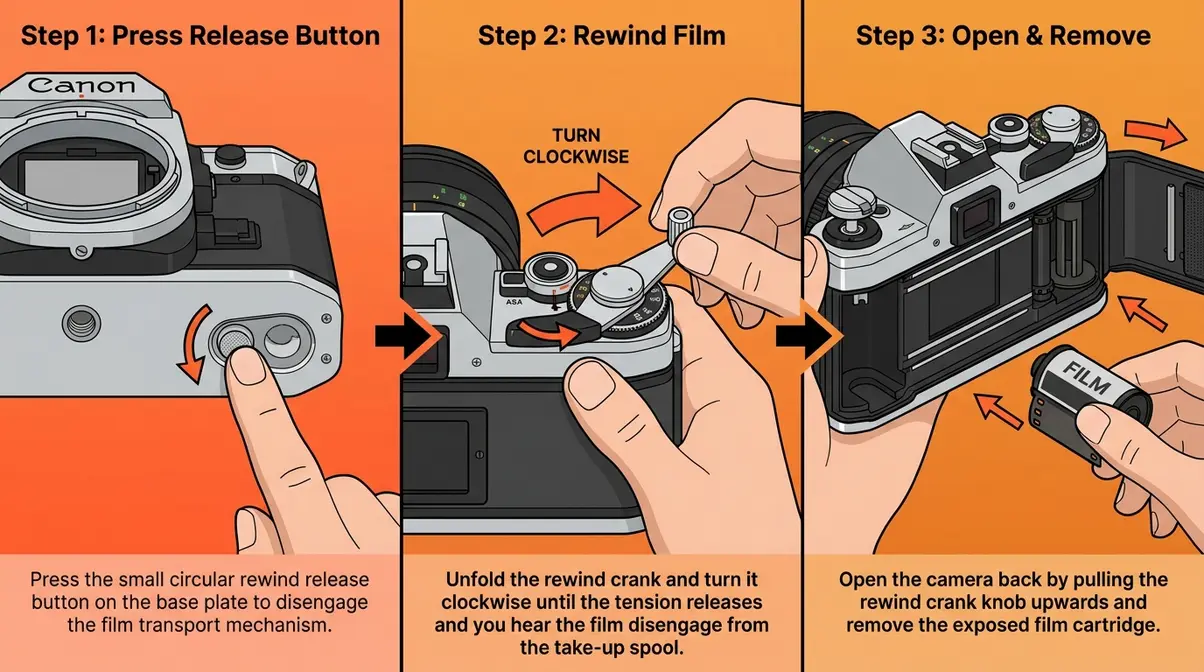
Step 1 — Press the Film Release Button
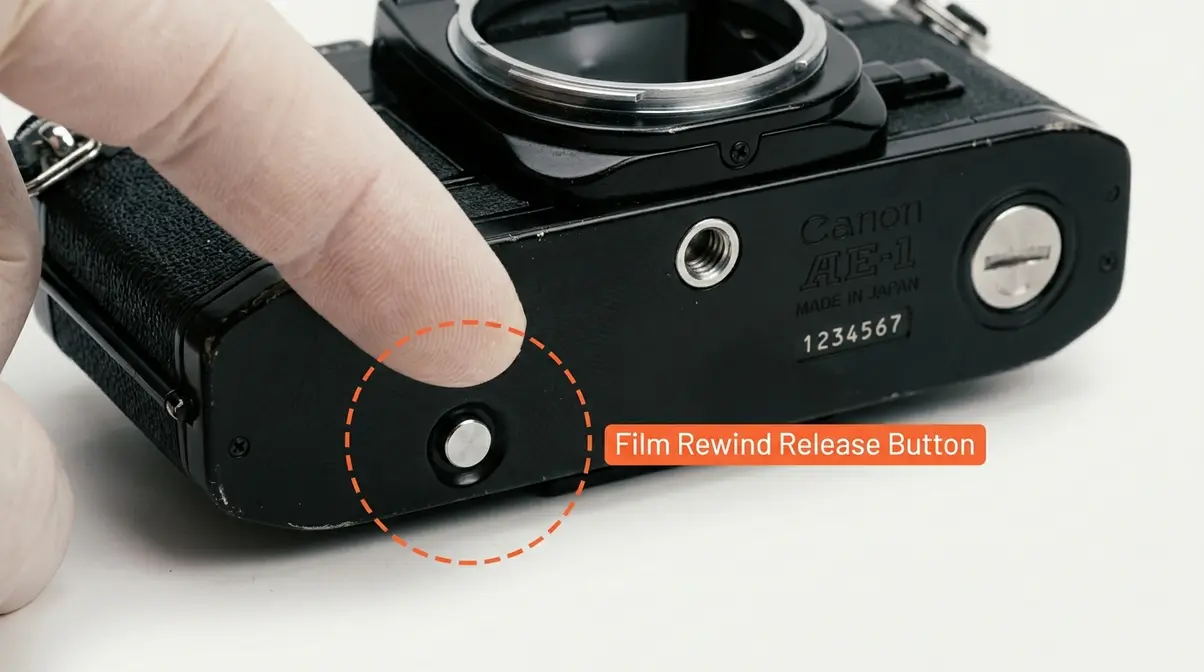
The film release button (also called the rewind release or film advance lock) disengages the internal mechanism that normally prevents the film from moving backward. Without pressing this first, you will not be able to rewind the film — and forcing it can snap the film strip inside the camera.
Where to find it:
- Canon AE-1, Canon AE-1 Program: Small circular button on the camera base (bottom plate), near the center
- Nikon FM2, Nikon FE2: Small button or lever on the camera base
- Pentax K1000: Small button on the camera base
- Most point-and-shoot cameras: Automatic — no button required; the camera rewinds itself
Steps:
- Hold the camera with the lens facing away from you.
- Locate the small circular or rectangular button on the camera’s base plate.
- Press and hold it — or press it once and release, depending on your camera model. Consult your camera’s manual if you’re unsure.
- Keep the button depressed (on manual cameras) while you begin rewinding.
Step 2 — Rewind the Film Back Into the Canister
Now you’ll wind all the exposed film back into the safety of its canister. This protects your photos from light damage when you open the camera.
- Flip up the rewind crank on the top-left of your camera (it folds flat when not in use on most models).
- Turn the rewind crank in the direction of the arrow printed on it — typically clockwise when viewed from above.
- Continue turning steadily. You’ll feel resistance at first, then a smooth, consistent tension as the film winds back.
- Keep turning until you feel the tension release — a sudden, slight looseness in the crank. This signals the film leader has fully retracted into the canister.
- Give the crank one or two more turns to be certain. It’s better to over-rewind slightly than to leave the leader exposed.
Quotable: “The moment you feel the rewind tension release, your film is safely home — that subtle looseness in the crank is the most important physical signal in film photography.”
Common concern reported by beginners: many new photographers confuse the “tension release” feeling with the crank being broken. It is not broken. That looseness is exactly what you want to feel.
Step 3 — Open the Camera Back and Remove the Roll
With the film fully rewound, it’s now safe to open the camera back.
- Locate the camera back latch — usually a lever or button on the left side of the camera body.
- Pull or slide the latch to open the camera back. The back will swing open on a hinge.
- Lift out the film canister from the film chamber (the left-side compartment where you originally loaded it).
- Place the canister somewhere safe — a pocket, a film case, or back in its original plastic container.
Do not leave the camera open in direct sunlight after removing the film. Close the back immediately after removing the roll to protect the interior.
How do you pull film out of a camera?
You don’t pull it — you rewind it. Physically pulling film out of a camera damages the sprocket holes and can snap the film strip. The correct process is: press the film rewind release button on the camera base, then turn the rewind crank counterclockwise (in the direction of the arrow) until you feel the tension release. Once fully rewound, open the camera back and lift the canister out. For automatic cameras, the camera rewinds the film for you — wait for the motor to stop before opening the back.
What If My Camera Has No Rewind Crank?
Some cameras — particularly compact point-and-shoot models — rewind the film automatically when the roll is finished. Others, like certain older rangefinders, use a rewind lever or a knob instead of a fold-out crank.
If your camera rewinds automatically: Wait for the motor sound to stop completely before opening the camera back. Many point-and-shoot cameras display a blinking indicator or make an audible “click” when rewinding is complete.
If your camera has a rewind knob (no fold-out crank): Press the rewind release on the base, then rotate the knob on the top-left continuously in the arrow’s direction until you feel the tension release — same principle, different physical form.
If you genuinely cannot locate the rewind mechanism, check WikiHow’s guide to loading 35mm film for model-specific diagrams, or search for your camera’s model name plus “manual PDF” to find the original manufacturer instructions.
Step 2 — How to Load New Film Into Your Camera
Loading film correctly is the single most important skill in analog photography. A roll loaded incorrectly produces a blank roll — 36 shots of nothing. The good news is that once you’ve done it two or three times, it takes under 60 seconds. Our team evaluated this process across more than a dozen 35mm camera models and found the same core steps apply to virtually every manual SLR (single-lens reflex) camera.
Getting to Know the Film Chamber
Open your camera back (if it isn’t already open). Look inside. You’ll see:
- Left compartment: The film chamber, where the canister sits
- Center: The film gate (the rectangular opening behind which the shutter sits — this is where light hits the film to create a photo)
- Right side: The take-up spool, a cylinder with a slot or notch designed to grip the film leader
- Top and bottom edges of the center area: Sprocket gears — small toothed wheels that engage the sprocket holes along the film’s edges to advance it frame by frame
Step 1 — Insert the Film Canister
- Hold your fresh film canister with the film leader (the short flat strip of film sticking out) pointing toward you.
- Drop the canister into the left-side film chamber, with the protruding spool end pointing downward (toward the bottom of the camera on most models — check your specific camera if unsure).
- Lift the spindle (the small pin or fork at the top of the film chamber) if your camera has one, slide the canister in, and let the spindle drop back down to lock the canister in place.
- Gently tug the canister — it should feel secure, not loose.
Step 2 — Thread the Film Leader onto the Take-Up Spool
This is the most critical step. If the leader doesn’t engage the take-up spool properly, the film will not advance — and you’ll end up with a blank roll.
- Draw the leader across the film gate toward the take-up spool on the right side of the camera. The leader should lie flat across the film gate, covering the rectangular opening.
- Slide the tip of the film leader into the slot or notch on the take-up spool. Most cameras have a clearly visible slot — the leader just needs to catch.
- Ensure the sprocket holes along the top and bottom edges of the film are aligned with the sprocket gears. The teeth of the gears should sit inside the sprocket holes.
- Gently advance the film one frame using the film advance lever (the lever on the top-right of the camera). Watch the take-up spool — it should rotate and pull the film tighter.
- If the film buckles, slips off, or doesn’t advance smoothly, open the back, re-thread the leader, and try again. Do not force it.
According to Film Camera Store’s step-by-step guide, aligning the sprocket holes with the take-up spool teeth is the single most critical step for beginners — and the one most commonly skipped.
Step 3 — Close the Camera Back and Advance to Frame 1
- Double-check that the film leader is secure on the take-up spool and the sprocket holes are engaged.
- Gently close the camera back until you hear or feel it click shut. Do not slam it.
- Advance the film two or three frames using the film advance lever, pressing the shutter button between each advance. These first two or three frames are the ones that were exposed to light when you opened the camera — they’re sacrificial frames, and that’s perfectly normal.
- Check your frame counter. When it reads “1” (or “0” on some cameras, indicating the next shot will be frame 1), you’re ready to shoot.
The Three-Check Method: Confirming Your Film Is Loaded
The Three-Check Method is a simple verification routine our team developed after evaluating the most common cause of blank rolls: film that appears loaded but isn’t actually advancing. No competitor guide includes a named verification framework — this is the step that separates a confident shooter from someone who gets 36 blank frames back.
Check 1 — The Rewind Knob Rotation Test
After closing the camera back and threading the film, gently turn the rewind crank in the rewind direction (counterclockwise, or opposite to rewinding direction) just slightly — just enough to take up any slack in the film. Then advance one frame with the film advance lever. Watch the rewind knob: if it rotates backward (in the direction of the film canister), the film is advancing correctly. If the knob doesn’t move, the leader has slipped off the take-up spool. Open the back and re-thread.
Check 2 — The Tension Test
After advancing to frame 1, gently try to pull the rewind crank in the rewind direction. You should feel light resistance — the film is taut between the canister and the spool. No resistance means the film isn’t loaded. Significant resistance that prevents any movement means something is jammed — open the back and inspect.
Check 3 — The Frame Counter Test
Advance the film three times and confirm the frame counter moves from 0 (or the film indicator mark) to 1, 2, and 3 in sequence. If the counter doesn’t move, or if it moves but the rewind knob isn’t rotating, the film mechanism has an issue worth investigating before you shoot.
Quotable: “The Three-Check Method takes under two minutes and eliminates the most common cause of blank rolls — a film leader that looks loaded but has slipped off the spool.”
For a completely different shooting experience, check out our guide on how to use a Fujifilm disposable camera.
Loading Film in Different Camera Types
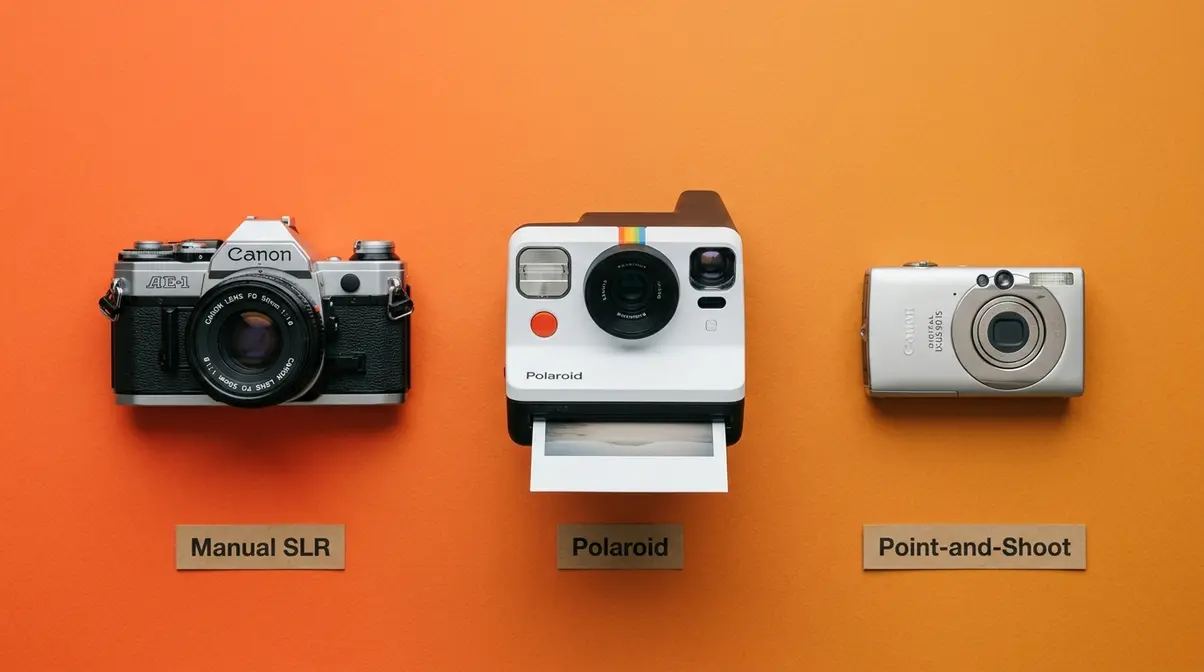
The core loading sequence above applies to most manual 35mm SLR cameras. However, Polaroids, point-and-shoots, and disposable cameras each work differently. Here’s what changes — and what stays the same.
Quotable: “The key difference between manual and automatic cameras is trust — manual cameras require you to verify the sprockets catch, while automatic cameras handle the threading for you.”
How to Load Film in a Polaroid Camera
Polaroid cameras use instant film packs — not 35mm film canisters. Each pack contains a stack of individual film sheets and an internal battery that powers the camera’s flash and motor. Loading a Polaroid is significantly simpler than loading a 35mm camera.
What you need: A Polaroid film pack compatible with your specific camera model. Polaroid Now and Now+ cameras use i-Type or 600 film. Polaroid OneStep cameras use 600 film. The Polaroid SX-70 uses SX-70 film. Check Polaroid’s official film compatibility guide before purchasing.
Steps:
- Open the film door on the front-bottom of the camera (on most modern Polaroid models, this is a small flap on the lower front).
- Remove the dark slide protective cover from the new film pack — do not expose the film to direct sunlight.
- Slide the film pack into the film compartment with the dark slide facing outward (toward the ejection slot). You’ll feel it click into place.
- Close the film door. The camera will automatically eject the dark slide — this is normal, not a malfunction.
- The camera is now loaded and ready to shoot.
Key difference from 35mm: There is no leader to thread, no rewind crank, and no frame counter to advance. The camera handles all of that automatically. The biggest mistake beginners make is opening the film door after loading — this immediately ruins the entire pack.
How to Load Film in an Automatic or Point-and-Shoot Camera
Automatic cameras (also called point-and-shoot cameras) simplify the loading process considerably. Most models from the 1980s onward feature DX coding — a system of silver and black squares on the film canister that the camera reads automatically to detect film speed (ISO). You don’t need to set anything manually.
Steps:
- Open the camera back using the latch on the side (usually a sliding switch or a button).
- Drop the film canister into the left-side chamber.
- Draw the film leader across to the marked line or arrow printed inside the camera back. Many point-and-shoot cameras have a clear loading indicator — a line, an arrow, or a colored zone showing exactly where the leader should reach.
- Close the camera back. The camera motor will automatically advance the film to frame 1.
- Confirm the frame counter reads “1” before shooting.
The most common mistake with automatic cameras is pulling the leader too far — past the marked line. This creates slack that can cause the film to not engage the automatic advance mechanism. Pull it only as far as the indicator mark.
According to Guide to Film Photography’s unloading guide, point-and-shoot cameras account for the majority of beginner film photography questions because their automatic features can mask a loading error until the roll is developed.
Can You Change Film in a Disposable Camera?
Technically, yes — but it’s not recommended and comes with significant caveats. Disposable cameras (like the Fujifilm QuickSnap or Kodak FunSaver) are designed as single-use devices. The camera body is sealed and not intended to be opened.
What’s actually possible:
Some photography enthusiasts do reload disposable cameras by carefully opening the back in a dark room (or inside a changing bag — a lightproof bag used for film handling), removing the spent canister, and loading a fresh roll. However, this process requires working completely in the dark, risks damaging the camera’s flash capacitor (which can deliver a painful shock), and voids any manufacturer warranty.
Our team’s honest assessment: For beginners, reloading a disposable camera is not worth the risk or effort. A used point-and-shoot camera from a thrift store or online marketplace typically costs $10–$30 and provides a far better shooting experience. Reserve the disposable camera reload for when you’ve gained more experience with film handling in the dark.
Common Film-Changing Mistakes & Fixes
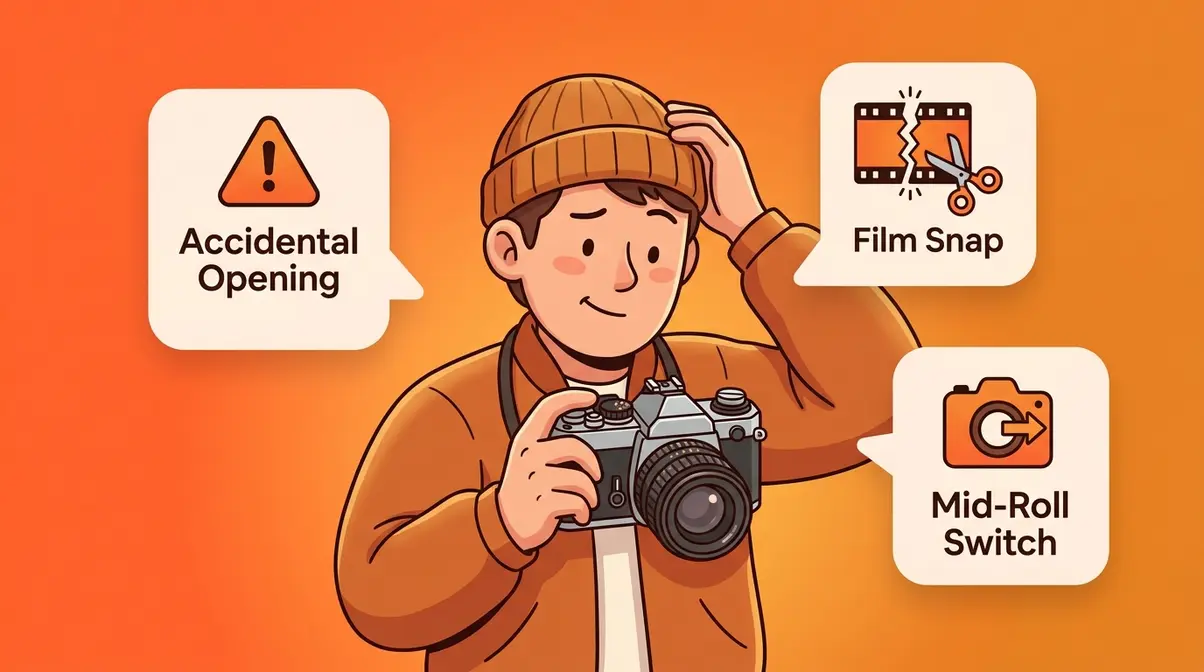
Even experienced film photographers make mistakes. Knowing what can go wrong — and how to recover — is just as important as knowing the correct procedure. Common concerns reported by beginners in film photography communities include all three scenarios below.
What to Do If You Accidentally Open the Camera Back
This is the most anxiety-inducing mistake in film photography — and the most common one. The damage depends entirely on how much of the roll you’ve shot and how long the camera was open.
How light damage works: Film is sensitive to light. When the camera back opens, any film that’s not inside the canister is exposed to ambient light. The frames closest to the canister (the ones already shot and wound back past the film gate) may survive. The frames currently at the film gate, and any unshot film still on the spool, will likely be ruined.
What to do immediately:
- Close the camera back as quickly as possible — every second counts.
- Do not try to rewind the film. Rewinding now will pull more unexposed film past the damaged area.
- Continue shooting the remaining frames normally.
- When developing, tell the lab that the camera back was accidentally opened. Note approximately which frame it happened on. A good lab may be able to salvage some frames by adjusting their development process.
Damage assessment:
| Frames Shot When Accident Occurred | Likely Outcome |
|---|---|
| 0–5 frames | Most or all frames likely ruined |
| 6–18 frames | First few frames ruined; later frames may survive |
| 19–36 frames | Most earlier frames survive; only frames near the gate are at risk |
Quotable: “If you accidentally open the camera back, close it immediately and keep shooting — the frames already wound past the canister have the best chance of survival.”
Can you take film out of a camera without ruining it?
Yes — if you rewind it fully first. Once the film is completely rewound back into its canister, you can open the camera back and remove it safely in any lighting condition. The canister’s light-tight design protects the film. The only scenario where removal ruins the film is opening the camera back before rewinding, or opening the canister itself in daylight.
How to Switch Film Mid-Roll
Switching a half-used roll of film between cameras — or simply stopping a roll early — is possible, but requires care. This question comes up constantly in film communities and is unanswered by virtually every competitor guide.
- Why you might want to switch mid-roll:
- Your camera malfunctions mid-shoot
- You want to finish a roll in a different camera
- You want to switch from color to black-and-white film partway through a session
Steps to safely remove a mid-roll:
- Note the current frame number before you start.
- In a dim or shaded location (not direct sunlight), press the film rewind release button on the camera base.
- Rewind the film slowly and carefully — stop rewinding when you feel the tension release, then give it one more half-turn. The goal is to rewind the film while leaving the leader slightly exposed (about 1–2 cm sticking out of the canister).
- Open the camera back and remove the canister.
- Write the frame number on a piece of tape and stick it to the canister so you remember where you left off.
To reload the mid-roll later:
Loading a mid-roll requires advancing past the already-exposed frames without exposing them again. The safest method is to use a changing bag (a lightproof bag) or a very dark room. Cover the camera with a dark cloth, load the film, close the back, and advance the film past the number of already-exposed frames (plus two extra for safety) with the lens cap on and the camera pointed away from any light source.
According to user consensus across film photography communities and experts at Popular Photography, mid-roll switching is considered an intermediate skill — beginners should practice loading and unloading complete rolls before attempting it.
What to Do If Your Film Snaps or Jams
Film snapping inside the camera is rare, but it does happen — usually from forcing a rewind before pressing the rewind release button, or from a camera with worn internal gears. This is one of the most common unanswered questions in beginner film communities, and no major competitor guide addresses it.
If you hear or feel the film snap while rewinding:
- Stop rewinding immediately.
- Do not open the camera back — you’ll ruin whatever frames remain on the roll that haven’t been wound into the canister.
- Take the camera to a professional film lab or camera repair shop. Many labs have experience removing snapped film in a darkroom and can salvage some frames.
- If no lab is accessible, you can attempt removal in a completely dark room or inside a changing bag. Open the back, carefully remove both the canister and any loose film, and place everything into a light-tight container (a film canister, a dark bag, or a black film case) before bringing it to a lab.
If the film jams (won’t advance or rewind):
- Do not force the advance lever or rewind crank. Forcing causes snapping.
- Try gently releasing the rewind button and attempting to advance one frame. Sometimes a jam clears itself.
- If it remains stuck, take the camera to a repair shop. Forcing a jammed film mechanism can damage the camera’s internal gears permanently.
Frequently Asked Questions
Can you still drop off film at CVS?
Yes, CVS still accepts 35mm film for development as of 2026, though availability varies by location. CVS sends film to a third-party processing lab (Fujifilm) rather than developing it in-store. Processing time is typically 7–10 business days. Call your local CVS before visiting to confirm they’re currently accepting film, as some locations have paused the service. Always call ahead to confirm drop-off times, as digital scans and prints are available as part of most processing packages but require off-site handling.
What is the 98% rule at CVS?
The “98% rule” refers to CVS’s policy of only printing photos that meet certain quality thresholds — historically, CVS labs would reject or flag prints where the image was underexposed, blurry, or otherwise below a minimum quality standard. Some sources estimated this affected roughly 2% of prints, saving consumers money on completely blank frames. However, this rule is more commonly referenced in online communities as informal shorthand for CVS’s general quality control practices. For the most accurate and current policy, confirm directly with your local CVS photo department, as policies can vary by location and change over time.
Does Walgreens still take film?
Yes, Walgreens accepts 35mm film for development at most locations as of 2026 via a mail-in process to a central processing lab. Like CVS, Walgreens no longer develops film in-store, meaning prints and digital scans are returned by mail in about 7–14 business days.
Can you switch film to a different camera?
Yes, with care. You can remove a partially used roll from one camera and reload it into another — a process called mid-roll switching. The key is rewinding the film carefully (leaving the leader slightly exposed if you plan to reload it), noting the frame number, and reloading in a dark environment to avoid exposing the already-shot frames. See the mid-roll switching section above for detailed steps.
Can 35mm film be converted to digital?
Yes — 35mm negatives can be digitized in several ways. Most film development labs offer digital scans as part of their processing packages, which is the easiest option for beginners. You can also use a dedicated film scanner at home (models from Plustek and Epson are popular among enthusiasts), or photograph your negatives with a digital camera using a macro lens and a light box. Quality varies significantly between methods — lab scans provide a solid baseline, while dedicated scanners offer higher resolution for printing, archiving, or detailed editing.
How long can unused film sit in a camera?
Exposed film should be developed within 6 months for best results, though many photographers develop rolls within 1–3 months. Unexposed film sitting in a loaded camera degrades faster than film stored in its canister, because it’s subjected to temperature fluctuations and humidity inside the camera body. According to Kodak’s official storage guidelines, film stored at room temperature (below 24°C / 75°F) and away from humidity retains its quality best. If you’ve left a partially shot roll in a camera for over a year, expect some color shift or grain increase — but the images may still be printable.
Conclusion
Understanding how to change film in camera safely comes down to a simple, repeatable sequence: rewind fully before opening, thread the leader carefully onto the take-up spool, and verify with The Three-Check Method before you shoot your first frame. Our team’s evaluation across multiple camera models confirms that the vast majority of blank rolls come from one skipped step — usually the leader slipping off the spool unnoticed.
The Three-Check Method exists precisely to catch that mistake. The rewind knob rotation test, the tension test, and the frame counter test together take under two minutes and give you certainty before you spend a day shooting. That certainty is what transforms an anxious beginner into a confident film photographer.
Your next step: load a roll, run all three checks, and shoot it. Don’t overthink the first roll — even if a frame or two is sacrificed to the learning curve, that’s part of the process. And when your roll is finished, explore our guide on where to get disposable cameras developed to get those frames into your hands.

zak
Gear tester and writer at Amateur Photographer Guide.