
Table of Contents
This blog post may contain affiliate links. As an Amazon Associate I earn from qualifying purchases.
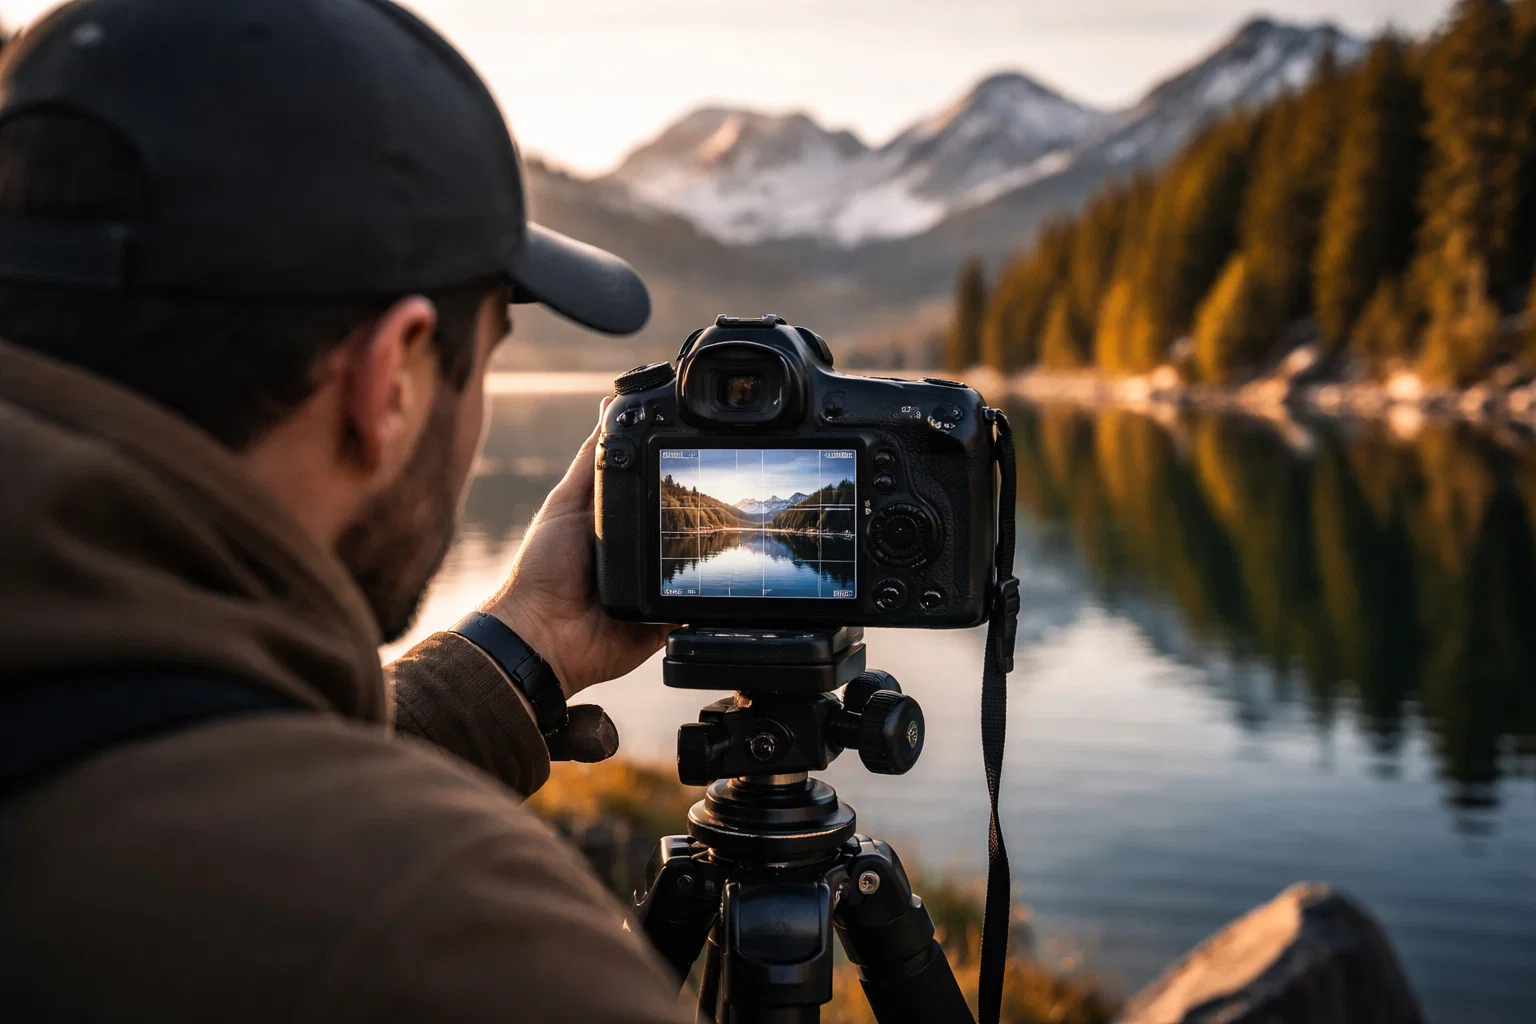
Choosing how your photos are framed can feel confusing for many beginners, especially when your camera offers several unfamiliar settings. Understanding aspect ratio — the relationship between width and height that shapes every photograph — helps you compose images with purpose rather than relying on guesswork. Whether you’re using a smartphone or a traditional 35mm camera, mastering aspect ratios like 3:2, 4:3, or 1:1 builds a strong foundation for creative storytelling and ensures your images display or print perfectly.


Key Takeaways
| Point | Details |
|---|---|
| Aspect Ratio Matters | The aspect ratio influences composition, subject placement, and viewer interpretation. Choosing the right ratio can enhance the emotional impact of your photograph. |
| Experimentation is Key | Shooting in various aspect ratios helps develop an intuitive understanding of composition. Try different ratios to see how they transform each scene. |
| Avoid Common Mistakes | Be mindful of your output format to prevent cropping or distortion issues. Always consider the intended use of your images when selecting an aspect ratio. |
| In-Camera vs. Editing Adjustments | Utilize in-camera settings for planned shots, but feel free to crop in post-processing for greater flexibility. Always keep original files intact to allow for changes later. |
Defining Aspect Ratio and Its Importance
Aspect ratio is simply the relationship between the width and height of your photograph, expressed as two numbers separated by a colon. Think of it like this: if your image is 4 units wide and 3 units tall, that’s a 4:3 aspect ratio. The actual pixel dimensions don’t matter. What matters is the proportion.
This concept shapes everything about how your images look and feel. A wide rectangle tells a different story than a tall rectangle or a square. Your camera actually locks you into specific aspect ratios based on its sensor size, but understanding what that means helps you compose stronger images from the moment you press the shutter button.
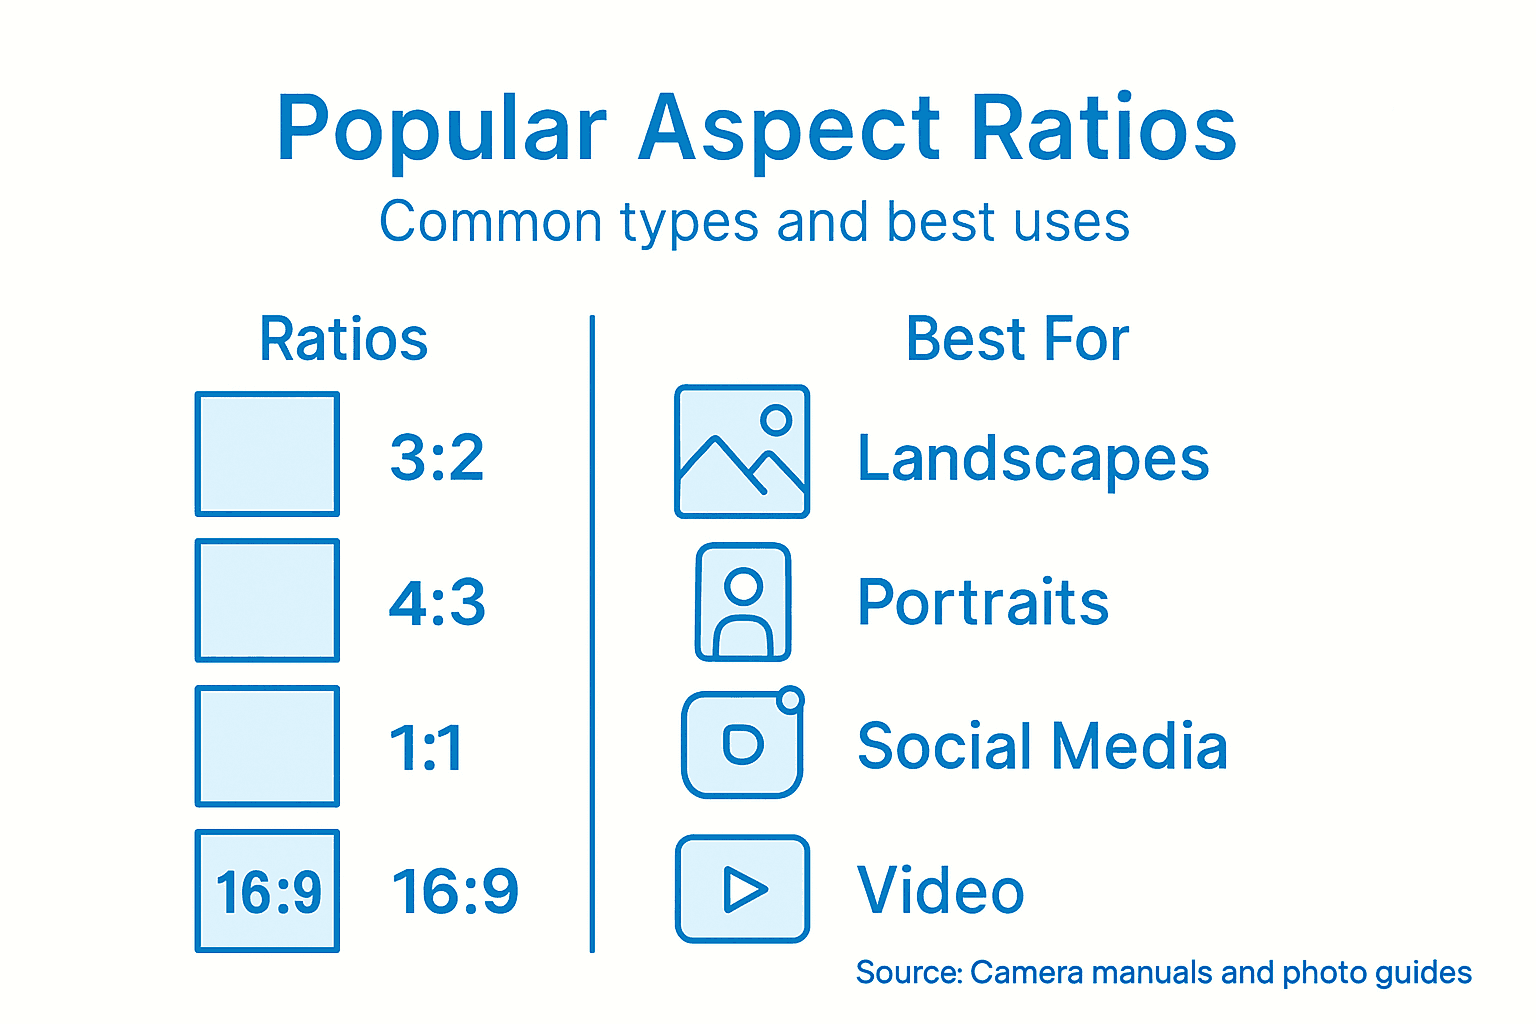
Common aspect ratios you’ll encounter include 3:2 (the standard for 35mm film and many digital cameras), 4:3 (popular in compact cameras and older digital sensors), and 1:1 (the perfect square). Each creates distinct visual effects. The 3:2 ratio feels natural and cinematic. The 4:3 ratio works well for portraits and more traditional framing. The 1:1 ratio suits balanced, symmetrical compositions, especially on social media platforms.
Why does this matter for your photography? Aspect ratio affects how you compose your shots, where you place subjects, and how viewers naturally read your images. It also determines compatibility with different display formats and print sizes. When you understand aspect ratio, you’re not accidentally squishing or stretching your images during editing or printing. You’re making intentional creative decisions.
The physical dimensions of your camera’s sensor determine your camera’s native aspect ratio. A full-frame digital camera typically shoots in 3:2, while many smartphone cameras use different ratios depending on the model. Knowing your camera’s native ratio helps you work with it, not against it, when you’re framing your shots.
Beyond just composition, aspect ratio connects to deeper photographic concepts like composition using the golden ratio, which artists have used for centuries to create visually appealing work.
Pro tip: Check your camera’s manual to identify its native aspect ratio, then spend a week shooting only in that ratio to develop an intuitive feel for how it frames subjects before experimenting with alternatives.
Popular Aspect Ratios Compared
Different aspect ratios serve different purposes, and knowing which ones exist helps you choose the right framing for your shots. The most common ratios you’ll encounter fall into a handful of categories, each with its own strengths and ideal use cases.
3:2 Ratio: The Film Standard
The 3:2 ratio is the workhorse of photography. This is what your full-frame digital camera shoots by default, and it’s the legacy of 35mm film. The ratio feels natural because it’s slightly wider than it is tall, giving you breathing room without being dramatically panoramic. Landscape photographers love this ratio because it captures expansive scenes without forcing you to crop away important details.
4:3 Ratio: The Balanced Frame
The 4:3 ratio appears on many compact cameras and older digital sensors. This ratio is closer to a square than 3:2, making it excellent for portraits where you want more vertical space. It also works beautifully for environmental portraits where the background adds important context. This ratio also plays well with standard print sizes, which is why it remains popular despite newer alternatives.
1:1 Ratio: The Perfect Square
The square format has exploded in popularity thanks to Instagram and other social media platforms. A 1:1 ratio creates a balanced, symmetrical feeling. Photographers use squares for bold, centered compositions and graphic subjects. The square format forces you to think differently about framing because you can’t rely on width or height dominance. This constraint actually pushes you to be more intentional with composition.
16:9 Ratio: The Widescreen
The 16:9 ratio dominates video and digital displays. You see this ratio on your television and computer monitor. Some photographers use it for ultra-wide landscape shots or cinematic storytelling. However, it’s less common in still photography because it requires specific compositional choices to look natural rather than stretched.
Comparison at a Glance
- 3:2: Versatile, natural feeling, traditional
- 4:3: Portrait friendly, nearly square, balanced
- 1:1: Bold, social media optimized, symmetrical
- 16:9: Cinematic, ultra-wide, video focused
Each ratio affects how your eye travels through an image and where you naturally place your subject. The ratio you choose should match your creative intention, not just your camera’s default setting.
Pro tip: Shoot the same scene in multiple aspect ratios on your phone or camera to see how each one changes the emotional impact and compositional balance of your image.
Here’s a concise reference for major aspect ratios in photography:
| Aspect Ratio | Typical Devices | Best For | Common Print Size |
|---|---|---|---|
| 3:2 | Full-frame cameras, 35mm film | Landscapes, general photography | 4×6 inches |
| 4:3 | Compact cameras, smartphones | Portraits, environmental shots | 8×10 inches |
| 1:1 | Instagram, some cameras | Social media, square compositions | 12×12 inches |
| 16:9 | Digital displays, video cameras | Cinematic scenes, panoramas | 13×19 inches |
How Aspect Ratio Impacts Composition
Aspect ratio is not just a technical specification. It’s a creative tool that shapes how your viewers experience your image. The moment you choose a ratio, you’re making a compositional decision that influences everything from subject placement to the emotional tone of your photograph.
Different ratios guide the viewer’s eye in different directions. A square 1:1 ratio creates a sense of balance and stability because there’s no visual dominance in either direction. Your eye naturally settles in the center, making squares ideal for symmetrical subjects or bold, centered compositions. When you use a square, you’re telling viewers to pause and examine the subject directly in front of them.
Wider ratios like 3:2 and 16:9 emphasize the horizontal plane. These formats suggest movement, expansiveness, and depth. A panoramic landscape naturally fits these ratios because they allow you to show sweeping vistas and create a sense of traveling across the frame. The horizontal emphasis guides your eye from left to right, mimicking how we naturally read and scan scenes.
Taller ratios pull attention upward and downward. When you shoot in a vertical orientation, you’re emphasizing height, grandeur, and verticality. Think of portrait photography, where a taller frame allows you to include more of the subject’s environment above or below them. This ratio works beautifully for architectural photography, forest scenes, and situations where height conveys significance.
The ratio you choose also determines where you naturally place compositional elements. Aspect ratio shapes your compositional options by constraining the space available. The rule of thirds applies differently depending on whether you’re working with a square, rectangle, or panorama. Your focal points, leading lines, and negative space all need to adapt to the ratio you’ve selected.
Think of aspect ratio as a compositional boundary that creates constraints. Constraints force creativity. When you’re working within a specific ratio, you make more deliberate choices about what to include and exclude. You’re not just pointing and shooting. You’re actively composing within a defined space.
Pro tip: Before you shoot, visualize your final image in your chosen aspect ratio and mentally draw that frame around your subject to see how it affects your composition and subject placement.
Common Mistakes When Choosing Ratios
Most beginner photographers make predictable mistakes with aspect ratios, and recognizing them now saves you from frustration later. The good news is these errors are entirely preventable once you understand what to avoid.
Mistake 1: Ignoring Your Final Output
This is the biggest trap. You shoot in one ratio without thinking about where your image will end up. Then you post it on Instagram and it gets cropped awkwardly, or you print it and discover unwanted stretching or squishing. Your aspect ratio must match your intended use. A square image looks perfect on Instagram but might not work for a print magazine. A 3:2 landscape photo might need cropping for a website banner. Think about the destination before you press the shutter button.
Mistake 2: Always Shooting Your Camera’s Default
Your camera has a native aspect ratio for good reason, but that doesn’t mean it’s always the best choice for every shot. Many photographers never change their camera’s default setting, missing opportunities to compose more effectively. That 3:2 ratio your full-frame camera defaults to might not serve a portrait subject as well as a 4:3 or even a square. You lose creative control by defaulting to the factory setting. Most cameras let you change aspect ratios in the settings menu or through cropping during editing.
Mistake 3: Forcing the Wrong Ratio for Your Subject
A panoramic 16:9 ratio looks stunning for vast landscapes but feels awkward for a tight portrait. Using the wrong ratio for your subject creates compositions that feel uncomfortable, even if you can’t immediately pinpoint why. The subject dictates the ratio, not the other way around. A tall building demands vertical framing. A sprawling sunset demands width. Match the ratio to what you’re photographing.
Mistake 4: Not Experimenting
Many photographers stick with one ratio their entire career without ever exploring alternatives. You’ll never know if a square or panorama might transform your photography unless you try them. Spend a week shooting exclusively in 1:1, another week in 16:9. The experimentation teaches your eye how different ratios feel and perform.
Pro tip: Before importing images into your editing software, write down the intended use and print size for each shoot so you can choose or adjust the aspect ratio with your destination already in mind.
Changing Aspect Ratio in Cameras and Editing
You have two opportunities to set or adjust your aspect ratio. The first happens when you’re shooting, directly in your camera. The second happens later during editing. Both approaches have merit, and understanding when to use each one makes you more flexible and intentional with your work.
Changing Aspect Ratio In-Camera
Most digital cameras let you select your aspect ratio before you shoot. Check your camera’s menu system, typically under image quality or shooting settings. You’ll find options like 3:2, 4:3, 1:1, or 16:9. Changing this setting before you shoot means your camera captures only the pixels needed for that ratio, giving you a preview of exactly what you’re getting. This approach forces intentional framing because you see the ratio boundaries in your viewfinder or LCD screen. You compose within that specific frame from the start.
Changing Aspect Ratio During Editing
Editing software offers more flexibility. Programs like Lightroom or Photoshop include cropping tools that let you change your aspect ratio after the fact. This is where most photographers make adjustments. You can shoot in your camera’s native ratio and then crop to a different ratio during editing. Cropping works by removing pixels from the edges while keeping the remaining image intact. This approach gives you creative freedom because you’re not locked into a decision made at capture time.
Cropping Versus Resizing: Know the Difference
Cropping and resizing are not the same thing. Cropping removes outer pixels to change composition and aspect ratio while maintaining image quality. Resizing stretches or squeezes your image to fit a specific ratio, which degrades quality and distorts your subject. Always crop, never stretch. When you adjust aspect ratio in editing, use crop tools exclusively.
Preserving Your Original Files
Here’s a critical principle: always keep your original image file unchanged. Save edited versions as separate files. This protects your flexibility. If you crop your original to 1:1 and later realize you need 3:2, you can always go back to the original and crop differently. Working non-destructively means making editing adjustments that don’t permanently alter your source material. Your raw files or original JPEGs are your safety net.
When to Choose Each Approach
Shoot in-camera with your intended ratio when you have a clear creative vision before you press the shutter. Adjust during editing when you’re unsure or want to experiment. Understanding how perspective works in your scene helps you make smarter cropping decisions later.
Pro tip: Create custom aspect ratio presets in your editing software for ratios you use regularly so you can apply them consistently with a single click instead of manually entering dimensions each time.
This summary table outlines the benefits and drawbacks of editing aspect ratio in-camera vs. during post-processing:
| Method | Advantages | Limitations | Best Use Case |
|---|---|---|---|
| In-Camera Selection | Dedicated composition preview, controlled framing | Less flexibility for crops | Pre-planned projects |
| Editing/Cropping | Flexible, experiment with ratios later | Possible unwanted cropping | Creative exploration, uncertain output |
Master Your Aspect Ratio Choices for Stronger Photography
Understanding how aspect ratio shapes your images is a vital step toward capturing photos that truly express your vision. This article highlights the challenges many photographers face when deciding on ratios and composing shots that communicate the right mood and fit their intended output. Whether you want to avoid awkward cropping, match your camera’s native ratio, or experiment confidently with creative framing, mastering aspect ratios can transform your work.
Explore practical advice, step-by-step tutorials, and expert insights on framing, composition, and camera settings by visiting Amateur Photographer Guide. Start applying these concepts today to improve your shooting techniques and make intentional choices with your camera. Don’t wait until your photos are distorted or mismatched for their final use. Learn how to control aspect ratio and sharpen your skills now by diving deeper into our photography basics and shooting tips. Your next great photo starts with understanding the frame you choose.
Frequently Asked Questions
What is aspect ratio in photography?
Aspect ratio is the relationship between the width and height of an image, expressed as two numbers separated by a colon, such as 4:3 or 16:9. It influences how your images are composed and how they appear to viewers.
Why is aspect ratio important for photography?
Aspect ratio affects the composition of your shots, how you place subjects within the frame, and how images will display on different platforms or print formats. Understanding it helps you make intentional creative choices while shooting and editing.
How does the choice of aspect ratio impact image composition?
Different aspect ratios guide the viewer’s eye in distinct ways. For example, a square (1:1) creates balance, while wider formats like 3:2 or 16:9 emphasize movement and expansiveness. The ratio selected can affect how viewers perceive the mood and importance of elements in the photograph.
Can I change the aspect ratio after taking a photo?
Yes, you can adjust the aspect ratio during post-processing using editing software like Lightroom or Photoshop. Cropping tools allow you to change the aspect ratio by removing pixels from the edges without degrading image quality.
Recommended
- What is Perspective in Photography? Understanding Its Impact
- Why Use Wide Angle Lens: Expanding Creative Possibilities
- Golden Ratio in Photography – Composition That Captivates
- How to Improve Photo Composition for Stunning Images
- 7 conseils essentiels pour filmer avec drone en entreprise
Last update on 2026-03-22 / Affiliate links / Images from Amazon Product Advertising API
