
Table of Contents
- Quick Summary
- Step 1: Select the right flash gear for your camera
- Step 2: Position your flash for optimal indoor lighting
- Step 3: Adjust flash settings to match your scene
- Step 4: Capture photos using balanced flash exposure
- Step 5: Verify image quality and correct exposure issues
- Elevate Your Indoor Flash Photography Skills Today
- Frequently Asked Questions
- Recommended
This blog post may contain affiliate links. As an Amazon Associate I earn from qualifying purchases.
Every indoor photo shoot can leave you frustrated when your images turn out dull or shadowy, especially in tricky low-light settings. Flash photography gives you the power to transform those moments into vibrant, professional-looking results, but mastering it requires knowing which equipment to use and how to control your lighting. This guide helps you unlock the secrets to choosing the right flash gear, positioning your light, and adjusting settings for beautifully balanced indoor photos.

- Powerful Camera Flash: Equipped with high-quality flash tubes, the camera flash offers high conductivity. With GN33 high guide number which can provide strong and stable light. Its sophisticated flash head is designed to give off light evenly. And a constant color temperature of 5500K±200K in daylight
- Three Kinds of Flash Mode: This Flash Speedlite supports Manual mode, S1 and S2 Modes. Press the MODE or M button to M Mode. When the camera shutter is pressed, the flash will work synchronously. The S1 and S2 modes are light-induced flash modes: S1 will follow the main flash, and the S2 mode will synchronize the second flash of the main flash. Note: Don’t support TTL and the camera menu setting function
- Multi Flash Mode: Under Multi flash mode, the flash will fire at your setting of output power/ flash frequency and flash times. And through the left/right Fn button, you can adjust the output power. The range of output power is 1/128-1/64/-1/32/-1/16-1/8-1/4. If need to set flash times and frequency, please press the flash times/frequency select button.
- Power Control: The flash unit has 22 levels of power output control . And adjusts the brightness through the left/right Fn button. For a test flash, Press the test button to fire a test flash with the current settings or to wake the flash from sleep mode. Press and hold [Mode] and [Test] to reset the flash
- What You Get: Photoolex Flash Speedlite*1, Protective Pouch *1, Stand *1, Instruction manual *1, Color Filter*12pcs, 7*24 Hours customer service and 24-month warranty

- Powerful Camera Flash: Equipped with high-quality flash tubes, the FK310 camera flash offers high conductivity. With GN33 high guide number which can provide strong and stable light. Its sophisticated flash head is designed to give off light evenly. And a constant color temperature of 5500K±200K in daylight
- Three Kinds of Flash Mode: This Flash Speedlite supports Manual mode, S1 and S2 Modes. Press the MODE or M button to M Mode. When the camera shutter is pressed, the flash will work synchronously. The S1 and S2 modes are light-induced flash modes: S1 will follow the main flash, and the S2 mode will synchronize the second flash of the main flash. Note: Don’t support TTL and the camera menu setting function
- Multi Flash Mode: Under Multi flash mode, the flash will fire at your setting of output power/ flash frequency and flash times. And through the left/right Fn button, you can adjust the output power. The range of output power is 1/128-1/64/-1/32/-1/16-1/8-1/4. If need to set flash times and frequency, please press the flash times/frequency select button. the multi-flash time/frequency instruction icon will flicker in the LCD, at this time you can adjust the flash times/flash frequency through the left/right Fn button
- Power Control: The flash unit has 22 levels of power output control which is shown by LCD screen. And adjusts the brightness through the left/right Fn button. For a test flash, Press the test button to fire a test flash with the current settings or to wake the flash from sleep mode. Press and hold [Mode] and [Test] to reset the flash
- What You Get: Photoolex FK310 LCD Flash Speedlite*1, Protective Pouch *1, Stand *1, Instruction manual *1, Color Filter*12pcs, 7*24 Hours customer service and 24-month warranty
- 【Professional Flash Output for Stable Lighting】 TT560 speed light features GN38 (ISO 100) guide number with 8 manual power levels from 1/128 to 1/1, stable 5600K±200K daylight color, 0.1–5s recycle time, and 1/300 to 1/20000s flash duration. Note: Does NOT support TTL, HSS, or camera menu control. Recommended shutter speed below 1/200s
- 【Optical Slave & Off Camera Triggering】 Supports S1/S2 optical modes for off camera use as a secondary flash to create various lighting effects. S1 works with the main flash in manual mode, while S2 works with the main flash in TTL mode. Equipped with a PC sync port for triggering the flash and camera via a sync cable
- 【Adjustable Flash Head】 Supports vertical rotation from 0–90° and horizontal rotation from 0–270°, flexible for portraits, indoor photography, studio photoshoots, content creator essential and influencer must have for creative camera photo lighting
- 【Power Supply】 This camera gear is powered by four AA batteries (alkaline or Ni-MH, not included). When the battery is low, the red charging indicator flashes once per second to signal that the batteries need replacement. In addition, an external power source can be connected through the CP-E4 port to speed up recycling, and it features built in power saving and overheating protection
- 【Wide Compatibility】 NEEWER TT560 flash attachment for photography accessories is compatible with Canon Nikon Panasonic Olympus Pentax Fujifilm standard hot shoe cameras and Sony MI hot shoe models including A9 A7III A7IV A7RIV A6400 ZV-1 A6000 A6300 A6500. Not compatible with Canon SL3 250D T7 1500D 2000D T100 3000D 4000D R6 200DII R50 Sony A9III A99 A77 A350 ZV-1F ZV1 Mark 2 Fujifilm X-A3X 100F X100T

- Wireless X System: Godox TT600 flash build-in Godox 2.4G X system, it can be used with godox flash, godox strobe, godox trigger and other devices that with 2.4G system. When used with Godox TTL wireless flash trigger, like X1T/X2T/XPro/XProII/X3, it can realize remote control, high speed sync and more functions, make your shooting simpler and easier
- Wide Compatibility: It can compatible with most brands cameras such as Canon Nikon Pentax Olympus Fujifilm Panasonic and other digital cameras with standard hot shoe
- Wireless Transmission: Build-in 2.4G wireless transmission with all-in-one functions and 100 meters further transmission, to offer you more stable signal and output and creative light effect, wider range of application, less power consumption, less affected by the obstacle
- Superior Performance: approx.230 full power flashes, 0.1-2.6s recycling time, provide enough flash times for your shooting, when used with TTL wireless trigger (Sold Separately), the max speed can up to 1/8000s(Depend on the cameras). It’s particularly convenient when using the aperture to fill flash on portrait preferentially. Note: Godox TT600 Speedlite can NOT realize HSS when used on camera hot shoe
- High Guide Number: GN60 (m ISO 100) high guide number, short flash duration, high illumination, far Irradiation distance. Stable color temperature at 5600±200K over the entire power range, explore creative lighting setups with the ability to control up to 5 groups and 32 channels

- Powerextra speedlite with a guide number of 33 (ISO 100/1m), Support manual mode, S1 and S2 wireless flash trigger modes, Single-contact hot shoe. Vertical Rotation Angle: 0~90 Degrees, Horizontal Rotation Angle: 0~270 Degrees.
- Compatible with Canon, Nikon, Panasonic, Olympus, Pentax, Fujifilm, and Sony cameras with Mi hot shoe, such as a9, a7, a7II, a7III, a7R III, a7RII, a7SII, a6000, a6300, a6500 ❗NOTE: NOT Compatible with Canon EOS Rebel SL3/250D, Rebel T7/1500D, 2000D, Rebel T100/3000D, 4000D,Sony A Series DSLR ❗
- The flash has 8 level of power output control which indicated by 8 pieces of LED lamp for different level. Powered by 4 pcs AA-size battery backup, provides PC port, you can make the flash synchronous by connecting to the PC port.
- Approximate 3.0 seconds flash recycle time, Power saving automatic shutdown function, automatic save function. For a test flash, Press the test button to fire a test flash with the current mode settings.
- Package included: Powerextra DF-400 speedlite ×1, Protective bag ×1, Mini Stand ×1, Instruction manual ×1
Quick Summary
| Key Point | Explanation |
|---|---|
| 1. Choose suitable flash gear | Select between on-camera and off-camera flashes based on your shooting style and environment requirements. |
| 2. Position flash effectively | Place your flash at a 45-degree angle to minimize shadows and create flattering, dimensional lighting. |
| 3. Adjust flash settings per scene | Modify manual, TTL, and intensity settings to suit ambient light conditions and ensure proper exposure. |
| 4. Balance flash and ambient light | Use aperture, shutter speed, ISO, and flash power settings to harmonize your flash with existing lighting for natural results. |
| 5. Verify image quality post-shoot | Analyze histograms and other diagnostic tools after capturing to ensure optimal exposure and detail in your photos. |
Step 1: Select the right flash gear for your camera
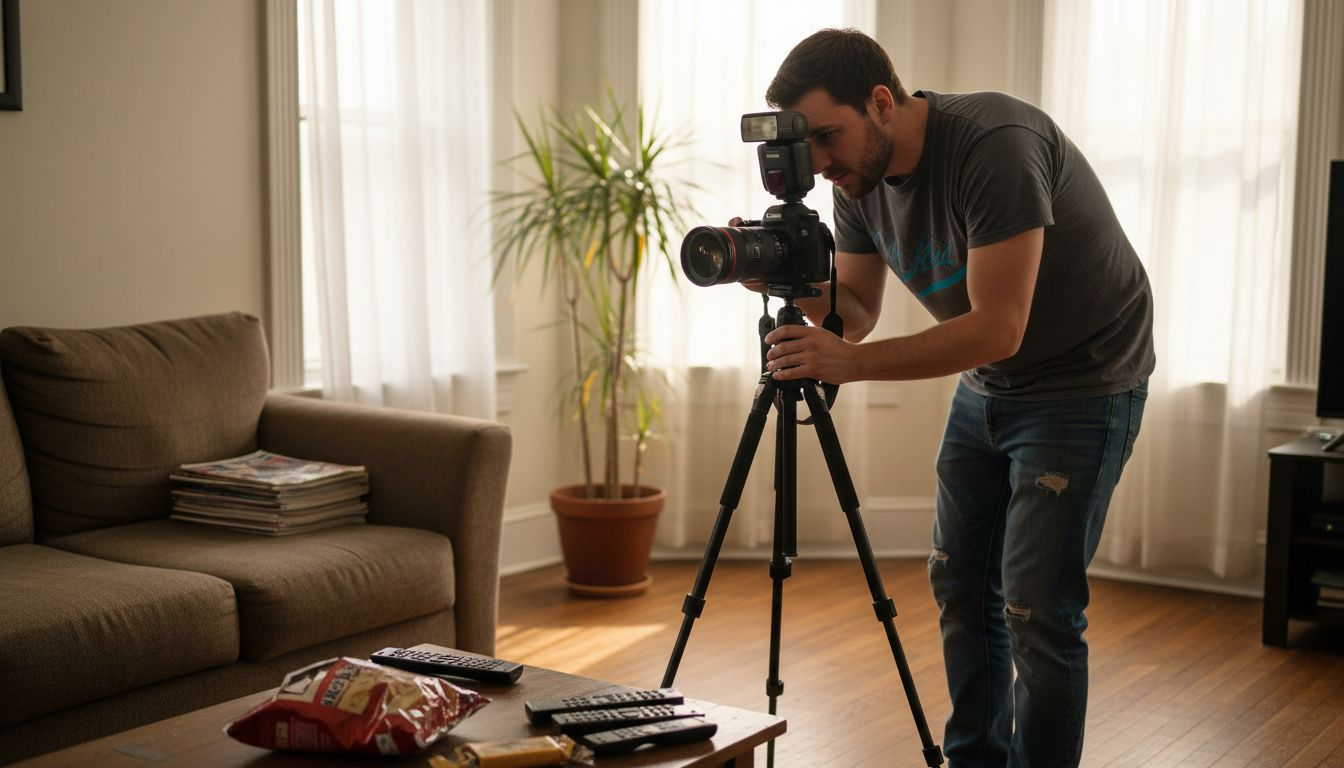
Choosing the perfect flash equipment can transform your indoor photography from flat and lifeless to vibrant and professional. Your camera’s built-in flash might seem convenient, but professional-grade indoor shots require more sophisticated lighting solutions.
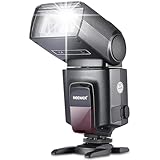
When selecting flash gear, you’ll want to consider three primary factors: camera compatibility, flash type, and lighting flexibility. External flashes provide significant advantages over built-in options, offering more power and nuanced control. Look for flashes with these key features:
- Adjustable power settings
- Swivel and tilt capabilities
- Compatible hot shoe mount
- Manual and automatic exposure modes
- Decent zoom range (typically 24-105mm)
External flashes come in two primary categories: on-camera and off-camera models. Camera gear selection plays a crucial role in determining which type will work best for your specific photography needs. On-camera flashes mount directly to your camera’s hot shoe, providing immediate versatility, while off-camera flashes allow more complex lighting setups with wireless triggers.
Professional photographers recommend investing in a flash that offers more control than your camera’s default option.
Consider your shooting environment and photography style when making your selection. Studio photographers might prefer powerful strobe units, while event photographers need compact, quick-to-deploy units. Budget matters too – professional-grade flashes can range from $100 to over $500.
Here’s a comparison of on-camera and off-camera flash options for indoor photography:
| Aspect | On-Camera Flash | Off-Camera Flash |
|---|---|---|
| Setup Convenience | Quick to attach and use | Requires more initial setup |
| Lighting Control | Moderate control | High creative flexibility |
| Portability | Compact and easy to transport | May require stands or triggers |
| Best For | Events, fast-paced shooting | Studio, creative portraits |
Pro tip: Always test your new flash in multiple lighting conditions before an important shoot to understand its full capabilities and limitations.
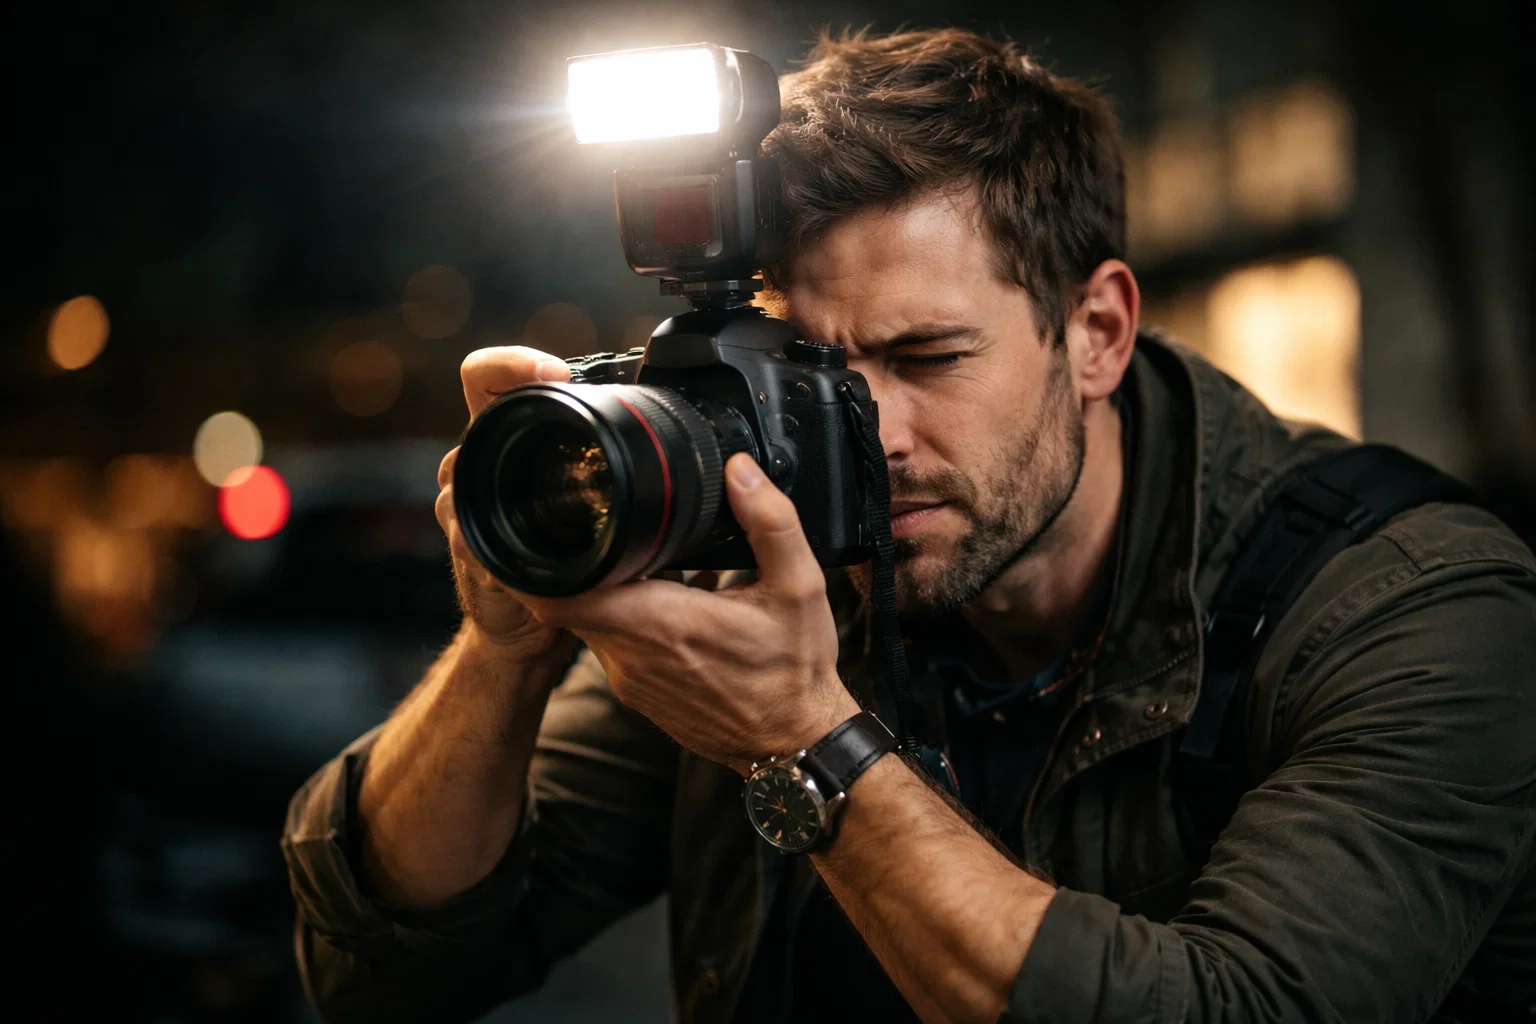
Step 2: Position your flash for optimal indoor lighting
Mastering flash positioning is crucial for creating professional-looking indoor photographs with natural, flattering lighting. Understanding how to strategically place your external flash can dramatically transform the quality and mood of your indoor shots.
Professional photographers recommend positioning your flash at a 45-degree angle from your subject, which helps minimize harsh shadows and create dimensional lighting. Fill flash techniques can further enhance your images by providing subtle light correction. Consider these key flash positioning strategies:
- Bounce the flash off white or light-colored surfaces
- Avoid direct flash pointing straight at your subject
- Use ceiling or wall reflections to soften light
- Experiment with different angle heights
- Maintain a consistent distance from your subject
The goal is to create soft, diffused illumination that mimics natural light. Off-camera flash placement allows for more creative control, enabling you to sculpt light and reduce unflattering shadows. Wireless flash triggers can help you achieve complex lighting setups without being limited by physical connection.
The secret to great indoor photography is making artificial light look completely natural.
Different indoor environments require unique flash positioning approaches. A home living room might need a different lighting strategy compared to a professional studio setting. Always consider the available ambient light and the specific mood you want to create.
Pro tip: Practice your flash positioning by taking test shots and reviewing the results, adjusting your technique incrementally to understand how slight changes impact your final image.
Step 3: Adjust flash settings to match your scene
Mastering your flash settings is the key to transforming ordinary indoor photographs into stunning, professionally lit images. Understanding how to fine-tune your flash output can make the difference between flat, harsh lighting and beautifully balanced shots.
Exposure compensation techniques play a crucial role in managing your flash’s impact on the overall scene. Modern flash units offer several critical settings to help you adapt to different lighting environments:
- Manual mode for precise light control
- TTL (Through The Lens) for automatic exposure
- Adjustable flash intensity levels
- Sync speed settings
- Flash zoom capabilities
Your flash’s intensity should be carefully matched to the ambient light conditions. In bright spaces, use lower power to provide subtle fill light. In darker environments, increase the flash output to illuminate your subject without creating harsh shadows. Experimenting with different settings is key to understanding how your flash interacts with various scenes.
The most powerful tool in flash photography is your ability to adapt and control light.
Pay special attention to your camera’s sync modes. Front curtain sync works best for stationary subjects, while rear curtain sync can create dynamic motion effects with moving subjects. Each indoor environment presents unique challenges, so be prepared to make quick adjustments.
Pro tip: Always take test shots and review the image histogram to ensure you’ve captured the perfect balance of ambient and flash lighting.
Step 4: Capture photos using balanced flash exposure
Balancing flash exposure is the secret to creating stunning indoor photographs that look natural and professional. Your goal is to blend artificial flash light seamlessly with existing ambient light, avoiding harsh shadows and unnatural illumination.
Exposure in photography requires careful manipulation of four critical elements: aperture, shutter speed, ISO, and flash power. Modern photographers use these settings to create perfectly balanced images:
- Adjust aperture to control depth of field
- Modify shutter speed to manage ambient light
- Set appropriate ISO for overall light sensitivity
- Fine-tune flash intensity to complement existing light
- Use manual mode for precise control
Start by determining the ambient light conditions in your indoor space. In darker rooms, you’ll need to increase your ISO and flash power, while brighter environments allow for lower settings. Experiment with different combinations to find the perfect balance that preserves detail and creates a natural look.
The art of flash photography lies in making artificial light appear completely invisible.
Pay close attention to your camera’s TTL (Through The Lens) metering system, which helps automatically balance flash and ambient light. Some photographers prefer manual mode for more precise control, especially in challenging lighting situations with mixed light sources.
Below is a summary of exposure adjustment methods for achieving balanced indoor flash:
| Setting | Impact on Image | When to Adjust |
|---|---|---|
| Aperture | Depth of field, light | Control subject-background focus |
| Shutter Speed | Ambient exposure | Reduce or increase motion blur |
| ISO | Sensor sensitivity | Low light or avoid noise |
| Flash Power | Subject brightening | Compensate for distance/lighting |
Pro tip: Take multiple test shots and review your camera’s histogram to ensure you’re capturing the full range of light without losing detail in shadows or highlights.
Step 5: Verify image quality and correct exposure issues
Verifying your flash photography results is crucial for ensuring professional-looking indoor images that capture every detail perfectly. Learning to critically evaluate and adjust your photographs will dramatically improve your overall image quality.
Exposure compensation techniques are essential for identifying and resolving potential lighting issues. Professional photographers rely on several key diagnostic tools to assess their images:
- Analyze the histogram for light distribution
- Check shadow and highlight details
- Examine color accuracy
- Evaluate overall image sharpness
- Review noise levels in low-light areas
Your camera’s histogram is the most powerful diagnostic tool for understanding exposure accuracy. Aim for a balanced histogram that shows a smooth distribution of light across the image, avoiding extreme peaks on either side that indicate potential overexposure or underexposure.
The histogram never lies – it’s your most objective guide to image quality.
Pay special attention to areas with complex lighting, such as scenes with bright windows or dark shadows. These challenging environments require careful adjustment of flash power, camera settings, and potentially additional light modifiers to achieve balanced exposure.
Pro tip: Use the camera’s zoom function during image review to check critical details like facial expressions, sharp focus, and subtle lighting nuances.
Elevate Your Indoor Flash Photography Skills Today
Struggling to master flash positioning and exposure for indoor shots is a challenge many photographers face. Whether you want to control harsh shadows or balance ambient light perfectly, understanding concepts like TTL settings, flash power adjustment, and bounce techniques is essential. Our in-depth guides help you overcome these obstacles while growing your confidence behind the camera.
Explore expert tips and clear tutorials on flash photography and much more at Amateur Photographer Guide. Discover practical advice on exposure compensation techniques and improve your gear knowledge with our helpful content on camera gear selection. Start applying simple yet powerful methods now to transform your indoor photography results. Visit the site and take the first step to creating striking, professional-quality images today.
Frequently Asked Questions
What should I consider when selecting flash gear for indoor photography?
Choosing flash gear for indoor photography involves considering camera compatibility, flash type, and lighting flexibility. Look for external flashes with adjustable power settings, swivel capabilities, and both manual and automatic exposure modes to enhance your indoor shots.
How can I position my flash to achieve better lighting?
Position your flash at a 45-degree angle from your subject for optimal lighting. Experiment with bouncing the flash off light-colored surfaces and adjusting the height to achieve soft, diffused illumination that mimics natural light.
What flash settings should I adjust for balanced indoor exposure?
Adjust your flash settings such as aperture, shutter speed, and flash power to match the ambient light conditions in your indoor space. For example, increase your ISO in darker environments and experiment with different combinations to achieve a natural look in your images.
How can I evaluate the quality of my indoor photos after shooting?
To verify image quality, analyze the histogram for light distribution and check for details in shadows and highlights. Reviewing your images allows you to make necessary adjustments in flash power or settings to ensure you capture every detail effectively.
What tips can I follow to improve my flash photography skills?
Start by taking test shots in various lighting conditions and review the results to understand your flash’s capabilities. Practicing different positioning and settings will help you adapt and create consistent, professional-quality images indoors.