
Table of Contents
- Key takeaways
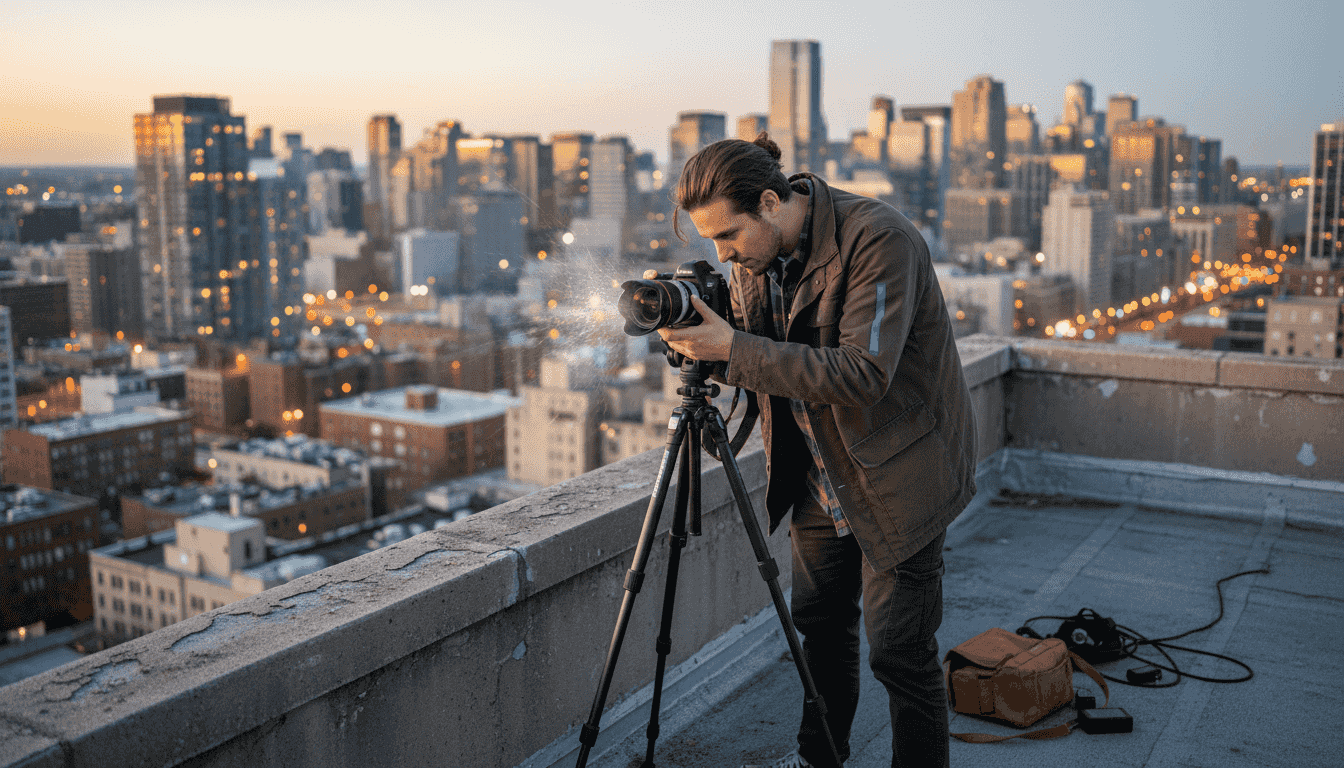
- Introduction to light photography settings
- Understanding ISO and light sensitivity
- Aperture’s effect on exposure and depth of field
- Shutter speed and its relationship with light and motion
- The exposure triangle and balancing settings
- Common misconceptions about automatic mode vs manual control
- Practical tips for shooting in different lighting conditions
- Creative uses of light settings for artistic photography
- Enhance your photography skills with Amateur Photographer Guide
- Frequently asked questions about light photography settings
- Recommended
This blog post may contain affiliate links. As an Amazon Associate I earn from qualifying purchases.
Relying on automatic mode sounds convenient, but 70% of amateur photographers struggle with exposure errors because auto settings often fail in mixed lighting. Your camera’s sensor needs precise instructions to capture light correctly, and that control comes from three core settings: ISO, aperture, and shutter speed. Understanding how these work together transforms snapshots into stunning images. This guide breaks down each setting so you can confidently manage light, fix common mistakes, and unlock creative possibilities beyond what automatic modes allow.

- 24.1 Megapixel CMOS (APS-C) sensor with is 100–6400 (H: 12800)
- Built-in Wi-Fi and NFC technology
- 9-Point AF system and AI Servo AF
- Optical Viewfinder with approx 95% viewing coverage
- Use the EOS Utility Webcam Beta Software (Mac and Windows) to turn your compatible Canon camera into a high-quality webcam. Compatible Lenses- Canon EF Lenses (including EF-S lenses, excluding EF-M lenses)

- Improved Dual Pixel CMOS AF and eye detection AF 24.1 Megapixel CMOS (APS-C) sensor with is 100–6400 (H: 12800)
- Built-in Wi-Fi and NFC technology working temperature range: 32-104°F/0-40°C
- 9-Point AF system and AI Servo AF
- Optical Viewfinder with approx 95% viewing coverage
- Use the EOS Utility Webcam Beta Software (Mac and Windows) to turn your compatible Canon camera into a high-quality webcam

- Canon EOS 2000D DSLRCamera Body – 24.1MP APS-C CMOS Sensor, DIGIC 4+ Image Processor, 3.0″ 920k-Dot LCD Monitor, Full HD 1080/30p Video Recording, 9-Point AF with Center Cross-Type Point, ISO 100-6400, Up to 3 fps Shooting, Built-In Wi-Fi with NFC, Scene Intelligent Auto Mode , Creative Filters and Creative Auto Modes
- Canon EF-S 18-55mm F/3.5-5.6 DC III Zoom Lens – EF-S-Mount Lens/APS-C Format, 28.8-88mm (35mm Equivalent) ,Aperture Range: f/3.5 to f/38 ,One Aspherical Element ,Super Spectra Coating ,Micro Motor AF System , Rounded 6-Blade Diaphragm
- 24.1MP APS-C CMOS sensor and DIGIC 4+ image processor, which combine to provide both speed throughout the camera system as well as notable image quality. Up to 3 fps shooting is possible to suit photographing moving subjects—for up to 150 consecutive JPEGs in a burst or up to 11 consecutive raw frames—and Full HD 1080p video at 30 fps can also be recorded. For working in a variety of lighting conditions, the sensitivity range of ISO 100-6400 can be further expanded to ISO 12800
- Shoot detailed images into the night with a large 24.1 Megapixel sensor, with up to 19x more surface area than many smartphones³, Take memorable, atmospheric pictures at night with large ISO sensitivity range of ISO 100-6400 (expandable to ISO 12,800) ,See the world through the optical viewfinder and experience the creative power of interchangeable lenses, Instantly review results on the user-friendly, 6.8 cm (2.7”) LCD screen
- Extending the capabilities of the camera, Canon’s EOS Webcam Utility software lets you turn your camera into a versatile webcam by just connecting it to a computer via USB. Compatible with a variety of streaming apps, including ZOOM, YouTube Live, Microsoft Teams, and more, this software also maintains the ability to record internally while livestreaming.

- 【2026 LATEST 8K UHD 88MP AUTOFOCUS DIGITAL CAMERA】: Our 8K digital camera Equipped with 8K video resolution, Also can shooting 88MP photos with true-to-life color and detail. Advanced autofocus instantly locks onto the subject, ensuring clear photos even when in motion, while the 16X digital zoom lets you get closer without sacrificing image quality. Whether you’re capturing family trips, daily moments, or creating video content, it delivers sharp images and smooth videos.
- 【WIFI TRANSFER & WEBCAM】:This vlog camera comes with built-in WiFi, allowing you to instantly upload and share videos and photos directly to social media platforms by simply downloading the “iSmart DV2” app on your Android or iOS device.Our 8K digital cameras for Photography is also ideal for video calls and live streaming on YouTube or social media.And perfect for quick sharing your joy on social media or cloud backup.has 6-axis stabilization that ensuring smoother videos, It is well-suited for both professionals and beginners.
- 【DUAL LENS & 3.2″ IPS TOUCH SCREEN PROFESSION CAMERA】:This portable digital camera features both front and rear lenses, allowing you to switch between them with a single touch for effortless selfies or content creation.Featuring a 3.2-inch large touch screen, it streamlines framing, focusing, and capturing with a simple touch. Ideal for preserving your clearest and most memorable moments.
- 【360°ROTARY DIAL EASY TO OPERATE】:This digital cameras for photography support 360° rotating button design allows you to easily switch between 8 shooting modes, including: auto mode,filters, program ,scene, portrait, landscape, slow motion, time-lapse.Capture your adventures and daily moments with this versatile camera, designed for effortless travel photography and stunning video recording.
- 【LONG BATTERY LIFE & AMPLE STORAGE】:Our cameras for photography equipped with two large capacity rechargeable battery and a 32GB SD card, this vlogging camera supports long shooting sessions without interruptions.The powerful battery lets you shoot all day without worrying about power or memory. Whether it’s a birthday, a holiday or a special occasion, this digital camera is the perfect present to inspire creativity and capture memories.A present that combines fun, creativity and technology.

- High-Quality Imaging: The Canon EOS Rebel T7 DSLR Camera features a 24.1 Megapixel CMOS sensor for stunningly detailed photos, even in challenging lighting
- Versatile ISO Range: With an ISO range of 100 to 6400 (expandable to 12800), the Canon EOS Rebel T7 captures clear images in various lighting conditions
- Fast Autofocus System: Equipped with a 9-point AF system and AI Servo AF, the Canon EOS Rebel T7 ensures precise focus for sharp images every time
- Built-In Sharing Options: The Canon EOS Rebel T7 DSLR Camera includes built-in Wi-Fi and NFC technology for effortless photo sharing and uploading to social media
- User-Friendly Features: The Canon EOS Rebel T7 boasts a 3.0-inch LCD display and Scene Intelligent Auto mode for simplified shooting, making it perfect for beginners
Key takeaways
| Point | Details |
|——-|———||
| ISO controls sensor sensitivity | Adjusts brightness but higher values above 3200 introduce grainy noise |
| Aperture regulates light intake | Larger openings create background blur; smaller openings keep everything sharp |
| Shutter speed manages exposure time | Fast speeds freeze motion; slow speeds allow more light but risk blur |
| Exposure Triangle balances settings | Changing one requires adjusting others to maintain correct exposure |
| Manual mode unlocks creativity | Offers precise control over artistic effects impossible in auto mode |
Introduction to light photography settings
Light determines everything in a photograph. Too much washes out details, too little hides them. Your camera uses three primary controls to manage how light reaches the sensor: ISO, aperture, and shutter speed.
ISO in photography adjusts sensor sensitivity to light. Aperture controls the lens opening size. Shutter speed determines how long the sensor receives light. These three settings work together, not independently.
Mastering them means you can shoot confidently in any lighting condition. You’ll move beyond automatic modes that guess at settings, often incorrectly. Each setting affects both technical quality and creative possibilities in your images.
Key benefits of understanding these controls:
- Correct exposure in challenging lighting situations
- Creative freedom to blur backgrounds or freeze action
- Reduced noise and sharper images
- Confidence to shoot in manual mode when needed
Understanding ISO and light sensitivity
ISO directly controls the camera sensor’s sensitivity to light, with higher ISO increasing brightness but also noise. Think of ISO as amplifying the signal your sensor receives. Doubling the ISO value doubles the brightness.
ISO values typically range from 100 to 6400 or higher on modern cameras. Low ISO (100 to 400) produces clean images with minimal grain, ideal for bright daylight. High ISO (1600 to 6400+) brightens dark scenes but introduces visible noise, especially noticeable in shadows and solid colors.
The trade-off is straightforward. You need higher ISO in dim environments to avoid underexposed, dark photos. But pushing ISO too high creates grainy, less detailed images. Finding the right balance depends on your lighting and how much noise you can accept.
| ISO Range | Best Use | Noise Level |
|---|---|---|
| 100-400 | Bright daylight, studio lighting | Minimal |
| 800-1600 | Indoor lighting, overcast skies | Moderate |
| 3200-6400+ | Dark venues, night photography | High |
Pro Tip: Start at your camera’s base ISO (usually 100 or 200) and only increase when shutter speed becomes too slow to handhold or when you need faster shutter speeds for motion.
Aperture’s effect on exposure and depth of field
Aperture is the adjustable opening in your lens, measured in f-numbers like f/1.8, f/5.6, or f/16. Confusingly, lower f-numbers mean larger openings. An f/1.8 aperture is wide open, letting in lots of light. An f/16 aperture is narrow, restricting light.
Larger apertures (f/1.8 to f/2.8) serve two purposes. They allow more light for shooting in dim conditions without raising ISO too much. They also create shallow depth of field, blurring backgrounds beautifully while keeping your subject sharp. This effect, called bokeh, isolates subjects and adds professional polish.
Smaller apertures (f/8 to f/16) let in less light but increase depth of field. More of your scene stays in focus, from foreground to background. Landscape photographers love this because it keeps everything crisp.
Aperture explained shows how balancing light intake with creative focus effects gives you artistic control. You’re not just adjusting brightness; you’re deciding what story your photo tells.
Pro Tip: For portraits, start with f/2.8 to f/5.6 to blur distracting backgrounds. For group shots or landscapes, use f/8 to f/11 to keep everyone sharp.
Shutter speed and its relationship with light and motion
Shutter speed controls how long your camera’s sensor is exposed to light, measured in fractions of a second. A shutter speed explained guide reveals speeds range from 1/8000s (extremely fast) to 30 seconds or longer.

Fast shutter speeds freeze action. At 1/1000s, you can capture a sprinting athlete mid-stride with zero blur. Sports and wildlife photographers rely on fast speeds. The downside? Less light reaches the sensor, requiring compensation with wider aperture or higher ISO.
Slow shutter speeds allow more light but introduce motion blur. At 1/30s or slower, any camera shake or subject movement shows as blur. This can be creative (like silky waterfalls) or accidental (like blurry portraits).
How to choose the right shutter speed:
- Assess your subject’s motion and available light
- For still subjects in good light, use 1/125s to 1/250s for safety
- For moving subjects, start at 1/500s and go faster if needed
- For low light scenes, slow down but watch for camera shake
- Use a tripod below 1/60s to prevent blur from hand movement
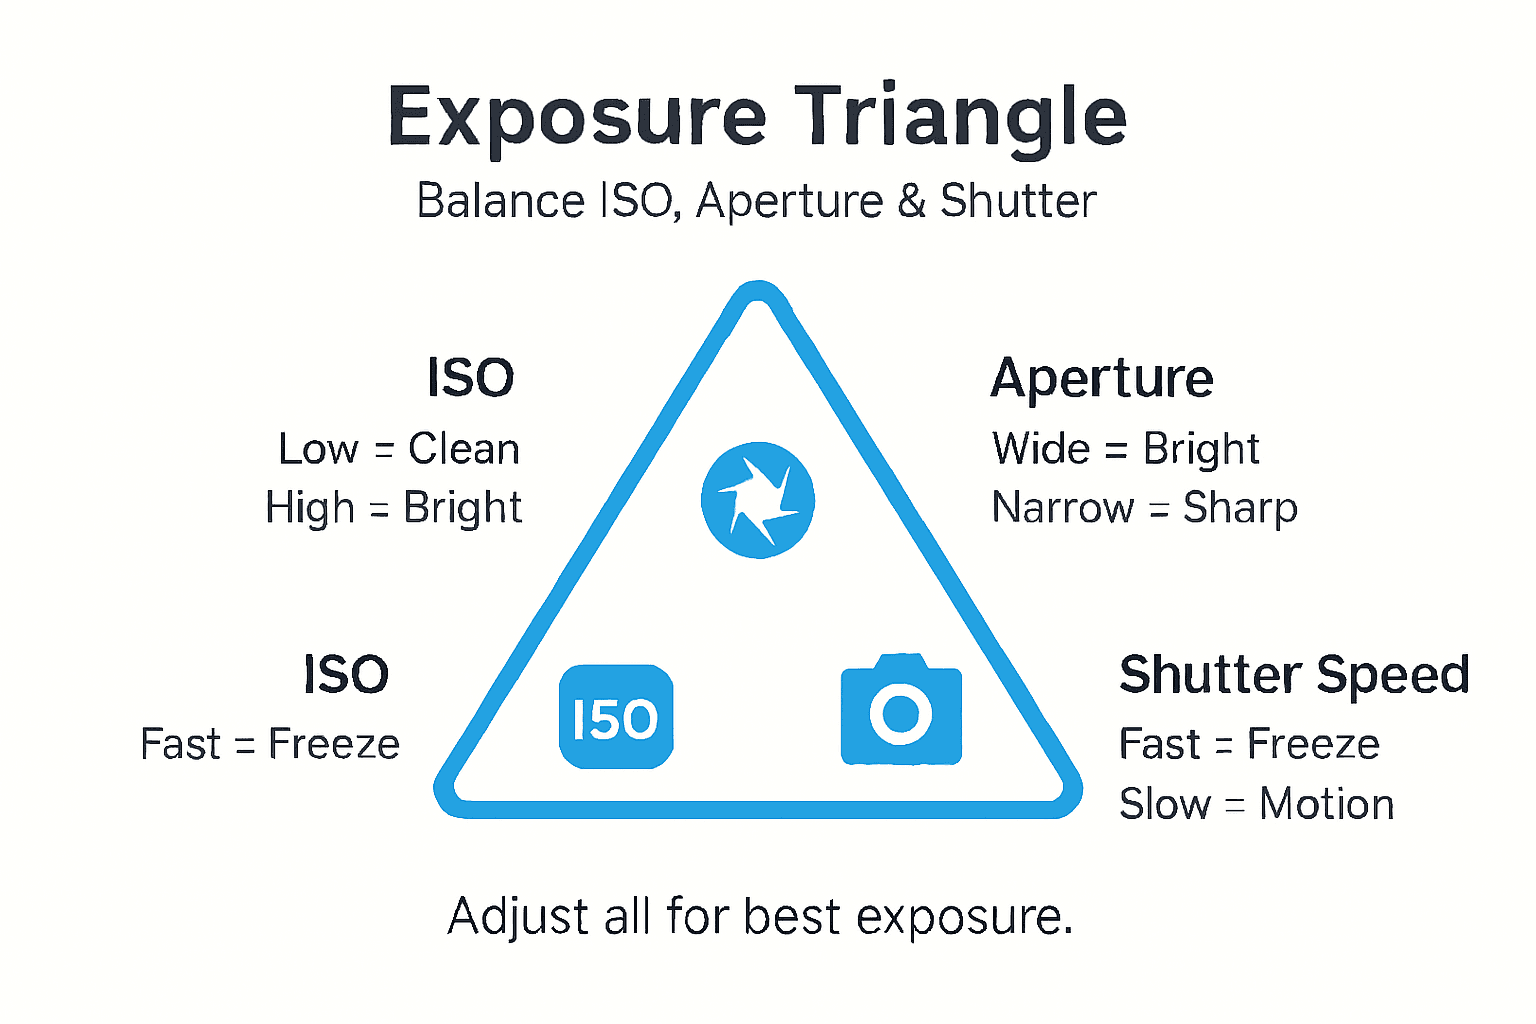
The exposure triangle and balancing settings
The Exposure Triangle visualizes how ISO, aperture, and shutter speed interact. Change one, and you must adjust others to maintain proper exposure in photography. This relationship is key to understanding exposure.
Imagine shooting outdoors on a sunny day. You set ISO 100, aperture f/8, and shutter speed 1/500s for a perfectly exposed photo. Now you want shallow depth of field, so you open aperture to f/2.8. That’s 3 stops more light. To compensate, increase shutter speed to 1/4000s or you’ll overexpose.
In low light indoors, you might need ISO 1600, f/2.8, and 1/60s. If you want sharper focus throughout the scene (f/8), you’d need to increase ISO to 6400 or slow shutter to 1/15s. Each choice has consequences.
| Scenario | ISO | Aperture | Shutter Speed | Goal |
|---|---|---|---|---|
| Bright daylight landscape | 100 | f/11 | 1/250s | Deep focus, clean image |
| Indoor portrait | 800 | f/2.8 | 1/125s | Blurred background, manageable noise |
| Night sports | 3200 | f/4 | 1/500s | Freeze motion, accept some noise |
Balancing the triangle becomes intuitive with practice. You learn which setting matters most for each shot and adjust the others accordingly.
Common misconceptions about automatic mode vs manual control
Many beginners believe automatic mode handles everything perfectly. In reality, auto mode struggles in complex lighting and limits creative control; manual adjustment improves exposure and artistic effects.
Auto mode averages the entire scene. If you photograph someone against a bright window, auto mode sees lots of light and darkens the exposure, turning your subject into a silhouette. It can’t read your mind about which part matters.
Common auto mode failures:
- Overexposing bright scenes like snow or beaches
- Underexposing backlit subjects
- Choosing high ISO when a slower shutter or wider aperture would work better
- Missing creative opportunities like intentional blur or shallow depth
Learning manual camera settings prevents these mistakes. You decide exposure priorities. You choose whether to freeze motion or blur it. You control depth of field precisely.
Manual mode sounds intimidating, but start with semi-automatic modes. Aperture Priority lets you set aperture while the camera picks shutter speed. Shutter Priority does the reverse. These modes teach the relationships before going fully manual.
Practical tips for shooting in different lighting conditions
Daylight photography offers abundant light. Use low ISO (100 to 200) for clean images. Set aperture between f/8 and f/16 for landscapes or f/4 to f/5.6 for portraits. Fast shutter speeds of 1/500s or higher prevent motion blur and camera shake.
Overexposure commonly occurs when beginners keep ISO too high or aperture too wide in bright conditions. If your LCD shows washed-out highlights, reduce ISO first, then narrow aperture or increase shutter speed.
Low light photography tips emphasize different priorities. Without a tripod, raise ISO to 800 or 1600. Open aperture to f/2.8 or wider. Keep shutter speed at least 1/60s to avoid blur from hand shake. If subjects are moving, prioritize faster shutter at the cost of higher ISO.
Mixed lighting presents challenges. Indoor rooms with windows create bright and dark areas. Auto mode gets confused. Manually balance settings for your main subject. Use fill flash if needed or adjust position to even out light.
Additional low light tips for beginners:
- Use a tripod to enable slower shutter speeds without blur
- Shoot in RAW format to recover more detail in editing
- Focus manually if autofocus struggles in darkness
- Embrace higher ISO if freezing motion is critical
Creative uses of light settings for artistic photography
Once you understand technical foundations, light settings become creative tools. Large apertures (f/1.4 to f/2.8) create dreamy bokeh, transforming background lights into soft circles. Aperture for artistic effects explains how shallow depth isolates subjects emotionally.
Slow shutter speeds turn motion into art. Photograph a waterfall at 1/4s or slower to smooth water into silk. Capture car headlights at night with 10-second exposures to create light trails. These effects are impossible in automatic mode.
Combine settings deliberately. For a sharp subject against blurred motion, use f/8 with a slow shutter and pan your camera to follow the subject. The background streaks while your subject stays clear. For low-key portraits, use low ISO and narrow aperture in dim light, forcing dark backgrounds that highlight your subject.
Creative techniques to explore:
- Intentional camera movement during long exposures for abstract effects
- Multiple exposures by adjusting settings between frames
- High-speed flash sync to freeze action with wide apertures in bright light
- Star trails using extremely long exposures and low ISO
These techniques seem advanced, but they’re just applications of the same three settings you’ve learned. Experimentation costs nothing with digital photography. Try wild combinations and review results immediately.
Enhance your photography skills with Amateur Photographer Guide
You’ve taken the first step toward mastering light. Now deepen your knowledge with targeted guides that fix specific problems and build essential skills.
Explore our beginner’s photography guide to identify and correct the most common camera mistakes holding you back. Develop strong photography habits for beginners that improve your workflow and creative consistency. Visit the Amateur Photographer Guide homepage for comprehensive resources covering everything from gear selection to advanced techniques. Every article is designed to give you actionable advice you can apply immediately to take better photos.
Frequently asked questions about light photography settings
How do I reduce noise when increasing ISO in low light?
Shoot in RAW format to preserve more detail for noise reduction in editing software like Lightroom. Many cameras also have built-in noise reduction features that process high ISO images. When possible, use a tripod to lower ISO instead of raising it.
What aperture should I choose to get a blurry background?
Use f/2.8 or wider (f/1.8, f/1.4) for maximum background blur. The effect increases with longer focal lengths and when your subject is far from the background. Portrait lenses around 85mm at f/1.8 create beautiful bokeh.
When should I prefer manual mode over auto mode for exposure?
Switch to manual when lighting is tricky, like backlit scenes, snow, or stage performances. Manual mode also helps when you want consistent exposure across multiple shots. Any time auto mode fails to expose correctly, manual gives you precise control.
How can I prevent motion blur when photographing moving subjects?
Use shutter speeds of 1/500s or faster for most action. Increase ISO or widen aperture to compensate for less light at high speeds. Track your subject smoothly and shoot in burst mode to capture the peak moment. Good lighting helps immensely.
Is it better to use a tripod or raise ISO in dark conditions?
If your subject is stationary, use a tripod and keep ISO low for cleaner images. For moving subjects or candid moments where tripods aren’t practical, raise ISO to maintain fast enough shutter speeds. Tripods eliminate one variable but aren’t always feasible.
Recommended
- What Is Exposure in Photography? Complete Guide
- ISO in Photography: Complete Guide for Beginners
- Understanding Exposure: How to Get the Perfect Shot
- 7 Essential Low Light Photography Tips for Beginners
Last update on 2026-03-05 / Affiliate links / Images from Amazon Product Advertising API