
Table of Contents
- Quick Summary
- 1. Understand Your Camera Settings for Travel Shots
- 2. Master Natural Lighting for Vibrant Images
- 3. Compose Your Shots Using the Rule of Thirds
- 4. Pack Smart With the Right Photography Gear
- 5. Capture Local Culture and Unique Moments
- 6. Edit Travel Photos for Maximum Impact
- 7. Protect Your Photos and Backup on the Go
- Elevate Your Travel Photography Skills Today
- Frequently Asked Questions
- Recommended
This blog post may contain affiliate links. As an Amazon Associate I earn from qualifying purchases.
Over half of American travelers admit they wish their photos better captured the excitement of their journeys. Understanding your camera, using natural light, and making smart gear choices can make a world of difference on any adventure. Whether you are exploring hidden neighborhoods or famous landmarks, this guide helps American explorers capture truly unforgettable travel memories by focusing on what really matters in photography.
Quick Summary
| Key Message | Explanation |
|---|---|
| 1. Master Camera Settings | Learn to adjust shutter speed, aperture, and ISO to enhance your travel photography. Practicing these settings allows for creative freedom and adaptability. |
| 2. Utilize Natural Lighting | Shoot during the golden hour for softer, more flattering light, and consider your subject’s position relative to the sun for better images. |
| 3. Apply the Rule of Thirds | Use a 3×3 grid to compose shots, positioning key elements along the lines or intersections for better balance and visual interest. |
| 4. Pack Essential Gear | Focus on lightweight, multifunctional equipment like a mirrorless camera and versatile lenses to enhance your travel photography experience without extra bulk. |
| 5. Implement Backup Strategies | Regularly back up photos using multiple methods such as cloud storage and portable hard drives to safeguard against data loss during travels. |


1. Understand Your Camera Settings for Travel Shots
Your camera is the gateway to capturing stunning travel memories, and understanding its settings is crucial for creating incredible photographs. Most travelers make the mistake of relying solely on automatic mode, which limits their creative potential and ability to adapt to changing light and environmental conditions.
The three core settings you need to master are shutter speed, aperture, and ISO – what photographers refer to as the exposure triangle. Shutter speed controls how long light enters your camera, affecting motion blur and image sharpness. Aperture determines depth of field and how much light reaches your sensor, while ISO influences the image’s brightness and digital noise.
Practical implementation starts with moving beyond automatic mode. Begin by practicing in aperture priority mode, which allows you to control depth of field while the camera adjusts complementary settings. When shooting landscapes, use a smaller aperture (higher f number like f8 or f11) to keep everything from foreground to background in sharp focus. For portraits against scenic backgrounds, try a wider aperture (lower f number like f2.8 or f4) to create a beautiful blurred background effect.
When shooting in challenging travel environments like bright beaches or dark indoor settings, understanding how to quickly adjust these three settings will transform your photography. For instance, in bright sunlight, lower your ISO to 100 200, use a faster shutter speed to prevent overexposure, and select an aperture that keeps your scene crisp and detailed.
A key strategy is to spend time with your camera before your trip. Practice changing settings quickly, understanding how each adjustment impacts your image. Take test shots in different lighting conditions to build muscle memory and confidence. By doing this, you will be prepared to capture spontaneous moments without fumbling with technical details.
Remember that mastering camera settings is a journey. Do not get overwhelmed trying to perfect everything at once. Start with one setting, practice consistently, and gradually expand your technical skills. Your travel photographs will quickly improve as you become more comfortable and intentional with your camera.
2. Master Natural Lighting for Vibrant Images
Natural lighting can transform ordinary travel photographs into extraordinary visual stories. Understanding how sunlight interacts with your environment is the key to creating images that capture the true essence of your destinations.
The golden hour is a photographer’s secret weapon a magical time shortly after sunrise and before sunset when sunlight becomes soft, warm, and incredibly flattering. During this period, light is diffused and creates rich, dimensional colors with minimal harsh shadows. Photographers who understand the role of light can dramatically improve their image quality without expensive equipment.
Practical strategies for mastering natural light involve more than just timing. Pay attention to your subject’s positioning relative to the sun. When shooting landscapes, try placing the sun to the side or behind you to minimize lens glare and maximize color saturation. For portraits, position your subject at a 45 degree angle to the sun to create soft, sculpting light that highlights facial features without creating harsh shadows.
Weather conditions also dramatically impact lighting. Overcast days provide soft diffused light perfect for detailed shots with minimal contrast. Bright midday sun can create challenging harsh shadows, so consider using natural reflectors like light colored walls or seeking shade to soften the light. Experiment with backlighting to create dramatic silhouettes or ethereal glowing effects around your subjects.
Technology can help you plan your shots. Many smartphone apps now provide precise golden hour predictions based on your geographic location, allowing you to schedule shoots during optimal lighting conditions. Some apps even calculate exact sunrise and sunset times, helping you plan your photography sessions with precision.
Remember that mastering natural light is a skill developed through practice and observation. Start by studying how light changes throughout the day, experiment with different angles and positions, and do not be afraid to take multiple shots under varying conditions. Your understanding and comfort with natural lighting will grow with each photograph you capture.
3. Compose Your Shots Using the Rule of Thirds
The rule of thirds is a powerful composition technique that can transform your travel photographs from ordinary snapshots to visually compelling images. This simple yet effective strategy helps photographers create balanced, dynamic compositions by mentally dividing their frame into a 3×3 grid.
Imaging your camera screen with two horizontal and two vertical lines creating nine equal sections. The rule of thirds explained suggests placing key elements of your image along these lines or at their intersections, rather than centered in the frame. This approach creates visual tension, draws viewer interest, and adds a sense of movement and depth to your photographs.
In practice, this means when photographing landscapes, position the horizon line along the top or bottom third of the frame instead of directly in the center. For portraits or wildlife shots, place your subject slightly off center at one of the grid intersections. This technique naturally guides the viewer’s eye through the image, creating a more engaging visual experience.
Most modern cameras offer a grid overlay feature that can help you implement the rule of thirds. If your camera does not have this option, many smartphones and editing apps provide grid lines to assist with composition. Start by enabling these guides and practicing intentional placement of your main subject or horizon line.
Do not consider the rule of thirds as a rigid law, but rather a flexible guideline. Sometimes breaking the rule intentionally can create powerful visual impact. Experiment with different compositions, taking multiple shots with slight variations. Review your images and notice how shifting elements can dramatically change the photograph’s emotional tone and visual appeal.
Travel photography offers endless opportunities to apply the rule of thirds. Whether you are capturing vast mountain landscapes, bustling city streets, or intimate cultural moments, this composition technique can help you create more professional looking images. The key is practice and developing an intuitive sense of visual balance.
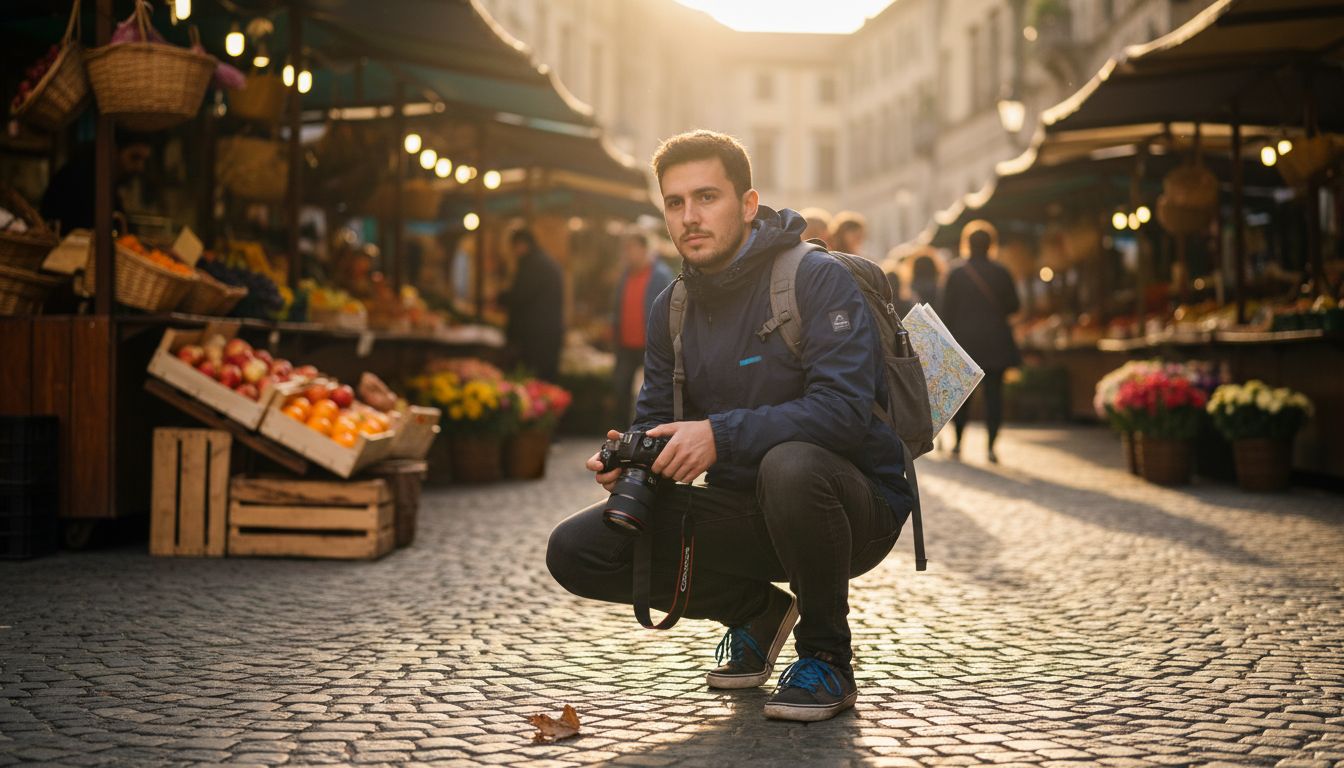
4. Pack Smart With the Right Photography Gear
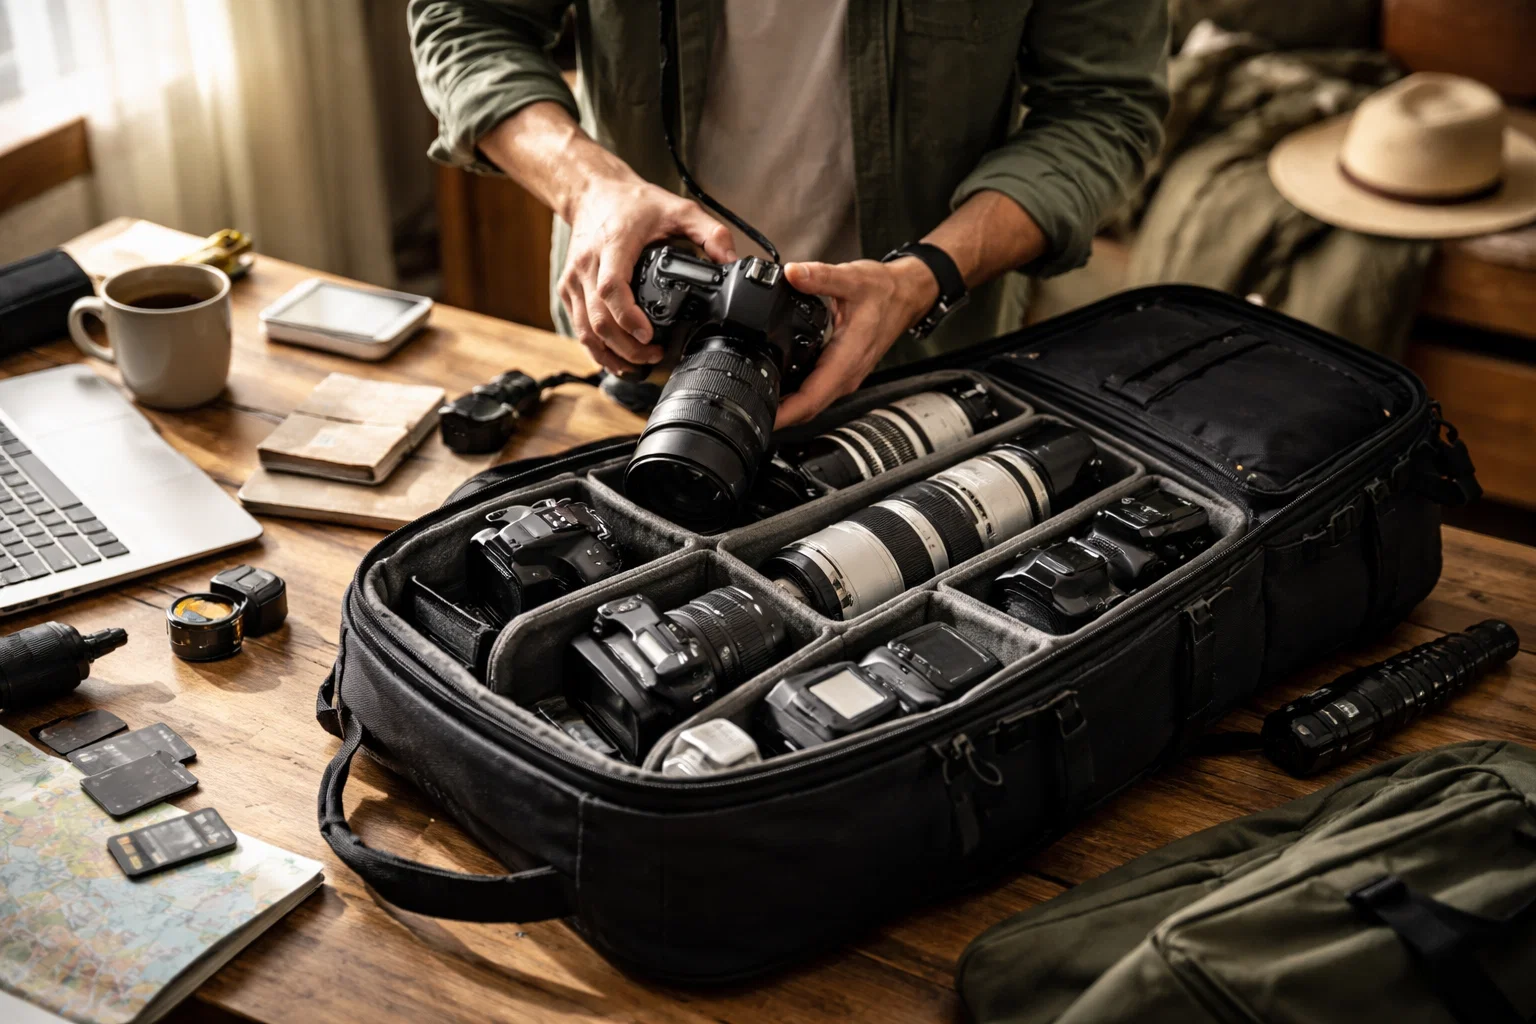
Successful travel photography requires thoughtful gear selection that balances versatility, weight, and performance. Packing the right equipment can mean the difference between capturing stunning memories and missing incredible moments.
Start by understanding your specific travel needs. A comprehensive photography gear essentials guide suggests focusing on lightweight, multipurpose equipment that can handle diverse shooting conditions. Your core kit should include a reliable camera body, versatile lens, extra batteries, multiple memory cards, and protective carrying solutions.
Essential Gear Recommendations:
- Mirrorless cameras for lightweight travel
- One versatile zoom lens covering multiple focal lengths
- Minimum two camera batteries
- Memory cards with minimum 64GB storage
- Compact tripod for stability
- Weatherproof camera bag
- Portable lens cleaning kit
Weight management is crucial for travel photographers. Select gear that provides maximum functionality with minimal bulk. A single lens that covers wide angle to telephoto ranges can replace multiple specialized lenses, reducing both weight and complexity. Consider investing in a mirrorless camera system, which typically weighs significantly less than traditional DSLR setups while delivering professional quality images.
Protect your investment by choosing gear with robust construction and weather sealing. Electronics can be vulnerable during travel, so invest in padded camera bags, silica gel packets to control moisture, and protective lens filters. Always pack your most valuable equipment in carry on luggage to prevent potential damage or loss.
Beyond physical equipment, consider digital storage solutions. Bring portable hard drives or use cloud backup services to ensure your precious travel photographs remain safe. Many photographers recommend maintaining multiple backup systems to prevent potential data loss.
Remember that the best camera is the one you have with you. While professional grade equipment can produce stunning results, creativity and technique matter more than expensive gear. Practice with your equipment before traveling, understand its limitations, and focus on developing your photographic skills.
5. Capture Local Culture and Unique Moments
Travel photography transcends mere landscape snapshots or tourist attractions. It is about telling genuine stories through images that reveal the soul of a destination and its people.
Authenticity requires more than technical skill. Capturing candid moments in photography demands respect, curiosity, and genuine human connection. Before raising your camera, invest time in understanding local cultural norms, learning basic language phrases, and building rapport with your subjects.
Key Strategies for Cultural Photography:
- Always ask permission before photographing individuals
- Learn basic local greetings and phrases
- Offer to share photos with subjects
- Respect cultural and religious sensitivities
- Carry small gifts or tokens of appreciation
- Dress appropriately for local contexts
- Show genuine interest beyond photography
Successful cultural photography involves creating meaningful interactions. Do not treat local people as photographic subjects but as collaborative storytellers. Engage in conversations, show genuine interest in their lives, and approach photography as a form of cultural exchange. Sometimes the most powerful images emerge from moments of authentic human connection.
Technical considerations matter too. Use a versatile lens that allows you to capture details without intrusive close ups. Wide angle lenses can help capture environmental portraits that situate people within their cultural context. Soft natural light and candid compositions often produce more compelling results than staged or overly formal photographs.
Remember that every photograph tells a story. Your goal is not just to document but to represent local cultures with dignity, nuance, and respect. Avoid exoticizing or stereotyping communities. Instead, seek to capture the complexity, humanity, and individuality of the people you encounter during your travels.
6. Edit Travel Photos for Maximum Impact

Post processing transforms good travel photographs into extraordinary visual narratives. Raw images captured in the field rarely represent the full emotional depth and visual potential of a scene.
Mastering essential photo editing tips for amateur photographers requires understanding both technical adjustments and creative vision. Think of editing as refining your photographic story, not just correcting technical imperfections.
Key Editing Principles:
- Adjust exposure to reveal hidden details
- Balance color temperature and saturation
- Crop strategically to improve composition
- Reduce digital noise in low light images
- Maintain natural looking results
- Use subtle adjustments
- Preserve image authenticity
Start with fundamental corrections like exposure, white balance, and contrast. These basic adjustments can dramatically improve image quality without requiring advanced technical skills. Learn to read histogram data to understand how light is distributed across your image and make precise adjustments.
Color correction plays a crucial role in travel photography. Subtle shifts in color temperature can transport viewers back to the exact moment you captured the scene. Warm tones can emphasize sunset landscapes while cooler tones might enhance urban architectural shots. Always aim for natural looking results that evoke genuine emotional responses.
Develop a consistent editing style that reflects your unique visual perspective. This does not mean applying the same preset to every image, but creating a recognizable approach that ties your travel photography portfolio together. Experiment with different editing techniques, but remain true to the authentic experience of each photograph.
7. Protect Your Photos and Backup on the Go
Nothing is more heartbreaking for a travel photographer than losing irreplaceable memories due to poor data management. Your photographs represent unique moments that cannot be recaptured, making robust backup strategies essential during your adventures.
Digital storage technologies offer multiple ways to protect your camera roll and ensure your photographic memories remain safe. Modern travelers have several strategic options for maintaining multiple backup layers.
Backup Strategy Essentials:
- Carry multiple high capacity memory cards
- Use cloud storage services
- Pack portable external hard drives
- Enable automatic wireless backup
- Keep physical and digital backups separate
- Store backups in different locations
- Consider encrypted backup solutions
The most reliable approach involves creating three separate backup copies: one on your original memory card, one on a portable external drive, and one in cloud storage. This strategy protects against potential device theft, physical damage, or technological failure. Lightweight portable hard drives weighing less than 8 ounces can store thousands of high resolution travel images.
Technology provides numerous backup solutions. Many smartphones offer automatic wireless backup to cloud services, allowing instant image transfer when connected to wifi. Dedicated travel photographers might invest in rugged portable solid state drives designed to withstand harsh environmental conditions. These compact devices can quickly transfer images from memory cards and provide immediate redundant storage.
Beyond technological solutions, practice smart data management. Regularly offload images from your memory cards during your trip. Create a routine of backing up images each evening, which prevents potential data loss and allows you to free up storage space for continued shooting. Always keep your backup devices in separate locations to mitigate risks associated with potential theft or damage.
Below is a comprehensive table summarizing the main strategies and techniques for enhancing travel photography as discussed in the article.
| Strategy | Implementation | Expected Results |
|---|---|---|
| Camera Settings | Master shutter speed, aperture, and ISO. Practice beyond automatic mode using aperture priority. | Capture images with better depth, clarity, and detail fitting different scenes. |
| Natural Lighting | Utilize golden hour, position relative to light, and consider weather conditions. | Create vibrant, well-lit images with minimal harsh shadows. |
| Rule of Thirds | Use a grid to align subjects along vertical and horizontal lines. | Achieve balanced and visually compelling compositions. |
| Smart Gear Packing | Pack lightweight and versatile gear; prioritize protective cases and backup storage. | Maximize functionality and safety, reducing the chances of gear loss or damage. |
| Cultural Photography | Engage respectfully, learn local customs, and ask permission before photographing. | Capture authentic, respectful images that tell compelling stories. |
| Photo Editing | Adjust exposure, color, and composition without compromising authenticity. | Transform raw images into polished and emotionally engaging photographs. |
| Photo Backup | Use external drives, cloud storage, and keep multiple backups. | Protect irreplaceable memories with reliable data management systems. |
Elevate Your Travel Photography Skills Today

Travel photography challenges like mastering camera settings, natural lighting, and capturing authentic moments can feel overwhelming for beginners. If you want to move beyond automatic modes, learn how to compose shots with the rule of thirds, or choose the right gear for your adventures, you are not alone. Understanding techniques such as the exposure triangle and harnessing the golden hour light can transform your images and unlock your creative potential.
Discover practical, easy-to-understand advice and expert insights designed specifically for amateur photographers at Amateur Photographer Guide. Whether you want to improve your shooting techniques, master post-processing, or protect your photos with effective backup strategies, our 7 Essential Travel Photography Tips for Beginners article and related resources will help you gain confidence and capture travel moments like a pro. Start exploring now and turn every trip into a visual story worth sharing.
Frequently Asked Questions
How can I improve my travel photography skills?
To enhance your travel photography skills, start by mastering your camera settings, including shutter speed, aperture, and ISO. Practice taking photos in different environments and lighting conditions to build your confidence and technique.
What is the golden hour in photography and when should I shoot?
The golden hour refers to the time shortly after sunrise and before sunset when the light is soft and warm, ideal for photography. Plan to shoot during this time to capture vibrant images with minimal harsh shadows.
How can I use the rule of thirds in my travel photography?
You can apply the rule of thirds by mentally dividing your frame into a 3×3 grid and placing key elements along these lines or at their intersections. This technique helps create balanced and visually engaging photos, enhancing the overall composition of your shots.
What photography gear should I take on my travels?
When packing for travel photography, prioritize lightweight and multipurpose gear that meets your needs. Essential items include a versatile camera, a zoom lens, extra batteries, and memory cards to ensure you are prepared for various shooting conditions.
How do I ensure the authenticity of cultural photography?
To capture authentic cultural photographs, engage with your subjects and seek their permission before taking photos. Showing genuine interest in their lives and respecting local customs will lead to more meaningful and impactful images.
What are key editing tips for enhancing travel photos?
Essential editing tips include adjusting exposure to reveal hidden details, balancing color temperature, and cropping to improve composition. Start with simple corrections and focus on creating a style that reflects your unique perspective in your travel photography.
Recommended
- The Art of Travel Photography: Tips and Tricks – Amateur Photographer Guide
- 7 Essential Photography Beginner Tips for New Photographers – Amateur Photographer Guide
- 7 Essential Steps for Your Photography Basics Checklist – Amateur Photographer Guide
- 7 Essential Steps for a Landscape Photography Checklist – Amateur Photographer Guide
- Essential Gear for City Walking Tours – Walking tours of oxford
Last update on 2026-07-07 / Affiliate links / Images from Amazon Product Advertising API
