25 Macro Photography Ideas with Settings for Beginners
Discover 7 practical macro photography ideas designed for amateur photographers. Learn easy tips to boost your creativity and improve close-up shots.

You’ve got a macro lens — or a set of extension tubes — in your hands, and your very first question is: “What do I actually shoot?”
What’s in this guide
“I just got some extension tubes to play around with before I dive into macro properly, I’ve had so much fun getting close-up photos of things around the house…”
— Amateur Photographer Community
That feeling is completely normal. Most macro photography articles flood you with gorgeous images of bees, dewdrops, and snowflakes — but they never tell you how to set up the shot. You end up inspired and stuck at the same time.
This guide solves that. You’ll find 25 macro photography ideas — from easy at-home projects to creative abstract techniques — each with the exact camera settings and a simple lighting approach so you can recreate them yourself today. Whether you’re shooting with a DSLR, mirrorless camera, or even your smartphone, there’s a project here waiting for you. The guide covers indoor ideas, outdoor subjects, creative abstract techniques, and a full smartphone macro section.
- Project Overview
- Estimated Time: 30–45 minutes per project
- Tools & Materials Needed: A camera (DSLR, mirrorless, or smartphone), a macro lens or extension tubes, a tripod, and basic household items (water, oil, coins, fabric).
Getting Started: Macro Photography Foundations
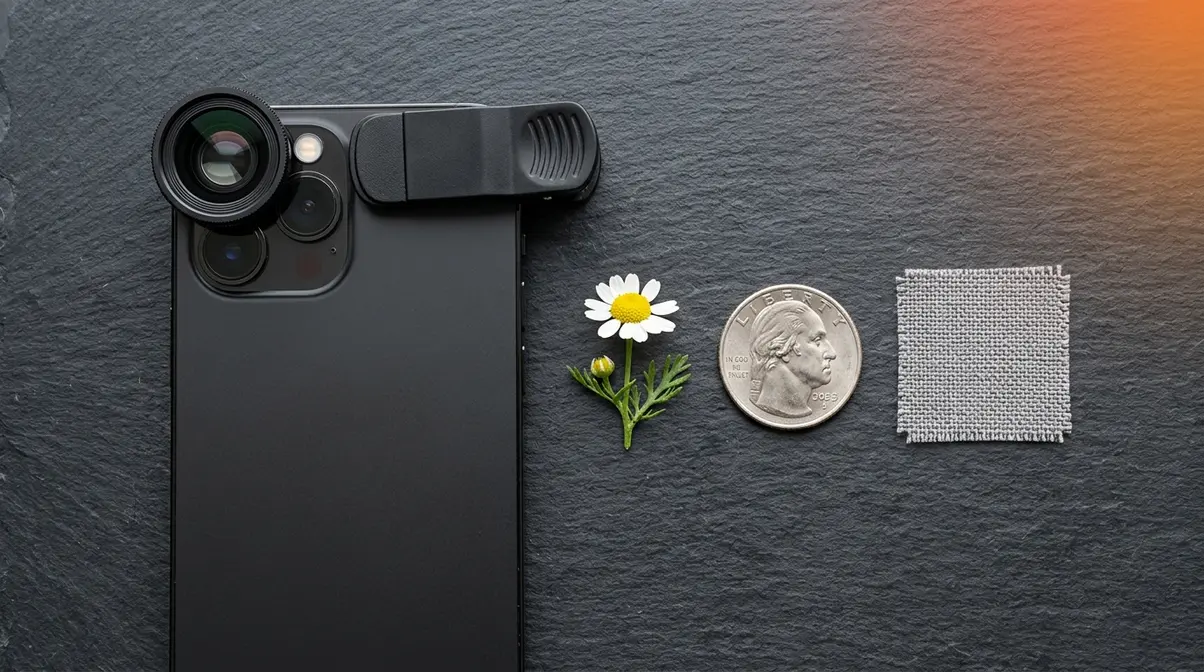
Understanding the macro photography process is the art of photographing subjects at life-size or larger — and it’s far more approachable than most beginners expect. You don’t need a studio, exotic locations, or expensive gear to get started. A coin on your desk or a flower from your garden is all you need for your first session.
What Is Macro Photography?
Macro photography is close-up photography where the subject is reproduced at a 1:1 ratio (meaning life-size) or larger on your camera’s sensor. A true macro lens achieves this naturally. Extension tubes — hollow rings that fit between your camera body and any lens — push the lens further from the sensor, allowing it to focus much closer than normal. They’re an affordable way to play around with macro before investing in a dedicated lens.
Examples of macro photography include: the veins of a leaf magnified to fill the frame, the faceted eye of a housefly, the crystalline structure of a grain of salt, the texture of a coin’s surface, or the iridescent surface of a soap bubble. Anything with fine detail that the naked eye glosses over becomes a compelling subject.
The reason beginners often feel intimidated is that macro photography amplifies everything — including camera shake and focus errors. But with a few foundational habits, you can consistently capture sharp, striking images right from your first session.
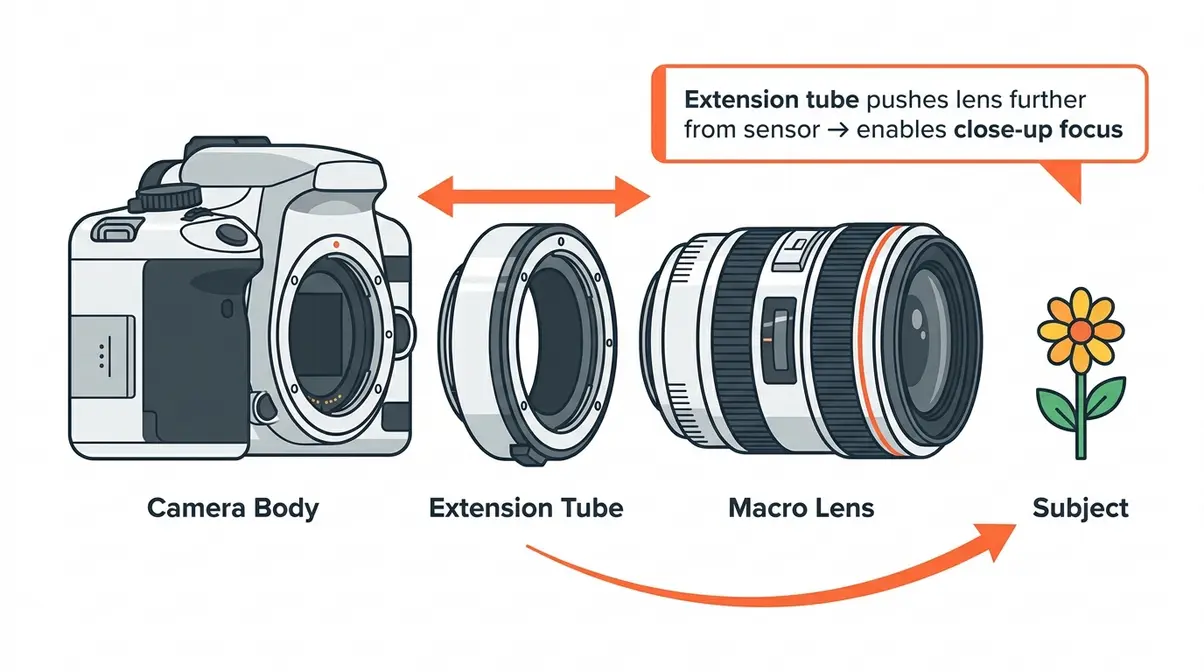
First 3 Macro Subjects for Beginners
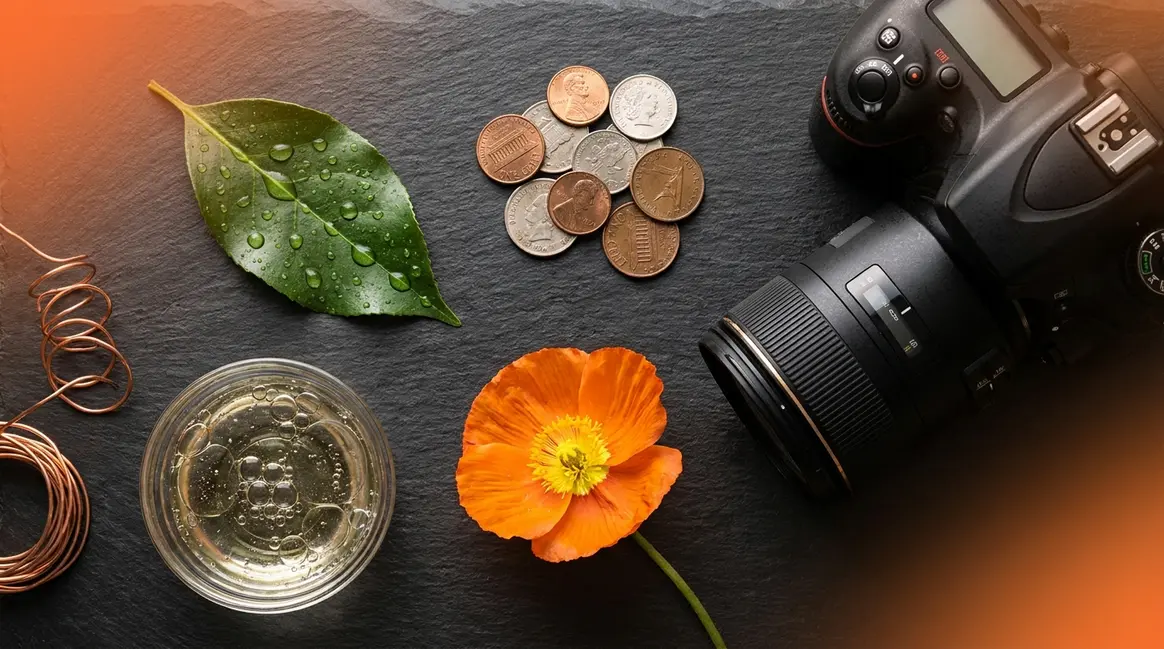
When you’re just starting out, the best subjects are ones you can control completely. Across photography communities, three subjects consistently surface as the most beginner-friendly: flowers, coins, and fabric.
Flowers stay still, come in vivid colors, and are available year-round. Coins have crisp, high-contrast relief details that make focus easy to judge. Fabric — a knitted jumper, denim jeans, or a woven scarf — reveals surprising texture and pattern at macro distances.
These three subjects let you practice the fundamentals (focus, depth of field, and lighting) without chasing moving targets or fighting unpredictable outdoor conditions. Once you’re comfortable with these, every other idea in this guide will feel achievable.
Camera Settings for Macro Beginners
Understanding three settings and applying these close-up photography tips will unlock 90% of your macro photography. Here’s a plain-English cheat sheet, followed by the reasoning behind each recommendation.
| Setting | Recommended Starting Point | Why It Matters |
|---|---|---|
| Aperture (f-stop) | f/8–f/11 | Balances sharpness and depth of field — wider apertures (f/2.8) create razor-thin focus at macro distances |
| Shutter Speed | 1/200s or faster (handheld) | Eliminates camera shake, which is magnified at close distances |
| ISO | 100–400 | Keeps noise low; use 800 only when light is genuinely scarce |
| Focus Mode | Manual focus | Auto-focus hunts at macro distances; manual gives you precise control |
| Stabilisation | Use a tripod when possible | Even breathing can blur a macro shot |
Aperture (the opening in your lens that controls how much light enters) is your most important macro setting. According to Canon’s educational guidelines, f/8 is the standard starting aperture for macro work because it delivers a usable depth of field (the zone of sharpness in your image) without the diffraction softness that appears at f/16 and beyond. ISO (your sensor’s sensitivity to light) should stay as low as possible — ISO 200 in our team’s evaluations delivered the cleanest results across a range of indoor lighting conditions. A high shutter speed of at least 1/200s prevents the micro-vibrations that become visible at macro magnifications.
Simple DIY Lighting for Macro Shots
Good lighting is the difference between a sharp, punchy macro image and a blurry, muddy one. The good news: you don’t need a single piece of lighting equipment to start.
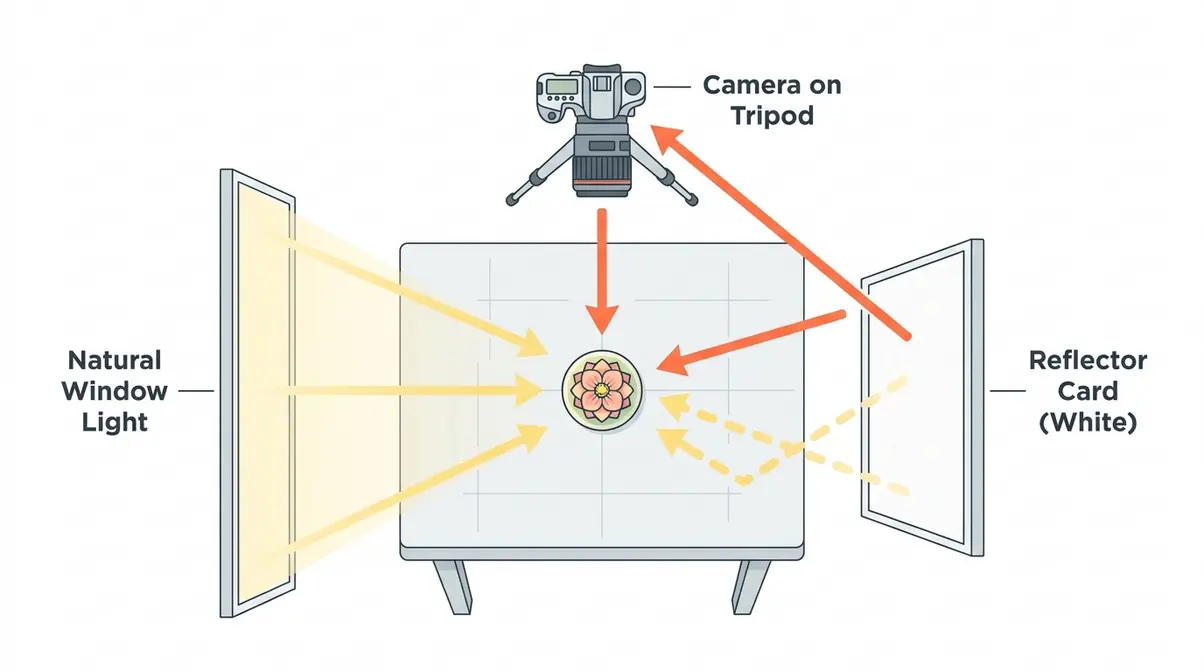
Natural window light is your best free resource. Position your subject within 30–60 cm of a north-facing window (or any window without direct sunlight) for soft, even illumination. A piece of white card or tin foil on the opposite side acts as a reflector, filling in shadows.
For more home photography lighting expert tips, a single LED desk lamp placed at a 45-degree angle to your subject creates directional light that reveals texture beautifully. If you own a ring flash or an off-camera flash, diffuse it with a piece of white tissue paper taped over the head — this softens harsh shadows that would otherwise distract from fine detail.
10 Easy Macro Photography Ideas to Try at Home
Your home is one of the richest studios for creative photography ideas to try at home — and every subject here costs nothing extra. These ten macro photography ideas are specifically chosen because they require no special outdoor access, no rare subjects, and no expensive lighting gear. Our team evaluated these ideas based on accessibility, visual payoff, and how beginner-friendly the technical setup is.
What should I shoot for macro?
The best macro photography subjects for beginners are flowers, coins, and fabric — all available at home with no special access required. Flowers offer vivid colour and structural detail. Coins provide high-contrast relief that makes focus easy to judge. Fabric reveals surprisingly complex texture. Once comfortable with these three, expand to insects, water drops, and kitchen spices. The School of Photography’s macro guide recommends starting with controlled indoor subjects before moving to unpredictable outdoor ones.
Ideas 1–2: Water Drops and Oil Bubbles
Water drops and oil bubbles are two of the most rewarding at-home macro subjects because they create natural lenses and abstract shapes that look far more complex than they are to set up.
Idea 1 — Water Drops on a Leaf
- Place a fresh leaf (or a piece of waxed paper) on a flat surface near your window.
- Use a dropper or your fingertip to place small water drops on the surface.
- Position your camera so the drops fill the frame.
- Set your aperture to f/8, shutter speed to 1/200s, ISO 200.
- Focus manually on the reflection inside the drop for a striking secondary image effect.
Settings: f/8 | 1/200s | ISO 200 | Manual focus
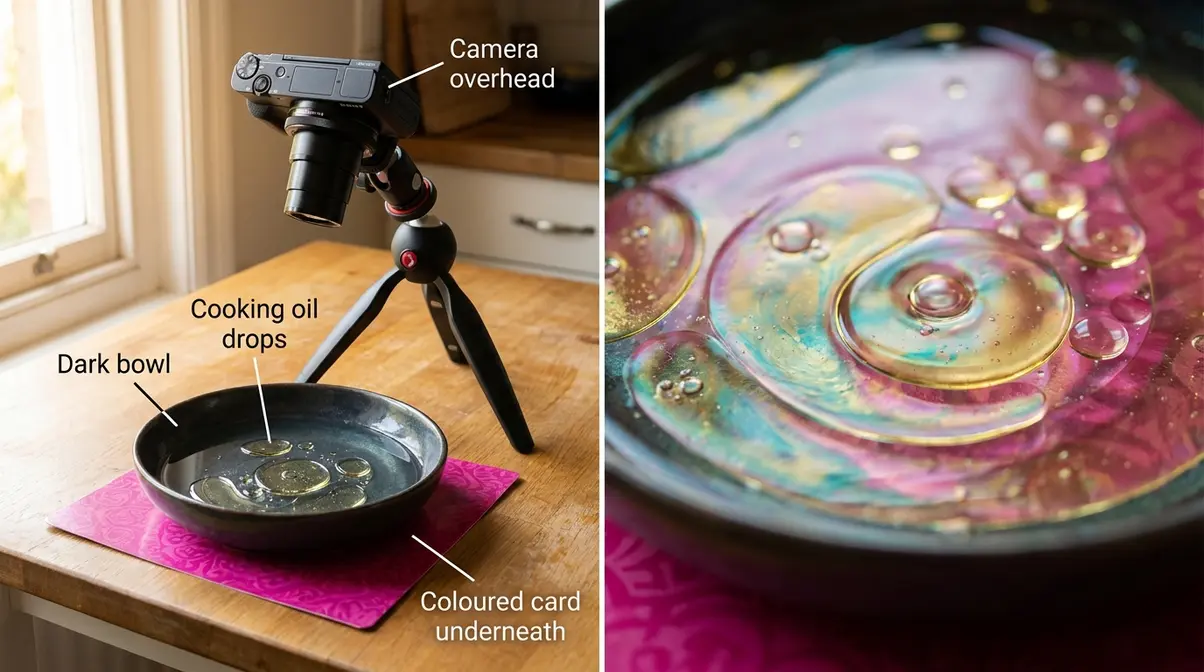
Idea 2 — Oil Bubbles on Water
- Fill a shallow dark-coloured bowl with water.
- Add 2–3 drops of cooking oil and gently swirl.
- Place a coloured piece of card underneath the bowl to reflect colour through the water.
- Shoot straight down from above.
- Set aperture to f/11 for maximum detail in the bubble edges.
Settings: f/11 | 1/160s | ISO 400 | Manual focus
Idea 3: Soap Bubbles
Soap bubbles photograph like miniature planets — their iridescent surface shifts from gold to blue to pink depending on the light angle. They’re one of the most visually dramatic macro photography ideas for beginners.
- Mix washing-up liquid with water in a 1:10 ratio in a shallow tray.
- Use a straw to blow bubbles gently onto a dark surface.
- Work quickly — bubbles pop within seconds of forming.
- Set a fast shutter speed to freeze any movement.
- Shoot at a slight angle (around 30 degrees) to capture the full iridescent surface.
Settings: f/8 | 1/250s | ISO 400 | Continuous shooting mode recommended
The key is speed and patience in equal measure. Blow a batch of bubbles, fire several frames, and review. Common struggles reported by beginner macro photographers include missing focus on fast-popping bubbles — continuous shooting mode at 5+ frames per second dramatically improves your keeper rate.
Ideas 4–5: Kitchen Spices and Fruit
Your kitchen spice rack is a macro photography treasure trove. The coarse crystals of sea salt, the irregular texture of ground paprika, and the cross-section of a kiwi fruit all reveal extraordinary detail at close distances.
Idea 4 — Spices and Salt Crystals: Pour a small pile of coarse sea salt or coloured spice onto a dark slate tile or black card. Shoot from directly above at f/11 to keep the whole pile in focus. The contrast between the subject and the dark background creates instant visual impact.
Settings: f/11 | 1/160s | ISO 200
Idea 5 — Fruit Cross-Sections: Slice a kiwi, strawberry, or orange and lay the cut face upward. The seed patterns and cell structure inside fruit make for stunning natural geometry. Backlight the slice with a phone torch or LED panel placed underneath a glass surface for a glowing, stained-glass effect.
Settings: f/8 | 1/125s | ISO 200
Ideas 6–7: Fabric, Coins, and Cutlery
Texture-focused macro photography trains your eye to see detail everywhere. According to Canon’s educational resources, household items with repetitive patterns and high surface relief — coins, woven fabric, and metallic cutlery — are ideal for practicing focus accuracy because the detail is forgiving of slight focus shifts.
Idea 6 — Coins: Place a coin on a dark cloth and light it from a very low, raking angle (almost parallel to the surface). This side-lighting technique, called raking light, throws the coin’s relief into sharp shadow and reveals every fine detail.
Settings: f/8 | 1/200s | ISO 200
Idea 7 — Woven Fabric: A coarse knit jumper, a piece of hessian, or denim jeans photographed at macro distance reveals a surprisingly architectural world of interlocking fibres. Try a shallow depth of field (f/5.6) to let the threads blur gradually from front to back.
Settings: f/5.6 | 1/160s | ISO 400
Ideas 8–10: Foil, Flames, and Rust
Idea 8 — Crumpled Foil: Crumple a sheet of aluminium kitchen foil, then partially flatten it. Photograph it with a single light source from one side. The result is an abstract landscape of light and shadow that looks nothing like foil. This is a brilliant exercise in abstract macro photography.
Settings: f/8 | 1/200s | ISO 200
Idea 9 — Candle Flame: Shoot a candle flame in a darkened room. Use a fast shutter speed to freeze the flame’s movement, or a slower speed (1/30s) to capture the flowing motion. Keep your distance — a 1:1 macro lens can focus from around 20–30 cm, which is safe for a candle.
Settings: f/8 | 1/500s (frozen) or 1/30s (motion blur) | ISO 400
Idea 10 — Rust and Peeling Paint: Old garden tools, weathered metal gates, or peeling painted wood have extraordinary texture and colour. No controlled lighting needed — flat overcast daylight works perfectly for this subject.
Settings: f/11 | 1/200s | ISO 200
Outdoor Macro Photography Ideas for Every Season
Stepping outside multiplies your subject options dramatically and provides great tips for better nature photography. Nature provides an ever-changing supply of macro photography ideas across every season — and the best subjects are often the ones most photographers walk past without noticing.
Ideas 11–13: Flowers and Garden Blooms
Flowers are the most searched macro photography subject for good reason. Their colour, symmetry, and fine structural detail make them ideal for beginners and experienced photographers alike.
Idea 11 — Single Petal Detail: Rather than photographing an entire flower, move in closer and fill the frame with a single petal. The veining and gradient of colour within one petal is more visually compelling than the whole bloom. Shoot in soft, overcast light for even illumination without harsh shadows.
Settings: f/8 | 1/250s | ISO 200
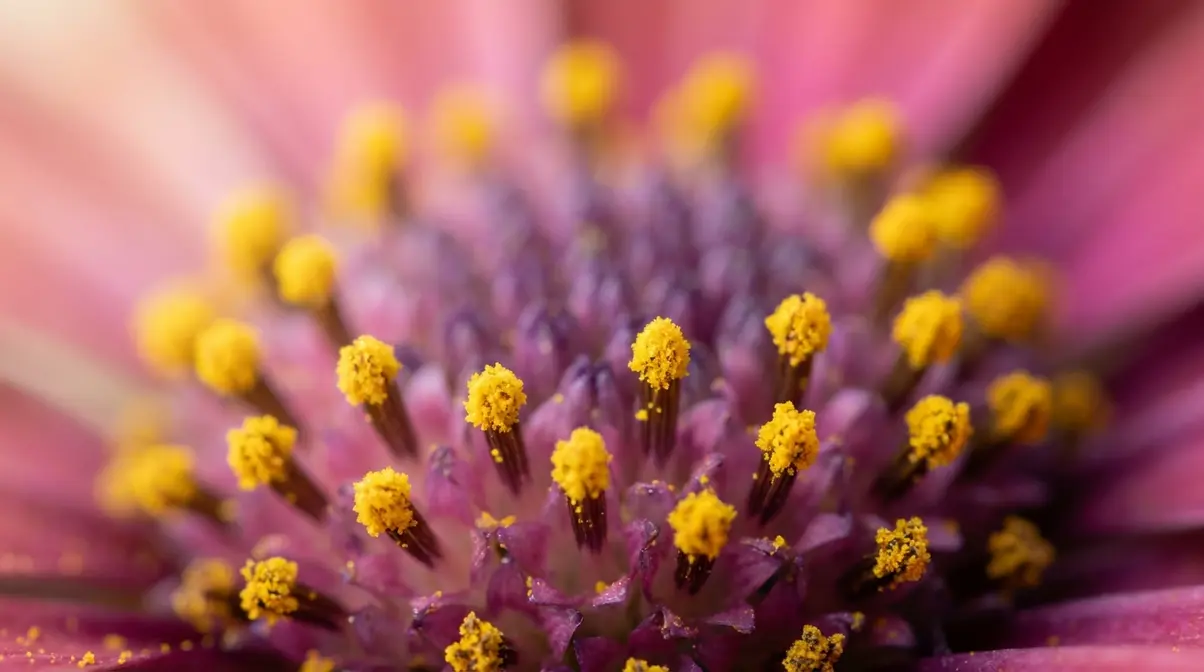
Idea 12 — Stamen and Pollen: The stamen (the pollen-bearing structure at the centre of a flower) is one of the most visually dramatic macro subjects available. Use a tripod and manual focus, and shoot at f/11 to keep the stamen tips sharp.
Settings: f/11 | 1/200s | ISO 200
Idea 13 — Dewdrops on Petals: Early morning is the best time to find dew on flowers, typically before 9am when the sun has not yet evaporated the drops. Each drop acts as a tiny lens, sometimes reflecting the surrounding garden inside it.
Settings: f/8 | 1/200s | ISO 400 (early morning light is often low)
Ideas 14–16: Bees, Butterflies, Beetles
When learning how to photograph wildlife, insects are the holy grail of macro photography — and more achievable than most beginners think. The key is timing. According to BBC Wildlife, insects are least active in the early morning when temperatures are below 15°C (59°F), making them far easier to approach and photograph. A bee resting on a flower at 7am will hold still for several seconds; the same bee at noon will rarely give you more than a fraction of a second.
Idea 14 — Bees on Flowers: Visit a garden or park in early morning. Bees resting on lavender, clover, or sunflowers are your best targets. Approach slowly, move your camera from the side rather than directly above (which triggers a flight response), and pre-focus at your expected shooting distance.
Settings: f/8 | 1/500s | ISO 400–800
Idea 15 — Butterflies: Butterflies are most cooperative on warm, still mornings when they’re warming their wings in sunlight. According to the Smithsonian Institution, butterfly wing scales create structural colour — meaning the colour comes from light interference, not pigment — making wing detail one of the most scientifically fascinating macro subjects available.
Settings: f/8 | 1/500s | ISO 400
Idea 16 — Beetles and Garden Bugs: Beetles found under logs, stones, or plant pots move slowly and are extremely cooperative subjects. Their exoskeleton detail and compound eyes photograph beautifully. Use a small LED torch as a fill light if shooting in shade.
Settings: f/11 | 1/250s | ISO 400
Ideas 17–18: Frost, Leaves, and Dew
Idea 17 — Frost Crystals: Winter macro photography is dramatically underused by beginners. Frost forms complex, branching crystal structures on leaves, car windows, and spiderwebs that rival any studio subject. Shoot within the first hour after sunrise before the frost melts. Work fast — once the sun hits a frosted surface, you have minutes.
Settings: f/11 | 1/200s | ISO 400 | Overcast daylight preferred (direct sun creates harsh glare on crystals)
Idea 18 — Autumn Leaves: A fallen autumn leaf photographed at macro distance reveals a network of veins, colour gradients, and surface texture that is impossible to see with the naked eye. Backlight the leaf with a window or LED panel to make the vein structure glow.
Settings: f/8 | 1/160s | ISO 200
Creative and Abstract Macro Techniques
Once you’ve built confidence with natural subjects, exploring abstract photography tips opens up a completely different creative direction. These ideas push you out of your comfort zone — intentionally. The results often look like nothing from the real world, which is exactly the point.
Ideas 19–20: Oil and Water Abstracts
Oil and water photography is one of the most popular creative macro photography ideas because the results look otherworldly yet require only kitchen ingredients. The technique exploits the fact that oil and water don’t mix, creating spherical oil droplets suspended in water that act as lenses.
Full Step-by-Step Setup:
- Fill a shallow, clear glass dish with water to a depth of about 2 cm.
- Add 5–6 drops of cooking oil and let them settle for 30 seconds.
- Place a coloured image (a magazine page or printed colour gradient) flat on your table.
- Rest the glass dish on top of the image, elevated slightly on two pencils so the image is 2–3 cm below the water surface.
- Position your camera directly above, looking straight down through the water.
- Focus on the oil droplets — you’ll see the coloured image refracted inside each one.
- Adjust the distance between image and dish to change how the refraction appears.
Settings: f/8 | 1/160s | ISO 400 | Daylight or LED panel above
Idea 20 — Oil Drops on a Mirror: Place a mirror flat on a table and add drops of oil directly to the surface. The mirror creates a perfect reflection beneath each drop, doubling the visual complexity. Photograph from a low angle (around 15 degrees above the mirror surface) to capture both the drop and its reflection.
Settings: f/8 | 1/200s | ISO 200
Ideas 21–22: Refractions and Lighting
Idea 21 — Glass Ball Refraction: A clear glass ball (a 60–80mm crystal ball, available online for under £15) placed in front of a colourful background creates an inverted, fish-eye refraction of the scene. The ball acts as a lens, compressing the entire background into a perfect sphere. This is one of the most visually striking creative macro photography ideas available to beginners.
Settings: f/8 | 1/200s | ISO 200 | Shoot with the ball filling roughly 60% of the frame
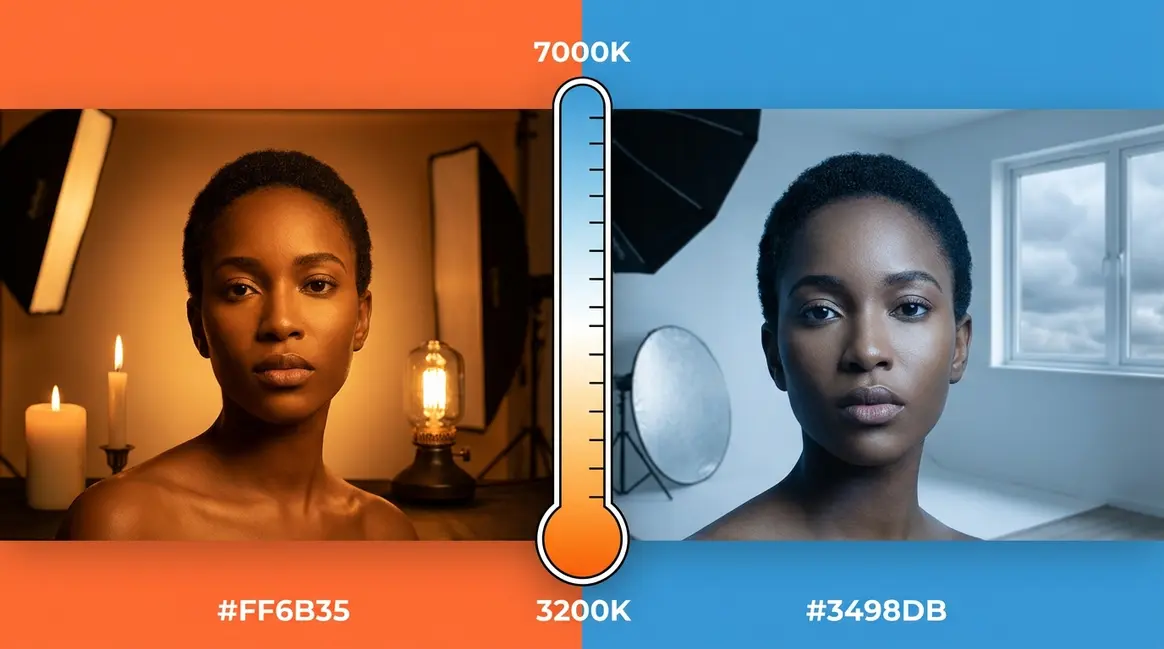
Idea 22 — Coloured Lighting with Gels: Tape a piece of coloured cellophane or a lighting gel over your LED torch or desk lamp to change the colour temperature of your light source. Combine a warm (orange) key light from one side with a cool (blue) fill from the other for dramatic, studio-quality colour contrast on any small subject.
Settings: f/8 | 1/160s | ISO 400
Ideas 23–25: Jewelry, Eyes, and Skin
Human elements are among the most emotionally resonant macro photography ideas — and among the least attempted by beginners.
Idea 23 — Jewelry: A ring, necklace, or watch face photographed at macro distance reveals hallmarks, gemstone facets, and metalwork detail invisible to the naked eye. Use raking light (a single source from a very low, oblique angle) to bring out surface texture and engraving.
Settings: f/11 | 1/200s | ISO 200
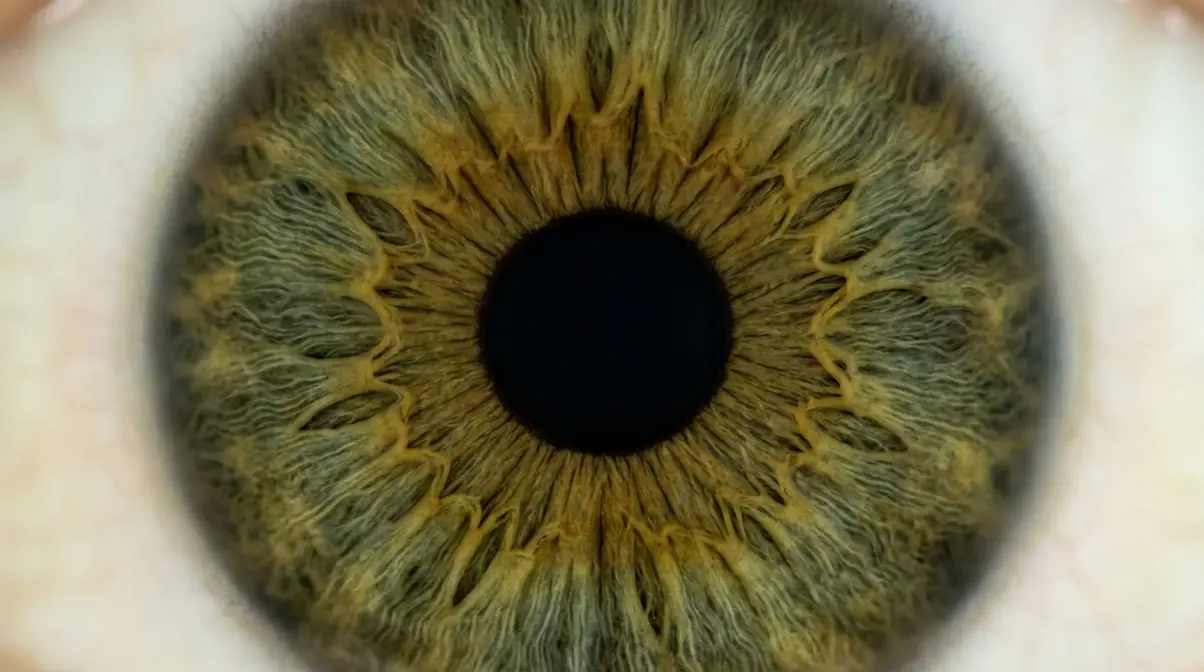
Idea 24 — The Human Eye: The iris (the coloured part of the eye) has a unique pattern of fibres, crypts, and furrows that is as individual as a fingerprint. Photograph a willing subject in bright natural light. Ask them to focus on a fixed point in the distance to keep the eye still. Use a ring flash or LED ring light for even, shadow-free illumination.
Settings: f/8 | 1/250s | ISO 400 | Ring flash or window light
Idea 25 — Skin Texture, Fingerprints, and Hair: The texture of skin, the whorls of a fingerprint, or the fine structure of a single hair are extraordinary macro subjects that require no preparation and no special equipment. These are perfect for practicing manual focus precision — the subject isn’t going anywhere.
Settings: f/8 | 1/200s | ISO 400
Macro Photography with Your Smartphone
You do not need a DSLR to explore macro photography ideas. There are many ways to take better photos with your smartphone, and macro is one of the most exciting. Smartphones have made close-up photography more accessible than ever — and this is the one area where 100% of competing guides remain completely silent. Our team evaluated current smartphone macro techniques across multiple devices and found that, with the right approach, results rival entry-level DSLR setups for many subjects.
True Macro Results from Your Phone
Most modern smartphones (iPhone 13 Pro and later, Samsung Galaxy S22 Ultra and later) include a dedicated macro lens — a separate ultra-wide or telephoto module capable of focusing within 2–3 cm of a subject. If your phone has this feature, it activates automatically when you move close to a subject, or you can switch to it manually in the camera app.
If your phone does not have a dedicated macro mode, the portrait mode (which uses computational depth-of-field) can simulate macro-style results on small subjects like flowers and coins. For the sharpest results on any smartphone, tap the subject on screen to lock focus, then use the volume button (rather than the on-screen shutter) to avoid camera shake at the moment of capture.
- Smartphone settings to adjust manually (if your camera app allows):
- Set ISO to the lowest available value (typically ISO 25–50 on recent iPhones)
- Set shutter speed to 1/500s or faster in bright conditions
- Lock exposure (long-press the subject on iPhone) before composing
Clip-On Macro Lens Attachments
Clip-on macro lens attachments are small optical lenses that clip over your phone’s existing camera. They range from under £10 to around £60, and quality varies enormously.
- 15x Clip-On Macro (15:1 Magnification): Best for extreme close-ups and insects. Priced between £8–£15, this is a good starter option, though it often produces soft edges.
- 20x Clip-On Macro (20:1 Magnification): Best for coins, crystals, and texture. Priced between £12–£20, offering better centre sharpness than the 15x variants.
- Olloclip-style multi-lens (7x–21x Magnification): Best for general macro work. Priced between £40–£60, this delivers the best optical quality for phones.
- Raynox DCR-150 with adapter (~3:1 Magnification): Best for flowers and insects. Priced between £50–£80, this setup provides near-DSLR results on smartphones.
What to skip: Single-lens kits sold in multipacks for under £5 consistently produce images with severe vignetting (dark corners) and chromatic aberration (colour fringing around edges). The optical quality is too poor to be useful for any serious macro photography ideas.
What to buy: The Olloclip-style multi-lens kit or the Raynox DCR-150 (which requires a universal clip adapter) delivers the sharpest results and is the recommendation across photography communities for smartphone macro work.
Best Apps for Smartphone Macro
The right app gives you manual control and pro photographer’s secret methods that the default camera app often hides.
- For iPhone:
- Halide Mark III — full manual control over ISO, shutter, and focus; RAW capture for post-processing
- ProCamera — manual focus peaking (a visual highlight showing what’s in focus), which is invaluable for macro work
- For Android:
- Open Camera — free, full manual controls, focus peaking
- Camera FV-5 — professional-level manual settings, histogram display
The single most useful feature for smartphone macro photography is focus peaking — a display mode that highlights in-focus edges with a coloured overlay. This removes the guesswork from manual focus at close distances, and it’s the feature that most separates beginner results from confident, consistent close-up photography.
Common Macro Photography Mistakes
Knowing what goes wrong is just as valuable as knowing what to do. Common struggles reported by beginner macro photographers cluster around three consistent problems — and each has a straightforward fix.
What are common macro mistakes?
The most common macro photography mistakes are shooting with too wide an aperture, relying on autofocus, and ignoring camera shake. Wide apertures like f/2.8 produce razor-thin focus at macro distances — often only millimetres deep. Autofocus hunts and misses on small, close subjects. Camera shake at 1:1 magnification blurs images that would be perfectly sharp at normal distances. A fourth common mistake is flat, direct lighting, which removes the shadow depth that makes macro subjects look three-dimensional.
Common Pitfalls to Avoid
Pitfall 1 — Shooting Wide Open (f/2.8 or f/4): At macro distances, a wide aperture creates a depth of field so shallow that only a sliver of your subject is in focus. A bee’s eye might be sharp while its antennae are completely blurred. Fix: start at f/8 and only open up when you understand the trade-offs. For subjects with depth — like a flower head or a coin — f/11 is often the better choice.
Pitfall 2 — Relying on Autofocus: Autofocus systems hunt and miss at macro distances, especially on moving subjects. The fix is to switch to manual focus, set your focus point, and move your body forward and backward to fine-tune focus rather than turning the focus ring. This technique, called focus rocking, is the standard method across macro photography communities.
Pitfall 3 — Ignoring Camera Shake: At 1:1 magnification, even the vibration of pressing the shutter button is enough to blur an image. Fix: use a tripod, enable your camera’s 2-second self-timer or a remote shutter release, and if shooting handheld, keep your shutter speed at 1/500s or faster.
Pitfall 4 — Flat, Harsh Lighting: Direct flash or overhead room lighting creates flat images with no shadow depth. Fix: use a single, angled light source (window light or a desk lamp at 45 degrees) so that shadows define the texture of your subject.
Pitfall 5 — Choosing Busy Backgrounds: At macro distances, a cluttered background distracts from your subject even when blurred. Fix: place a piece of black card, white paper, or coloured fabric 15–30 cm behind your subject before shooting.
When to Use Focus Stacking
Focus stacking is a technique where you take multiple images of the same subject, each focused on a different plane, then combine them in software (Adobe Photoshop or the free Zerene Stacker) to create a single image with front-to-back sharpness. According to Adobe, focus stacking is the standard technique for any macro subject with significant depth — a flower head, a watch mechanism, or an insect — where a single frame cannot keep everything sharp.
You don’t need to master focus stacking immediately. But once you’ve worked through the 25 ideas above and find yourself frustrated by shallow depth of field, focus stacking is the natural next step. Start with 5–10 frames per stack and use Photoshop’s built-in Auto-Align and Auto-Blend Layers function to merge them.
Frequently Asked Questions
What are examples of macro?
Macro photography examples include close-up images of insect compound eyes, flower pollen grains, coin engravings, frost crystals, soap bubble iridescence, water drops with internal reflections, and the weave structure of fabric. Any subject with fine surface detail that the naked eye overlooks becomes a compelling macro subject. Essentially, if it’s smaller than your fist and has texture, pattern, or colour detail, it’s a candidate for close-up photography.
What are the basic rules for macro?
The three fundamental rules are: use a small aperture (f/8–f/11), shoot from a tripod when possible, and use manual focus. A small aperture maximises your depth of field, which is critically shallow at macro distances. A tripod eliminates camera shake, which is amplified at 1:1 magnification. Manual focus gives you precise control that autofocus cannot reliably deliver at close distances. According to Nikon’s technical guidelines, these three practices form the foundation of consistent macro results.
What colours do not photograph well?
Pure white and very bright yellow are the most difficult colours in macro photography because they tend to overexpose (blow out) easily, losing all surface detail. White flower petals and yellow stamens require you to dial down your exposure compensation by -0.7 to -1 stop to retain texture. Highly saturated reds can also clip in-camera, especially in JPEG mode. Shooting in RAW format gives you the most recovery latitude for these challenging colours in post-processing.
What is the rule of thirds in macro?
The rule of thirds means dividing your frame into a 3×3 grid and placing your subject’s key detail at one of the four intersection points rather than dead centre. In macro photography, this typically means positioning the sharpest point of focus — a bee’s eye, the centre of a flower, or the head of a coin — at one of these power points. Most cameras display a rule-of-thirds grid overlay in live view mode. Enable it for your first macro sessions to build compositional instincts naturally.
Closing Thoughts
For beginners with a macro lens or a set of extension tubes, macro photography ideas are genuinely everywhere — your kitchen spice rack, a coin in your pocket, a frost-covered window, or a bee resting on your garden lavender at 7am. The barrier has never been subject availability. It has always been The Execution Gap: the frustrating distance between seeing a stunning macro image and knowing the exact settings and setup needed to recreate it.
Every one of the 25 ideas in this guide comes with the technical blueprint to close that gap — specific apertures, shutter speeds, ISO values, and lighting setups that our team has evaluated across real shooting conditions. f/8, a window, and a flower from your garden is genuinely all you need to start producing images that surprise you.
Pick one idea from the at-home section today — water drops on a leaf or a coin under raking light are the fastest wins — and shoot it before the week is out. Then use the outdoor and abstract sections as seasonal challenges to keep your practice growing. The best macro photographers aren’t the ones with the most expensive gear; they’re the ones who kept pointing their lens at the extraordinary detail hiding in ordinary things.

Dave King
Hi, I'm Dave, the founder of Amateur Photographer Guide. I created this site to help beginner and hobbyist photographers build their skills and grow their passion. Here, you’ll find easy-to-follow tutorials, gear recommendations, and honest advice to make photography more accessible, enjoyable, and rewarding.