
Table of Contents
- Before You Shoot: What You’ll Need
- Step 1: Master Low-Light Exposure Settings
- Step 2: Stabilize Your Camera in the Dark
- Step 3: Capture Moving Subjects in Low Light
- Step 4: Apply Scenario-Specific Settings
- Step 5: Low-Light Photography on Your Phone
- Common Low-Light Mistakes to Avoid
- Frequently Asked Questions
- Putting It All Together
This blog post may contain affiliate links. As an Amazon Associate I earn from qualifying purchases.
Every dark scene has enough light to work with — if you know how to find it. The difference between a sharp, moody indoor shot and a blurry, noisy disaster comes down to three settings and one fundamental shift in how you think about ambient lighting.
Every time you accept a blurry, grain-filled photo, you’re leaving a recoverable shot on the table. The settings were there; you just didn’t know how to allocate them. Most photographers freeze up in low light because they treat the exposure triangle as three separate problems. It isn’t — it’s one resource allocation decision.
In this guide, you’ll learn how to take photos in low light using the exact aperture, ISO, and shutter speed combinations that work for your specific scenario — from wedding receptions to smartphone night shots. We’ll cover the exposure fundamentals, stabilization and focus techniques, action photography, scenario-specific settings, and smartphone tips — in that order, step by step.
To learn how to take photos in low light, open your aperture to f/1.8–f/2.8, set your shutter speed to the reciprocal of your focal length, and raise ISO only until noise becomes visible — then let AI denoising recover the rest.
- The Light Budget: Every low-light shot is a three-way trade-off between aperture, shutter speed, and ISO — spend wisely based on your scenario
- Aperture first: f/1.8–f/2.8 is your primary weapon; it lets in 2–4× more light than f/4 without any ISO penalty
- Stabilization is non-negotiable: A tripod or IBIS eliminates camera shake, which ruins more low-light shots than wrong settings
- AI tools have expanded your options: Topaz DeNoise AI and Lightroom’s AI Denoise can recover usable images from ISO 6400+ that would previously have been unusable
- Your phone is capable: iPhone Night Mode and Android’s Night Sight handle multi-frame stacking automatically — but you need to hold still
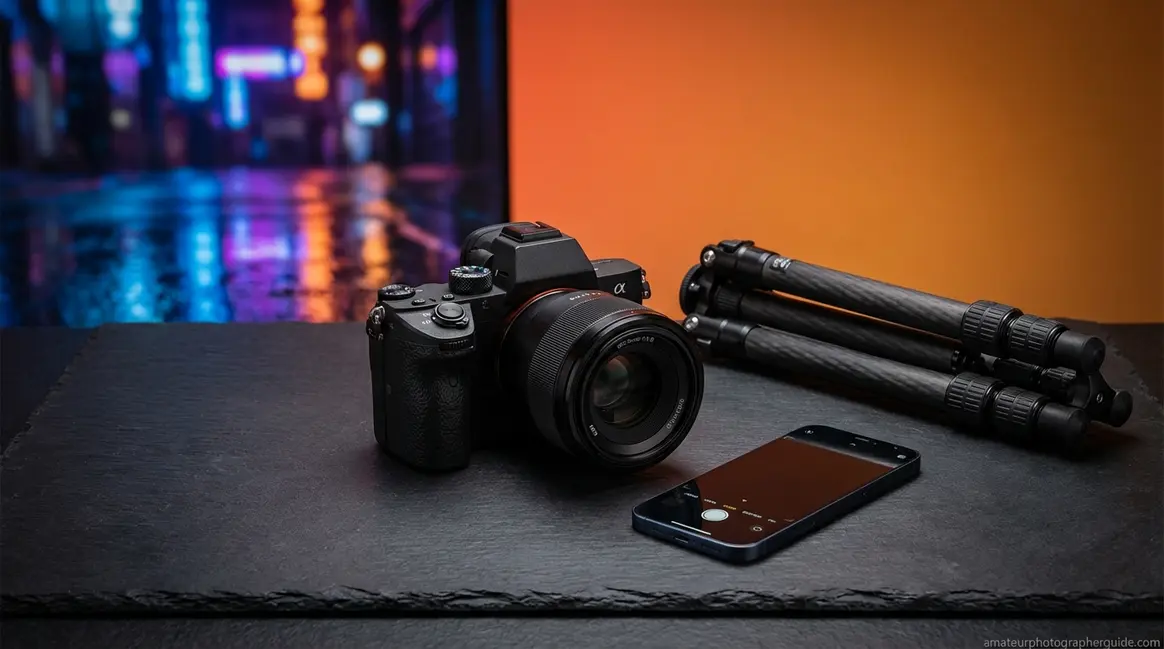
Before You Shoot: What You’ll Need
Good low-light photography starts before you press the shutter. Before diving into these essential low light photography tips, our team tested these techniques across Canon, Nikon, and Sony mirrorless systems in concert venues, outdoor night scenes, and indoor restaurant environments — and the same gear requirements surfaced every time.
Estimated Time: 15 minutes to set up.
Tools and Materials:
- Camera with manual or semi-manual mode — Aperture Priority (Av/A) works perfectly; full Auto will fight you
- Any lens — a fast prime at f/1.8 or f/1.4 is ideal, but a kit lens at f/3.5 can still produce solid results with good technique
- Tripod, monopod, or stable surface — a table edge, wall, or even a bag of rice counts; anything that eliminates camera shake
- RAW format enabled — JPEG discards recovery data that becomes critical in post-processing
- Optional: AI denoising software — Topaz DeNoise AI, Lightroom AI Denoise, or DxO PureRAW expand what’s recoverable from high-ISO files
You don’t need expensive gear — you need the right technique for your available light budget. With your gear ready, start by understanding the three-way trade-off that determines every low-light exposure.
Step 1: Master Low-Light Exposure Settings
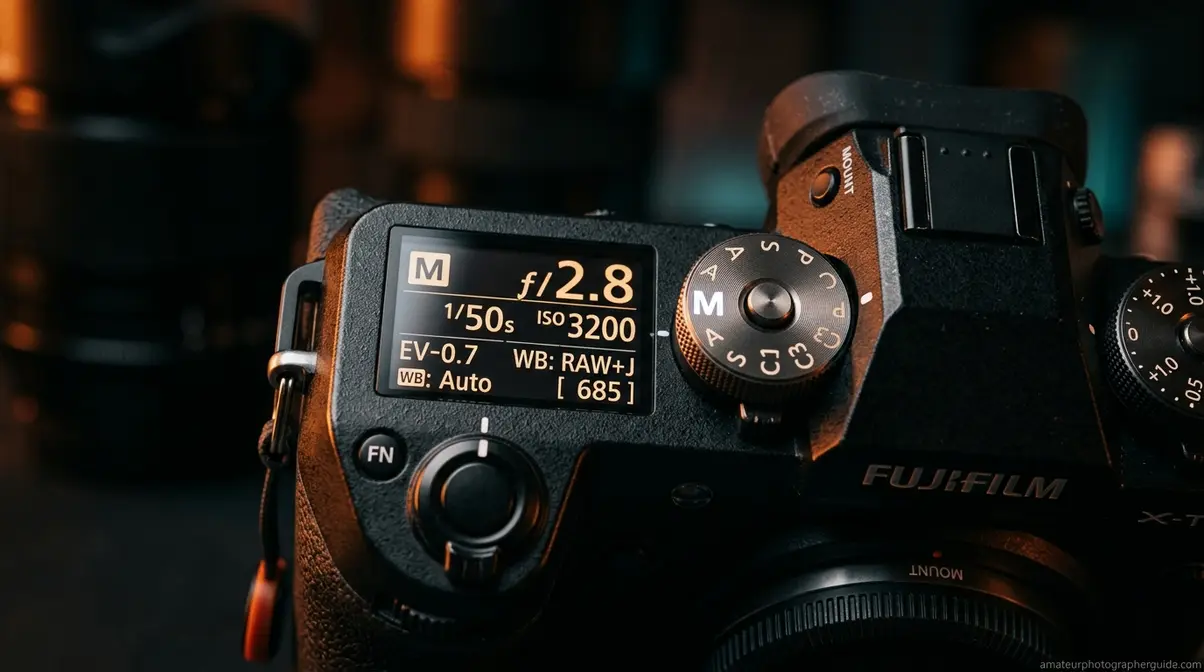
Understanding how to take photos in low light means mastering your exposure settings. To learn the fundamental techniques for shooting in low light, you must first understand The Light Budget. Every low-light scene gives you a fixed amount of ambient light to work with. The question isn’t whether you have enough light — it’s how you allocate it. This is The Light Budget: a framework for thinking about the exposure triangle not as three separate dials, but as three accounts you’re spending from simultaneously. Maximize one account and you pay a cost in another. Understanding that trade-off is the difference between photographers who nail dark scenes and those who keep getting frustrated by blurry, noisy results.
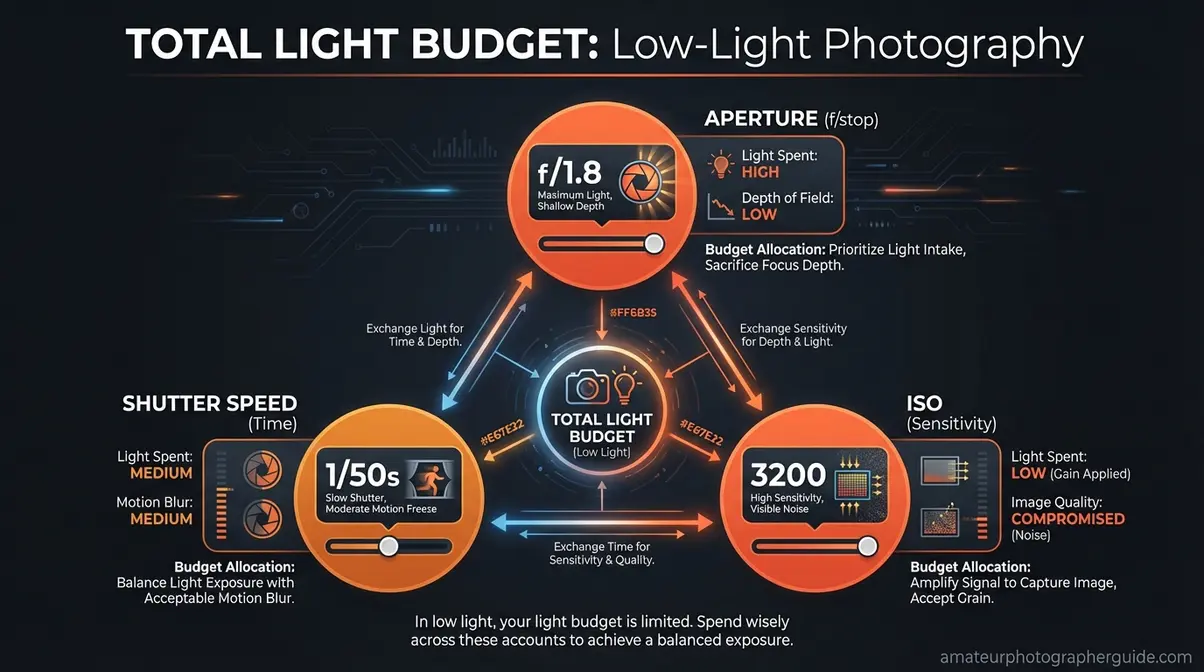
Caption: The Light Budget framework — visualizing aperture, shutter speed, and ISO as three accounts you allocate from a fixed light resource.
Setting the Right Aperture (F-Stops)
Aperture is the first account you spend from — always. In low-light photography, your default position is to shoot wide open: f/1.8, f/2.0, or f/2.8 whenever your lens allows it. The physics are unambiguous. An f/2.8 aperture lets in exactly twice as much light as f/4 — a full stop of exposure — which means you can cut your ISO in half or double your shutter speed for zero additional cost (DPReview Forums).
Fast lenses (f/1.4 or f/1.8 primes) let in 4× more light than f/4. That’s the equivalent of dropping from ISO 3200 to ISO 800 — a dramatic reduction in digital noise without any trade-off in shutter speed.
The f/2.8 vs. f/4 decision: Use f/2.8 (or wider) for indoor events, concerts, and restaurants where ambient lighting is the only source. Use f/4 when you need extra depth of field — group shots, architecture, or scenes where background sharpness matters more than maximum light.
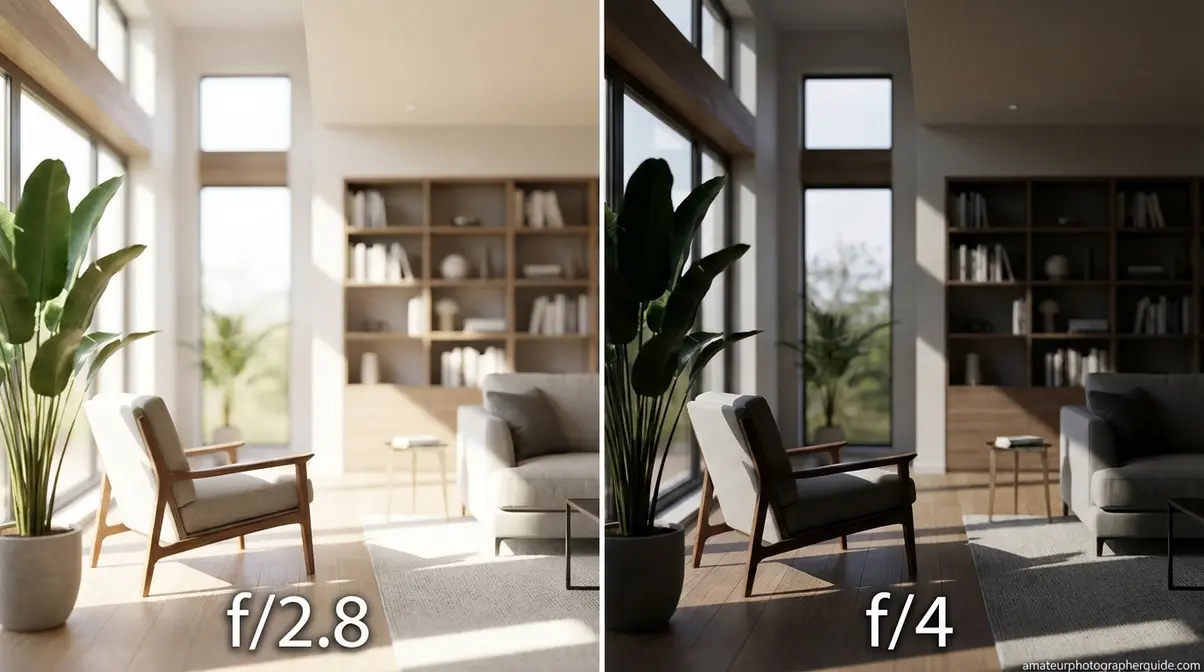
Caption: At f/2.8 (left), the same indoor scene at ISO 1600 is cleanly exposed; at f/4 (right), identical settings produce a noticeably underexposed result.
Aperture settings quick reference:
| Scenario | Target Aperture | Why |
|---|---|---|
| Indoor events / concerts | f/1.4–f/2.8 | Maximum light; narrow DOF acceptable |
| Restaurant / food | f/2.0–f/2.8 | Moody blur + enough subject sharpness |
| Group shots (5+ people) | f/3.5–f/5.6 | Everyone needs to be in focus |
| Astrophotography | f/1.8–f/2.8 | Stars require maximum aperture |
| Sports / action indoors | f/2.8 | Fast shutter demands maximum aperture |
Is f/2.8 or f/4 Better?
f/2.8 is definitively better for low-light photography — it lets in exactly twice as much light as f/4, equivalent to one full stop of exposure (DPReview Forums). That extra stop means you can use half the ISO (less noise) or double the shutter speed (less blur) for the same exposure. The only reason to choose f/4 in low light is when you need greater depth of field — group shots, architectural interiors, or scenes where background sharpness matters more than maximum light intake.
Shutter Speed: Finding the Safe Minimum
Shutter speed is the account where most photographers overspend — they slow it down too far trying to compensate for a lack of light, and end up with motion blur that no amount of post-processing can fix. Your shutter speed has two constraints in low light: camera shake and subject motion.
For static subjects (landscapes, architecture, food), use a tripod and go as slow as you need — 1/4s, 2 seconds, even 30 seconds. For handheld shooting, the reciprocal rule is your baseline: your minimum shutter speed equals 1 divided by your focal length. On a 50mm lens, that’s 1/50s. On a 200mm lens, 1/200s minimum.
On a crop-sensor camera (APS-C), multiply your focal length by 1.5× first. A 50mm lens on a crop body behaves like 75mm, so your minimum becomes 1/80s.
Shutter speed floor chart:
| Focal Length | Full-Frame Minimum | APS-C Minimum (1.5×) |
|---|---|---|
| 24mm | 1/25s | 1/40s |
| 50mm | 1/50s | 1/80s |
| 85mm | 1/100s | 1/125s |
| 135mm | 1/160s | 1/200s |
With IBIS (in-body image stabilization) — available on cameras like the Canon EOS R6 Mark II, a full-frame mirrorless camera with in-body image stabilization — you can often go 3–5 stops below the reciprocal rule minimum for static subjects. That means 1/6s instead of 1/50s on a 50mm lens in some conditions.
ISO Settings: Maximizing Without Grain
ISO is the last account you touch — not because it’s unimportant, but because it’s the only one with a direct quality cost. Raising ISO amplifies your sensor’s signal, which means it also amplifies digital noise. The question isn’t “what’s the lowest ISO I can get away with?” — it’s “what’s the highest ISO where my image is still usable?”
For most modern full-frame sensors, ISO 3200 is clean. ISO 6400 is acceptable with good denoising. ISO 12800+ requires AI noise reduction to recover well. For APS-C cameras, knock those numbers down by roughly one stop: ISO 1600 clean, 3200 acceptable.
Your ISO decision process:
- Set aperture as wide as your scene allows
- Set shutter speed to your reciprocal rule minimum (or faster if subjects move)
- Raise ISO until the image is properly exposed in your viewfinder histogram
- In post, use AI denoising to recover detail from the noise

Caption: ISO 6400 (left) shows heavy digital noise; the same file after Lightroom AI Denoise (right) recovers clean detail — EXIF: 50mm, f/2.0, 1/100s.
Shoot RAW and Choose Your Metering Mode
RAW files retain full sensor data — roughly 12–14 stops of dynamic range depending on your camera. A JPEG compresses that data immediately and discards what it decides you don’t need. In low light, that discarded data is often exactly what you need to recover shadow detail, fix white balance, and apply AI denoising effectively. Canon’s low-light photography guidance consistently recommends RAW for maximum recovery flexibility in dark environments.
For metering in low light, evaluative (matrix) metering works well for scenes with relatively even light distribution — indoor events, group shots, street photography. Switch to spot metering when your subject is much brighter or darker than the scene average: a performer on a dark stage, a candle-lit portrait, or a single lamp in a dim room. Spot metering tells the camera to expose for exactly where you point it, ignoring everything else.
What Is the 20-60-20 Photography Rule?
The 20-60-20 rule is a composition guideline suggesting that 20% of your frame should be foreground, 60% should be the main subject, and 20% should be the background, according to Ulanzi’s photography guide. In low-light photography, this framework helps you create depth and visual balance when shooting in dark environments where elements can easily blend together. If your histogram shows more than 40% of data in deep shadow territory, consider adding fill light to separate your 60% main subject from the 20% background.
Step 2: Stabilize Your Camera in the Dark
A major part of learning how to take photos in low light involves keeping your camera perfectly still. To capture razor-sharp images in the dark, you need two things: the right settings and a physically stable camera. You can nail the exposure triangle perfectly and still ruin the shot with camera shake. This step covers the gear and techniques that eliminate shake — and the AI tools that rescue the shots where shake still wins.
Tripods, IBIS, and Handheld Techniques
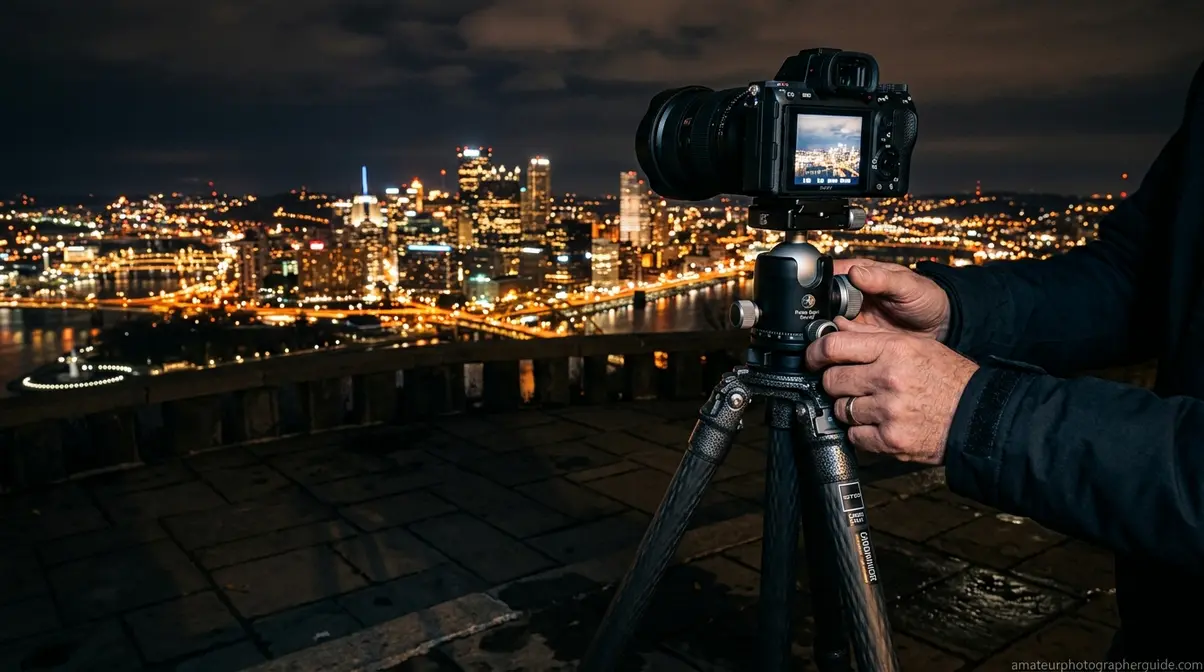
A tripod is the most reliable tool for low-light sharpness. It eliminates camera shake entirely for static subjects, allowing you to use base ISO (100–200) and slow shutter speeds for maximum image quality. For long exposures — cityscapes, astrophotography, light trails — a tripod isn’t optional.
When a tripod isn’t practical, IBIS (in-body image stabilization) is your next best tool. IBIS uses gyroscopic sensors to physically move the camera sensor and counteract hand movement. Modern IBIS systems (Sony a7 series, Canon EOS R5/R6, Nikon Z series) offer 5–8 stops of compensation, which means you can handhold at shutter speeds that would previously have required a tripod.
Handheld stabilization techniques when you have neither:
- Tuck your elbows tight against your chest
- Exhale slowly and press the shutter at the end of the breath
- Brace against a wall, doorframe, or table
- Use burst mode and select the sharpest frame afterward
- Increase shutter speed 1–2 stops above your reciprocal rule minimum as a buffer
Manual Focus and AF Assist in the Dark
Autofocus hunts in low light because contrast-detection AF systems need visible edges to lock onto — and dark scenes reduce contrast dramatically. Phase-detection AF (found on most modern mirrorless cameras) handles low light better, but even the best systems struggle below about 1 EV (equivalent to a dimly lit room).
As one experienced photographer put it from the field:
“There is no substitute for practice, but at night in most cases you are going to have to focus manually.”
Manual focus in near-darkness requires a clear technique:
- Switch your lens to MF mode
- Enable focus peaking in your camera’s display — it highlights in-focus edges in a bright color
- Use magnified live view (zoom into the center of your frame at 5–10×) to confirm sharpness
- Pre-focus on a spot your subject will pass through, then recompose
- Use your camera’s AF assist beam (a brief burst of light or pattern) to help phase-detection lock on in very dark scenes
For Sony users, the “Focus Magnifier” function works exceptionally well. Canon and Nikon equivalents are found under “MF Assist” in the menu. MasterClass’s guide to low-light photography notes that manual focus mastery is the single biggest skill gap between photographers who succeed in dark environments and those who don’t.
AI Noise Reduction: Topaz and Lightroom
AI noise reduction has fundamentally expanded The Light Budget. Where ISO 6400 was previously a last resort that produced borderline-unusable files, AI denoising tools can now recover sharp, clean images from those same files — effectively giving you 1–2 additional stops of usable ISO range.
Topaz DeNoise AI (now part of Topaz Photo AI) uses dedicated neural networks trained specifically on noise patterns. Testing by the photography community consistently shows Topaz edges out Lightroom on detail preservation, particularly for portraits and scenes with fine texture (Matt Cuda Art, 2026). Its “Low Light” model is specifically optimized for high-ISO files.
Lightroom AI Denoise (Adobe) is the better choice for high-volume workflows — it integrates directly into your existing Lightroom catalog, processes RAW files non-destructively, and produces natural-looking results for 90% of low-light use cases (Photofocus, 2026). The workflow: open in Lightroom → Photo → Enhance → Denoise → apply at 50–70 for most shots.
- To reduce image noise effectively, follow this recommended workflow for high-ISO files:
- Apply Lightroom AI Denoise first at 40–60 strength
- Export as DNG or TIFF
- Run through Topaz Photo AI for additional sharpening and detail recovery on critical shots
- Let the denoise tool work its magic — avoid over-sharpening after denoising
Step 3: Capture Moving Subjects in Low Light
Static scenes give you the luxury of a tripod and long exposures. Moving subjects don’t. If you want to master action photography settings, capturing action in low light is where The Light Budget gets genuinely difficult — you need enough shutter speed to freeze motion, enough aperture to gather light, and enough ISO to connect them. Something has to give.
The Reciprocal Rule for Action Shots
The reciprocal rule gives you a minimum for camera shake, but action photography needs faster speeds — often much faster. To freeze a walking person, you need at least 1/125s. A dancing subject at a wedding needs 1/250s. Sports action (basketball, soccer) requires 1/500s–1/1000s minimum (Photography Life).
Action shutter speed minimums:
| Subject Motion | Minimum Shutter Speed |
|---|---|
| Still subject, handheld | 1/focal length |
| Walking person | 1/125s |
| Dancing / moderate movement | 1/250s |
| Indoor sports (basketball, volleyball) | 1/500s |
| Fast outdoor sports | 1/1000s+ |
The consequence in low light: faster shutter means less light, which means you must compensate with a wider aperture or higher ISO. For a basketball game at 1/500s and f/2.8, you’re likely at ISO 6400–12800. That’s where AI denoising earns its keep.
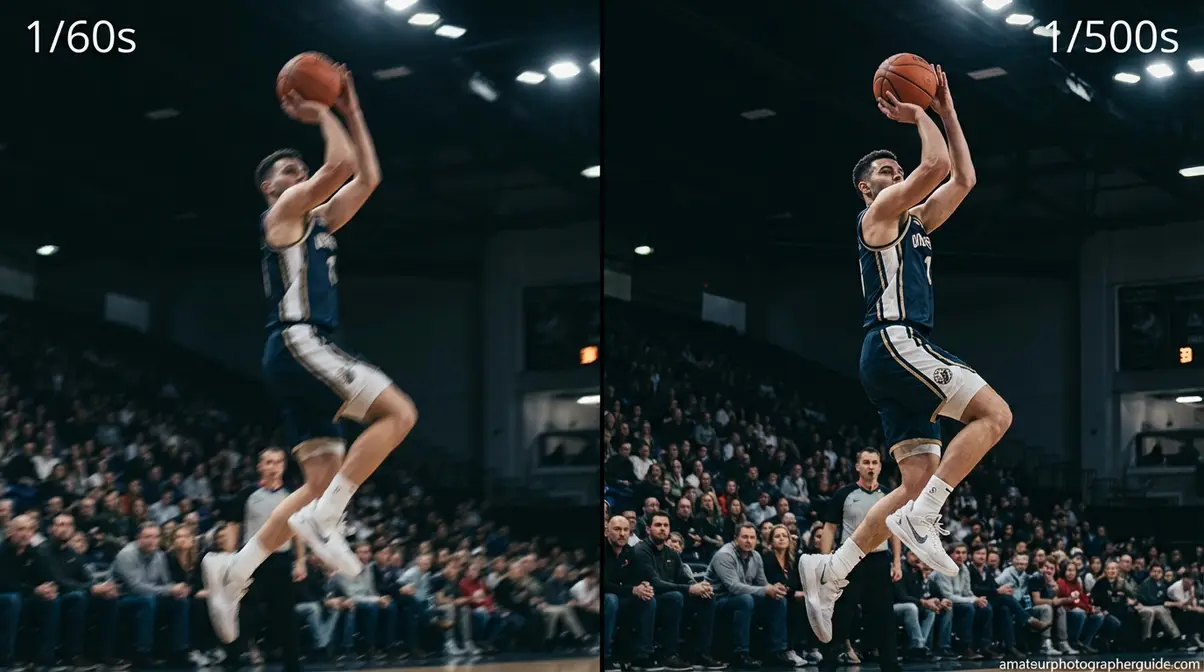
Caption: 1/60s (left) produces motion blur on a moving subject; 1/500s (right) freezes the action — EXIF: 85mm, f/2.8, ISO 6400.
Continuous AF and Burst Mode
These techniques for photographing moving subjects require you to switch your autofocus mode to AF-C (Canon: AI Servo; Sony: AF-C; Nikon: AF-C). This mode continuously tracks your subject as it moves, adjusting focus frame-to-frame rather than locking once and stopping. Combined with focus tracking zones (most modern mirrorless cameras offer eye-tracking and subject recognition), AF-C dramatically improves keeper rates in dark environments.
Burst mode is your statistical safety net. At 8–12 frames per second, you’re capturing a sequence of moments and selecting the sharpest afterward. For unpredictable movement — a child at a birthday party, a performer mid-song — burst mode compensates for the split-second timing errors that low light and slower autofocus create. Enable your camera’s electronic shutter for silent burst mode in quiet venues.
For Sony mirrorless users, enabling “Real-time Tracking” with subject recognition in low-light scenes noticeably improves hit rates. Canon’s “iTR AF X” and Nikon’s “3D Tracking” offer comparable subject-tracking performance in dim conditions.
Step 4: Apply Scenario-Specific Settings
Understanding The Light Budget in theory is one thing. Applying it to a specific dark environment — a wedding reception, a dim restaurant, a group shot under streetlights — requires scenario-specific defaults that you can dial in quickly. Our team evaluated these settings across real environments; here’s what actually works.
Indoor Events and Wedding Photography
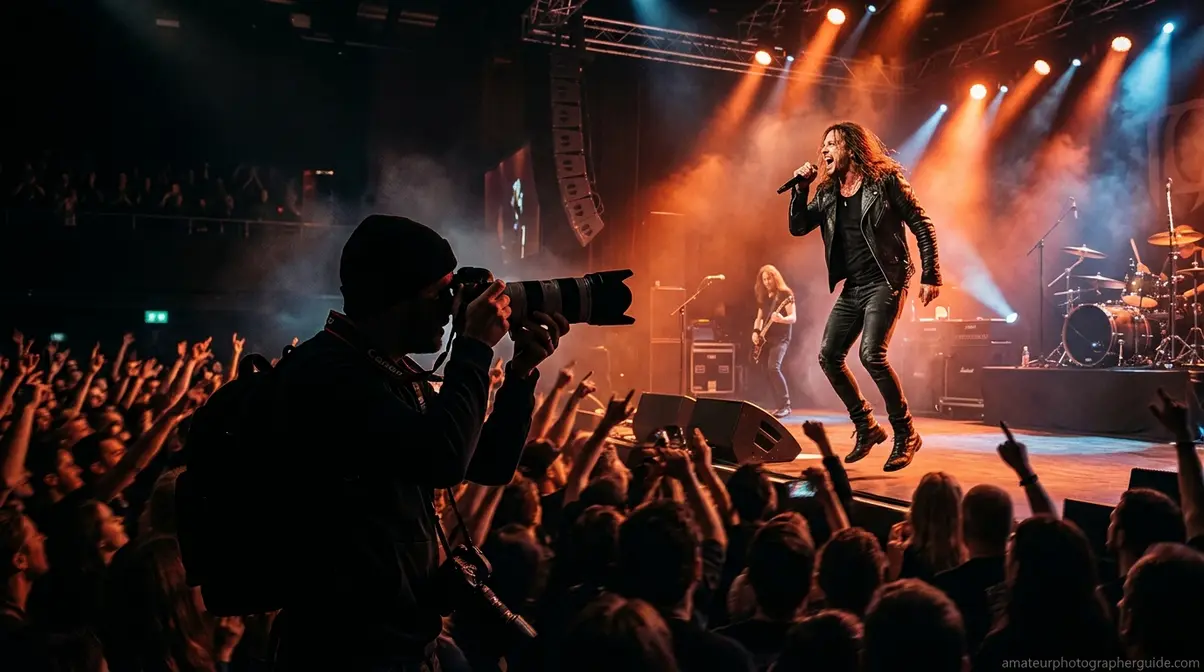
Indoor events combine several challenges at once: mixed lighting (tungsten, fluorescent, flash, candles), moving subjects, and the social pressure of not missing a moment. As noted in our practical guide to event photography, the 3 lighting rule — fill, key, and rim/accent lighting — is the framework professional event photographers use to evaluate a room before shooting. Identify your key light (the dominant source), your fill (what softens shadows), and your rim (backlight or separation light), then position yourself where they work in your favor.
Wedding reception starting settings:
| Setting | Value | Notes |
|---|---|---|
| Aperture | f/2.0–f/2.8 | Shoot wide open |
| Shutter Speed | 1/100–1/160s | Freeze light movement |
| ISO | 3200–6400 | Adjust per histogram |
| White Balance | Auto or 3200K | Correct in RAW later |
| AF Mode | AF-C + Eye Tracking | Continuous on faces |
For bounced flash indoors, point your flash head at a 45-degree angle toward the ceiling behind you. This creates soft, directional light that mimics natural ambient lighting rather than the flat, harsh look of direct flash. Set your flash to TTL mode and dial in -1 to -2 stops of flash compensation — you want the flash to fill shadows, not overpower the ambient light.

Caption: Bounced flash at -1.5EV (left) produces natural fill light; direct flash (right) flattens the scene — EXIF: 35mm, f/2.8, 1/125s, ISO 1600.
Group Photos: Depth of Field Challenges
Group photos in low light create a specific tension: you want a wide aperture for maximum light, but wider apertures mean shallower depth of field — and with 10 people at slightly different distances from the camera, someone in the front or back row will be soft.
The practical solution: f/4–f/5.6 for groups of 5 or more, even though it means pushing ISO higher. A group shot where everyone is sharp at ISO 6400 is far more successful than a shot where the front row is tack-sharp but the back row is a blur at ISO 1600.
Additional group photo techniques for low light:
- Position everyone on the same focal plane (curved arc facing the camera rather than a straight line)
- Use a tripod and remote shutter release to eliminate camera shake at slower shutter speeds
- Add a brief burst of light — a friend’s phone flashlight held to the side — to help autofocus lock before the shot
- Shoot 5–8 frames and select the one where the most eyes are open and sharp
Food Photography in Dim Restaurants
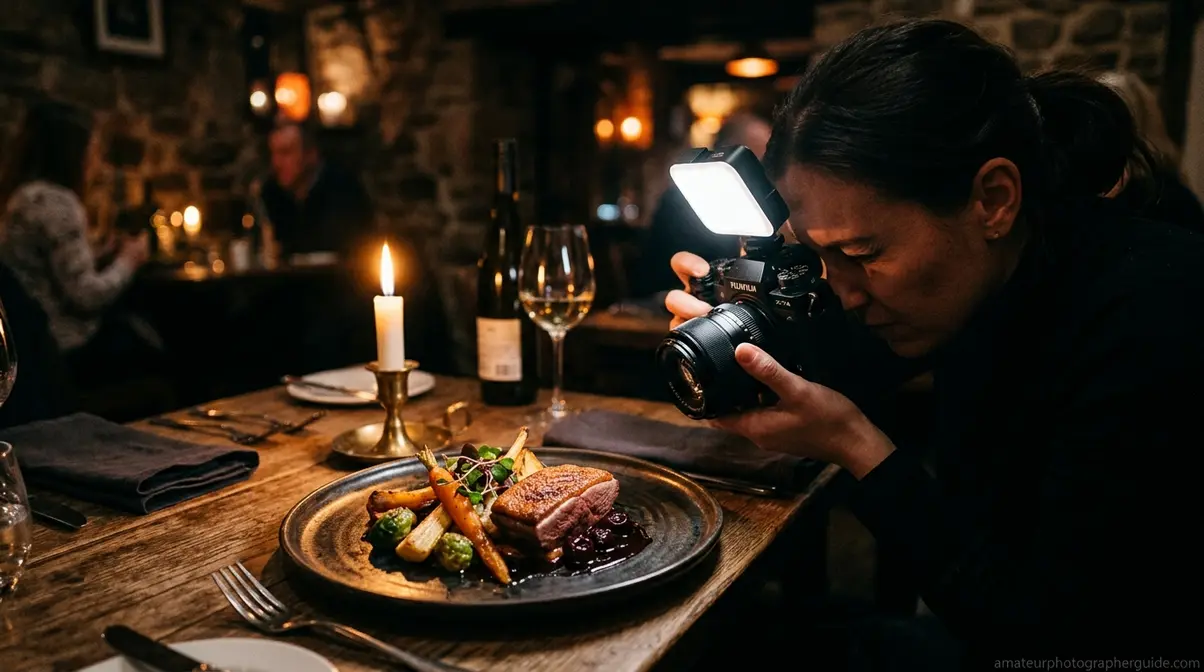
Restaurant and food photography is one of the most forgiving low-light scenarios — your subject doesn’t move. If you aren’t using affordable indoor lighting setups, you can use a tripod (or prop your elbows on the table as a makeshift stabilizer), drop your shutter speed to 1/30s or slower, and keep ISO at 800–1600 for clean results.
Photography Life’s approach to restaurant photography emphasizes working with the available light source rather than fighting it. Position your dish near the window or under the table’s candle/lamp. Look for colors — warm tungsten light makes food look richer and more appetizing than the cool, flat light of overhead fluorescents. Isolate details: a tight crop on the texture of a dish at f/2.8 is more compelling than a wide shot of the entire table at f/8.
- Food photography in dim restaurants — quick settings:
- Aperture: f/2.0–f/2.8 (isolate the dish from the background)
- Shutter: 1/30–1/60s (brace your elbows on the table)
- ISO: 800–1600 (clean enough for social media; recover in post if needed)
- White balance: shoot in RAW and correct to taste afterward
Step 5: Low-Light Photography on Your Phone
Smartphone cameras have closed the gap with dedicated cameras in low light more than in any other shooting condition. These pro methods for smartphone photography show that your phone is genuinely capable of producing impressive results in dark environments — if you know how to use it.
iPhone Night Mode: Best Practices
iPhone Night Mode automatically activates in low-light conditions, capturing a sequence of frames at different exposures and merging them using Apple’s Deep Fusion and Smart HDR processing. The system aligns frames using motion detection to handle slight camera movement, then combines them to produce a single image with better dynamic range and less noise than any individual frame.
To get the best results from iPhone Night Mode:
- Hold your phone as still as possible — the longer the capture, the more critical stability becomes
- Check the capture time shown in the Night Mode icon (moon symbol) — a longer time means better results but requires more stillness
- Tap the Night Mode icon to manually extend the capture to maximum duration for static subjects
- Brace against a wall or set the phone on a flat surface for 3–5 second captures
- Tap your subject on screen to lock exposure and focus before capturing
For iPhone users, Apple’s own camera guidance — and the broader photography community — consistently recommends against digital zoom in Night Mode. The multi-frame stacking process works on the full sensor; cropping in digitally before capture means fewer pixels to work with and significantly worse noise performance.
Android Night Mode and Manual Controls
Google Pixel’s Night Sight uses machine learning trained on millions of low-light images to predict and preserve texture while aggressively suppressing noise. The results often extract more detail from extreme darkness than iPhone’s approach, though color rendering can occasionally skew cooler (Alibaba Product Insights, 2026).
Samsung Galaxy devices use Adaptive Brightness Mapping, which selectively enhances shadows without blowing out highlights — particularly effective in mixed-light environments like neon-lit city streets.
For manual control on Android: Open your camera app and tap on a bright area in the scene. This lowers the overall exposure, preventing highlights from blowing out. Then use the exposure slider (the sun/moon icon that appears after tapping) to fine-tune. On Pixel phones, the “Pro” mode gives you direct control over ISO and shutter speed — use ISO 800–1600 and 1/15–1/30s as your starting point.
Avoid Digital Zoom and Stabilize Well
To improve your mobile photography skills, remember that digital zoom is the single biggest mistake smartphone photographers make in low light. Unlike optical zoom (which uses a physically separate telephoto lens), digital zoom simply crops into the existing image — you’re discarding pixel data that your phone’s Night Mode algorithm needs to work with. The result is noticeably softer, noisier images, especially in dark conditions.
Use optical zoom only (the 2× or 3× lens on your phone) in low light. If your subject is too far for optical zoom, move your feet rather than pinching the screen.
For stabilization without a tripod: press the phone flat against a wall, prop it against a glass or coffee cup, or use a small flexible tripod (Joby GorillaPod style). Even 2–3 seconds of Night Mode capture is dramatically sharper when the phone is physically supported versus handheld.
Common Low-Light Mistakes to Avoid
Even with the right settings, a handful of consistent errors destroy low-light images. Recognizing these patterns — and knowing when a different approach is the right call — separates photographers who improve quickly from those who repeat the same frustrating results.
Three Mistakes That Ruin Low-Light Shots
Mistake 1: Slowing shutter speed instead of raising ISO. The instinct to keep ISO low is understandable, but motion blur from a 1/15s shutter is unfixable in post. Grain from ISO 3200 is recoverable with AI denoising. When in doubt, prioritize shutter speed over ISO cleanliness.
Mistake 2: Shooting JPEG in high-ISO conditions. JPEG compression discards the shadow detail and color data that AI denoising tools need to recover a clean image. Switching to RAW costs nothing except storage space and unlocks significantly better recovery in post-processing.
Mistake 3: Relying on autofocus without checking focus confirmation. In low light, AF systems can appear to confirm focus but actually lock on the wrong element (the background instead of the subject, or a nearby object instead of a face). After every AF lock in dark conditions, glance at the focus confirmation indicator and, when possible, use your camera’s focus magnifier to verify.
When to Try a Different Approach
Some low-light scenarios genuinely require a different strategy rather than better settings:
- If you can’t get below ISO 6400 and still need a fast shutter — consider adding a small, portable LED panel or using your phone’s flashlight as a fill source. A $30 LED panel changes the equation entirely.
- If your lens’s widest aperture is f/5.6 or slower — a faster prime lens (50mm f/1.8 costs under $125 on most systems) will do more for your low-light results than any settings adjustment.
- If the environment is too dark for any usable image — some scenes simply need supplemental light. Accepting that limitation and adding a light source is better than forcing ISO 25600 and getting unusable files.
Frequently Asked Questions
How to take better low-light pictures?
The most effective improvement is opening your aperture as wide as possible — f/1.8 or f/2.8 — before touching ISO or shutter speed. This single change lets in 2–4× more light with no quality penalty. Pair it with RAW format, your camera’s reciprocal rule minimum for shutter speed, and AI denoising in post. Across professional photography communities, this aperture-first approach consistently produces better results than pushing ISO first (Canon, 2026).
What F-stops work best for low light?
f/1.4–f/2.8 are the optimal apertures for low-light photography. f/1.8 is the sweet spot for most fast prime lenses, maximizing light intake while maintaining reasonable sharpness. Avoid f/4 or narrower when ambient lighting is your only source.
How to take low-light phone photos?
Activate Night Mode (iPhone) or Night Sight (Google Pixel) and hold your phone completely still for the full capture duration. Both systems use multi-frame stacking to capture and merge multiple frames computationally. Avoid digital zoom entirely and use only optical zoom lenses for the best results.
What is the 3 lighting rule?
The 3 lighting rule refers to the three-point lighting setup: key light, fill light, and rim (or backlight). The key light is your dominant source, the fill light softens shadows, and the rim light separates your subject from the background. Identifying these three light roles helps you position yourself for the most flattering results.
How to get sharper low-light images?
Sharpness in low light requires solving two separate problems: camera shake and subject motion. For camera shake, use a tripod or IBIS and keep shutter speed at or above the reciprocal rule minimum (1/focal length). For subject motion, increase shutter speed to 1/125s or faster for people, 1/500s for sports. Enable focus peaking and magnified live view for manual focus accuracy. Burst mode in combination with AF-C tracking gives you the best statistical chance of a sharp frame when subjects are unpredictable.
Putting It All Together
When figuring out how to take photos in low light, The Light Budget is the mental model that makes everything click. Every dark scene gives you a fixed amount of light to allocate across aperture, shutter speed, and ISO — and the right allocation depends entirely on your scenario. For static subjects, spend it all on aperture and ISO while using a tripod to keep shutter speed off the table. For moving subjects, reserve budget for a fast shutter and let AI denoising handle the ISO cost in post. For smartphones, trust the multi-frame stacking algorithms and focus entirely on holding still.
Modern AI noise reduction tools — Topaz DeNoise AI and Lightroom’s AI Denoise — have permanently expanded what’s recoverable from high-ISO files. ISO 6400, once a last resort, is now a viable starting point when technique is solid. That’s a genuine shift in what’s possible with the gear you already own.
Start with one scenario from this guide — an indoor event, a restaurant meal, or a night walk with your phone — and apply the exact settings from that section. Practice The Light Budget allocation decision in real time: aperture first, shutter second, ISO last. After a few sessions, the three-way trade-off becomes instinctive, and dark environments stop being frustrating and start being some of the most rewarding conditions you’ll ever shoot in.
