Minimalist Photography: The Complete Beginner’s Guide
Minimalism in photography explained with key principles, essential techniques, creative examples, and common pitfalls in this comprehensive guide.
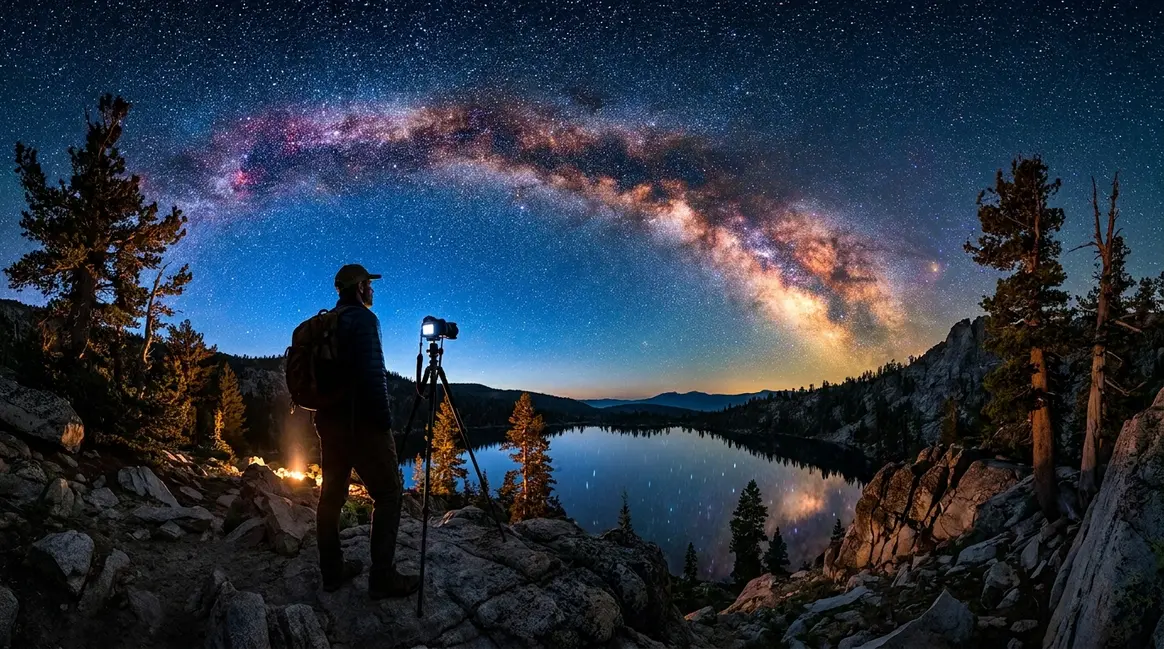
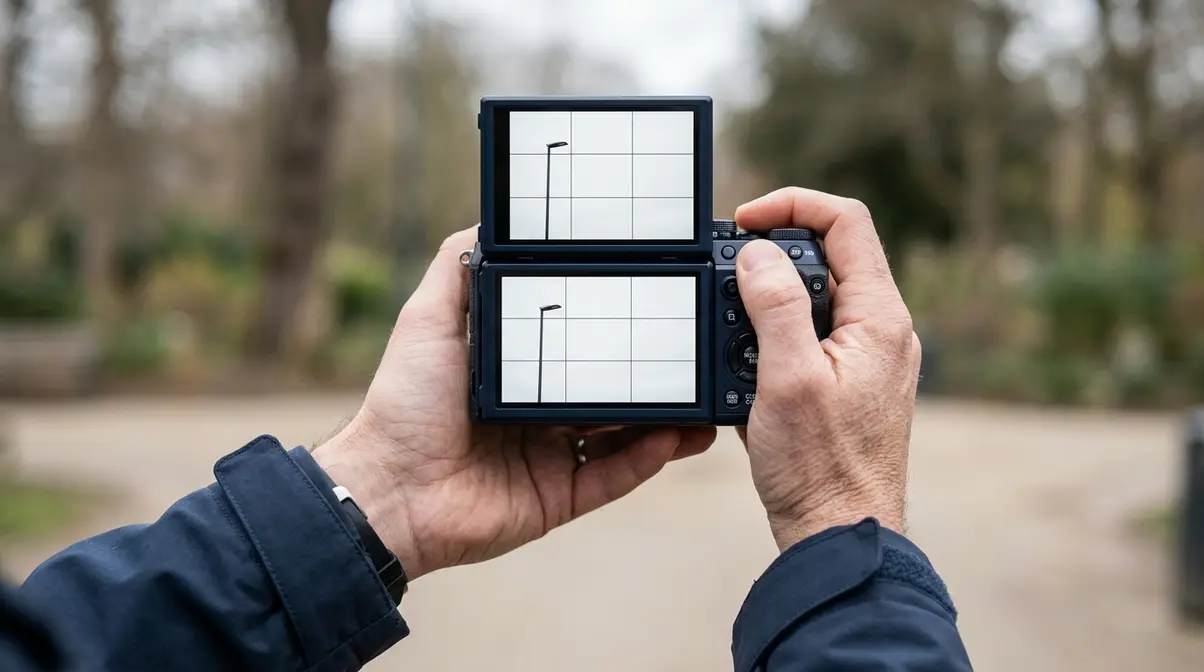
You spot a perfect scene — a lone lamp post against a grey winter sky — and you press the shutter. But when you look at the image later, it feels crowded and flat, and you can’t figure out why. That frustration is exactly what drives beginners toward minimalist photography.
What’s in this guide
The problem isn’t your camera or your eye. It’s that most photos try to capture everything — and when everything competes for attention, nothing wins. Your strongest subjects get buried beneath competing lines, colors, and shapes that were never supposed to be the point. The impact you felt in the moment simply doesn’t survive the frame.
This guide covers everything you need to change that: the core definition and principles, seven practical composition techniques, genre-specific strategies, inspiring artists, gear guidance, and how to build a brand around your minimalist style — so you can transform any scene into a focused, powerful image starting today.
What Is Minimalist Photography?
Minimalist photography is the practice of deliberately removing visual distractions to direct the viewer’s complete attention to a single subject. It is not about taking empty or boring photos — it is about making active, editorial choices that strip a scene down to its most essential element. Every element that remains in the frame is there on purpose. Everything else has been excluded, also on purpose.
That distinction matters more than beginners realize, and it’s where most cluttered photos go wrong.
The Philosophy and Definition
Minimalist photography draws its roots from minimalism as a broader art movement. Tate’s definition of minimalism describes it as an extreme form of abstract art that emerged in the 1960s, typified by simple geometric shapes and a radical reduction of visual elements. The Smithsonian analysis of minimalism notes that the movement strips away personal expression to focus on pure, objective visual elements — a philosophy that translates directly into the camera viewfinder.
When a camera points at a scene, it records everything. The phone wire above the tree, the parked car behind the subject, the harsh shadow on the left edge — the lens is indifferent to your intentions. The minimalist photographer’s job is to override that indifference. You decide what stays and what goes, either by moving, cropping, waiting, or choosing a different angle entirely.
This is where The Clarity-Intention Framework comes in. Every minimalist photo requires two active editorial decisions:
- Clarity — choosing one strong, unambiguous subject that will anchor the entire image.
- Intention — deliberately excluding everything that competes with that subject.
Minimalism is not passive emptiness. It is active removal. If you are just starting out, it helps to learn the fundamentals of minimalist photography before diving into advanced techniques.
“Minimalism isn’t about empty frames, it’s about clarity and intention. When nothing else fights for attention, the subject and every element in the photo stands out even more.”
That quote captures what separates a minimalist image from a snapshot. The difference between a boring photo and a powerful one isn’t the amount of content — it’s whether the simplicity was chosen.
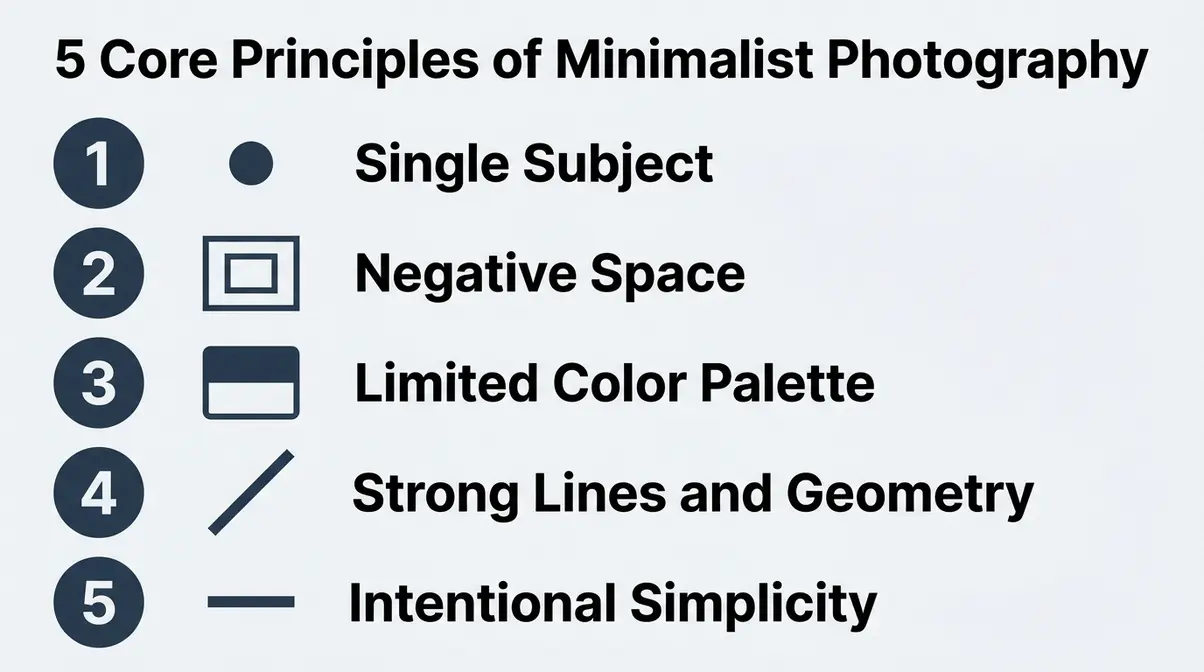
5 Core Principles of Minimalism
These five principles form the foundation of minimalism in photography. Each one is a tool, not a rule — use them to build your own visual instincts.
- Single Subject. One clear focal point anchors every successful minimalist image. What this means for your photos: Before you shoot, ask yourself, “What is this photo about?” If you can’t answer in three words, simplify the scene.
- Negative Space. Negative space is the empty area surrounding your subject — sky, water, a plain wall, an open field. What this means for your photos: Give your subject room to breathe. A bird perched on a wire against a blank grey sky reads as intentional. The same bird surrounded by branches reads as cluttered.
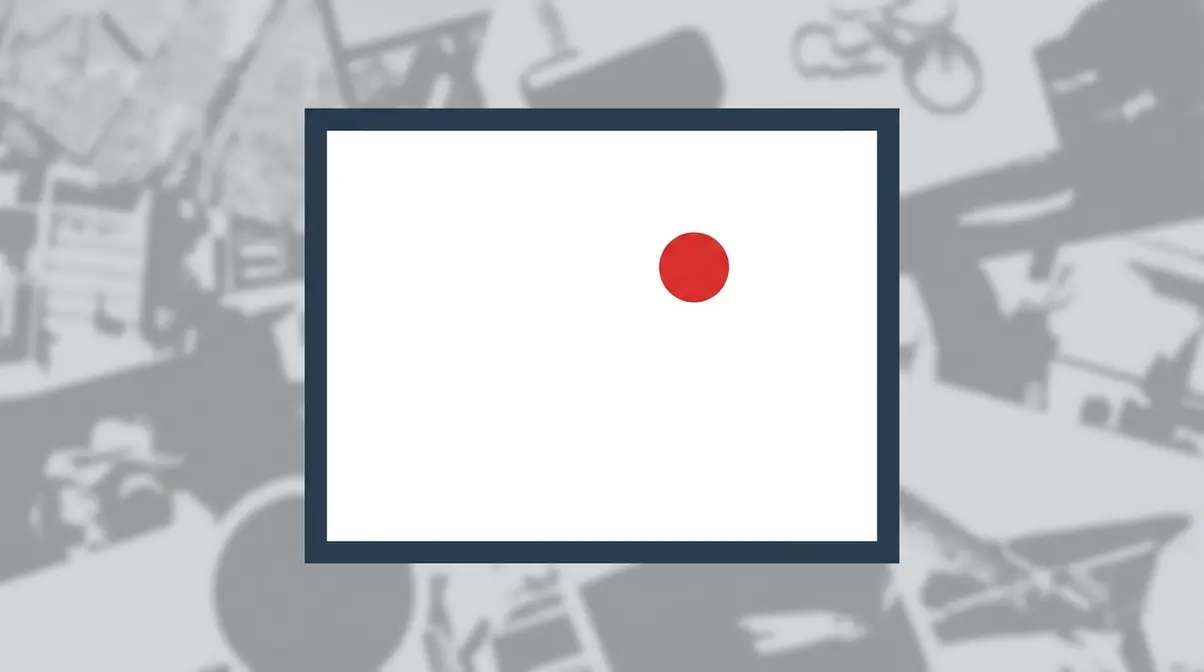
- Limited Color Palette. Minimalist style photography often relies on one or two dominant colors, or strips color entirely. What this means for your photos: A red umbrella against a white wall works because the contrast is simple. Five competing colors fight each other for dominance — and your subject loses.
- Strong Lines and Geometry. Minimalist composition frequently uses a single leading line, a lone curve, or a clean geometric shape to guide the eye. What this means for your photos: A lone road disappearing into fog, a single staircase rail — these lines do the compositional work that a complex scene would otherwise bury.
- Intentional Simplicity. This is the meta-principle. Simplicity is not something that happens by accident — it is engineered. What this means for your photos: Every time you raise the camera, ask whether each element in the viewfinder is earning its place. If it isn’t, it needs to go.
Negative Space: Let Subjects Breathe
Negative space deserves its own section because beginners consistently underuse it. When photographers first hear “use more empty space,” their instinct is to resist — empty space feels like wasted frame. That instinct is wrong, and understanding why changes everything.
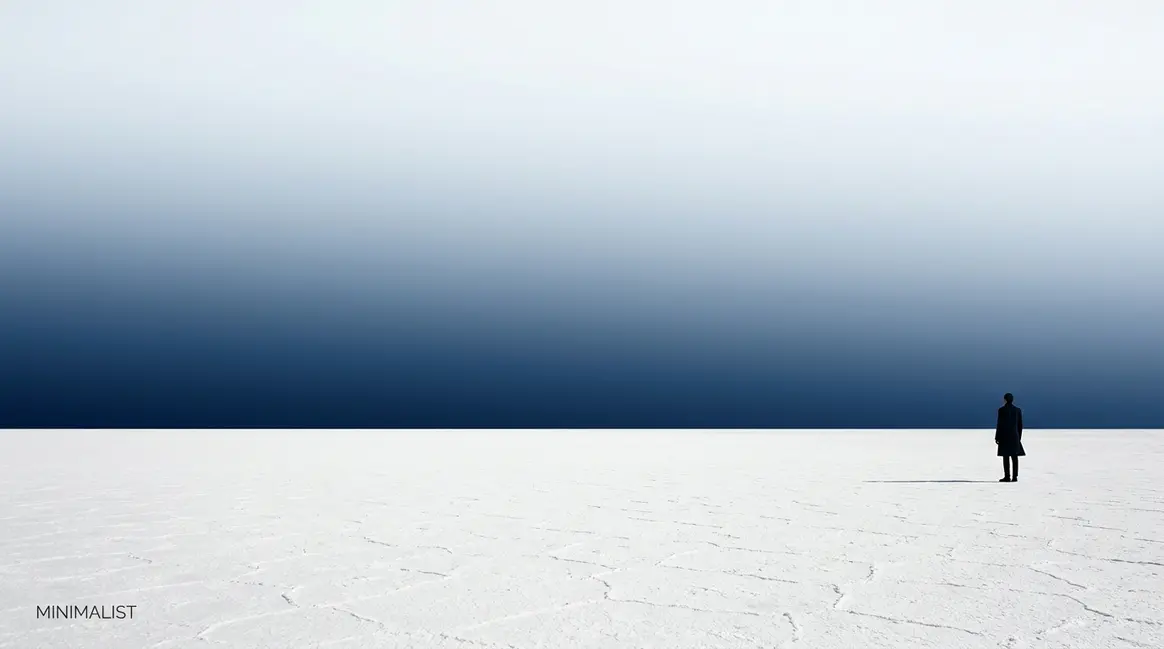
Negative space creates visual tension. It forces the viewer’s eye toward the subject because there is simply nowhere else to go. A small figure standing at the edge of a vast, featureless ocean is more powerful than the same figure surrounded by detailed coastline, because the scale contrast communicates something — solitude, insignificance, possibility — that a busier frame cannot.
Practically, you create negative space by: shooting against clean backgrounds (overcast sky, still water, blank walls), positioning your subject away from the center so the empty area forms a deliberate shape, and increasing your distance from the subject to include more surrounding space in the frame.
Color Theory: Less Color, More Impact
Color is one of the fastest ways a scene either supports or destroys a minimalist composition. When you include multiple competing colors, the viewer’s eye bounces between them rather than settling on your subject. Limiting your palette solves this problem before you press the shutter.
Simple minimalist photography often works best with monochromatic palettes — one dominant hue with neutral tones — or with a single bold color set against a neutral background. Think of a yellow raincoat against a grey concrete wall. The contrast is immediate, the subject is undeniable, and nothing else competes. Shooting during golden hour or overcast conditions naturally reduces harsh color contrast and creates the muted, unified tones that minimalist images favor.
How to Shoot Minimalist Photography
You understand what minimalism in photography means. Now the real question is: how do you actually do it when you’re standing in front of a busy street, a complicated scene, or a subject that refuses to cooperate with your vision? This section gives you seven concrete frameworks — each one a repeatable approach you can apply in the field today.
Essential Composition Rules
Before the seven frameworks, two foundational composition principles give you a structural foundation. Both are tools that serve minimalism particularly well.
The Rule of Thirds divides your frame into a 3×3 grid (nine equal sections). Placing your subject at one of the four intersection points — rather than dead center — creates natural visual tension and gives the surrounding negative space a sense of balance. Most cameras and smartphones display this grid in the viewfinder settings; turn it on and leave it on until placing subjects off-center becomes instinctive.
Leading Lines are natural or man-made lines in the scene — roads, fences, shorelines, shadows — that guide the viewer’s eye toward the subject. In minimalist composition, a single strong leading line does double duty: it creates structure and reduces the need for additional compositional elements. One line. One subject. Done. To consistently capture these images, you must master minimalist composition techniques that train your eye to see structure.
Finding Subjects in Busy Scenes
Photographers consistently report that the hardest part of minimalist photography isn’t the technique — it’s finding the moment of simplicity within a complicated scene. The good news: simplicity is almost always present. You just need to train your eye to find it.
Four strategies work reliably:
- Change your angle. Getting low eliminates background clutter below the horizon. Getting high eliminates ground-level noise. A subject that looks busy from eye level often looks clean against sky when you crouch down.
- Isolate with distance. Step back. Wide shots of a lone element in a large environment naturally create the negative space minimalism requires.
- Wait for the frame to clear. Street photographers know this instinctively — a busy intersection becomes a minimalist composition the moment the crowd parts and one person crosses alone.
- Use weather and light. Fog, mist, overcast skies, and flat light all naturally suppress background detail. Harsh, directional light creates strong shadows that simplify form. Both conditions are allies.
If you can’t get outside, you can explore creative minimalist photography ideas at home using everyday objects.
7 Step-by-Step Composition Frameworks
Estimated time: 30-45 minutes
Tools needed: Camera or smartphone, tripod (optional)
These frameworks are repeatable approaches — each one transforms a complicated scene into a minimalist composition through a specific sequence of decisions.
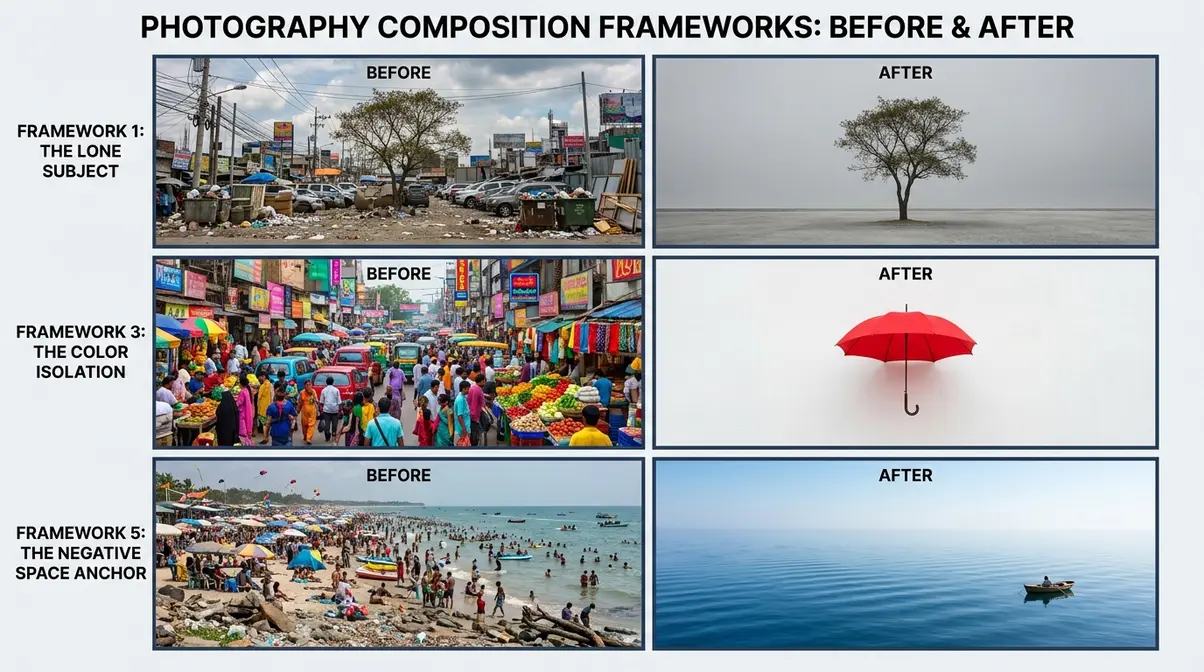
- Framework 1: The Lone Subject
- Identify one element that has visual weight — a tree, a figure, a building.
- Move until the background behind it is as plain as possible (sky, water, wall).
- Place the subject at a rule-of-thirds intersection point.
- Shoot.
- Framework 2: The Line and Endpoint
- Find a strong leading line (road, fence, shoreline, shadow).
- Place a single subject at the end of the line.
- Frame so the line enters from a corner and terminates at your subject.
- Eliminate any competing elements from the edges of the frame.
- Framework 3: The Color Isolation
- Find a subject with one bold, distinct color.
- Seek a background that is the opposite — neutral, muted, or complementary.
- Fill the frame so only the subject and the background are visible.
- Expose for the subject color to keep it vivid.
- Framework 4: The Reflection
- Find still water, a wet surface, or a reflective window.
- Frame so the reflection doubles the subject without adding complexity.
- Keep the composition symmetric or deliberately asymmetric — not accidentally unbalanced.
- Framework 5: The Negative Space Anchor
- Choose a small subject with strong visual identity (a bird, a figure, a boat).
- Place it in one corner or edge of the frame.
- Let the remaining 70-80% of the frame be empty, plain space.
- The tension between subject and void is the composition.
- Framework 6: The Geometric Shape
- Find a clean geometric form — a circle, triangle, arch, or grid.
- Frame the shape so it fills the composition without competing elements.
- The shape itself becomes the subject. No additional focal point is needed.
- Framework 7: The Texture Close-Up
- Move in close to a surface with strong texture — bark, concrete, sand ripples, fabric.
- Fill the entire frame with texture.
- Introduce one point of difference — a crack, a shadow, a single contrasting element — to give the viewer’s eye somewhere to land.
Best Settings for Minimalist Photos

What camera settings are best for minimalist photography? The most important setting is aperture—specifically a wide aperture between f/1.8 and f/2.8. This creates a shallow depth of field (only your subject is sharp) and blurs the background into a smooth, undistracting plane.
Camera settings (the technical controls that determine how much light enters the sensor and how the image is rendered) directly support or undermine minimalist composition. Here are the key settings and why each one matters.
| Setting | Recommended Value | Why It Helps Minimalism |
|---|---|---|
| Aperture (f-stop) | f/1.8–f/2.8 (wide) | Blurs the background, isolating your subject |
| ISO (sensor sensitivity) | As low as possible | Reduces grain, keeps tones clean and simple |
| Shutter Speed | Match to subject motion | Slow shutter blurs moving water/clouds into smooth, featureless planes |
| White Balance | Cloudy or Shade | Produces cooler, muted tones that reduce color competition |
| Shooting Mode | Aperture Priority (Av/A) | Lets you control background blur while the camera handles exposure |
For long-exposure minimalism — a technique where you use a slow shutter speed (several seconds) with a tripod — moving water turns into a silky, featureless surface and clouds stretch into smooth streaks. Both effects dramatically simplify backgrounds that would otherwise be busy and distracting.
Lightroom: Removing Distractions
Estimated time: 10-15 minutes
Tools needed: Adobe Lightroom (Desktop or Mobile), RAW image file
Even a carefully composed minimalist shot sometimes contains elements you couldn’t avoid in the field — a distant telephone wire, a small figure in the background, a distracting patch of bright color at the edge of the frame. Adobe Lightroom’s modern tools make removing these distractions straightforward, even for beginners.
According to Adobe’s guide to minimalist photography, post-processing is an integral part of the minimalist workflow — not a shortcut, but a continuation of the same editorial intention you applied in the field.
Step 1: Open the Masking panel.
In Lightroom (desktop), click the Masking icon (the circle with a dotted border) in the top-right of the Edit panel. This opens the AI-powered selection tools.
Step 2: Use “Select Subject.”
Click “Select Subject.” Lightroom’s AI identifies and isolates your main subject automatically. You can then adjust exposure, contrast, or color on the subject independently — making it stand out more cleanly against the background.
Step 3: Use “Select Background” and reduce distractions.
After selecting the subject, invert the mask to select the background. Reduce Texture and Clarity sliders to soften background detail. This mimics the effect of a wider aperture and reduces competing visual noise without removing elements entirely.
Step 4: Use Generative Remove for objects.
For specific distracting objects (a wire, a sign, a person in the distance), select the Healing panel and choose “Generative Remove.” Paint over the distraction. Lightroom’s AI fills the area with contextually appropriate background content — sky, ground, or wall — in seconds.
Step 5: Check the edges.
Zoom to 100% and scan the frame edges for remaining distractions. A small bright patch at the corner draws the eye away from your subject. Use a Radial Gradient mask to slightly darken edges, keeping the viewer’s attention centered.
Minimalist Photography Genres

Discovery begins when you realize minimalism isn’t a single type of photography — it’s an approach you can apply across almost every genre. Each one rewards the same underlying discipline: identify your subject, eliminate everything else, and let the resulting clarity do the work.
Minimalist Landscape Photography
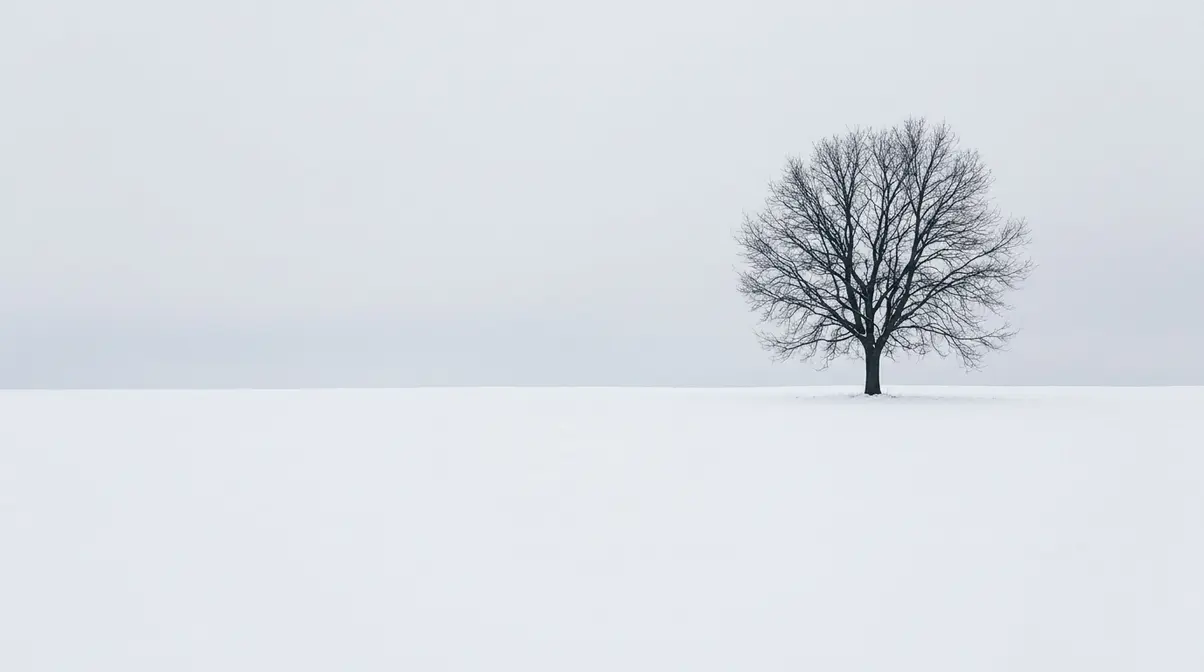
Minimalist landscape photography is perhaps the genre most naturally suited to the style. Wide open environments — beaches, deserts, snowfields, foggy forests — already offer large areas of undifferentiated negative space. The challenge is resisting the urge to include more.
The most effective minimalist landscape images typically feature one clear subject (a lone tree, a single rock, a distant horizon line) set against a vast, featureless environment. Shooting at dawn or dusk when light is soft and shadows are long naturally simplifies color and contrast. Fog and mist are particularly powerful allies — they suppress background detail and wrap distant elements in neutral grey, leaving only the closest subject visible and sharp.
Minimalist Architecture Photography
Cities and buildings might seem like the opposite of minimalism, but architecture is full of geometric precision, clean lines, and isolated forms that reward a minimalist eye. The key is framing: instead of photographing a building in context, move in close and isolate a single detail — an archway, a grid of identical windows, a curved wall against sky. When you learn minimalist architectural photography, you start seeing buildings as abstract shapes rather than functional structures.
Minimalist street photography follows the same logic. Rather than capturing the full energy of a busy street, you wait for the moment when one person crosses an empty intersection, or a single figure stands against a plain wall. The School of Photography’s minimalist photography tutorial notes that urban environments actually train the minimalist eye faster than natural settings, because the contrast between busy and simple is more dramatic and more frequent.
Minimalist Portrait Photography
Minimalist portrait photography strips the portrait back to one subject and one expression — removing busy backgrounds, competing props, and distracting clothing choices. A plain backdrop (seamless white, a neutral wall, an overcast sky) is the standard approach. Wide aperture isolates the face from even a relatively plain background.
The most powerful minimalist portraits often feature a single point of emotional focus — one expression, one gesture, one shaft of light crossing a face — with everything else deliberately subdued or removed. Common challenges reported by beginners include choosing backgrounds that appear plain in person but read as busy in photos; the solution is to shoot further from the background and use a wider aperture to blur it smooth.
Black and White Minimalist Photography
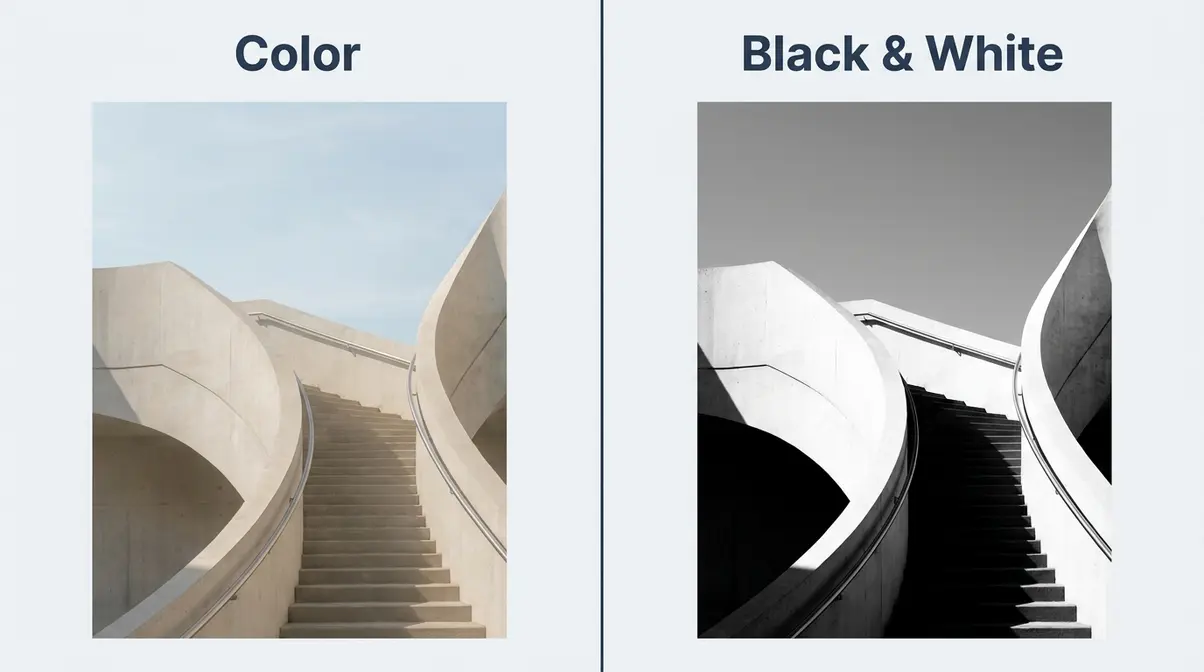
Removing color is one of the most effective single decisions a minimalist photographer can make. Color carries its own visual weight — sometimes more than you realize until it’s gone. Converting to black and white (monochrome) strips the image down to light, shadow, form, and texture. These elements alone carry more compositional power than most beginners expect. Many artists prefer to discover black and white minimalist photography to emphasize pure form over colorful distractions.
Black and white minimalist photography works especially well with strong geometric subjects, dramatic light-and-shadow contrasts, and textural close-ups. When evaluating whether a scene suits black and white conversion, our team looks for one defining element: strong tonal contrast. If the image relies on color difference to distinguish the subject from the background, it will likely flatten in monochrome. If it relies on light and shadow difference, the conversion will strengthen it.
Famous Photographers & Examples
Great minimalist photography has a lineage. Knowing who shaped the style — and what award-winning work looks like — gives you a visual vocabulary to draw from and a standard to aim toward.
Pioneers of Minimalist Style
Michael Kenna is among the most recognized names in minimalist photography. Working primarily in black and white with long exposures (sometimes hours long), Kenna’s images of trees, industrial structures, and lone figures in vast environments have been exhibited across Europe, Japan, and North America. His approach — returning to the same location across multiple seasons and times of day until the light and conditions produce exactly the simplicity he seeks — embodies the Clarity-Intention Framework at a professional level.
Hiroshi Sugimoto approaches minimalism through conceptual rigor. His Seascapes series, which photographs the horizon line dividing sea and sky across dozens of locations worldwide, reduces photography to its most fundamental binary: the line between water and air. Every image in the series is structurally identical — and yet each one carries distinct emotional weight because of the quality of light and the texture of the surface.
Fan Ho, the Hong Kong photographer active from the 1950s through 1980s, demonstrated that minimalism thrives in urban environments. His street photographs — figures caught in geometric shafts of light, lone silhouettes against blank walls — showed that a busy city is simply a collection of moments waiting to be isolated.
These photographers share one working principle: patience. The minimalist image rarely presents itself immediately. It is found through waiting, repositioning, and returning — until the scene offers exactly the clarity and intention the image requires.
Award-Winning Minimalist Examples
The Minimalist Photography Awards — an annual international competition dedicated exclusively to the style — provides one of the clearest benchmarks for what award-winning minimalism looks like in practice. Winning entries across categories consistently share three characteristics: a single unambiguous subject, deliberate and generous use of negative space, and an emotional quality that emerges directly from the simplicity rather than despite it.
Across photography communities, the consistent feedback from working photographers is that studying award-winning minimalist images teaches the eye faster than any technical instruction. Spend thirty minutes with a gallery of winning entries and you will begin to see the decisions behind each frame — what was excluded, what was kept, and why.
Gear for Minimalist Photography
Here is a contrarian claim worth stating plainly: expensive gear does not make minimalist photography better. In fact, the philosophy of the style actively resists it. The most important equipment in minimalist photography is the eye behind the camera — the ability to identify, isolate, and frame a single subject with intention.
That said, certain tools support minimalist outcomes more effectively than others.
Do I Need Expensive Gear?
Do I need expensive gear for minimalist photography? No — minimalist photography requires no expensive gear. Any camera that gives you control over aperture is sufficient for minimalist photography. That includes entry-level DSLRs (Digital Single-Lens Reflex cameras — where the viewfinder shows you exactly what the lens sees), mirrorless cameras, and modern smartphones with manual or pro modes. Photographers consistently report that the discipline of minimalism actually improves faster when shooting with a limited tool — a single fixed-lens camera or a smartphone — because constraints force creative decisions rather than technical ones.
The “minimal kit” that our team recommends for beginners: one camera body, one lens, and a tripod for long-exposure work. Nothing else is required to produce genuinely strong minimalist images. A neutral density (ND) filter — a dark filter that attaches to the lens and reduces light entering the camera — is a useful addition if you want to shoot long exposures in daylight, smoothing water and clouds into featureless planes.
Choosing the Right Lens
Focal length (the number measured in millimeters that determines how wide or narrow your field of view is) has a direct effect on minimalist composition. Here is how the most common focal lengths behave:
| Focal Length | Effect on Minimalism | Best For |
|---|---|---|
| 24–35mm (Wide) | Includes more of the scene; requires careful background management | Architecture, landscape with vast negative space |
| 50mm (Standard) | Closest to natural human vision; versatile and clean | Portraits, street, everyday subjects |
| 85–135mm (Short Telephoto) | Compresses background, isolates subjects naturally | Portraits, distant subjects, urban isolation |
| 200mm+ (Telephoto) | Strong background compression; blurs even distant backgrounds | Wildlife, sports, isolating subjects in busy environments |
For most beginners, a 50mm or 85mm lens is the most effective starting point. The 50mm produces natural-looking images with clean separation between subject and background at moderate apertures. The 85mm adds background compression that does compositional work automatically — subjects pop away from even moderately busy backgrounds at f/1.8 or f/2. When you choose the best lenses for minimalist photography, prime lenses often force better compositional habits by restricting your field of view.
Building Your Minimalist Brand
A direct statement to begin: your photography style is your brand. The same principles that make a minimalist image powerful — clarity, restraint, intentional simplicity — are exactly the principles that make a minimalist photography brand memorable. Consistency between your images and your visual identity isn’t just aesthetically pleasing; it signals professionalism to potential clients and followers.
Creating a Minimalist Logo & Brand
A minimalist photography logo should reflect the same editorial discipline as your images. Across working photographer portfolios, the most effective minimalist logos share three characteristics: a limited color palette (typically monochrome or one accent color), clean typography without decorative elements, and a simple mark or monogram rather than a complex illustration.
Practical starting points: use a wordmark (your name in a clean sans-serif typeface like Helvetica, Futura, or Neue Haas Grotesk) rather than a complex icon. If you include a symbol, make it geometric and simple — a circle, a thin-line camera icon, or a single letter mark. Tools like Adobe Express, Canva Pro, and Squarespace Logo Maker offer minimalist photography logo templates that are free or low-cost and easily customizable. Avoid gradients, drop shadows, and decorative flourishes — they contradict the aesthetic your images communicate.
Portfolios, Websites & Social Media
Your portfolio is your strongest marketing asset, and for minimalist photographers, curation is everything. A portfolio of twelve exceptional minimalist images is more effective than a portfolio of sixty competent ones. Photographers consistently report that editing down — removing images that are good but not great — is the single most impactful improvement they make to their online presence.
For websites, platforms like Squarespace, Format, and Pixieset offer minimalist photography website templates with clean white backgrounds, generous image spacing, and simple navigation. All three support full-screen image display — essential for work where the composition itself needs to breathe without interface clutter competing for attention.
On social media, Instagram and 500px remain the primary platforms for minimalist photography communities. Consistency of style across your feed matters more than posting frequency. Twelve images with a unified tonal palette and compositional approach build a recognizable visual identity faster than daily posting with inconsistent style.
Common Mistakes and How to Avoid Them
Common Minimalist Pitfalls
Beginners make predictable mistakes when first applying minimalist principles. Knowing them in advance means you can correct them before they become habits.
Confusing empty with minimalist. A photo of a blank white wall is empty. A photo of a single red door in a white wall is minimalist. The difference is a subject with visual weight and intentional placement. If your image has negative space but no clear subject, it isn’t minimalist — it’s incomplete. Apply the Clarity-Intention Framework: ask whether you have both a clear subject and a deliberate reason for everything surrounding it.
Centering every subject. Placing the subject in the dead center of the frame is the most common compositional default — and it eliminates the visual tension that makes minimalist images compelling. Practice placing your subject at rule-of-thirds intersection points and observe how the surrounding negative space becomes more dynamic.
Including “just one more thing.” Every element you add to a minimalist frame reduces its impact exponentially. A lone tree is powerful. A lone tree with a fence in the foreground is already less powerful. A lone tree with a fence and a parked car is no longer minimalist at all. Treat every addition as a subtraction from impact.
Over-processing in post. Heavy HDR effects, strong vignettes, and aggressive clarity sliders all add visual texture that contradicts minimalist simplicity. In Lightroom, favor restraint: gentle tonal adjustments, clean shadows, and subtle clarity reductions rather than dramatic processing effects.
Shooting in poor light and hoping to fix it later. Minimalism depends on clean tones and clear contrast. Harsh midday light creates competing shadows. Artificial mixed lighting creates competing color casts. Overcast light, golden hour, and blue hour all produce the unified, controlled tonal environments that minimalist composition favors. Shoot in the right light — it cannot be fully replicated in post-processing.
When to Choose a Different Approach
Minimalism is not the right approach for every subject or every photographer. Understanding when to set it aside is as important as knowing when to apply it.
If your subject is inherently complex — a market scene, a family gathering, a documentary moment with multiple interacting figures — a minimalist approach will strip out the contextual information that gives the image its meaning. Photojournalism, event photography, and environmental portraiture all require a richer visual environment to tell their stories fully.
Similarly, if you find that applying minimalist constraints consistently produces images that feel cold or emotionally distant rather than focused and powerful, the style may not match your natural photographic instincts. Many photographers find that minimalism works best as one mode within a broader practice — used deliberately for certain subjects and set aside for others.
Frequently Asked Questions
What is minimalist photography?
Minimalist photography is a style that uses deliberate simplicity to create images where one subject commands complete attention. It draws on the broader minimalism art movement, which emerged in the 1960s and emphasized reduced forms and pure visual elements. In practice, it means actively excluding everything from the frame that doesn’t serve the subject — background clutter, competing colors, distracting lines. The result is an image where the subject is undeniable and the surrounding space amplifies rather than dilutes its impact. It works across every genre, from portrait to architecture.
How do I take minimalist photos?
Taking minimalist photos means applying two decisions before every shot: choose one clear subject (Clarity) and remove everything that competes with it (Intention). Start by identifying a single element with strong visual weight — a lone figure, a geometric shape, a bold color. Then move, adjust your angle, or wait until the background is as plain as possible. Use the rule of thirds to place the subject off-center, and allow generous negative space around it. Camera settings that help: a wide aperture (f/1.8–f/2.8) blurs backgrounds automatically, and a telephoto lens (85mm–135mm) compresses and simplifies the environment behind your subject.
Who are the most famous minimalist photographers?
Michael Kenna is widely regarded as the defining figure in minimalist photography, known for long-exposure black and white images of lone trees, industrial forms, and quiet landscapes across Japan, Europe, and North America. Hiroshi Sugimoto’s Seascapes series — photographs of the horizon line dividing sea from sky — reduces photography to its most fundamental binary. Fan Ho documented minimalist moments within the urban complexity of mid-century Hong Kong. All three share a working discipline of patience: waiting for, or returning to, a scene until the conditions produce exactly the simplicity the image requires.
Conclusion
For beginner photographers frustrated by cluttered, disappointing images, minimalist photography offers both a diagnosis and a solution. The diagnosis: most photos fail not because of bad subjects, but because too many competing elements divide the viewer’s attention until nothing wins. The solution: apply the Clarity-Intention Framework — choose one subject with deliberate care, then remove everything that fights it for attention. That two-part editorial decision is the entire practice, applied consistently.
The five core principles — single subject, negative space, limited palette, strong lines, and intentional simplicity — give you a repeatable pre-shoot checklist. The seven composition frameworks give you specific sequences to follow in the field. Post-processing tools like Lightroom’s Masking and Generative Remove extend that editorial intention into the digital darkroom. And studying photographers like Michael Kenna and Hiroshi Sugimoto shows you what the discipline looks like at its highest level.
Start small. Pick one subject today — a lamp post, a doorway, a coffee cup against a plain surface — and apply the two questions: What is this photo about? What can I remove? Then press the shutter. The practice of minimalist photography begins with a single intentional frame, and each one builds the visual instinct that makes the next one stronger. Your clearest, most powerful images are already waiting in the scenes around you — they just need the right editorial eye to find them. Ready to start? Grab your camera, pick a single subject, and try applying the Clarity-Intention Framework today.
Dave King
Hi, I'm Dave, the founder of Amateur Photographer Guide. I created this site to help beginner and hobbyist photographers build their skills and grow their passion. Here, you’ll find easy-to-follow tutorials, gear recommendations, and honest advice to make photography more accessible, enjoyable, and rewarding.