
Table of Contents
This blog post may contain affiliate links. As an Amazon Associate I earn from qualifying purchases.
Photographs often feel overcrowded when every corner is packed with detail. For new photographers, learning to use negative space can completely change how your images are perceived. By leaving intentional empty areas around your subject, you create balance and guide the viewer’s eye straight to what matters most. This skill adds emotion, clarity, and focus, helping you move from simple snapshots to powerful storytelling through your camera.


Key Takeaways
| Point | Details |
|---|---|
| Understanding Negative Space | Negative space is the intentional emptiness that enhances the main subject of a photograph, improving focus and viewer engagement. |
| Types of Negative Space | Recognize the difference between active and passive negative space to convey the desired emotional tone in your images. |
| Background Selection | Choose simple, minimal backgrounds that support negative space effectively, ensuring that they do not distract from the main subject. |
| Common Mistakes | Avoid placing subjects too close to frame edges or using cluttered backgrounds, as these can undermine the impact of negative space in your composition. |
Negative Space Defined in Photography
Negative space is the empty or unfilled area surrounding your main subject in a photograph. It’s not about nothing—it’s about intentional emptiness that serves a creative purpose.
Think of it this way: if your subject is the main actor on stage, negative space is the backdrop that lets that actor shine. Without it, your image feels cluttered and your viewer doesn’t know where to look.
What Negative Space Actually Does
Negative space performs several critical functions in your images:
- Creates visual breathing room for your subject to exist without competition
- Directs viewer attention naturally toward what matters most
- Establishes mood and emotion through emptiness or simplicity
- Improves composition balance by preventing visual overload
- Enhances storytelling by giving context without distraction
A busy background with too much detail pulls focus away from your subject. Negative space prevents this. When you consciously use empty areas—whether sky, water, walls, or blurred backgrounds—your subject becomes impossible to ignore.
How Negative Space Changes Your Image’s Story
Negative space doesn’t just sit there. It actively shapes how viewers feel about your photograph. A large expanse of empty sky around a small subject might evoke loneliness or vastness. The same subject in a tightly framed image with minimal negative space feels confined and intense.
Consider a person standing alone in a massive empty field versus the same person filling most of the frame. The first tells a story of isolation or freedom. The second tells a story of importance or intensity. Same subject. Different emotional outcome. That’s the power of negative space.
Negative space is not wasted space—it’s strategic emptiness that makes your subject more powerful, not less.
The Practical Value for Your Photography
As an amateur photographer, you have a simple decision to make with every shot: Will you fill the frame with details, or will you use empty space strategically?
When you understand how to use negative space effectively, you instantly improve your ability to control composition and direct viewer attention toward your intended subject. This is one of the fastest ways to elevate from casual snapshots to intentional photography.
Negative space works in almost every genre—portraits, landscapes, still life, street photography. You’re not limited to any particular style.
Pro tip: When framing your next shot, ask yourself whether every element in the frame is pulling viewers toward your subject or away from it. If something isn’t helping tell your story, remove it or reduce it through negative space.
Types and Effects of Negative Space
Negative space isn’t one-size-fits-all. Different types create different emotional responses and serve different purposes in your images. Understanding these types helps you choose the right approach for each shot.
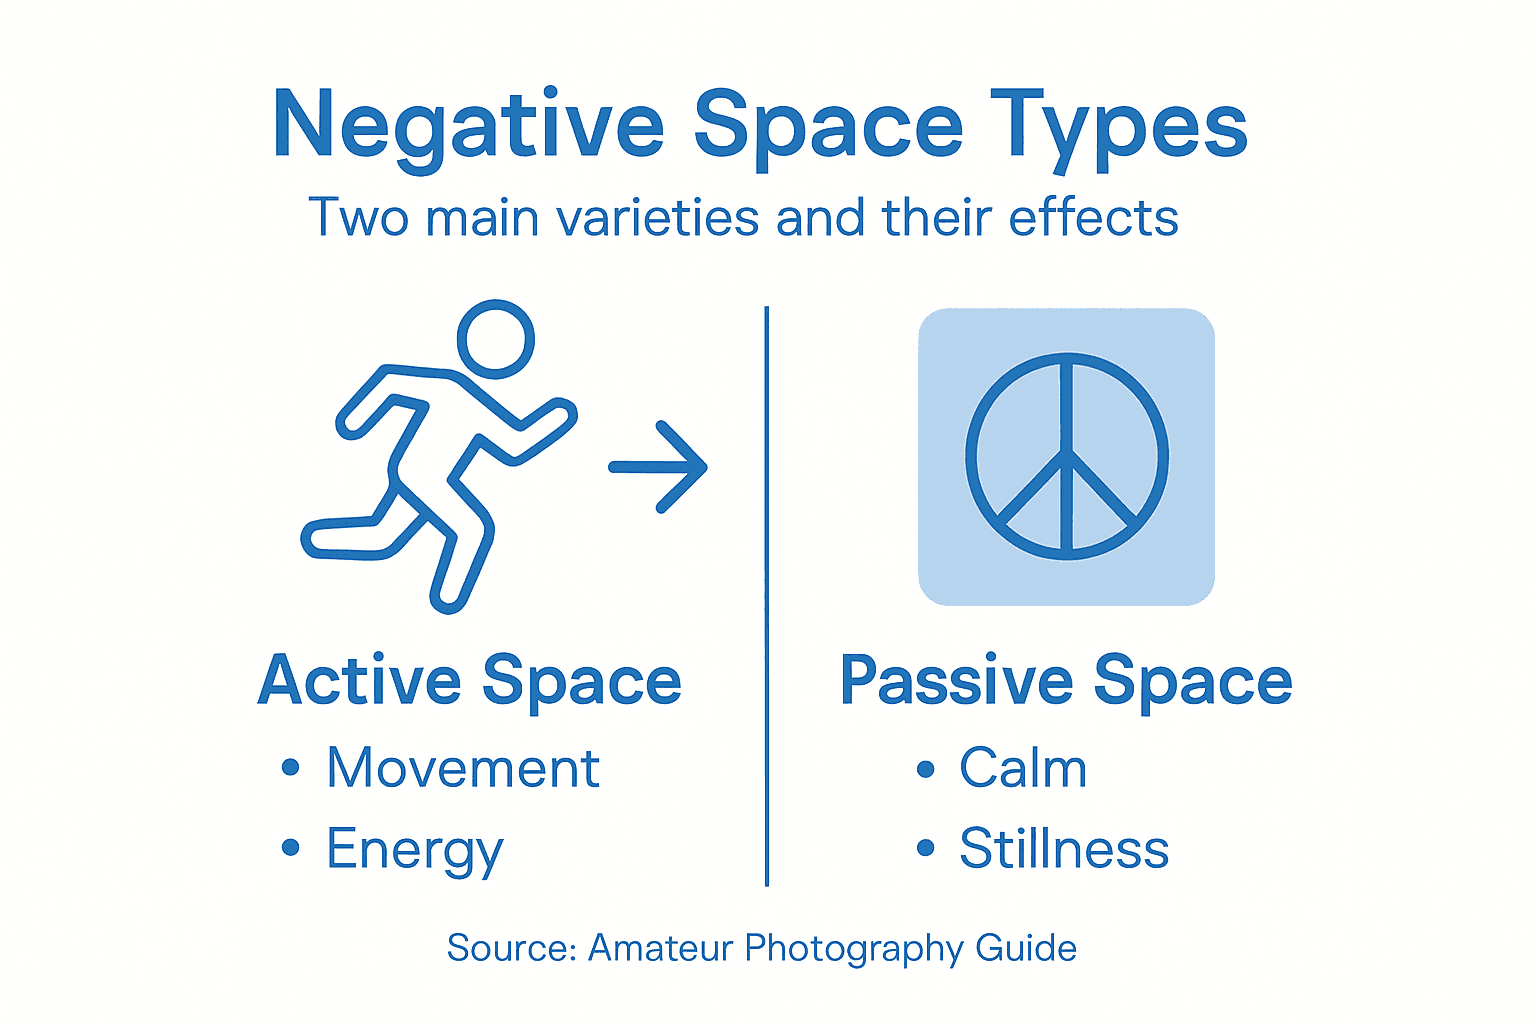
There are two main categories: active negative space and passive negative space. Each one changes how viewers experience your photograph.
Active Negative Space
Active negative space brings energy and movement to your image. It engages viewers and encourages them to interact with the composition.
Imagine a dancer captured mid-leap against an open sky. That sky isn’t just empty—it’s dynamic. It creates a sense of motion, freedom, and possibility. The viewer’s eye follows the dancer through the space, feeling the energy of the moment.
Active negative space works by:
- Suggesting movement or action within the frame
- Creating tension between the subject and empty space
- Drawing viewers in through visual curiosity
- Amplifying emotion like joy, freedom, or momentum
This type of negative space feels alive. It makes viewers want to explore the image.
Passive Negative Space
Passive negative space creates calm and stillness. It emphasizes your subject without distractions or energy.
Think of a bird perched on a branch against a soft, uniform sky. The simplicity is peaceful. There’s no movement, no tension—just a quiet moment of observation. This is passive negative space at work.
Passive negative space works by:
Here’s a quick reference comparing active and passive negative space in photography:
| Type of Negative Space | Typical Emotional Effect | Best Background Choice | Ideal Subjects |
|---|---|---|---|
| Active | Dynamic, energetic | Textured, open, minimal clutter | Action shots, sports, moving wildlife |
| Passive | Calm, contemplative | Smooth, uniform, blurred | Portraits, still life, tranquil landscapes |
- Eliminating distractions through smooth, uniform backgrounds
- Creating tranquility and contemplative mood
- Isolating your subject from surrounding context
- Allowing focus without visual competition
How Background Choice Shapes the Effect
Your background determines which type of negative space you’re using. A blurred bokeh background creates passive space. A textured but simple background can work either way depending on its complexity.
The type of negative space you choose directly shapes whether your image feels active and energetic or calm and introspective.
Choosing Between Active and Passive
Ask yourself: What emotion do I want to convey? If you want movement, energy, or dynamic feeling, lean toward active negative space. If you want tranquility, focus, or contemplation, use passive negative space.
Both approaches work in every photography genre—portraits, landscapes, wildlife, street photography. Your subject and story determine which serves you better.
Pro tip: Shoot the same subject with both active and passive negative space approaches, then compare them side by side. You’ll immediately see which emotional tone matches your creative vision for that particular image.
Techniques for Creating Negative Space
Creating effective negative space requires intentional choices across multiple elements of your shot. It’s not accidental—it’s the result of deliberate decisions about background, lighting, subject placement, and camera settings.
Here are the practical techniques that work in real-world photography.
Choose Your Background Strategically
Your background is the foundation of negative space. It should be simple and minimal, with little texture or visual competition.
Uniform backgrounds work best. A plain wall, clear sky, or smooth water surface all serve this purpose. Your background should fill at least 50% of the frame around your subject, creating that breathing room viewers need.
Background options include:
- Plain walls or solid-colored backdrops (studio or outdoor)
- Clear skies with minimal clouds
- Blurred backgrounds using distance and aperture
- Soft, diffused light on the background for tonal separation
The key is minimal texture. Even a slightly textured wall can distract. The simpler your background, the stronger your negative space becomes.
Use Lighting to Separate Subject from Space
Soft, diffused lighting creates smooth transitions between your subject and background. This separation is crucial for negative space to feel intentional rather than accidental.
Rim lighting is particularly effective. Light hitting the edge of your subject creates separation and makes it pop against the background. This technique works whether you’re shooting in studio or outdoors using natural light.
Lighting techniques for negative space:
- Soft, diffused light prevents harsh shadows that distract
- Rim lighting separates subject from background
- Directional light creates contrast without clutter
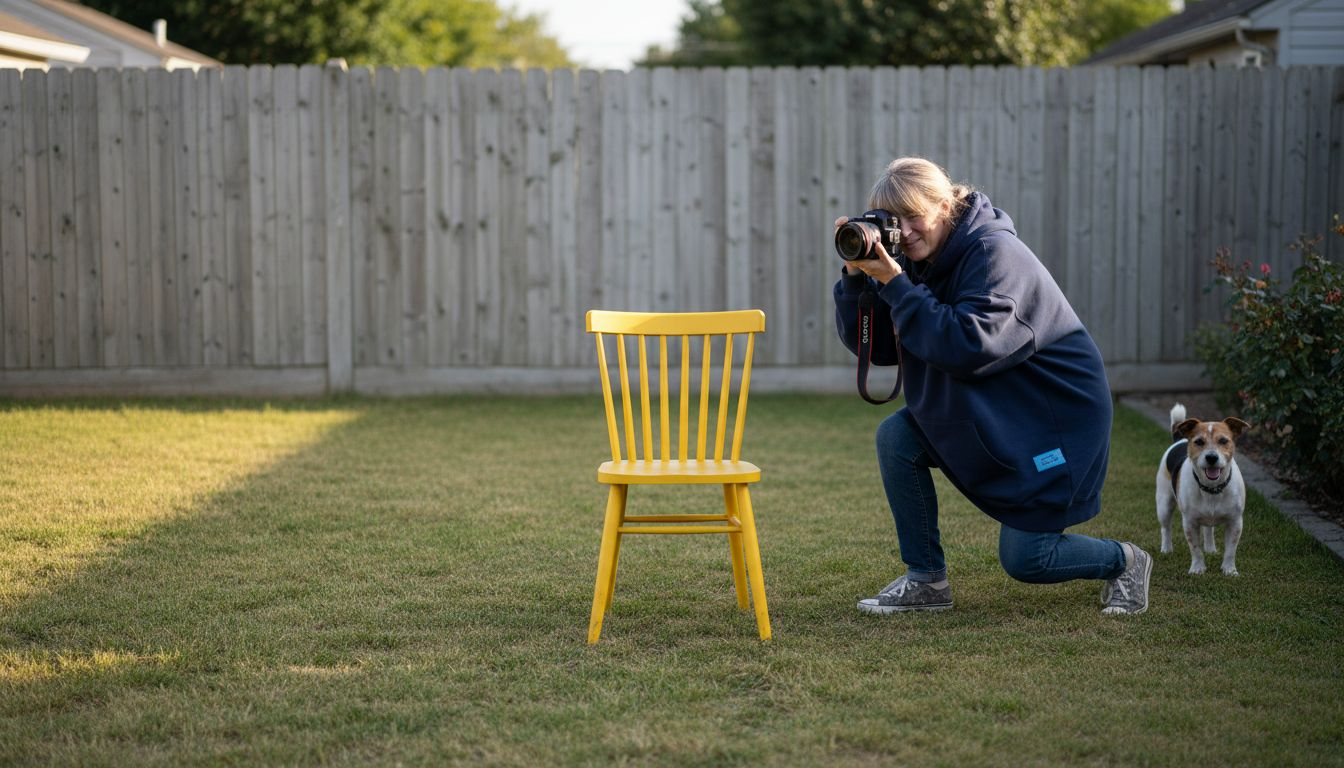
Position Your Subject Thoughtfully
Subject placement controls how negative space flows around your subject. Don’t center everything—use compositional guides like the rule of thirds.
Leave space in the direction your subject is facing or moving. This creates narrative and gives the subject room to “breathe” into the frame.
Effective negative space starts with intentional subject placement that respects both composition rules and the story you’re telling.
Adjust Your Aperture and Camera Angle
Wide apertures (small f-numbers like f/1.8 or f/2.8) blur your background into smooth negative space. This is one of the fastest ways to isolate your subject.
Camera angle also matters. Changing your perspective affects how much negative space surrounds your subject and the emotional impact of your image.
Pro tip: Start by shooting at your widest available aperture and positioning your subject off-center with plenty of empty space behind it. This simple combination creates powerful negative space without overthinking the technique.
Real-World Examples and Use Cases
Negative space works across every photography genre. The techniques remain consistent, but the application shifts based on your subject and environment. Let’s look at how professionals use negative space in practical situations.
Wildlife and Nature Photography
Wildlife photographers rely heavily on negative space to isolate their subjects from busy natural environments. A bird in flight against a clear blue sky becomes instantly recognizable because nothing competes for attention.
Negative space in wildlife works by:
- Simplifying complex backgrounds into single tones like sky or water
- Emphasizing the animal’s form without environmental distraction
- Conveying mood through isolation or vastness
- Creating impact with minimal visual noise
When you photograph a deer in a forest, the trees behind it create chaos. Position the deer against the sky or a distant hillside instead, and suddenly the composition becomes powerful. That’s negative space solving a real compositional problem.
Portrait Photography
Portraits benefit enormously from negative space. A person’s face and expression deserve focus without background elements competing.
Blurred backgrounds work perfectly here. A wide aperture combined with distance from the background creates smooth, creamy negative space that makes your subject unmissable. The viewer’s attention has nowhere else to go.
Portrait negative space accomplishes:
- Isolating the subject from distracting environments
- Directing full attention to facial expression and emotion
- Creating professional polish with intentional composition
- Adding breathing room around the subject’s head and shoulders
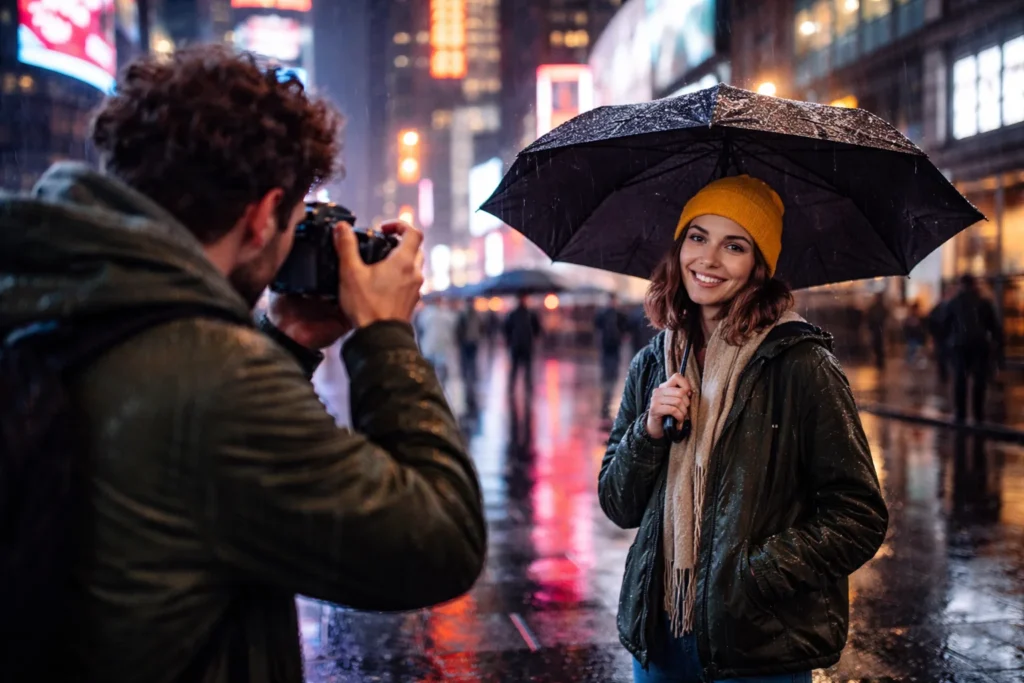
Street and Urban Photography
Street photographers use negative space differently. Empty walls, clear pavements, and open sky become compositional tools rather than just backgrounds.
A solitary person walking across a massive empty plaza tells a story through negative space. The vastness emphasizes isolation, smallness, or contemplation. The composition becomes inherently more engaging because of what’s not in the frame.
Negative space transforms ordinary scenes into compelling images by controlling what the viewer sees and, equally important, what they don’t see.
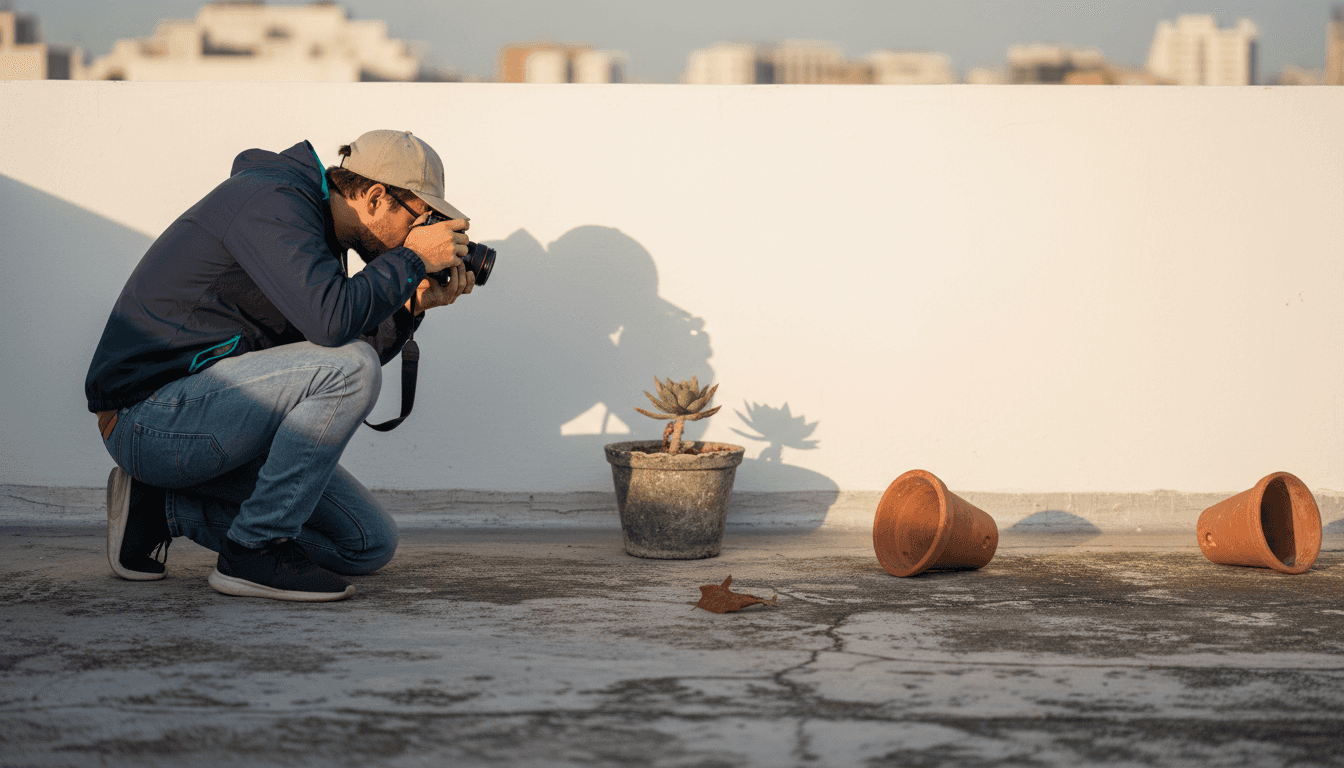
Still Life and Product Photography
In controlled studio settings, negative space becomes a design choice. A single object on a plain background follows the rules of negative space perfectly.
Minimal still life compositions use negative space to showcase form, texture, and detail. The subject becomes art because nothing else competes with it.
Pro tip: Study photographs in your preferred genre that stop you in your tracks. Analyze how much empty space surrounds the subject and what that emptiness communicates. Then intentionally replicate that ratio in your own work.
The following table summarizes genre-focused strategies for using negative space:
| Photography Genre | Main Strategy | Typical Result |
|---|---|---|
| Wildlife & Nature | Isolate with sky/water backdrop | Highlights animal’s form |
| Portrait | Blur backgrounds with aperture | Focuses on face and emotion |
| Street & Urban | Use empty urban elements | Emphasizes isolation/story |
| Still Life/Product | Employ plain, single-color backdrop | Accentuates object shape/detail |
Common Mistakes and How to Avoid Them
Even with good intentions, amateur photographers often sabotage their own negative space compositions. These mistakes are easy to make and even easier to fix once you know what to watch for.
Let’s walk through the most common pitfalls and how to sidestep them.
Cramping Your Subject Against Frame Edges
One of the biggest mistakes is placing your subject too close to the frame edges. This creates visual tension and uncomfortable negative space rather than intentional breathing room.
Your subject needs space around it, especially in the direction it’s facing or moving. A person looking left needs empty space to their left, not a wall. A bird flying right needs sky to its right.
When you cram your subject:
- The image feels claustrophobic and uncomfortable
- Negative space becomes accidental rather than intentional
- Viewer attention bounces around instead of settling on the subject
- The emotional impact weakens significantly
Solution: Leave generous margins around your subject. Frame with intention, not by accident.
Using Cluttered or Textured Backgrounds
Complex backgrounds destroy negative space. A busy wall, cluttered shelves, or patterned fabric competing for attention negates everything you’re trying to accomplish.
Your negative space only works when it’s genuinely empty or uniform. Texture and detail in the background pull focus away from your subject, making the composition confusing rather than compelling.
Background mistakes to avoid:
- Textured walls with visible blemishes or patterns
- Multiple objects or elements in the background
- Conflicting colors or tones that distract from the subject
- Insufficient blur when using background distance
Forgetting About Lighting
Poor lighting makes negative space feel accidental. Harsh shadows, uneven background exposure, or inconsistent tones undermine your compositional choices.
Soft, controlled lighting separates your subject from the background and makes negative space feel intentional. Without proper lighting, even a simple background becomes visually confusing.
The difference between accidental emptiness and intentional negative space often comes down to lighting and subject separation.
Not Adjusting Aperture or Subject Size
When your aperture is too small (high f-number like f/16), backgrounds stay sharp instead of blurring into smooth negative space. This creates visual competition rather than isolation.
Similarly, making your subject too small in the frame without adequate negative space leaves the composition feeling unbalanced and weak.
Settings to correct:
- Use wider apertures (f/1.8 to f/4) for background blur
- Position your subject to occupy 20-40% of the frame, not 80%
- Increase distance from subject to background when possible
- Adjust subject size to match your compositional vision
Pro tip: When reviewing your shots, ask: “Does the negative space feel like an intentional design choice, or does it look like I just pointed and shot?” If it’s the latter, adjust your background, lighting, or aperture before taking the next frame.
Master Negative Space To Elevate Your Photography
Struggling to create images where your subject truly stands out? Negative space is the secret tool every amateur photographer must understand to transform ordinary shots into powerful visual stories. By mastering concepts like active and passive negative space, learning purposeful subject placement, and controlling backgrounds, you can guide viewers’ attention exactly where you want it.
Discover detailed tutorials, practical tips, and expert advice on how to use negative space effectively on Amateur Photographer Guide. Whether you want to refine your portraits, wildlife shots, or street photography, our shooting techniques and comprehensive resources will help you avoid common mistakes and create compelling images that resonate emotionally. Start exploring now and take real control over your compositions with trusted guidance available anytime at Amateur Photographer Guide.
Frequently Asked Questions
What is negative space in photography?
Negative space refers to the empty or unfilled area surrounding the main subject in a photograph. It serves a creative purpose by providing visual breathing room, directing viewer attention, and establishing mood.
How does negative space affect the storytelling of a photograph?
Negative space shapes how viewers feel about a photograph by altering the emotional tone. For example, a large empty area around a subject can evoke feelings of isolation, while a tightly framed image can create a sense of intensity.
What are the types of negative space, and how do they differ?
There are two main types of negative space: active negative space, which brings energy and movement to an image, and passive negative space, which creates calm and tranquility. Each type affects viewer perception and emotional engagement differently.
How can I effectively use negative space in my photography?
To effectively use negative space, choose a simple and minimal background, position your subject thoughtfully, and use appropriate lighting. You can also adjust your aperture to blur the background and draw attention to your subject.
Recommended
- What Is Vignetting and Why It Matters for Photos
- Focal Plane in Photography: Why It Matters For Better Photos
- Noise Reduction in Photography: Clearer Images Explained
- Role of Photo Editing: Transforming Amateur Shots
Last update on 2026-04-15 / Affiliate links / Images from Amazon Product Advertising API
