
Table of Contents
- Key Takeaways
- What Makes a Lens Wide Angle?
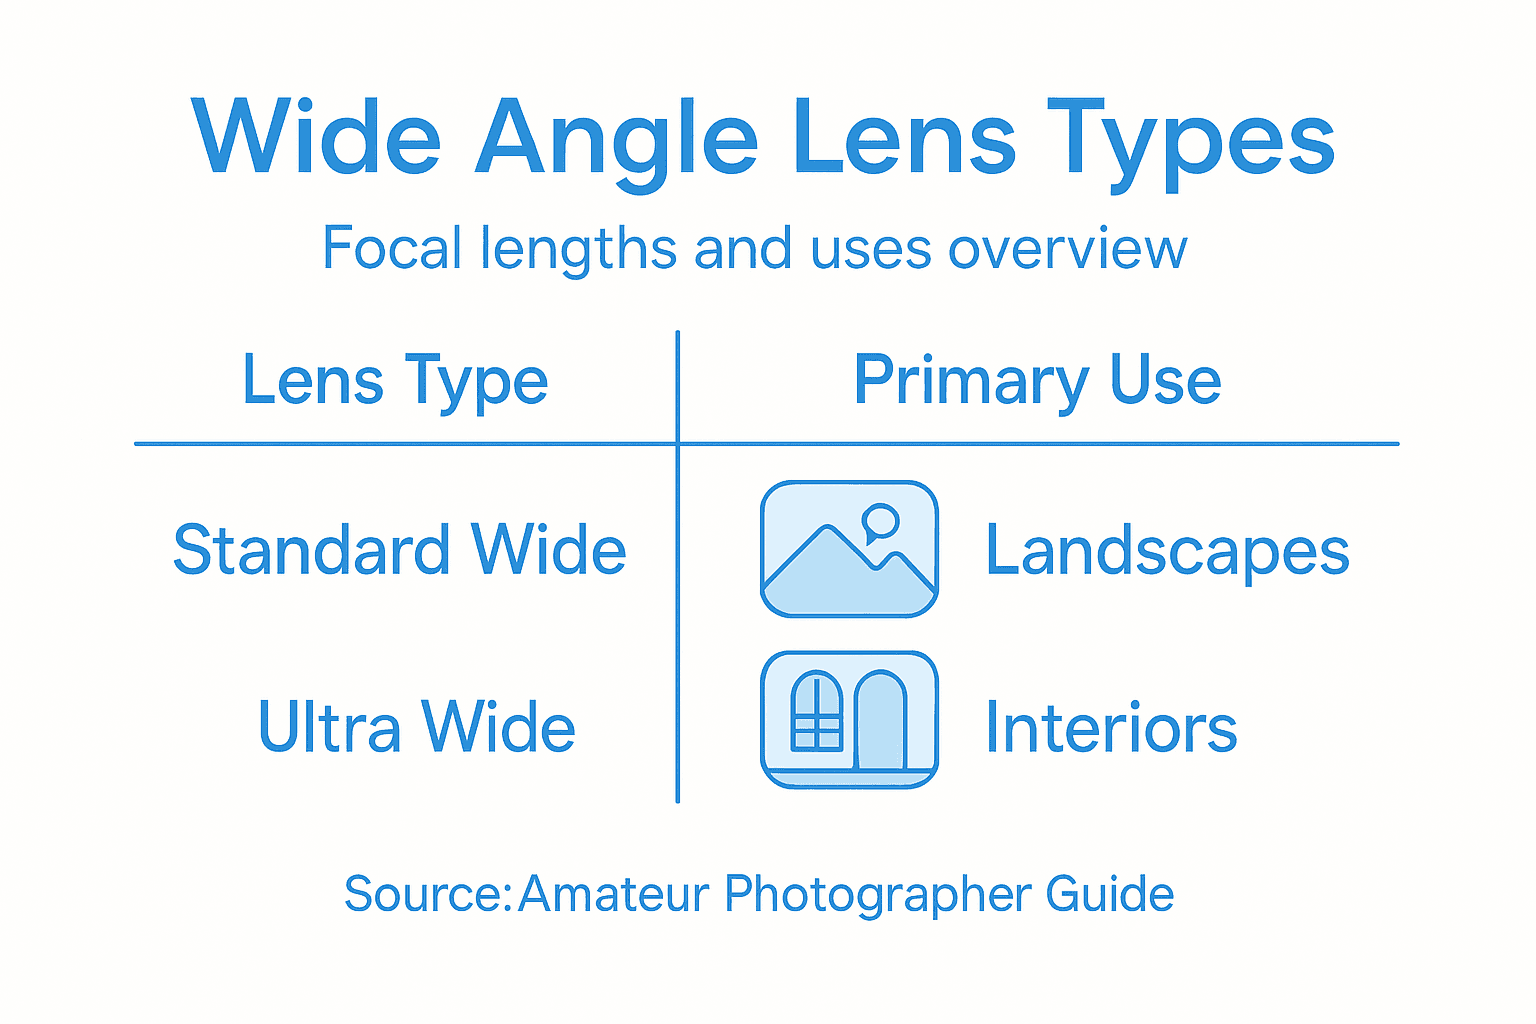
- Key Types of Wide Angle Lenses
- How Wide Angle Lenses Change Composition
- Best Scenarios for Wide Angle Use
- Common Mistakes and How to Avoid Them
- Wide Angle Lenses Versus Other Options
- Unlock the Full Creative Potential of Wide Angle Lenses
- Frequently Asked Questions
- Recommended
This blog post may contain affiliate links. As an Amazon Associate I earn from qualifying purchases.
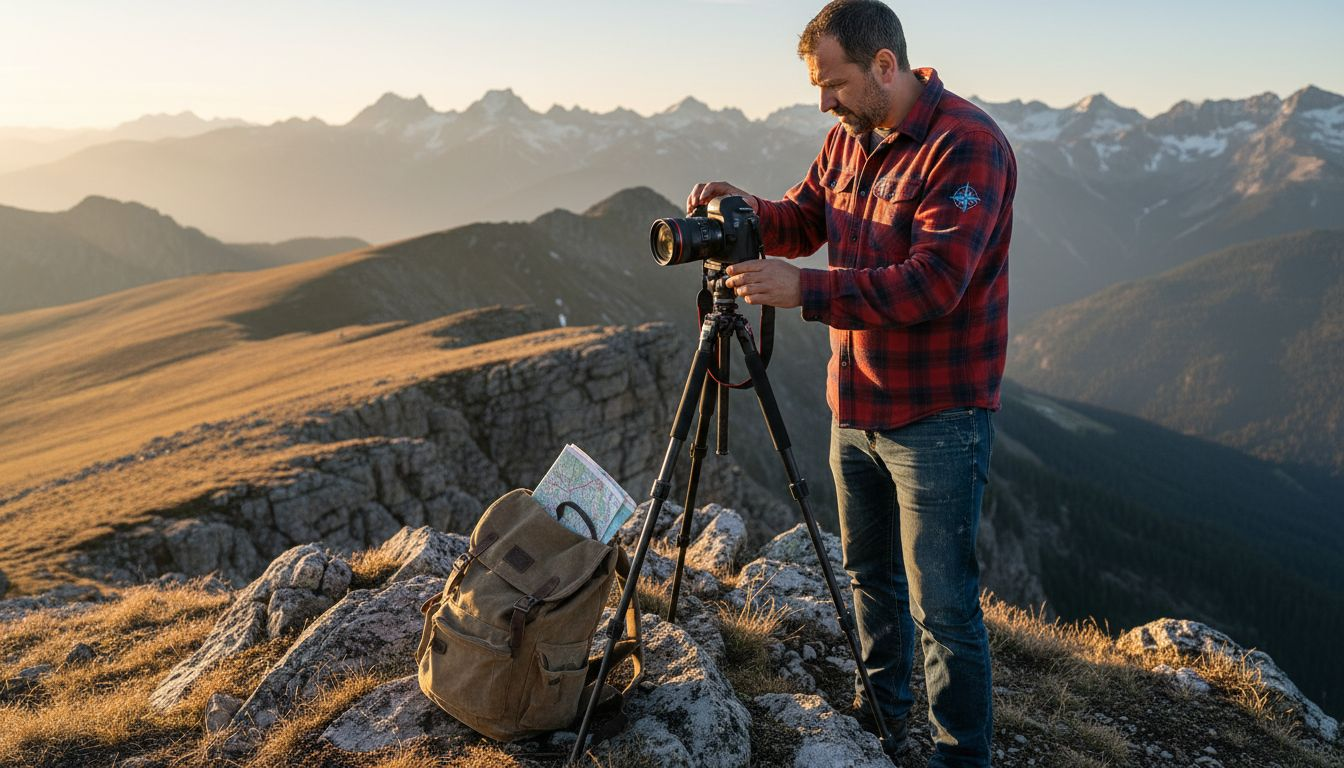
Capturing the sheer scale of a mountain range or the wide sweep of a city skyline can be frustrating when your camera just will not fit everything in. For amateur photographers eager to create more dramatic, spacious images, learning about wide angle lenses is a key step. These lenses include much more of a scene within each frame, letting you emphasize foreground details and explore creative compositions that truly stand out in landscape photography.


Key Takeaways
| Point | Details |
|---|---|
| Wide Angle Lenses Capture More | These lenses have a focal length between 14mm and 35mm, allowing for a broader field of view and more context in images. |
| Types of Wide Angle Lenses | Various lens types include Prime, Zoom, Ultra-Wide, and Fisheye, each suited for different photography needs. |
| Composition Impact | Wide angle lenses alter spatial relationships, enhancing background context and emphasizing foreground subjects for dynamic storytelling. |
| Avoiding Common Mistakes | Photographers should be aware of distortion and composition challenges to effectively use wide angle lenses in their work. |
What Makes a Lens Wide Angle?
A wide angle lens is a specialized optical instrument designed to capture a broader field of view compared to standard camera lenses. These unique lenses typically have a focal length ranging between 14mm and 35mm, enabling photographers to include significantly more visual information within a single frame.
When discussing wide angle lenses, several key characteristics distinguish them from other lens types:
- Focal lengths shorter than 35mm
- Wider horizontal and vertical angle of view
- Ability to capture expansive scenes with minimal distortion
- Typically featuring a wider maximum aperture
Professional photographers often distinguish wide angle lenses by their unique optical properties. Different focal length characteristics play a crucial role in determining how much visual information can be captured in a single image. The lens’s design allows photographers to include more background context, making them particularly valuable for landscape, architectural, and interior photography.
Understanding the technical specifications matters, but creativity truly defines wide angle lens usage. These lenses enable photographers to compress spatial relationships, create dramatic perspectives, and transform ordinary scenes into extraordinary visual narratives. By allowing more environmental context into each frame, wide angle lenses provide storytelling opportunities that standard lenses cannot match.
Pro tip: When shooting with a wide angle lens, position yourself closer to your primary subject to maximize foreground impact and create more dynamic compositions.
Key Types of Wide Angle Lenses
Wide angle lenses are not a one-size-fits-all category, with multiple distinct types serving different photographic needs. Photographers can choose from several specialized wide angle lens designs, each offering unique characteristics and creative possibilities.
The primary categories of wide angle lenses include:
- Prime Wide Angle Lenses: Fixed focal length lenses with exceptional optical quality
- Zoom Wide Angle Lenses: Flexible focal range allowing multiple composition options
- Ultra-Wide Angle Lenses: Extremely short focal lengths below 20mm for dramatic perspectives
- Fisheye Lenses: Specialized wide angle lenses creating extreme curved distortion
Selecting camera lenses for better photography requires understanding the nuanced differences between these lens types. Prime wide angle lenses typically offer superior image sharpness and wider maximum apertures, making them ideal for low-light scenarios and landscape photography.
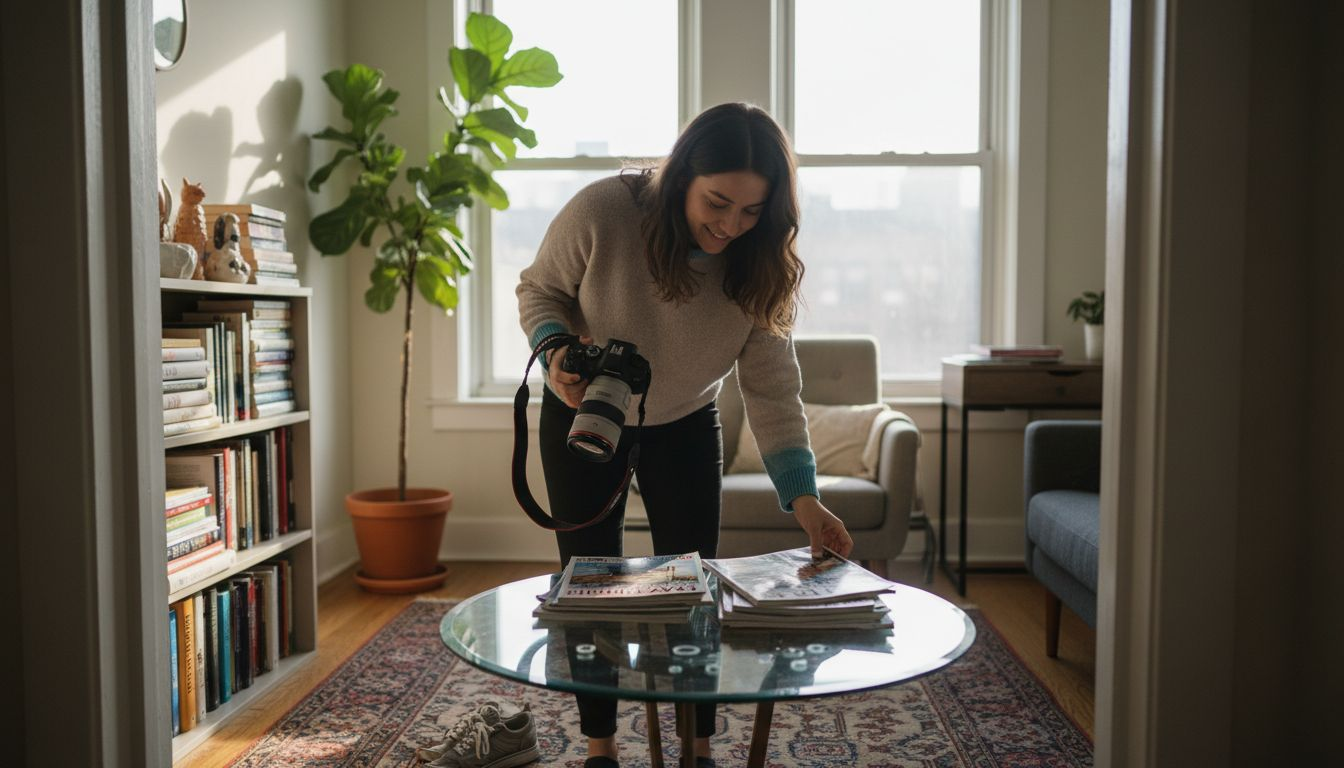
Zoom wide angle lenses provide photographers with greater compositional flexibility. These versatile lenses allow rapid reframing of scenes without changing physical position, which can be crucial when shooting in constrained environments like interior spaces or crowded urban settings.
Ultra-wide and fisheye lenses represent the most extreme wide angle options. Ultra-wide lenses capture expansive scenes with minimal distortion, while fisheye lenses intentionally create dramatic, curved perspectives that transform ordinary scenes into surreal visual experiences.
Pro tip: When choosing a wide angle lens, consider your primary photography subjects and shooting environments to select the most appropriate lens type for your creative vision.
Here’s how key wide angle lens types differ:
| Lens Type | Focal Length Range | Primary Use | Distortion Level |
|---|---|---|---|
| Prime Wide Angle | 14–35mm (fixed) | Landscape, low light | Minimal |
| Zoom Wide Angle | 14–35mm (variable) | Interiors, flexibility | Moderate |
| Ultra-Wide Angle | Below 20mm | Architecture, drama | Low to moderate |
| Fisheye | 8–16mm | Artistic, creative effect | Very high (curved lines) |
How Wide Angle Lenses Change Composition
Wide angle lenses fundamentally transform photographic composition by dramatically altering spatial relationships and visual perspective. These unique optical instruments compress visual information, creating dynamic images that challenge traditional photographic framing and perception.
Key compositional changes introduced by wide angle lenses include:
- Expanded Background Context: Revealing more environmental details
- Dramatic Foreground Emphasis: Creating visual depth through strategic subject placement
- Spatial Compression: Reducing perceived distance between foreground and background elements
- Enhanced Sense of Scale: Dramatizing size relationships within a scene
Focal length in photography plays a critical role in understanding how wide angle lenses manipulate visual storytelling. By capturing broader scenes, these lenses invite viewers to explore intricate details they might otherwise miss, transforming seemingly ordinary environments into compelling visual narratives.
The most profound compositional impact comes from how wide angle lenses alter spatial perception. Unlike standard lenses, wide angle optics create a sense of expansiveness by stretching horizontal and vertical planes. This optical characteristic allows photographers to craft images that feel immersive, pulling viewers into the scene through an exaggerated sense of depth and dimension.
Professional photographers leverage these unique compositional properties to create images that transcend traditional visual storytelling. By understanding how wide angle lenses distort and compress space, creative artists can intentionally manipulate viewer perception, turning ordinary scenes into extraordinary visual experiences.
Pro tip: Experiment with different subject distances and camera angles to maximize the unique compositional potential of your wide angle lens.
Best Scenarios for Wide Angle Use
Wide angle lenses shine in specific photographic scenarios where capturing expansive scenes and unique spatial relationships becomes crucial. These versatile optical tools transform ordinary shooting environments into extraordinary visual narratives, offering photographers unprecedented creative opportunities.
Ideal scenarios for wide angle lens deployment include:
- Landscape Photography: Capturing sweeping vistas and dramatic terrain
- Interior Architecture: Revealing complete room layouts and spatial dynamics
- Real Estate Photography: Showcasing entire spaces in single comprehensive shots
- Astrophotography: Recording vast night sky panoramas
- Environmental Portraits: Incorporating extensive contextual background information
Perspective in photography fundamentally changes when utilizing wide angle lenses, allowing photographers to create images that communicate deeper visual stories. Landscape photographers particularly benefit from these lenses, as they can capture expansive mountain ranges, sprawling coastlines, and intricate natural environments with remarkable depth and detail.
Architectural and interior photographers leverage wide angle lenses to document spaces comprehensively. By capturing broader views, these lenses eliminate visual constraints, revealing architectural nuances and spatial relationships that standard lenses might compress or omit. The ability to showcase entire rooms or building interiors in single, dynamic compositions makes wide angle lenses indispensable for professional documentation.
Understanding context is key when selecting wide angle lenses. While they excel in specific scenarios, they also present unique challenges like potential distortion and complex composition requirements. Successful photographers learn to work with these characteristics, transforming potential limitations into powerful creative tools.
Pro tip: Position yourself strategically and experiment with different angles to minimize lens distortion and maximize compositional impact.
Common Mistakes and How to Avoid Them
Wide angle lenses present unique photographic challenges that can quickly transform potentially stunning shots into technically flawed images. Understanding these potential pitfalls is crucial for photographers seeking to harness the full creative potential of these specialized lenses.
The most frequent mistakes photographers encounter with wide angle lenses include:
- Excessive Distortion: Warping of vertical and horizontal lines
- Unwanted Foreground Clutter: Capturing too much unnecessary visual information
- Complex Composition Challenges: Difficulty balancing multiple visual elements
- Unintentional Subject Minimization: Making primary subjects appear smaller
- Background Overwhelm: Losing subject focus amid expansive scenes
Common photography mistakes and fixes provide essential insights into managing wide angle lens complexities. One primary challenge involves managing lens distortion, which can cause straight lines to appear curved or converge unnaturally, especially near image edges.
Mitigating these challenges requires strategic shooting techniques and careful compositional planning. Photographers must learn to position themselves deliberately, using lens characteristics to enhance rather than detract from their visual storytelling. This means understanding how different distances and angles impact image perception, and intentionally using wide angle lens properties to create compelling visual narratives.
Successful wide angle photography demands technical skill and creative intuition. While these lenses offer extraordinary creative possibilities, they also require photographers to develop nuanced technical skills. Learning to anticipate and control potential distortions, manage visual complexity, and strategically place subjects becomes essential for producing impactful wide angle images.
Pro tip: Practice shooting with a grid overlay to help manage compositional balance and minimize unintended distortion effects.
Wide Angle Lenses Versus Other Options
Photographers face numerous lens choices, each with unique strengths and limitations that dramatically impact visual storytelling. Wide angle lenses occupy a distinctive space in this optical ecosystem, offering creative possibilities that standard and telephoto lenses cannot replicate.
Key differences between wide angle and alternative lens types include:
- Field of View: Wide angle lenses capture significantly broader scenes
- Depth Perception: Unique spatial compression compared to standard lenses
- Subject Relationship: Enhanced environmental context and background integration
- Optical Characteristics: More pronounced foreground-background interactions
- Creative Potential: Greater capacity for dramatic visual narratives
How to select camera lenses requires understanding these fundamental optical differences. Standard lenses typically maintain more natural perspective representation, while wide angle lenses intentionally distort spatial relationships to create more dynamic visual experiences.
Telephoto lenses compress distant scenes and isolate subjects, whereas wide angle lenses expand visual context and invite viewers into immersive environments. This fundamental difference means photographers must strategically choose lenses based on storytelling objectives, considering how each optical design transforms visual perception.
Understanding lens characteristics becomes critical for making informed creative decisions. While telephoto lenses excel at wildlife and sports photography, and standard lenses provide balanced perspectives, wide angle lenses offer unparalleled ability to communicate spatial relationships, environmental context, and emotional landscape of a scene.
Pro tip: Experiment with multiple lens types to develop intuitive understanding of their unique visual languages and creative potential.
Compare how lens types shift creative storytelling:
| Lens Type | Scene Coverage | Subject Emphasis |
|---|---|---|
| Wide Angle | Expansive context | Strong foreground impact |
| Standard | Balanced view | Natural proportions |
| Telephoto | Narrow, isolated | Subject separation |
Unlock the Full Creative Potential of Wide Angle Lenses
Are you struggling with mastering wide angle lenses and capturing those stunning expansive scenes with perfect composition? This article highlights the challenges like controlling distortion and balancing complex visuals that many amateur photographers face when using wide angle optics. If you want to overcome these hurdles and transform your images with dynamic foreground emphasis and dramatic perspectives, you need practical guidance tailored to your skill level and creative goals.
Explore detailed tutorials, shooting tips, and gear advice at Amateur Photographer Guide to boost your confidence and refine your technique. Learn how to select the right wide angle lenses, understand focal length impacts, and avoid common mistakes by visiting pages like Choosing Camera Lenses and Focal Length Basics. Start elevating your photography now by diving into expert insights that turn wide angle challenges into your creative advantage.
Frequently Asked Questions
What is a wide angle lens?
A wide angle lens is an optical instrument designed to capture a broader field of view, typically with a focal length ranging between 14mm and 35mm, allowing photographers to encompass more visual information in a single frame.
How do wide angle lenses change photographic composition?
Wide angle lenses fundamentally alter spatial relationships in images by expanding background context, creating dramatic foreground emphasis, and enhancing the sense of scale, which allows for dynamic and immersive compositions.
What are the ideal scenarios for using wide angle lenses?
Wide angle lenses are particularly effective for landscape photography, interior architecture, real estate photography, astrophotography, and environmental portraits, where capturing expansive scenes and unique spatial relationships is essential.
What common mistakes should photographers avoid when using wide angle lenses?
Common mistakes include excessive distortion of lines, unwanted foreground clutter, complex composition challenges, unintentional subject minimization, and overwhelming backgrounds. To avoid these issues, photographers should carefully plan their compositions and manage the positioning of subjects and camera angles.
Recommended
- Why Use Wide Angle Lens: Expanding Creative Possibilities – Amateur Photographer Guide
- Tilt Shift Explained: Creative Control in Photography – Amateur Photographer Guide
- Focal Length in Photography – How It Shapes Your Shot (2025 Guide)
- Master product photography with these professional tips from Elisabet – Instant Backdrops
Last update on 2026-05-21 / Affiliate links / Images from Amazon Product Advertising API
