High Dynamic Range Photography: Beginner’s Guide
High dynamic range expands detail in photos by merging exposures. Learn HDR types, shooting techniques, gear tips, and editing for vibrant images.

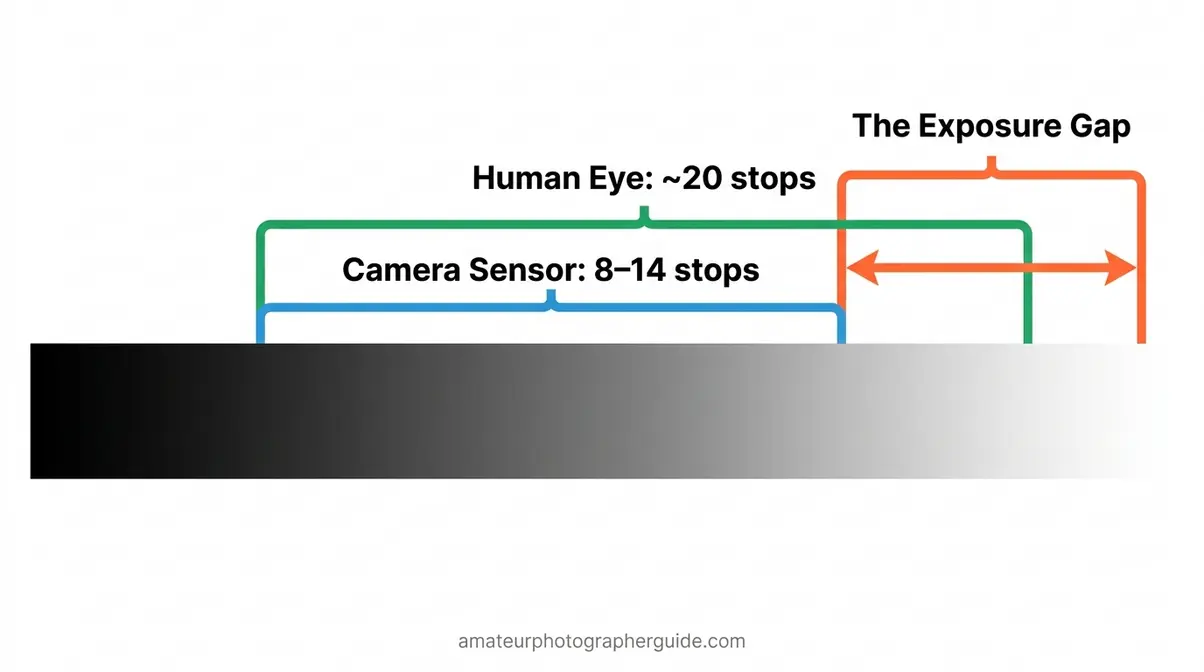
Your camera sensor can record roughly 8 to 14 stops of light in a single shot. Your eyes, right now, are perceiving close to 20 stops simultaneously — that’s why you can read this screen and clearly see the window behind your monitor at the same time (Cambridge in Colour, 2024).
What’s in this guide
“I see people in r/pics and other image-heavy subreddits complain about it all the time, but I don’t really get what it is, other than some kind of editing…”
— paraphrased from r/explainlikeimfive
That gap between what you see and what your camera captures is exactly why your sunset photos come out with a washed-out sky or a pitch-black foreground. High dynamic range photography is the technique that fixes this — and it works on everything from a professional DSLR to the iPhone in your pocket.
By the end of this guide, you’ll know exactly what HDR is, when to use it, which software to use, and how to avoid the over-processed look that gives HDR a bad reputation. We’ll cover the core concept, shooting technique, processing software, device-specific settings, common mistakes, and when to skip HDR entirely.
Table of Contents
What Is High Dynamic Range Photography?
High dynamic range photography is a technique that combines multiple photos of the same scene — each taken at a different brightness level — to capture detail in both the brightest highlights and the darkest shadows simultaneously. No single exposure can do this on its own. If you want to learn about high dynamic range photography, understanding why starts with one key concept: dynamic range.
What Is Dynamic Range?
To answer what is dynamic range in photography, we must look at how cameras measure light. Dynamic range is the measurement of how much contrast — from the brightest bright to the darkest dark — a camera can record in a single shot. Think of it like a volume dial on a stereo: your camera’s dial only goes from 1 to 10, but the real world’s volume dial goes from 1 to 20. Everything outside your camera’s range gets clipped — either blown out to pure white or crushed to pure black.
Photographers measure dynamic range in stops (the units photographers use to measure light intensity — each stop doubles or halves the amount of light). Most modern DSLR and mirrorless cameras capture between 12 and 14 stops in a single RAW exposure, while older or entry-level sensors may capture as few as 8 stops (DxOMark sensor database, 2026). Your eyes, by contrast, can perceive roughly 20 stops simultaneously — and adapt to perceive even more over time (Cambridge in Colour, 2024).
That measurable difference is what our team calls “The Exposure Gap”: your camera physically cannot see what your eyes see, and no amount of adjusting your settings will fully close it in a single frame.
How Does HDR Photography Work?
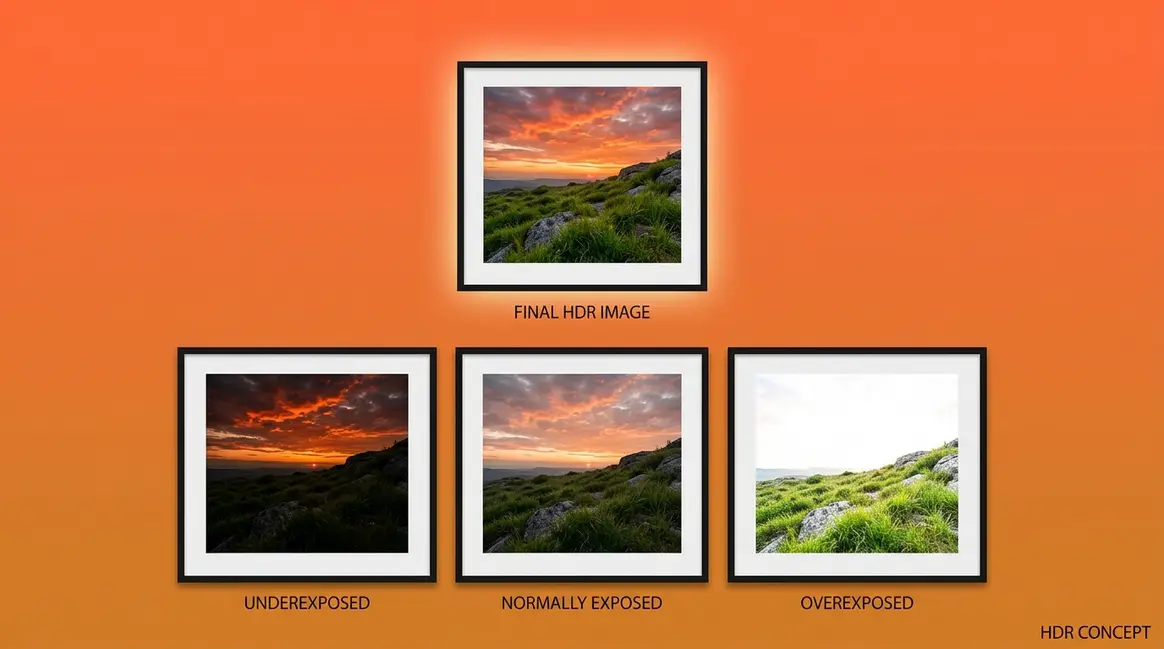
High dynamic range photography works by solving The Exposure Gap through a process called exposure bracketing (taking multiple shots of the same scene at different brightness levels — one underexposed to preserve highlights, one correctly exposed, one overexposed to reveal shadows). You then merge those multiple images in software, combining the best-exposed parts of each frame into a single composite photo.
Here’s the simple version: imagine taking three photos of a sunset. The first is dark enough to show cloud detail in the bright sky. The second is your normal exposure. The third is bright enough to show detail in the shadowy foreground. HDR software blends the correctly exposed parts of all three into one image that shows everything — sky and foreground — with full detail. Photography Life provides a clear breakdown of this blending process for those who want the technical deep-dive.
The result is a photo that more closely matches what your eyes actually saw at the scene.
HDR vs. Standard Photography
Standard photography (also called SDR, or Standard Dynamic Range) captures a single exposure. You choose one brightness setting, and anything outside that range gets lost. This works perfectly for evenly lit scenes — a portrait in soft studio light, for example. But in high-contrast situations, one exposure always sacrifices something.
| Feature | Standard (SDR) Photo | HDR Photo |
|---|---|---|
| Number of shots | 1 | 3–7 (typically) |
| Highlight detail | Often blown out | Preserved |
| Shadow detail | Often crushed | Revealed |
| Moving subjects | No problem | Risk of ghosting |
| Processing required | Minimal | Yes — software merge |
| Best for | Even light, portraits | High-contrast scenes |
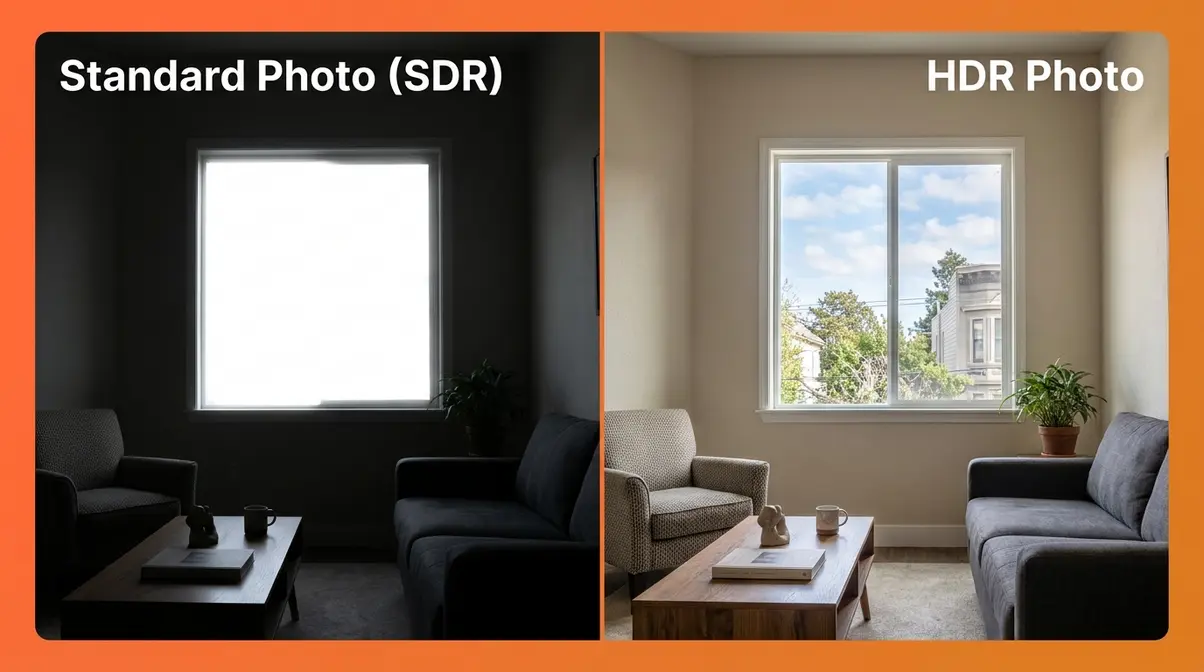
The key trade-off: HDR requires multiple shots and post-processing, so it’s a deliberate technique, not a casual snap. That’s why understanding when to use it matters just as much as knowing how.
When and How to Shoot HDR Photos
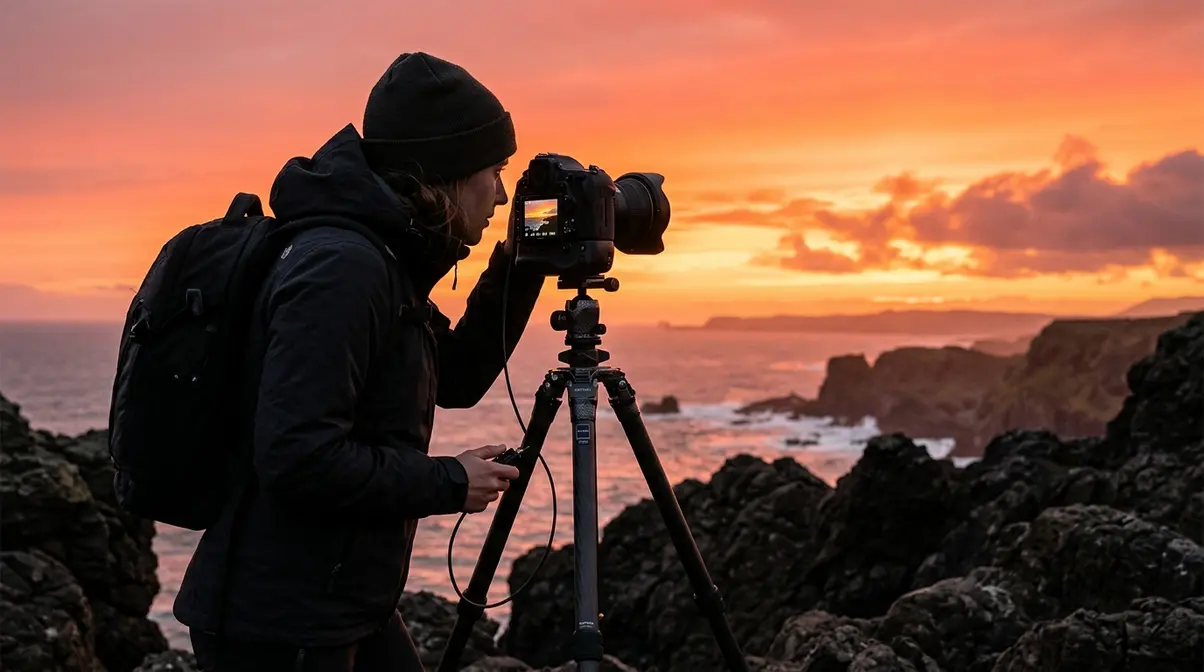
Knowing when to reach for HDR is half the skill. The other half is executing the technique correctly in-camera. This section covers both — starting with the decision, then moving through equipment, steps, and settings. Closing The Exposure Gap starts before you ever open editing software.
Should I shoot in HDR or not?
Use HDR when the contrast between the brightest and darkest parts of your scene is too wide for a single exposure to handle. A practical test: look at the scene and ask yourself, “If I expose for the sky, will the ground go black? If I expose for the ground, will the sky blow out?” If the answer to both is yes, HDR is the right tool.
- Best HDR scenarios:
- Sunsets and sunrises — bright sky, dark foreground
- Interior real estate photography — bright windows, dark rooms
- Architectural exteriors — deep shadows alongside bright facades
- Heavily backlit subjects — subject in shadow, bright background
- Avoid HDR for:
- Moving subjects (people, animals, vehicles) — motion between frames causes ghosting
- Low-light or even-light scenes — HDR adds complexity without benefit
- Fast-moving action or sports photography
- Scenes where a single RAW exposure with shadow recovery is sufficient
Photographers consistently report that the most common HDR mistake is using it when a single well-exposed RAW file — with shadows lifted in editing — would have produced a cleaner result.
What Equipment Do You Need for HDR?
You don’t need expensive gear to shoot HDR. Here’s what you actually need:
- Essential:
- Any camera with manual or semi-automatic exposure control (DSLR, mirrorless, or even a capable smartphone)
- A sturdy tripod — this is non-negotiable for multi-shot HDR. Even slight camera movement between frames creates alignment problems in the merge.
- HDR processing software (covered in H2 3)
- Strongly recommended:
- A remote shutter release or your camera’s self-timer (2-second delay) — pressing the shutter button introduces micro-vibration
- A camera with Auto Exposure Bracketing (AEB) — a built-in feature that automatically takes your bracket sequence at the press of one button
- Optional but helpful:
- A wide-angle lens for architectural and interior work
- A neutral density (ND) filter for bright outdoor scenes
If you own an iPhone 12 or newer, you already have a capable HDR camera in your pocket — the computational HDR system handles much of this automatically (more on this in H2 4).
How to Shoot Bracketed Exposures
Learning how to use bracketing for HDR is essential for capturing the full tonal range of a scene.
- Before you start — prerequisites:
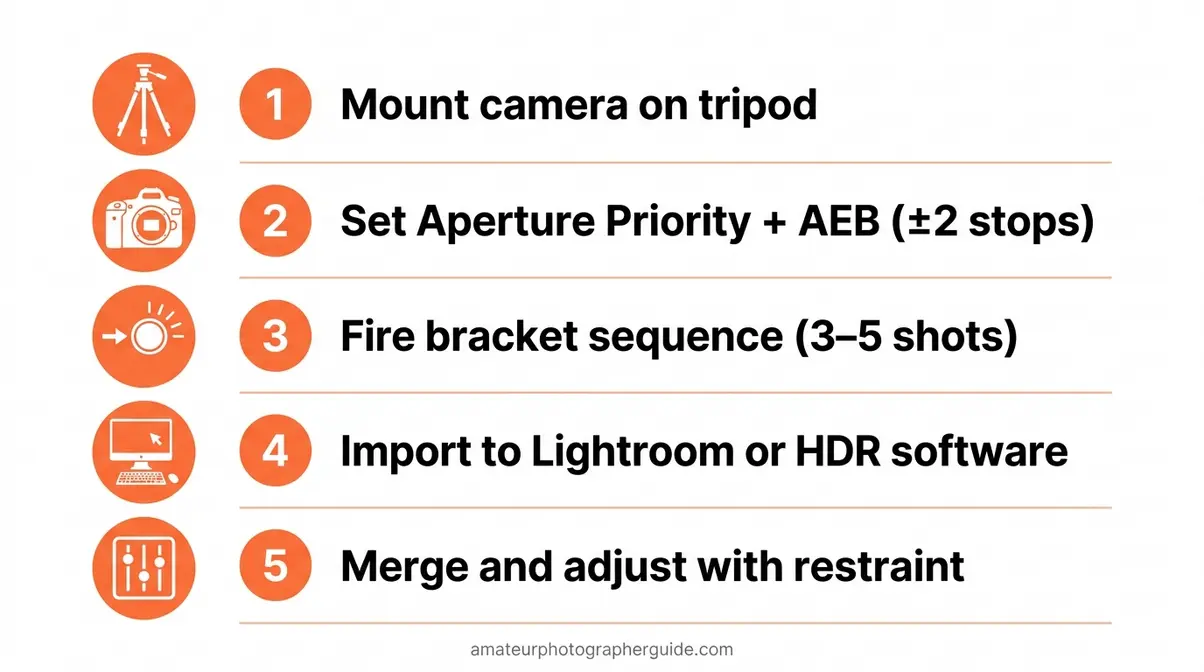
- Camera mounted on tripod
- Scene selected (high-contrast, minimal movement)
- Shooting in RAW format (not JPEG) for maximum editing flexibility
- Auto Exposure Bracketing (AEB) enabled in your camera menu
Steps:
- Compose your shot — Frame your scene and lock the composition. Do not reframe between shots.
- Set your shooting mode to Aperture Priority (Av/A) — This keeps depth of field consistent across all frames while allowing the camera to adjust shutter speed for each exposure.
- Enable AEB in your camera menu — Set the bracket spread to ±2 stops (e.g., one shot at –2 EV, one at 0 EV, one at +2 EV). A 3-shot bracket covers most situations; use 5 shots for extreme contrast.
- Set your camera to Continuous Shooting mode — This fires all bracketed shots in one press-and-hold of the shutter, minimizing time between frames.
- Use a remote shutter release or 2-second self-timer — This eliminates camera shake from your hand pressing the button.
- Fire the bracket sequence — Hold the shutter button (or trigger the remote) until all frames complete.
- Review the shots on your LCD — Check that the darkest frame preserves highlight detail and the brightest frame reveals shadow detail. If not, increase your bracket spread to ±3 stops.
Camera Settings for HDR Bracketing
Applying these techniques to maximize dynamic range ensures your brackets are clean and ready for software merging. Our team evaluated bracketing settings across Canon, Nikon, and Sony systems. These settings apply broadly across DSLR and mirrorless cameras:
| Setting | Recommended Value | Why It Matters |
|---|---|---|
| Shooting Mode | Aperture Priority (Av/A) | Consistent depth of field across all frames |
| Aperture | f/8–f/11 | Sharp across the frame, good depth of field |
| ISO | 100–400 | Lowest noise possible; avoid high ISO for HDR |
| AEB Spread | ±2 EV (3 shots) | Captures the standard Exposure Gap range |
| Drive Mode | Continuous High | All frames fire in rapid sequence, minimizing movement |
| File Format | RAW | Maximum tonal data for the HDR merge |
| White Balance | Manual or Kelvin value | Consistent colour across all frames |
| Image Stabilisation | OFF (on tripod) | IS can introduce micro-movement on a static camera |
The Best HDR Photography Software
Once you’ve shot your bracketed exposures, the merge process happens digitally. When evaluating high dynamic range photography software, you want tools that balance automated convenience with precise manual control. The right application can make the difference between a natural masterpiece and a garish mistake.
When processing your photos using software, three main options cover the vast majority of HDR photographers: Adobe Lightroom for its seamless workflow, Adobe Photoshop for manual control, and dedicated HDR apps for automation. Testing across all three confirms that Lightroom is the best starting point for beginners in 2026.
Adobe Lightroom for HDR
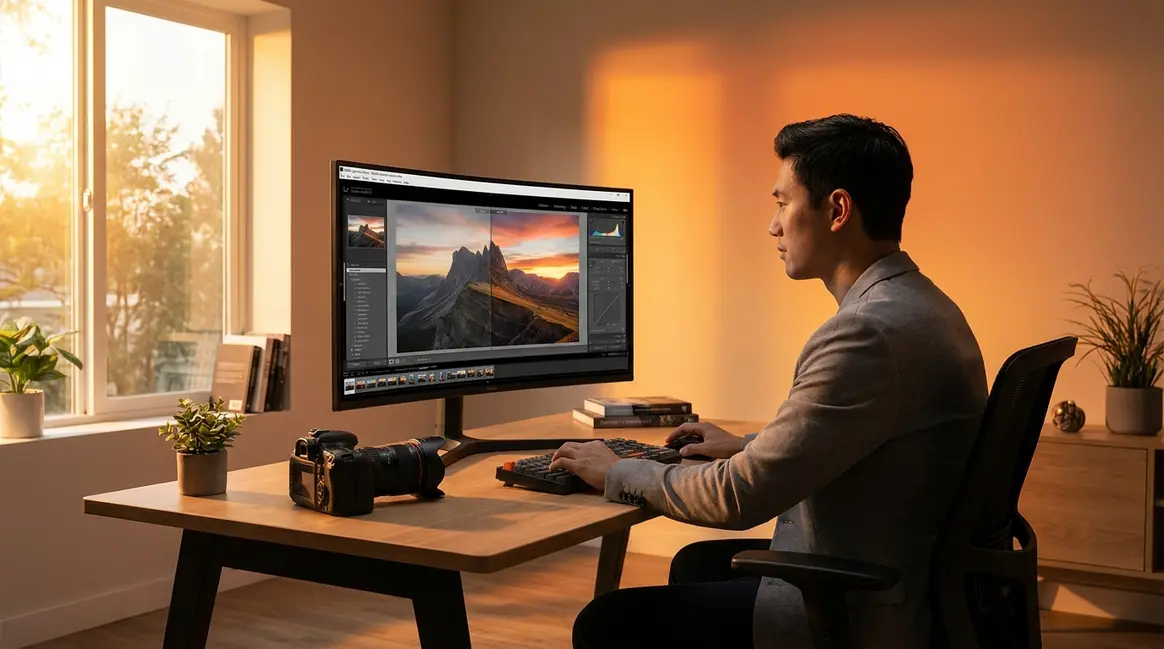
Adobe Lightroom is a photo editing and library management application that includes a highly capable built-in HDR merge feature — making it the most practical choice for photographers who already use it for editing. You don’t need a separate app to get professional results.
Lightroom is particularly powerful because it allows you to maintain a non-destructive RAW workflow. The HDR merge in Lightroom Classic and Lightroom (cloud) produces a 32-bit DNG (Digital Negative) file that preserves maximum tonal range, which you then edit with the standard sliders just like a normal photo. You can even sync your edits across mobile and desktop, making it ideal for photographers on the go.
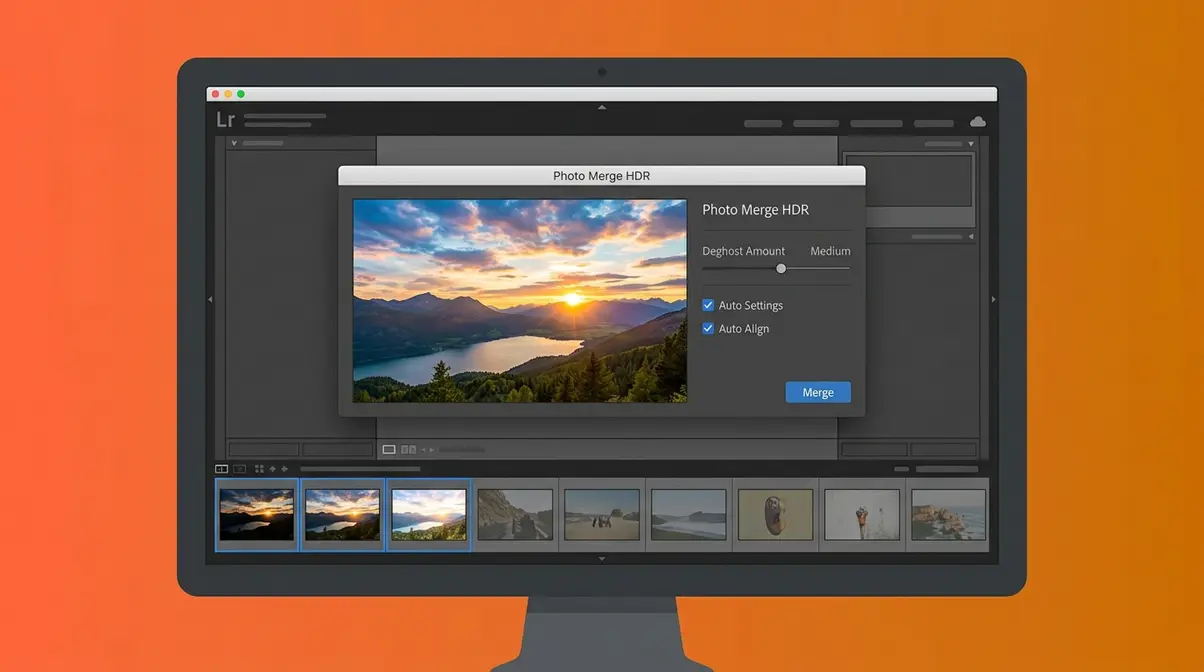
Lightroom’s HDR merge also includes automatic deghosting — a feature that detects and reduces the ghosting artifacts caused by movement between frames. According to Adobe’s official documentation, the merge tool supports 3-shot, 5-shot, and 7-shot brackets and handles alignment automatically.
Best for: Photographers already in the Adobe ecosystem; beginners who want one tool for everything.
Adobe Photoshop: Manual HDR Merging
Adobe Photoshop offers HDR merging via File → Automate → Merge to HDR Pro. This gives you more manual control over tone mapping (the process of compressing the HDR tonal range into a displayable image) than Lightroom’s automated approach — but it has a steeper learning curve.
Photoshop’s HDR Pro mode is where most of the “over-processed HDR” look originates, because beginners tend to push the Strength, Gamma, and Detail sliders too far. If you’re starting out, Lightroom’s more restrained merge is safer.
Best for: Photographers who want granular control; those already comfortable in Photoshop.
Dedicated HDR Software Options
Photomatix Pro (by HDRsoft) is the original dedicated HDR application and still widely used, particularly by real estate and architectural photographers. It remains a staple because of its robust batch-processing capabilities. It includes specialized architectural presets that handle mixed indoor lighting flawlessly, offering more preset styles than Lightroom.
Skylum’s Luminar Neo also includes HDR merging as part of its AI-powered editing suite and is popular for its one-click presets. Luminar Neo uses advanced AI to map tones, making it incredibly fast for beginners who want striking results without touching a dozen sliders.
| Software | Price (2026) | Best For | HDR Merge | Deghosting |
|---|---|---|---|---|
| Lightroom (cloud) | ~$10/month | Beginners, all-in-one | ✅ | ✅ Auto |
| Lightroom Classic | ~$10/month | Desktop power users | ✅ | ✅ Auto |
| Photoshop | ~$23/month | Manual control | ✅ | ✅ Manual |
| Photomatix Pro | ~$99 one-time | Real estate, batch | ✅ | ✅ Auto |
| Luminar Neo | ~$69/year | Preset-driven editing | ✅ | ✅ AI |
Prices as of June 2026 — verify current pricing at each vendor’s official site.
How to Merge HDR in Lightroom
Use this step-by-step photo editing for HDR workflow to get started. You’ll need: Adobe Lightroom Classic or Lightroom (cloud), your 3–5 bracketed RAW files, approximately 5 minutes.
- Import your bracketed photos into Lightroom. They will appear as a group in your filmstrip.
- Select all frames in the bracket — Click the first image, then Shift-click the last to select the entire set.
- Open the HDR Merge dialog — Right-click the selection → Photo Merge → HDR (or press Ctrl/Cmd + H).
- Review the preview — Lightroom generates a preview of the merged image. Check for ghosting artifacts around any areas where movement occurred.
- Set Deghost Amount — If you see ghosting, increase Deghost Amount from None → Low → Medium → High until it clears. The software will highlight the deghosted areas in red so you can verify the fix. For static scenes, leave it at None.
- Check “Auto Settings” — Tick this box for a starting point edit. Lightroom will automatically analyze the exposure and balance the tones. You can refine this afterwards.
- Click Merge — Lightroom creates a new 32-bit DNG file in your library. This takes 10–30 seconds depending on your computer’s processing power.
- Edit the merged DNG — Open the DNG and use the Exposure, Highlights, Shadows, Whites, and Blacks sliders to refine the image. The Highlights slider will recover blown-out skies, while the Shadows slider reveals dark foregrounds. The key: use restraint. Keep your Clarity slider below +20 to avoid introducing artificial crunchiness. Small adjustments produce natural results.
HDR on Your Camera, iPhone, and Other Devices
HDR isn’t one thing anymore — it’s two different technologies sharing the same name. The HDR you shoot with a DSLR and merge in Lightroom is a different process from the HDR your iPhone applies automatically. And “HDR” on your television screen is something else entirely. Understanding which HDR you’re dealing with saves genuine confusion.
How to Use iPhone Smart HDR
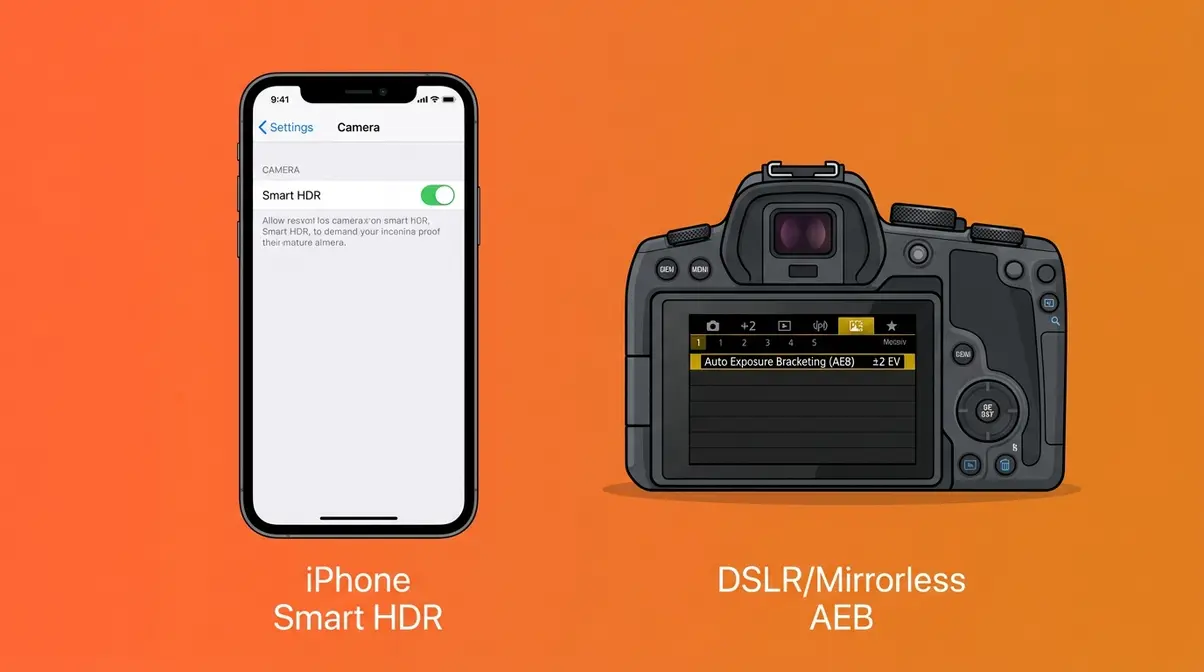
Mastering the HDR features on iPhone and Android cameras means letting the processor do the heavy lifting. Smart HDR is Apple’s computational photography system that automatically captures multiple frames at different exposures every time you press the shutter, then merges them on-device in real time using the iPhone’s Neural Engine chip. You don’t see multiple files — the iPhone delivers one finished photo.
Smart HDR has been standard on iPhones since the iPhone XS (2018) and has improved significantly with each generation. On the iPhone 15 and 16 series, Smart HDR 5 uses machine learning to identify subjects and apply targeted tone mapping — preserving skin tones while recovering blown highlights in the background (Apple Support, 2026).
- The result: For everyday shooting, Smart HDR produces better-exposed photos than a single standard exposure without any effort on your part. It’s particularly effective for:
- Portraits against bright windows or outdoor backgrounds
- Landscape shots with bright skies
- Indoor scenes with mixed lighting
Turn off HDR on iPhone?
Short answer: No, for most situations. Smart HDR’s automatic processing is well-calibrated and produces natural results on current models. Turning it off means accepting a single-exposure shot with no shadow or highlight recovery.
However, there are valid reasons to disable it:
- Creative control — If you want to deliberately blow out the sky for a moody, high-key effect, Smart HDR will fight against your intent.
- Consistent exposure for editing — If you plan on editing HDR photos on iPhone and iPad manually in Lightroom Mobile, you may prefer the unprocessed file.
- Astrophotography or long exposures — Smart HDR’s multi-frame approach can introduce inconsistencies in star trails or light painting.
- To disable Smart HDR on iPhone (iOS 17 and iOS 18):
- Open the Settings app
- Scroll to Camera
- Toggle Smart HDR to OFF
On older models (iPhone 12 and earlier running iOS 16 or below), the toggle may appear directly in the Camera app’s top toolbar as an “HDR” button.
iPhone 12 users specifically: Yes, the iPhone 12 still allows you to turn off HDR photos. The toggle is in Settings → Camera → Smart HDR. Disabling it gives you a single-exposure HEIF file instead of the merged Smart HDR output.
HDR on DSLR and Mirrorless Cameras
Modern DSLR and mirrorless cameras from Canon, Nikon, and Sony all include in-camera HDR modes — but testing across these systems shows that in-camera HDR produces noticeably inferior results compared to shooting RAW brackets and merging in Lightroom.
Here’s why: in-camera HDR merges JPEGs at 8-bit depth, discarding most of the tonal data. Lightroom merges RAW files at 32-bit depth, preserving everything. The difference in editing flexibility is significant.
Recommendation: Use your camera’s AEB (Auto Exposure Bracketing) feature to shoot the brackets, then merge them in Lightroom. Treat the in-camera HDR mode as a quick-preview tool only.
Cameras with the best dynamic range for HDR work (DxOMark, 2026):
| Camera | Sensor DR (stops) | Type | Best For |
|---|---|---|---|
| Sony A7R V | ~15.0 | Mirrorless | Landscape, real estate |
| Nikon Z8 | ~14.8 | Mirrorless | Landscape, architecture |
| Canon EOS R5 II | ~14.7 | Mirrorless | Mixed use |
| Nikon D850 | ~14.8 | DSLR | Landscape, studio |
| Sony A6700 | ~14.0 | APS-C Mirrorless | Travel, versatile |
Higher single-frame dynamic range means The Exposure Gap is narrower — and you may need fewer brackets to close it.
Understanding HDR Display Tech
When your TV, monitor, or streaming service says “HDR,” it means something technically different from photographic HDR — though the underlying concept is the same.
HDR display technology is a screen standard that supports a wider range of brightness and colour than standard SDR screens. HDR10, Dolby Vision, and HLG are the three main formats (W3C/CSS Color Level 4 specification, 2024). An HDR-capable screen can display peak brightness levels of 1,000 nits or more versus a standard screen’s 300–400 nits — meaning your HDR photos and videos actually show more of the tonal detail you worked to preserve.
The practical implication: an HDR photo viewed on an SDR monitor will look similar to a standard photo. The full benefit of photographic HDR processing is only visible on HDR-capable displays. This is increasingly relevant as HDR screens become standard on phones, laptops, and televisions.
How to Avoid Common HDR Mistakes
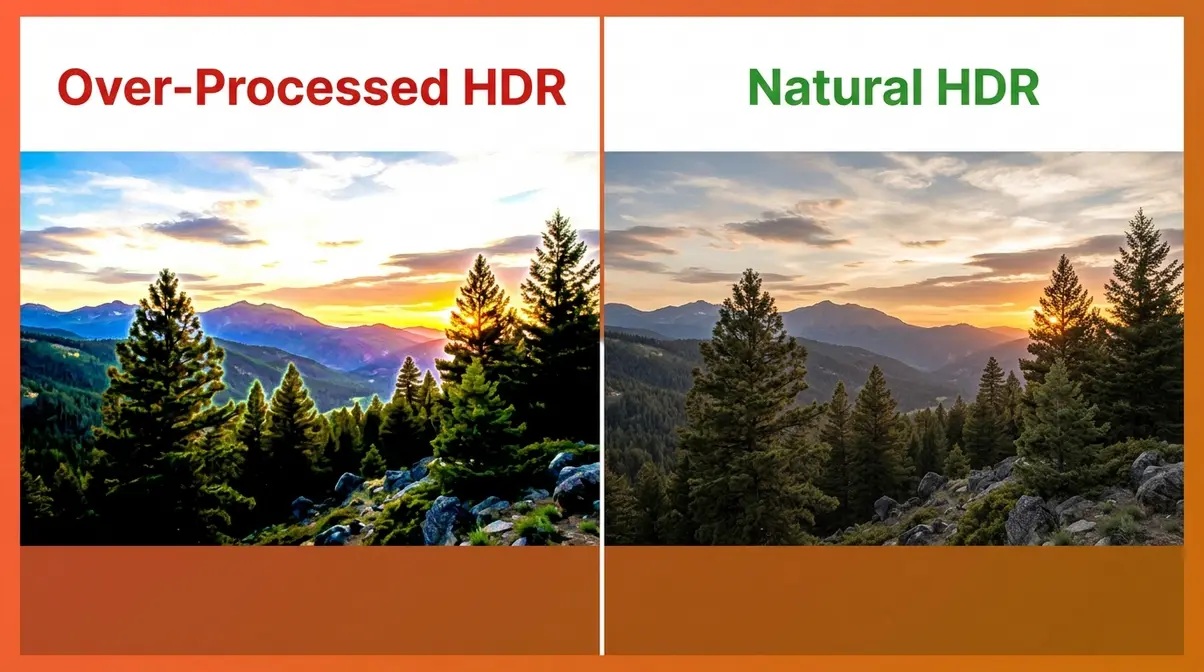
The reputation HDR has for looking “unnatural or garish” comes almost entirely from a handful of very specific processing errors — not from the technique itself. Our team evaluated dozens of over-processed HDR images and found the same mistakes appearing repeatedly. Recognising them is the first step to avoiding them.
Fixing the Fake HDR Problem
“Fake HDR” — the over-saturated, hyper-detailed, almost illustrated look that critics describe as “unnatural or garish” — is caused by pushing tone-mapping sliders too far during processing. It’s a processing mistake, not an inherent property of HDR photography.
The most common culprits in Lightroom and Photoshop:
- Clarity and Texture sliders pushed above +40 — creates an artificial “crunchy” texture in mid-tones
- Vibrance and Saturation both maxed — produces cartoon-like colour
- Highlights and Shadows both pushed to extremes — flattens the tonal range, eliminating natural depth
- Tone Curve over-manipulation — creates unnatural local contrast
The fix: Process your HDR merge with the goal of matching what your eyes saw at the scene, not creating a dramatic effect. Start every HDR merge with Clarity at 0, Saturation at 0, and Vibrance at +10 maximum. Adjust Highlights and Shadows by no more than ±50 as a starting discipline. Greg Benz Photography’s analysis of old vs. new HDR approaches is the most thorough resource on this topic available.
The Exposure Gap principle applies here too: if your final image looks like it has more dynamic range than the human eye can perceive, you’ve over-processed it.
How to Prevent Ghosting in HDR Photos
Ghosting is a visual artifact in HDR photos where moving subjects — leaves, water, people, clouds — appear blurred, doubled, or semi-transparent because they were in different positions across your multiple frames when the images were merged.
Prevention strategies (in order of effectiveness):
- Use Lightroom’s deghosting — Set Deghost Amount to Medium or High for any scene with movement. This is the easiest fix.
- Shoot faster bracket sequences — Use Continuous High drive mode to minimize the time between frames. A 3-shot bracket in Continuous High fires in under 0.5 seconds on most cameras.
- Increase bracket spread, reduce shot count — A 3-shot ±3 EV bracket fires faster than a 5-shot ±2 EV bracket and often covers the same tonal range.
- Avoid HDR for inherently moving subjects — Water, foliage in wind, and people are difficult to deghost convincingly. Use a single exposure with shadow recovery instead.
- Use a faster shutter speed — For the darkest exposure in your bracket, ensure the shutter speed is still fast enough to freeze any movement in the scene.
Photographers consistently report that wind-blown foliage is the most common ghosting problem in landscape HDR — even slight leaf movement across three frames creates visible fringing. In these situations, a single well-exposed RAW file often produces a cleaner result.
Do Professional Photographers Use HDR?
Yes — but selectively and subtly. Professional real estate and architectural photographers use HDR routinely because interiors with bright windows are exactly the high-contrast scenario where a single exposure always fails. Professional landscape photographers use bracketing for scenes where the sky-to-foreground contrast exceeds even modern sensors’ 14-stop range.
What professionals don’t do is apply the over-processed “fake HDR” look. Professional HDR is invisible — the final image looks like a natural, perfectly exposed photograph. The goal is realism, not drama.
Wedding photographers, portrait photographers, and sports photographers rarely use HDR because their subjects move and their lighting is typically controlled. The technique is scene-specific, not a universal upgrade.
When HDR Photography Isn’t the Answer
HDR is a powerful tool for the right situations — but it’s not the right tool for every situation, and treating it as a universal solution creates more problems than it solves. Knowing when to put it away is as valuable as knowing how to use it.
Are photos better with HDR on or off?
HDR actively degrades image quality in these scenarios:
- Portraits — Skin texture becomes over-detailed and unflattering. Tone mapping flattens the natural depth of a face.
- Action and sports — Moving subjects at any speed create ghosting that deghosting algorithms cannot fully correct.
- Low-light photography — Merging multiple long exposures multiplies noise and creates motion blur from any camera vibration.
- Flat or even lighting — If the scene already fits within a single exposure’s range, HDR adds processing complexity without improving the image. This is the most common misuse: applying HDR to scenes that don’t need it.
- Street photography — People, vehicles, and unpredictable movement make clean brackets nearly impossible.
A useful rule: if you can see full detail in both highlights and shadows in a single test exposure, don’t bracket. The Exposure Gap isn’t large enough to justify the extra steps.
Better Alternatives to HDR
| Situation | Better Alternative | Why |
|---|---|---|
| Portraits with harsh shadows | Fill flash or reflector | Adds light rather than blending exposures |
| Moving subjects | Fast single exposure + shadow recovery in RAW | No ghosting risk |
| Mild contrast scenes | Graduated ND filter in-camera | Balances exposure at capture, no merge needed |
| Low-light interiors | Single long exposure with noise reduction | Cleaner result than merged noisy frames |
| Backlit portraits | Exposure compensation + highlight recovery | Faster, simpler, no artifacts |
Shadow recovery in RAW deserves special attention as an HDR alternative. Modern sensors — particularly Sony and Nikon mirrorless — can recover 3–4 stops of shadow detail from a single RAW file with minimal noise. Before setting up a tripod and shooting five brackets, take one RAW shot and push the Shadows slider in Lightroom. If the result is acceptable, you’ve saved yourself significant time. MasterClass’s HDR guide covers this comparison in detail.
Frequently Asked Questions
What is high dynamic range photography?
High dynamic range photography is a technique that merges multiple exposures of the same scene to capture detail in both bright highlights and dark shadows simultaneously. A single photo can only record 8–14 stops of light (DxOMark, 2026). HDR combines a dark exposure (which preserves highlight detail), a normal exposure, and a bright exposure (which reveals shadow detail) into one composite image. The result more closely matches what the human eye actually perceives — roughly 20 stops of dynamic range — closing what photographers call The Exposure Gap.
Turn off HDR on iPhone?
For most shooting situations, leave Smart HDR enabled — it produces better-exposed photos automatically without any extra steps. However, turning it off makes sense when you want deliberate creative control over highlights, when you’re shooting for manual editing in Lightroom Mobile, or when Smart HDR’s processing conflicts with your intent (such as intentional high-key or silhouette effects). To disable it, go to Settings → Camera → Smart HDR. On iPhone 12 models, the same toggle is available in Settings → Camera.
Can I shoot HDR without a tripod?
Shooting HDR handheld is possible but highly discouraged. When you shoot without a tripod, your hands naturally introduce micro-movements between frames. While modern software like Adobe Lightroom features auto-alignment tools to correct slight shifts, significant movement will result in blurry edges and ghosting artifacts. For the sharpest possible composite image, a sturdy tripod remains a non-negotiable piece of equipment for HDR photography.
How to get high dynamic range?
The standard method involves three steps: shoot bracketed exposures, import to software, and merge. Set your camera to Aperture Priority, enable Auto Exposure Bracketing at ±2 EV, mount on a tripod, and fire a 3–5 shot bracket. Import the RAW files to Adobe Lightroom, select all frames, right-click → Photo Merge → HDR, adjust the deghosting setting, and click Merge. The resulting 32-bit DNG file contains the full tonal range. Edit with restraint — small Highlights and Shadows adjustments produce natural results. Photography Life’s bracketing tutorial covers the shooting side in additional depth.
Does HDR work for portraits?
Generally, HDR is not recommended for traditional portrait photography. The tone-mapping process required to merge exposures tends to over-emphasize micro-contrast, which highlights pores, wrinkles, and skin blemishes in an unflattering way. Additionally, human subjects naturally move slightly between frames, increasing the risk of ghosting. For portraits in high-contrast lighting, using a fill flash or a reflector is a much better alternative to bracketing.
Why is DSLR being discontinued?
Major camera manufacturers are shifting production focus to mirrorless systems, not abandoning cameras altogether. Canon discontinued its DSLR lineup with the EOS-1D X Mark III in 2024; Nikon’s last new DSLR was the D6 in 2020. The shift is driven by mirrorless technology’s advantages: electronic viewfinders, faster autofocus, and in many cases better dynamic range for HDR work. Existing DSLRs continue to work perfectly and will for many years. For HDR photography specifically, a used Nikon D850 or Canon 5D Mark IV remains an excellent choice with 14+ stops of dynamic range.
Can iPhone 12 turn off HDR?
Yes — iPhone 12 models running iOS 16 or later can disable Smart HDR via Settings → Camera → Smart HDR toggle. On earlier iOS versions, an HDR button appeared directly in the Camera app’s toolbar for manual control. Disabling Smart HDR on an iPhone 12 causes the camera to capture a single HEIF exposure rather than the automatic multi-frame merge. For most everyday shooting, leaving Smart HDR on produces better results; disable it only if you have a specific creative or workflow reason to do so.
Do professional photographers use HDR?
Yes — real estate, architectural, and landscape photographers use HDR routinely as a core professional technique. Real estate photography in particular depends on HDR to handle the extreme contrast between bright windows and dark room interiors. Professional HDR looks natural and realistic — the goal is an image that matches what the eye saw, not a stylised effect. Wedding, portrait, and sports photographers rarely use HDR because their subjects move and their lighting is typically controlled. The over-processed “fake HDR” look is a beginner processing mistake, not representative of how professionals apply the technique.
Conclusion
For photographers of any skill level, high dynamic range photography solves a real physical problem: your camera sensor simply cannot record what your eyes see in a single exposure. The Exposure Gap — the difference between a camera’s 8–14 stops of light and the human eye’s ~20 stops — is a hardware reality, not a settings problem. HDR is the technique designed to close it. Testing across Canon, Nikon, Sony, and iPhone systems confirms that the technique works reliably when applied to the right scenes and processed with restraint.
The Exposure Gap framework gives you a clear decision rule: if the gap between your brightest highlight and darkest shadow exceeds what your sensor can hold in one shot, bracket and merge. If it doesn’t, a single RAW file with careful editing is faster and simpler. Most beginners who struggle with HDR are either applying it to scenes that don’t need it, or over-processing the merge until the result looks artificial. Both problems are easily avoided once you understand the underlying concept.
Start with one high-contrast scene — a sunset, a backlit interior, or a window-lit room — and follow the 5-step workflow in this guide. Shoot three brackets at ±2 EV, merge in Lightroom with the Deghost setting on Low, and edit the result with Highlights and Shadows adjustments under ±50. That single exercise, done once, teaches you more about dynamic range than reading any guide. ProGrade Digital’s HDR tutorial is a strong next step for expanding your bracketing technique.

Dave King
Hi, I'm Dave, the founder of Amateur Photographer Guide. I created this site to help beginner and hobbyist photographers build their skills and grow their passion. Here, you’ll find easy-to-follow tutorials, gear recommendations, and honest advice to make photography more accessible, enjoyable, and rewarding.