
Table of Contents
- Key Takeaways
- Prerequisites and Required Materials
- Lens Cleaning Methods and Tools
- Sensor Cleaning Precautions and Techniques
- Body and Viewfinder Cleaning Instructions
- Step-by-Step Cleaning Workflow for Amateurs
- Common Errors and How to Fix Them
- Recommended Cleaning Frequency and Maintenance Tips
- Expected Outcomes and How to Measure Successful Cleaning
- Explore More Photography Guides and Tips
- Frequently Asked Questions
- Recommended
This blog post may contain affiliate links. As an Amazon Associate I earn from qualifying purchases.
Many amateur photographers unknowingly damage their camera lenses every time they clean due to improper methods. Using the wrong tools or harsh chemicals can scratch delicate coatings, void warranties, and reduce image quality permanently. This comprehensive guide reveals safe, systematic cleaning methods that can extend your gear’s lifespan by up to 50%, helping you maintain professional results without costly repairs.
Key Takeaways
| Point | Details |
|---|---|
| Essential Tools | Manual air blowers, microfiber cloths, lens brushes, and sensor swabs safely remove 95% of dust and smudges. |
| Sensor Safety | Use manual blowers only; canned air propellants damage delicate sensors permanently. |
| Cleaning Frequency | Clean every 3 to 6 months to reduce image quality issues and extend gear life by up to 50%. |
| Avoid Damage | Never use household cleaners or apply excessive pressure; both destroy lens coatings and cause micro-scratches. |
Prerequisites and Required Materials
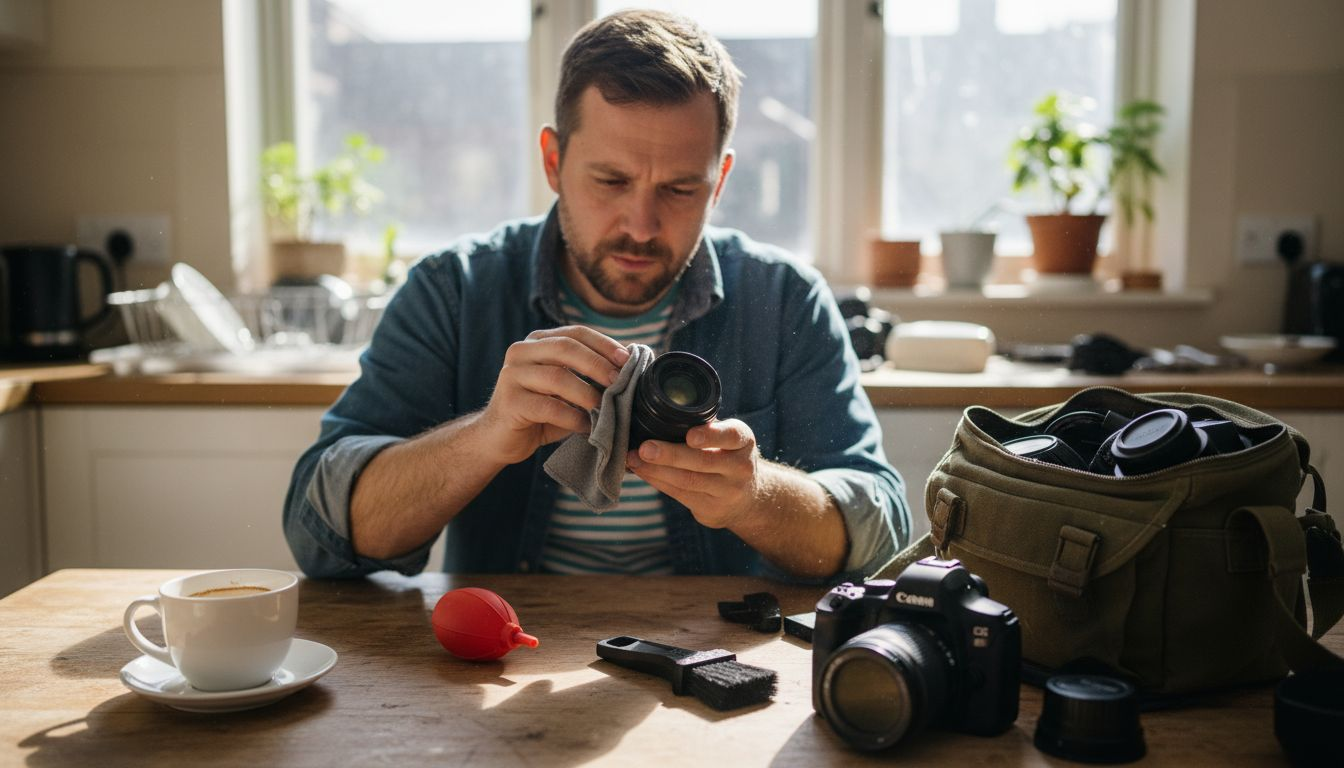
Before touching your camera gear, gather the right tools and create a safe cleaning environment. A simple blower and microfiber cloth can safely remove over 95% of dust and smudges from your camera gear if used properly.
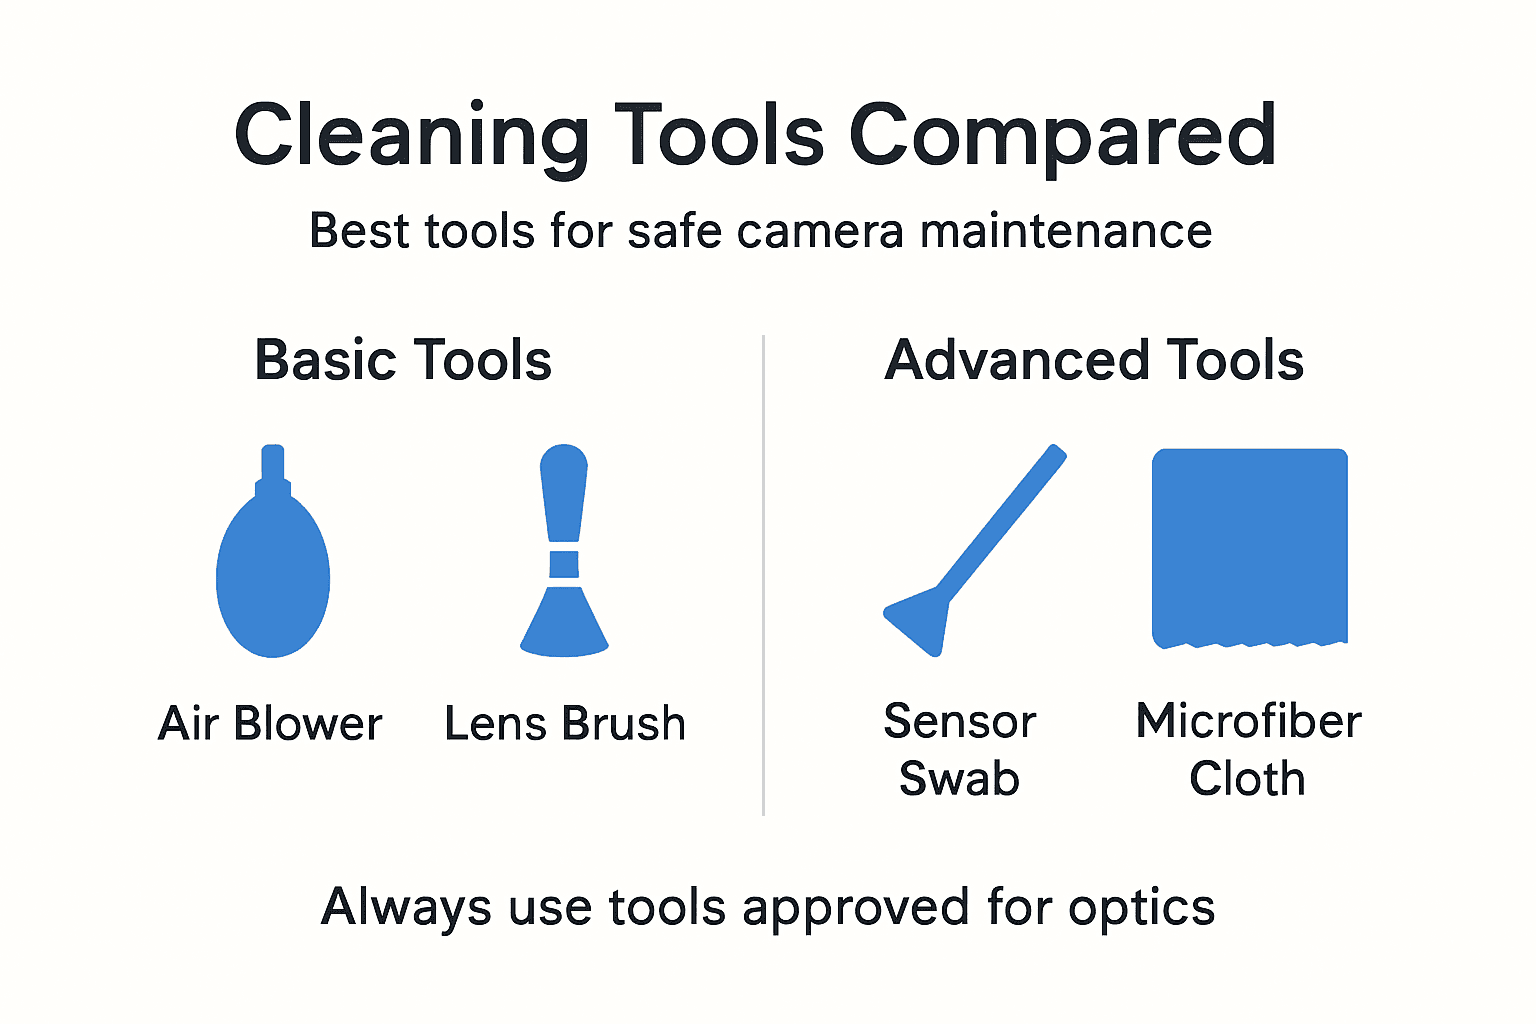
Your essential cleaning kit should include a manual air blower, several clean microfiber cloths, a soft lens brush with natural bristles, sensor cleaning swabs designed for your sensor size, and optical cleaning solution approved for camera lenses. Never substitute household items.
Choose a dust-free, well-lit workspace to minimize contamination risk during cleaning sessions. Good lighting helps you spot stubborn smudges and dust particles that could otherwise remain hidden. Avoid outdoor locations or areas with excessive air circulation that might introduce new dust.
Household glass cleaners contain ammonia and other chemicals that permanently damage specialized lens coatings. These coatings control reflections, protect glass surfaces, and enhance color accuracy. Once damaged, they cannot be restored without expensive professional recoating.
Pro Tip: Store your cleaning tools in a sealed plastic bag or container between uses. This prevents your cleaning cloths from collecting dust that could scratch your lenses during the next cleaning session.
Recommended Cleaning Tools Comparison
| Tool | Purpose | Safety Rating | Cost |
|---|---|---|---|
| Manual Air Blower | Remove loose dust particles | Very Safe | $10 to $15 |
| Microfiber Cloth | Wipe smudges and oils | Safe | $5 to $10 |
| Lens Brush | Dust from crevices | Safe | $8 to $12 |
| Sensor Swabs | Clean camera sensor | Moderate Risk | $15 to $25 |
| Optical Solution | Remove stubborn marks | Safe | $10 to $15 |
Understanding the importance of cleanliness in equipment maintenance extends beyond photography to many professional fields. Regular maintenance with proper tools prevents accelerated wear and preserves equipment value over time.
Lens Cleaning Methods and Tools
Start every lens cleaning session with a manual air blower to dislodge loose dust particles without physical contact. Hold the lens facing downward and squeeze the blower several times, allowing gravity to help remove debris. This simple step prevents you from grinding particles across the glass surface.
After blowing away loose dust, use a soft lens brush to gently sweep away finer particles that cling to the lens barrel and edges. Natural bristle brushes work better than synthetic ones because they generate less static electricity. Brush in a circular motion from the center outward.
For smudges and fingerprints, apply one drop of optical cleaning solution to a clean microfiber cloth, never directly onto the lens. Wipe gently using small circular motions, working from the center to the edges. This technique prevents solution from seeping into the lens housing.
Household glass cleaners contain chemicals that damage lens coatings and can void warranties, making manufacturer-approved solutions essential for safe maintenance. Even water alone can leave mineral deposits that affect image quality.
Pro Tip: Wipe in a single direction rather than back and forth to prevent streaking. Start at the top of the lens and work downward in overlapping strokes for the clearest results.
Microfiber cloths trap dirt particles rather than spreading them around. Wash your cloths regularly in plain water without fabric softener, which leaves residue that can smear on lenses. Replace cloths when they become worn or lose their soft texture.
Master these camera lens cleaning techniques to maintain optical clarity and image sharpness throughout your gear’s lifetime. Proper technique matters more than expensive cleaning products.
Sensor Cleaning Precautions and Techniques
Your camera sensor represents the most delicate and expensive component requiring specialized care. Only clean the sensor when you notice actual dust spots appearing consistently in the same location across multiple images. Unnecessary cleaning increases the risk of accidental damage.
Use a manual bulb blower with the camera body facing downward and the mirror locked up in sensor cleaning mode. Canned air propellants can cause damage to delicate camera sensors, making manual blowers the only safe option for removing loose particles.
When visible dust spots persist after blowing, switch to pre-moistened sensor swabs designed specifically for your sensor size. These single-use swabs come in Full Frame, APS-C, and Micro Four Thirds sizes. Using the wrong size leaves areas uncleaned or risks touching the sensor edges.
Apply very gentle pressure while swiping the swab across the sensor in one smooth motion from left to right. Flip the swab and make a return pass in the opposite direction. Never reuse swabs or apply excessive force that could scratch the sensor’s protective filter.
Improper sensor cleaning represents the leading cause of expensive camera repairs among amateur photographers, with professional sensor cleaning services costing $75 to $150 per session.
Perform sensor cleaning in a dust-free environment with steady hands and good lighting. Work quickly to minimize the time the sensor remains exposed to airborne particles. If you feel uncertain about cleaning the sensor yourself, professional camera shops offer this service affordably.
Follow safe camera sensor cleaning protocols to protect your investment. One mistake can cost hundreds in repairs or sensor replacement.
Body and Viewfinder Cleaning Instructions
The viewfinder glass accumulates dust, fingerprints, and facial oils that degrade your ability to frame shots accurately. Clean the viewfinder eyepiece regularly using the same gentle techniques you apply to lenses. A clean viewfinder ensures you can properly evaluate focus and composition.

Use soft brushes and dry microfiber cloths to clean external camera body surfaces including the grip, buttons, and LCD screen. Remove dust from button crevices and dial markings where particles accumulate over time. Pay special attention to the lens mount area, which directly impacts your ability to attach lenses securely.
Never spray liquids directly onto the camera body. Moisture can seep through button gaps and port covers, damaging internal electronics permanently. Instead, lightly dampen your cloth and wring it until barely moist before wiping external surfaces.
Pro Tip: Use a manual air blower to remove dust from tight crevices around buttons and dials before wiping. This prevents you from pushing particles deeper into gaps where they can interfere with mechanical operation.
Clean weather sealing gaskets around battery compartments and memory card doors with a barely damp cloth. These rubber seals protect against moisture and dust intrusion. Cracked or dirty gaskets compromise your camera’s environmental resistance.
The LCD screen requires special care because its coating scratches easily. Use only microfiber cloths designed for screens and apply minimal pressure. Screen protectors provide an extra layer of protection for photographers who work in harsh conditions.
Step-by-Step Cleaning Workflow for Amateurs
Following a systematic workflow prevents you from redistributing dust and ensures thorough cleaning with minimal handling. This methodical approach reduces the risk of missing problem areas or introducing new contamination.
-
Start by using your manual air blower to remove loose dust from the lens front and rear elements, camera body, and viewfinder. Work in a downward direction to let gravity assist.
-
Employ your lens brush next to sweep away finer dust particles from lens barrels, body crevices, and the lens mount area. Use gentle circular motions.
-
Wipe lenses and body surfaces gently with a clean microfiber cloth for remaining smudges and fingerprints. Apply optical solution only when necessary for stubborn marks.
-
Clean the sensor last using pre-moistened sensor swabs only if you confirmed dust spots in your images. This minimizes sensor exposure time.
Pro Tip: Inspect your gear under bright light before and after cleaning to verify you removed all dust and smudges. Regular inspections help you catch issues before they affect image quality.
Cleaning Method Effectiveness Comparison
| Method | Dust Removal | Smudge Removal | Safety | Time Required |
|---|---|---|---|---|
| Manual Blower | 85% | 0% | Very High | 1 minute |
| Lens Brush | 70% | 10% | High | 2 minutes |
| Microfiber Cloth | 60% | 90% | High | 3 minutes |
| Sensor Swab | 95% | 95% | Moderate | 5 minutes |
Understanding the importance of methodical approach to equipment care translates across many fields requiring precision. Photographers benefit from structured workflows that ensure consistent results.
Develop your step-by-step cleaning routine until it becomes second nature. Consistency prevents forgotten steps that leave your gear partially clean.
Common Errors and How to Fix Them
Using household window cleaners ranks as the most common mistake that destroys lens coatings permanently. These cleaners contain ammonia that etches specialized optical coatings designed to reduce reflections and protect glass. Always use manufacturer-approved optical cleaning solutions instead.
Applying excessive pressure while wiping creates micro-scratches that accumulate over time, degrading image sharpness and increasing lens flare. Your cloth should glide across the glass with minimal resistance. If you encounter resistance, use more solution rather than more pressure.
Neglecting regular sensor cleaning allows dust to accumulate until it appears in every image, requiring more aggressive cleaning that increases damage risk. Address sensor dust promptly when you first notice spots appearing in your photos.
Using canned air on sensors introduces propellant chemicals that leave residue or freeze-damage the sensor’s protective filter. Stick exclusively to manual bulb blowers for all sensor cleaning tasks.
Storing gear in humid environments or putting cameras away while still damp invites mold growth on internal lens elements. Always ensure your equipment is completely dry before storage. Use silica gel packets in camera bags for moisture control.
Avoid these common camera cleaning mistakes by investing in proper tools and learning correct techniques from reliable sources. Prevention costs far less than repair.
Recommended Cleaning Frequency and Maintenance Tips
Perform thorough cleaning every 3 to 6 months for gear used in normal conditions. Cleaning every 3 to 6 months reduces image quality issues and extends gear life by up to 50% through prevention of abrasive dust accumulation.
Increase cleaning frequency to monthly or even weekly if you shoot frequently in dusty, sandy, or coastal environments where salt spray and fine particles accelerate wear. Heavy usage demands more frequent maintenance to prevent particle buildup.
Store your camera gear in a cool, dry environment using padded cases or camera bags with good sealing. Avoid leaving equipment in hot cars or humid spaces where condensation forms. Proper storage dramatically reduces how often you need to perform deep cleaning.
Never touch lens elements or the sensor unnecessarily, even with clean fingers. Skin oils transfer easily and require solvents to remove. Always handle lenses by their barrels and use lens caps religiously.
Storage Best Practices:
- Keep cameras in low-humidity environments below 60% relative humidity
- Use airtight storage containers with silica gel packets for long-term storage
- Remove batteries during extended storage to prevent corrosion from leaks
- Store lenses with both caps attached to minimize dust intrusion
- Avoid basement or attic storage where temperature and humidity fluctuate
Clean your gear before long storage periods to prevent dust and oils from hardening into stubborn deposits. Similarly, inspect and clean equipment after returning from challenging shooting environments before particles have time to cause damage.
Expected Outcomes and How to Measure Successful Cleaning
Proper cleaning produces immediately visible improvements in gear appearance and image quality. Your lenses should appear crystal clear with no visible smudges, streaks, or dust particles when examined under bright light.
Image sharpness increases noticeably across the frame when you remove dust and oils that scatter light. Test shots of plain surfaces like blue sky or white walls reveal whether you successfully eliminated sensor dust spots.
Viewfinder clarity improves significantly after cleaning, making manual focusing easier and composition more precise. A clean viewfinder reduces eye strain during long shooting sessions.
Successful cleaning leaves no scratches, streaks, or new damage to lens coatings or sensor surfaces. Examine your gear carefully under strong light after cleaning to verify you used proper technique.
Extended equipment lifespan becomes measurable over years of use through maintained resale value and continued reliable operation. Well-maintained cameras and lenses retain significantly higher resale value and require fewer repairs.
Explore More Photography Guides and Tips
Maintaining clean gear represents just one aspect of developing strong photography fundamentals. Our comprehensive guides help you avoid mistakes that limit image quality and creative expression.

Learn to overcome challenges with our common camera mistakes guide that addresses technical and creative obstacles beginners face. Building good photography habits for beginners ensures consistent improvement alongside proper gear maintenance. Discover essential equipment with our photography gear essentials for beginners guide featuring must-have items for serious hobbyists.
Frequently Asked Questions
How often should I clean my camera sensor?
Clean your sensor every 3 to 6 months or whenever visible dust spots consistently appear in the same location across multiple images at small apertures. Avoid unnecessary sensor cleaning to minimize the risk of accidental damage from excessive handling.
Is it safe to use canned air to clean my camera sensor?
Canned air releases harmful propellants that can damage delicate sensors through chemical residue or freeze damage. Always use manual rubber bulb blowers instead, which provide safe dust removal without introducing contaminants.
What tools do I need to clean my camera lenses safely?
Essential lens cleaning tools include a manual air blower, soft natural-bristle lens brush, clean microfiber cloths, and optical cleaning solution approved for camera lenses. Never substitute household cleaners or abrasive materials that damage coatings.
Can I use my shirt or tissue to clean my camera lens?
Never use clothing, tissues, or paper towels on lenses because these materials contain wood fibers that scratch glass and coatings. Invest in proper microfiber cloths designed specifically for optical surfaces to ensure safe cleaning.
How do I know if my lens coating is damaged?
Damaged coatings appear as scratches, cloudiness, or rainbow-like patterns on the lens surface visible under bright light. Images may show reduced contrast, increased flare, or color shifts that proper cleaning cannot fix, requiring professional repair or lens replacement.
Recommended
- How To Clean A Camera Lens – Amateur Photographer Guide
- Camera Lens Cleaners: Ultimate Guide & Helpful Tips In 2025
- How To Clean A Camera Sensor Without Damaging It – Amateur Photographer Guide
- How to Select Camera Gear for Stunning Photos – Amateur Photographer Guide
- Mirror Ball Cleaning Process for Flawless Shine Results – Mirror Balls