
Table of Contents
- Key Takeaways
- Defining ND Filters and Common Myths
- Types of ND Filters and Their Key Differences
- How ND Filters Work With Camera Settings
- Creative Uses: Long Exposures and Depth of Field
- Common ND Filter Mistakes to Avoid
- ND Filters vs. Alternative Techniques
- Elevate Your Photography with Expert ND Filter Guidance
- Frequently Asked Questions
- Recommended
This blog post may contain affiliate links. As an Amazon Associate I earn from qualifying purchases.
Managing bright daylight is a familiar challenge for every amateur photographer who dreams of capturing silky waterfalls or smooth city crowds. Mastering creative control over light is essential, yet many are unsure how to use ND filters without losing color fidelity or struggling with exposure. By demystifying neutral density filters and busting myths about color shifts or optical quality, you will open doors to richer images and new photographic techniques wherever your adventures take you.


Key Takeaways
| Point | Details |
|---|---|
| Understanding ND Filters | Neutral density filters allow photographers to control light and exposure effectively, enhancing creative possibilities in bright conditions. |
| Types of ND Filters | The main types of ND filters are fixed, variable, and graduated, each serving different artistic and technical needs. |
| Common Missteps | Photographers should avoid common mistakes such as failing to recalibrate exposure settings after using ND filters to ensure optimal results. |
| ND Filters vs. Alternatives | ND filters provide superior image quality compared to traditional methods like adjusting aperture or ISO, preserving creative vision without introducing artifacts. |
Defining ND Filters and Common Myths
Neutral density (ND) filters are specialized optical accessories designed to reduce the amount of light entering a camera lens uniformly, without altering color characteristics. Photographers use these precision tools to manipulate exposure settings and achieve creative photographic effects that would otherwise be challenging in bright lighting conditions. From landscape photographers capturing silky waterfall movements to urban shooters creating dynamic street scenes with motion blur, ND filters provide unprecedented creative control.
ND filters function by strategically reducing light intensity across all wavelengths, enabling photographers to work with slower shutter speeds or wider apertures than standard lighting would permit. Unlike colored filters that modify color balance, high-quality ND filters maintain color neutrality. These filters come in several variations, including:
- Fixed density filters with consistent light reduction
- Variable density filters that allow adjustable light transmission
- Graduated ND filters that provide selective light reduction across an image
Despite their utility, several persistent myths surround ND filters that can discourage amateur photographers from exploring their potential. One common misconception suggests that all ND filters automatically introduce color shifts or image degradation. While lower-quality filters might produce undesirable effects, professional-grade ND filters from reputable manufacturers maintain exceptional optical clarity and color neutrality. Technological advancements have significantly improved filter manufacturing, ensuring minimal color distortion and maximum image quality.
Understanding the nuanced capabilities of neutral density filters in photography allows photographers to expand their creative toolkit and overcome challenging lighting scenarios. By selecting appropriate filters and understanding their technical characteristics, photographers can transform seemingly ordinary scenes into extraordinary visual narratives.
Pro tip: Always test your ND filter under different lighting conditions and conduct a color calibration check to ensure optimal performance and color accuracy.
Types of ND Filters and Their Key Differences
Neutral density (ND) filters represent a critical tool in a photographer’s arsenal, offering diverse options to control light and enhance creative expression. These filters are primarily categorized into three main types: fixed density, variable density, and graduated filters, each designed to address specific photographic challenges and artistic goals.
Fixed density ND filters provide photographers with consistent and predictable light reduction. These filters are rated in standard stop increments like ND2, ND4, ND8, and ND16, which correspond to specific light reduction levels. For instance:
- ND2 reduces light by 1 stop (50% light reduction)
- ND4 reduces light by 2 stops (75% light reduction)
- ND8 reduces light by 3 stops (87.5% light reduction)
- ND16 reduces light by 4 stops (93.75% light reduction)
Variable density filters represent a more flexible approach to light management. Unlike fixed density filters, these innovative accessories allow photographers to dynamically adjust light transmission by rotating the filter, effectively creating a range of light reduction from minimal to significant. These filters typically employ two polarizing layers that interact to control light intensity, providing unprecedented creative flexibility. When exploring polarizing filter techniques, photographers can discover how these advanced filters enable nuanced exposure control.
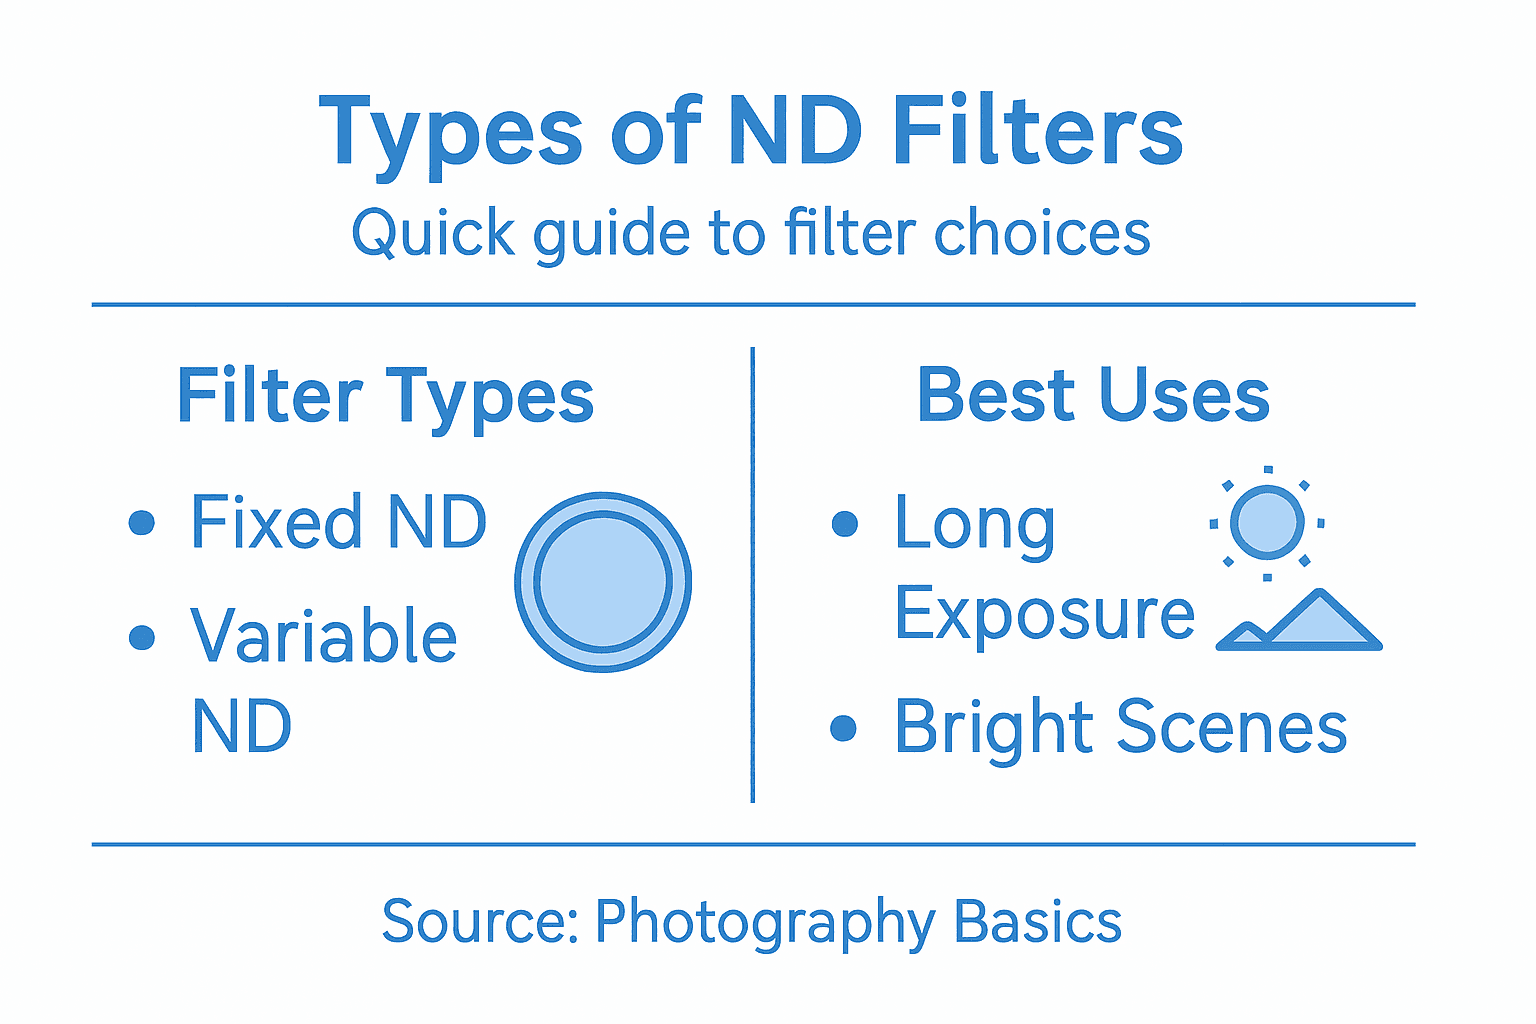
Graduated ND filters offer a unique solution for scenes with extreme brightness variations, such as landscapes with bright skies and darker foregrounds. These filters feature a gradual transition from dark to clear, allowing photographers to balance exposure across different areas of an image. Professional photographers often use graduated filters to capture scenes with challenging lighting conditions, preventing overexposed highlights while maintaining shadow details.
Pro tip: Invest in high-quality filters with multiple density options and practice rotating variable ND filters to understand their full range of light reduction capabilities.
Here’s a quick comparison of different ND filter types and their ideal use cases:
| Filter Type | Light Reduction Control | Ideal Scenarios | Key Advantage |
|---|---|---|---|
| Fixed ND | Consistent, preset stops | Predictable conditions | Reliable exposure reduction |
| Variable ND | Adjustable by rotation | Dynamic light changes | Versatile light control |
| Graduated ND | Gradual across image | High contrast landscapes | Balances sky and foreground light |
How ND Filters Work With Camera Settings
Neutral density (ND) filters fundamentally transform how photographers interact with camera settings, offering unprecedented control over light and exposure. These optical accessories work by strategically reducing light entering the camera, which enables photographers to manipulate traditional exposure triangle components in ways previously impossible under standard lighting conditions.
When integrating ND filters with camera settings, photographers typically shift to manual or aperture priority mode to maintain precise control. The filter’s light reduction is measured in stop increments, which directly correlate to exposure adjustments. Photographers can compensate for reduced light by making strategic modifications to three key camera settings:
- Shutter Speed: Extend exposure time to capture motion blur or create smooth, ethereal effects
- Aperture: Select wider apertures for shallower depth of field even in bright environments
- ISO: Keep sensitivity low to minimize digital noise while maintaining image quality
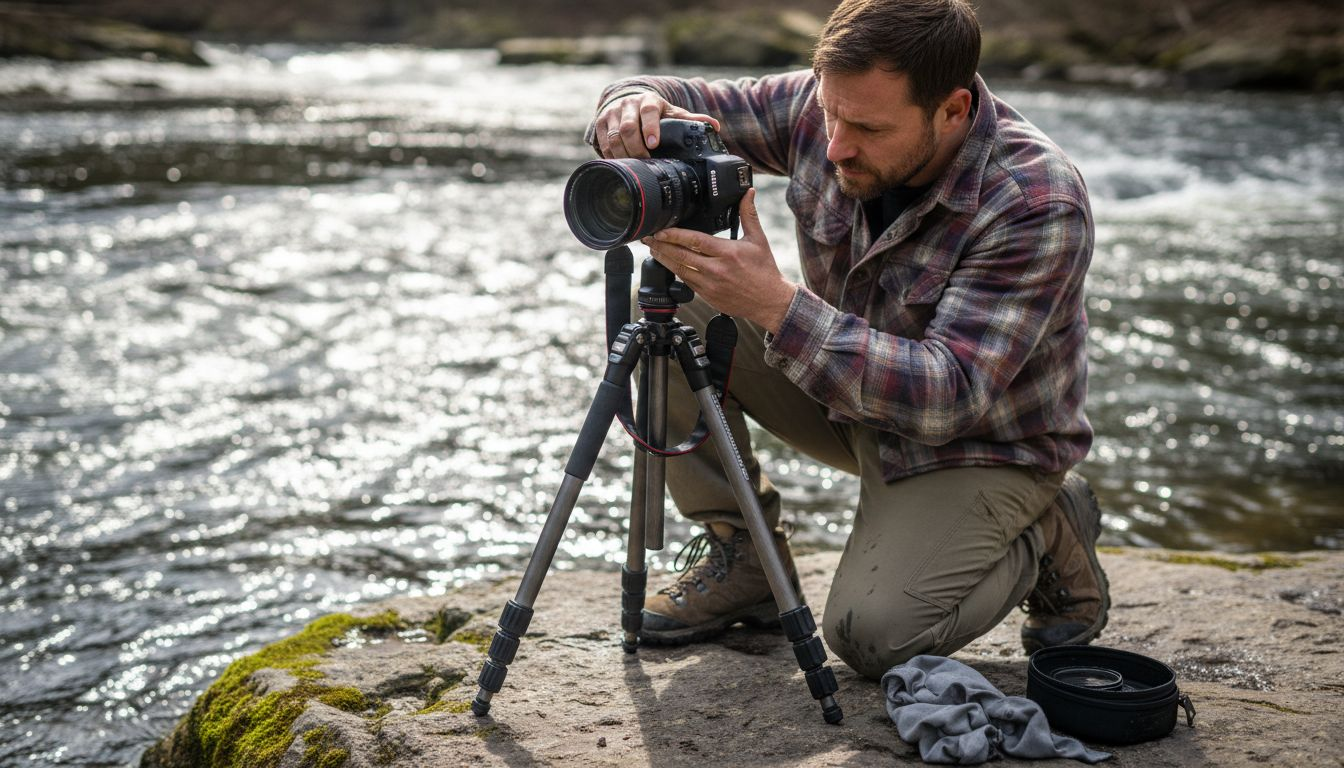
Implementing ND filters requires careful preparation and technique. Understanding basic camera settings becomes crucial when working with these specialized filters. Photographers should always focus before attaching the filter, as reduced light can significantly impair autofocus performance. Professional workflows typically involve mounting the camera on a tripod, selecting the desired aperture and ISO, and then calculating the necessary filter density to achieve the intended creative effect.
Pro tip: Always carry a light meter or use your camera’s exposure preview to accurately calculate filter compensation and maintain precise exposure control.
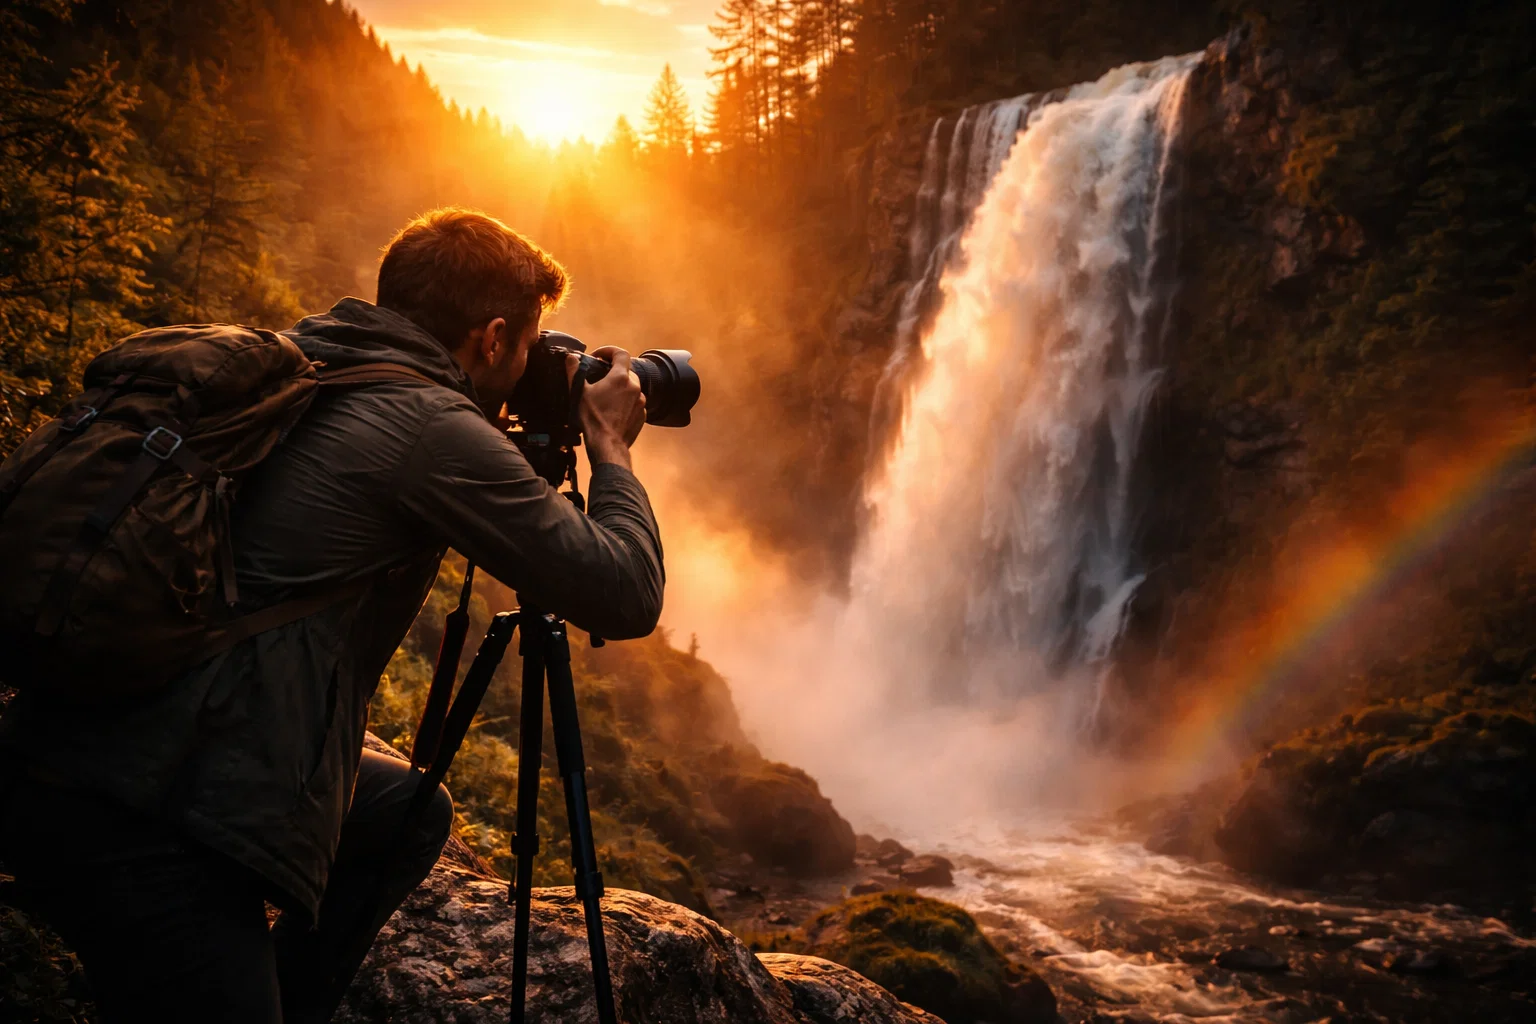
Creative Uses: Long Exposures and Depth of Field
Neutral density (ND) filters unlock extraordinary creative possibilities by empowering photographers to manipulate light and time in ways that transcend traditional camera limitations. These optical tools enable photographers to capture mesmerizing visual narratives through strategic control of exposure, motion, and depth of field, transforming ordinary scenes into extraordinary images.
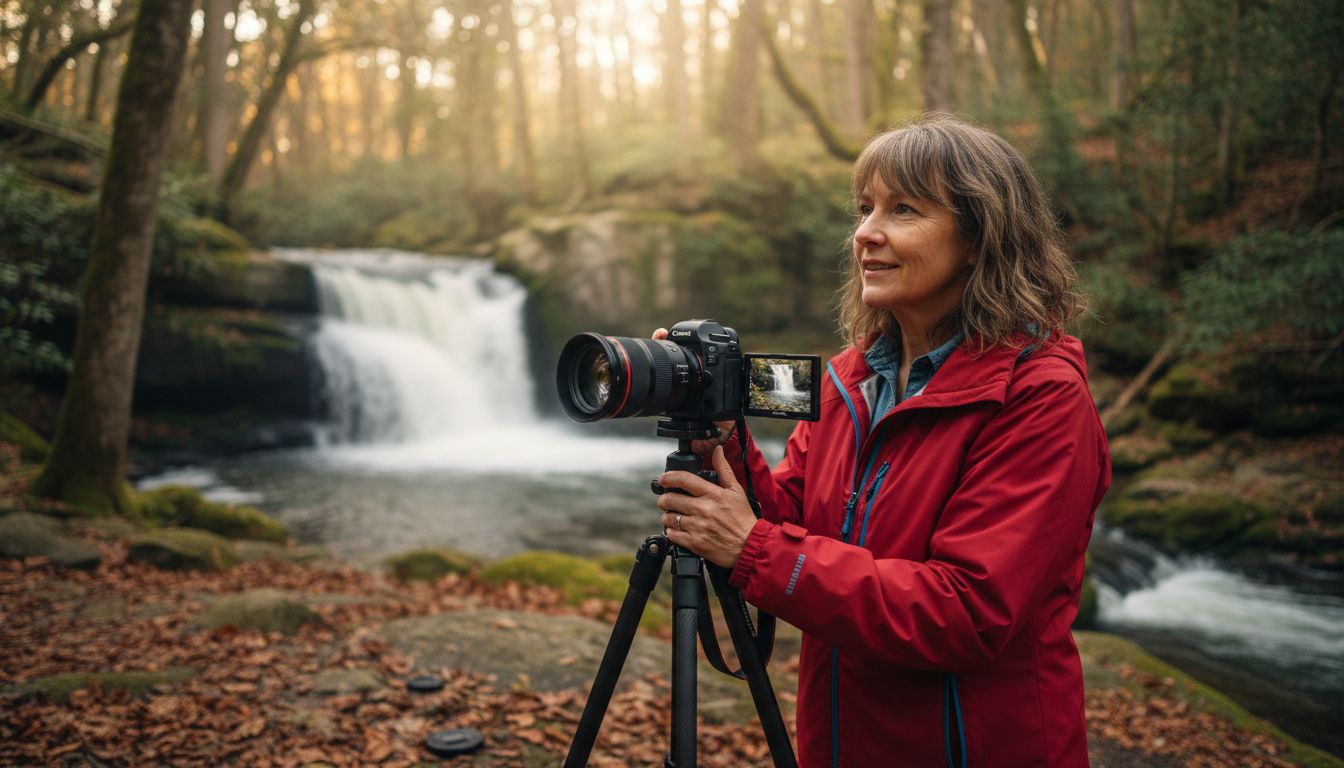
Long exposure techniques represent one of the most compelling applications of ND filters. By dramatically reducing incoming light, photographers can extend shutter speeds to create ethereal effects that reveal the hidden dynamics of motion. Iconic photographic styles emerge from these techniques:
- Water Landscapes: Transforming rushing rivers and crashing waves into silky, dreamlike surfaces
- Urban Scenes: Blurring moving crowds to highlight architectural elements
- Night Photography: Creating light trails from moving vehicles
- Cloudscapes: Rendering clouds as smooth, dramatic streaks across the sky
When exploring depth of field techniques, ND filters provide unprecedented creative control. Photographers can achieve extremely shallow depth of field even in bright daylight by using wide apertures that would typically overexpose an image. This allows for stunning subject isolation, where foreground elements remain razor-sharp while backgrounds dissolve into soft, atmospheric blur. Landscape and portrait photographers particularly appreciate this ability to manipulate visual emphasis and create compelling compositional narratives.
Pro tip: Practice previsualization by mentally mapping how different ND filter densities will transform your scene before actually attaching the filter.
Common ND Filter Mistakes to Avoid
Neutral density (ND) filters can dramatically enhance photographic creativity, but they also present a minefield of potential technical pitfalls that can undermine image quality and artistic vision. Amateur photographers frequently encounter challenges that transform what should be a sophisticated technique into a frustrating experience, often due to overlooked technical nuances and improper implementation.
Exposure miscalculation represents the most prevalent error when working with ND filters. Photographers often forget to recalibrate camera settings after attaching the filter, resulting in dramatically under or overexposed images. Critical exposure mistakes include:
- Failing to manually adjust shutter speed after filter attachment
- Relying solely on automatic exposure modes
- Not accounting for the specific light reduction of the filter
- Ignoring the filter’s potential impact on color temperature
Exploring common photography mistakes reveals that technical preparation is crucial when using ND filters. Variable density filters, while versatile, introduce additional complexity with potential artifacts like uneven light transmission or distracting X-pattern patterns across images. Professional photographers recommend carefully selecting high-quality filters and understanding their specific optical characteristics to minimize these technical limitations.
Tripod stability emerges as another critical factor often overlooked by amateur photographers. Extended exposure times enabled by ND filters demand absolute camera immobility. Even minor vibrations can transform potentially stunning long-exposure images into blurry, unusable compositions. Photographers must invest in robust tripod systems and consider additional stabilization techniques like using remote shutter releases or camera mirror lock-up functions to guarantee crisp, sharp results.
Pro tip: Always perform a test exposure and review your histogram immediately after attaching an ND filter to confirm proper light compensation and image quality.
Use this table to quickly reference common ND filter mistakes and strategies to avoid them:
| Mistake | Potential Impact | How to Avoid |
|---|---|---|
| Exposure not recalculated | Under/overexposed photos | Manually adjust settings post-attachment |
| Skipping tripod use | Image blur, softness | Always use a stable tripod |
| Low-quality filter causes color | Unwanted color cast | Choose professional-grade filters |
| Ignoring filter effect on focus | Missed focus, soft images | Focus before attaching filter |
ND Filters vs. Alternative Techniques
Neutral density filters represent a specialized photographic tool that offers unique advantages over alternative exposure manipulation techniques. While photographers have multiple methods to control light and exposure, ND filters provide a direct, in-camera solution that preserves image quality and creative flexibility in ways other techniques cannot match.
Traditional alternatives to ND filters include standard camera setting adjustments:
- Aperture Adjustment: Stopping down the lens to reduce light
- Shutter Speed Modification: Using faster shutter speeds
- ISO Sensitivity Reduction: Lowering camera sensor sensitivity
However, these methods come with significant limitations. Stopping down the aperture eliminates the possibility of achieving shallow depth of field, while reducing ISO can introduce digital noise. Faster shutter speeds restrict the ability to capture motion blur or create ethereal long-exposure effects. Understanding common photography techniques reveals that these alternatives often compromise creative vision by forcing photographers to sacrifice one technical parameter to control another.
Post-processing techniques like digital exposure blending or simulated long-exposure effects offer another alternative to physical ND filters. While software can create impressive visual effects, these methods cannot replicate the authentic optical qualities achieved through in-camera filtration. Digital manipulations often introduce artifacts, reduce image resolution, and require significant technical skill. Physical ND filters maintain superior image integrity by controlling light at the moment of capture, preserving the nuanced details and color information that define professional-quality photography.
Pro tip: Experiment with both physical ND filters and digital techniques to understand their unique strengths and limitations in different photographic scenarios.
Elevate Your Photography with Expert ND Filter Guidance
Struggling to master the art of creative exposures using neutral density filters The article highlighted key challenges like exposure miscalculations and choosing the right filter type. If you want to overcome these hurdles and unlock stunning long-exposure effects and depth of field control you need more than just basic info. Amateur Photographer Guide offers practical tutorials and expert advice tailored to help you confidently harness ND filters and other essential photography techniques.
Discover step-by-step tips on balancing your settings in our beginners’ guide to basic camera settings and explore how to maximize polarizing filter techniques for enhanced creative control. Visit Amateur Photographer Guide now and transform your photography with trusted advice that takes the guesswork out of using ND filters. Start creating your signature images today!
Frequently Asked Questions
What are ND filters used for in photography?
ND filters are used to reduce the amount of light entering the camera lens, allowing photographers to use slower shutter speeds or wider apertures in bright conditions without affecting color balance.
How do I choose the right type of ND filter for my photography needs?
Choosing the right ND filter depends on your creative goals: fixed ND filters offer consistent light reduction, variable ND filters allow adjustable light control, and graduated ND filters balance exposure in scenes with significant brightness contrast.
Can using an ND filter affect image quality?
While low-quality ND filters may introduce color shifts or image degradation, high-quality ND filters from reputable manufacturers maintain optical clarity and color neutrality, ensuring excellent image quality.
What common mistakes should I avoid when using ND filters?
Common mistakes include not recalibrating exposure settings after attaching the filter, using a tripod for stabilization during long exposures, and forgetting to focus before attaching the filter due to reduced light availability.
Recommended
- Why Use Filters in Photography: Complete Guide
- Camera Hacks I Learned After Shooting 10,000+ Photos [Pro Secrets]
- How to use Dynamic Range in your images
- 7 Inspiring Examples of Creative Photography for Beginners
Last update on 2026-03-07 / Affiliate links / Images from Amazon Product Advertising API