Photography Resolutions Ideas: 31 Actionable Goals for 2026
Discover 7 actionable photography resolutions ideas for amateurs to boost creativity, master new skills, and stay motivated all year with these educational tips.
Most photographers set resolutions in January and abandon them by February — not because the goals were wrong, but because the list had no structure. You want to shoot more photos, get creatively alive again, and actually see your resolution through — but a vague list of 20 ideas won’t get you there.
What’s in this guide
Every year, photographers lose months of potential growth to generic advice like “shoot more” or “learn manual mode” — the same advice that didn’t move the needle last year. Without a clear starting point and a measurable first step, motivation evaporates fast.
In this guide, you’ll find 31 specific photography resolutions ideas for 2026, organized by The Resolution Ladder — a three-tier framework that tells you exactly where to start and how to follow through. We cover examples of creative photography for beginners, technical skill-building, product photography ideas, and a practical guide to image resolution — everything you need to make this year genuinely count.
Key Takeaways: Photography Resolutions Ideas 2026
The best photography resolutions ideas combine a creative project, one technical skill, and a sharing goal — giving your year structure instead of scattered effort.
- Use The Resolution Ladder: Start with Foundation (technical skills), move to Expression (creative projects), then Impact (sharing and business goals) — this three-tier system prevents overwhelm
- Daily challenges work: The 365 Project builds shooting consistency faster than any single course or workshop
- AI is now essential: AI culling and smart masking tools can cut post-processing time significantly — freeing more hours for actually shooting
- Resolution matters for prints: 300 PPI is the universal benchmark for gallery-quality output, and understanding it will save you from pixelated disappointment
- Product photography is a viable niche: The U.S. photography services industry generates over $10 billion annually, with product and commercial work among the fastest-growing segments
Creative Resolutions & Projects
The most effective photography resolutions ideas follow a three-tier structure called The Resolution Ladder. Foundation resolutions build your technical base — exposure, composition, understanding resolution. Expression resolutions develop your creative voice through projects, challenges, and genres. Impact resolutions connect your work to the world through contests, prints, and community. Start at Foundation if you’re rebuilding skills; move straight to Expression if your technique is already solid.
Photographers who follow structured project challenges consistently report higher creative output than those who set general goals — a pattern that emerges repeatedly across communities like Reddit’s r/photojournalism and Petapixel’s reader surveys. The reason most photography resolutions fail isn’t lack of motivation. It’s lack of specificity. The Resolution Ladder fixes that by assigning each goal a tier, a starting action, and a 30-day check-in milestone.
“Any suggestions, ideas, or advice on how to see my resolution through? I have a Fujifilm x100v and a Canon Eos 80D with a variety of lenses.”
— Photographer on Reddit r/AskPhotography
That question captures exactly what this section answers. Here are the creative photography resolutions that will keep you shooting on, month after month.
Daily & Weekly Photography Challenges
Daily and weekly challenges are the fastest way to rebuild a shooting habit. They replace the “what do I photograph today?” paralysis with a ready answer — and that single shift makes consistency dramatically more achievable.
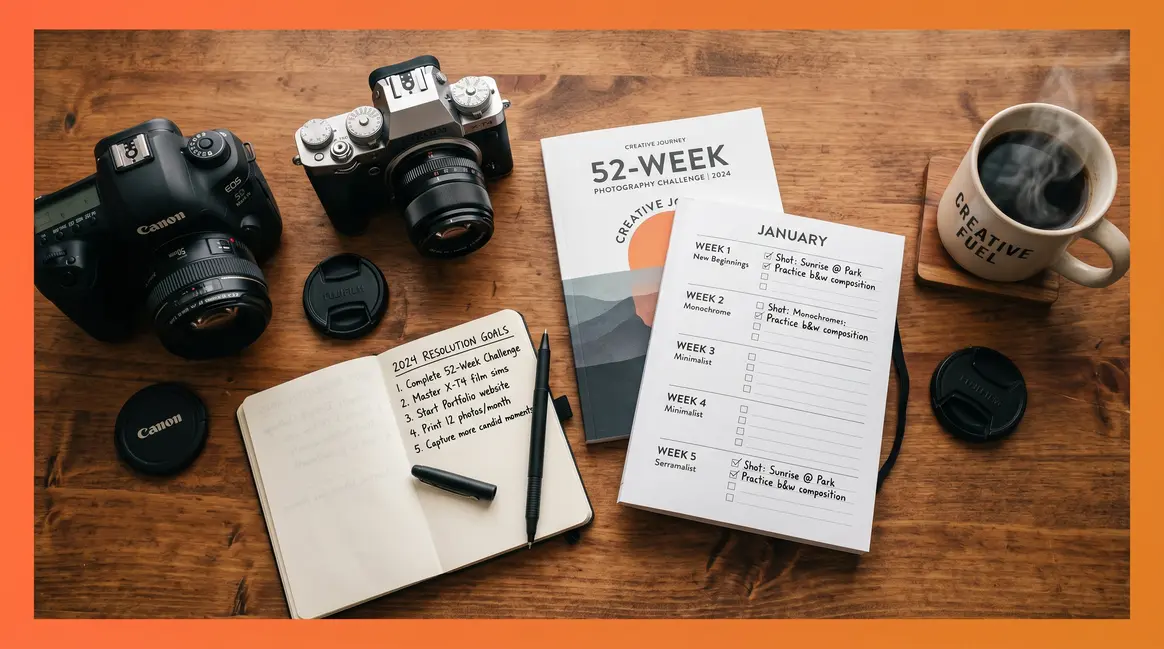
Resolution 1: The 365 Project. Capture and share one photograph every day for a full year. The setup matters: choose a loose theme (street, nature, people) or keep it open, post to a community like Flickr’s 365 Project group or Instagram with a dedicated hashtag, and do a monthly self-review comparing your first 30 images to your most recent 30. The improvement you’ll see is the motivation that sustains you through month four, which is where most participants stall.
Resolution 2: Weekly Theme Challenges. Less intense than the 365 Project but equally structured. Assign each week a single visual theme — “Week 1: Shadows. Week 2: Reflections. Week 3: Portraits of strangers. Week 4: Motion blur.” Weekly themes eliminate the “I don’t know what to shoot” problem, which is the most commonly cited reason photographers stop shooting between January and March (Petapixel community data, 2026).
Resolution 3: The One Lens Challenge. Commit to a single focal length for 30 consecutive days. Photographers using a Fujifilm X100V already have a built-in version of this — the fixed 23mm (35mm equivalent) forces you to move your feet instead of zooming. Canon 80D users: pick your 50mm and leave the zoom bag at home.
Action Step — Start This Week:
1. Download a free 52-week challenge tracker (search “52-week photo challenge PDF” on Pinterest or Unsplash’s blog)
2. Fill in your first four weekly themes before Sunday
3. Post your Week 1 image to a public community — accountability accelerates consistency
Skill-Building Photography Goals
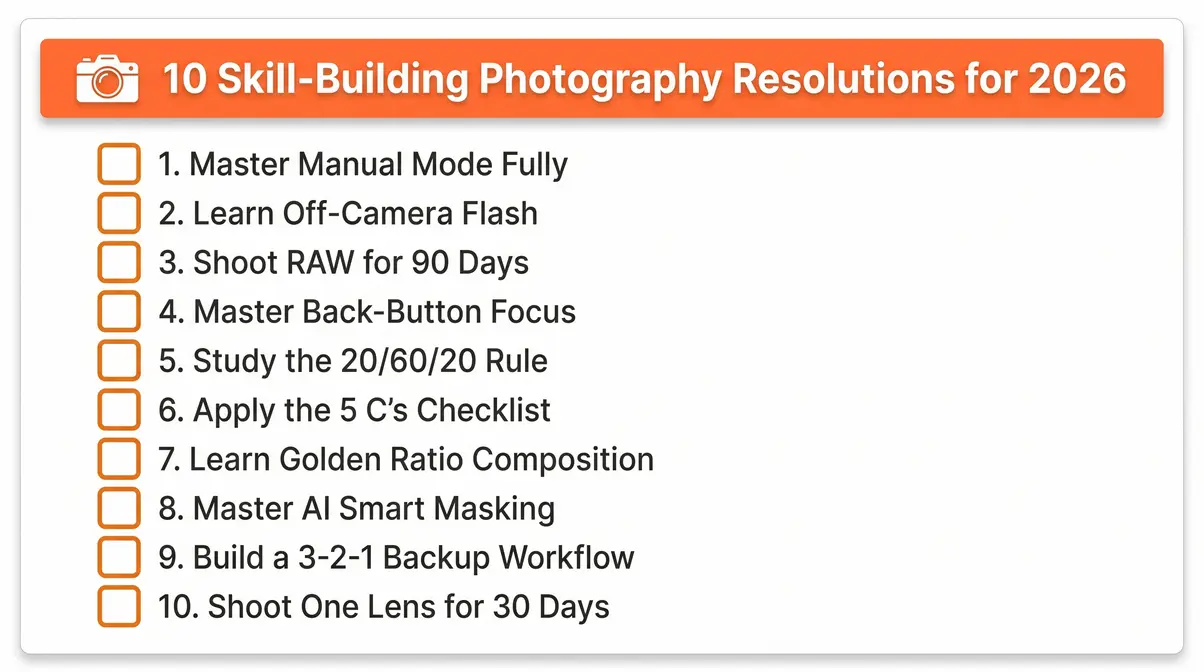
Technical skills compound. One hour learning back-button focus this week saves you missed shots every month for the rest of the year. Across photography forums and communities, the top-10 skill-building resolutions that intermediate photographers report as genuinely transformative cluster around three areas: manual control, light management, and post-processing discipline.
Resolution 4: Master Manual Mode Fully. Set your camera to M and shoot an entire weekend in full manual — aperture, shutter speed, and ISO all dialed by hand. The goal isn’t to abandon auto modes forever; it’s to understand why your camera makes the choices it makes so you can override them intentionally.
Resolution 5: Learn Off-Camera Flash. A single speedlight on a stand changes your portrait photography more than any lens upgrade. Start with one light, one modifier (a $20 shoot-through umbrella), and one subject. The SLR Lounge guide to off-camera flash is a practical starting point for understanding flash-to-ambient ratios.
Resolution 6: Shoot Exclusively in RAW for 90 Days. RAW files (uncompressed image data straight from the sensor, before in-camera processing) give you far more latitude in post-processing than JPEGs. The commitment period of 90 days is intentional — it takes that long for the editing workflow to feel natural rather than burdensome.
Resolution 7: Master Back-Button Focus. Separating focus from the shutter button is a small configuration change with a significant impact on hit rate for moving subjects. Most Canon and Nikon bodies support this natively; Fujifilm users can configure it via the AF-L button.
Action Step — Start This Week:
1. Pick one skill from the list above — just one
2. Schedule two 90-minute practice sessions this week in your calendar (treat them like appointments)
3. At the end of week one, post one before/after image pair to a photography community for feedback
Long-Term Creative Projects
Long-term projects give your photography a narrative spine — a reason to keep shooting that extends beyond any single image. As noted by Eric Kim and covered in depth on Petapixel’s year-end roundup, personal projects consistently rank as the most creatively satisfying resolutions photographers report completing.
Resolution 8: Document Your Life for One Year. Not a polished portfolio — a raw, honest visual diary. Shoot your morning coffee, your commute, your neighborhood in different light. At year’s end, you’ll have a document that is worthy of bumping any generic stock-style image out of your portfolio.
Resolution 9: Try One New Genre Per Quarter. Four quarters, four genres: street photography (Q1), exploring creative macro photography ideas for amateur photographers (Q2), astrophotography (Q3), documentary portraiture (Q4). This approach prevents the creative rut that comes from shooting the same subjects in the same way.
Resolution 10: Enter Three Photo Contests. Submission deadlines force you to select, edit, and commit to images. The selection process alone — deciding which image is worthy — sharpens your editorial eye faster than any tutorial.
Resolution 11: Build a Personal Photography Project Around a Single Theme. Choose a subject you’re genuinely curious about — a neighborhood, a craft, a community — and spend the year photographing it deeply. The constraint of a single subject forces creative problem-solving that open-ended shooting never produces.
Action Step — Start This Week:
1. Write one sentence defining your long-term project theme (e.g., “I will document the independent coffee shops of through 2026”)
2. Identify three specific locations or subjects to photograph in the next two weeks
3. Research one photo contest with a deadline 60-90 days away and add it to your calendar
AI & Workflow Integration Resolutions
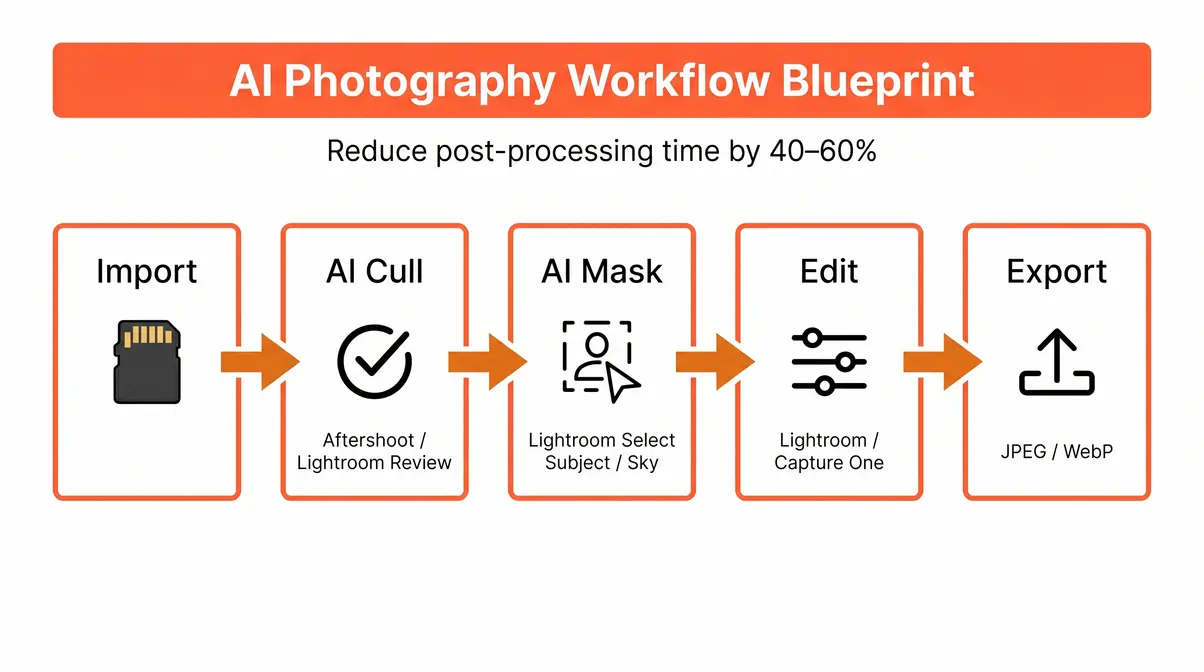
This is the category no competitor article from 2024 or earlier covers — and it’s the one that will save you the most time in 2026. AI integration in photography workflow refers to the use of machine-learning tools to automate repetitive editing tasks: selecting keeper images, removing backgrounds, and making targeted local adjustments without manual masking.
Resolution 12: Implement AI Culling. AI culling (the automated selection of your best images from a shoot using machine-learning analysis of sharpness, exposure, and composition) is now available in tools like Adobe Lightroom’s “Review” feature and standalone apps like Aftershoot. Photographers who’ve adopted AI culling across communities like Reddit’s r/photojournalism report cutting culling time by 40-60% per shoot — time that goes directly back into shooting.
Resolution 13: Learn Generative Fill for Compositing. Generative fill (an AI tool that synthesizes new image content to fill selected areas, introduced to Adobe Photoshop in its historical 2023 update) is now stable enough for professional use in product and portrait retouching. The resolution: complete five generative fill composites by March 31.
Resolution 14: Master AI Smart Masking. Adobe Lightroom’s AI-powered masking (Select Subject, Select Sky, Select People) has matured significantly. Smart masking (AI-generated selection masks that automatically detect and isolate subjects, skies, or backgrounds) reduces what used to be a 15-minute Photoshop task to under 60 seconds. Spend one weekend working through Adobe’s official masking tutorials and apply the technique to your next 10 portrait edits.
Resolution 15: Build a Consistent Backup Workflow. The 3-2-1 rule: three copies of every image, on two different media types, with one stored offsite (cloud). Tools like Backblaze ($99/year) make the offsite component automatic. This is a Foundation-tier resolution that protects everything else on this list.
Action Step — Start This Week:
1. Download a free trial of Aftershoot or enable Lightroom’s AI Review feature
2. Run your last shoot through AI culling and compare results to your manual selects
3. Set up one new cloud backup destination this week — even Google Photos as a secondary copy
Community, Business & Growth Resolutions
Impact-tier resolutions connect your photography to the world outside your hard drive. These are the resolutions most photographers defer indefinitely — which is exactly why committing to them in January, before the year gets busy, matters most.
Resolution 16: Print and Display Your Work. Across photography communities, the consistent feedback is that printing your images changes how you evaluate them. A photograph you dismissed on screen can be striking at 12×18 inches. Commit to printing at least 12 images this year — one per month.
Resolution 17: Update Your Portfolio with Only Your Best 20 Images. A ruthless edit. Remove anything that wouldn’t be worthy of bumping another image out if a better shot came along. Twenty strong images outperform 100 average ones in every professional context.
Resolution 18: Join or Start a Local Photography Group. Accountability, feedback, and shared locations are all benefits that solo shooting can’t replicate. Meetup.com lists active photography groups in most cities; if yours doesn’t have one, starting a monthly “photo walk” group takes under an hour to set up.
Resolution 19: Teach One Photography Skill to a Beginner. Teaching accelerates your own mastery more reliably than consuming more tutorials. Explain exposure compensation to a friend, lead a 90-minute walk-through for a family member, or write a single how-to post for a local photography club newsletter.
Resolution 20: Start a Photography Blog or Social Channel. Documenting your 2026 photography journey publicly creates accountability and, over time, builds an audience. You don’t need perfect images — you need consistent posting and honest reflection on what you’re learning.
Action Step — Start This Week:
1. Identify one community or business resolution from above that you’ve deferred for more than six months
2. Take the smallest possible first step today (e.g., order one print, delete five portfolio images, post one “before and after” edit)
3. Schedule a 30-day check-in in your calendar to assess progress
Technical Skills & Composition
Strong technical skills are the Foundation tier of The Resolution Ladder — the layer everything else rests on. Creative photography resolutions become far more achievable when you understand why certain compositions work and how to set up your camera to capture them. This section covers three frameworks that photographers at the intermediate level consistently report as the most impactful to study.
What is the 20/60/20 rule in photography?
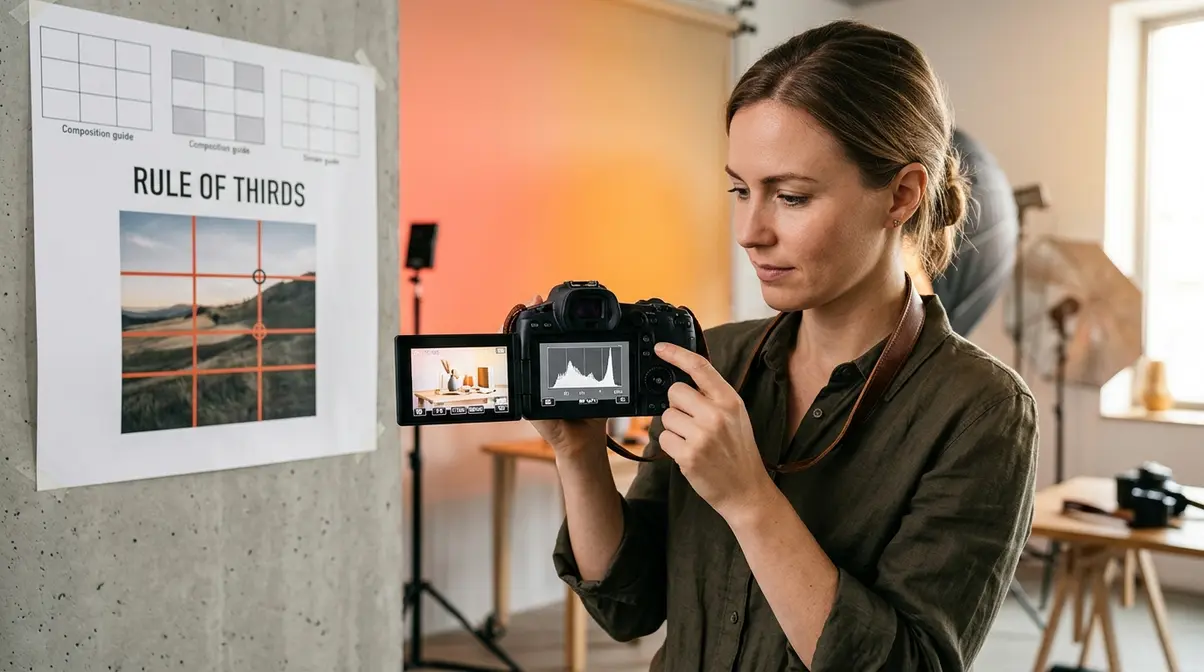
The 20/60/20 rule in photography is a compositional guideline that divides your frame into three tonal zones: 20% deep shadows, 60% midtones, and 20% highlights. The principle holds that images with this tonal distribution tend to feel balanced and visually satisfying — neither flat (too much midtone) nor harsh (too much contrast).
The rule is widely discussed in lighting and post-processing communities and is frequently cited in workshop curricula for portrait and product photographers. It’s particularly useful as a histogram-reading guide: when you pull up your histogram after a shot and see roughly this distribution, you’re likely working with a well-exposed image that will hold detail in both shadows and highlights during post-processing.
- How to apply it in 2026:
- After each shoot, pull up your histogram in Lightroom or Capture One
- Check whether your tonal distribution roughly follows the 20/60/20 pattern
- If highlights are above 20%, reduce exposure by ⅓ stop and reshoot
- If shadows are above 20%, adjust your lighting ratio or add fill
To summarize as a quick tonal distribution guideline, well-balanced images contain roughly 20% deep shadows, 60% midtones, and 20% highlights. It functions as a practical histogram-reading target — when your histogram shows this distribution, your exposure is likely retaining detail across the tonal range. Photographers use it as a post-shot check in Lightroom or Capture One. It’s particularly useful in portrait and product photography, where tonal balance affects how the subject reads against the background.
Resolution 21: Practice the 20/60/20 Rule on Every Shoot for 60 Days. Review your histogram after every frame for two months. By day 60, you’ll read light intuitively rather than mechanically.
What are the 5 C’s of photography?
The 5 C’s of photography is a compositional framework covering five core principles: Composition, Color, Contrast, Creativity, and Context. Together they function as a pre-shot mental checklist that helps photographers evaluate a scene before pressing the shutter — rather than hoping the image works and fixing it in post.
- Composition: How elements are arranged within the frame. Quick Check: Does the rule of thirds, leading lines, or framing apply here?
- Color: The palette and color relationships in the scene. Quick Check: Are colors harmonious or clashing? Is white balance accurate?
- Contrast: The tonal and color differences that create visual separation. Quick Check: Does the subject stand out from the background?
- Creativity: The unique angle, timing, or concept you bring. Quick Check: What would make this image different from the first 100 results on Getty?
- Context: The story or meaning conveyed beyond the literal subject. Quick Check: What is this image about beyond what it shows?
In short, the 5 C’s of photography are Composition, Color, Contrast, Creativity, and Context. Used as a pre-shot mental checklist, they help photographers make deliberate decisions rather than reactive ones.
Resolution 22: Apply the 5 C’s Checklist Before Every Shot for 30 Days. The goal is to internalize the checklist until it becomes instinct. By month’s end, you’ll find yourself naturally thinking “what’s the context here?” before raising the camera.
Composition Mastery: From Rule of Thirds to Golden Ratio
Composition is the element that separates a technically correct image from one that’s genuinely interesting. Our rule of thirds photography guide explains that dividing your frame into a 3×3 grid and placing your subject at the intersection points is the perfect entry point — but intermediate photographers benefit from moving beyond it.
Resolution 23: Learn and Apply the Golden Ratio. The golden ratio photography technique (approximately 1:1.618, a proportional relationship found throughout nature and classical art) produces a spiral guide that many photographers find more natural than the rigid rule-of-thirds grid. Most cameras and editing software include a golden ratio overlay option in the crop tool.
Resolution 24: Study Leading Lines Deliberately. Spend one month shooting exclusively images where a leading line (a road, fence, river, or shadow) draws the eye toward the primary subject. This constraint trains you to see geometry in scenes that initially look unstructured.
Resolution 25: Master Negative Space. Intentionally leaving large areas of the frame empty around your subject creates breathing room that draws attention to what’s there. This technique is particularly effective in minimalist and product photography.
Product Photography Ideas
Product photography is one of the most practical niches an intermediate photographer can develop — and one of the most in-demand. The U.S. photography services market generates over $10 billion annually, with e-commerce product photography representing one of its fastest-growing segments (IBISWorld, 2026). Whether you’re looking for the 7 best product photography tips or building a commercial portfolio, this section functions as a product photography tutorial easy guide to give you a structured starting point.
Lifestyle & Flat Lay Product Photography
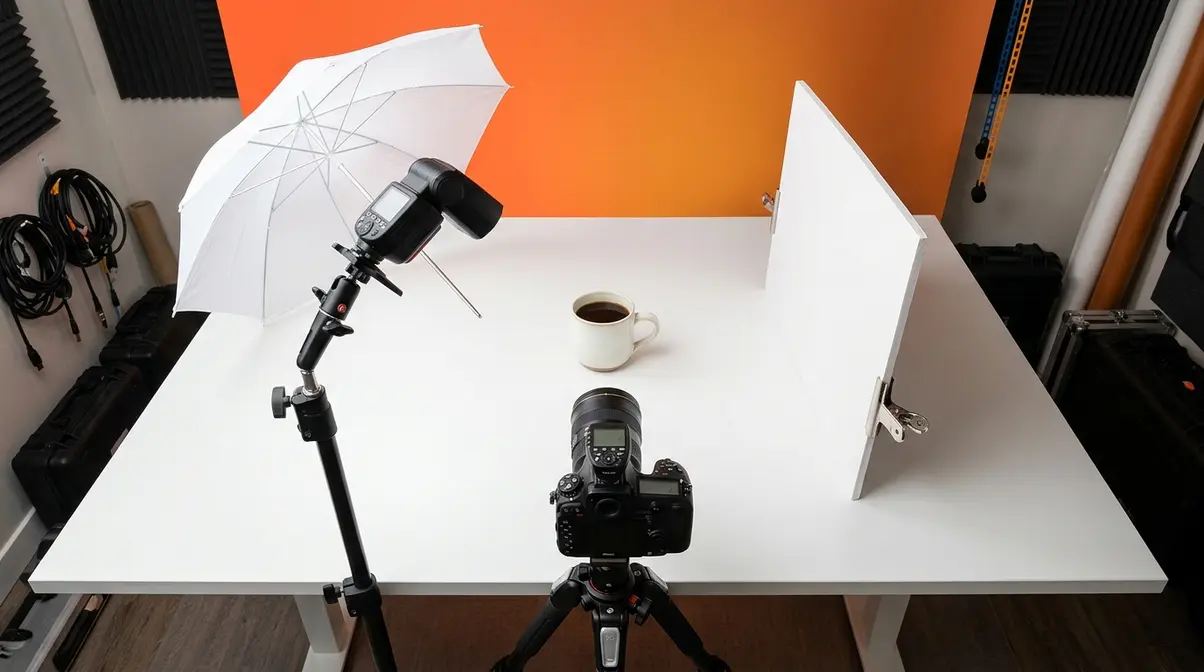
Lifestyle product photography places products in real-world settings to suggest how they’re used — a coffee mug on a morning desk, a skincare bottle beside a bathroom plant. Flat lay photography arranges products overhead on a flat surface, creating clean, graphic compositions popular in food, fashion, and beauty content.
Resolution 26: Shoot 10 Lifestyle Product Photos This Quarter. Start with objects you own. A book, a pair of headphones, a kitchen tool. Natural window light from the side creates the soft, directional shadows that make lifestyle images look intentional rather than accidental.
Resolution 27: Build a Flat Lay Kit. You need: a foam board or poster board in white, black, and one neutral color; a selection of props (plants, fabric, small objects that complement your subject); and a step ladder or overhead arm for your camera. Total cost: under $40.
Dramatic Lighting & Texture Product Shots
Light direction transforms a product shot from flat to dimensional. Hard side-lighting (a bare speedlight or a sunny window with the curtains mostly closed) rakes across surfaces and reveals texture — critical for products where material quality is a selling point: leather goods, ceramics, food, wood.
Resolution 28: Create One “Texture Hero” Shot Per Month. Choose a product with interesting surface texture, set up a single hard light source at 45 degrees to the surface, and shoot. Compare your first attempt in January to your twelfth in December.
Creative Concept & Story-Driven Product Photography
Story-driven product photography asks: what emotion or narrative does this product belong to? A watch isn’t just a timepiece — it’s a symbol of punctuality, legacy, or adventure, depending on how you frame it. The most memorable commercial photography answers a conceptual question, not just a “what does it look like?” question.
Resolution 29: Create One Concept-Driven Product Series. Choose a single product and shoot it three ways: literal (what it is), contextual (where it lives), and metaphorical (what it represents). The three-image series forces you to think beyond documentation into storytelling.
Motion, Splash & Action Product Photography
Motion adds energy to product images that static shots can’t replicate. Splash photography (capturing a product at the moment of liquid impact or submersion) and levitation shots (suspending a product mid-air using fishing line, removed in post) are two techniques that create high-impact portfolio images with modest equipment.
Resolution 30: Attempt One Splash or Levitation Shot. For splash: you need a fast shutter speed (1/2000s or faster), a dark background, and a trigger or assistant. For levitation: shoot the product hanging from thin fishing line against a clean background, then remove the line in post using Photoshop’s Clone Stamp or Generative Fill.
Image Resolution: Pixels & PPI
Image resolution is one of the most misunderstood technical topics in photography — and one of the most consequential. Image resolution refers to the amount of detail an image contains, typically measured in pixels (the total number of picture elements in width × height) or in pixels per inch (PPI) when discussing how an image will appear at a specific physical size. Getting resolution right determines whether your prints look gallery-quality or pixelated, and whether your web images load fast or crawl.
What Is a Good Resolution for a Photograph?
A good resolution for a photograph depends entirely on its end use. For web display, 72-96 PPI is standard — higher resolution adds file size without visible benefit on screen. For print, 300 PPI at the intended output size is the widely accepted benchmark for sharp, professional results. For large-format prints viewed from a distance (posters, banners), 150 PPI at output size is often sufficient.
PPI (pixels per inch) measures how densely pixels are packed into a physical inch of print — higher PPI means finer detail at a given size. This is distinct from total pixel count: a 20-megapixel image has plenty of pixels for a sharp 8×10 print at 300 PPI, but may show softness at 24×36 inches.
Resolution 31: Audit Your Portfolio for Print-Ready Resolution. Open your top 20 portfolio images in Lightroom or Photoshop. Check Image → Image Size and confirm each file has sufficient pixels for your intended largest print size. This single audit prevents the disappointment of ordering a large print and receiving a pixelated result.
Ultimately, a good resolution depends on the image’s intended use. For print, 300 PPI at the intended output size is the professional standard — an 8×10 print at 300 PPI requires a minimum of 2,400 × 3,000 pixels (approximately 7 megapixels). For web and social media, pixel dimensions matter more than PPI: Instagram recommends 1,080 × 1,080 pixels for square posts. For large-format prints viewed from a distance, 150 PPI at output size is often sufficient. The key is matching your export settings to the final use case, not using a single setting for everything.
Print Resolution Standards: The 300 PPI Benchmark
300 PPI is the universal standard for gallery-quality photographic prints — a benchmark supported by professional print labs, the Library of Congress digital preservation guidelines, and Adobe’s image resolution documentation. At 300 PPI, the human eye cannot distinguish individual pixels at normal viewing distances (12-18 inches), producing a result that appears continuous rather than digitized. Furthermore, understanding how sensor size impacts photography helps determine if your camera can natively achieve these dimensions without upscaling.
The list below shows the minimum pixel dimensions required for common print sizes at 300 PPI:
- 4×6 in: Minimum 1,200 × 1,800 px (~2 MP). Notes: Any modern smartphone or DSLR.
- 5×7 in: Minimum 1,500 × 2,100 px (~3 MP). Notes: Comfortable for most cameras.
- 8×10 in: Minimum 2,400 × 3,000 px (~7 MP). Notes: Entry-level DSLR minimum.
- 11×14 in: Minimum 3,300 × 4,200 px (~14 MP). Notes: 16+ MP camera recommended.
- 16×20 in: Minimum 4,800 × 6,000 px (~29 MP). Notes: Full-frame or medium format ideal.
- 24×36 in: Minimum 7,200 × 10,800 px (~78 MP). Notes: Upscaling software often needed.
For large-format prints (24×36 and above), AI-powered upscaling tools like Topaz Gigapixel AI or Adobe’s Super Resolution can increase pixel dimensions significantly while preserving detail — making large prints achievable from 24-45 MP cameras.
Web & Social Media Resolution Guide
Web images follow different rules than print. Screens display at 72-96 PPI regardless of the file’s embedded PPI value — what matters for web is the pixel dimensions, not the PPI setting. Exporting a 300 PPI image to the web doesn’t make it sharper on screen; it just makes the file larger and slower to load. Additionally, choosing the right file formats in photography ensures your images compress beautifully without losing quality.
- Instagram (square): 1,080 × 1,080 px. Format: JPEG (Under 8 MB).
- Instagram (portrait): 1,080 × 1,350 px. Format: JPEG (Under 8 MB).
- Facebook cover: 820 × 312 px. Format: JPEG (Under 100 KB for fast load).
- Portfolio website: 2,000 px on longest edge. Format: JPEG at 80% quality (Under 500 KB).
- Photography blog post: 1,200-1,600 px wide. Format: JPEG at 75-85% quality (Under 300 KB).
Export settings in Lightroom: File → Export → set Long Edge to 2,000 px, Resolution to 72 PPI (for web), Quality to 80, sRGB color space. This combination produces files that look sharp on screen and load quickly — the two goals that are often in tension.
PPI vs DPI: What’s the Difference?
PPI (pixels per inch) measures screen and digital image resolution — how many pixels exist per inch of digital display. DPI (dots per inch) measures printer output resolution — how many ink dots a printer lays down per inch of physical paper. They’re related but not identical, and confusing them leads to incorrect export settings.
In practice: when you export an image for print, set your file to 300 PPI. Your printer’s DPI setting (often 600-1,200 DPI for photo printers) is handled by the printer driver — you don’t need to match them. When you export for web or screen, PPI is effectively irrelevant; pixel dimensions are all that matter.
A simple way to remember the distinction: PPI lives in the file, DPI lives in the printer. Set 300 PPI in Lightroom, let the printer handle DPI, and your prints will be sharp.
Common Pitfalls to Avoid
Even well-structured resolutions can stall. Across photography communities and forums, the consistent failure patterns reported by photographers fall into three categories — and each has a specific fix.
Pitfall 1: Setting too many resolutions at once. The most common mistake. Committing to the 365 Project, off-camera flash, AI workflow integration, and a product photography series simultaneously in January is a reliable path to abandoning all of them by March. The fix: choose one resolution from each tier of The Resolution Ladder — one Foundation, one Expression, one Impact — and start there. Add more only after the first three are habitual.
Pitfall 2: Resolutions without scheduled time. “I’ll shoot more this year” fails because it has no calendar entry. “I will shoot for 90 minutes every Saturday morning” succeeds because it’s blocked. Schedule your shooting time the same way you schedule work meetings — it’s not optional until after you’ve shown up.
Pitfall 3: Skipping the 30-day check-in. Progress that isn’t reviewed isn’t progress — it’s activity. Set a calendar reminder for February 1, March 1, and every subsequent month. At each check-in, ask: Did I complete my weekly targets? What’s one thing I’ll adjust? This review cadence is what separates photographers who see their resolution through from those who don’t.
When to adjust your resolution, not abandon it: If a resolution consistently feels impossible, the problem is usually scope, not motivation. The Fstoppers community discussion on photography resolutions worth breaking makes a useful point: some resolutions (like “shoot every single day”) create guilt rather than growth. It’s better to adjust the goal — “shoot four times per week” — than to abandon the practice entirely.
Frequently Asked Questions
What are the top 10 photography resolutions for 2026?
The top 10 photography resolutions for 2026 are: (1) Start the 365 Project, (2) Master manual mode fully, (3) Learn off-camera flash, (4) Implement AI culling in your editing workflow, (5) Shoot exclusively in RAW for 90 days, (6) Build a long-term personal photography project, (7) Enter three photo contests, (8) Print and display 12 images across the year, (9) Update your portfolio to your best 20 images only, and (10) Master AI smart masking in Lightroom. These cover all three tiers of The Resolution Ladder: Foundation, Expression, and Impact.
What colors do not photograph well?
Colors that are difficult to photograph accurately include highly saturated reds, neon yellows, and certain pure whites and blacks. Saturated reds (especially bright crimson) tend to clip in the red channel of digital sensors, losing detail and appearing as a flat, textureless block. Neon yellows and greens can cause similar channel clipping. Pure white backgrounds often need deliberate overexposure to appear truly white rather than grey. Shooting in RAW (rather than JPEG) gives you significantly more latitude to recover clipped colors in post-processing.
What are fun, unique photography resolutions to make?
Some of the most creative and unique photography resolutions include: the One Lens Challenge (one focal length for 30 days), a “Document Your Neighborhood” year-long project, a “Portraits of Strangers” weekly series, splash photography of everyday objects, and a “Before and After” editing series documenting your post-processing evolution across 12 months. Community favorites from Wildtree Outdoor’s photography resolution roundup include astrophotography attempts and printing a photo book at year’s end.
What are the most popular photography resolutions?
The most popular photography resolutions, based on consistent community reporting across Reddit, Petapixel, and photography forums, are: shooting in RAW, completing a 365 Project, learning off-camera flash, printing and displaying work, and updating a portfolio. These five appear in virtually every photography resolution discussion because they address the most common growth gaps: technical skill, consistency, lighting knowledge, tangible output, and curation. The challenge with popular resolutions is their generality — pairing each with a specific first action (as The Resolution Ladder framework requires) is what determines whether they actually get completed.
What is the most common picture resolution?
The most common picture resolution for digital photographs from modern cameras is 6,000 × 4,000 pixels, yielding 24 megapixels (a standard noted by photography experts). This is produced by entry-to-mid-range mirrorless and DSLR cameras from Canon, Nikon, Sony, and Fujifilm. For social media, the most common export resolution is 1,080 pixels on the short edge, following Instagram’s display standard. For web portfolios, 2,000 pixels on the longest edge at 72 PPI is the most widely recommended setting among professional photographers and web designers, balancing visual quality with page load speed.
Make 2026 the Year You Actually Follow Through
For intermediate photographers, the right photography resolutions for 2026 aren’t the most ambitious ones — they’re the ones with the clearest first step and a structure that holds past February. The Resolution Ladder works because it forces prioritization: one Foundation goal, one Expression goal, one Impact goal. That’s three resolutions, each with a specific action, a 30-day check-in, and a measurable milestone. That’s what “seeing your resolution through” actually looks like in practice.
The Resolution Ladder isn’t about doing less. It’s about doing the right things in the right order. Foundation before Expression, Expression before Impact — because technical skills make creative projects better, and creative projects make your Impact goals worth sharing. Every resolution in this guide connects to that chain.
Ready to transform your skills? Pick one resolution from each tier today, schedule your first shooting session before the end of this week, and bookmark this guide for your 30-day check-in. By December 2026, you’ll have a body of work — and a set of skills — that makes next year’s resolution list look completely different.
Dave King
Hi, I'm Dave, the founder of Amateur Photographer Guide. I created this site to help beginner and hobbyist photographers build their skills and grow their passion. Here, you’ll find easy-to-follow tutorials, gear recommendations, and honest advice to make photography more accessible, enjoyable, and rewarding.