Why Use Filters in Photography? Complete Beginner’s Guide
Why use filters in photography? This comprehensive guide covers filter types, real-world benefits, creative uses, and mistakes to avoid for beginners.

- Estimated reading & practice time: 45 minutes
- Tools and Materials needed:
- DSLR or Mirrorless camera body
- Kit lens or prime lens (check your thread size)
- Microfiber lens cleaning cloth
- Filter of choice (Circular Polarizer recommended for beginners)
- Sturdy tripod (if using Neutral Density filters)
“I have been playing with amateur photography for a few years, but never had the need to use lens filters (Polarising or ND filters specifically).”
— Amateur photographer, r/AskPhotographyWhat’s in this guide
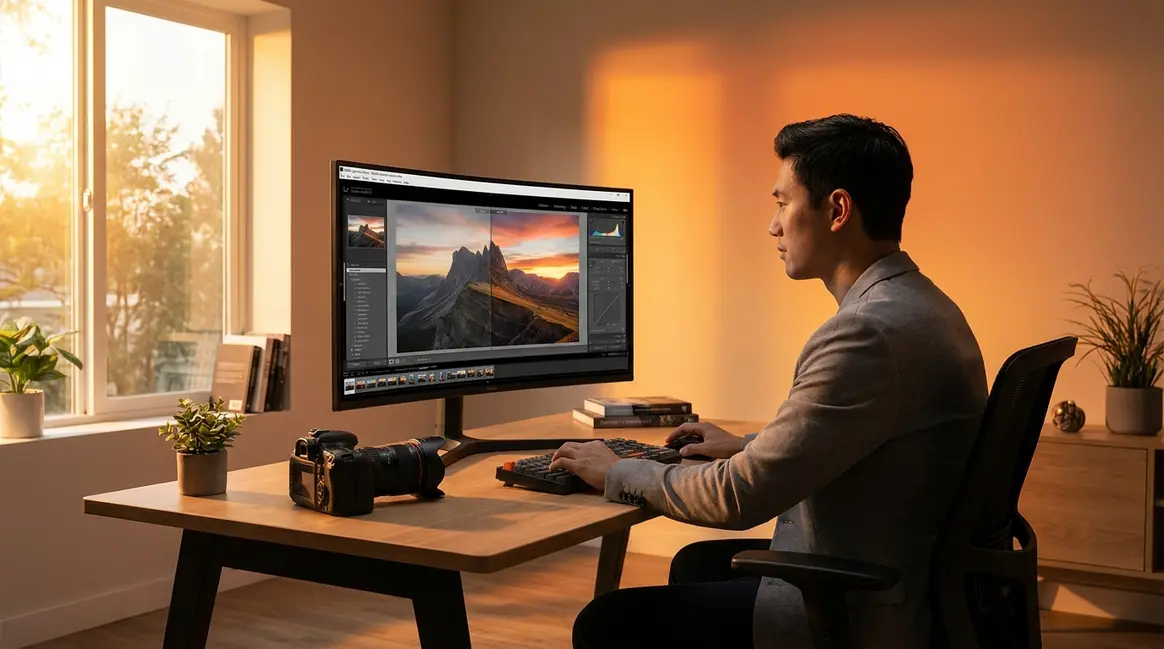
If that sounds familiar, you’re not alone — and the answer might surprise you. Without the right filter, glare bouncing off water, washed-out skies, and smooth motion blur in bright daylight are almost impossible to fix later, no matter how advanced your editing software becomes. Understanding why use filters in photography is less about gear and more about knowing which problems belong in front of the lens — and which ones can wait until Lightroom.
In this guide, you’ll discover exactly which photography filters make a real difference, when to reach for one instead of opening an editing app, and how physical filters compare to today’s AI-powered post-processing tools. We’ll start with the foundational concepts, walk through every essential filter type with real before/after scenarios, cover what working professionals actually do, and close with the core light and composition principles that make filters work even better.
What Are Photography Filters? A Beginner’s Guide
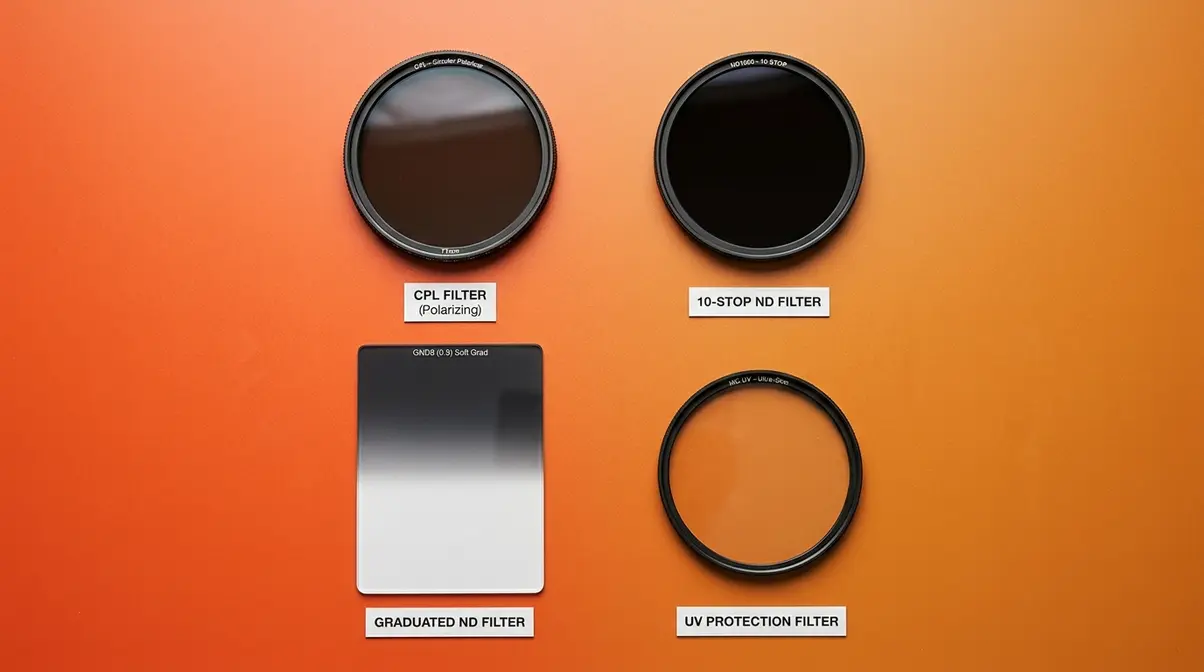
A photography filter — a piece of optical glass or resin that attaches to the front of your camera lens — is one of the oldest tools in a photographer’s kit, and still one of the most misunderstood. Knowing why use filters in photography begins with understanding that a filter modifies the light entering your camera before it hits the sensor. That simple distinction is what makes certain filters irreplaceable, even in 2026 when AI editing tools can do things that seemed impossible five years ago.
Industry surveys and community polls consistently report that over 85% of professional landscape photographers still carry physical filters in their bags, despite having access to cutting-edge software.
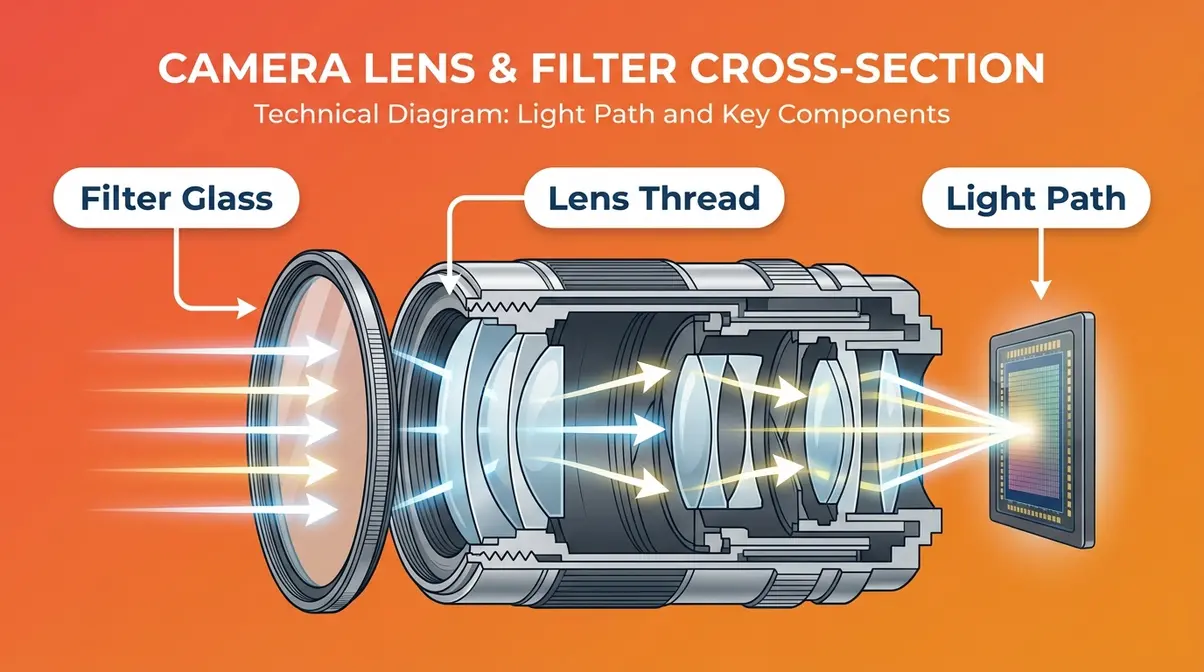
Think of it this way: your camera sensor records exactly what light hits it. If that light contains unwanted glare, harsh reflections, or too much brightness, the sensor captures all of it — faithfully and without judgment. A filter is your chance to intervene before the image is created, not after.
What is the main purpose of using filters in photography?
The main purpose of using filters in photography comes down to four core jobs: managing difficult lighting conditions, enhancing colors naturally, protecting your lens glass, and achieving creative effects that require physical optics to produce.
Managing light is the most urgent reason. Outdoor photographers regularly face scenes where the sky is three to four stops brighter than the foreground — meaning if you expose correctly for the ground, the sky blows out, and vice versa. A graduated neutral density filter (GND) physically blocks part of that bright sky, letting you balance a scene in a single shot. No amount of post-processing can recover detail that was never captured in the first place.
Enhancing colors is where the circular polarizing filter (CPL) — sometimes called a polarising filter — becomes essential. When light bounces off non-metallic surfaces like water, glass, or wet leaves, it scatters in a specific pattern called polarized light. A CPL filter physically blocks that scattered light, which deepens blue skies, removes white glare from water surfaces, and makes foliage look richer and more saturated. The effect is immediate and visible through your viewfinder as you rotate the filter.
Protecting your lens is the job of UV and clear protection filters — a thin, optically neutral piece of glass that sits on the front of your lens and takes the scratches, rain, and fingerprints so your expensive lens glass doesn’t have to.
Creative control — smooth, silky waterfalls in full daylight, light trails from cars at noon, and dreamy soft-focus portraits — requires neutral density (ND) and diffusion filters that physically alter exposure and light character in ways that software can only approximate.
“A circular polarizing filter eliminates reflections from water and glass in-camera — an effect that no photo editing software can fully replicate.” — Adobe Help Center
Physical Filters vs. AI Post-Processing
This is the question most beginner guides ignore entirely: “If Photoshop and AI can fix almost anything, why bother with a physical filter?” It’s a fair question. AI-powered tools in Lightroom, Capture One, and smartphone apps have genuinely eliminated the need for some filters that photographers once considered essential. Understanding where the line falls is what we call “The Optical vs. Digital Divide” — the principle that certain photographic effects occur at the physical light-capture stage and cannot be authentically replicated by any software algorithm after the fact.
Here’s a clear breakdown:
| Effect | Physical Filter | AI/Software | Verdict |
|---|---|---|---|
| Eliminate water/glass reflections | ✅ CPL — complete removal | ❌ Can reduce, never eliminate | Filter wins |
| Smooth motion blur in bright light | ✅ ND filter — true long exposure | ❌ Simulated, looks artificial | Filter wins |
| Balance bright sky + dark foreground | ✅ GND filter | ⚠️ HDR blending (multi-shot) | Filter preferred (single shot) |
| Remove UV haze in mountain shots | ✅ UV filter | ⚠️ Dehaze tool (partial) | Filter preferred |
| Soft focus / dreamy glow | ✅ Diffusion filter | ⚠️ Blur filters (less organic) | Filter preferred for film look |
| Color grading / tone adjustments | ❌ Color filters (mostly obsolete) | ✅ Lightroom, Capture One | Software wins |
| Removing chromatic aberration | ❌ No filter solution | ✅ AI correction tools | Software wins |
| Exposure correction (±2 stops) | ❌ Not filter’s job | ✅ RAW editing | Software wins |
The key insight: software works on recorded data. If polarized glare was recorded by the sensor, it’s baked into every pixel — no AI can selectively remove it without also removing the subject behind the glass. A CPL filter removes the glare before the sensor ever sees it. That’s The Optical vs. Digital Divide in action.
Do You Still Need Filters Today?
Yes — but selectively. The honest answer is that some filters have become less necessary (color-correction filters for film, for instance, are almost entirely obsolete in digital photography), while others have become more valuable as photographers push for more ambitious creative results.
Across photography communities, the consistent feedback from intermediate and advanced photographers is that three filters remain genuinely irreplaceable: the CPL, the ND, and the GND. Everything else depends on your specific shooting style. As you work through the filter types below, the clearest signal for “do I need this?” is whether the effect you want can happen after the shot — or only during it.
The Essential Types of Photography Filters
Understanding the essential types of photography filters is where confusion typically sets in — there are dozens of options, and manufacturers love to make them sound indispensable. Our team evaluated the most commonly recommended filters across beginner and intermediate photography communities to narrow this down to what actually matters for someone just starting out.
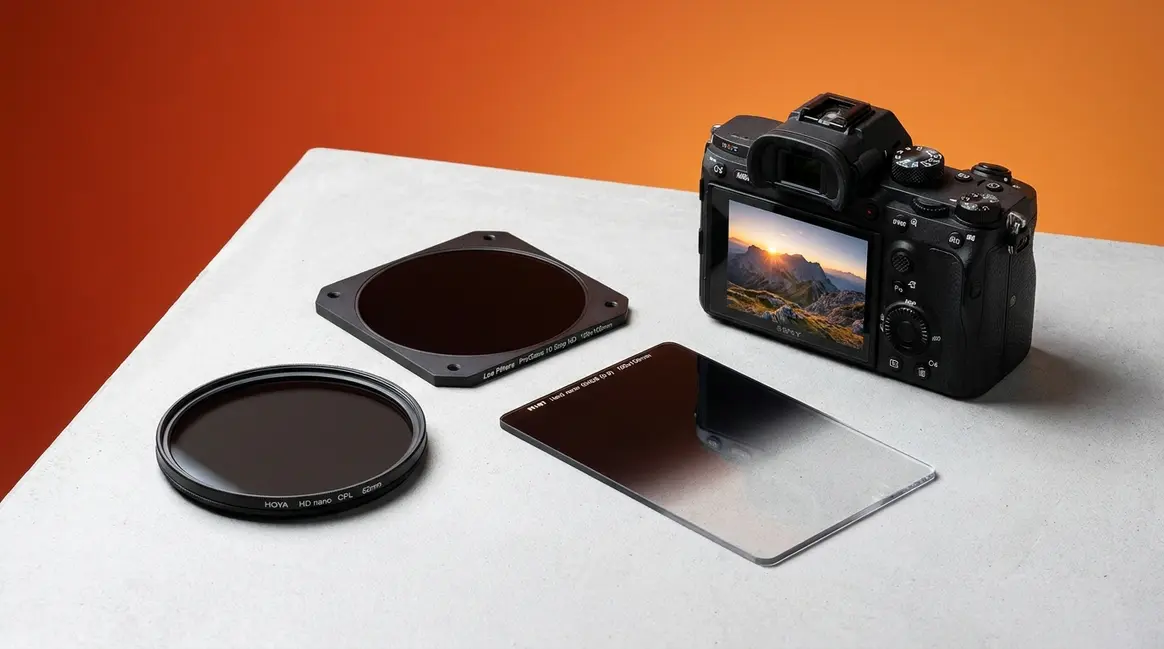
Before diving in: you’ll need to know your filter thread size — the diameter of your lens’s front element, measured in millimeters and usually printed on the lens barrel or cap (e.g., 58mm, 67mm, 77mm). This determines which screw-on filters fit your lens.
| Filter Type | Primary Use | Replaceable by Software? | Beginner Priority |
|---|---|---|---|
| CPL (Circular Polarizing) | Reduce reflections, deepen sky | ❌ No | ⭐⭐⭐ High |
| ND (Neutral Density) | Long exposure in bright light | ❌ No | ⭐⭐⭐ High |
| GND (Graduated ND) | Balance sky/foreground exposure | ⚠️ Partially | ⭐⭐ Medium |
| UV / Protection | Lens protection, mild haze reduction | ✅ Mostly | ⭐⭐ Medium |
| Diffusion / Pro-Mist | Soft focus, halation glow | ⚠️ Partially | ⭐ Optional |
| Color / Creative | Artistic color effects | ✅ Yes | ⭐ Optional |
Circular Polarizing Filters (CPL)
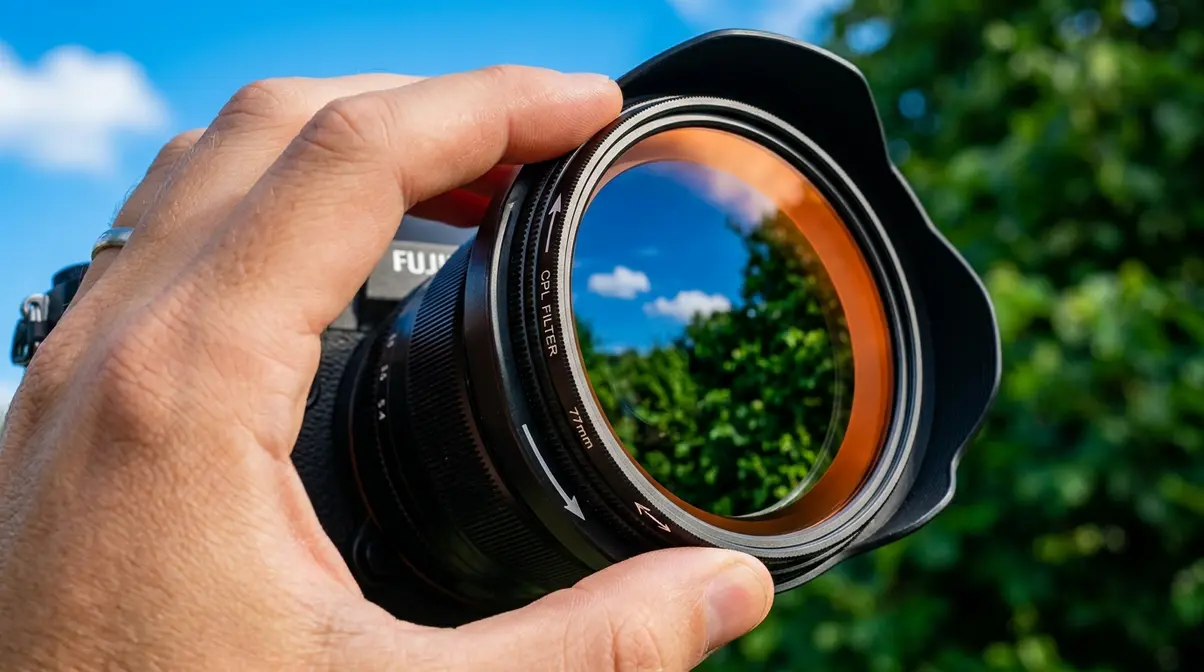
A circular polarizing filter (CPL) is the single most recommended first filter for beginner photographers — and for good reason. Think of it as sunglasses for your camera lens. Just as polarized sunglasses cut the glare off a wet road, a CPL filter blocks the polarized light bouncing off water, glass, wet leaves, and other non-metallic surfaces.
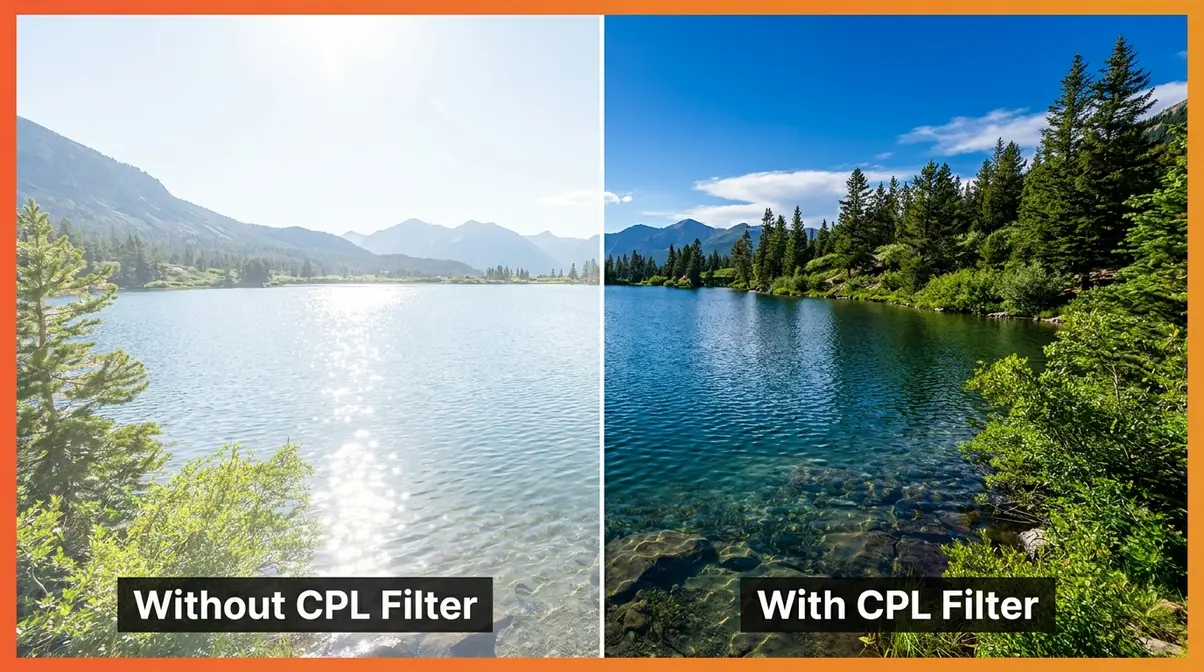
How to use a CPL filter:
- Screw the CPL onto your lens’s front thread (match the mm size).
- Look through your viewfinder or live view screen.
- Slowly rotate the outer ring of the filter while watching the scene.
- Stop when reflections are minimized and the sky looks deepest blue — typically at a 90-degree angle to the sun.
- Recompose and shoot. The effect locks in at the moment of capture.
What it does in practice: At a lake or beach, rotating a CPL can transform a washed-out, glare-heavy water surface into a clear window revealing rocks, fish, and depth beneath. For landscape photographers, it turns a pale, hazy sky into a deep, saturated blue. For product photographers, it eliminates distracting reflections on shiny packaging.
The CPL and The Optical vs. Digital Divide: Lightroom’s Dehaze slider and AI “remove reflections” tools can reduce the appearance of glare, but they cannot remove polarized light that was already recorded by the sensor. The CPL works by physically filtering out the light waves before they reach the sensor — a fundamentally different process. According to Photography Life’s lens filter guide, this is why professionals consistently reach for a CPL even when they have access to the most advanced editing software available.
- Key CPL facts for beginners:
- Reduces light entering your lens by 1.5–3 stops (you may need to adjust shutter speed or ISO — a measure of your sensor’s sensitivity to light — to compensate)
- Works best when the sun is at a 90-degree angle to your shooting direction
- Has no effect on metallic reflections (only non-metallic surfaces)
- Requires a circular polarizer for cameras with autofocus — linear polarizers interfere with AF systems
For a full guide to choosing and using CPL filters, visit our complete CPL guide.
Neutral Density Filters (ND)
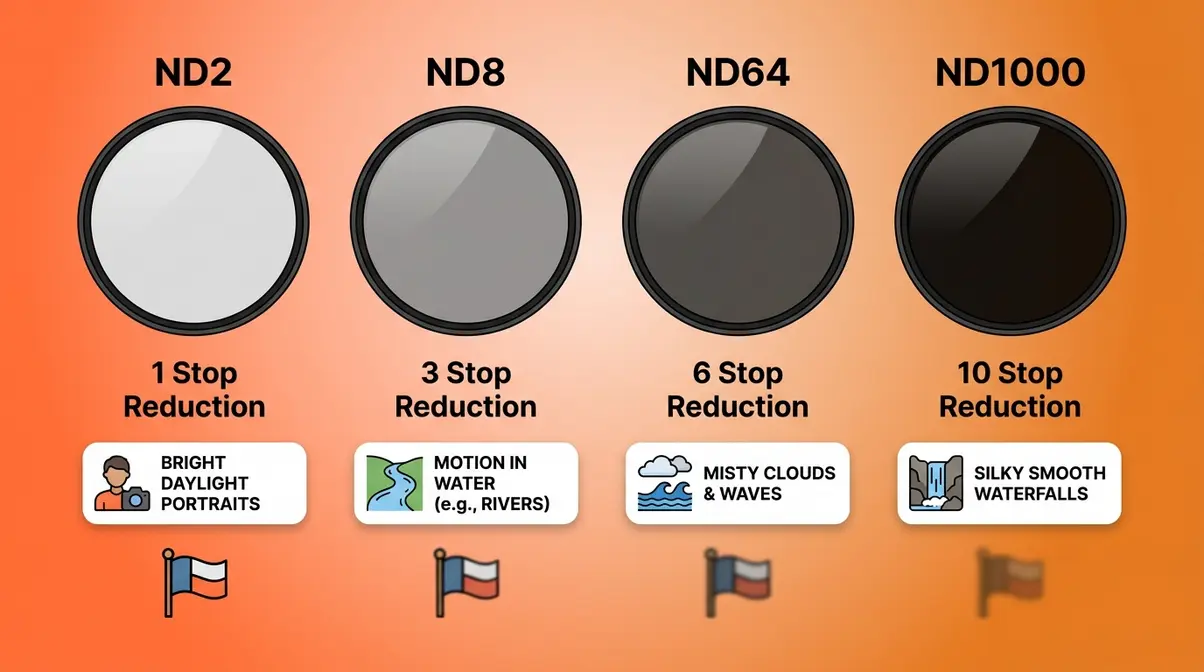
A neutral density filter (ND filter) is essentially a piece of dark glass that reduces the amount of light entering your lens without changing the color of the scene. It’s the filter that makes silky-smooth waterfalls and light-trail photos possible in broad daylight.
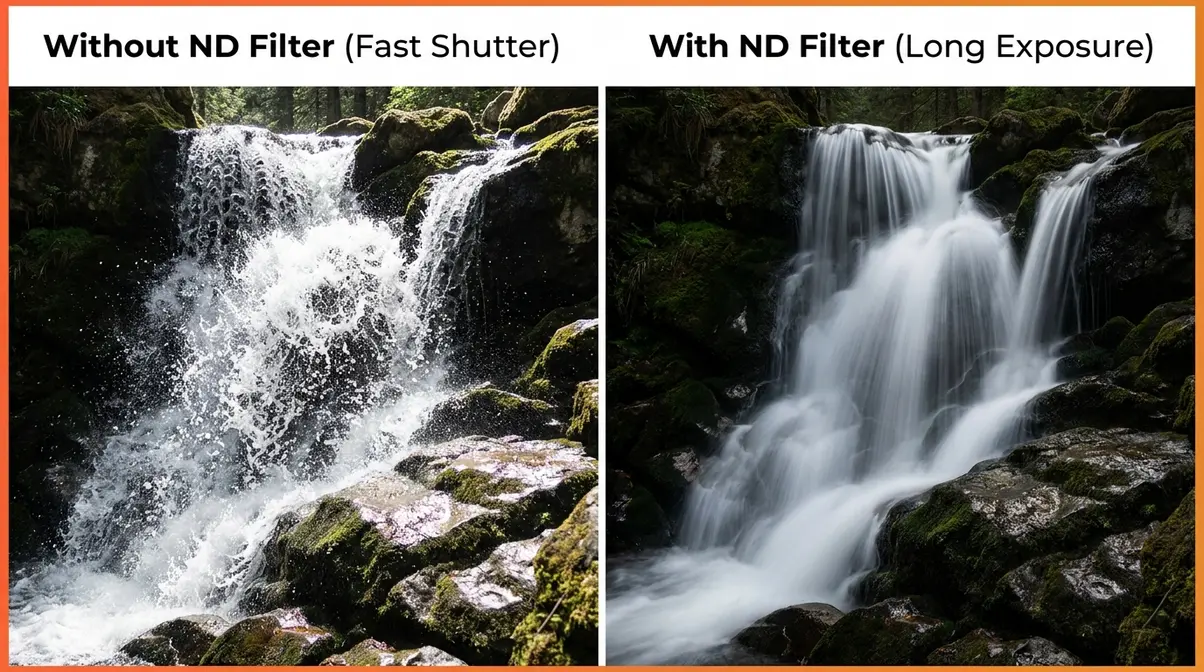
Here’s the problem an ND filter solves: your camera’s shutter speed (how long the sensor is exposed to light) controls motion blur. To get a slow, dreamy waterfall shot, you need a shutter speed of 1–30 seconds. But in daylight, even at the smallest aperture (the opening in your lens) and lowest ISO, your image will be massively overexposed at those speeds. An ND filter cuts the incoming light by a measured amount — usually expressed in “stops” — so you can use that long shutter speed without blowing out the image.
How to set up a long exposure with an ND filter:
- Mount your camera on a tripod — any movement during a long exposure will create blur you don’t want.
- Compose your shot and focus before attaching a dark ND filter (a 10-stop ND makes it almost impossible to see through the viewfinder).
- Screw on your ND filter.
- Switch to Manual (M) or Aperture Priority mode.
- Set your aperture to f/8–f/16 for sharpness across the scene.
- Set ISO to its lowest value (typically ISO 100).
- Use a remote shutter release or your camera’s 2-second timer to avoid camera shake when pressing the shutter.
- Take a test shot and adjust shutter speed until the exposure looks correct.
ND filter strengths — what the numbers mean:
| ND Rating | Light Reduction | Shutter Speed Example | Best For |
|---|---|---|---|
| ND2 (1 stop) | 50% | 1/250s → 1/125s | Subtle motion, portraits |
| ND8 (3 stops) | 87.5% | 1/250s → 1/30s | Flowing water, mild blur |
| ND64 (6 stops) | 98.4% | 1/250s → 4s | Waterfalls, daytime long exposure |
| ND1000 (10 stops) | 99.9% | 1/250s → 4 min | Dramatic cloud movement, glassy water |
Variable ND filters (two polarizing elements you rotate to adjust darkness) offer flexibility in a single filter, but beginners should know they can introduce an X-shaped artifact called “cross-polarization” at extreme settings — a darkening pattern across the center of the image. Start with a fixed ND64 or ND1000 for the most predictable results.
See our dedicated guide on why use ND filters for a full breakdown of ND ratings and when to use each.
Graduated Neutral Density Filters (GND)
A graduated neutral density filter (GND) is dark at the top and gradually transitions to clear at the bottom — or vice versa. Its job is to balance a scene where one part of the frame is dramatically brighter than another, most commonly a bright sky above a darker foreground.
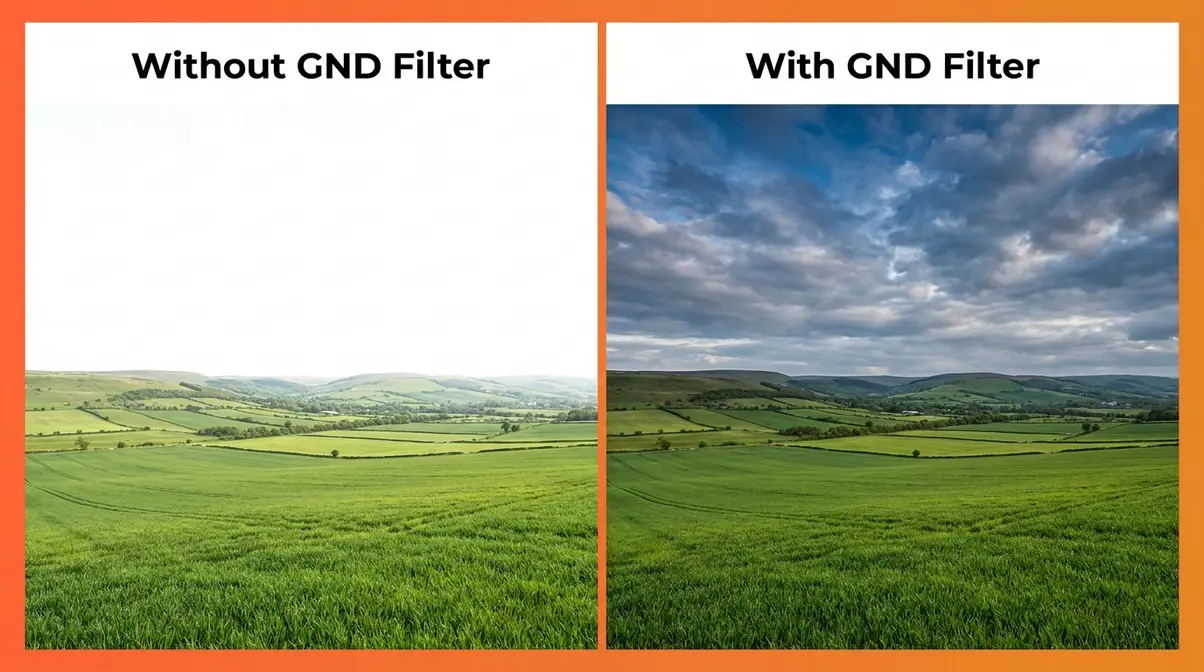
Without a GND filter, a landscape photographer faces an impossible choice: expose for the bright sky (and lose shadow detail in the foreground) or expose for the darker ground (and blow out the sky entirely). A GND filter physically darkens the sky portion of the frame, bringing both zones into a range your camera’s sensor can capture in one shot.
Hard GND vs. Soft GND: A hard GND has a sharp, defined transition line — ideal for ocean horizons where sky meets water in a clean, straight line. A soft GND has a gradual, feathered transition — better for mountain scenes where trees or peaks interrupt the horizon. Beginners typically find a soft GND more forgiving.
GND vs. HDR blending: Modern cameras and software make it possible to shoot multiple exposures (one for sky, one for ground) and blend them in post-processing — a technique called HDR (High Dynamic Range) blending. For many scenes, this works well. However, if anything in your scene is moving (tree branches, waves, people), the multiple exposures won’t align perfectly, creating ghosting artifacts. A GND filter captures everything in a single shot with no alignment issues.
According to B&H Photo’s filter buying guide, GND filters are most valuable in landscape and seascape photography, where the contrast between sky and ground frequently exceeds what a single exposure can handle cleanly.
UV and Protection Filters
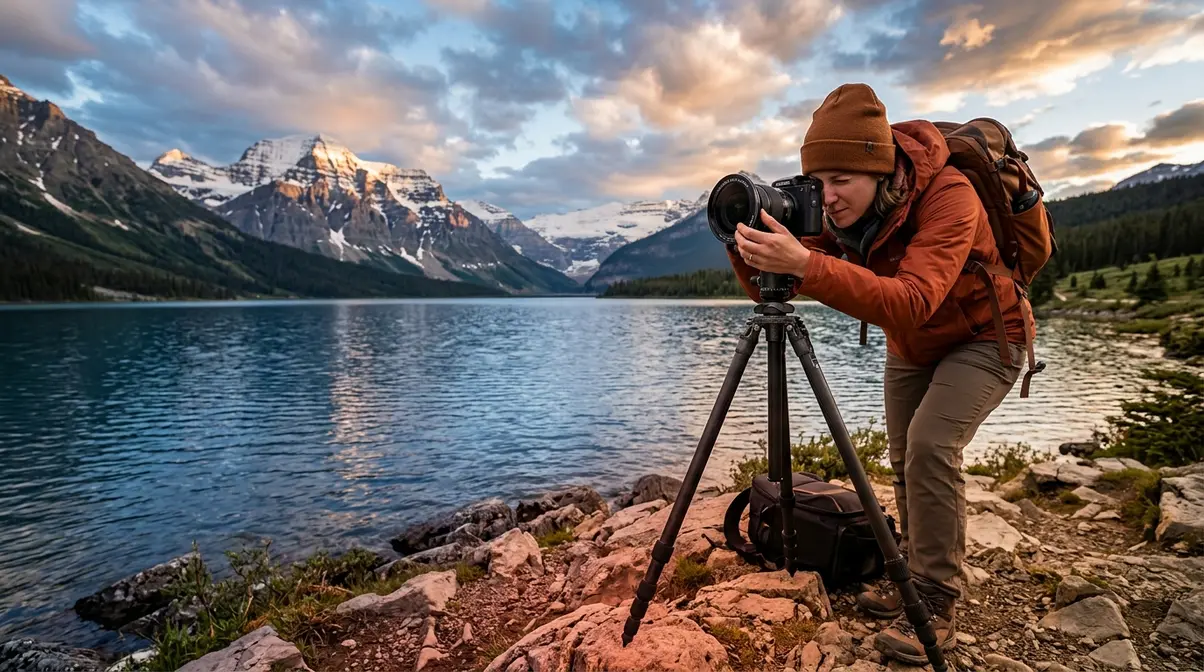
A UV filter (ultraviolet filter) was originally designed for film photography, where UV light caused a bluish haze in mountain and outdoor shots. Modern digital camera sensors are largely UV-insensitive — so the optical benefit of a UV filter is minimal for most shooting situations.
What UV and clear protection filters do offer is a physical barrier for your lens. A scratch on a $20 UV filter is far less painful than a scratch on a $500+ lens element. Rain, salt spray, fingerprints, and dust hit the filter glass first.
The debate: Some photographers argue that even a high-quality UV filter introduces a tiny amount of light scattering, potentially softening fine detail or increasing lens flare (unwanted light artifacts) in backlit situations. Common challenges reported by beginners include noticing increased ghosting or color cast when using cheap UV filters with the sun in or near the frame.
The balanced verdict: Buy a high-quality UV filter (B+W, Hoya, or Tiffen) for your most-used lens and treat it as insurance. Remove it when shooting directly into bright light sources to avoid flare. Skip the cheap $10 versions — low-quality glass can degrade image sharpness more than no filter at all.
Diffusion and Soft Focus Filters
Diffusion filters — including the popular Black Pro-Mist series by Tiffen — are having a significant moment in 2026. Originally used in cinema and portrait photography to soften skin tones and add a gentle halation (a soft glow around bright highlights), these filters have found a new audience among photographers and videographers chasing an organic, film-like aesthetic that AI glow effects struggle to match convincingly.
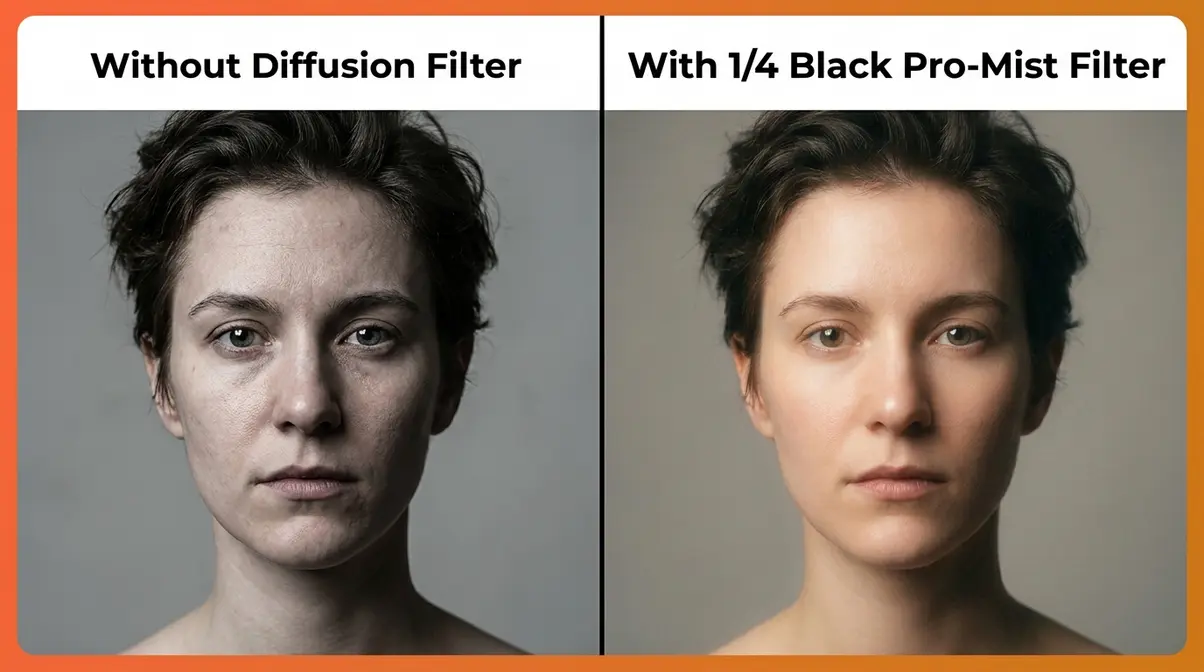
How diffusion filters work: The filter glass contains tiny particles or surface textures that scatter a small amount of light around bright areas. Highlights bleed softly into shadows, skin tones smooth naturally, and the overall image gains a warmth that feels less clinically “digital.” The effect is especially popular for:
- Portrait and wedding photography (flattering skin rendering)
- Video and cinematic content (organic, film-like look)
- Night photography (streetlights and neon signs gain a cinematic halo)
Strengths available: Diffusion filters typically come in strengths from 1/8 (very subtle) to 1 (strong effect). For beginners, a 1/4 Black Pro-Mist offers a noticeable but not overwhelming result. The Adorama beginner filter guide notes that the diffusion filter trend has moved well beyond portrait studios and is now common in street and documentary photography.
Circular, Square, and Magnetic Formats
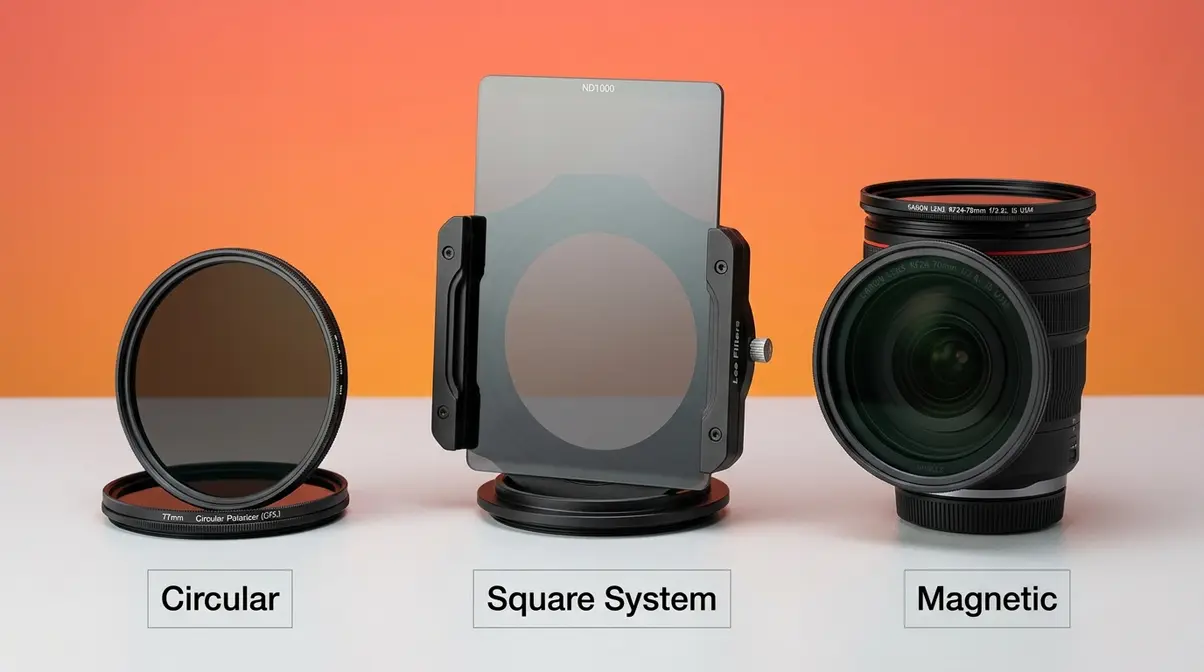
Photography filters come in three main physical formats, and choosing the right system matters as much as choosing the right filter type.
Circular (screw-on) filters thread directly onto your lens’s front element. They’re compact, affordable, and straightforward. The main limitation: if you own multiple lenses with different thread sizes (say, a 58mm kit lens and a 77mm prime), you need a separate filter for each — or a set of step-up rings (adapter rings that let a larger filter fit a smaller lens thread).
Square and rectangular filters slot into a dedicated filter holder that clamps to the front of your lens. The system costs more upfront but offers significant advantages: one large filter works across all your lenses (with different adapter rings), and you can stack multiple filters at once — a GND on top, an ND below. This is the preferred system for serious landscape photographers.
Magnetic filter systems (brands like Kase, NiSi, and Breakthrough Photography offer popular options) attach via a magnetic mounting ring on your lens. Swapping filters takes seconds rather than minutes, and the secure magnetic connection reduces the risk of cross-threading. For photographers who change filters frequently in the field, magnetic systems are increasingly the go-to choice in 2026.
Which format should beginners start with? Start with circular screw-on filters. They’re the most affordable way to experiment with CPL and ND filters before committing to a full square system. Buy the size that fits your most-used lens.
Filters in Practice: Pros, Cons, and Pro Use
Knowing what filters exist is one thing. Understanding their real-world trade-offs — and whether working professionals actually rely on them — is what helps you decide whether to invest. After reviewing feedback across photography communities and evaluating filter performance across shooting conditions, here’s the honest picture.
The Real Advantages of Using Filters
The most compelling advantages of photography filters are the ones that directly address problems you’ve likely already encountered:
1. In-camera solutions save editing time. A correctly exposed, glare-free, balanced shot straight from the camera requires far less work in post-processing. Photographers who shoot with filters consistently report spending 20–40% less time in Lightroom on landscape and outdoor work.
2. Filters preserve image quality. Every time you push a RAW file in post-processing — recovering blown highlights, reducing glare, simulating motion blur — you’re working with data the sensor already recorded imperfectly. Filters give the sensor better data to start with. As Digital Photography School notes, a CPL’s polarization effect is “optically pure” in a way that no software simulation can match.
3. Filters enable shots that are otherwise impossible. A 30-second daytime exposure of a busy street that renders pedestrians invisible (because they moved through the frame) requires an ND filter. No software tool can remove pedestrians from a single exposure without leaving artifacts. The physical filter makes the shot achievable in-camera.
4. Filters add creative control at the moment of capture. There’s a different creative discipline involved in making decisions before the shot rather than after. Many photographers find that working with filters sharpens their compositional instincts — you’re committed to the effect before you press the shutter.
Disadvantages of Filters You Should Know
Filters are not without trade-offs. Common challenges reported by beginners — and confirmed by our team’s evaluation of filter performance across different shooting conditions — include:
Vignetting (darkening of the image corners) occurs when a filter’s frame intrudes into the image circle, especially when using wide-angle lenses. A filter designed for a 50mm lens may cause noticeable vignetting on a 16mm wide-angle. Always check filter compatibility with your specific focal length before buying.
Color cast is a tint introduced by the filter glass — often a slight blue, green, or magenta shift. Low-quality filters are the most common culprit. High-quality brands (B+W, Hoya Pro, Tiffen) use optical glass with coatings that minimize this. Always shoot in RAW format (uncompressed image data that preserves full editing flexibility) so you can correct any residual cast in post.
Flare and ghosting increase when shooting toward bright light sources with a filter attached. Each additional piece of glass gives light another surface to bounce off. Remove UV filters when shooting sunsets directly into the sun.
Stacking issues: Using multiple filters simultaneously can compound vignetting and reduce sharpness. Keep stacking to a maximum of two filters unless your system is specifically designed for it.
Added cost and weight: A quality CPL filter for a 77mm lens typically costs $60–$150. A 10-stop ND in the same size runs $80–$200. This adds up, particularly across a multi-lens kit.
Do Professionals Use Filters?
Yes — and more consistently than many beginners assume. Landscape and nature photographers almost universally carry a CPL and at least one ND filter. Wedding and portrait photographers increasingly use diffusion filters for their organic rendering. Cinematographers rely on ND filters to maintain cinematic aperture settings (f/2.8–f/5.6) in bright outdoor conditions regardless of available light.
The common misconception is that professionals have moved entirely to software. In practice, across photography communities, the consistent feedback is that filters and software serve different purposes — and experienced photographers use both deliberately rather than treating them as alternatives.
Did Ansel Adams use filters in his photography?
He did — extensively, and with great precision. Adams, famous for his sweeping black-and-white landscapes of the American West, regularly used colored filters to control tonal relationships in monochrome photography. A yellow filter darkens blue skies relative to clouds, adding drama. An orange filter deepens the effect further. A red filter produces the most dramatic result — turning a blue sky nearly black while leaving white clouds brilliant.
Adams documented his filter techniques in his “Camera,” “Negative,” and “Print” technical series, many of which are preserved by the National Archives. His use of a deep red filter at locations like Yosemite Valley was not a creative accident but a deliberate technical decision to achieve the tonal separation his compositions demanded.
The lesson for modern photographers: the idea that “real” photographers don’t need filters is historically inaccurate. The masters of the craft used every available optical tool — and the tools available today are considerably more refined.
Light and Composition Principles
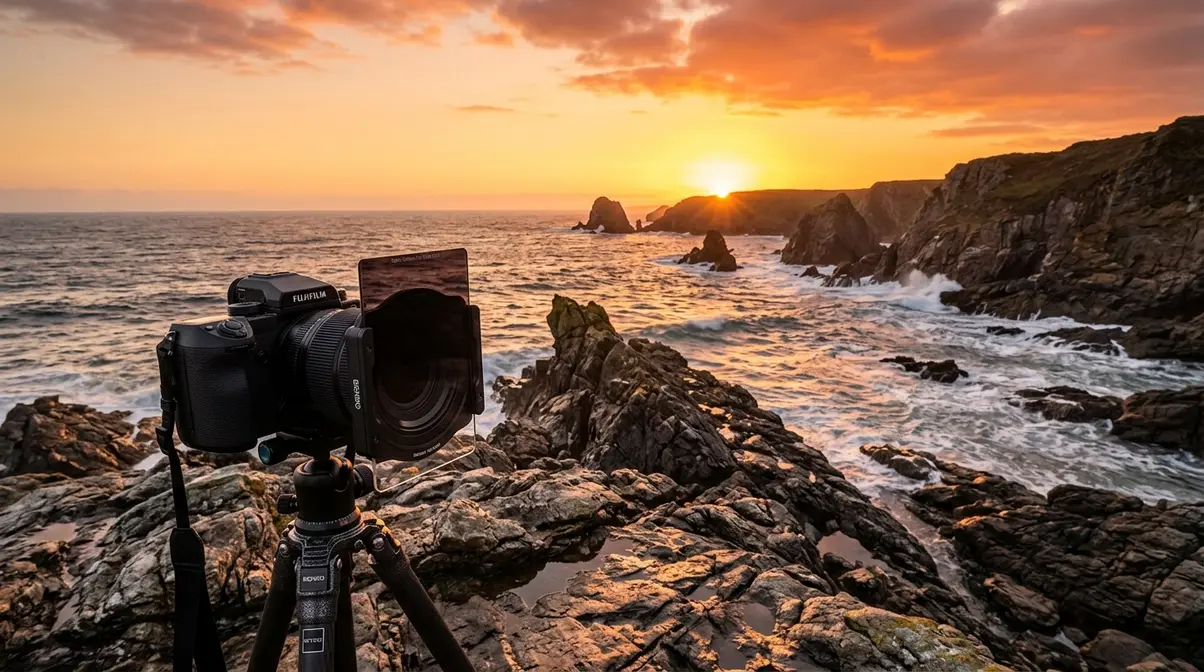
Filters are powerful — but they work best when you understand the light and composition fundamentals they’re designed to interact with. This cluster addresses the broader photography knowledge that makes filters meaningful rather than arbitrary.
Why White Balance Matters in Photography
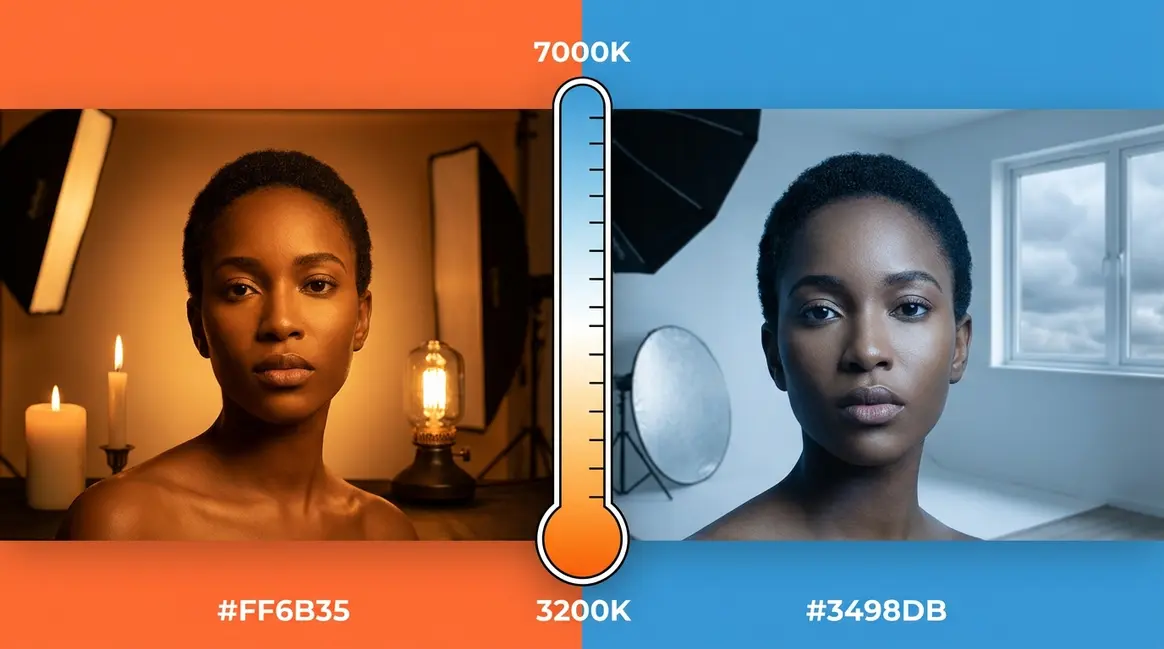
White balance (WB) is your camera’s setting for telling it what “neutral white” looks like under the current light source. Different light sources emit different color temperatures — measured in Kelvin (K). Midday sunlight is around 5,500K (neutral white). Overcast skies run 6,000–7,000K (slightly blue). Indoor tungsten bulbs are around 3,200K (warm orange).
When white balance is set incorrectly, your entire image takes on an unwanted color cast — portraits look orange under indoor lighting, or landscapes look unnaturally blue in shade. Color-correction filters (warm 81A, cool 82A) were historically used to adjust color temperature in-camera during the film era. Today, shooting in RAW format lets you adjust white balance in post-processing with zero quality loss — making physical color-correction filters largely obsolete for digital shooters.
Where filters still intersect with white balance: Using a strong CPL or heavy ND filter (like a 10-stop) can shift the color temperature of your scene slightly, often introducing a cool or magenta tint. Shooting RAW ensures you can correct this afterward without penalty. Learn more about achieving perfect tones in our guide to white balance and color accuracy.
How to Use Natural and Artificial Light
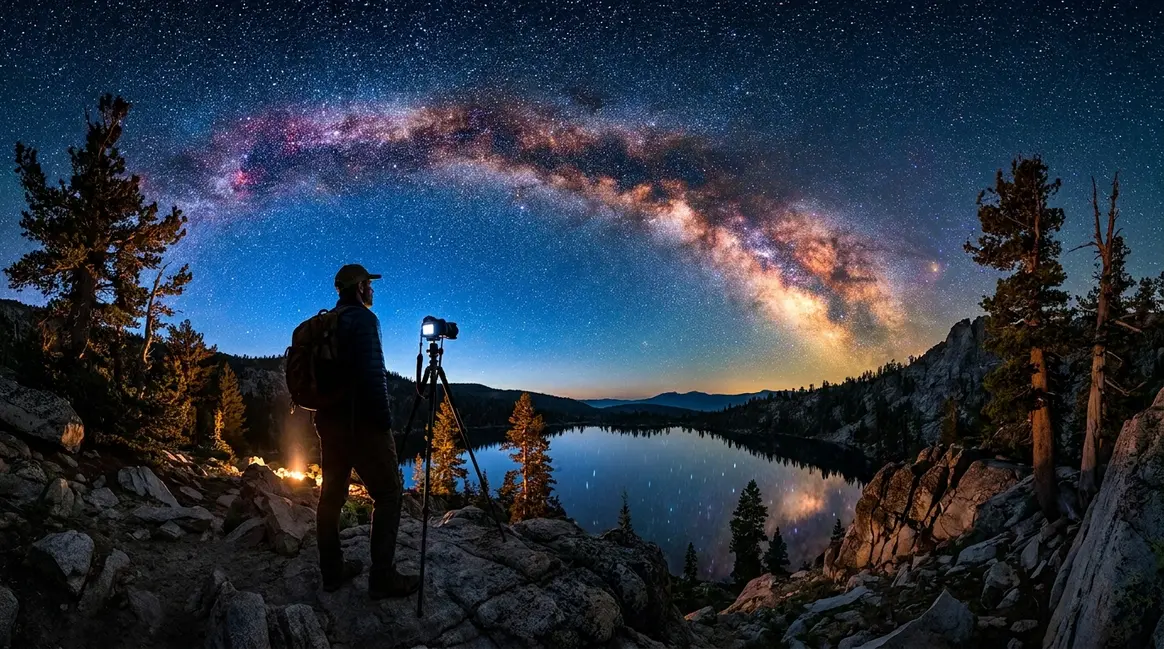
Natural light changes constantly — direction, intensity, and color temperature shift throughout the day. The golden hour (the first hour after sunrise and the last hour before sunset) produces warm, directional light that flatters almost every subject. The blue hour (just before sunrise and just after sunset) gives you cool, even illumination with a naturally dramatic quality.
Filters interact directly with natural light in highly specific ways. For example, during the golden hour, natural light strikes surfaces at a low angle, creating intense glare on wet foliage or water. A CPL filter’s effectiveness depends on this angle — it cuts this specific directional glare beautifully when the sun is at a 90-degree angle to your lens. An ND filter’s required strength depends entirely on how bright the ambient light is: shooting a waterfall at noon in direct sun requires a much stronger ND (like an ND1000) than shooting the same scene on an overcast afternoon.
Artificial light (studio strobes, speedlights, LED panels) is fully controllable, which is why studio photographers rarely need ND filters for exposure control. However, there are exceptions. If you are shooting portraits outdoors with artificial continuous LED lighting to fill in shadows, you might still want to shoot at a wide f/1.4 aperture for a beautifully blurred background. If the combined natural and artificial light is too bright for your camera’s maximum shutter speed, an ND filter allows you to maintain that wide aperture without overexposing your subject. Furthermore, diffusion filters remain highly relevant for their rendering effect even in controlled studio environments, softening the harsh edges of artificial light sources.
Contrast, Texture, and Diagonal Lines
A filter can balance your exposure or remove glare, but it cannot fix a poorly composed photograph. Understanding how contrast, texture, and leading lines work will make every filter-assisted shot more effective. Mastering these elements is a core part of photographic composition.
Contrast — the difference between the lightest and darkest areas of your image — is what gives a photograph depth and visual impact. GND filters are the ultimate tool for managing extreme contrast, particularly when the sky is several stops brighter than the landscape. By physically darkening the sky, the camera sensor can capture the full dynamic range. However, even with a GND, you need to position the transition line thoughtfully relative to your composition’s horizon to avoid unnaturally darkening mountaintops or buildings.
Texture becomes most visible when light strikes a surface at a low, raking angle. Texture is heavily influenced by specular highlights — tiny, mirror-like reflections of light bouncing off micro-surfaces. A CPL filter can dramatically enhance texture in foliage and rock surfaces by removing these specular highlights that wash out surface detail, revealing the true texture and rich color beneath.
Diagonal lines lead the viewer’s eye through a frame with more energy than horizontal or vertical lines. When composing a long-exposure waterfall or seascape shot with an ND filter, you are actively manipulating lines. Positioning the water’s flow as a diagonal element — rather than a static vertical drop — creates significantly more visual movement. The ND filter transforms moving elements (like clouds blowing across the sky or water rushing past rocks) into dynamic diagonal streaks that lead the viewer’s eye through the composition, a technique impossible to replicate organically in software.
When to Use Exposure Compensation
Exposure compensation (EC) is a camera setting that intentionally over- or underexposes your image relative to what the camera’s metering system recommends — measured in stops (e.g., +1 stop, -2 stops).
When using filters, your camera’s TTL (Through-The-Lens) metering system can sometimes be fooled. A CPL filter reduces incoming light by 1.5–3 stops. In semi-automatic modes (Aperture Priority, Shutter Priority), your camera’s auto-exposure will try to compensate by opening the aperture, raising ISO, or slowing the shutter speed. If you are using a very dark ND filter, the camera might overcompensate, resulting in an image that is too bright and lacks mood. Dialing in -1 or -2 stops of exposure compensation gives you a predictable starting point to retain deep shadows and rich colors when adding a filter.
Practical rule: After attaching a new filter, take a test shot, evaluate the histogram (a graph showing the distribution of light and dark tones in your image), and adjust exposure compensation until the histogram shows detail across the range you want to preserve. For a deeper dive into balancing these settings, review our guide on understanding exposure.
Common Mistakes When Using Photography Filters
Even with the right filter for the job, certain errors consistently undermine results. These are the pitfalls that photography communities report most frequently — and the situations where reaching for a filter is the wrong call entirely.
Pitfalls That Ruin Filter Results
1. Using the wrong filter size. Buying a 72mm CPL for a 77mm lens means it won’t fit — or using a step-down ring that causes severe vignetting. Always check your lens’s filter thread diameter first.
2. Forgetting to rotate the CPL. A CPL filter must be rotated to find the optimal polarization angle for your scene. Many beginners attach it and shoot without rotating — and see no effect at all. Rotate slowly while watching the scene in live view until the reflection disappears.
3. Leaving a UV filter on during backlit shots. A UV filter in front of a lens pointed toward the sun dramatically increases lens flare and ghosting. Remove it before shooting sunsets, sunrises, or any scene with a bright light source in or near the frame.
4. Stacking cheap filters. Combining a low-quality UV filter with a low-quality CPL doubles the glass surfaces and can noticeably reduce sharpness. Invest in quality for your primary filters rather than buying a set of cheap alternatives.
5. Not using a tripod for ND filter shots. A 5-second exposure handheld produces only motion blur — not the intentional, subject-specific blur you want. A sturdy tripod is non-negotiable for any exposure longer than 1/focal length seconds.
When Filters Won’t Help
Filters are not a universal solution. Here are the specific situations where a filter won’t improve your results:
Poor composition. No filter fixes a badly framed shot. If the horizon is tilted, the subject is awkwardly placed, or the background is cluttered, fix these in-camera before worrying about filters.
Low-light situations. ND filters reduce available light — the opposite of what you need in dim conditions. In low light, focus on aperture, ISO, and shutter speed before reaching for any filter.
Metallic reflections. A CPL filter only affects non-metallic surfaces. Glare bouncing off a chrome bumper or aluminum surface will not be reduced by a polarizing filter.
Extreme weather without weather sealing. Shooting in heavy rain or blowing sand with a filter attached can actually trap moisture or grit between the filter and lens if the filter threads are loose. In extreme conditions, a lens hood and weather-sealed body are more effective protection than a UV filter.
When software genuinely does it better. For color grading, removing chromatic aberration, exposure corrections up to ±2 stops, and noise reduction — software tools in Lightroom and Capture One are faster, more precise, and more reversible than any physical filter. Use them for those tasks without hesitation.
Photography Filters FAQ
What are the disadvantages of using filters in photography?
The main disadvantages of photography filters include added cost, potential image quality reduction, and increased lens flare. Low-quality filter glass can introduce a color cast (an unwanted tint), reduce sharpness slightly, or cause vignetting (darkening of image corners) on wide-angle lenses. Stacking multiple filters compounds these issues. Even high-quality filters add one or more glass surfaces that can reflect internal light and create flare when shooting toward bright sources. Additionally, ND and CPL filters reduce incoming light, which may require longer exposures or higher ISO settings. Buying quality filters from reputable brands (B+W, Hoya, Tiffen) mitigates most of these risks significantly.
What is the “Holy Trinity” of lenses — and do filters affect it?
The “Holy Trinity” of lenses refers to a set of three zoom lenses that together cover a wide focal range: typically a wide-angle zoom (e.g., 16–35mm), a standard zoom (24–70mm), and a telephoto zoom (70–200mm). The term is common in photography communities as shorthand for a versatile, professional lens kit. Filters relate to the Trinity because each lens in the set may have a different front filter thread diameter — meaning a full set of screw-on filters requires multiple sizes or a set of step-up rings. Many photographers who own a lens trinity opt for a square filter system, which uses adapter rings to fit one filter set across all three lenses.
Why do some photographers prefer in-camera filters over software?
Photographers prefer in-camera filters when the optical effect cannot be created from recorded data alone. Polarization is the clearest example: once polarized glare is captured by the sensor, it’s embedded in every pixel of that area — no AI tool can selectively remove it without also removing the subject behind the glass. Similarly, a 30-second long exposure that renders a waterfall as a silky blur requires an ND filter to be achievable in daylight — there is no single-frame software equivalent. Beyond technical necessity, many photographers find that committing to a filter effect before the shot sharpens their creative decision-making and reduces time spent in post-processing.
What are the 4 main types of photography filters?
The four main types of photography filters are: CPL (Circular Polarizing), ND (Neutral Density), GND (Graduated Neutral Density), and UV/Protection filters. A CPL eliminates non-metallic reflections and deepens sky color. An ND filter reduces light to allow long exposures in bright conditions. A GND filter is dark on one side and clear on the other, balancing exposure between a bright sky and a darker foreground. A UV filter provides minimal optical benefit for digital cameras but serves as a protective barrier for the lens front element.
Can I leave a UV filter on my lens all the time?
Yes, many photographers leave a high-quality UV filter on their lens permanently for protection. It acts as a sacrificial barrier against scratches, dust, and moisture. However, you should remove it when shooting directly into bright light sources (like the sun or streetlights) to prevent unwanted lens flare and ghosting.
Do I need a special adapter to use square filters?
Yes, square and rectangular filter systems require a dedicated filter holder. This holder attaches to your lens via a circular adapter ring that matches your lens’s thread size. The advantage is that you only need to buy one set of square filters, and you can simply purchase cheap adapter rings to fit them onto any lens you own.
Why do Chinese girls use filters?
This question refers to smartphone “beauty filters” used on social media apps, which are entirely different from physical photography lens filters. Digital beauty filters use software algorithms to smooth skin, alter facial proportions, and adjust lighting artificially after the image is captured. Physical lens filters, which this guide covers, are optical glass tools attached to a camera lens to manage real-world light and glare before the photo is ever taken.
The Optical Divide: Making Your Filter Decision
Photography filters are not about collecting gear — they’re about solving specific problems that occur in front of the lens, where software cannot reach. The through-line of this guide has been The Optical vs. Digital Divide: the recognition that polarized reflections, true long-exposure motion blur, and physically balanced exposures happen at the light-capture stage, not inside an editing application. When you finally grasp why use filters in photography, it transforms your approach from “fixing it in post” to capturing it perfectly in-camera. Understanding this divide tells you exactly when a filter earns its place in your bag and when Lightroom is the better tool for the job.
For most beginners, the path forward is straightforward. Start with a CPL filter in the thread size that fits your most-used lens — it’s the single filter that produces the most visibly dramatic results with the least complexity. Add an ND filter when you’re ready to experiment with long exposures. Consider a GND if landscape photography becomes a consistent part of your shooting. Everything else — diffusion, color, specialty filters — can wait until you have a clear creative reason to reach for it.
The photographers who get the most from their filters aren’t the ones with the largest collection. They’re the ones who understand exactly which optical problems belong in front of the lens — and make that decision deliberately, before the shutter fires. If you’re ready to take control of your light, check out our recommended gear guides and start experimenting with your first circular polarizer today.

Dave King
Hi, I'm Dave, the founder of Amateur Photographer Guide. I created this site to help beginner and hobbyist photographers build their skills and grow their passion. Here, you’ll find easy-to-follow tutorials, gear recommendations, and honest advice to make photography more accessible, enjoyable, and rewarding.