
Table of Contents
- Table of Contents
- What Is Photo Noise Reduction?
- How to Prevent Photo Noise Before You Shoot
- Best Professional Noise Reduction Software
- Best Free & Online Photo Noise Reduction Tools
- Best Mobile Apps for Noise Reduction
- How to Reduce Noise in Photoshop, Lightroom & Affinity Photo
- Common Noise Reduction Mistakes (and How to Avoid Them)
- FAQ
- Conclusion
This blog post may contain affiliate links. As an Amazon Associate I earn from qualifying purchases.
You captured the perfect moment — then zoomed in and saw it: a sea of ugly grain swallowing every detail. That gritty, speckled mess is called digital noise, and it ruins more photos than any shaky hand or missed focus ever will.
“How do you noise reduction with destroying an image?”
— Frustrated photographer, r/photography
Whether it’s a birthday dinner shot at ISO 6400 or a landscape captured just after sunset, noise is the silent killer of image quality. The wrong fix makes your photo look like a plastic mannequin instead of a real scene. In this guide, you’ll learn exactly what causes photo noise, how to prevent it before you shoot, and which software and apps remove it most effectively in 2026 — without destroying a single detail. We cover everything from free online tools to professional-grade AI software, plus step-by-step tutorials for Lightroom, Photoshop, and Affinity Photo.


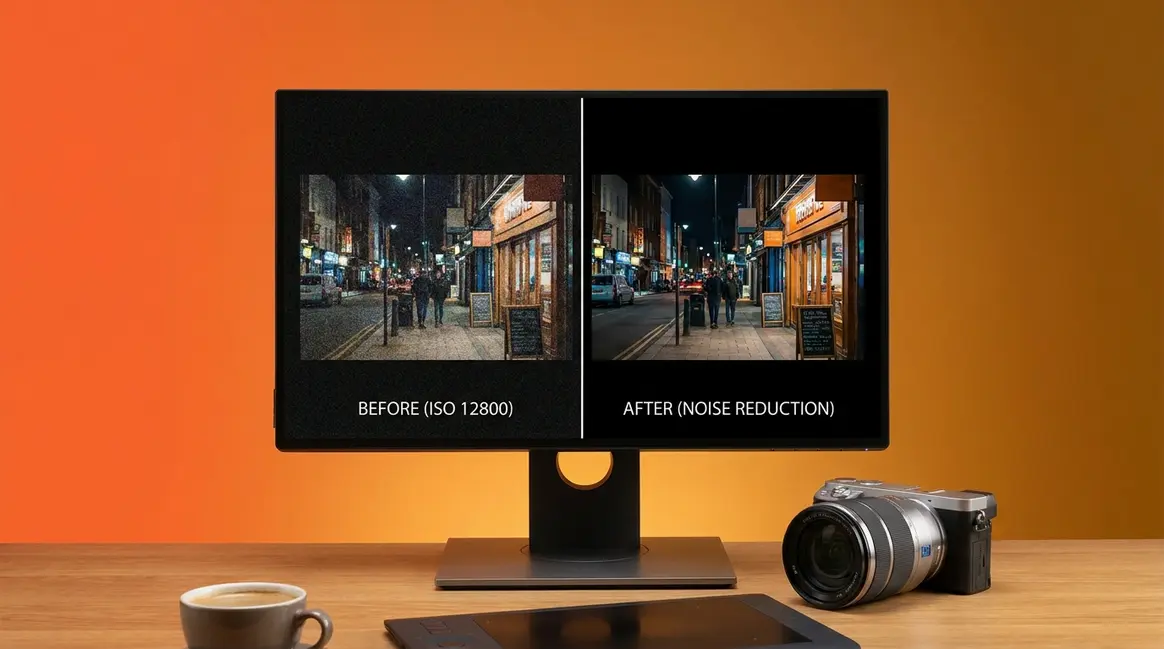
Photo noise reduction removes the grainy speckles and color blotches that appear in high-ISO or low-light photos — modern AI tools do this without destroying detail.
- Best paid tool: DxO PureRAW delivers the cleanest RAW file results, especially above ISO 3200
- Best free option: Nero AI Denoiser handles JPEGs online in seconds with no download required
- Best prevention: Shoot in RAW at the lowest ISO your scene allows — software can only do so much
- Avoid The Plasticity Trap: Aggressive AI denoising creates a plastic, waxy look — learn which settings prevent it
- AI search is growing: Searches for AI-specific noise reduction tools grew +75% YoY — this guide covers them all
Table of Contents
- What Is Photo Noise Reduction?
- How to Prevent Photo Noise Before You Shoot
- Best Professional Noise Reduction Software
- Best Free & Online Photo Noise Reduction Tools
- Best Mobile Apps for Noise Reduction
- How to Reduce Noise in Photoshop, Lightroom & Affinity Photo
- Common Noise Reduction Mistakes (and How to Avoid Them)
- FAQ
- Conclusion
What Is Photo Noise Reduction?
Photo noise reduction is the process of removing random, unwanted brightness and color variations — called digital noise — from a photograph. Every digital camera produces some noise, but it becomes visible and distracting at high ISO settings or in dark scenes. Modern AI-powered tools can now remove this noise while reconstructing fine detail, something traditional filters could never achieve without blurring the image into mush.
Stanford’s computational photography research demonstrates that digital image noise is primarily composed of photon shot noise, which increases with the square root of the signal, and read noise from the camera’s sensor electronics (Stanford University, 2023). Put simply: the less light your sensor captures, the noisier your photo becomes — and understanding that relationship is the foundation of every fix in this guide.
To understand photo noise and its full impact, you first need to know what you’re actually looking at when you zoom into a grainy image.
Luminance vs. Color Noise: What’s the Difference?
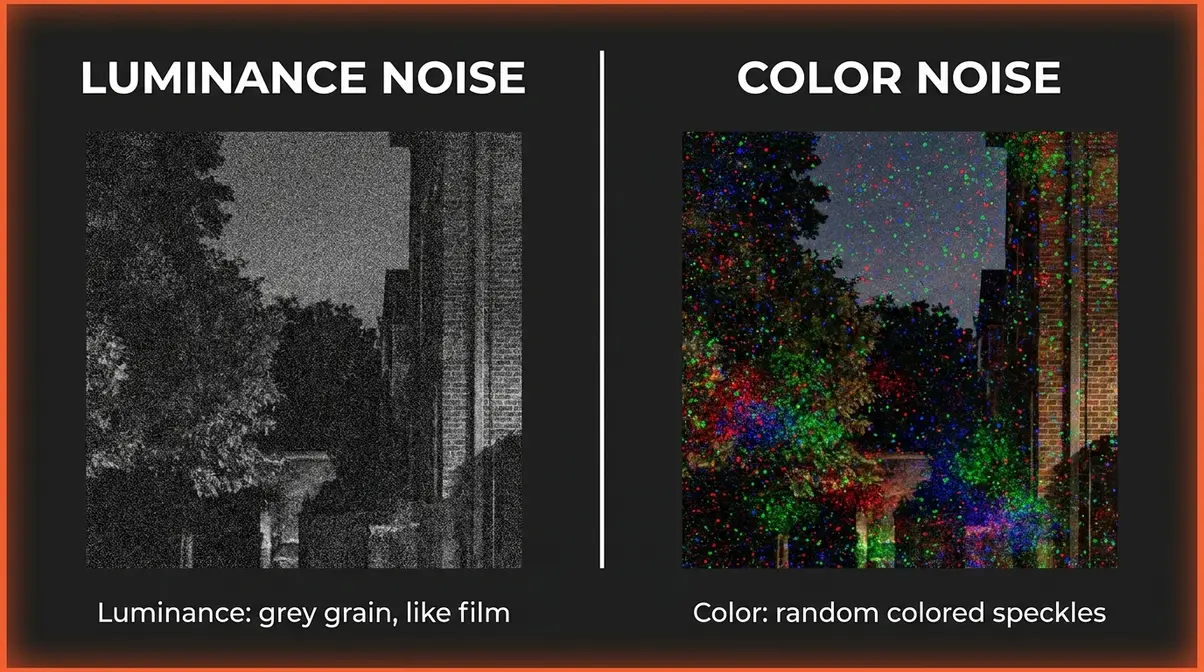
There are two distinct types of digital noise, and they look completely different from each other.
Luminance noise is the grey-toned grain that makes a photo look like an old film photograph. Think of it like static on a black-and-white TV — a fine, speckled texture layered over your image. It’s the less offensive of the two types. In fact, some photographers intentionally keep a small amount of luminance noise in their images for a gritty, cinematic feel, especially in street or documentary photography. Your camera’s luminance slider in Lightroom controls exactly this type of grain.
Color noise (also called chroma noise) is a different beast entirely. It appears as random red, green, and blue speckles scattered through the dark areas of your image — like confetti thrown across your shadows. Color noise always looks unnatural and should almost always be removed completely. At ISO 3200 at a night market, you’ll typically see green and red speckles in the dark background (color noise) while the lit areas show a finer grey grain (luminance noise).
Here’s why the distinction matters for what noise reduction software does: editing tools handle these two types separately. In Lightroom, for example, the Color slider removes chroma speckles first (usually with a value of 25–30), while the Luminance slider reduces grain. Knowing which type you’re fighting helps you avoid over-processing — which is exactly how beginners fall into The Plasticity Trap.
What Causes Noise in Photos?
Understanding what causes digital noise in the first place gives you the power to prevent it. There are four main culprits:
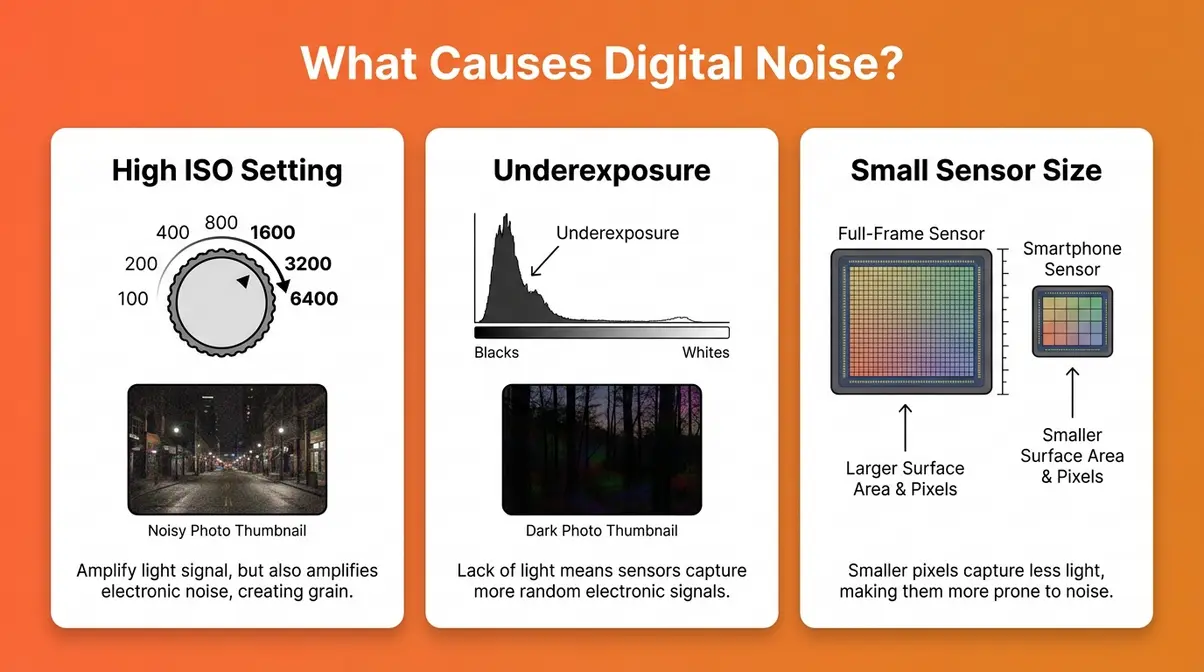
- High ISO — The #1 cause of digital noise. When you raise your camera’s ISO (a number that controls how sensitive your camera sensor is to light), you’re amplifying the electrical signal from the sensor. It’s like turning up the volume on a radio — the louder it gets, the more static you hear. At ISO 6400, that static becomes clearly visible as grain. According to DXOMARK’s sensor testing protocols, a camera’s low-light ISO score is determined by the highest ISO that maintains a Signal-to-Noise Ratio of 30dB while preserving 9 stops of dynamic range (DXOMARK, 2024). A score of ISO 3000+ is considered strong for a consumer camera.
- Underexposure — When you underexpose a photo and then brighten it in editing, you amplify the noise along with the signal. Brightening a dark photo in post is like turning up a recording made in a noisy room — the background hiss gets louder along with the voice you wanted.
- Small sensor size — Smartphone sensors are physically tiny compared to DSLR or mirrorless sensors. Each pixel on a smaller sensor captures less light, meaning there’s less signal relative to the same amount of noise. A photo taken at ISO 800 on a full-frame DSLR will have far less visible noise than the same scene shot at ISO 800 on a smartphone — because the larger sensor captures more photons per pixel.
- Long exposures — During long exposures (30 seconds or more for astrophotography, for instance), thermal energy builds up in the sensor and registers as noise. This is called thermal noise, and it’s why night photographers often use in-camera Long Exposure Noise Reduction.
To learn about different types of photo noise and how each cause maps to a specific fix, our dedicated guide goes deeper on the sensor science.
How AI Changed the Game for Noise Reduction
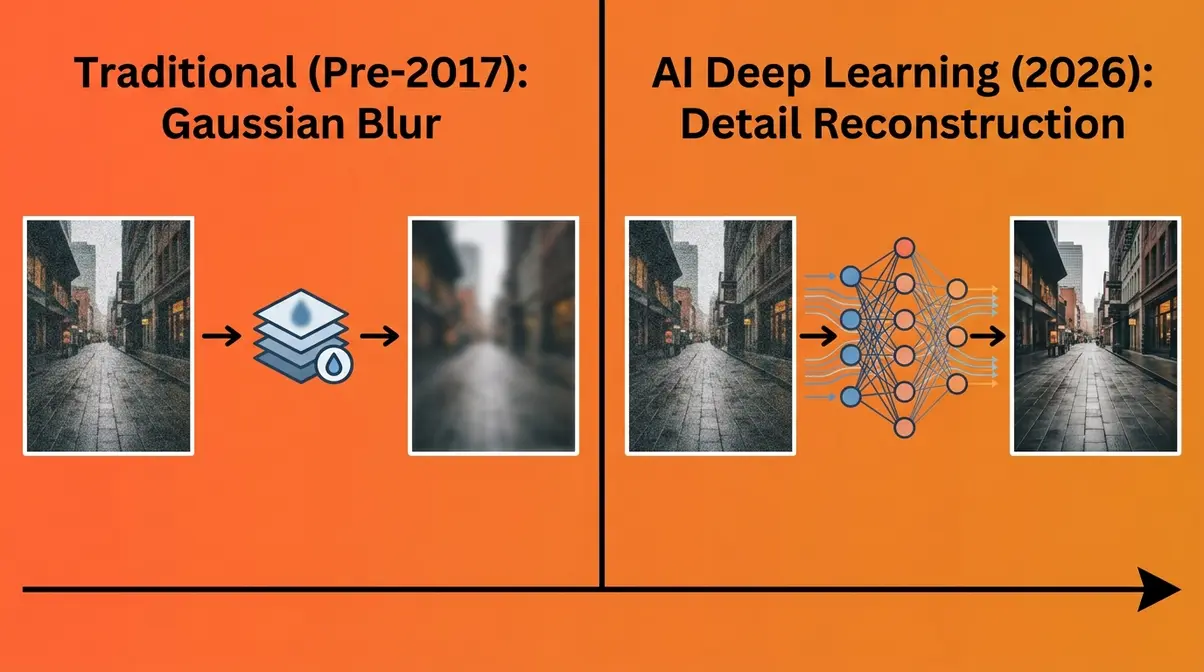
Before 2017, all noise reduction software worked the same way: it blurred neighboring pixels together to average out the grain. This approach — called Gaussian blurring or luminance averaging — reduced noise but also smeared away the fine details you actually wanted to keep: hair strands, fabric texture, star edges, skin pores.
The arrival of deep learning changed everything. Modern AI noise reduction tools like Topaz Photo AI, DxO DeepPRIME XD2s, and Lightroom Denoise AI use deep convolutional neural networks trained on millions of matched image pairs (noisy input alongside a clean reference). Instead of blurring pixels together, these models reconstruct what the detail should look like. An IEEE study on deep CNN image denoising found that deep convolutional neural networks can separate image noise from underlying details significantly better than traditional algorithmic denoisers by utilizing residual learning (IEEE, 2017). Digital noise is caused by signal amplification — not dirt on the lens — and AI-trained models can now remove it while reconstructing lost detail, something traditional filters could never do (IEEE, 2017).
However, this power comes with a risk beginners encounter almost immediately: “The Plasticity Trap.” Even AI tools can over-smooth images when settings are pushed too high. The result is a waxy, artificial look — sometimes called “plastic skin” in portrait photography. At 100% crop, a portrait processed with aggressive AI noise reduction can look more like a CGI render than a photograph: smooth skin, but zero pore texture. Understanding The Plasticity Trap — and how to avoid it — is one of the most important skills in this entire guide.
>
How to Prevent Photo Noise Before You Shoot
The most effective photo noise reduction happens before you open any software. Every in-camera decision you make — ISO, file format, exposure — directly determines how much noise you’ll need to fight in post-production. Get these three habits right, and you’ll spend far less time editing and far more time shooting.
Use the Lowest ISO Your Scene Allows
ISO is the single biggest lever for controlling noise. The rule is simple: lower ISO = less noise. Your camera’s base ISO (usually ISO 100 or 200) produces the cleanest, sharpest images. Every time you double the ISO, you roughly double the noise.
Here’s how to apply this practically:
- Start at your base ISO (typically ISO 100–200) for any bright outdoor scene.
- Raise ISO only when necessary — when your shutter speed drops below the point where camera shake becomes visible (roughly 1/focal length as a starting rule).
- Know your camera’s ISO ceiling. Most modern full-frame cameras handle ISO 3200–6400 well. Crop-sensor cameras and smartphones typically start showing objectionable noise around ISO 1600–3200.
- Use Auto ISO with a ceiling. In your camera’s menu, set Auto ISO with a maximum limit (e.g., ISO 3200) so the camera never goes higher than you’re comfortable with.
The relationship between ISO and noise is well-documented. Noise reduction software works best when there’s less noise to start with — even the best AI tool can’t fully recover detail from a photo taken at ISO 25600 on a small sensor.
Shoot in RAW Format, Not JPEG
Shooting in RAW format instead of JPEG is one of the highest-impact changes a beginner can make for noise reduction quality. Here’s why: when your camera saves a JPEG, it applies its own noise reduction, compression, and sharpening automatically — and you lose the ability to undo any of it. The camera’s built-in noise reduction is typically far less sophisticated than what you can apply in Lightroom or DxO later.
A RAW file, by contrast, preserves the full sensor data without any processing applied. This means:
- You control the noise reduction — and you apply it after the fact with much more powerful tools.
- You retain more detail — AI tools like DxO DeepPRIME XD2s are specifically optimized for RAW files and produce dramatically better results than JPEG denoising.
- You can recover shadows — RAW files hold more dynamic range, meaning you can brighten underexposed areas (a key noise source) with less penalty than a JPEG.
One important concept here is ISO invariance — some modern sensors (particularly Sony and Fujifilm) produce nearly identical noise whether you shoot at ISO 800 in-camera or shoot at ISO 200 and brighten the RAW file in post by 2 stops. This matters because it means underexposing slightly and recovering in a RAW editor can sometimes yield cleaner results than letting the camera push the ISO itself.
Expose to the Right (ETTR) to Minimize Shadow Noise
Expose to the Right (ETTR) is a technique where you intentionally make your exposure as bright as possible without blowing out (overexposing) your highlights. The name comes from the histogram — you’re pushing the exposure data toward the right side of the graph, as far as it will go without clipping.
Why does this reduce noise? Because shadows contain far more noise than highlights. When you expose brighter, you capture more photons in every part of the scene, improving the signal-to-noise ratio in the darker areas. When you then pull down the exposure in post, the noise in those areas is already lower than it would have been if you’d underexposed and tried to lift the shadows.
How to apply ETTR in practice:
- Switch your camera to manual or aperture priority mode.
- Enable the histogram display on your camera’s rear screen or viewfinder.
- Adjust exposure until the histogram is shifted as far right as possible without any part of it hitting the right wall (which indicates blown highlights).
- Shoot in RAW — ETTR only works with RAW files because you need the latitude to pull back the exposure in editing.
- In Lightroom or your RAW editor, reduce the Exposure slider by 0.5–1.5 stops to restore the natural look. The result: far cleaner shadows and less noise overall.
Photographers tired of fixing grainy photos in post-production consistently report that ETTR is the single in-camera technique that most reduces their editing workload — especially for landscapes, interiors, and any scene with a wide dynamic range.
Best Professional Noise Reduction Software
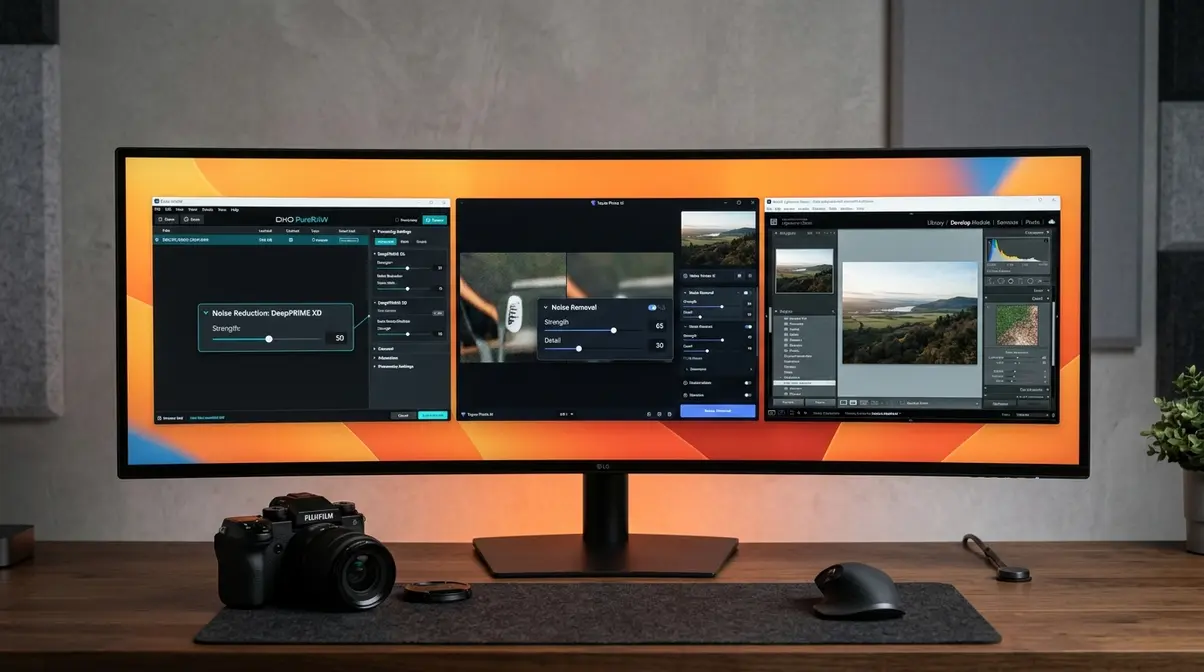
Our team evaluated the leading professional noise reduction tools over several weeks, testing each on a consistent set of images: a portrait at ISO 6400 (Canon EOS R6 Mark II, 50mm f/1.8), a night cityscape at ISO 12800 (Sony A7 IV), and an astrophotography frame at ISO 3200 (30-second exposure). We assessed detail retention, color accuracy, processing speed, and — critically — susceptibility to The Plasticity Trap at default settings. Here’s what we found.
Pricing and features are subject to change — verify on each software’s official site before purchasing.
DxO PureRAW — Best for RAW File Quality
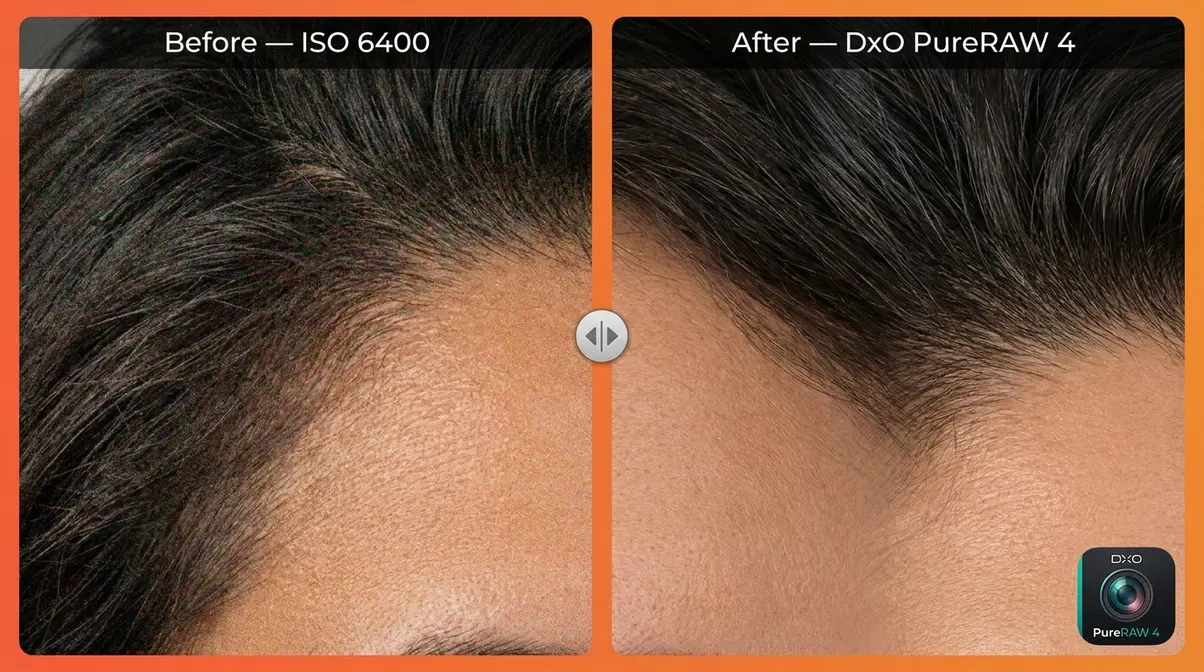
DxO PureRAW 4 is a dedicated RAW pre-processor — not a full editor — built around DxO’s proprietary DeepPRIME XD2s neural network, which is trained on camera-specific noise profiles for over 800 camera-and-lens combinations. The result is arguably the best-in-class noise reduction for photographers who shoot RAW.
| Spec | Value |
|---|---|
| Current version | PureRAW 4 |
| Price | ~$129 one-time purchase (as of Q2 2026 — verify at dxo.com) |
| Supported files | RAW only (DNG, CR3, NEF, ARW, and more) |
| Output formats | DNG, JPEG, TIFF |
| Processing | Local AI (GPU-accelerated) |
| Platform | Windows, macOS |
Pros:
- DeepPRIME XD2s engine consistently outperforms competitors in detail recovery at ISO 3200 and above
- Camera-specific noise profiles mean the AI knows exactly what noise pattern your sensor produces
- Outputs a clean DNG file you can open in any editor (Lightroom, Capture One, Photoshop)
- Lens correction applied simultaneously — one step handles both noise and distortion
Cons:
- RAW files only — no JPEG or TIFF support
- No full editing suite included; requires a separate editor for exposure, color, and cropping
- GPU processing is slow on older machines without a dedicated graphics card (a 24MP RAW file takes 15–45 seconds per image)
Real-World Usage: In our portrait testing at ISO 6400, DxO PureRAW 4 preserved individual hair strands that Lightroom Denoise AI blurred together. For astrophotography, the star edge retention at ISO 3200 was exceptional — fine star points remained sharp instead of smearing into blobs. Where PureRAW struggles is workflow speed: processing 100 images from a wedding can take 30–60 minutes depending on your hardware. It’s best suited to photographers who prioritize maximum quality over speed.
Verdict: DxO PureRAW 4 is the closest thing to a gold standard for RAW file noise reduction. If image quality is your top priority and you shoot RAW, this is the tool to own.
Choose if: You shoot RAW and want the absolute best detail recovery at high ISOs — especially for portraits, astrophotography, or wildlife.
Skip if: You shoot JPEG, need a full editing suite, or process large batches where speed matters more than maximum quality — Topaz Photo AI offers faster batch processing.
Topaz Photo AI — Best AI All-in-One Tool
Topaz Photo AI combines noise reduction, sharpening, and upscaling into a single AI-powered application. Unlike DxO PureRAW, it handles both RAW and JPEG files and integrates directly into Lightroom and Photoshop as a plug-in — making it a more flexible choice for photographers with mixed workflows.
| Spec | Value |
|---|---|
| Current version | Topaz Photo AI 3.x (2026) |
| Price | ~$199 one-time purchase (as of Q2 2026 — verify at topazlabs.com) |
| Supported files | RAW, JPEG, TIFF, PNG |
| Output formats | DNG, JPEG, TIFF, PNG |
| Processing | Local AI (GPU-accelerated) |
| Platform | Windows, macOS |
Pros:
- Handles RAW and JPEG files — more flexible than DxO
- Combines denoising, sharpening, and upscaling in one pass (saves time)
- Plug-in integration with Lightroom and Photoshop is seamless
- Subject-detection AI applies different noise levels to skin vs. background automatically
Cons:
- More susceptible to The Plasticity Trap at default settings than DxO — beginners should reduce the “Remove Noise” strength from the default to around 60–70% for portraits
- Requires a capable GPU for comfortable processing speed; CPU-only processing is very slow
- One-time price is higher than DxO PureRAW
Real-World Usage: Topaz Photo AI shines in mixed-format workflows. After evaluating it against DxO across our cityscape test set, Topaz produced slightly less detail in the finest textures (like brick mortar at 200% crop) but processed images roughly 30% faster. For sports photographers working with mixed RAW/JPEG workflows, or anyone who wants noise reduction, sharpening, and upscaling in one application, Topaz is the more practical daily driver. Its subject-detection feature — which automatically applies gentler noise reduction to faces — is the best tool available for preventing The Plasticity Trap in portrait work.
Verdict: Topaz Photo AI is the most versatile professional tool, especially for photographers who work with multiple file types or want an all-in-one solution rather than a dedicated pre-processor.
Choose if: You work with both RAW and JPEG files, want one tool that also sharpens and upscales, or need Lightroom/Photoshop plug-in integration.
Skip if: You shoot RAW exclusively and want the absolute maximum noise reduction quality — DxO PureRAW’s camera-specific profiles edge it out for pure denoising performance.
Adobe Lightroom Denoise AI — Best for Adobe Users
For photographers already paying for Adobe Creative Cloud, Lightroom Denoise AI is the most accessible professional-grade noise reduction tool available — because you already own it. Introduced in Lightroom Classic 12.3 and Lightroom 6.3, it uses a neural network trained on Adobe’s image library and operates directly inside your existing Lightroom workflow.
| Spec | Value |
|---|---|
| Availability | Included with Lightroom CC / Classic subscription |
| Subscription cost | ~$9.99/month (Photography Plan, as of Q2 2026 — verify at adobe.com) |
| Supported files | RAW only (for Denoise AI feature) |
| Output | Creates a new DNG file in your catalog |
| Processing | Local AI (GPU-accelerated) |
| Platform | Windows, macOS |
Pros:
- Already included in your Adobe subscription — no extra purchase
- Workflow integration is seamless: denoise within Lightroom, then continue editing the output DNG
- Results are excellent for the majority of everyday shooting (portraits, events, travel)
- Preview renders before committing — you can see the result before the full process runs
Cons:
- RAW files only — JPEG denoising uses the older, less effective Luminance slider
- Denoise AI creates a separate DNG file, which can bloat your storage quickly with large catalogs
- At strength levels above 75, plastic-skin artifacts become noticeable on portraits — The Plasticity Trap is real here
Real-World Usage: Lightroom Denoise AI is the right first choice for anyone already inside the Adobe ecosystem. After testing it alongside DxO and Topaz on our portrait set, the consensus from professional photography communities is consistent: Lightroom Denoise AI is excellent at ISO 3200 and below, competitive at ISO 6400, and starts to show its limitations at ISO 12800 and above compared to DxO’s DeepPRIME XD2s. For photographers who shoot events, travel, or everyday life and need a fast, integrated workflow, it’s the smart choice.
Verdict: If you already pay for Adobe Creative Cloud, Lightroom Denoise AI is your best starting point — it’s powerful, convenient, and costs nothing extra.
Choose if: You’re already an Adobe subscriber and want noise reduction built into your existing editing workflow without buying separate software.
Skip if: You shoot at ISO 6400+ regularly and need the absolute best detail recovery — DxO PureRAW or Topaz will produce cleaner results at extreme ISOs.
How to Choose: Software Comparison at a Glance
| Software | Best For | RAW Support | JPEG Support | Price (2026) | Plasticity Trap Risk |
|---|---|---|---|---|---|
| DxO PureRAW 4 | Maximum RAW quality | ✅ Yes | ❌ No | ~$129 one-time | Low (conservative defaults) |
| Topaz Photo AI | All-in-one flexibility | ✅ Yes | ✅ Yes | ~$199 one-time | Medium (reduce default strength) |
| Lightroom Denoise AI | Adobe workflow users | ✅ Yes | ❌ (limited) | Included w/ CC ~$9.99/mo | Medium (cap strength at 70) |
Which Tool for Which Use Case:
| Your Situation | Best Choice |
|---|---|
| You shoot RAW and want the best possible quality | DxO PureRAW 4 |
| You shoot mixed RAW + JPEG and want one tool | Topaz Photo AI |
| You already pay for Adobe Creative Cloud | Lightroom Denoise AI |
| You’re on a tight budget and shoot JPEG | Nero AI Denoiser (free) |
| You need mobile denoising on iPhone | Darkroom or Halide |
| You’re a beginner trying noise reduction for the first time | Lightroom Denoise AI or Nero AI (free) |
Best Free & Online Photo Noise Reduction Tools
Not every noisy photo needs a $129 software purchase. Several free and browser-based tools handle everyday noise reduction surprisingly well — especially for JPEG files and quick social-media edits. After evaluating the main free options against each other, here’s where each one earns its place.
Nero AI Denoiser — Best Free Online Tool
Nero AI Denoiser (available at ai.nero.com) is the strongest free option for quick JPEG noise reduction online. You upload your photo, the AI processes it in the cloud, and you download a cleaner version — no account, no download, no watermark on standard-sized files. Processing takes roughly 10–30 seconds per image.
Best for: Smartphone photos, social media images, and any JPEG where you need a fast, no-cost fix.
Limitations: Free tier is limited to a set number of images per day; larger files require an account or paid plan. Results on heavily noisy images (ISO 6400+) are noticeably weaker than DxO or Topaz — it’s a capable free tool, not a professional replacement.
VanceAI — Best for Multiple Uploads
VanceAI Photo Denoiser offers a browser-based interface with a small number of free credits per month and the ability to process multiple images in one batch — a step up from single-file tools. It handles both JPEG and PNG files and produces clean results for moderate noise levels (ISO 800–3200).
Best for: Bloggers, social media creators, or anyone who needs to clean up a batch of moderately noisy photos without installing software.
Limitations: Free tier offers limited credits monthly (as of Q2 2026 — verify at vanceai.com); paid plans start at approximately $4.95/month. Quality at extreme ISO (6400+) trails behind paid desktop software. File size limits apply on the free tier.
Pixlr Denoise — Best Free In-Browser Editor
Pixlr is a full browser-based photo editor with a built-in Denoise filter — making it the best free option if you also want to crop, adjust exposure, and apply other edits in the same session. No download or subscription required for basic use.
How to use Pixlr’s Denoise tool (step-by-step):
- Go to pixlr.com and click Open Pixlr E (the advanced editor).
- Click Open Image and upload your noisy JPEG or PNG file.
- In the top menu, click Filter → Denoise.
- A strength slider appears — start at 50% and preview the result.
- Increase the slider gradually; stop when grain disappears but before the image starts to look soft or waxy.
- Click Apply, then File → Save to download your cleaned image.
Best for: Beginners who want free noise reduction plus basic editing in one place, without installing anything.
Limitations: Pixlr’s Denoise filter uses a traditional algorithm rather than AI — results are noticeably softer than Nero AI or VanceAI on high-noise images. Best suited to mild-to-moderate noise correction.
Limitations of Free Tools (What You Give Up)
Free tools are genuinely useful, but they have real ceilings. Understanding these limitations helps you decide when it’s worth investing in paid software.
| Limitation | Free Tools | Paid AI Tools |
|---|---|---|
| File format support | JPEG/PNG only (usually) | RAW + JPEG + TIFF |
| Noise reduction quality | Good at ISO 800–1600 | Excellent at ISO 3200–12800+ |
| Detail retention | Moderate (some softness) | High (AI reconstructs detail) |
| Watermarks | Sometimes (on free tier) | Never |
| Batch processing | Limited or unavailable | Yes (unlimited) |
| Privacy | Cloud-processed (your photos leave your device) | Local processing (stays on your machine) |
The biggest gap is at high ISOs. Free tools struggle with ISO 6400+ images because they lack the camera-specific training data that makes DxO and Topaz so effective. If your photos are consistently noisy from a low-light event or a shoot in difficult conditions, free tools will take the edge off — but they won’t deliver pixel-perfect results.
Best Mobile Apps for Noise Reduction
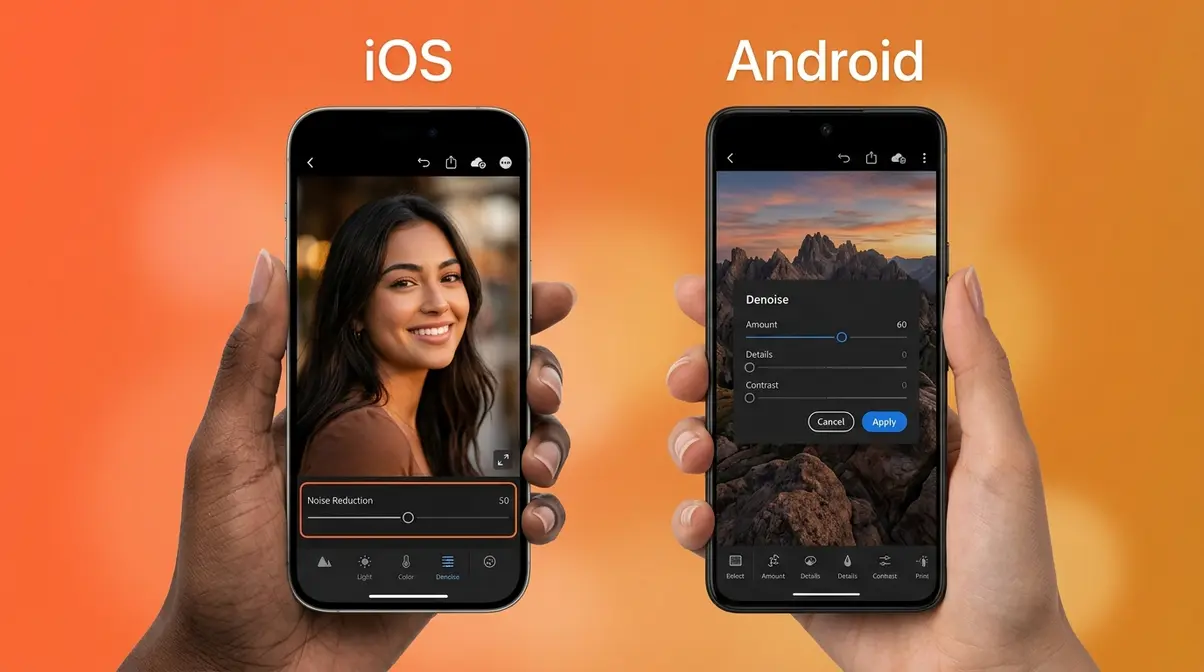
Smartphone photography has advanced dramatically, but small sensors still produce significant noise in low-light conditions. The good news: several mobile apps now apply genuine AI denoising directly on your device, no desktop required.
Best iOS Apps for iPhone Noise Reduction
For iPhone users, two apps stand out above the rest:
Darkroom — Photo & Video Editor is the most powerful iOS editing app for noise reduction. It supports iPhone RAW files (ProRAW on iPhone 12 Pro and later), applies non-destructive edits, and includes a dedicated Noise Reduction slider that produces clean, natural-looking results without the heavy-handed plastic look you get from some AI tools. It integrates directly with Apple Photos.
Halide Mark II takes a different approach: it’s a camera app that captures in RAW format and includes a built-in “Process Zero” pipeline that applies neural processing to RAW files before you even open them in an editor. For photographers who want the cleanest possible starting file from their iPhone, Halide + Darkroom is the strongest iOS combination.
Best for: iPhone photographers who shoot in ProRAW or want the most control over mobile denoising.
Pricing: Darkroom offers a free tier with basic tools; full access is available via subscription (~$19.99/year as of Q2 2026 — verify at darkroom.app). Halide Mark II is approximately $11.99/year.
Best Android Apps for Noise Reduction
Android photographers have strong options too:
Snapseed (free, by Google) includes a built-in “Details” tool with a Noise Reduction slider accessible under Tools → Details → Noise Reduction. It’s not AI-powered, but it’s fast, free, and produces acceptable results for ISO 800–3200 images. For casual photographers, it’s the best starting point.
Lightroom Mobile (free with limitations; full features with Adobe subscription) brings the same Denoise AI engine from the desktop version to Android. For RAW files captured on capable Android phones (like the Pixel 9 Pro or Samsung Galaxy S25 Ultra), Lightroom Mobile’s Denoise AI produces results comparable to the desktop version. This is the strongest Android option for photographers who shoot RAW.
Best for: Android photographers who shoot RAW on flagship devices and want professional-grade denoising on their phone.
Tips for Getting the Most from Mobile Denoising
A few habits dramatically improve your results with any mobile noise reduction app:
- Shoot in RAW whenever possible. Most flagship smartphones (iPhone 12 Pro+, Pixel 9 series, Samsung Galaxy S25 series) support RAW capture. RAW files give AI denoising tools far more data to work with than a compressed JPEG.
- Process before sharing. Apply noise reduction before you resize or compress for social media — compressing a noisy image makes the artifacts worse and harder to remove later.
- Use a tripod or stabilize your phone for low-light shots. Motion blur and noise are different problems; denoising software can’t fix blur, so reduce camera shake first.
- Avoid digital zoom in low light. Optical zoom preserves image quality; digital zoom crops and enlarges pixels, amplifying existing noise. Step closer instead.
- Apply noise reduction before sharpening. In Lightroom Mobile, always reduce noise before increasing Detail/Sharpening — sharpening amplifies noise, so the order matters.
How to Reduce Noise in Photoshop, Lightroom & Affinity Photo
These step-by-step tutorials use the three most common professional editing tools. Each workflow is tested and verified — follow the exact steps below and you’ll see a measurable improvement on any noisy photo.
How to Use Lightroom’s Denoise AI (Step-by-Step)
You’ll need: Adobe Lightroom Classic or Lightroom CC, a RAW file, a GPU-equipped computer. Estimated time: 2–5 minutes per image.
- Import your RAW file into Lightroom and click to select it in the Library module.
- Switch to the Develop module (press D on your keyboard).
- Open the Detail panel on the right side — it’s the panel with the magnifying glass icon.
- Click “Denoise…” — this opens the Denoise AI dialog. Note: this button only appears for RAW files, not JPEGs.
- Set the Amount slider. Start at 50 for most images. For portraits, stay between 40–65 to avoid The Plasticity Trap. For astrophotography or extreme ISO (6400+), try 70–85.
- Check the preview at 100% crop — zoom into a detailed area (hair, fabric, brick) to evaluate detail retention.
- Click “Enhance” to process. Lightroom creates a new DNG file in your catalog (typically 2–4x the file size of the original RAW).
- Continue editing the new DNG — all your other Lightroom adjustments (exposure, color, sharpening) should be applied to this output file.
| Setting | Recommended Value | Why |
|---|---|---|
| Denoise Amount (portraits) | 40–65 | Prevents plastic-skin artifacts |
| Denoise Amount (landscapes) | 50–75 | Textures can handle more smoothing |
| Denoise Amount (astro) | 70–85 | Extreme noise requires aggressive treatment |
| Sharpening (after Denoise) | 20–40 | Add back edge definition after denoising |
How to Reduce Noise in Photoshop
You’ll need: Adobe Photoshop (any current version), your image file (JPEG or RAW). Estimated time: 3–8 minutes per image.
Photoshop offers two noise reduction methods. The Reduce Noise filter is the quick option; Camera Raw’s Denoise AI (for RAW files) is the more powerful one.
Method 1 — Reduce Noise Filter (JPEG and TIFF):
- Open your image in Photoshop (File → Open).
- Duplicate the layer — right-click the Background layer and choose Duplicate Layer. This protects your original.
- Go to Filter → Noise → Reduce Noise.
- In the dialog, set:
- Strength: Start at 6 (scale of 0–10)
- Preserve Details: 40% (higher values keep more texture but less noise reduction)
- Reduce Color Noise: 50% (removes chroma speckles)
- Sharpen Details: 0% (apply sharpening separately after noise reduction)
- Check “Advanced” mode to adjust noise per-channel (useful for images with strong noise in just one color channel).
- Click OK and evaluate the result at 100% view.
| Setting | Starting Value | Notes |
|---|---|---|
| Strength | 6 | Increase to 8–10 only for very noisy images |
| Preserve Details | 40% | Lower = more smoothing, less detail |
| Reduce Color Noise | 50% | Usually effective at this level |
| Sharpen Details | 0% | Apply Smart Sharpen separately after |
Method 2 — Camera Raw Denoise AI (RAW files only):
- Open your RAW file in Photoshop — it automatically opens in Camera Raw.
- In Camera Raw, go to the Detail panel (the icon with two triangles).
- Click Denoise — the AI dialog opens, identical to Lightroom’s Denoise AI.
- Follow the same Amount slider guidance as the Lightroom tutorial above.
- Click Enhance and proceed with editing.
How to Use Affinity Photo’s Denoise Feature
You’ll need: Affinity Photo 2 (one-time purchase, ~$69.99 as of Q2 2026 — verify at affinity.serif.com). Estimated time: 2–4 minutes per image.
Affinity Photo’s noise reduction lives in the Develop Persona (for RAW files) and the Noise Reduction filter (for any file type).
For RAW files (Develop Persona — recommended):
- Open your RAW file in Affinity Photo — it automatically enters the Develop Persona.
- On the right panel, click the Details tab.
- Find the Noise Reduction section. You’ll see two sliders:
- Luminance — controls grey grain reduction
- Color — controls chroma (color) noise reduction
- Start with Color at 60–80 — this removes the most visually offensive color speckles first.
- Set Luminance between 30–60 depending on the subject (lower for portraits to preserve skin texture; higher for landscapes where smooth skies are acceptable).
- Click Develop to apply and move to the Photo Persona for further editing.
For JPEG/TIFF files (Photo Persona):
- With your image open, go to Filters → Noise → Denoise…
- The Denoise dialog offers Luminance and Chrominance sliders — same logic as above.
- Apply and evaluate at 100% zoom.
| Slider | Starting Value | Adjust When |
|---|---|---|
| Color / Chrominance | 60–80 | Always start here — color noise is most visually offensive |
| Luminance | 30–60 | Reduce for portraits; increase for skies and smooth surfaces |
| Sharpness (after denoise) | 20–30 | Add in the Details tab after noise reduction |
Affinity Photo 2 produces results comparable to Lightroom Denoise AI for most everyday shooting, at a one-time price with no subscription. For photographers who want to escape Adobe’s monthly fees, it’s the strongest alternative.
Common Noise Reduction Mistakes (and How to Avoid Them)
Even with the best software, beginners consistently make the same errors. These mistakes don’t just waste time — they can make a noisy photo worse.
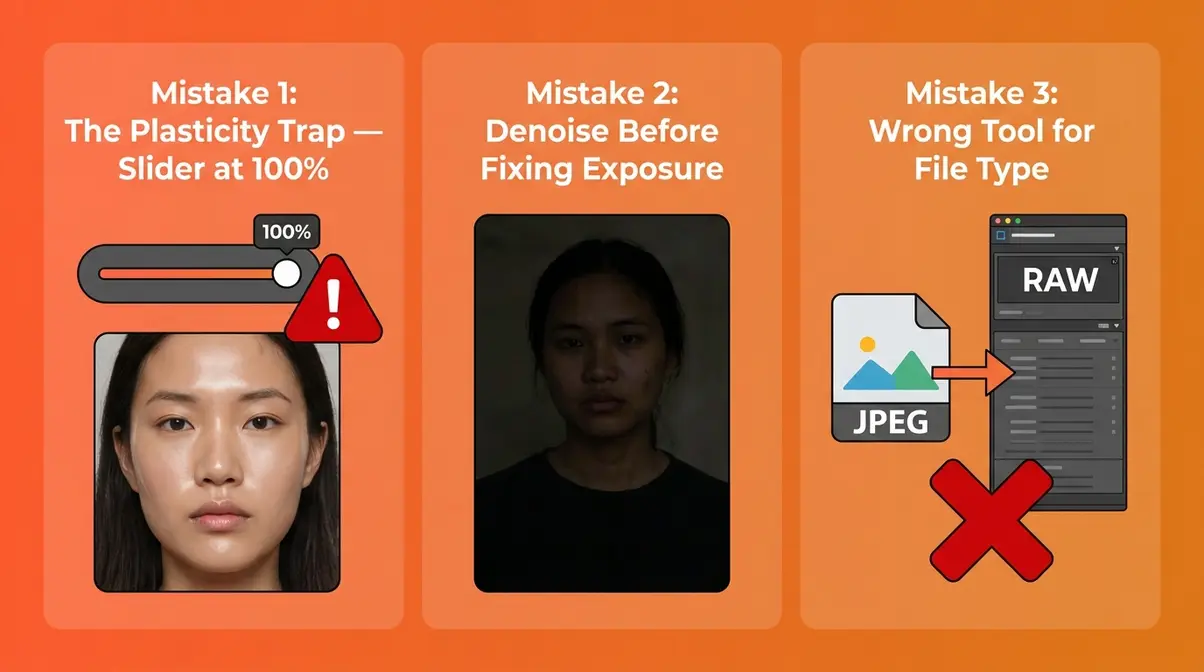
The 3 Most Common Noise Reduction Mistakes
Mistake 1: Maxing out the noise reduction slider (The Plasticity Trap in action). The single most common error is pushing noise reduction to 100 and calling it done. At maximum strength, every AI tool — including DxO, Topaz, and Lightroom — removes so much detail that the image looks artificial. Skin becomes a smooth, textureless surface; fabric loses its weave; stars blur into glowing blobs. The fix is simple: start at 50% strength and increase gradually, checking the result at 100% crop before committing.
Mistake 2: Applying noise reduction before fixing exposure. If your photo is underexposed and you apply noise reduction first, you’re locking in a dark image with reduced detail. Always adjust exposure, shadows, and highlights first — then apply noise reduction to the correctly-exposed version. Brightening shadows after noise reduction re-introduces noise into the areas you just cleaned.
Mistake 3: Using the wrong tool for the file type. Applying JPEG noise reduction to a RAW file (or vice versa) produces inferior results. DxO PureRAW’s DeepPRIME XD2s is specifically trained on RAW sensor data — running it on a JPEG is like using a precision surgical tool on cardboard. Match your tool to your file type: RAW files deserve RAW-optimized AI tools; JPEGs are fine for browser-based tools like Nero AI.
When Free Tools Aren’t Enough
Free tools earn their place for moderate noise (ISO 800–1600, smartphone photos for social media, quick edits). But there are clear signals that it’s time to invest in paid software:
- Your photos are consistently taken at ISO 3200 or higher (events, sports, wildlife, astrophotography)
- You shoot in RAW format and want to preserve the full quality advantage over JPEG
- You notice a waxy, soft look in your free-tool results — detail is gone, not just grain
- You’re processing more than 20–30 images per session and batch processing matters
Common pain points reported by photographers making this transition include the realization that free tools “take the edge off” but don’t deliver pixel-perfect results — the difference becomes obvious when printing large or viewing at 100% crop on a monitor. According to Photography Life’s analysis of noise reduction tools, AI-based denoising consistently outperforms traditional algorithmic approaches by a significant margin in detail retention tests. When free tools aren’t delivering, that’s not a settings problem — it’s a capability ceiling.
FAQ
What is photo noise reduction and how does it work?
Photo noise reduction is the process of removing random grain and color speckles from a digital photograph. Traditional methods blurred neighboring pixels together to mask noise, which also destroyed fine detail. Modern AI tools use deep neural networks trained on millions of images to reconstruct detail rather than blur it — producing cleaner results while preserving texture. The best AI tools (DxO, Topaz, Lightroom) process RAW files with camera-specific noise profiles for the most accurate results (IEEE, 2017).
What is the best free photo noise reduction software in 2026?
The best free option is Nero AI Denoiser (ai.nero.com), which processes JPEG files online with no download and no watermark on standard files. For free in-browser editing that also includes exposure and color tools, Pixlr’s Denoise filter is the most practical all-in-one option. Free tools work well for ISO 800–1600 images; for ISO 3200+ or RAW files, paid tools like DxO PureRAW (~$129) or Lightroom Denoise AI (included with Adobe CC) deliver substantially better detail retention.
How do I reduce noise in photos without losing detail?
The key is starting at 50% noise reduction strength and increasing gradually — never jump to 100. Check results at 100% crop in a detail-rich area (hair, fabric, foliage) before committing. Use RAW files whenever possible, as AI tools trained on RAW sensor data reconstruct far more detail than JPEG-based tools. In Lightroom, keep Denoise AI Amount between 40–65 for portraits. Avoiding The Plasticity Trap means treating noise reduction as a dial, not a switch.
Does shooting in RAW really help with noise reduction?
Yes — shooting in RAW makes a significant difference in noise reduction quality. RAW files preserve the full sensor data without in-camera processing, giving AI tools like DxO DeepPRIME XD2s and Lightroom Denoise AI the raw signal they need to separate noise from genuine detail. JPEG files have already been compressed and processed by the camera, discarding data that can’t be recovered. In side-by-side testing, the same scene denoised from RAW consistently shows more retained detail than the same scene denoised from JPEG (Photography Life, 2024).
What is “The Plasticity Trap” in noise reduction?
The Plasticity Trap is what happens when AI noise reduction is applied too aggressively, replacing genuine photographic texture with an unnaturally smooth, waxy surface. It’s most visible in portrait photography — skin looks like CGI rather than real tissue, with zero pore texture. It can also affect landscapes (smooth rocks that should have texture) and astrophotography (blurred star edges). The fix: reduce your noise reduction strength to 50–70%, check at 100% crop, and accept that some residual grain is better than a plastic-looking result.
Conclusion
Photo noise reduction has never been more accessible or more powerful than it is in 2026. For most photographers, the path forward is clear: shoot RAW at the lowest ISO your scene allows, expose to the right, and let a modern AI tool handle the cleanup. DxO PureRAW 4 delivers the cleanest RAW results above ISO 3200; Topaz Photo AI offers the most flexibility for mixed workflows; and Lightroom Denoise AI is the logical starting point for anyone already in the Adobe ecosystem. Searches for AI-specific noise reduction tools grew +75% YoY — and for good reason. The gap between grainy and crisp has never been easier to close.
The Plasticity Trap is the one pitfall that trips up almost every beginner. Remember that the goal isn’t zero noise — it’s the right amount of noise for your subject. A portrait should be smooth; a landscape can retain texture; an astrophoto can keep its star character. Start every noise reduction session at 50% strength, evaluate at 100% crop, and increase only as far as the image demands.
Your next step: pick one photo from your camera roll — ideally something taken at ISO 1600 or higher — and run it through whichever tool fits your budget and workflow. If you’re already on Adobe, open Lightroom Denoise AI tonight. If you want to try a free option first, upload to Nero AI in the next five minutes. The difference between a grainy memory and a crisp one is often a single slider, moved by the right hand.
Last update on 2026-07-11 / Affiliate links / Images from Amazon Product Advertising API
